

Impersonation settings in ADH
Overview
In the Hadoop ecosystem, impersonation is a mechanism that allows a service to perform an action on behalf on a different user. Impersonation is implemented in order to conform with security policies (e.g. Kerberos or Ranger policies), isolate data and resources among users, and to audit actions while writing the name of an actual user who launched an action.
ADH supports impersonation for HBase (Phoenix, Thrift), Spark (Livy), Hive, Zeppelin, Flink, Solr, Sqoop, Airflow. By default, impersonation is enabled for all services, but some of them require additional tweaking which is described below. To make a service impersonate certain users, you need to change the hadoop.proxyuser.<service>.groups and hadoop.proxyuser.<service>.hosts parameters in the core-site.xml parameter group of the Core configuration service.
Livy impersonation
The example below shows how to enable impersonation for Livy.
ADCM preparation
-
In ADCM, select your ADH cluster and head to the Spark service. Expand the livy.conf parameter group and make sure that the livy.impersonation.enabled parameter is set to
true. -
Head to the Core configuration service and edit the hadoop.proxyuser.livy.groups and hadoop.proxyuser.livy.hosts parameters. By default, they are filled with
*, but you need to put actual group names/host addresses there. The service will be allowed to impersonate users from the listed groups if a request came from a whitelisted host. -
Save the configuration and run the Update Core configuration action.
Host preparation
-
Create user directories in HDFS (here and below,
<username>is a user that Livy will be allowed to impersonate, while<group>is a group, which<username>is a part of):$ sudo -u hdfs hdfs dfs -mkdir /user/<username> $ sudo -u hdfs hdfs dfs -chown <username>:<group> /user/<username> -
Grant the required permissions to a user and copy a JAR with Spark examples to HDFS:
$ hdfs dfs -chmod -R a+rwx /user/<username>
$ hdfs dfs -chmod -R a+rwx /var/log/spark/apps
$ hdfs dfs -mkdir /user/<username>/spark_examples
$ hdfs dfs -put /usr/lib/spark/examples/jars/* /user/<username>/spark_examples
Testing
-
To test, create a similar JSON:
{ "file": "/user/<username>/spark_examples/spark-examples_2.11-2.3.2.3.1.0.15-1.jar", "className": "org.apache.spark.examples.SparkPi", "name": "test-livy-1", "args": [10], "proxyUser": "<username>" } -
Send a request with the JSON to Livy:
$ curl --negotiate -v -u: -d @app_spark.json -H "X-Requested-By: <username>" -H 'Content-Type: application/json' -X POST 'http://kru-adh-22.ru-central1.internal:8998/batches'
SSM impersonation
To configure impersonation in SSM, complete the following steps:
-
Go to the ADCM UI and select your cluster on the Clusters page.
-
Open the Services tab and select the SSM service.
-
Switch on the Show advanced toggle and expand the Custom smart-site.xml parameter group.
-
Click Add property and specify the following values:
-
Field name —
smart.proxy.user; -
Field value — name of the user for the impersonation.
-
-
Click Apply.
-
Expand the smart-site.xml parameter group and specify the following parameters:
-
smart.proxy.user.strategy — defines the impersonation strategy to use. Select one of the following:
-
NODE_SCOPE— enable impersonation on node level. All actions will be performed by the previously specified user. -
CMDLET_SCOPE— enable impersonation on cmdlet level. All actions will be performed by the cmdlet owner (the cmdlet creator).
-
-
smart.proxy.users.cache.ttl — time interval since the last access to the proxy user cache entry before that entry is discarded.
-
smart.proxy.users.cache.size — size of the proxy users cache.
-
-
Click Save, then Create.
-
Click Actions and select Restart.
Zeppelin impersonation
Zeppelin impersonation requires the Active Directory Kerberos to be enabled both in ADH and integrated ADPS clusters.Ranger plugins should be enabled for HDFS, YARN, and Hive.
Follow the steps below to see Zeppelin impersonation in effect:
-
In ADCM, select your ADH cluster and head to the Zeppelin service. Enable the Shiro LDAP auth parameter and fill in the details. After that, restart Zeppelin.
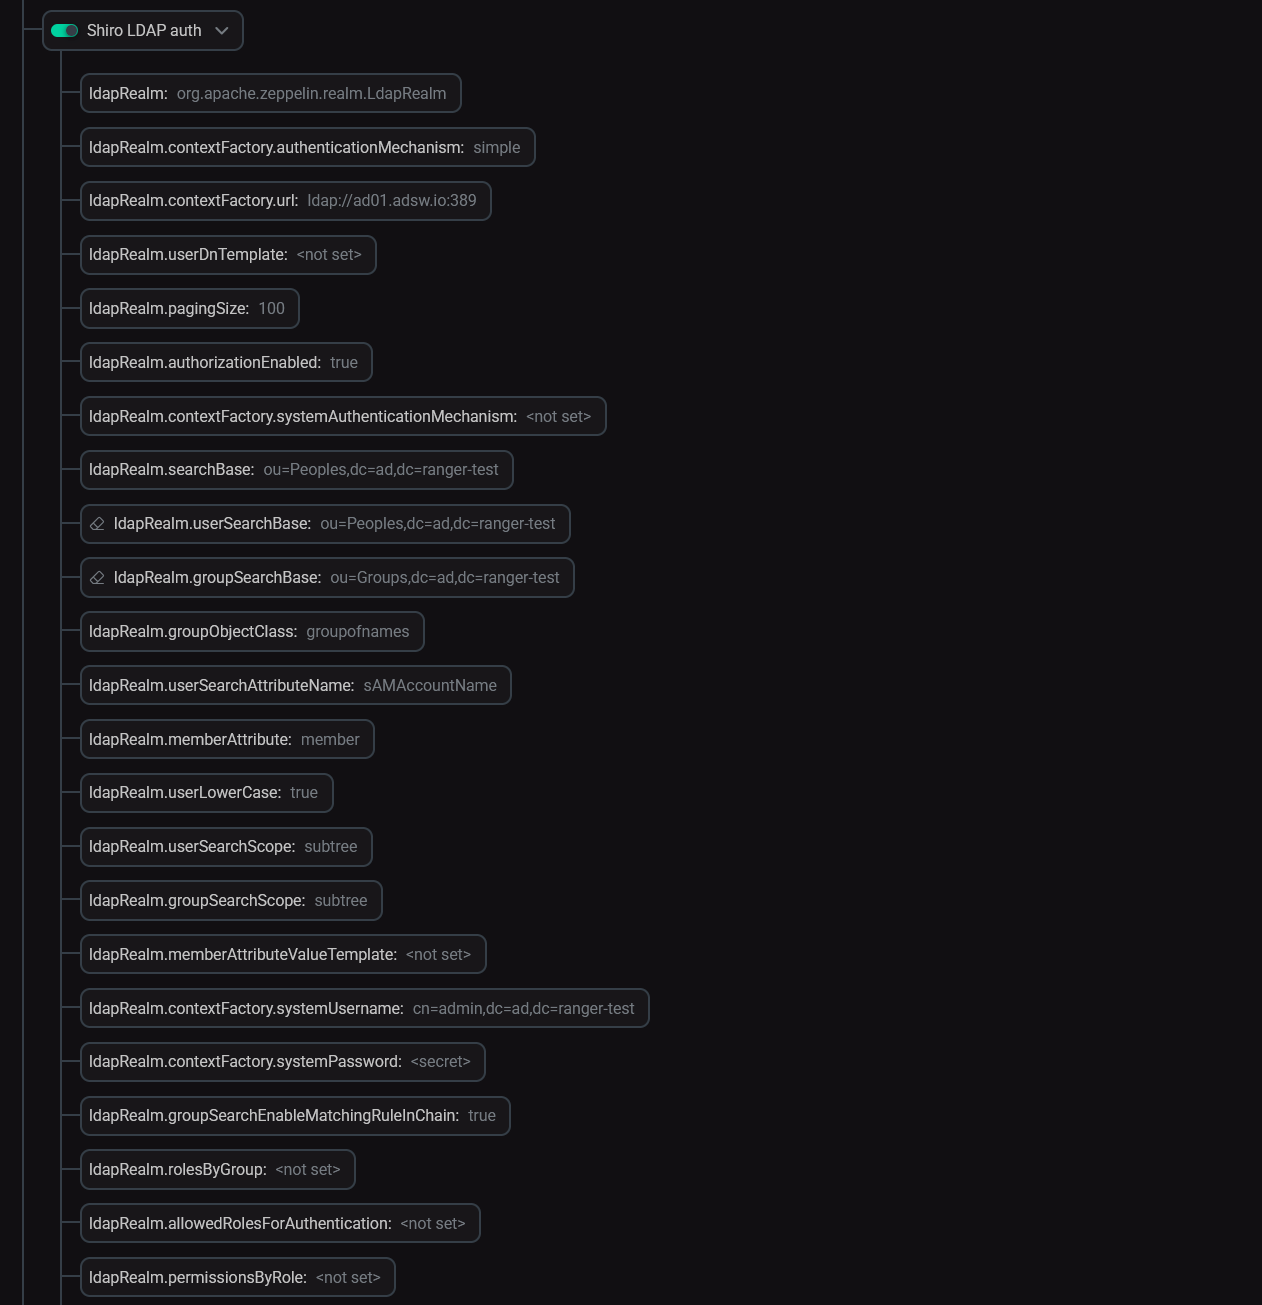 Zeppelin LDAP auth parameters
 -
In the Zeppelin web interface, log in as an Active Directory user.
 Zeppelin web interface login
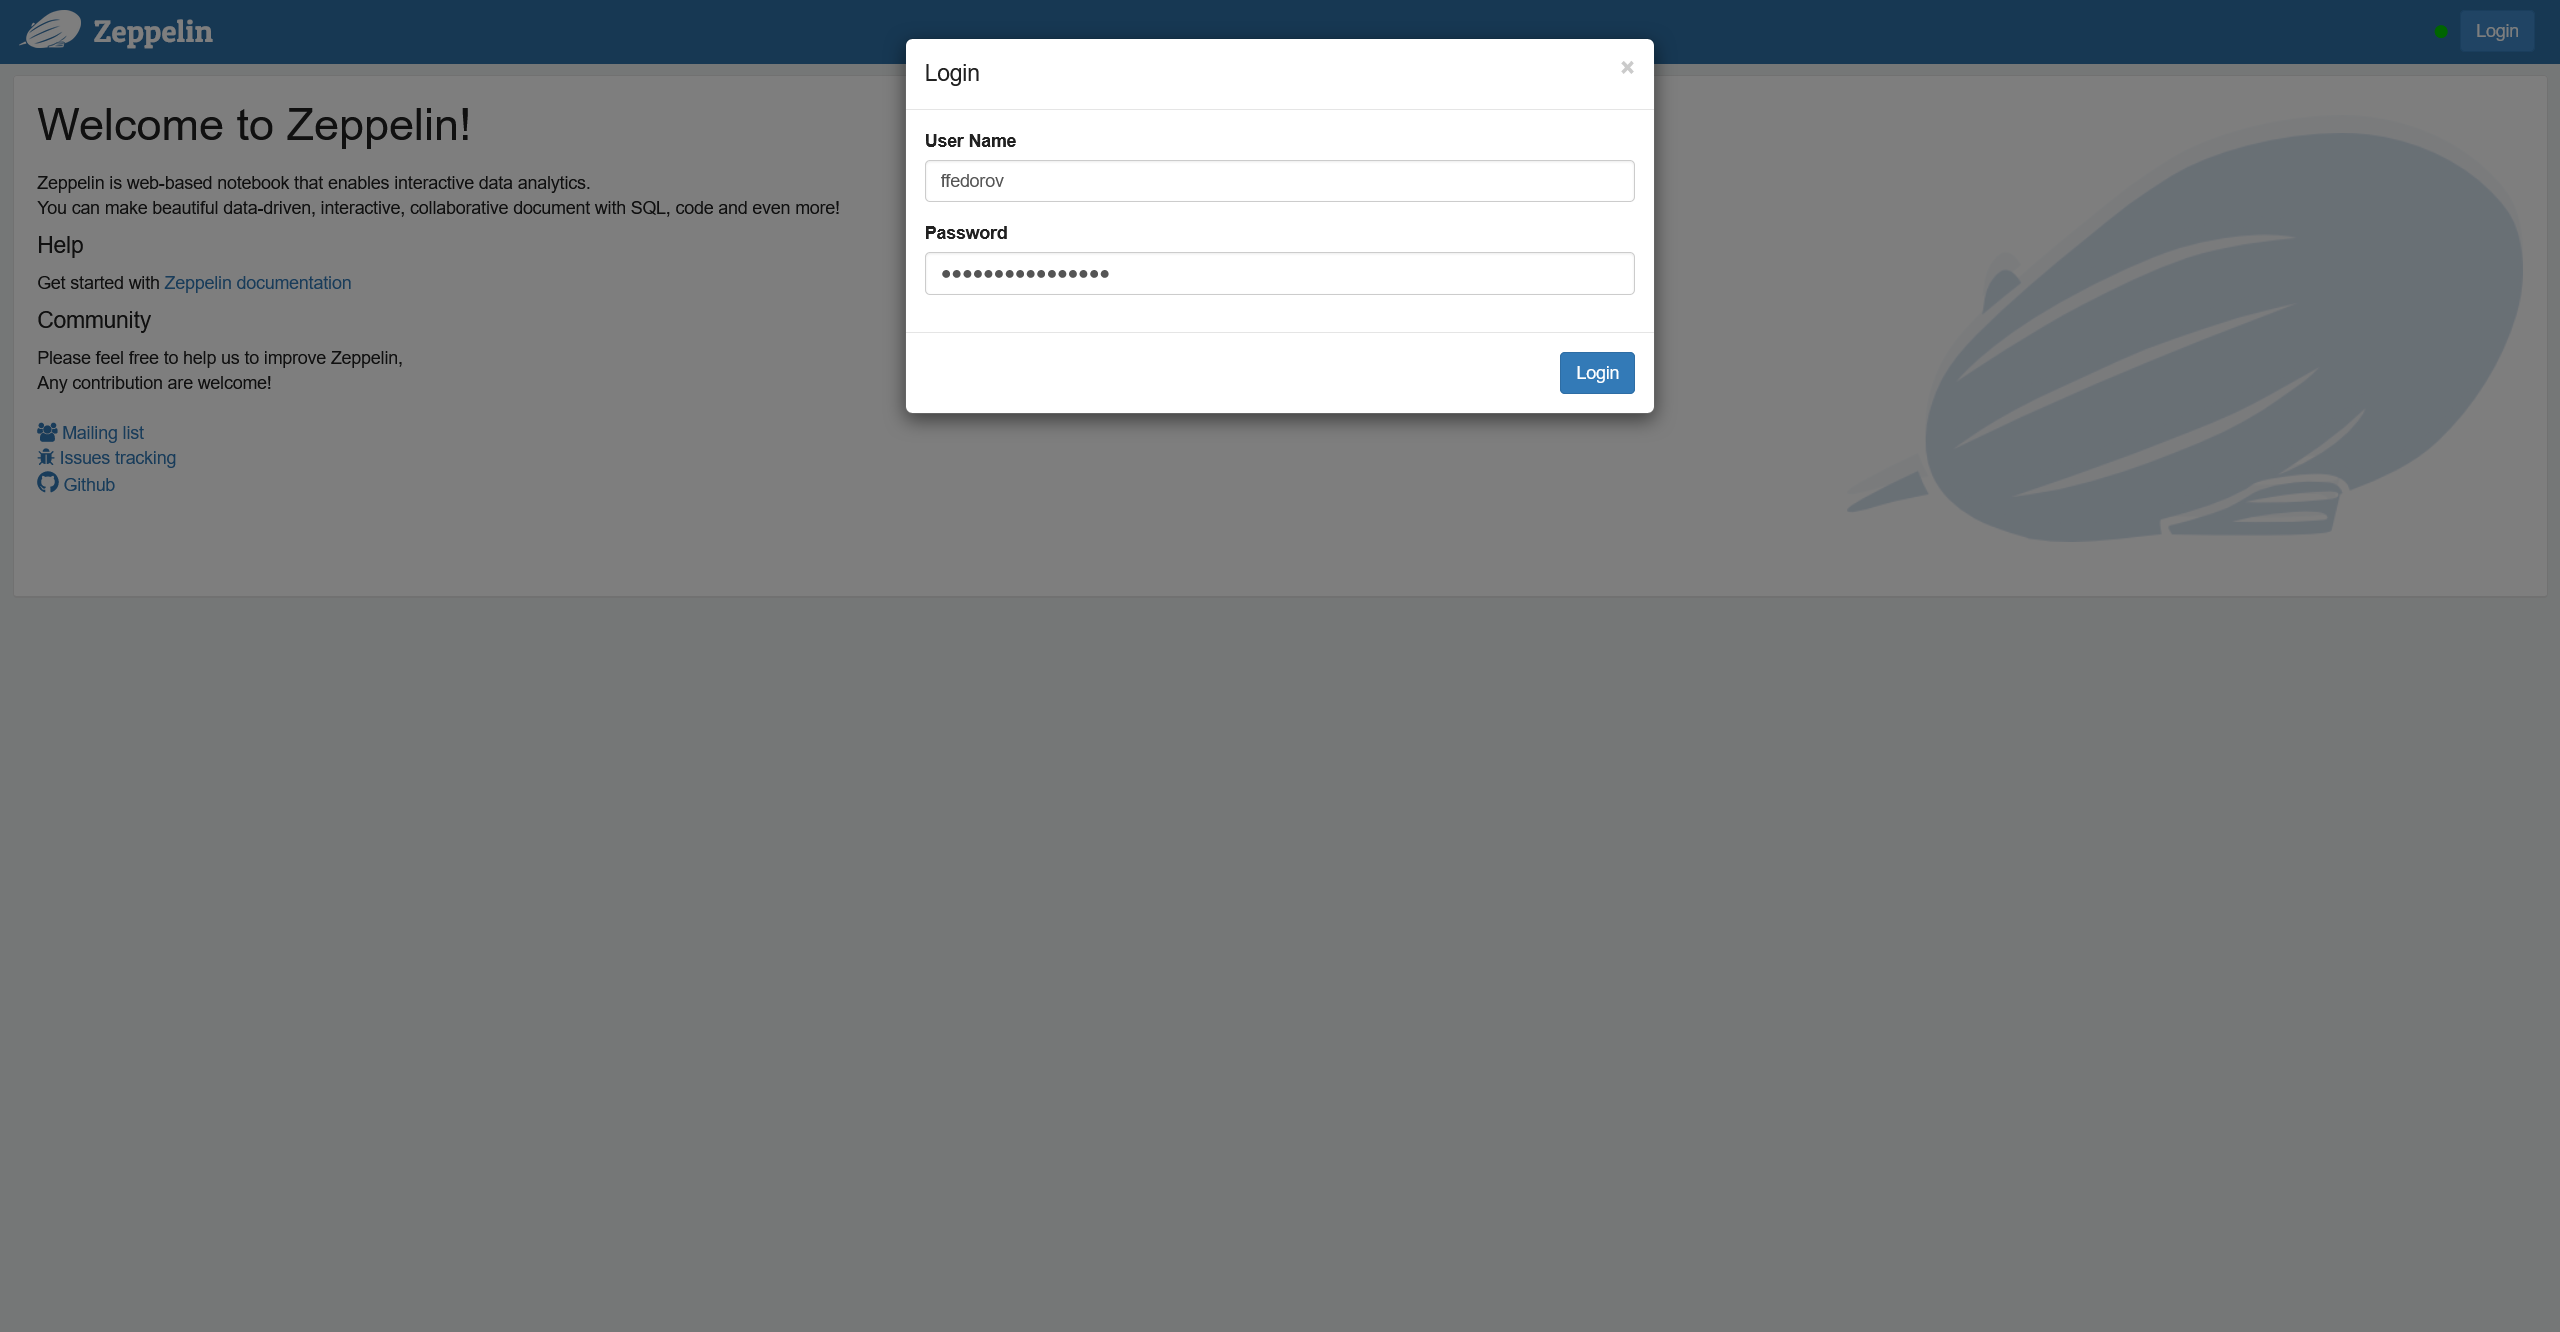 Zeppelin web interface login
 -
Choose an interpreter. Create a note with a test command and run it on the chosen interpreter.
-
In Ranger Admin, head to the Audit → Access page, and you will see a log record with an AD user.