Connect to Phoenix
There are several ways to work with Phoenix. You can use the most suitable work mode for you.
SQLLine
The simplest way to begin working with Phoenix is to use SQLLine. It is a Java console, available on each node of the HBase cluster after its installation. To start working with SQLLine, run the following commands:
$ cd /usr/lib/phoenix/bin
$ ./sqlline.py
The SQLLine prompt ends with a > character. All subsequent commands should be written after it.
Setting property: [incremental, false]
Setting property: [isolation, TRANSACTION_READ_COMMITTED]
issuing: !connect jdbc:phoenix: none none org.apache.phoenix.jdbc.PhoenixDriver
Connecting to jdbc:phoenix:
SLF4J: Class path contains multiple SLF4J bindings.
SLF4J: Found binding in [jar:file:/usr/lib/phoenix/phoenix-5.0.0-HBase-2.0-client.jar!/org/slf4j/impl/StaticLoggerBinder.class]
SLF4J: Found binding in [jar:file:/usr/lib/hadoop/lib/slf4j-log4j12-1.7.25.jar!/org/slf4j/impl/StaticLoggerBinder.class]
SLF4J: See http://www.slf4j.org/codes.html#multiple_bindings for an explanation.
21/11/30 13:51:00 WARN util.NativeCodeLoader: Unable to load native-hadoop library for your platform... using builtin-java classes where applicable
Connected to: Phoenix (version 5.0)
Driver: PhoenixEmbeddedDriver (version 5.0)
Autocommit status: true
Transaction isolation: TRANSACTION_READ_COMMITTED
Building list of tables and columns for tab-completion (set fastconnect to true to skip)...
142/142 (100%) Done
Done
sqlline version 1.2.0
0: jdbc:phoenix:>
To logout from SQLLine, use the following command:
!quitThe basic data operations available in Phoenix via SQLLine are described in Use SQLLine to work with Phoenix.
JDBC
There are two ways to connect to Phoenix via JDBC:
-
Phoenix Thick Driver. It is used to connect via ZooKeeper. The full JDBC URL looks like this:
jdbc:phoenix:[comma-separated ZooKeeper Quorum Hosts [: ZK port [:hbase root znode [:kerberos_principal [:path to kerberos keytab]]]]
The simplest example:
jdbc:phoenix:bds-adh-1.ru-central1.internal,bds-adh-2.ru-central1.internal,bds-adh-3.ru-central1.internal:2181
-
Phoenix Thin Driver. It is designed to implement a standalone client avoiding excessive number of dependencies. It uses special Phoenix Query Server services. The JDBC URL looks like this:
jdbc:phoenix:thin:[key=value[;key=value...]]
The example:
jdbc:phoenix:thin:url=http://10.92.6.9:8765;serialization=PROTOBUF
|
NOTE
You can find more information about Phoenix JDBC drivers in Phoenix documentation. |
In practice, both drivers are used. The choice of a specific driver is determined by the cluster topology, the number of Phoenix Query Servers, and the ability to place dependencies into the client application. When using batches, the performance is approximately the same for both drivers, without batches — the Thick Driver usually shows a performance of about 30% higher.
Let’s consider a simple Java application, using the Phoenix Thin Driver:
-
Create a Java class with the following code (using Eclipse IDE, for example). Replace
<IP>with the IP-address of your Phoenix Query Server. This code creates a new tableTEST_JDBCwith two columns, inserts some values into it, and then selects these values from the table.package test; import java.sql.Connection; import java.sql.DriverManager; import java.sql.ResultSet; import java.sql.SQLException; import java.sql.PreparedStatement; import java.sql.Statement; public class testclass { public static void main(String[] args) throws SQLException { Statement stmt = null; ResultSet rset = null; Connection con = DriverManager.getConnection("jdbc:phoenix:thin:url=http://<IP>:8765;serialization=PROTOBUF"); stmt = con.createStatement(); stmt.executeUpdate("CREATE TABLE TEST_JDBC (PK INTEGER NOT NULL PRIMARY KEY, NAME VARCHAR)"); stmt.executeUpdate("UPSERT INTO TEST_JDBC VALUES (1,'Thick')"); stmt.executeUpdate("UPSERT INTO TEST_JDBC VALUES (2,'Thin')"); con.commit(); PreparedStatement statement = con.prepareStatement("SELECT * FROM TEST_JDBC"); rset = statement.executeQuery(); while (rset.next()) { System.out.println(rset.getString("NAME")); } statement.close(); con.close(); } } -
Get the corresponding version of the JAR file phoenix-<phoenix_version>-HBase-<hbase_version>-thin-client.jar. For example, for HBase 2.0 and Phoenix 5.0.0, this file is called phoenix-5.0.0-HBase-2.0-thin-client.jar. You can copy it from any host of your HBase cluster (from the /usr/lib/phoenix directory). The other way is to download it from Phoenix repository.
-
Add the uploaded file to the build path of your Java application. If you use Eclipse, you can add the file to the /lib directory of your workspace and then use the context menu item Build Path → Add to Build Path.
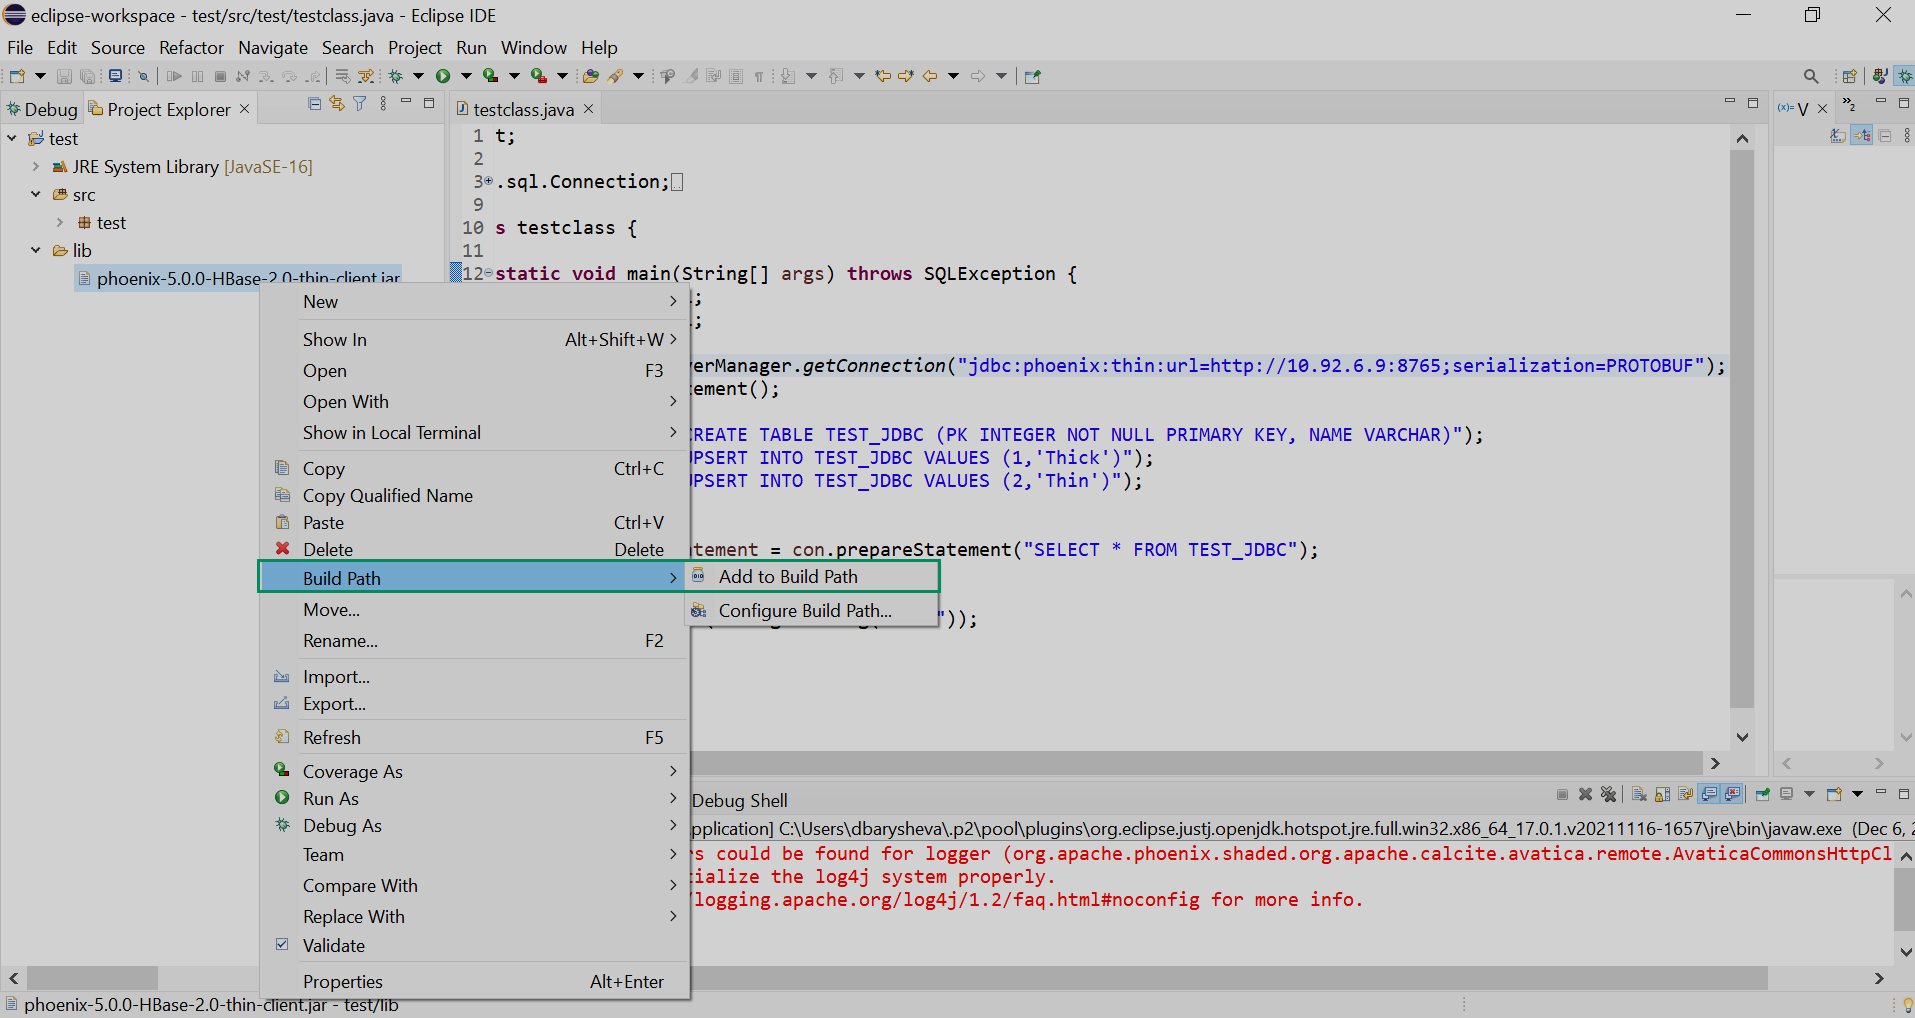 Adding the JAR file to the build path
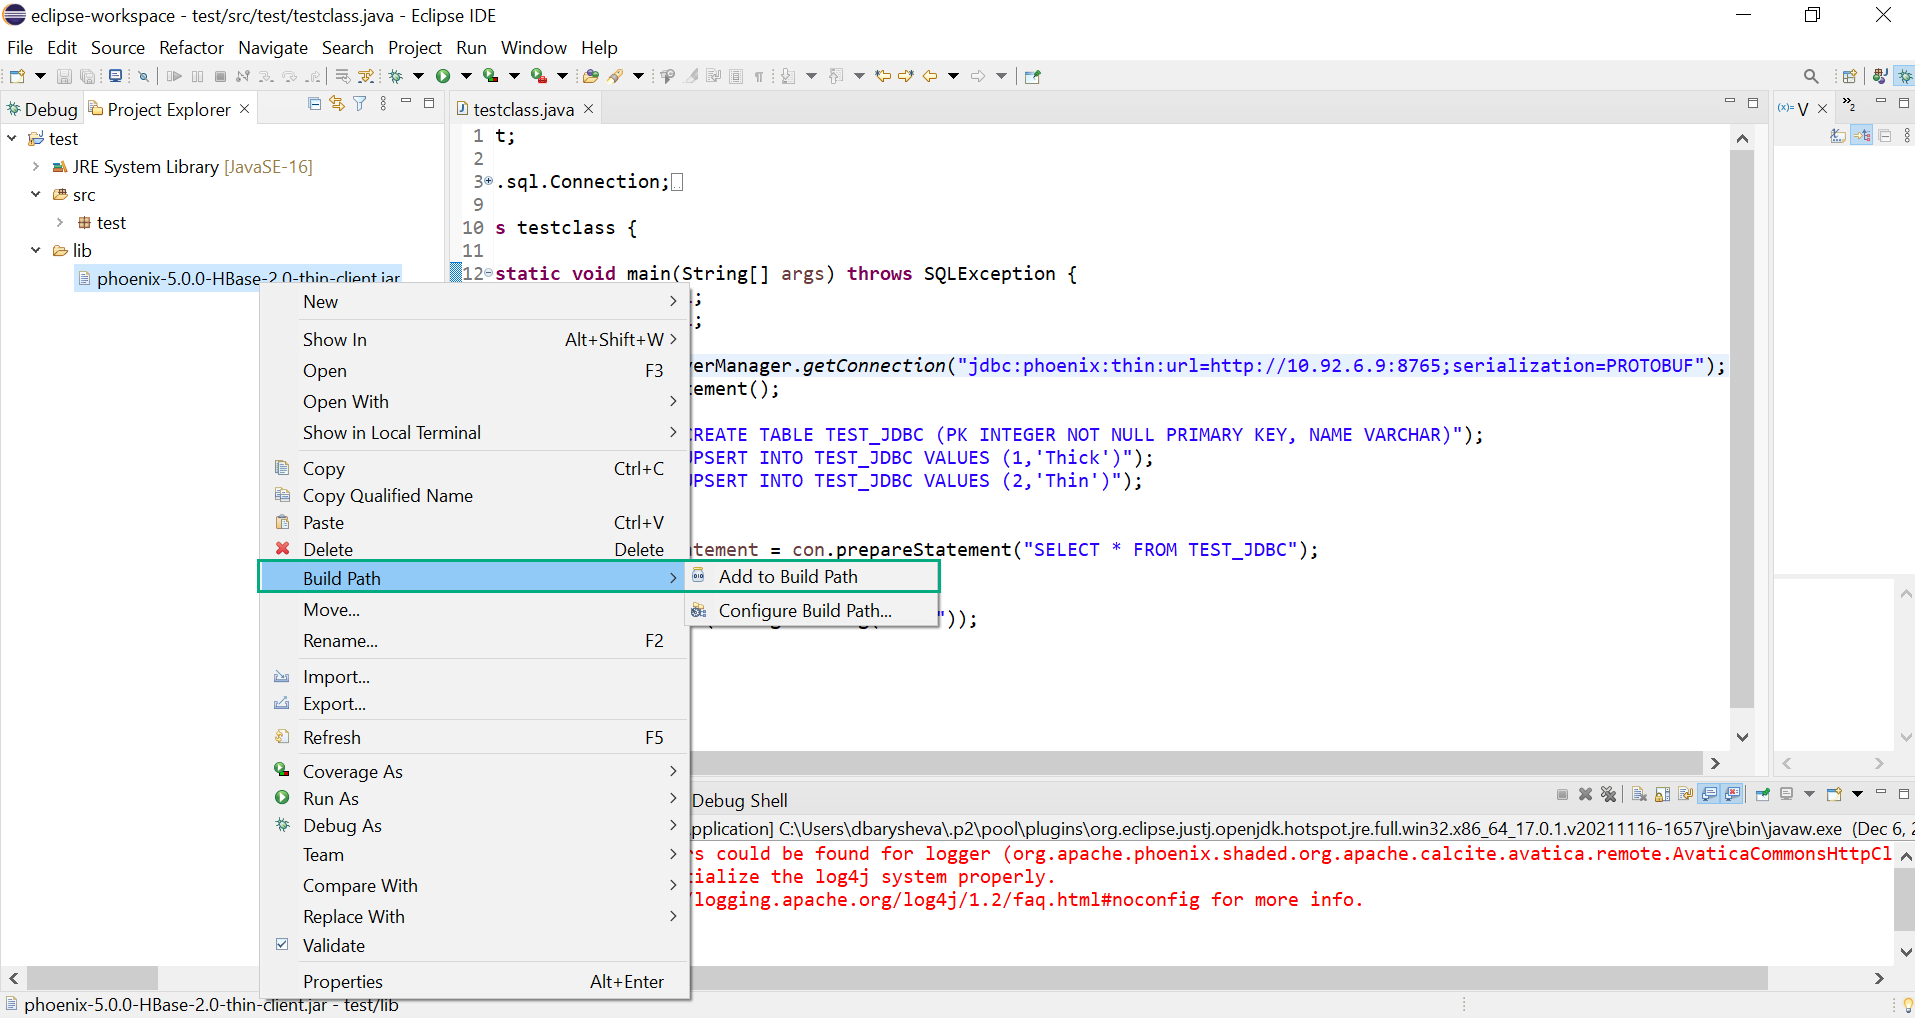 Adding the JAR file to the build path
 -
Run your class as Java application. The result should be similar to:
log4j:WARN No appenders could be found for logger (org.apache.phoenix.shaded.org.apache.calcite.avatica.remote.AvaticaCommonsHttpClientImpl).
log4j:WARN Please initialize the log4j system properly.
log4j:WARN See http://logging.apache.org/log4j/1.2/faq.html#noconfig for more info.
Thick
Thin
CAUTIONIf there is no Kerberos authentication in your ADH cluster, the JDBC connection will use the login name
phoenixby default. This user should have the sufficient rights in HBase. For example, if you want only to create tables and write data to them, run the following command in HBase shell:grant 'phoenix', 'WC'Otherwise, you will get the following errors in your Java application:
Insufficient permissions (user=phoenix, scope=default, params=[namespace=default,table=default:TEST_JDBC,family=0],action=CREATE)
Insufficient permissions (user=phoenix, scope=default:SYSTEM.CATALOG, family=0:USE_STATS_FOR_PARALLELIZATION, params=[table=default:SYSTEM.CATALOG,family=0:USE_STATS_FOR_PARALLELIZATION],action=WRITE)
For more information about the previously used command, see the grant.
-
Check the existence of the
TEST_JDBCtable in Phoenix:!tables
The output:
+------------+--------------+--------------+---------------+----------+--------+
| TABLE_CAT  | TABLE_SCHEM  |  TABLE_NAME  |  TABLE_TYPE   | REMARKS  | TYPE_N |
+------------+--------------+--------------+---------------+----------+--------+
|            | SYSTEM       | CATALOG      | SYSTEM TABLE  |          |        |
|            | SYSTEM       | FUNCTION     | SYSTEM TABLE  |          |        |
|            | SYSTEM       | LOG          | SYSTEM TABLE  |          |        |
|            | SYSTEM       | SEQUENCE     | SYSTEM TABLE  |          |        |
|            | SYSTEM       | STATS        | SYSTEM TABLE  |          |        |
|            |              | BEST_BOOKS   | TABLE         |          |        |
|            |              | TEST_JDBC    | TABLE         |          |        |
|            |              | employee     | TABLE         |          |        |
|            |              | people_ages  | TABLE         |          |        |
+------------+--------------+--------------+---------------+----------+--------+
0: jdbc:phoenix:> select * from TEST_JDBC;
+-----+--------+
| PK  |  NAME  |
+-----+--------+
| 1   | Thick  |
| 2   | Thin   |
+-----+--------+
2 rows selected (0.058 seconds)
GUI
You can also use JDBC drivers for connecting to Phoenix via GUI. Let’s consider the example of using a thin JDBC driver in DBeaver.
|
NOTE
This section is presented only as an example. If GUI access is required, it is strongly recommended to take a look at Zeppelin, which is included into the ADH package and specifically designed for Big Data analytics. You can find information on connecting from Zeppelin to Phoenix in Add a custom interpreter to a group. |
Step 1. Add a driver
-
Install DBeaver on your local computer.
-
Get the corresponding version of the JAR file phoenix-<phoenix_version>-HBase-<hbase_version>-thin-client.jar. For example, for HBase 2.0 and Phoenix 5.0.0, this file is called phoenix-5.0.0-HBase-2.0-thin-client.jar. You can copy it from any host of your HBase cluster (from the /usr/lib/phoenix directory). The other way is to download it from Phoenix repository.
-
Put the uploaded file into the plugins folder inside of the DBeaver work directory. For example, in Windows, the full path should look like this: C:/Program Files/DBeaver/plugins/.
-
Select Database → Driver Manager in the main menu of DBeaver.
-
In the opened form, click New.
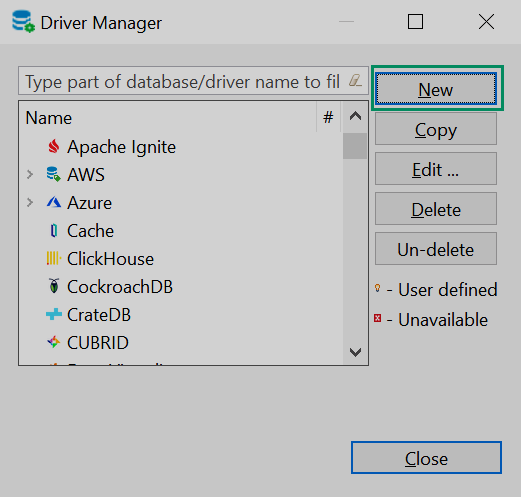 Adding a new driver
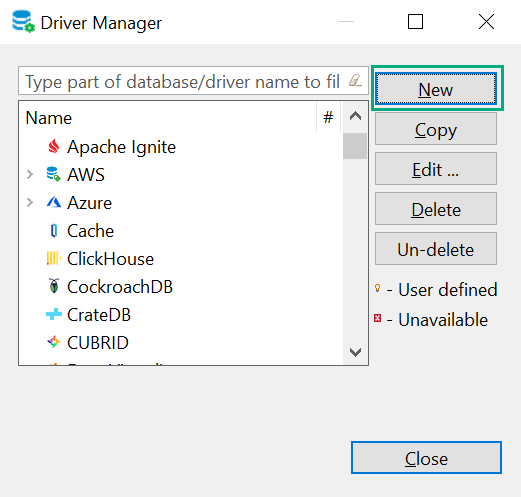 Adding a new driver
 -
In the opened window, add information about a new driver:
-
Enter the driver name
phoenix-thinat the Settings tab.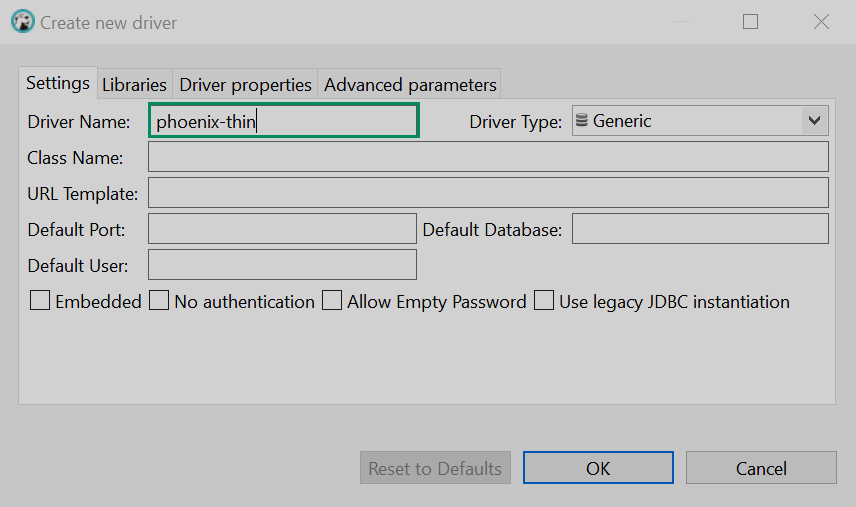 Adding a driver name
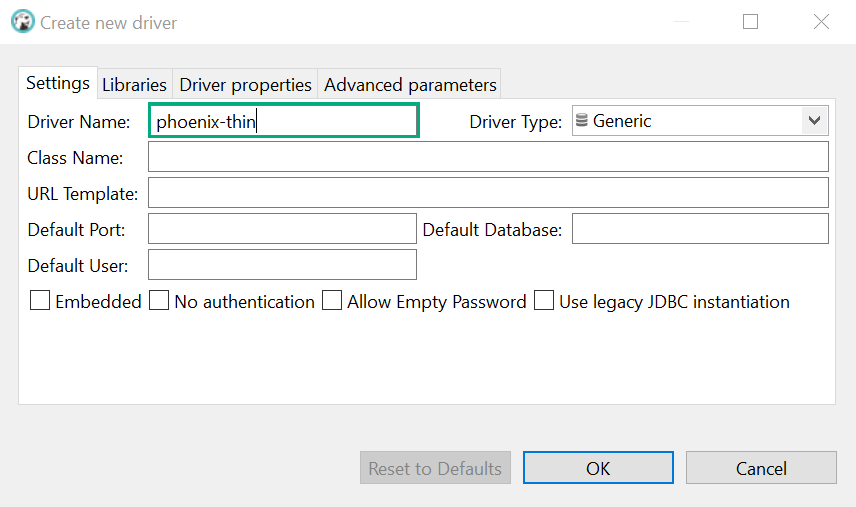 Adding a driver name
 -
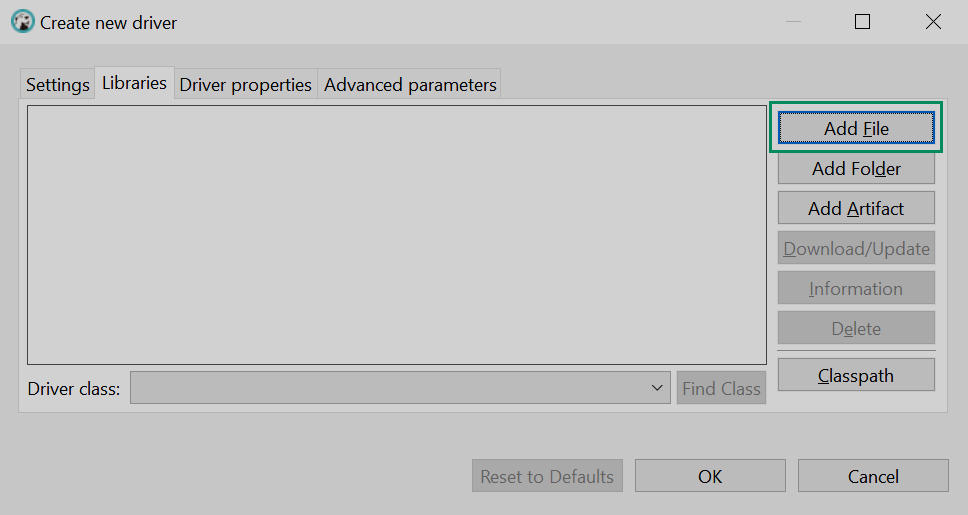
Click Add file at the Libraries tab.
 Switching to choosing the file
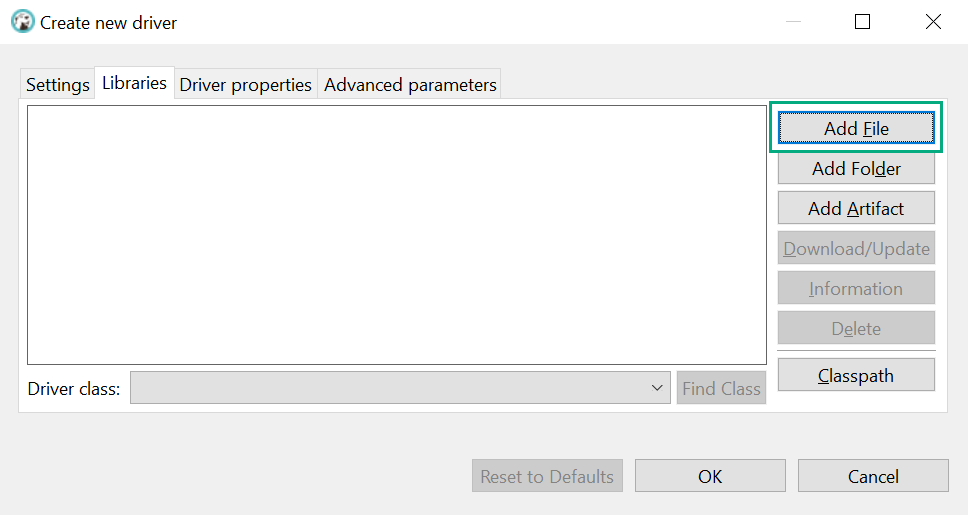 Switching to choosing the file
 -
Choose the previously uploaded JAR file in the opened dialog window and click Open.
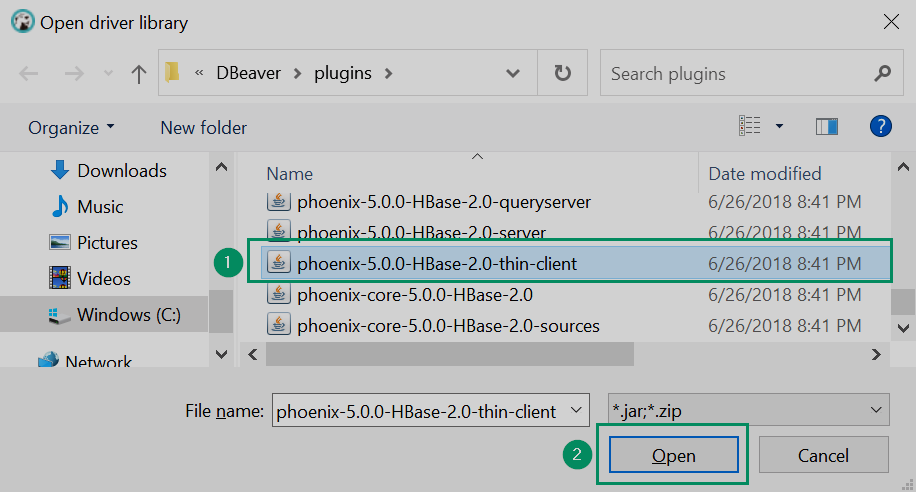 Choosing the JAR file from the folder
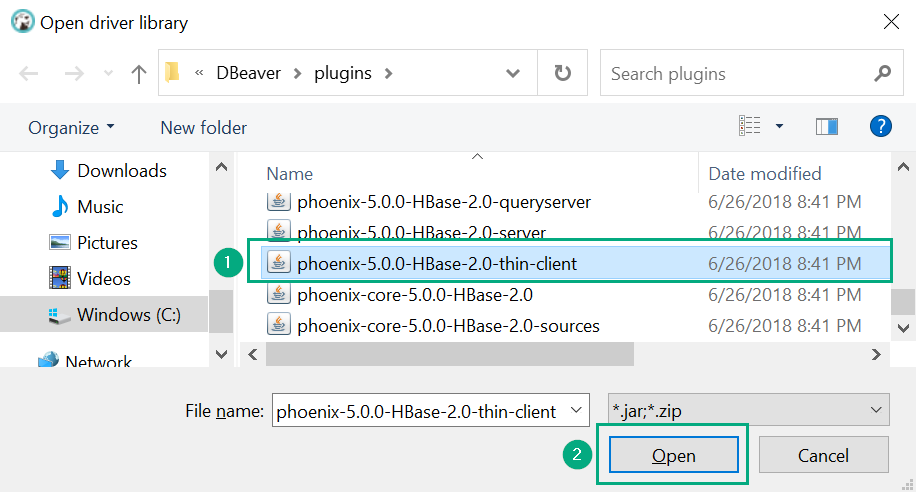 Choosing the JAR file from the folder
 -
Click Find Class.
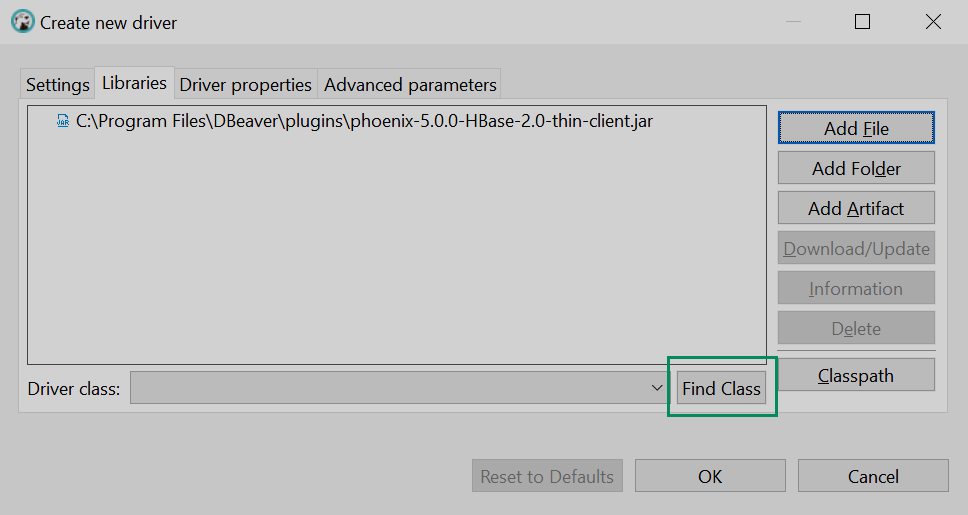 Switching to finding a class
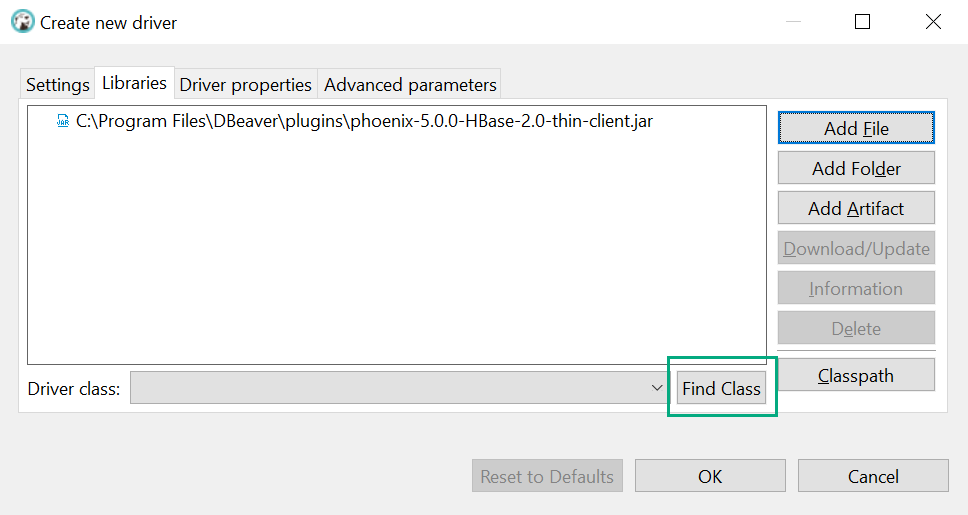 Switching to finding a class
 -
When the search for suitable classes is over, select the
org.apache.phoenix.queryserver.client.Driverclass in the drop-down list.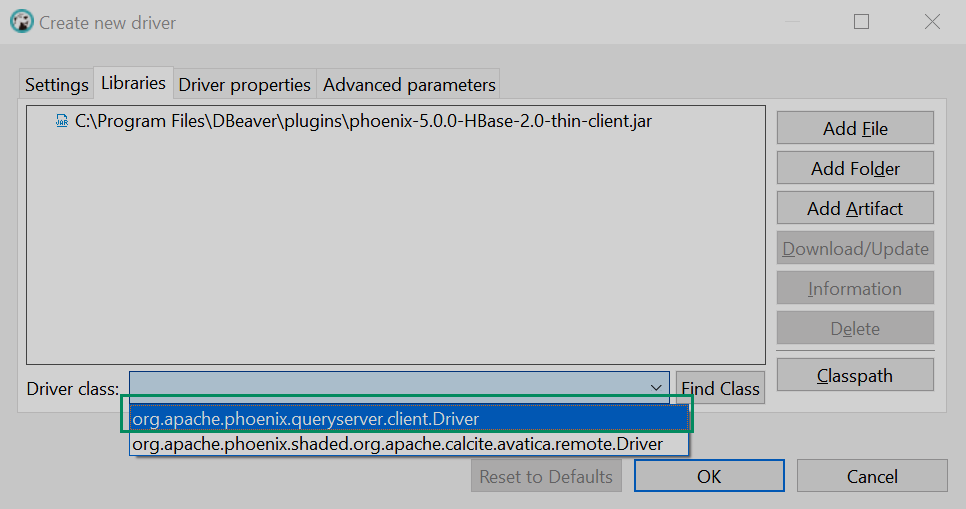 Selecting a class
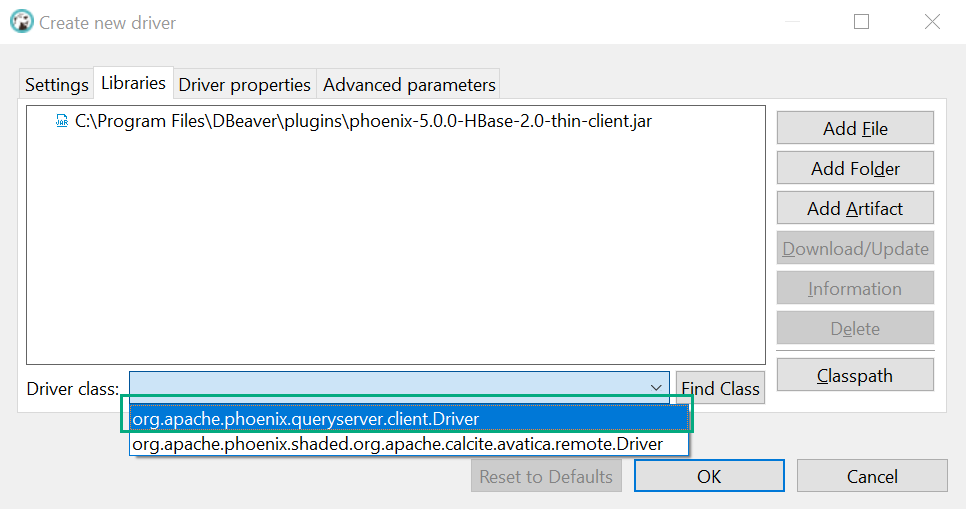 Selecting a class
 -
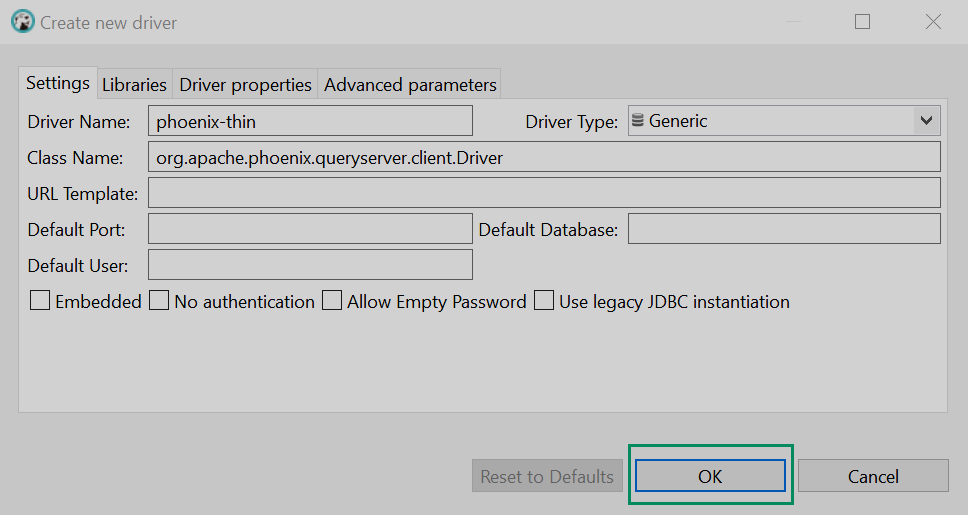
Return to the Settings tab, check the class existence in the Class Name field, and click OK. Close the next window.
 Finishing the driver creation
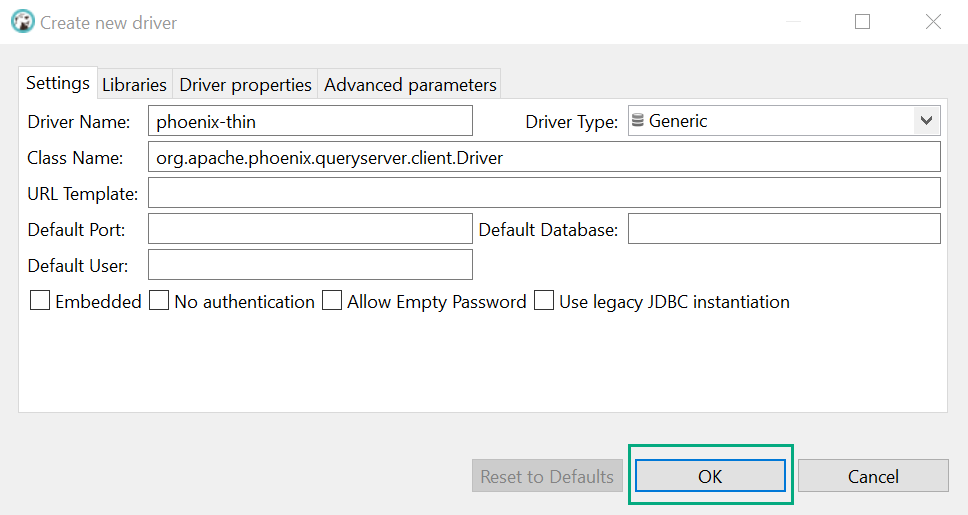 Finishing the driver creation
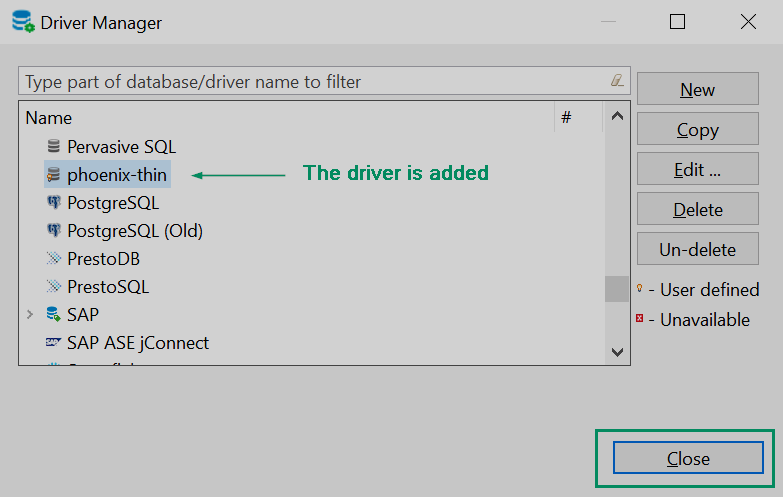 The driver is added to the common list
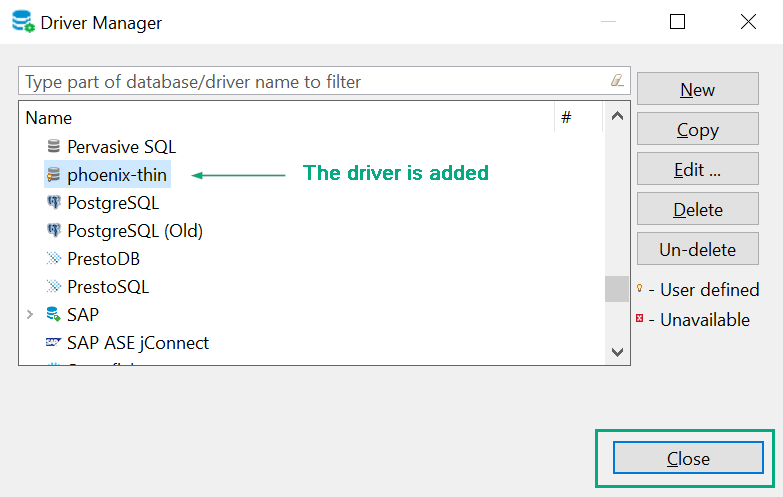 The driver is added to the common list
-
The new driver is ready.
Step 2. Add a connection
-
Open the menu item File → New. In the opened window, select the dropdown menu item DBeaver → Database Connection and click Next.
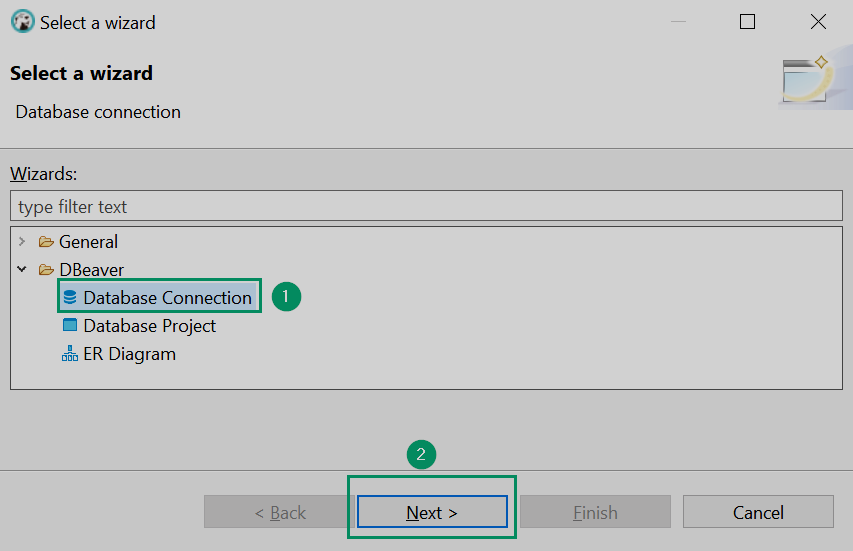 Switching to adding a new connection from the main menu
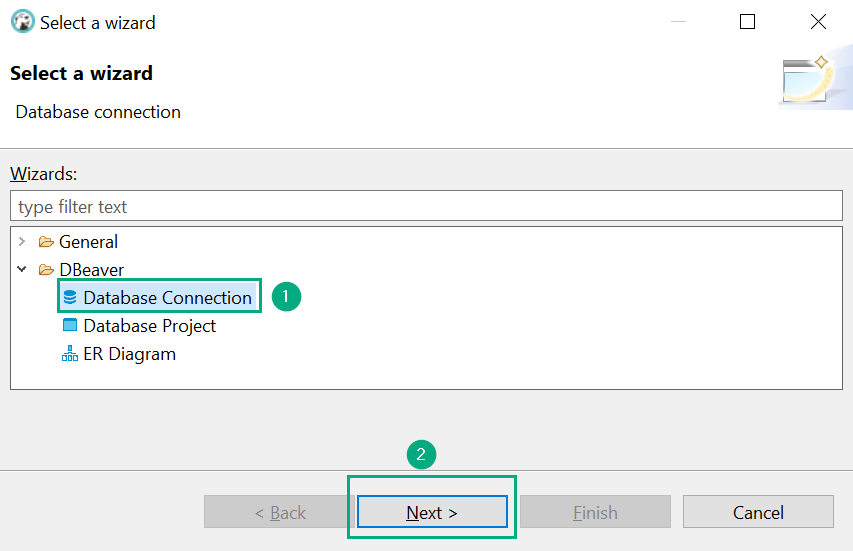 Switching to adding a new connection from the main menu
Another way is to click the corresponding icon in the main window.
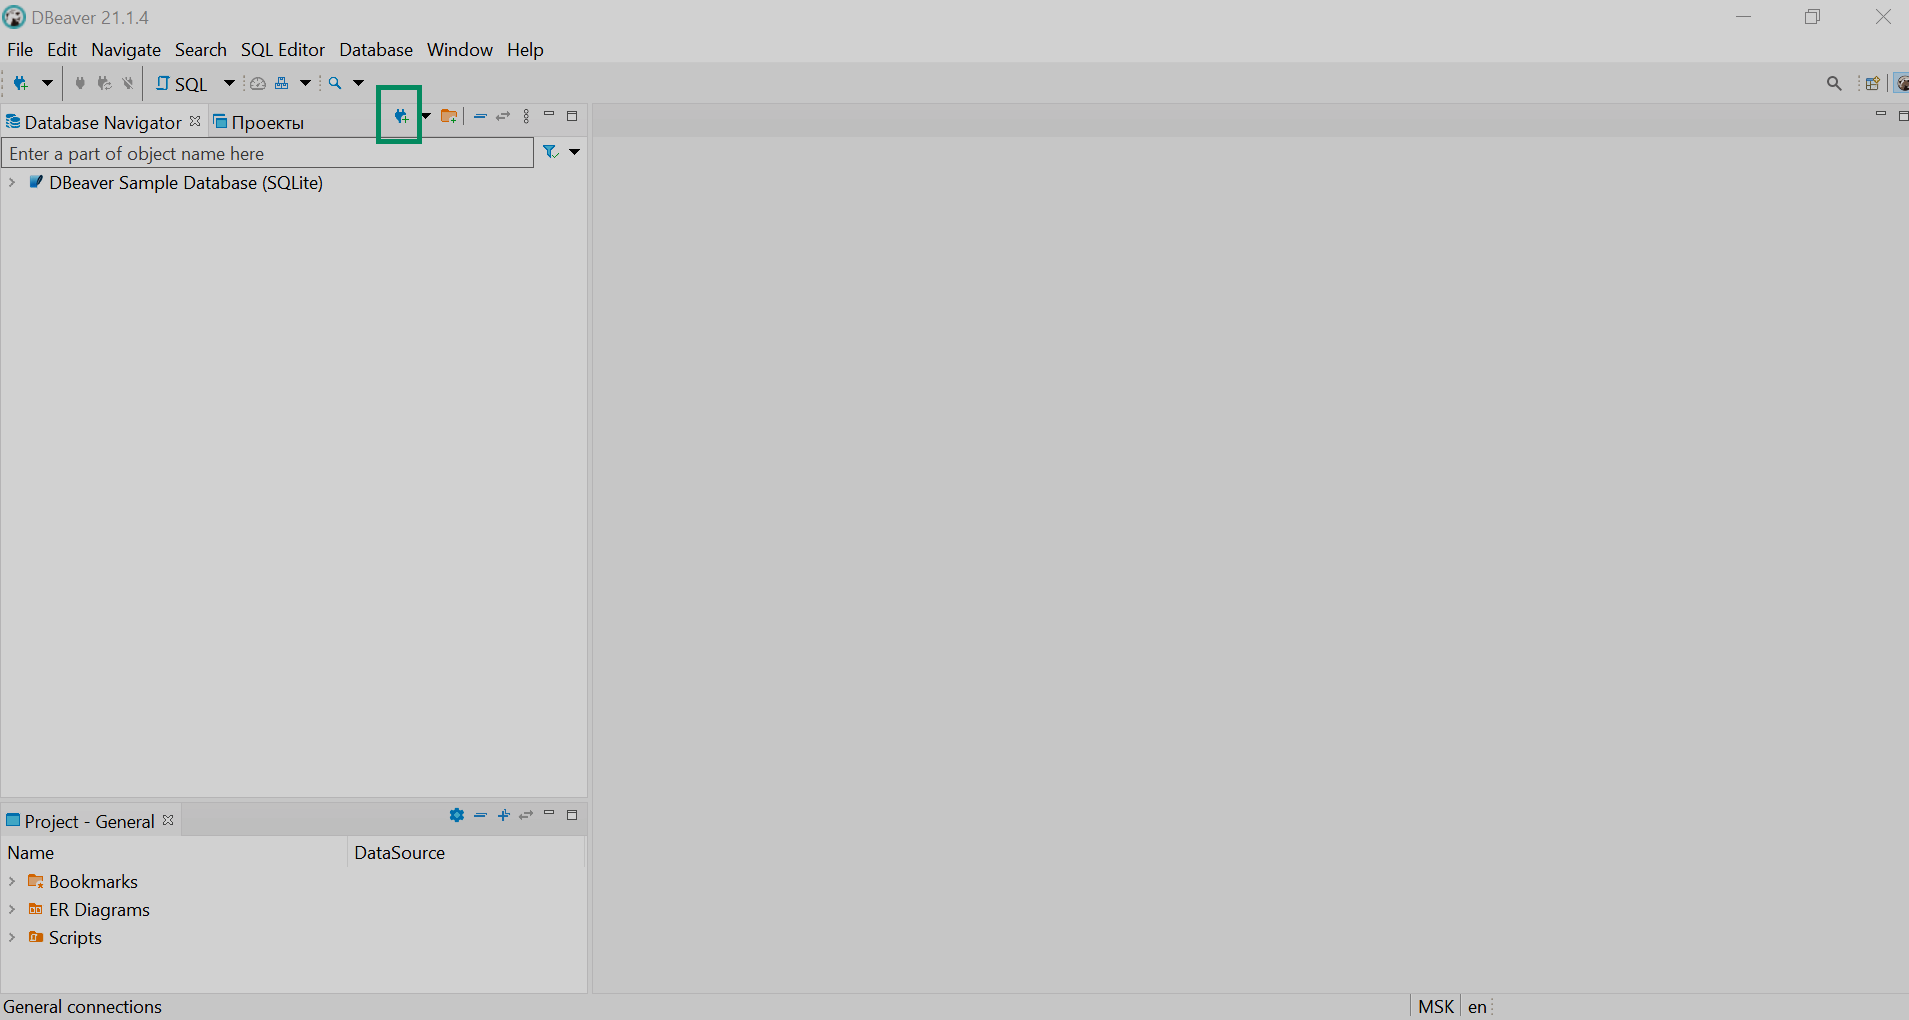 Switching to adding a new connection by clicking the icon
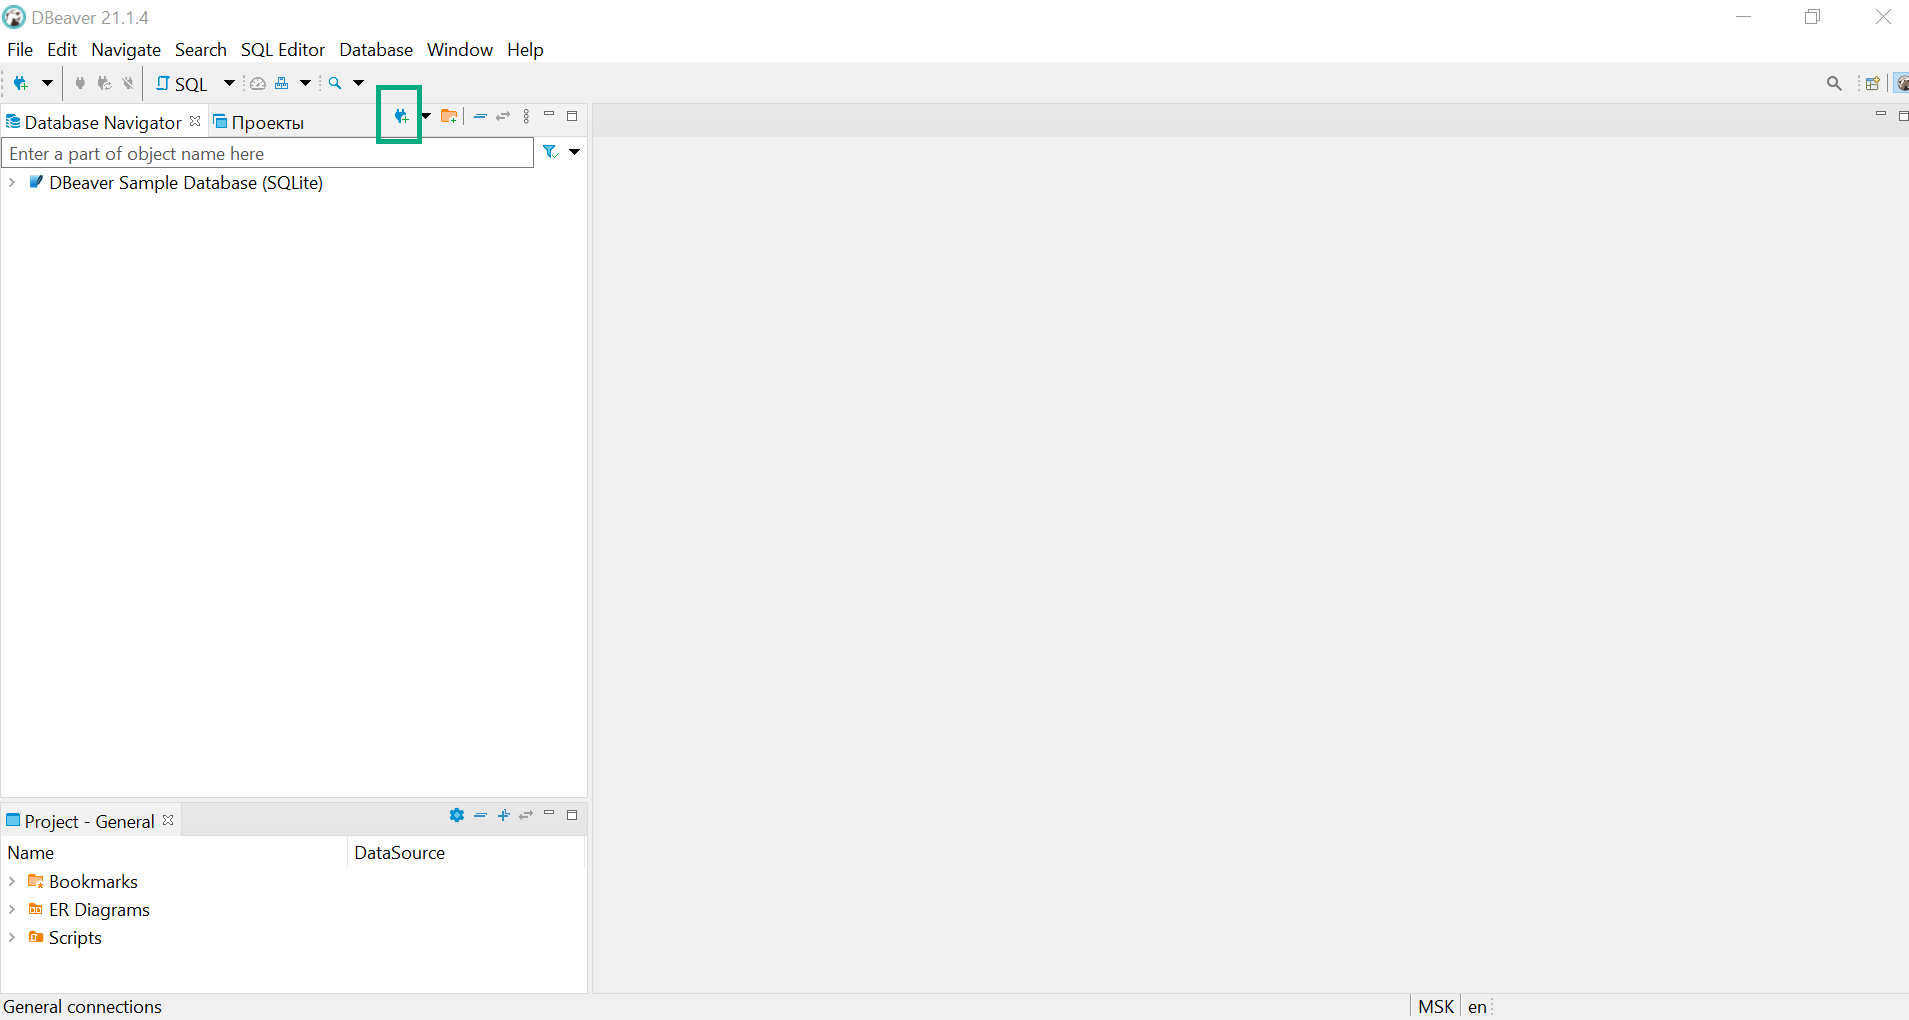 Switching to adding a new connection by clicking the icon
 -
Find the previously created driver
phoenix-thinand click Next.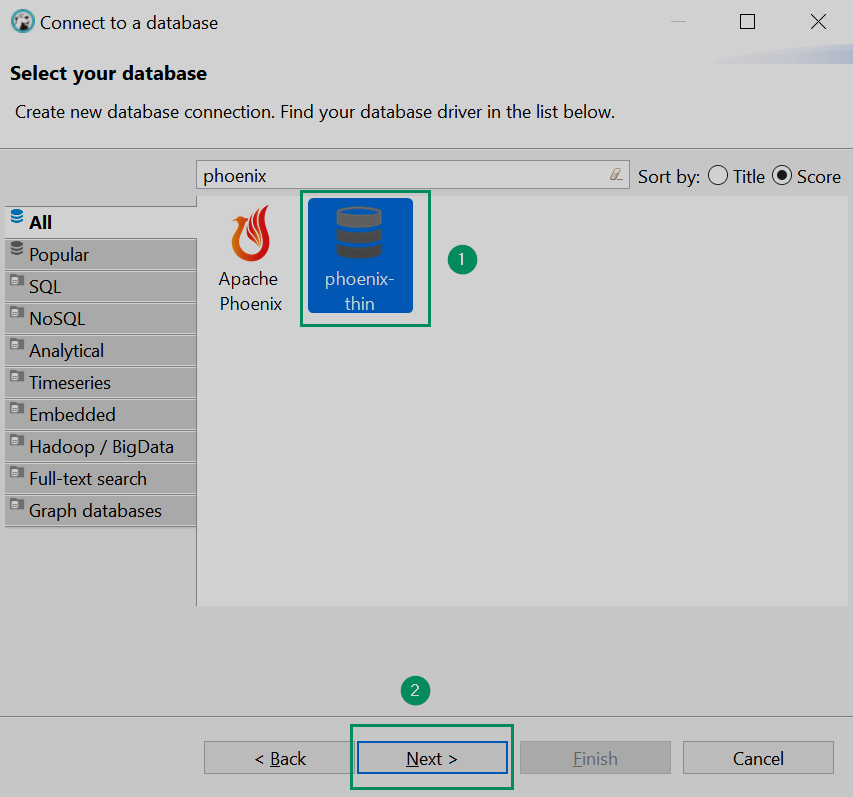 Selecting the driver
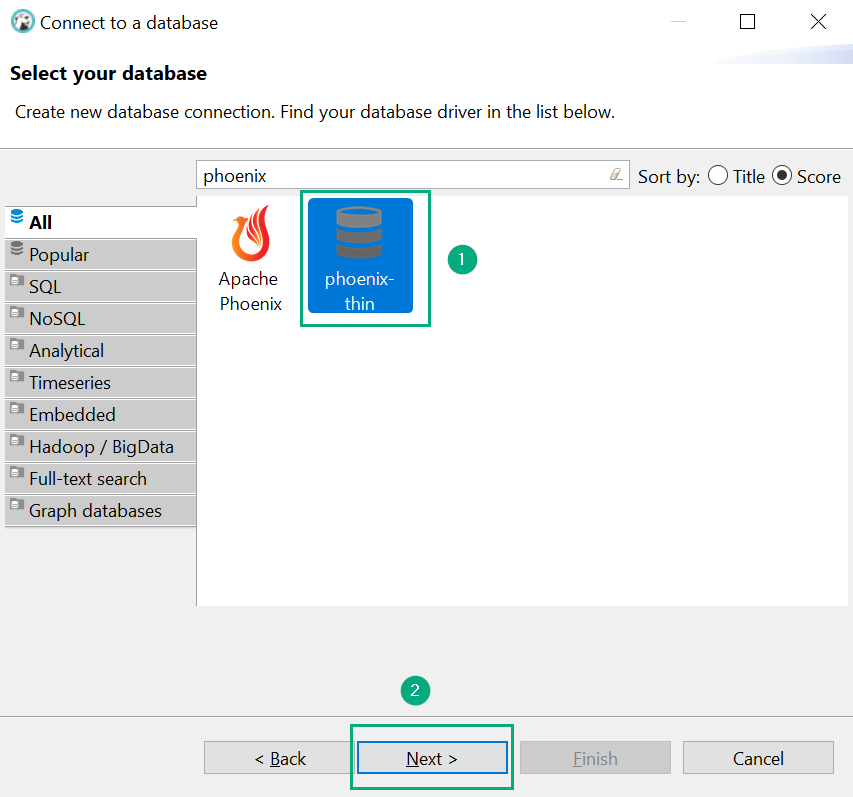 Selecting the driver
 -
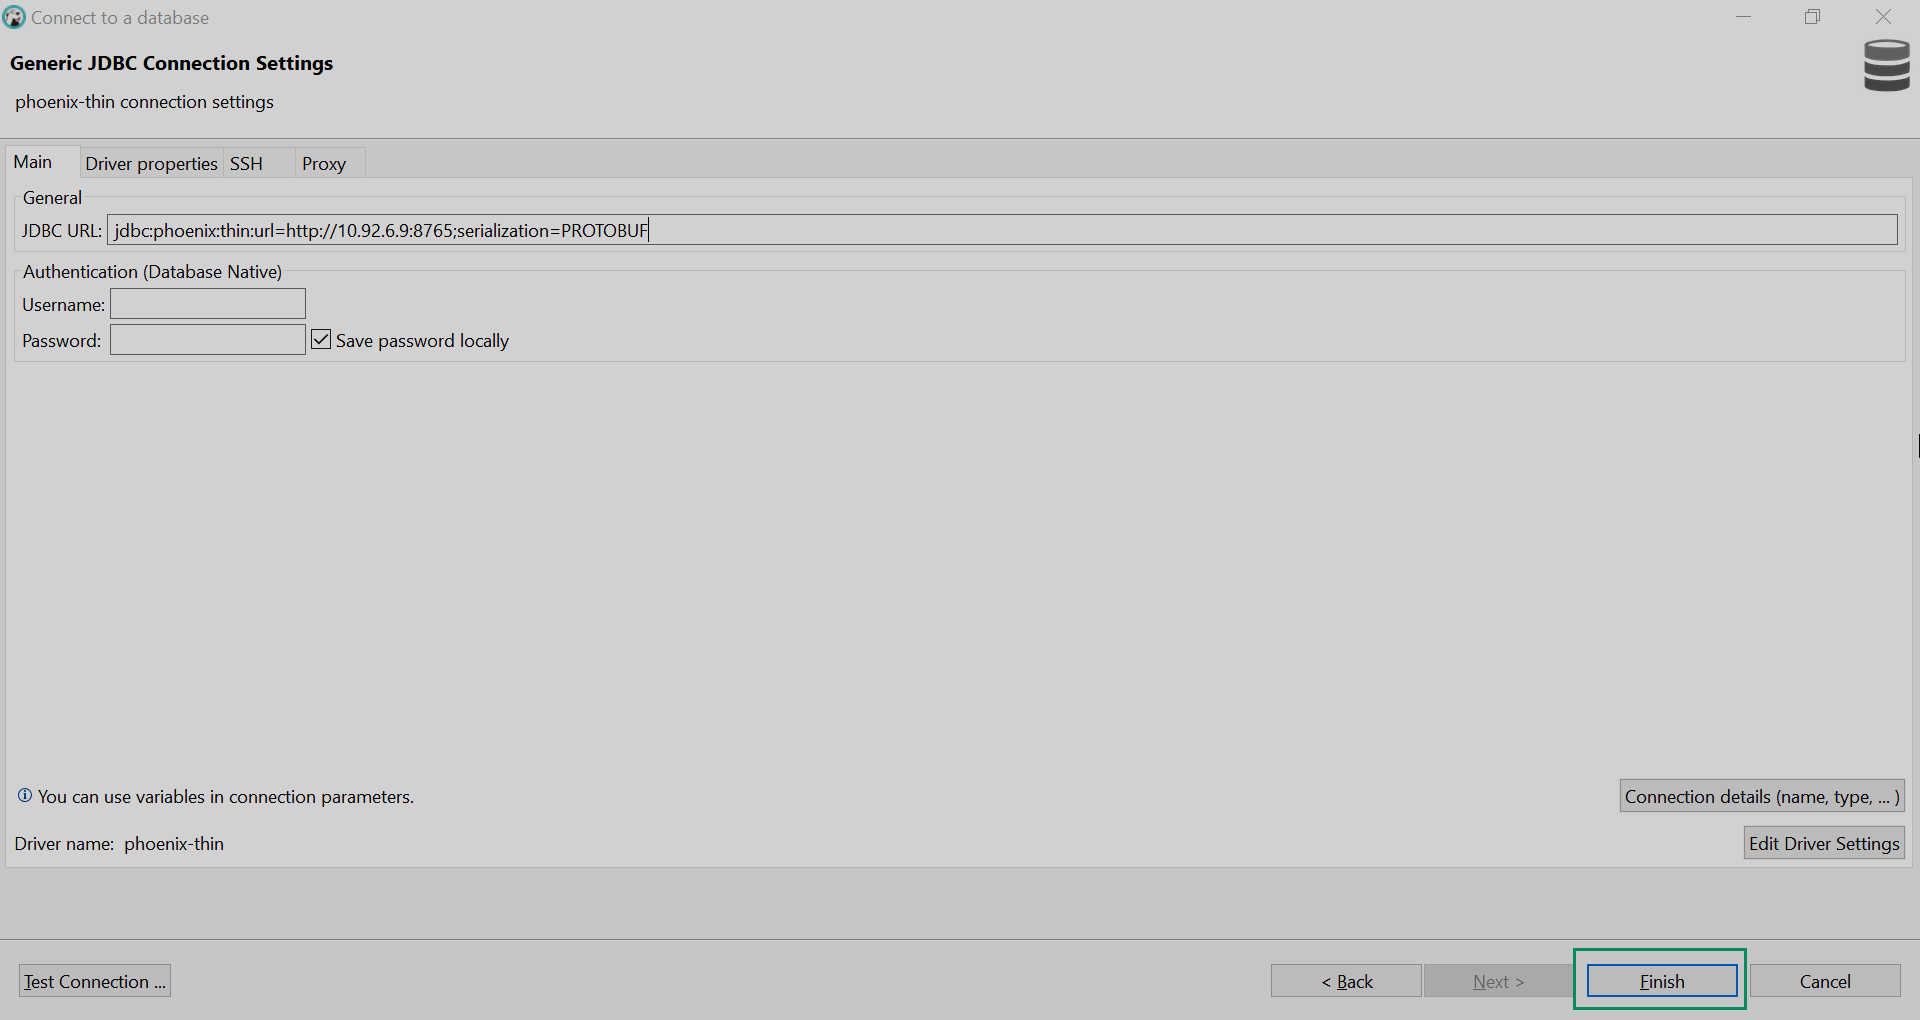
Enter the JDBC URL in the field of the same name. Use the following syntax:
jdbc:phoenix:thin:url=http://<IP>:8765;serialization=PROTOBUF, where<IP>means the IP-address of your Phoenix Query Server.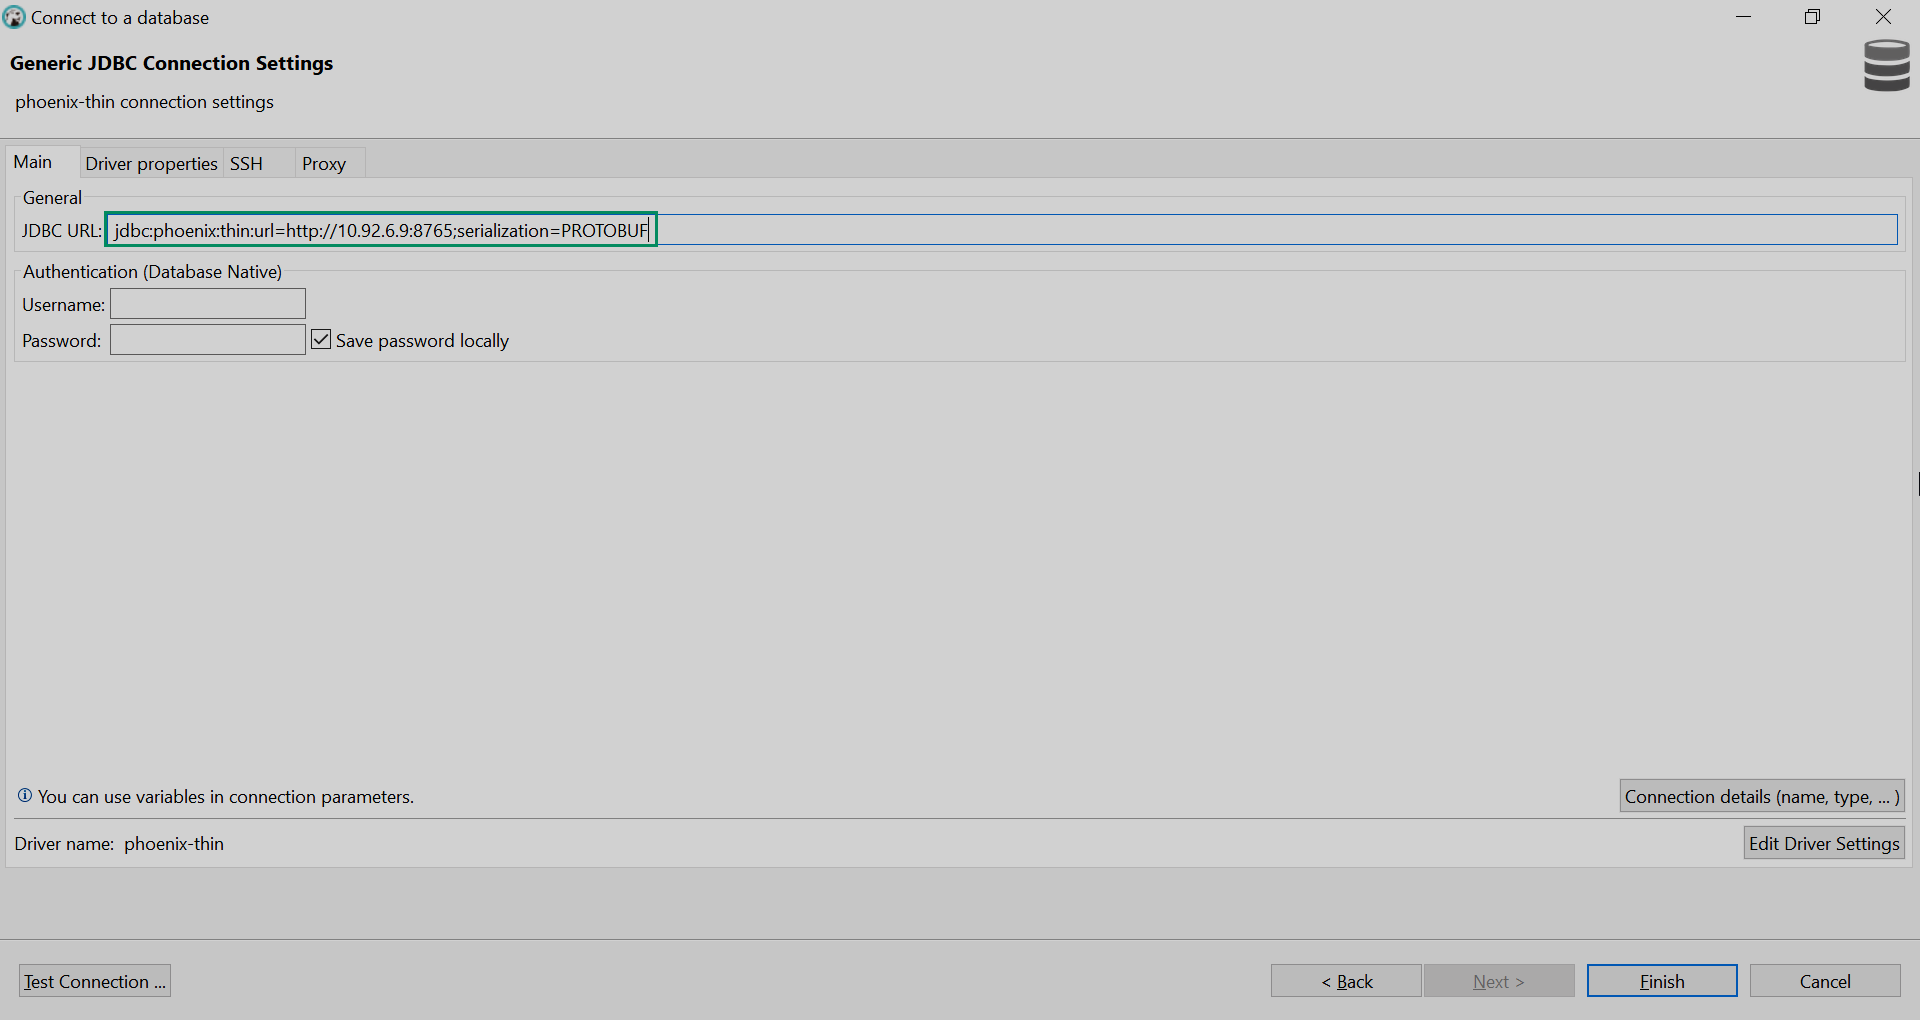 Filling the JDBC URL
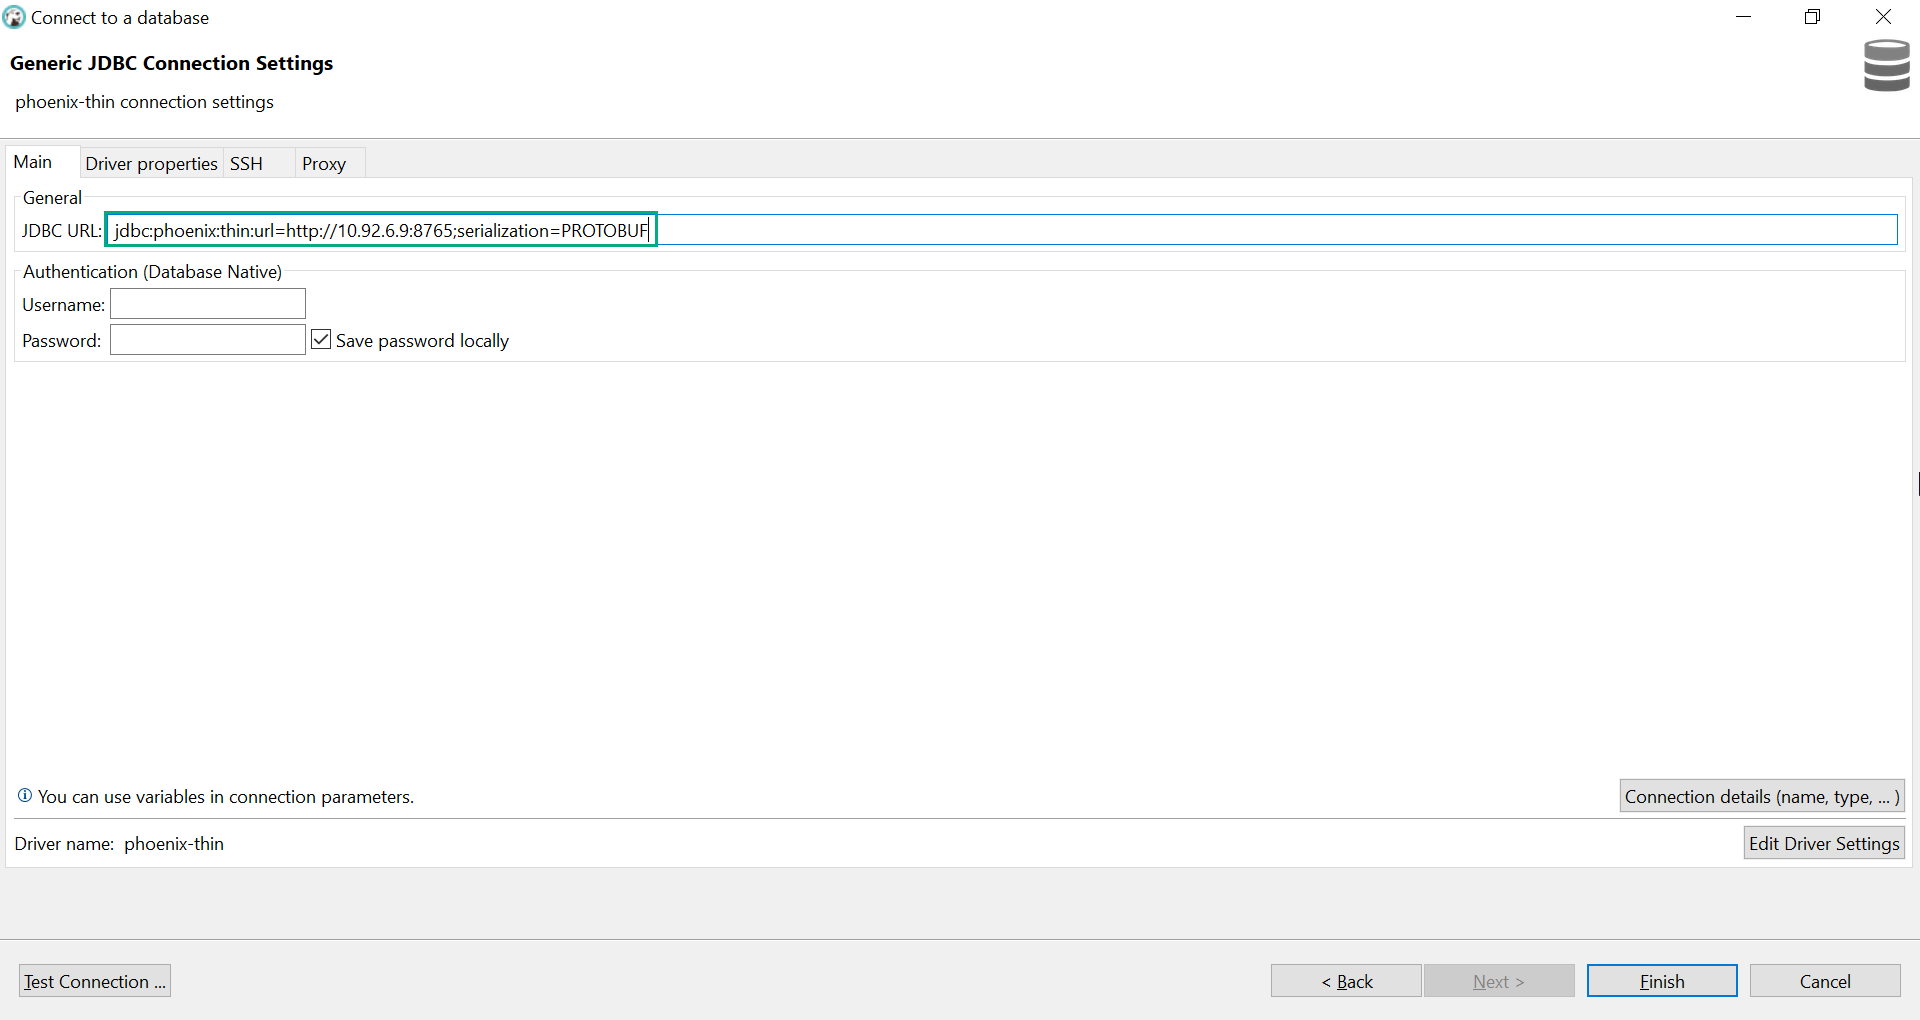 Filling the JDBC URL
 -
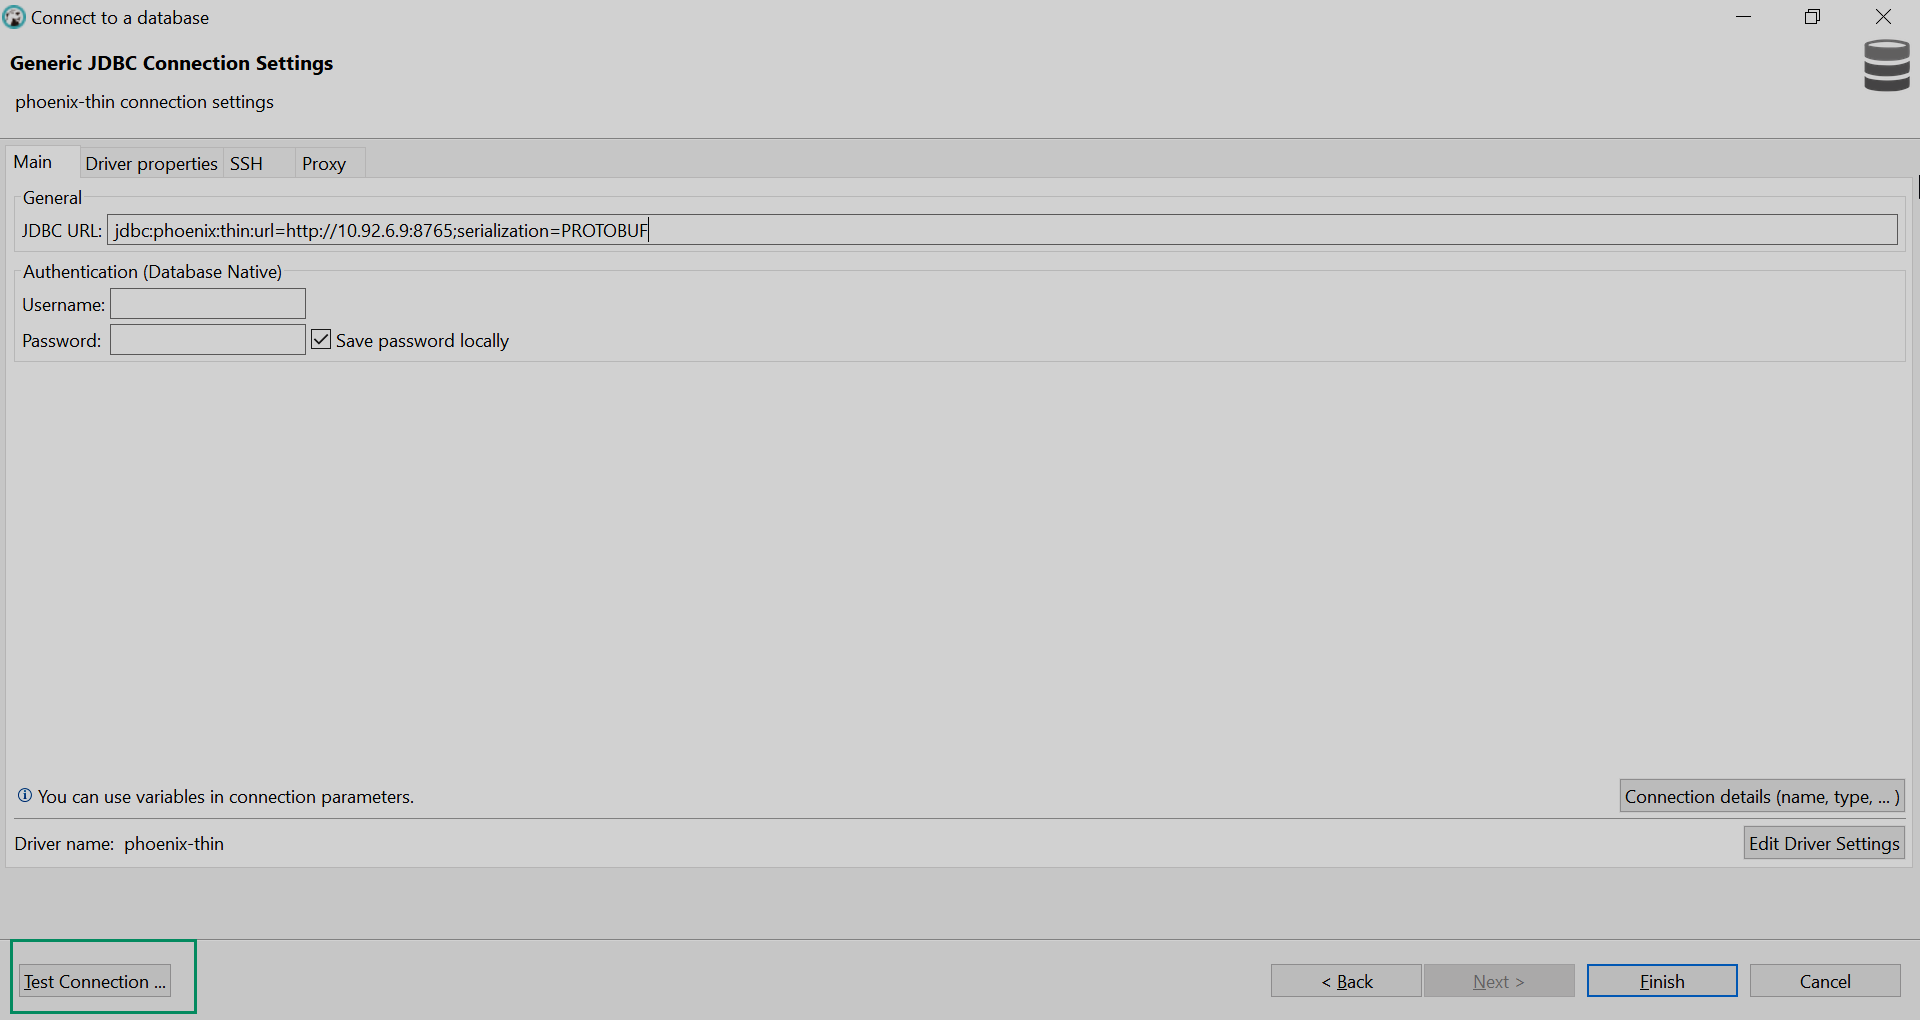
Click Test Connection… to check, that the configured connection can be established.
 Testing the connection
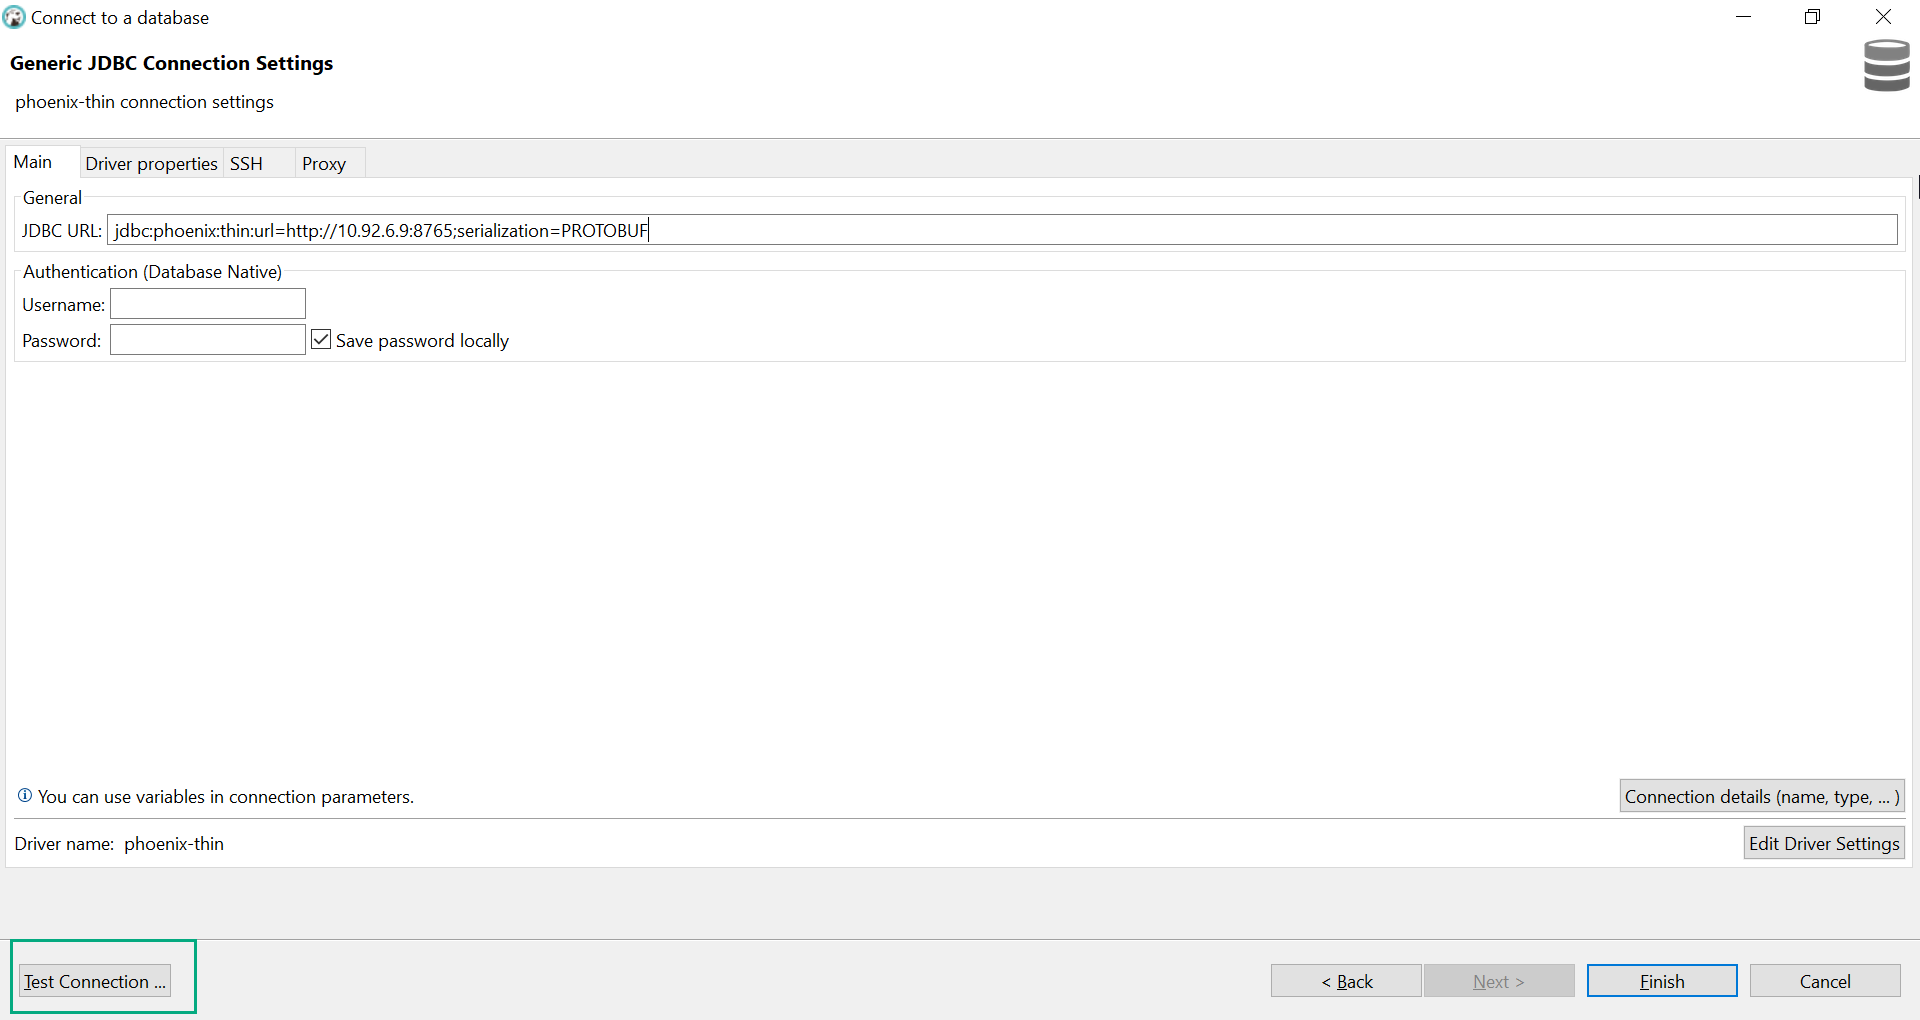 Testing the connection
The result is similar to:
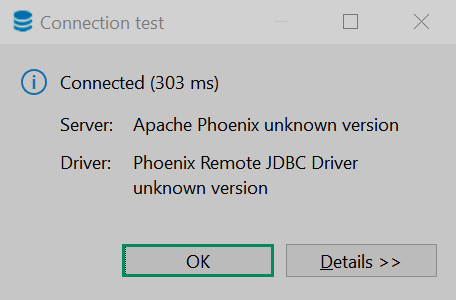 The result
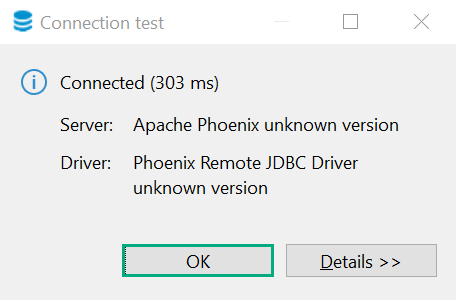 The result
 -
Click Finish. The connection is added.
 Finishing the connection adding
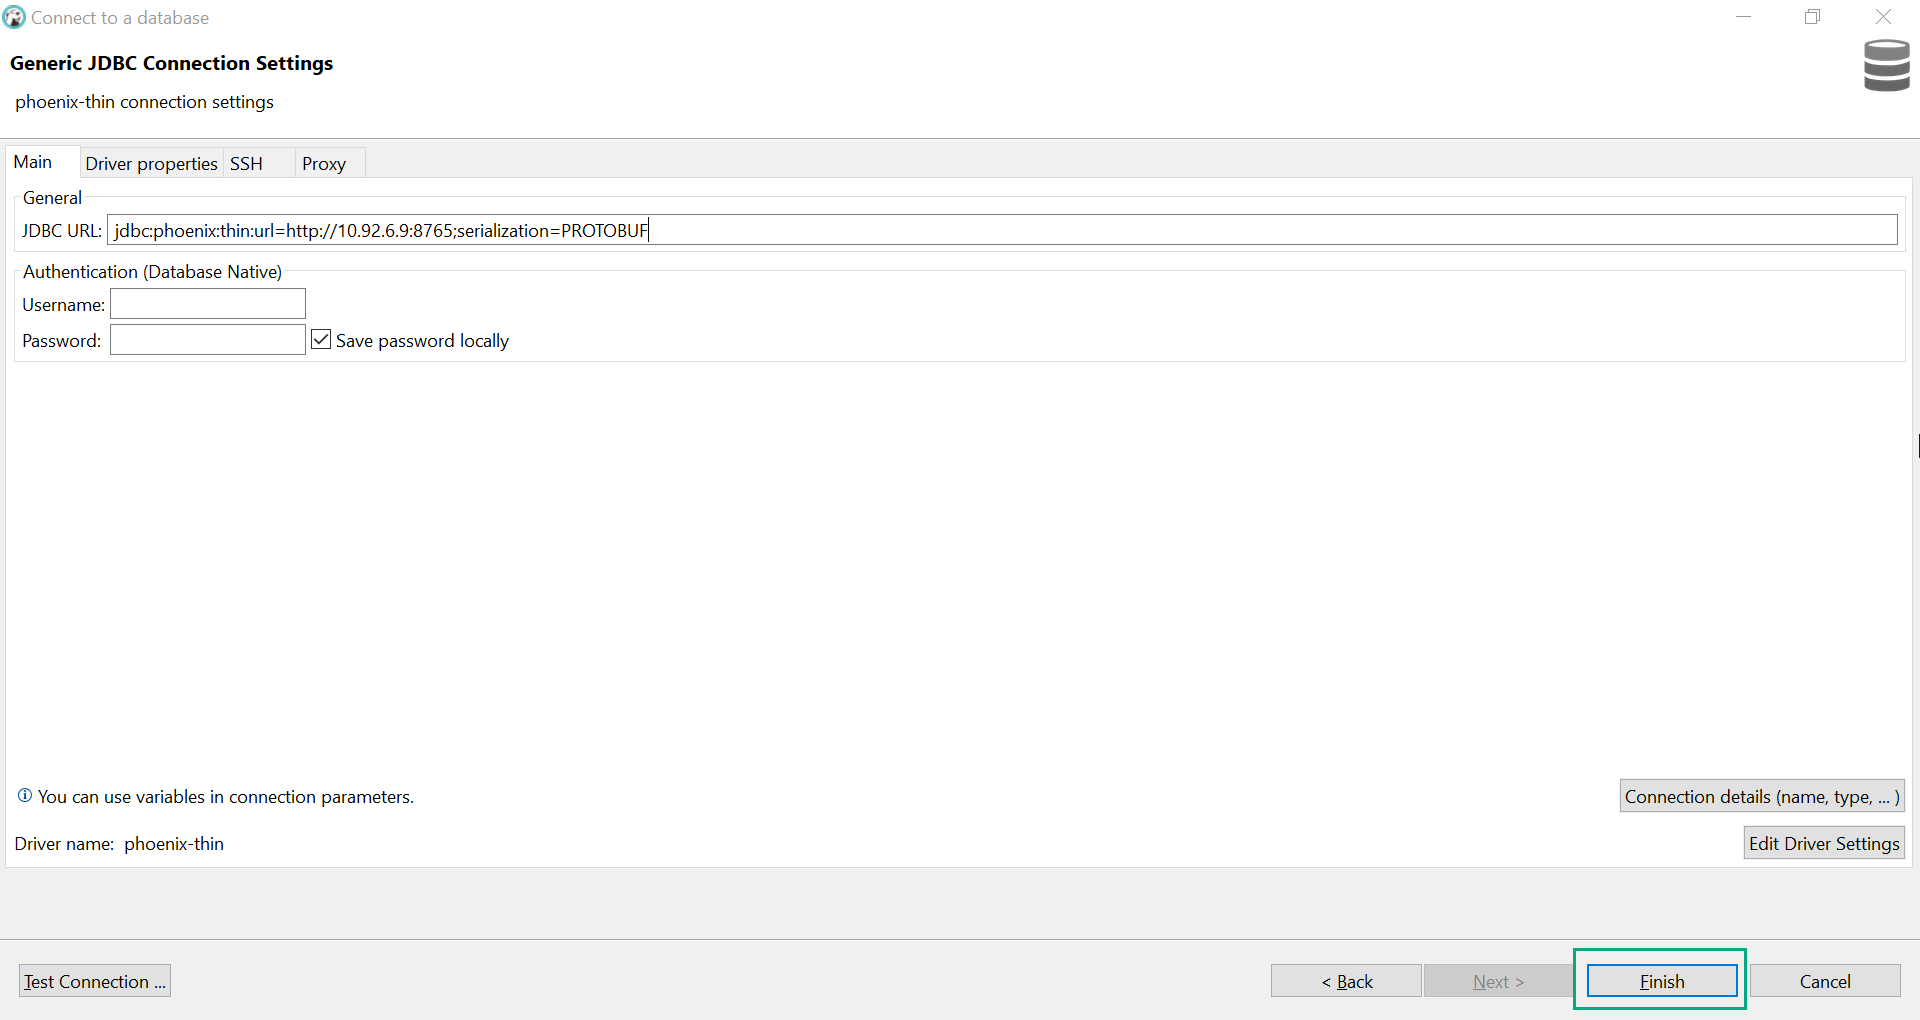 Finishing the connection adding
Step 3. Work with Phoenix tables
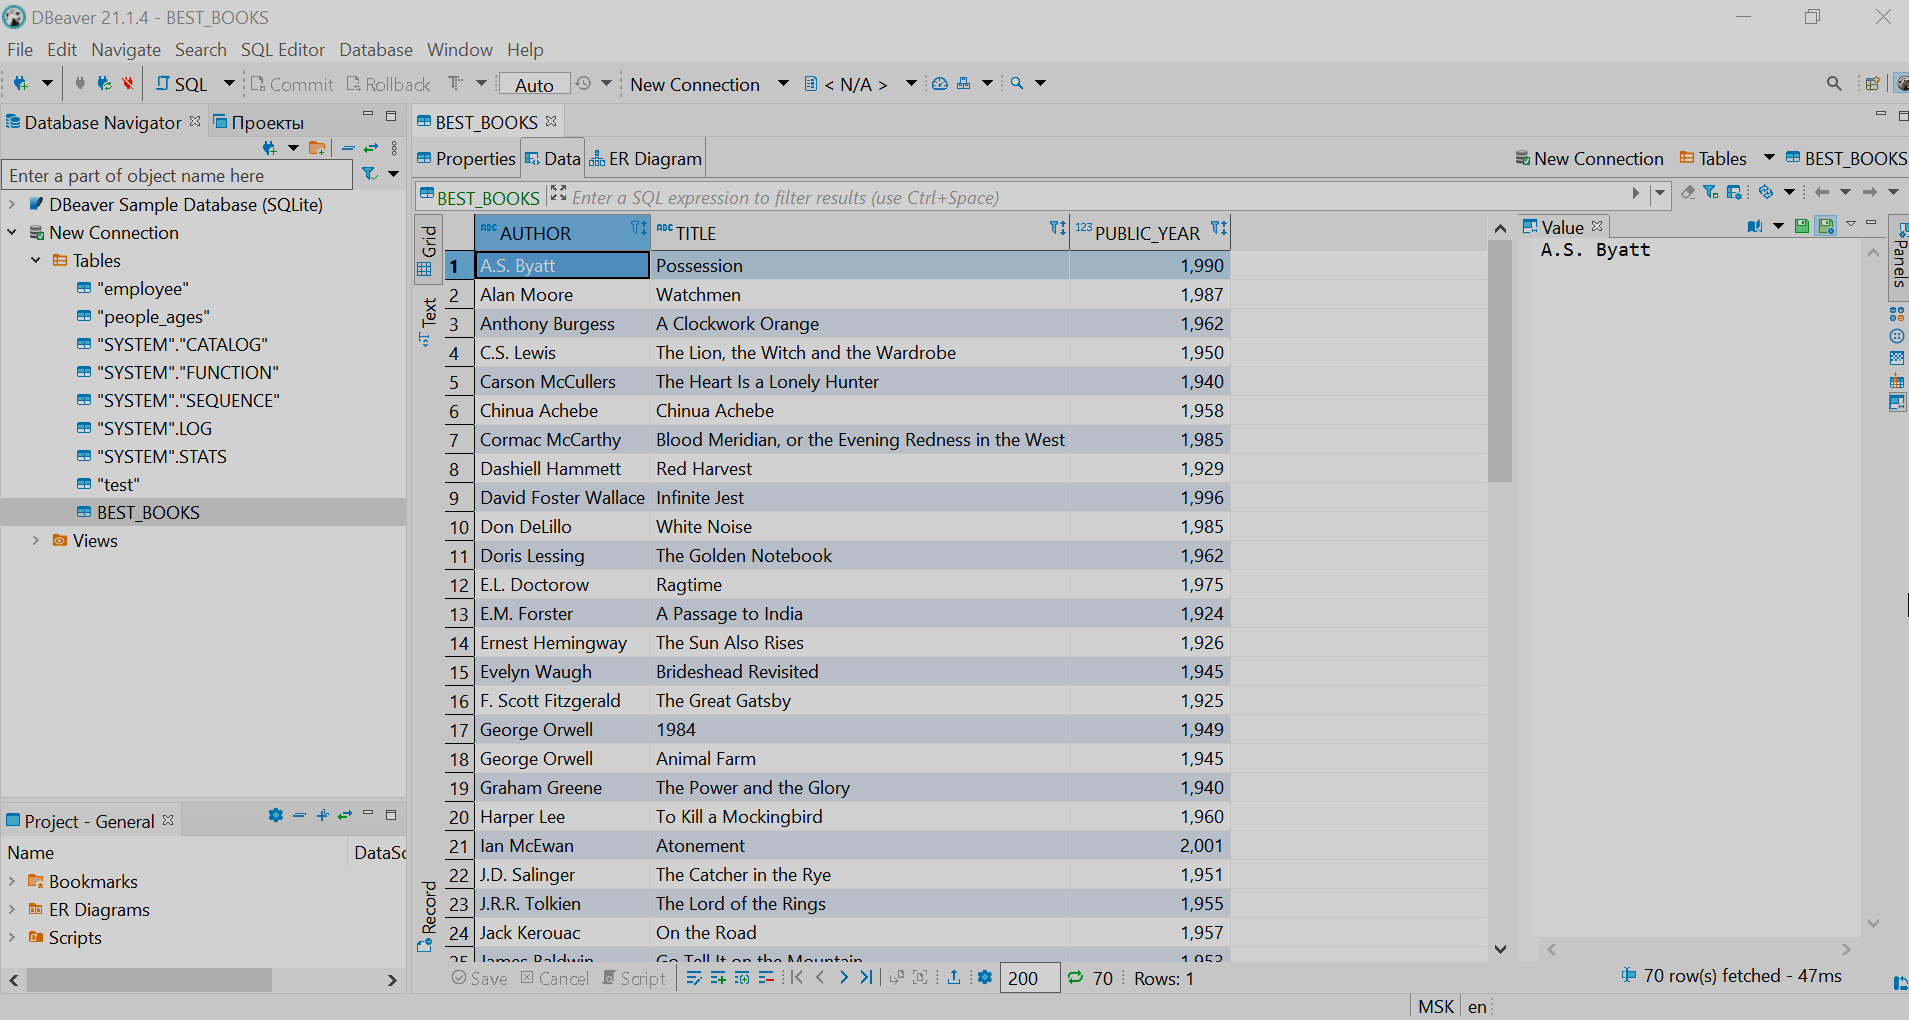
After the connection is established, you can see it in the current connections list at the left side of the main window. If you expand the list item Tables, you will get all the tables in Phoenix.
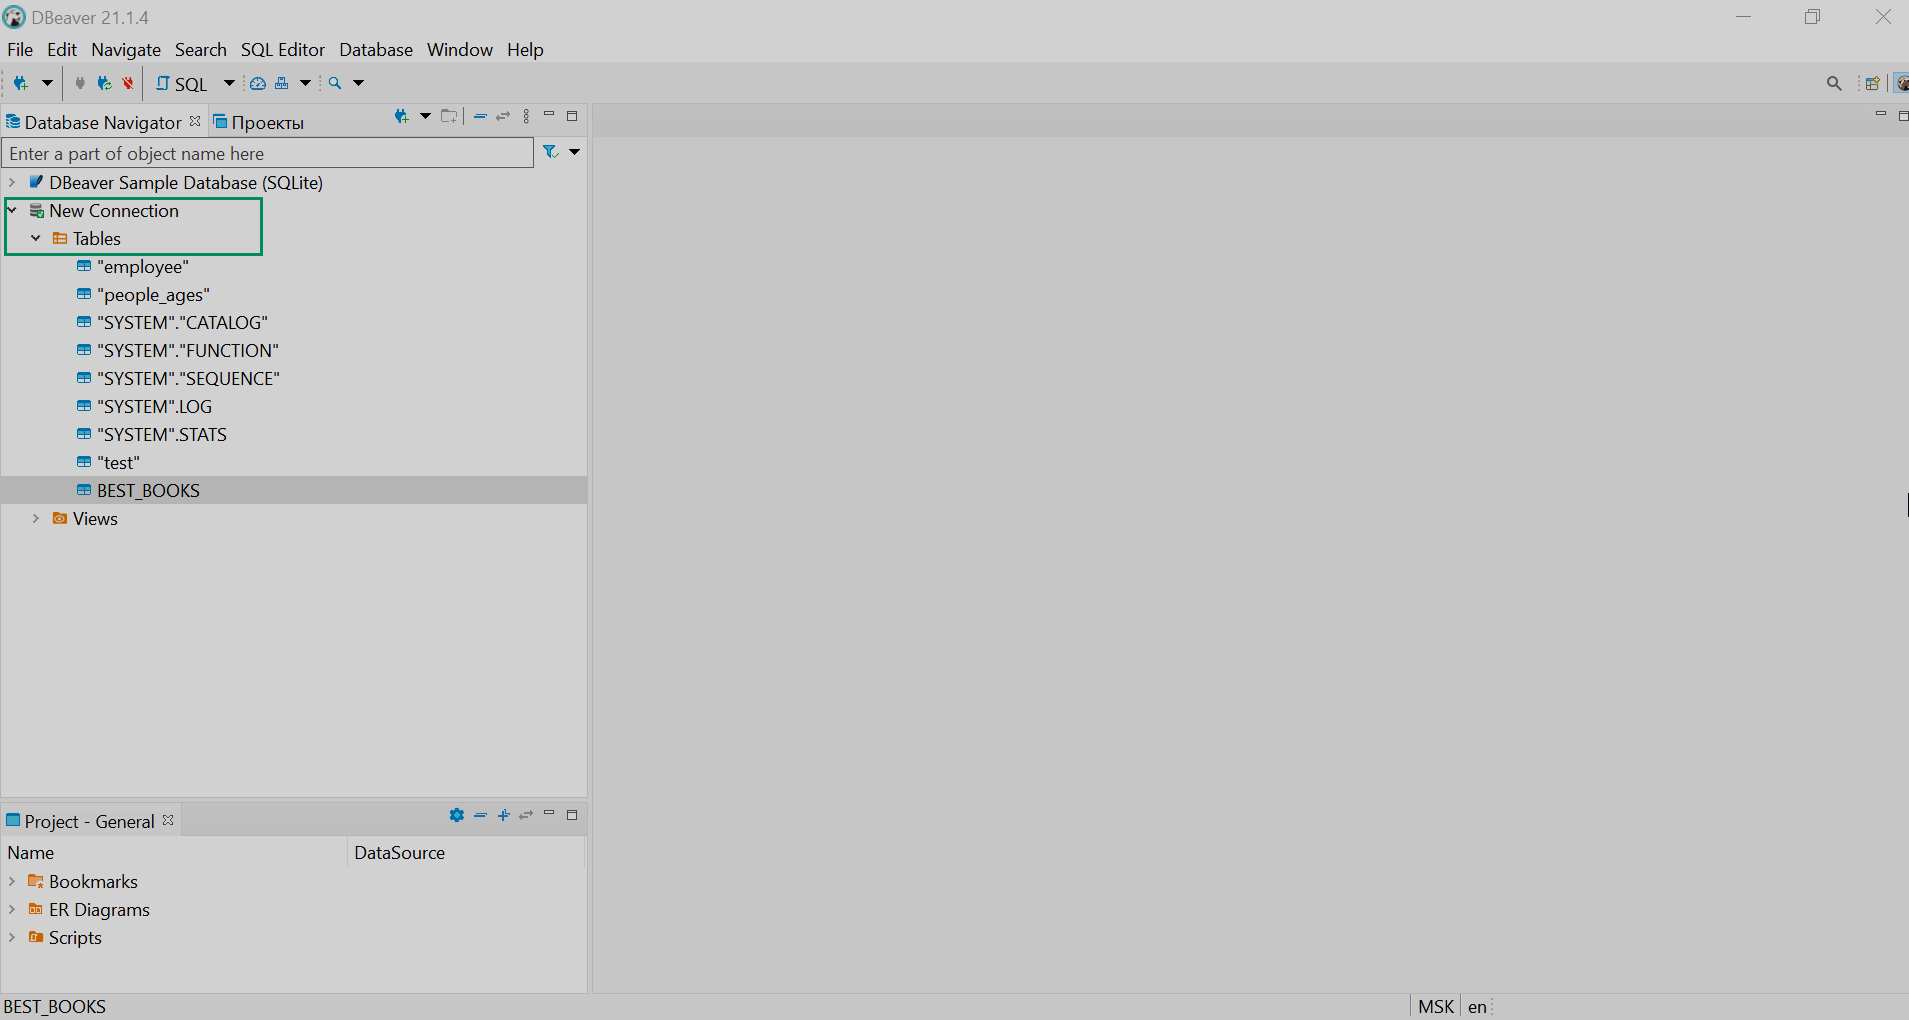

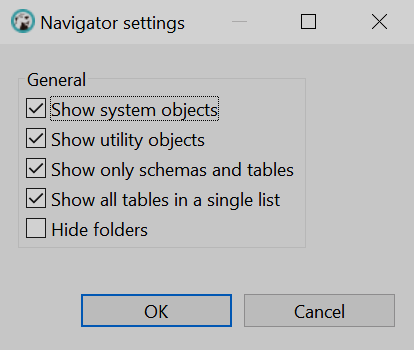
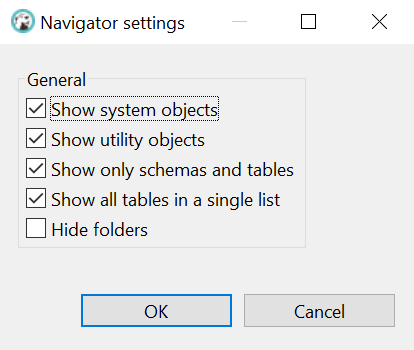
If you do not see the tables, and no errors are displayed, try to change the connection view to Custom by selecting the context menu item Connection View → Custom… and setting the necessary flags.
|
CAUTION
If there is no Kerberos authentication in your ADH cluster, the JDBC connection will use the login name Otherwise, you will get the following error in DBeaver when reading tables: Insufficient permissions for user 'phoenix' (table=SYSTEM.CATALOG, action=READ). For more information about the |
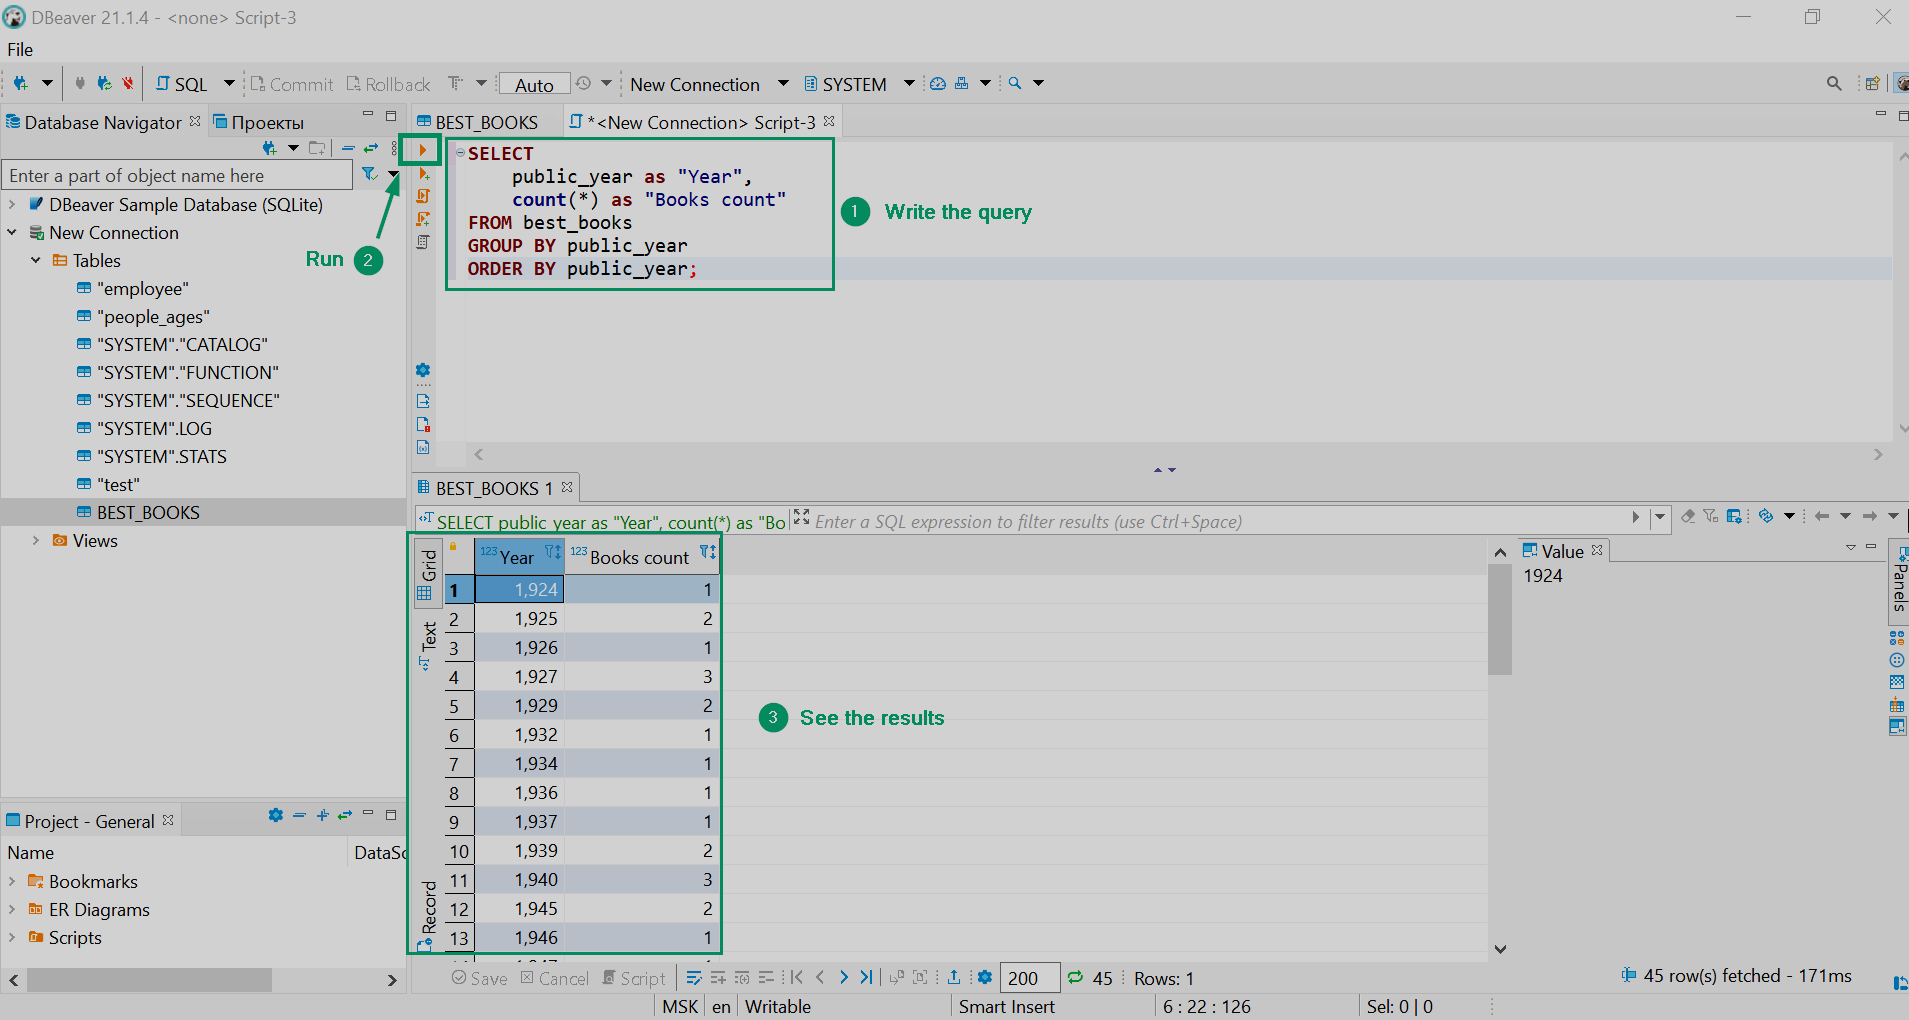
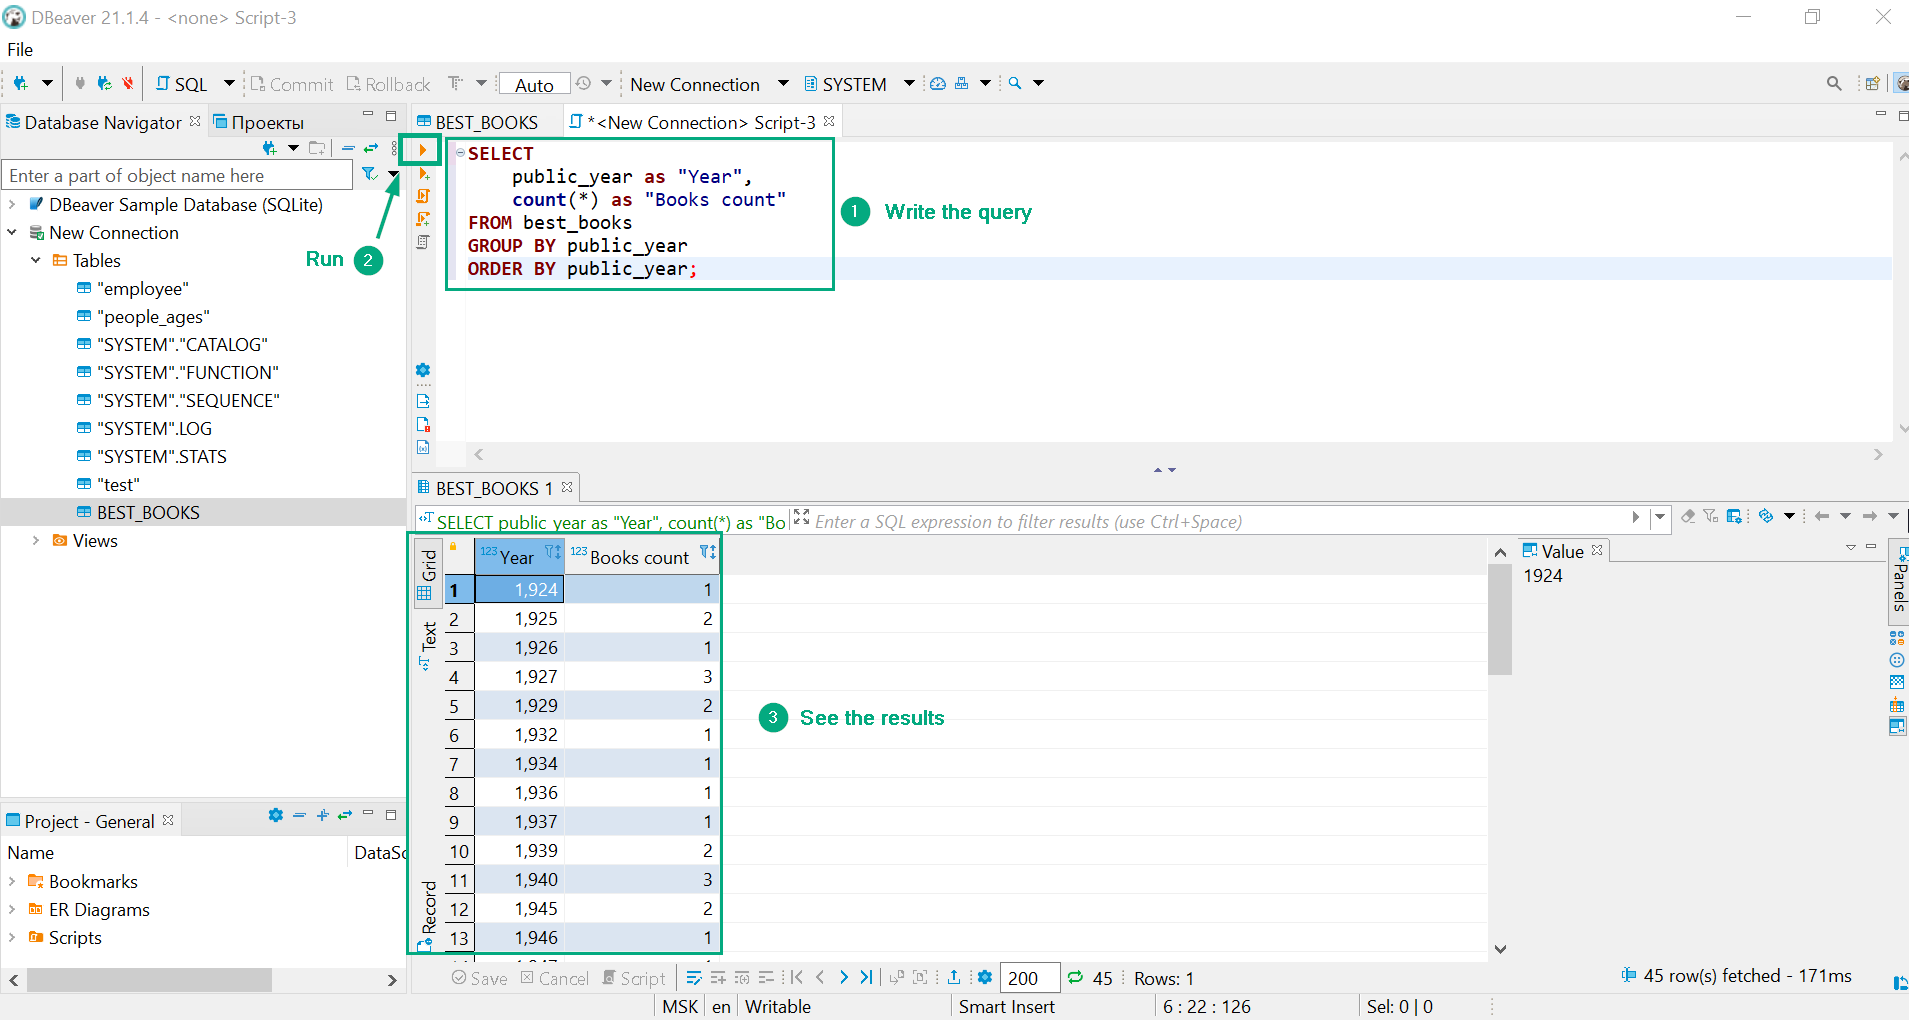
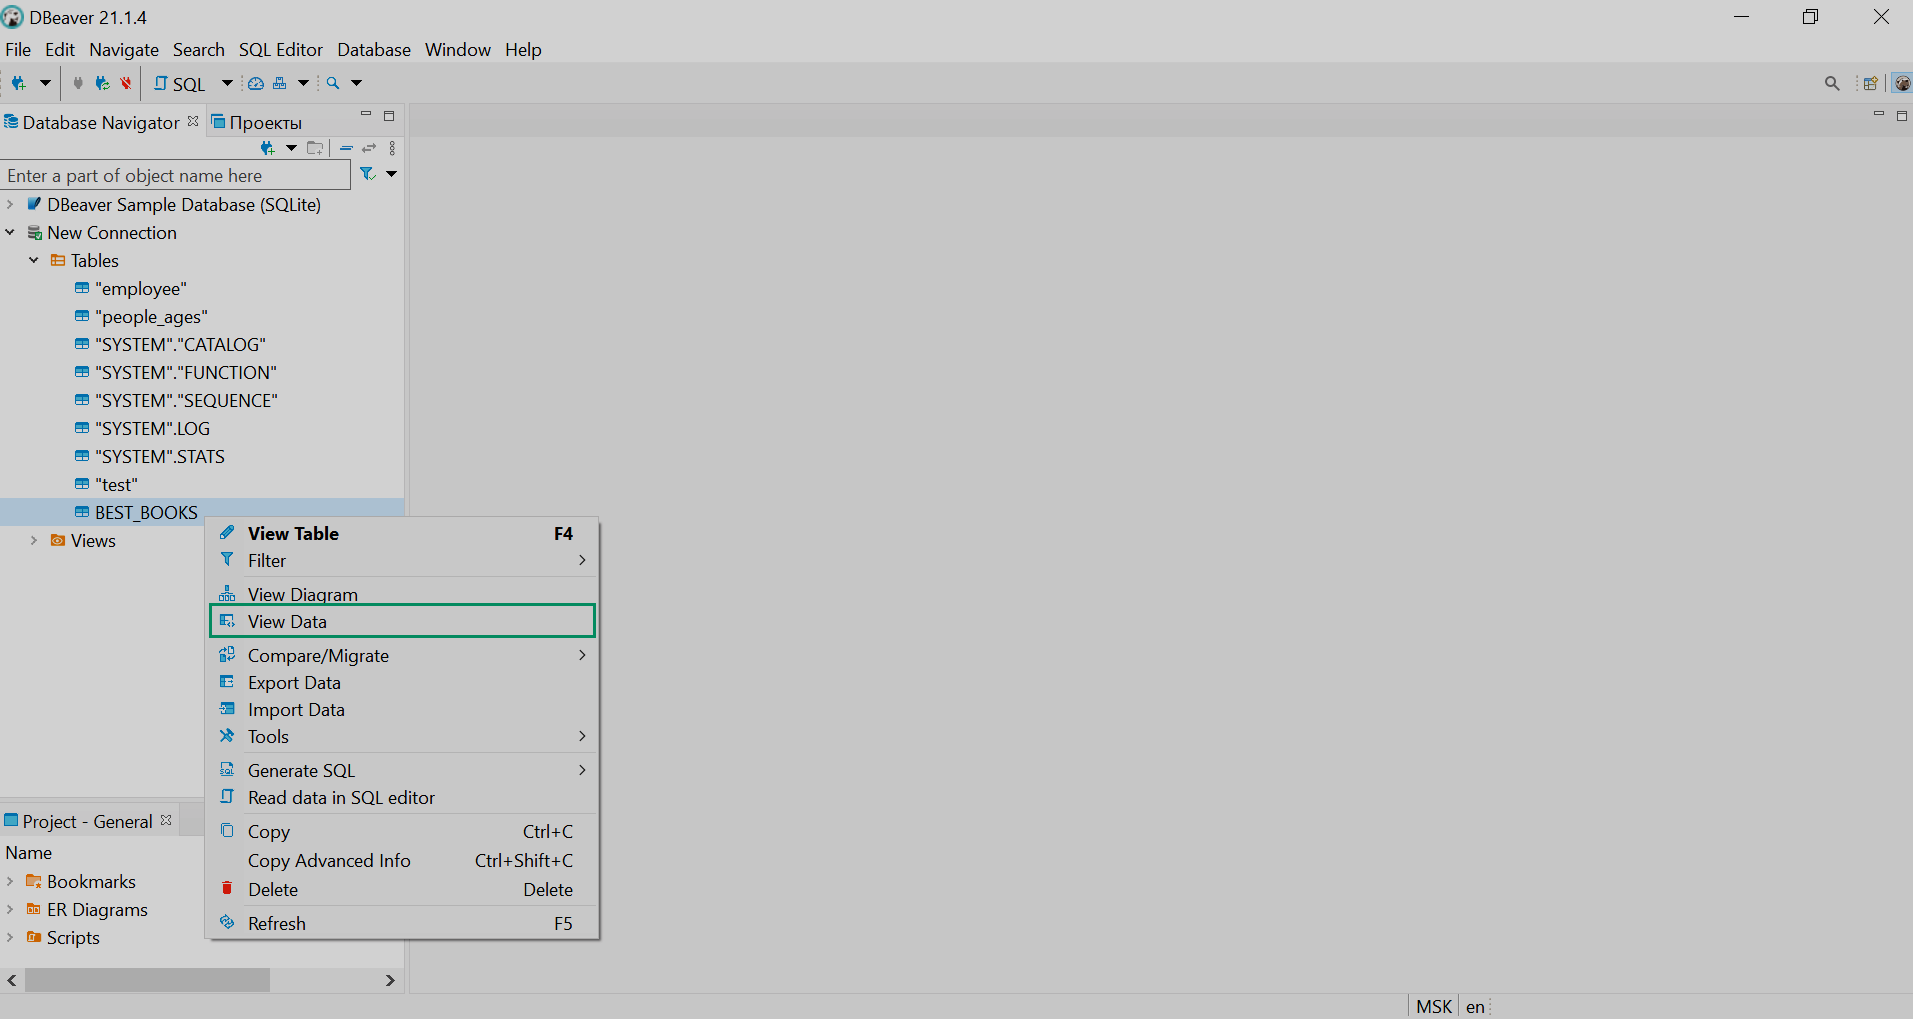
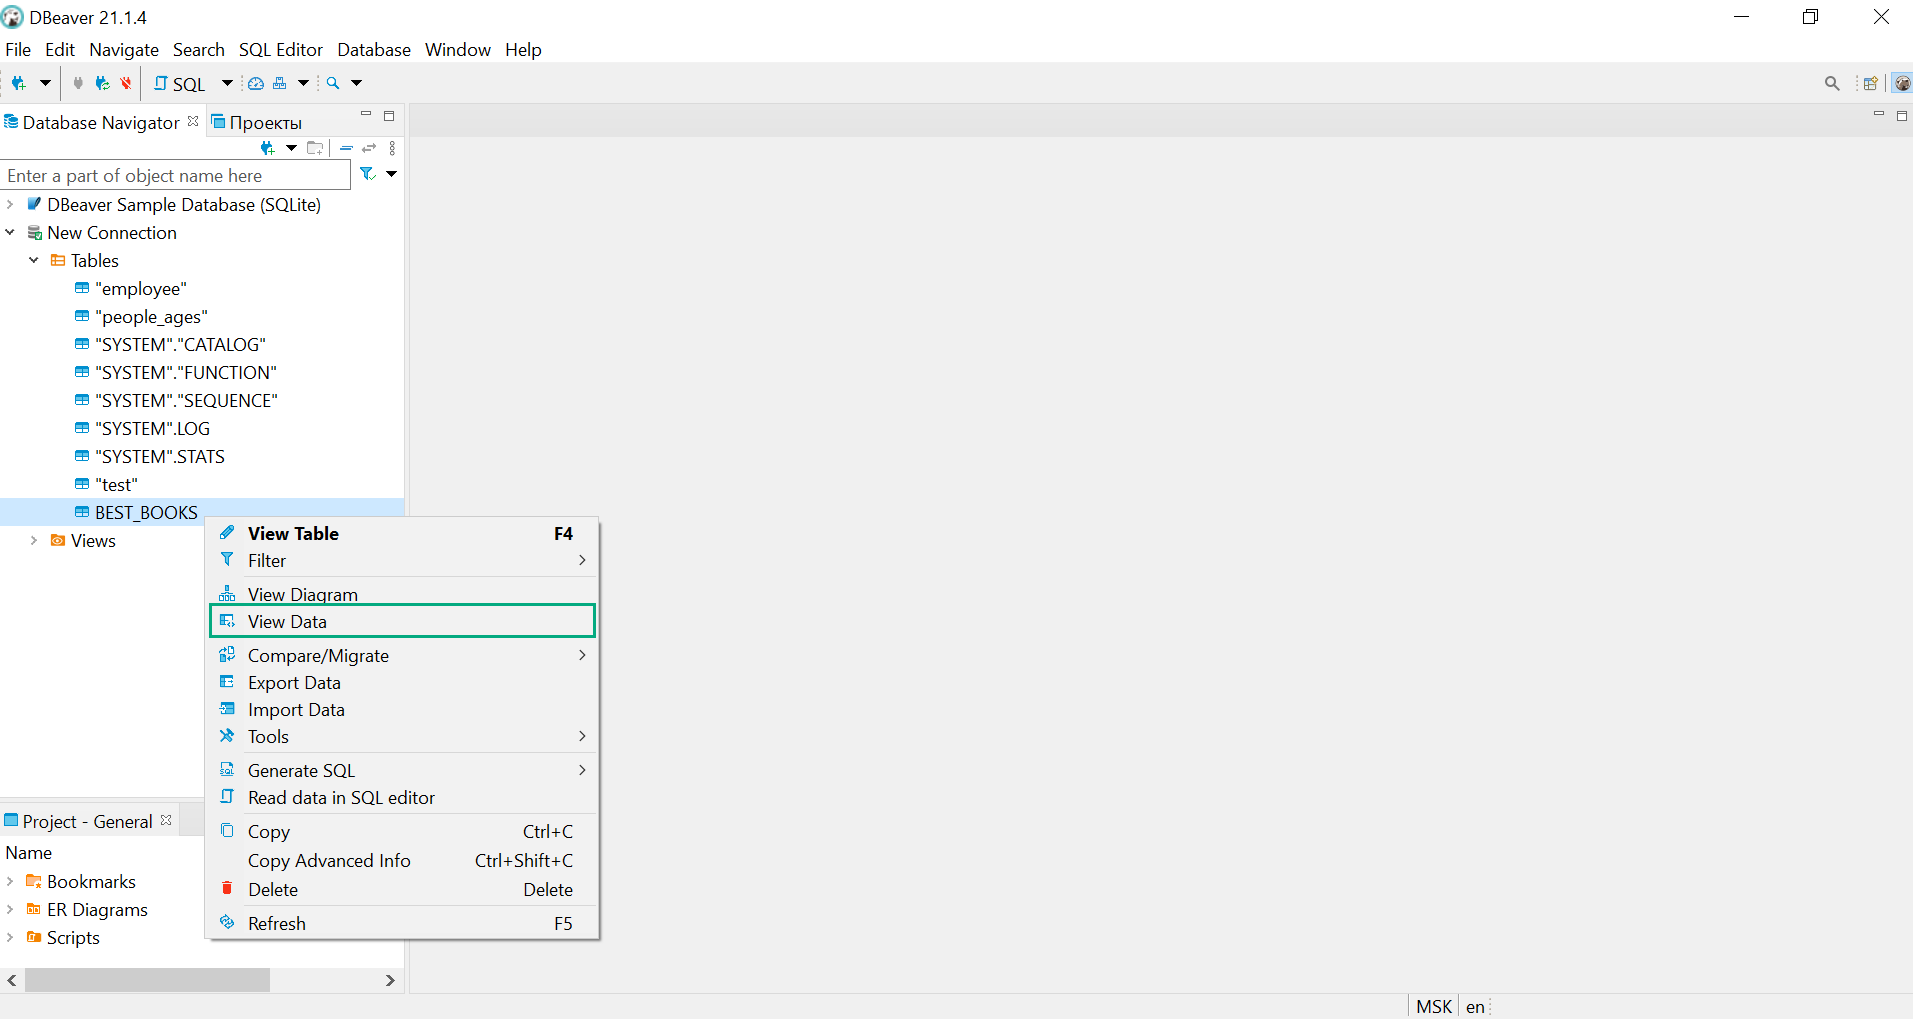
To get the content of a table, select the View Data item in its context menu.
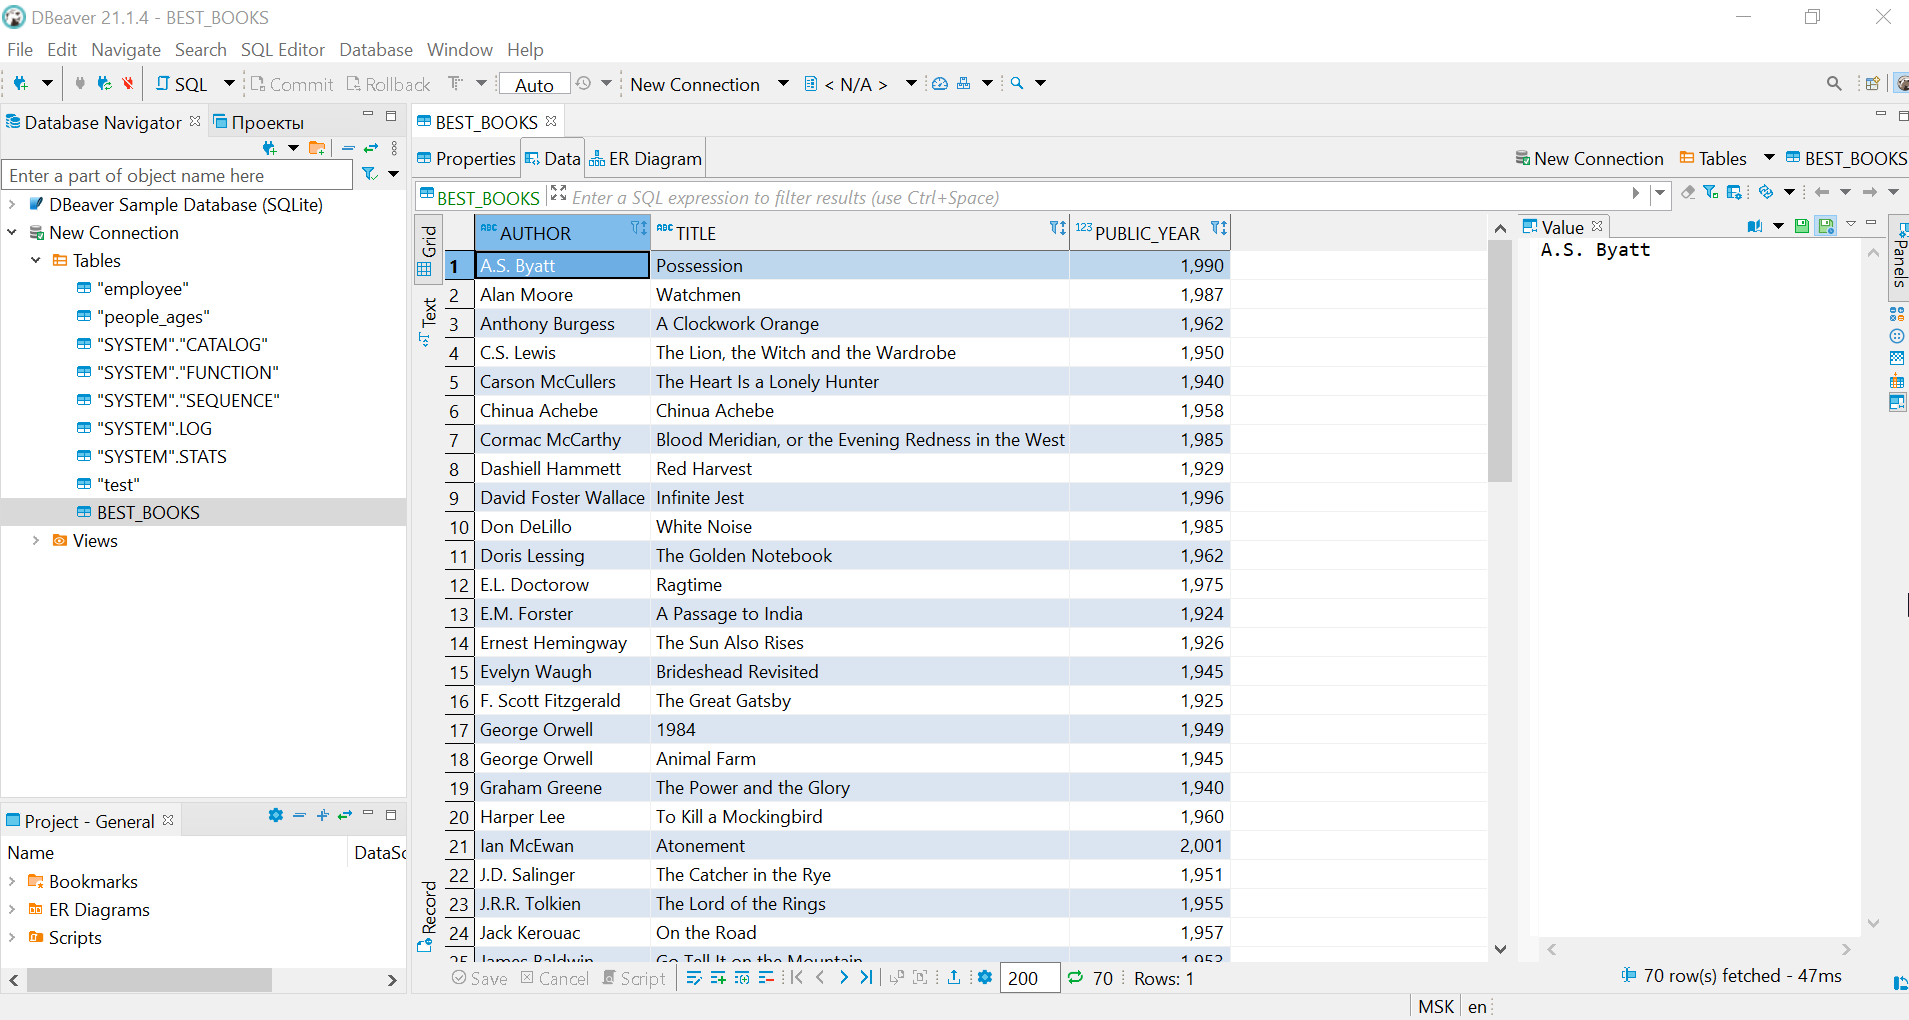
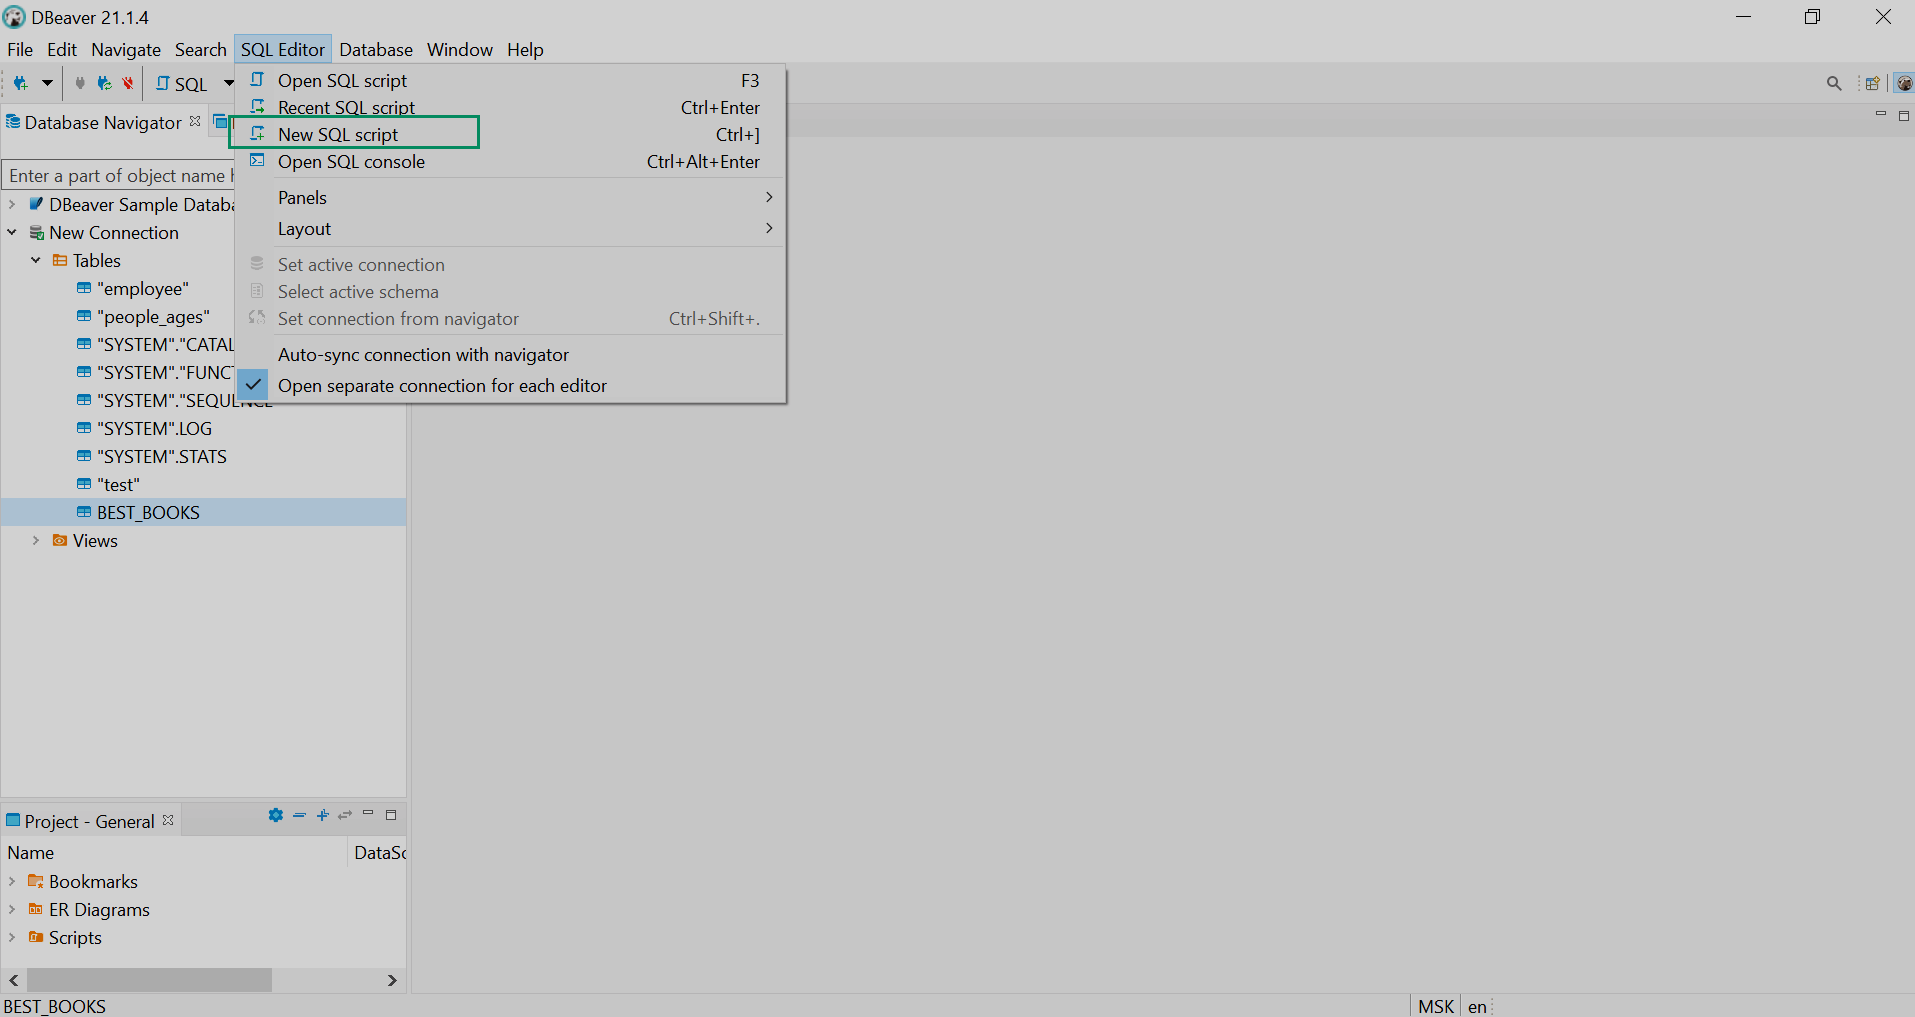
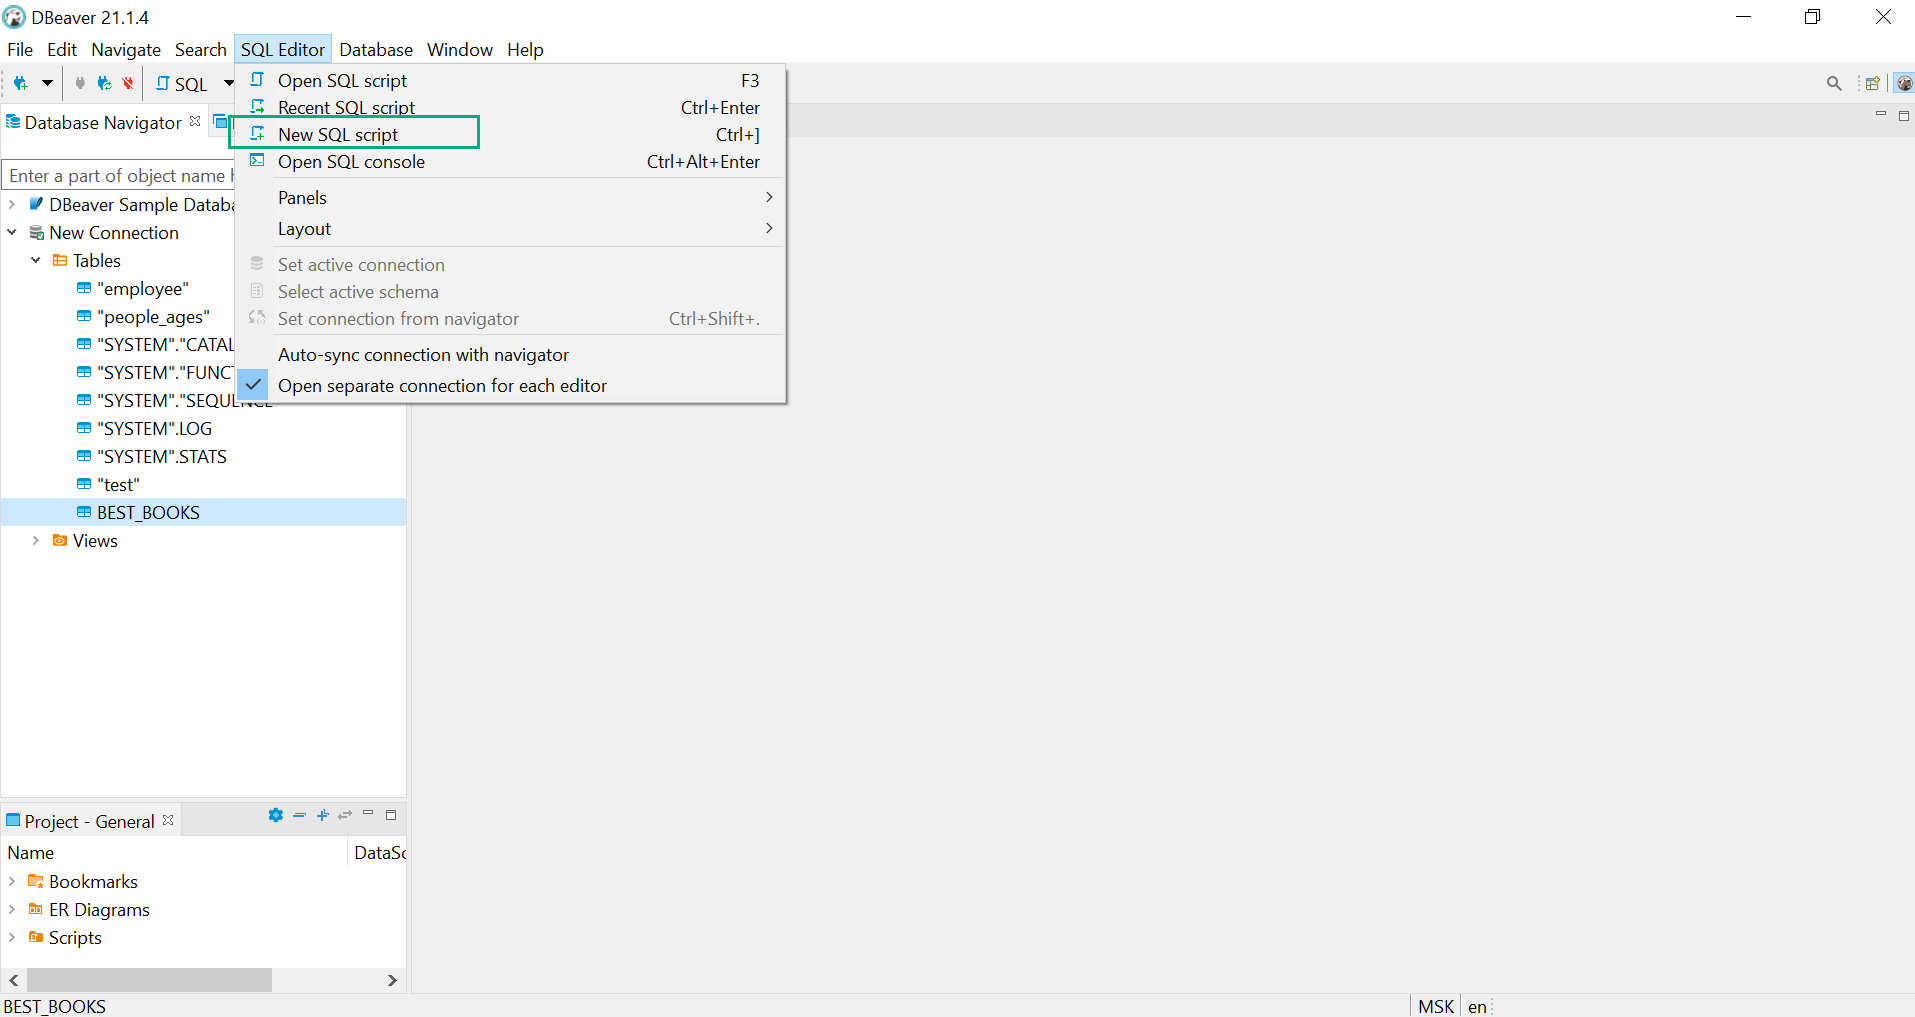
You can also run any other SQL query, using the main menu item SQL Editor → New SQL script.