

Add a custom interpreter to a group
The list of built-in Zeppelin interpreters is available in the web UI after selecting the Interpreter item in the account menu.
You can also add your own interpreters within the existing groups.
This section shows two methods of creating a new interpreter, using the example of adding Phoenix interpreter to the jdbc group.
|
NOTE
You can find more information about interpreters in the Zeppelin documentation. Zeppelin also allows to create your own interpreters, which are not based on the existing groups, and to install third-party interpreters.
|
Preparation
As described in the Connect to Phoenix section, you can access Phoenix databases via JDBC. In the examples throughout this section, the Phoenix Thin Driver is used for this purpose. Before using any of two methods, you should perform preparation steps:
-
Get the corresponding version of the JAR file phoenix-<phoenix_version>-HBase-<hbase_version>-thin-client.jar. For example, for HBase 2.0 and Phoenix 5.0.0, this file is called phoenix-5.0.0-HBase-2.0-thin-client.jar. You can copy it from any host of your HBase cluster (from the /usr/lib/phoenix directory). The other way is to download it from Phoenix repository.
-
Copy the prepared JAR file from the source folder to the interpreter directory /usr/lib/zeppelin/interpreter/jdbc/:
$ sudo cp /usr/lib/phoenix/phoenix-5.0.0-HBase-2.0-thin-client.jar /usr/lib/zeppelin/interpreter/jdbc/ -
Verify that the file is copied successfully using the command:
$ ls -la /usr/lib/zeppelin/interpreter/jdbc/The output looks as follows:
total 35412
drwxr-xr-x.  3 root root     4096 Dec  7 17:46 .
drwxr-xr-x. 28 root root     4096 Dec  7 08:36 ..
-rw-r--r--.  1 root root     2314 Apr 15  2021 ansi.sql.keywords
-rw-r--r--.  1 root root   167962 Apr 15  2021 commons-dbcp2-2.0.1.jar
-rw-r--r--.  1 root root    60686 Apr 15  2021 commons-logging-1.1.1.jar
-rw-r--r--.  1 root root   109568 Apr 15  2021 commons-pool2-2.3.jar
-rw-r--r--.  1 root root     4800 Apr 15  2021 interpreter-setting.json
-rw-r--r--.  1 root root   489884 Apr 15  2021 log4j-1.2.17.jar
drwxr-xr-x.  2 root root       55 Dec  6 09:10 META-INF
-rw-r--r--.  1 root root 34651233 Dec  7 17:46 phoenix-5.0.0-HBase-2.0-thin-client.jar
-rw-r--r--.  1 root root   648487 Apr 15  2021 postgresql-9.4-1201-jdbc41.jar
-rw-r--r--.  1 root root     6573 Apr 15  2021 postgresql-native-driver-sql.keywords
-rw-r--r--.  1 root root    32119 Apr 15  2021 slf4j-api-1.7.10.jar
-rw-r--r--.  1 root root     8866 Apr 15  2021 slf4j-log4j12-1.7.10.jar
-rw-r--r--.  1 root root    46253 Apr 15  2021 zeppelin-jdbc-0.8.1.jar
TIPStarting with Zeppelin 0.9.0, you can skip the preparation steps and use the Apache Phoenix guide to create a new Phoenix interpreter exclusively via the web UI. In older versions, errors may occur while accessing the Maven repository for resolving dependencies. That is why it is recommended to place the necessary JARs manually.
Method 1. Using prefixes
This method is based on adding new properties with a specific prefix to the existing interpreter.
Thus, when working with notes, you can use the source interpreter not only with the default settings, but with the settings that have the special prefix.
To call such an interpreter from the note, you should append the prefix to the main interpreter name, for example: %jdbc(phoenix).
-
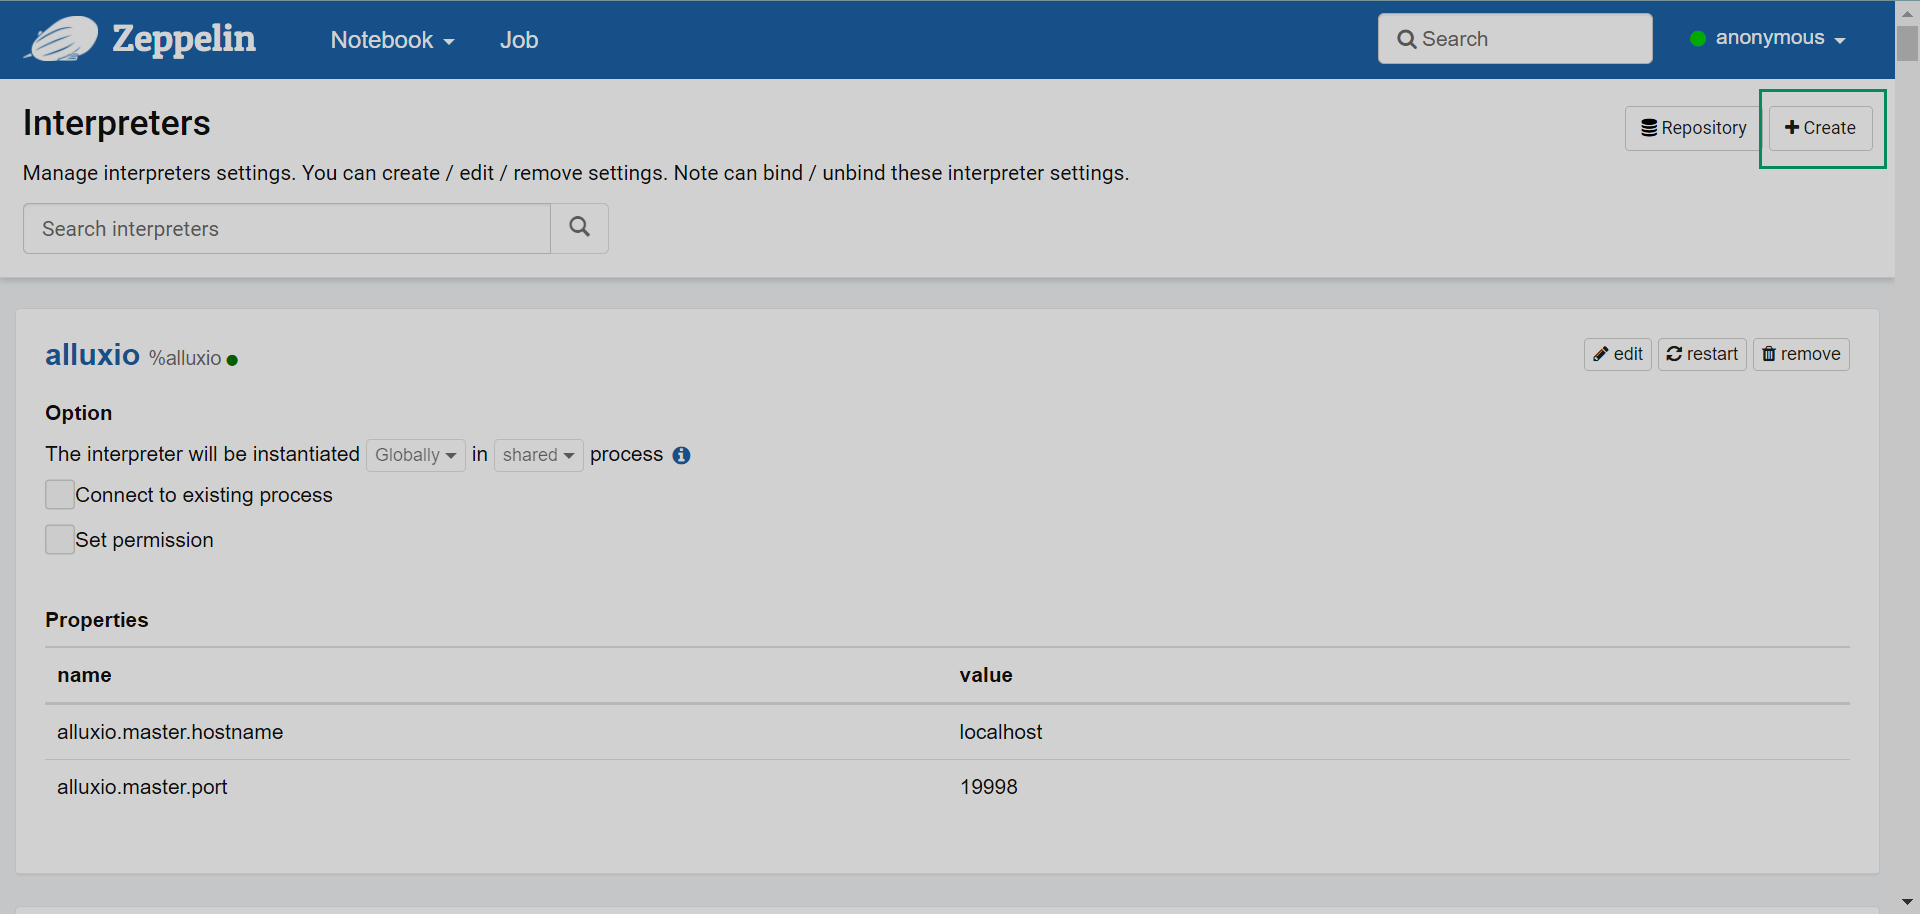
Select the Interpreter item in the account menu placed in the top right corner of the Zeppelin home page.
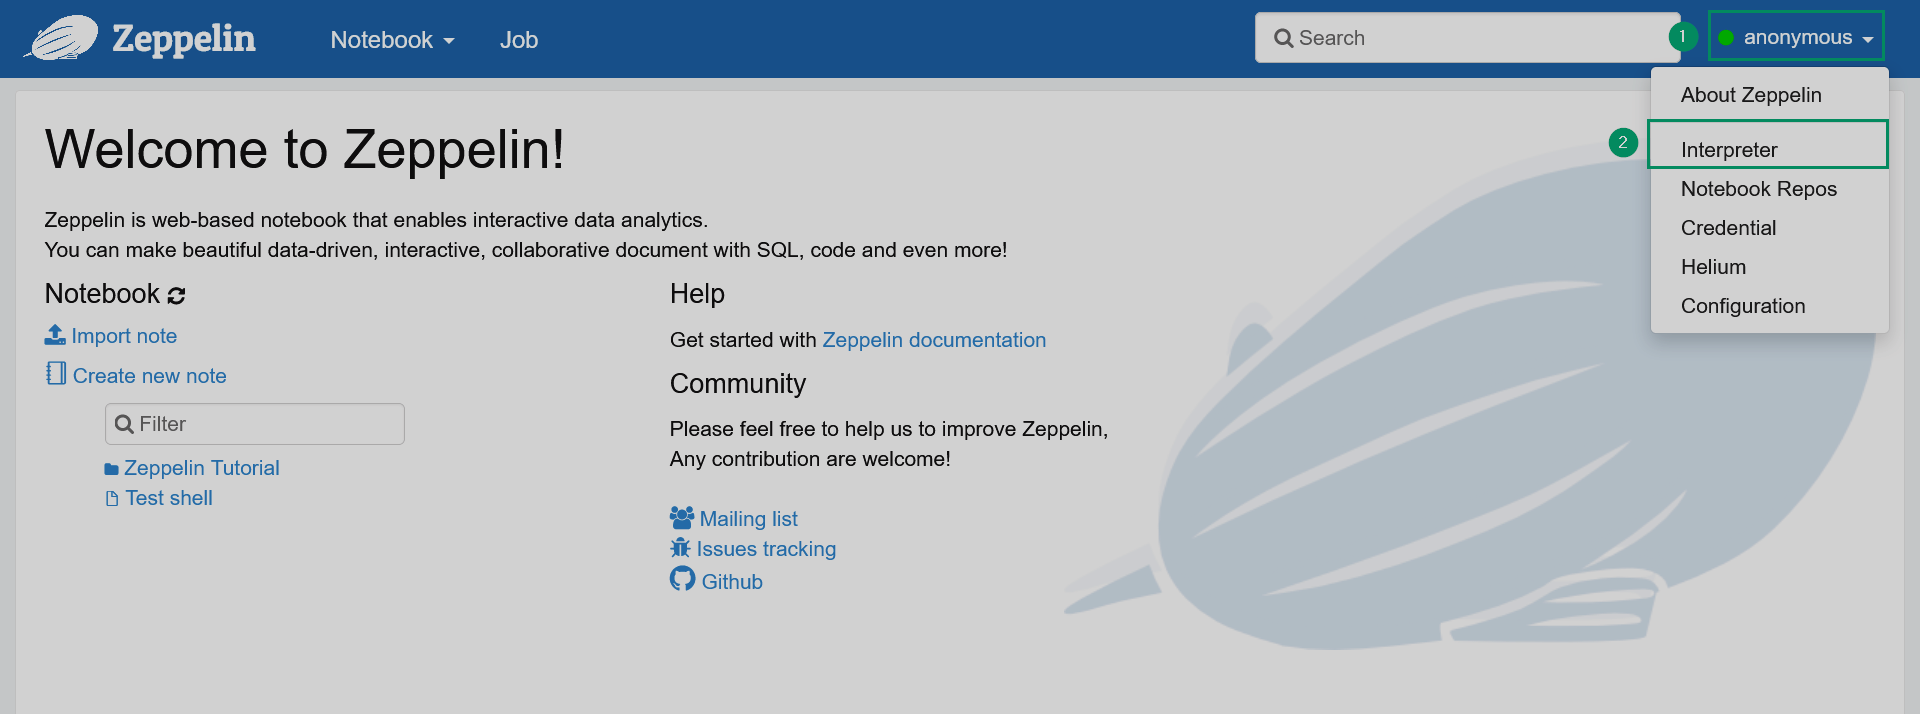 Switching to the list of interpreters
 Switching to the list of interpreters
 -
Using the search bar, find the jdbc interpreter, and click edit.
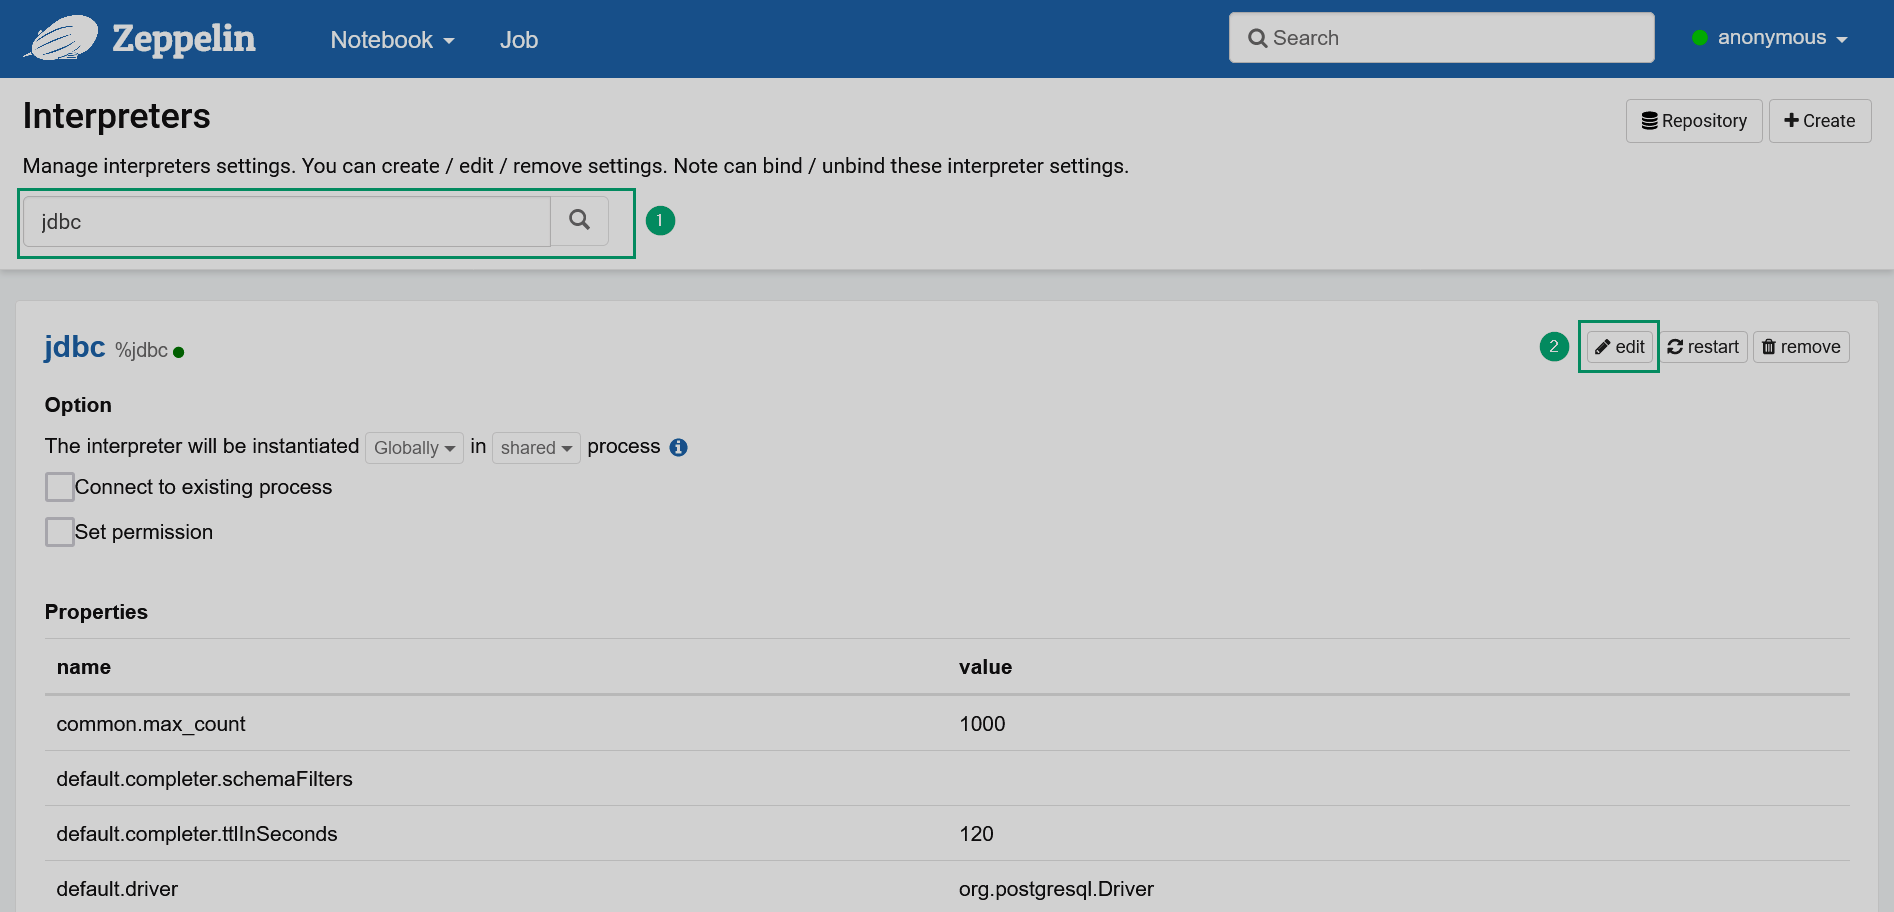 Editing the JDBC interpreter
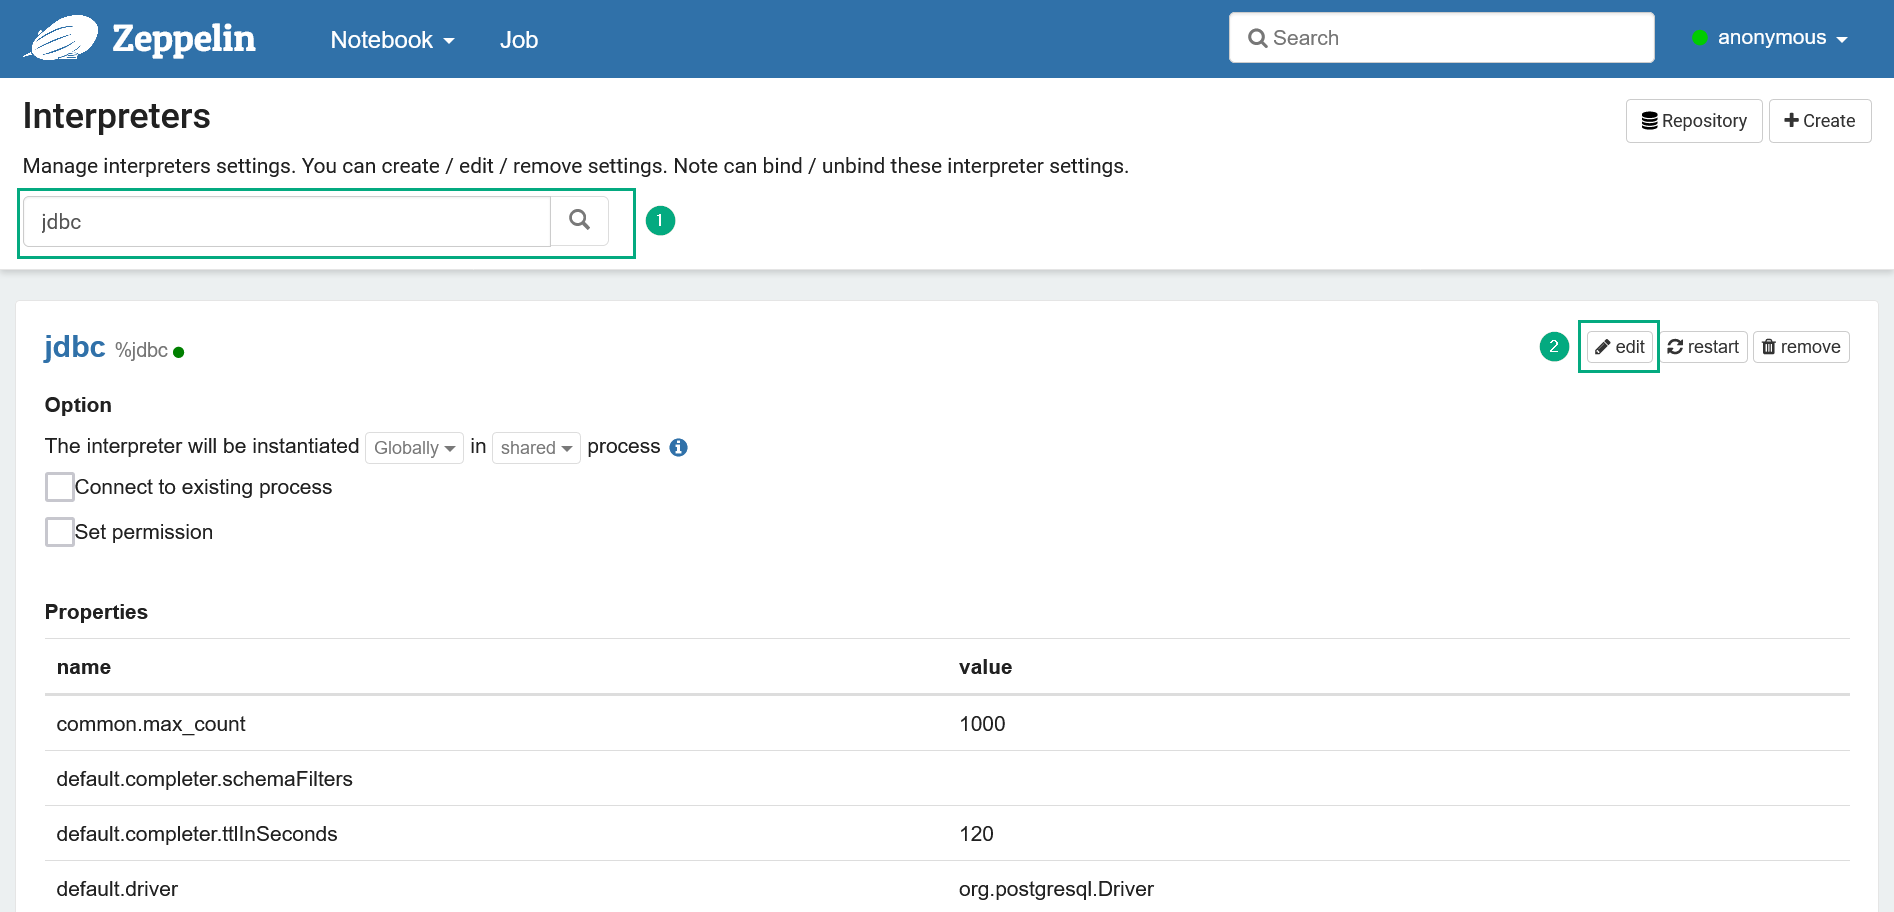 Editing the JDBC interpreter
 -
Add new properties to the interpreter settings list with the
phoenixprefix.Name Value Description phoenix.driver
org.apache.phoenix.queryserver.client.Driver
The driver used to connect to Phoenix
phoenix.url
jdbc:phoenix:thin:url=http://<IP>:8765;serialization=PROTOBUF
The url used for connecting to Phoenix.
<IP>means the IP-address of your Phoenix Query Serverphoenix.user
—
The login used for connecting to Phoenix
phoenix.password
—
The password used for connecting to Phoenix
To add a property, you should enter its name, value, and then click + to add the next field.
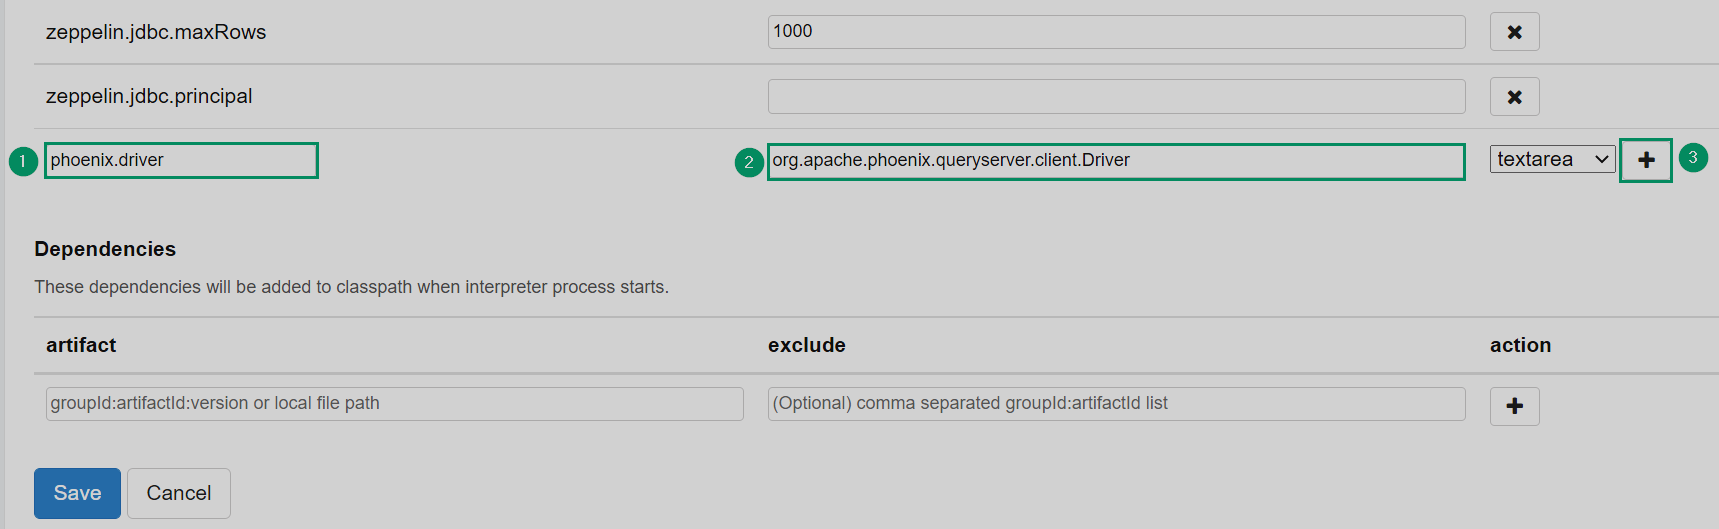 Adding new fields
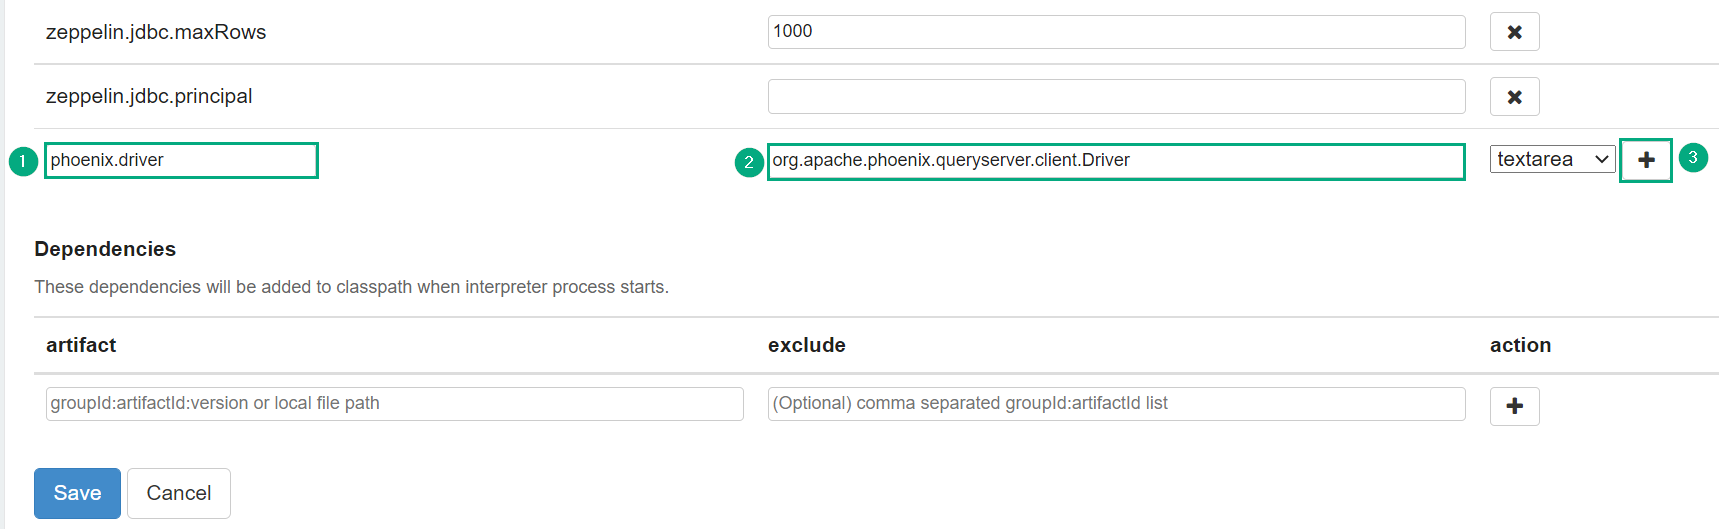 Adding new fields
 -
After adding all the necessary fields, click Save.
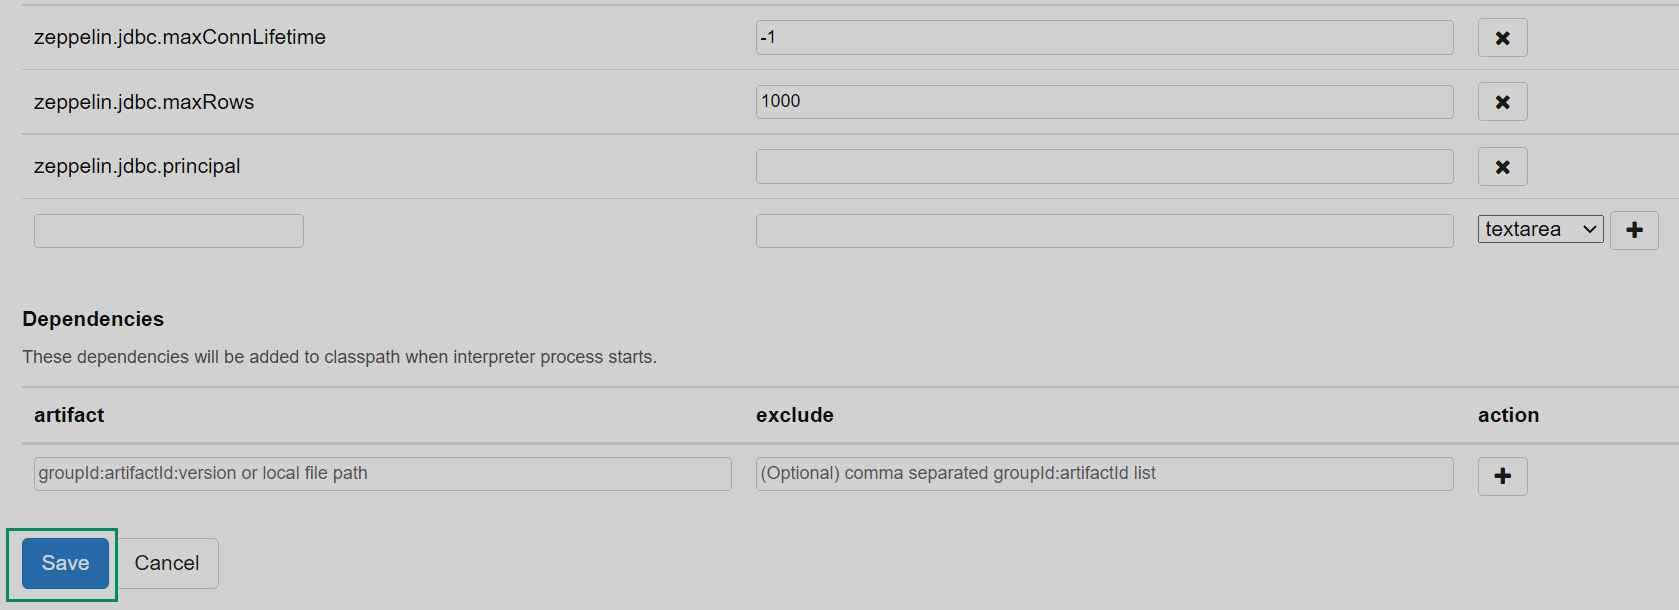 Saving the JDBC interpreter
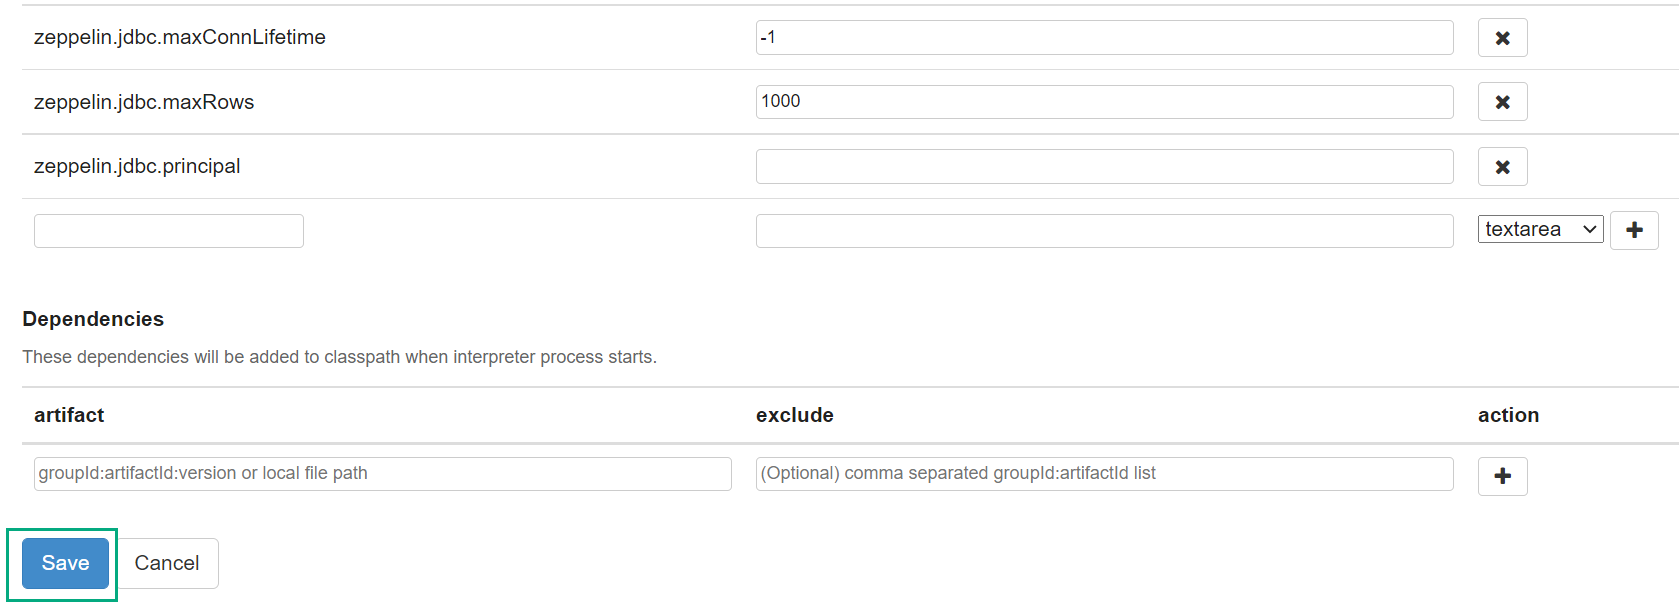 Saving the JDBC interpreter
 -
Confirm the operation in the opened dialog window. Your interpreter is ready.
 Confirming saving the interpreter
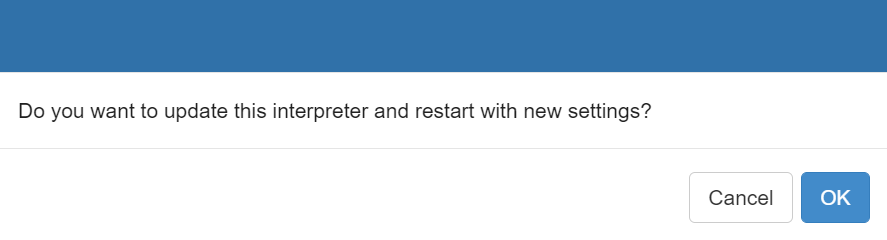 Confirming saving the interpreter
Method 2. Adding an interpreter from scratch
This method assumes adding a new interpreter based on the existing one.
For this, select the current interpreter as a group (in this example — jdbc) and change its default properties to your own.
All the libraries available for the source interpreter are also available for the newly created one.
To call such an interpreter from a note, you should use the new interpreter name: %phoenix.
-
Select the Interpreter item in the account menu placed in the top right corner of the Zeppelin home page.
Switching to the list of interpreters
Switching to the list of interpreters -
Click Create.
 Creating a new interpreter
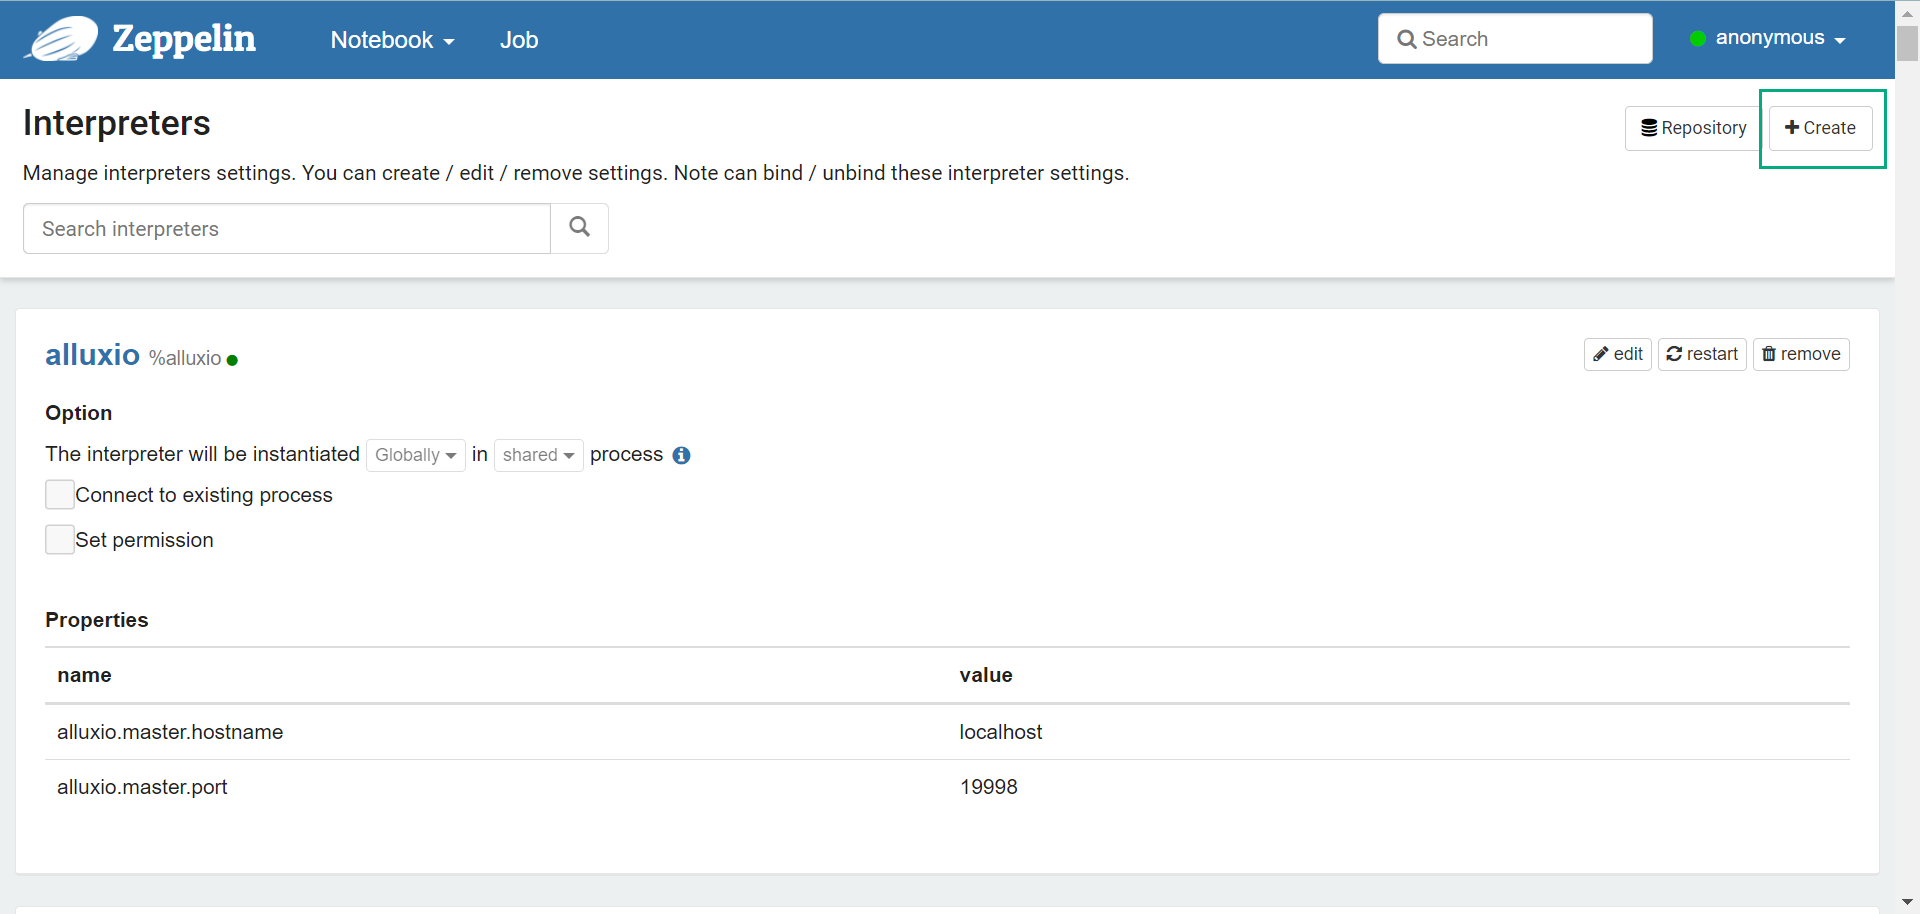 Creating a new interpreter
 -
Enter
phoenixin the Interpreter Name field and selectjdbcin the Interpreter group.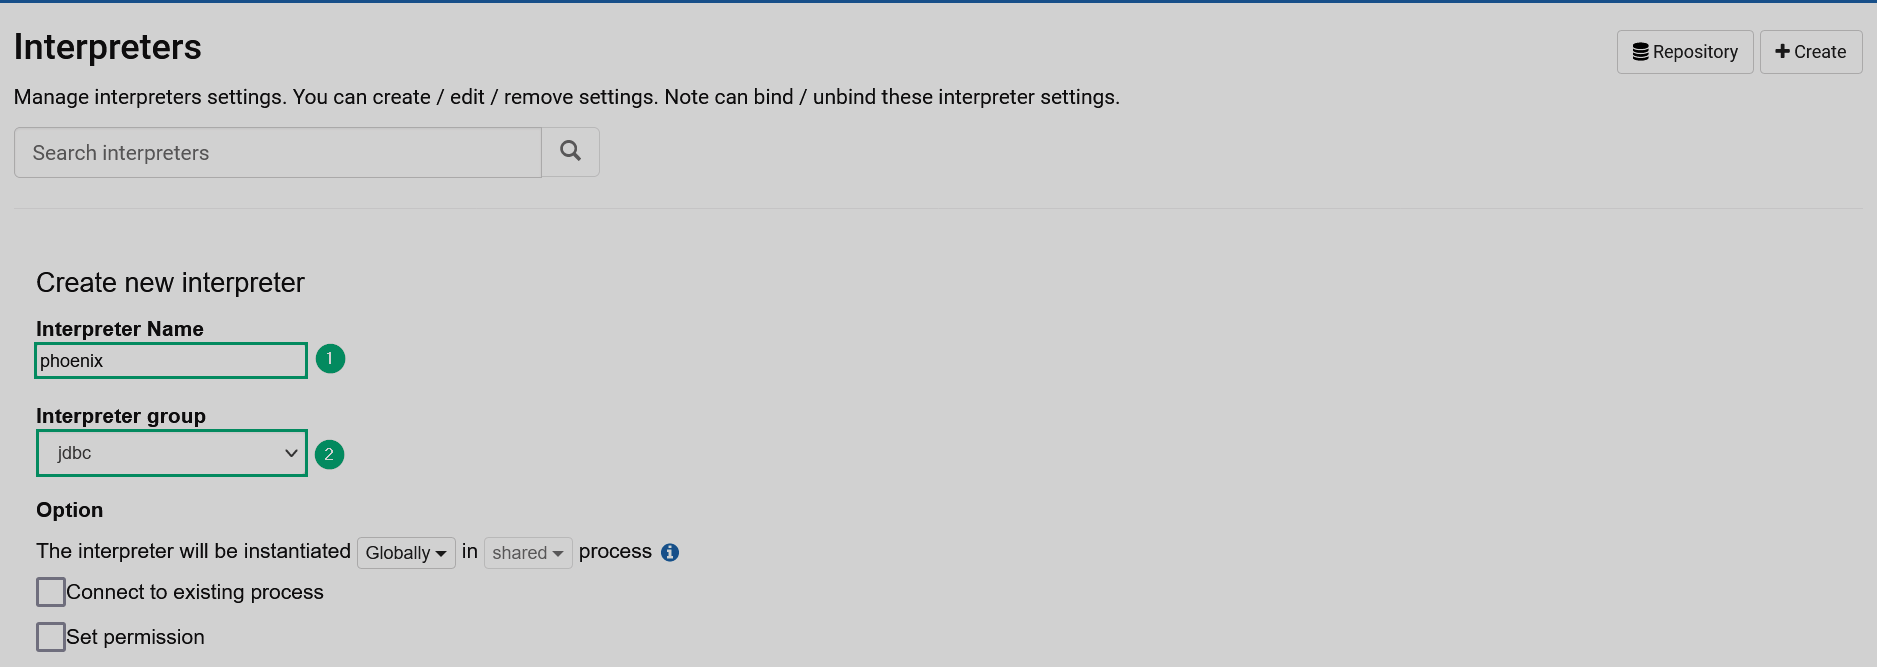 Filling a name and a group
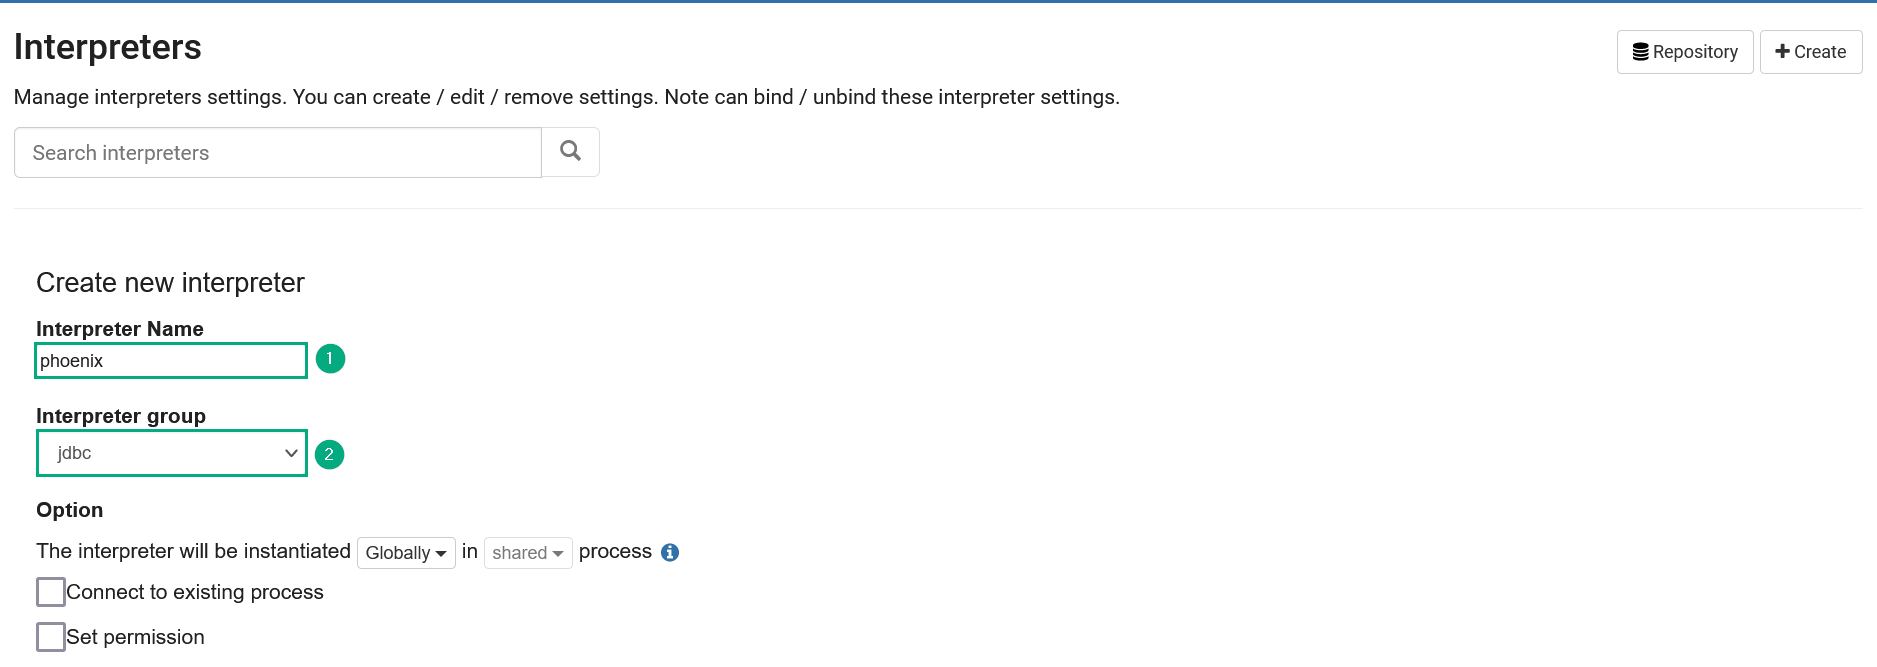 Filling a name and a group
 -
Clear the values of the following fields:
default.driver,default.url,default.user,default.password. Fill them with the new values according to the table from the previous section. -
Click Save. The new interpreter is ready.
Saving the Phoenix interpreter
Saving the Phoenix interpreter
|
NOTE
The example of creating a note using the described interpreters can be found in the article Create a note using Phoenix.
|