

Example of reading data from ADB with NiFi ADB Connector
Overview
To illustrate the operation of NiFi ADB Connector, the article shows the implementation of reading data from an ADB table (based on Greengage DB) and loading data into a PostgreSQL database table.
The creation of NiFi ADB Connector is performed in the NiFi user interface. The function for reading data from ADB is available starting from ADS 4.0.0.b1.
Prerequisites
The following describes the environment used to create the NiFi ADB Connector.
ADS
-
An ADS cluster is installed according to the Online installation guide. The minimum ADS version is 4.0.0.b1.
-
The NiFi and Zookeeper services are installed in the ADS cluster.
ADB
-
An ADB cluster is installed according to the Online installation guide.
-
A user with the
my_username,SUPERUSERprivileges and a password was created in theadbdatabase. -
A
my_tabletable was created in theadbdatabase, and a few rows of data were added to it.
Log in with the gpadmin account:
$ sudo su - gpadminConnect to the database via psql:
$ psql adbCreate a user with the SUPERUSER role:
CREATE USER my_user WITH SUPERUSER PASSWORD 'P@ssword';|
CAUTION
The SUPERUSER role is used for testing purposes only.
|
Create a test table:
CREATE TABLE my_table (
    id BIGSERIAL PRIMARY KEY,
    name VARCHAR(100) NOT NULL,
    country VARCHAR(100),
    updated_at TIMESTAMP DEFAULT CURRENT_TIMESTAMP
);
Fill in the table with data (provided as an example, a few rows are needed for clarity):
INSERT INTO my_table(name, country) VALUES ('John Jones','USA');-
The pg_hba.conf file is configured to provide user access from the host on which the ADS cluster NiFi service is installed. To do this, an entry about the host address has been added to the Custom pg_hba section field on the configuration parameters page of the ADB service:
host all all 10.92.38.11/24 trust -
On the Interconnect network to which the cluster hosts are connected, you should specify a jumbo frame
MTU=9000so that the packets generated by ADB (gp_max_packet_size+ overhead) can fit into these frames. For more information about ADB cluster network requirements, see Network requirements.
|
NOTE
For information on working with ADB tables, see: |
ADP
-
An ADP cluster is installed according to the Online installation guide.
-
A user named
my_user, withSUPERUSERprivileges and a password, was created in thepostgresdatabase. -
In the
postgresdatabase, themy_tabletable was created, with column types and names matching the table copied from ADB.
Connect to the postgres database:
$ sudo su - postgres$ psqlCreate a user with the SUPERUSER role:
CREATE USER my_user WITH SUPERUSER PASSWORD 'P@ssword';|
CAUTION
The SUPERUSER role is used for testing purposes only.
|
Create a test table:
CREATE TABLE my_table (
    id BIGSERIAL PRIMARY KEY,
    name VARCHAR(100) NOT NULL,
    country VARCHAR(100),
    updated_at TIMESTAMP DEFAULT CURRENT_TIMESTAMP
);-
The pg_hba.conf file is configured to provide user access from the host where the NiFi service of the ADS cluster is installed. For this purpose, an entry about the host address is added to the PG_HBA field on the configuration parameters page of the ADPG service:
host all all 10.92.38.11/24 trust
|
NOTE
For information on working with ADP, see: |
Connect to Greengage DB (ADB)
-
To connect to a Greengage DB table, create a GetGreengageRecord processor, open its configuration, and specify parameters related to the Greengage DB table.
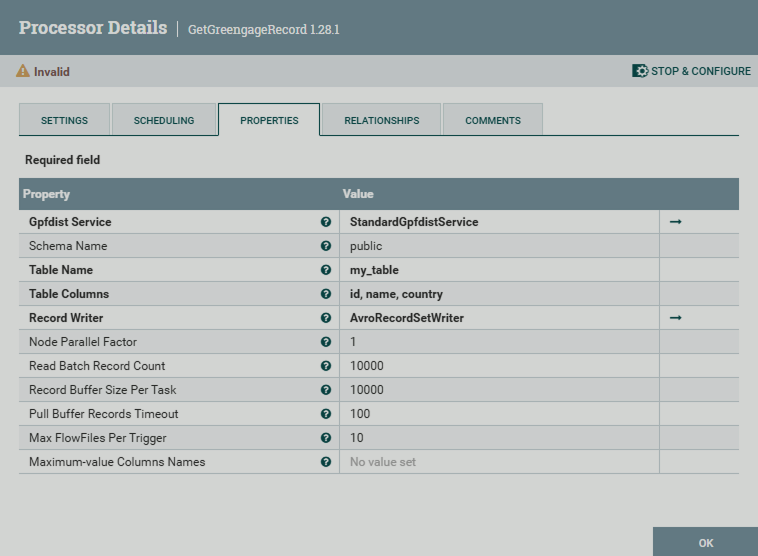 GetGreengageRecord processor configuration
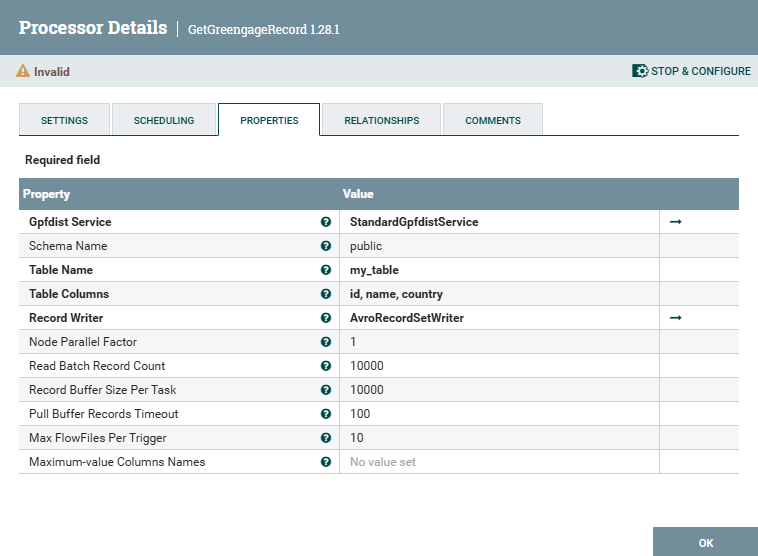 GetGreengageRecord processor configuration
 -
Go to the Gpfdist Service parameter value field, select Create new service… in the pop-up list, and create an instance of the StandardGpfdistService service in the window that opens.
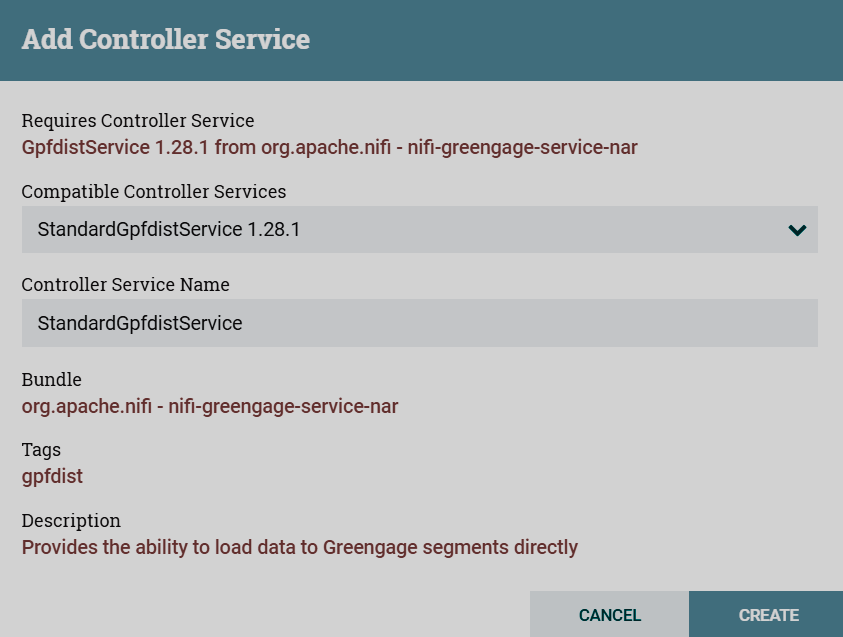 Creating an instance of the StandardGpfdistService service
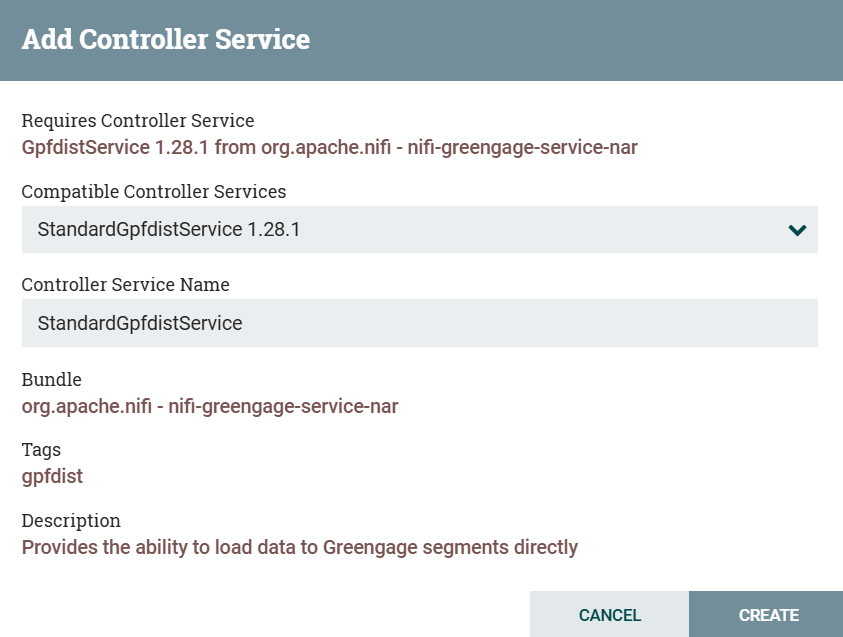 Creating an instance of the StandardGpfdistService service
 -
After saving the created instance, click
 . In the next NiFi Flow Configuration → Controller Services window, open the service configuration and specify the necessary parameters.
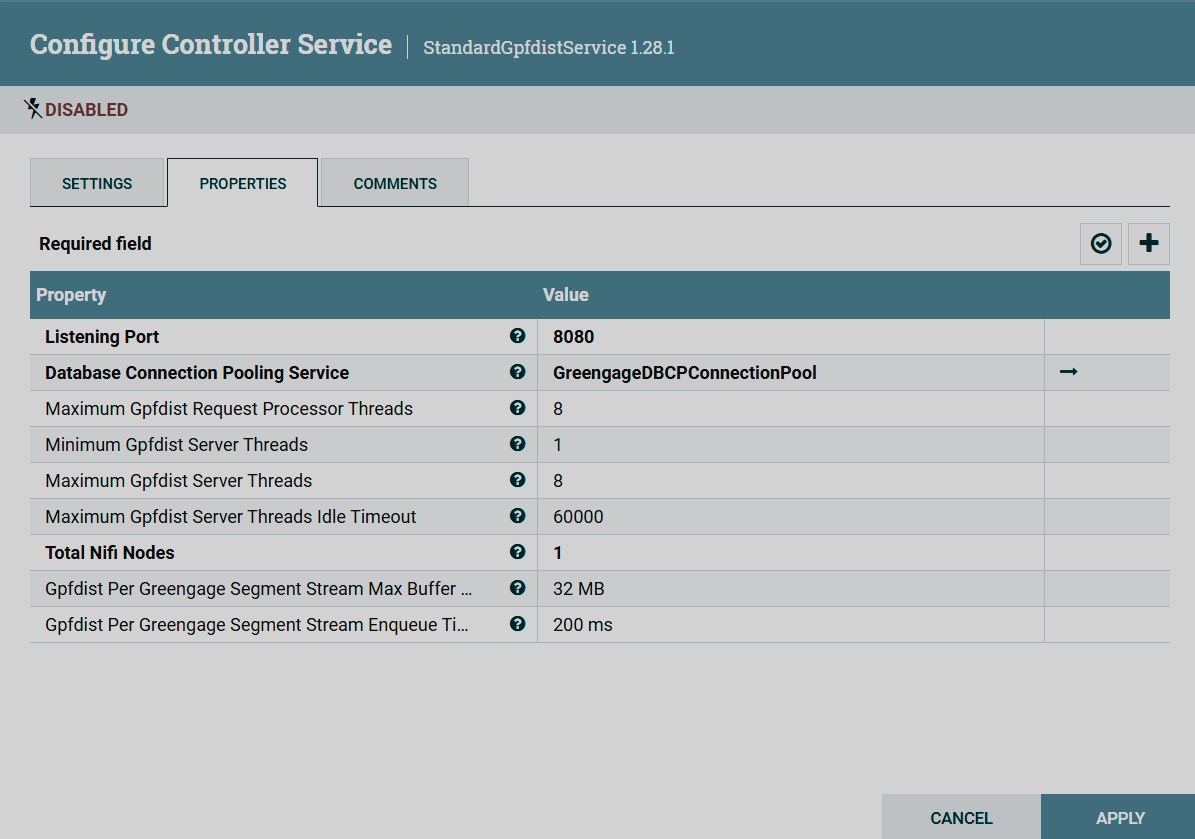 StandardGpfdistService service configuration
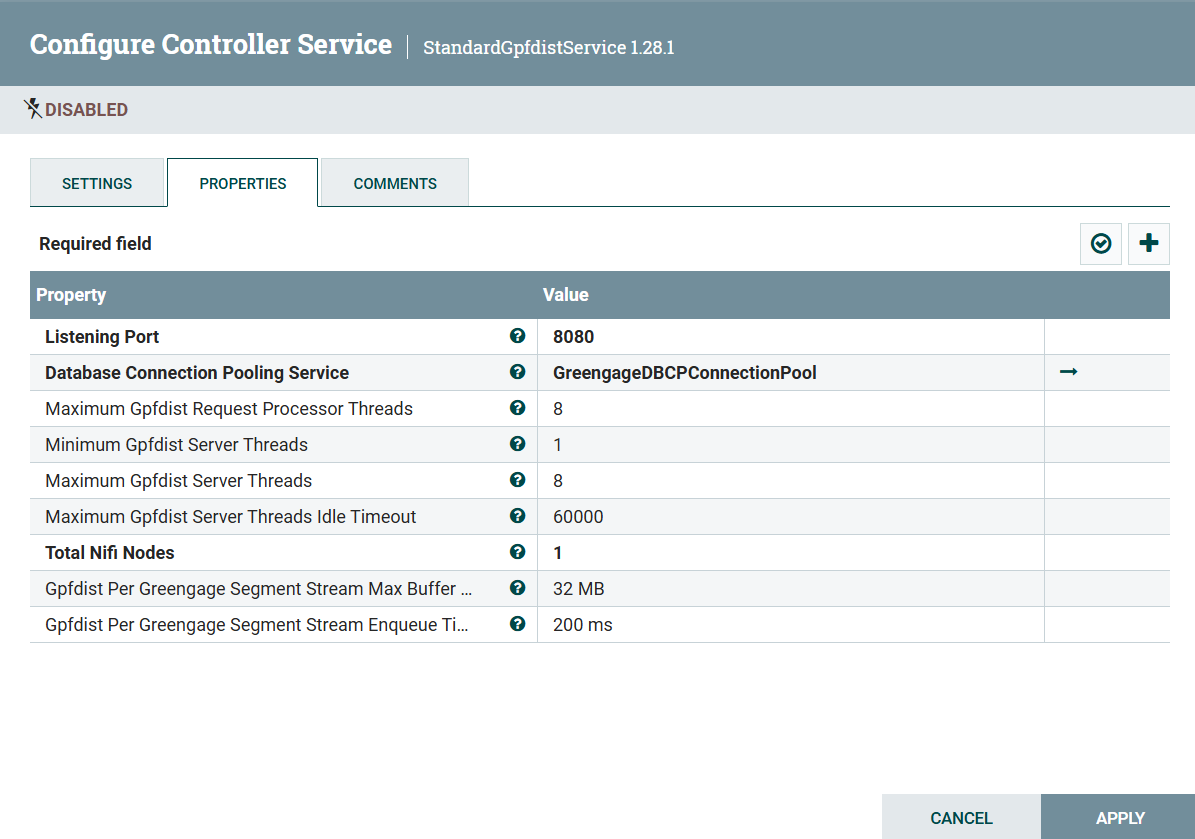 StandardGpfdistService service configurationNOTE
The default value of the Listening Port parameter can be changed if this port is already in use.
-
Go to the Database Connection Pooling Service parameter value field, select Create new service… in the pop-up list, and in the opened window, create an instance of the DBCPConnectionPool service to connect to Greengage DB.
-
After saving the created instance, click
. In the opened NiFi Flow Configuration → Controller Services window, open the DBCPConnectionPool service configuration and specify parameters of the Greengage DB database and the driver being used.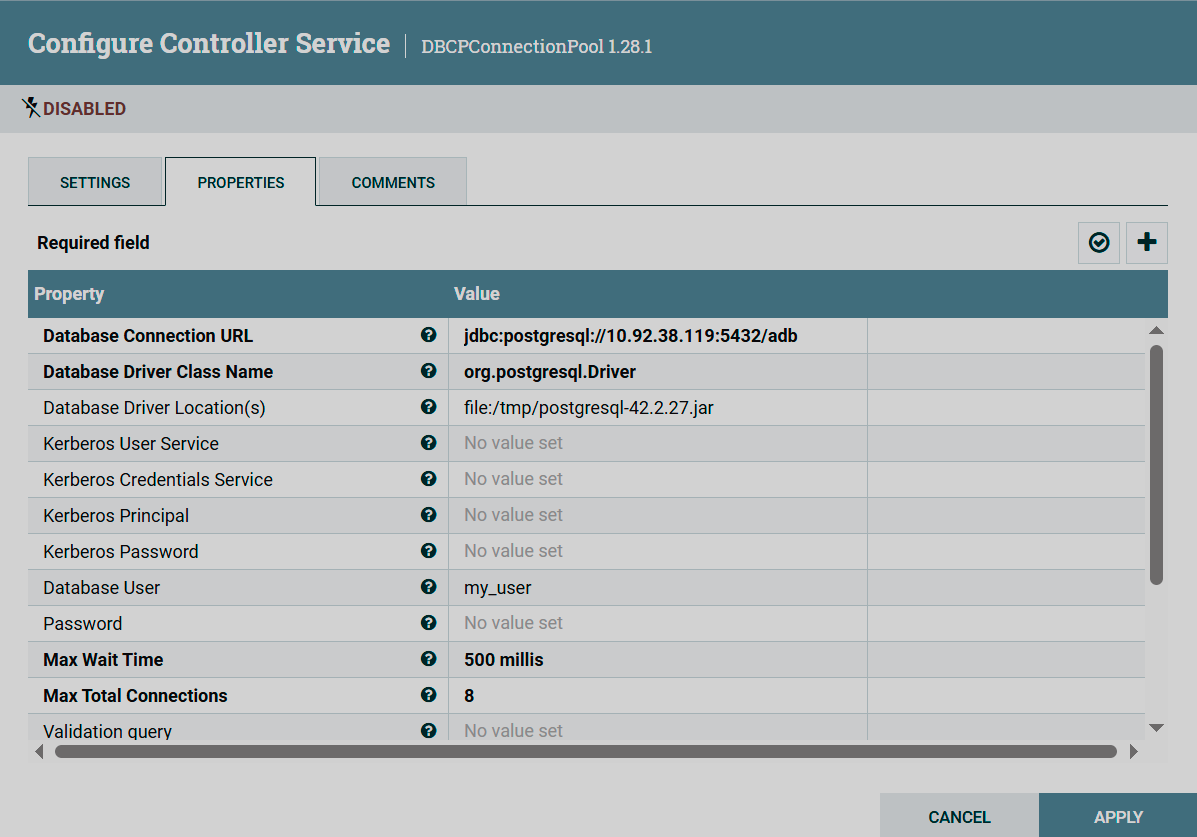 GreengageDBCPConnectionPool service configuration
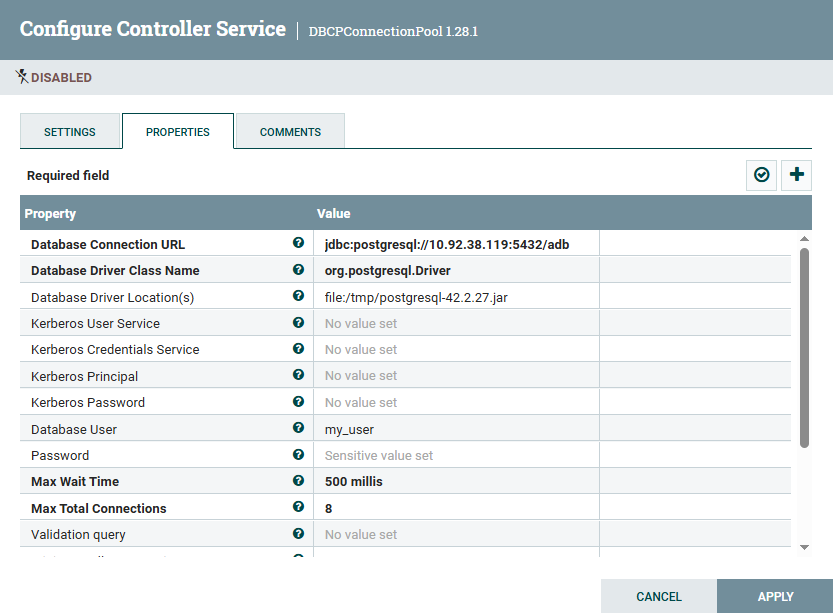 GreengageDBCPConnectionPool service configuration
 -
Close the NiFi Flow Configuration → Controller Services window and go back to the GetGreengageRecord processor configuration. In the Record Reader parameter value field, create an instance of the AvroRecordSetWriter service for writing content in Avro binary format.
|
TIP
If you are using multiple GetGreengageRecord processors to transfer data from different sources to a single ADB database, for the Gpfdist Service value, select the same StandardGpfdistService_* you created. Creating service instances can be done before creating the processor. This can be used to connect multiple processors to a single service. To create a service:
|
Connect to PostgreSQL server (ADP)
-
Create a PutDatabaseRecord processor and open its configuration. This processor uses the specified RecordReader to input one or more records from the incoming FlowFile. These records are converted into SQL queries to write to a PostgreSQL table and are executed as a single transaction. Fill in the parameters related to the PostgreSQL table used.
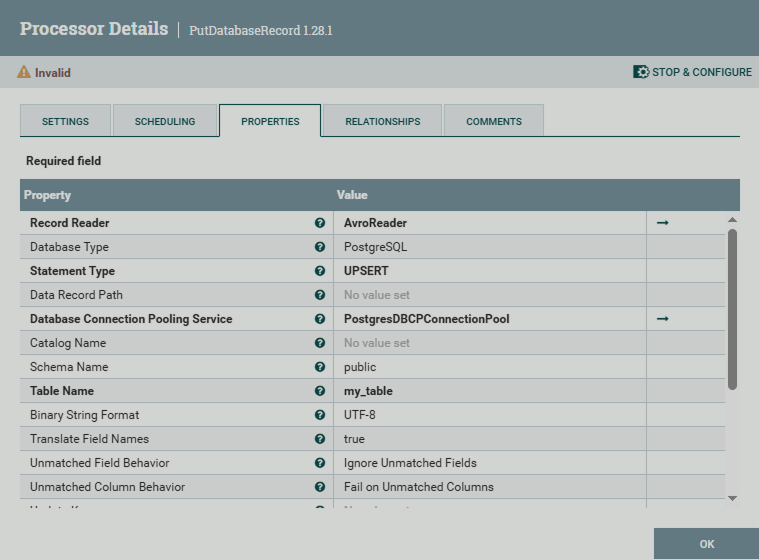 PutDatabaseRecord processor configuration
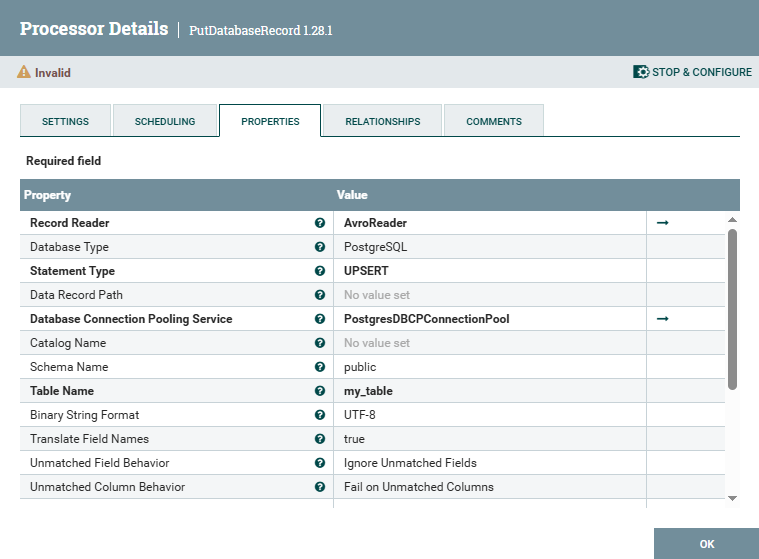 PutDatabaseRecord processor configuration
 -
Go to the Database Connection Pooling Service parameter value field, select Create new service… in the pop-up list and in the window that opens, create an instance of the DBCPConnectionPool service to connect to the PostgreSQL server.
-
After saving the created instance, click
. In the next NiFi Flow Configuration → Controller Services window, open the DBCPConnectionPool service configuration and specify parameters of the PostgreSQL database and the driver being used.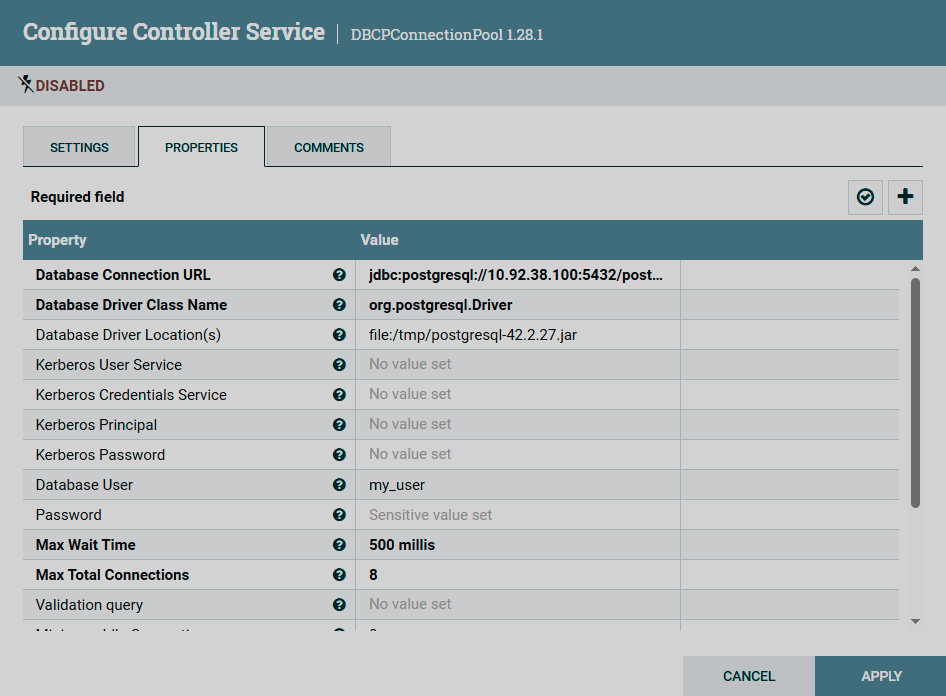 PostgresDBCPConnectionPool service configuration
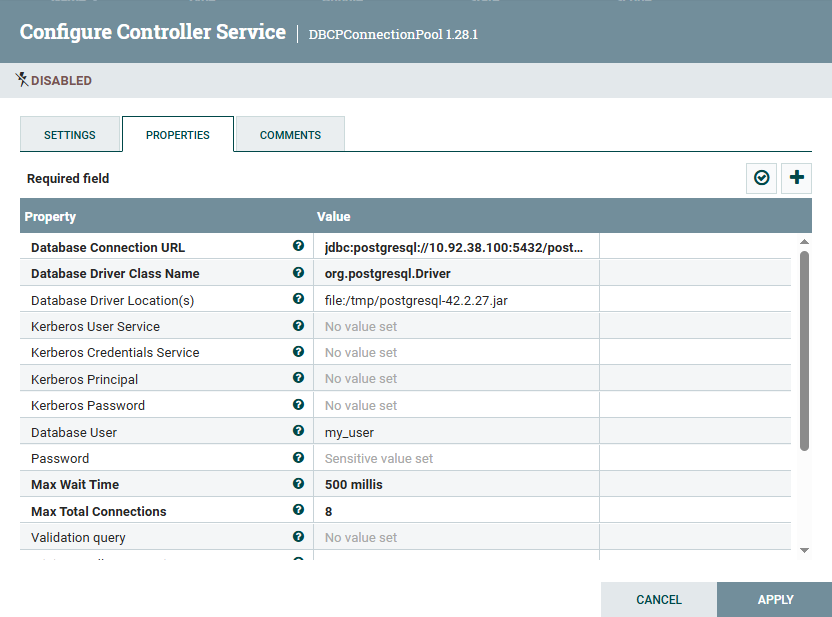 PostgresDBCPConnectionPool service configuration
 -
Close the NiFi Flow Configuration → Controller Services window and go back to the PutDatabaseRecord processor configuration. In the Record Reader parameter value field, create an instance of the AvroReader service to read records from PostgreSQL in Avro format with built-in schema.
After all services are created, they are displayed on the NiFi Flow Configuration → Controller Services page.
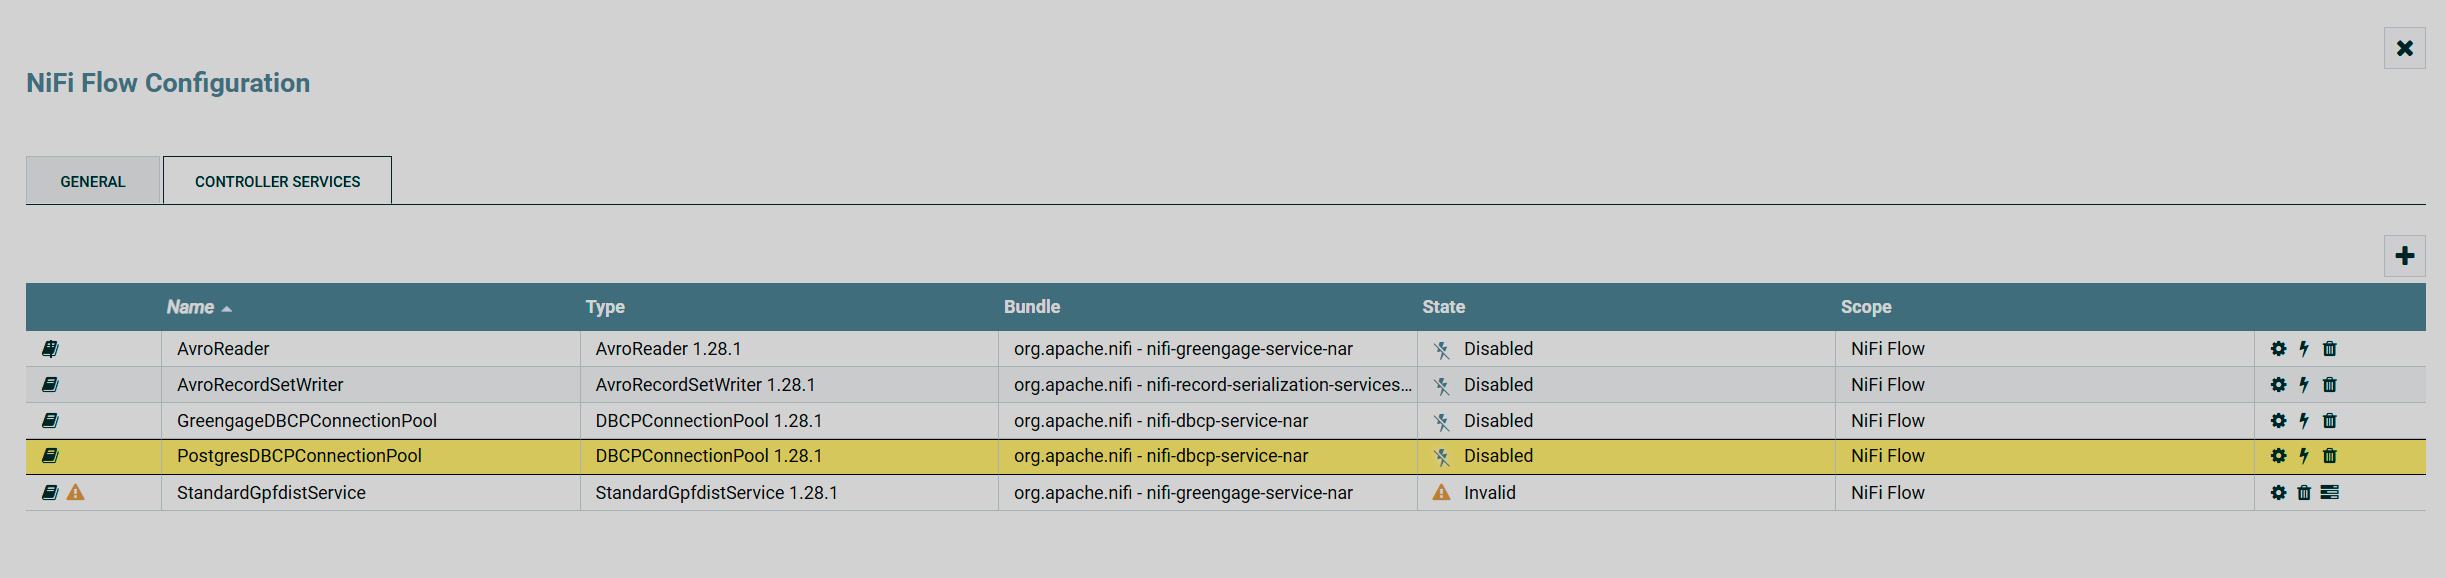
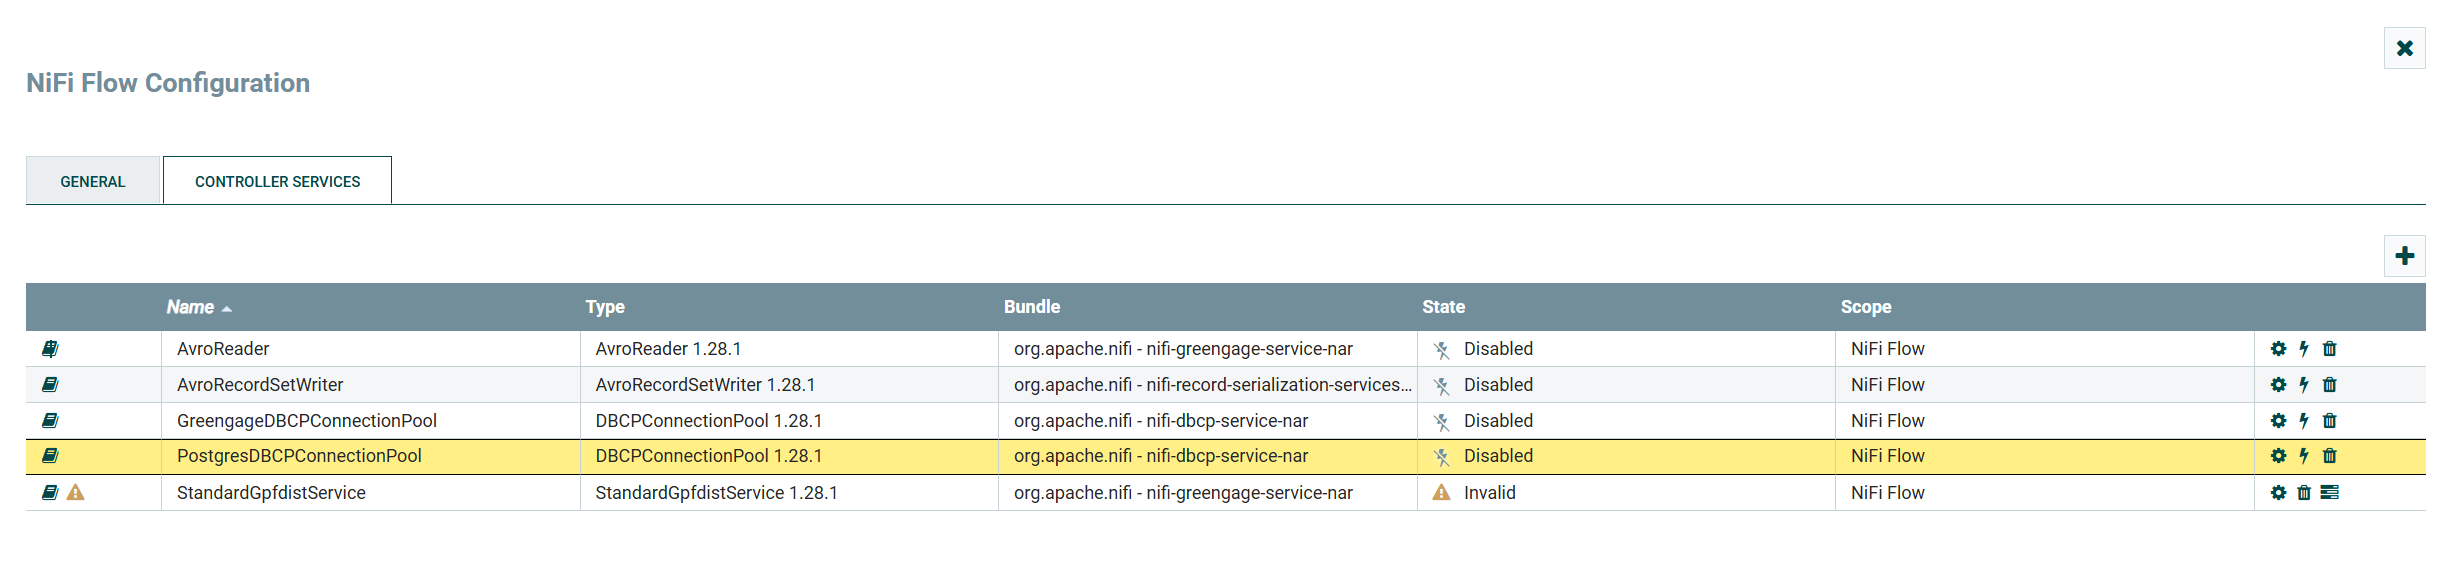
The StandardGpfdistService service is displayed as Invalid until its associated service GreengageDBCPConnectionPool is started.
Start a data flow
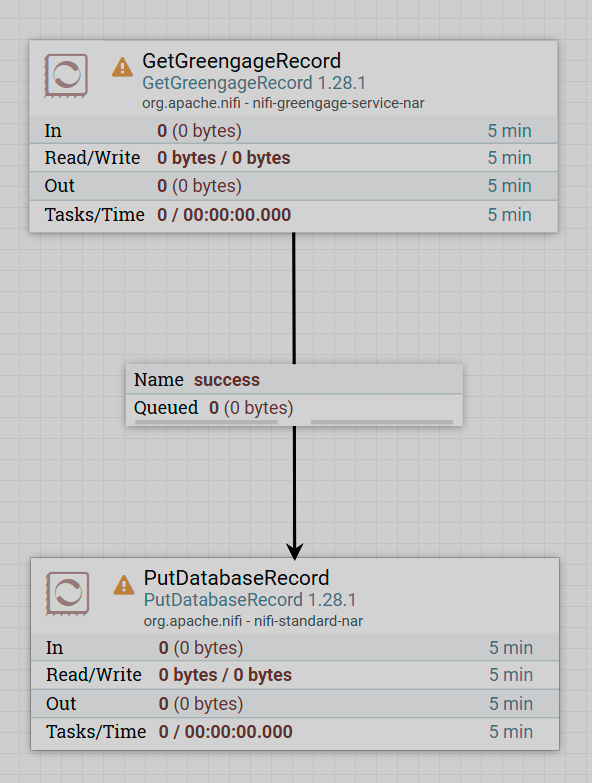
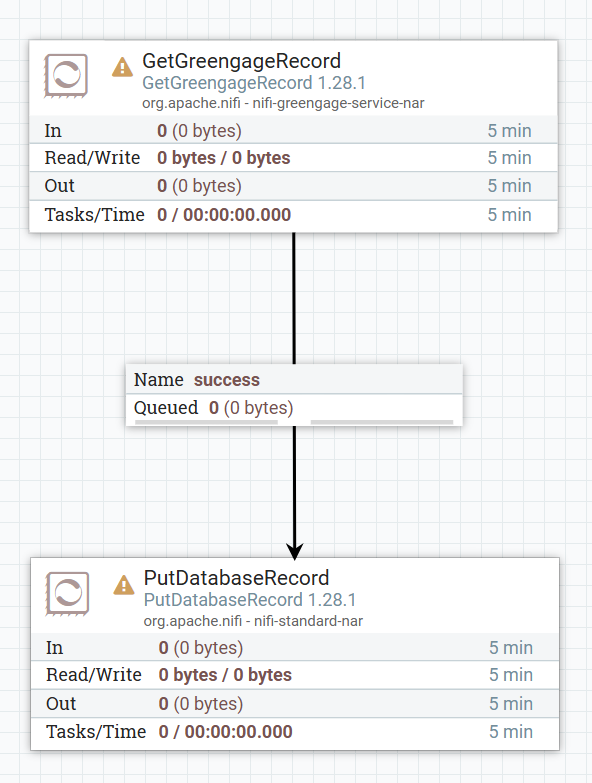
Processors are displayed with errors because the services associated with them are not running.
To start the flow, perform the following:
-
Start the services one by one on the NiFi Flow Configuration → Controller Services page by clicking on the icon
 .
. -
Run the created data stream.
Using queries to the ADP database, you can read the received data, for example:
SELECT * FROM my_table;Update a data flow
In the pipeline described in this article, to get new rows from the adb database, you need to clear the cluster state. This will cause the table to be read again completely. New rows will be written to the postgres database, and existing ones will be updated if any changes were made to them.
To clear the cluster state, right-click to open the processor context menu, stop the processor, and select View state. In the opened Component State tab, click Clear state, then start the processor again.
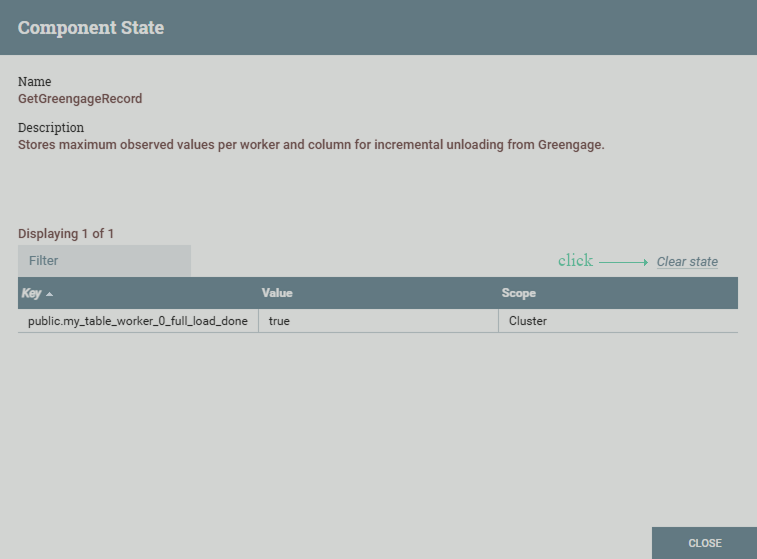
The Component State tab shows the cluster state — a list of snapshots that store the maximum observed values for each worker for the processor, and a column for incremental unloading from Greengage DB.
A worker is one of the parallel tasks of the processor, responsible for unloading data from segments. The number of workers is determined as the minimum value between the number of Greengage segments and the product of the total number of NiFi nodes and the Node Parallel Factor value.
Incremental unloading mode
The GetGreengageRecord processor supports an incremental loading mode, where each processor cycle reads only the newly appeared data ranges instead of rereading the entire table.
Incremental unloading mode is supported for the following types of data: smallint, integer, bigint, real, double precision, numeric, date, time, timestamp, timestamp with time zone.
How incremental unloading works
To enable incremental unloading mode, specify the name of one or more columns in the Maximum-value Columns Names parameter field.
The processor uses the stored maximum observed values for the current table snapshot in state as a lower bound for the next cycle.
The processor creates a new snapshot of the table for its current state, the upper bound is defined. Data is read-only within the lower-upper bound range.
If there is no new range, the export for this worker is skipped.
If there is a range, a request to export the data is made. After a successful export, the maximum observed values are saved in the cluster’s state until the next cycle.
When the processor restarts, the incremental position is restored from the cluster state.
Clearing cluster state causes the unload to start over for the configured mode.
After changing the Maximum-value Columns Names parameter values (column list), run the clear cluster state.
Work without incremental unloading
If the Maximum-value Columns Names parameter is not set (for example, in the pipeline described in this article), the processor operates in full-load mode:
-
each worker performs a full load once;
-
the processor saves the last shapshot of the source table in the state for each worker in the cluster;
-
next cycles are skipped until the state is cleared.
Idempotent mode
The upper bound (maximum observed values) is determined before the unloading starts.
Rows inserted into the Greengage DB (ADB) table during unloading are guaranteed to be included in the next cycle.
The state is fully written (committed) only after the cycle completes successfully: if there is any error, the upper bound doesn’t change and the range is reread, so duplicate rows are possible.
Changing the value of Node Parallel Factor alters the distribution of workers between segments: for new workers, the state is empty and they will perform an initial load of the entire range (duplicates with already loaded data are possible).
Based on this, the GetGreengageRecord processor supports at least once delivery semantics (messages will be processed at least once).
To implement exactly once semantics (each message will be processed one and only one time), an idempotent mode is needed on the writing side to prevent duplicate rows:
-
UPSERT/UPDATEby key (for example, in the GetGreengageRecord → PutDatabaseRecord pipeline); -
deduplication by
reading_idin the target storage (for example, in the GetGreengageRecord → UpdateRecord → PutGreengageRecord pipeline).