

ACL in Kafka
This article describes the basic steps for working with ACL authorization in Kafka.
Access Control List (ACL) — an access control list that defines who can access topics or groups in Kafka and what operations are allowed or denied to be performed by a user or group of users.
Kafka has AclAuthorizer — a built-in ACL-based authorizer.
ACLs for Kafka are stored in ZooKeeper.
Enable ACL in Kafka
|
NOTE
Before configuring authorization for an ADS cluster, authentication must be enabled and configured, and users must be created using one of the following protocols: |
To enable and use AclAuthorizer, do the following:
-
Open the Services tab on the cluster’s page and click on the service name Kafka in the Name column.
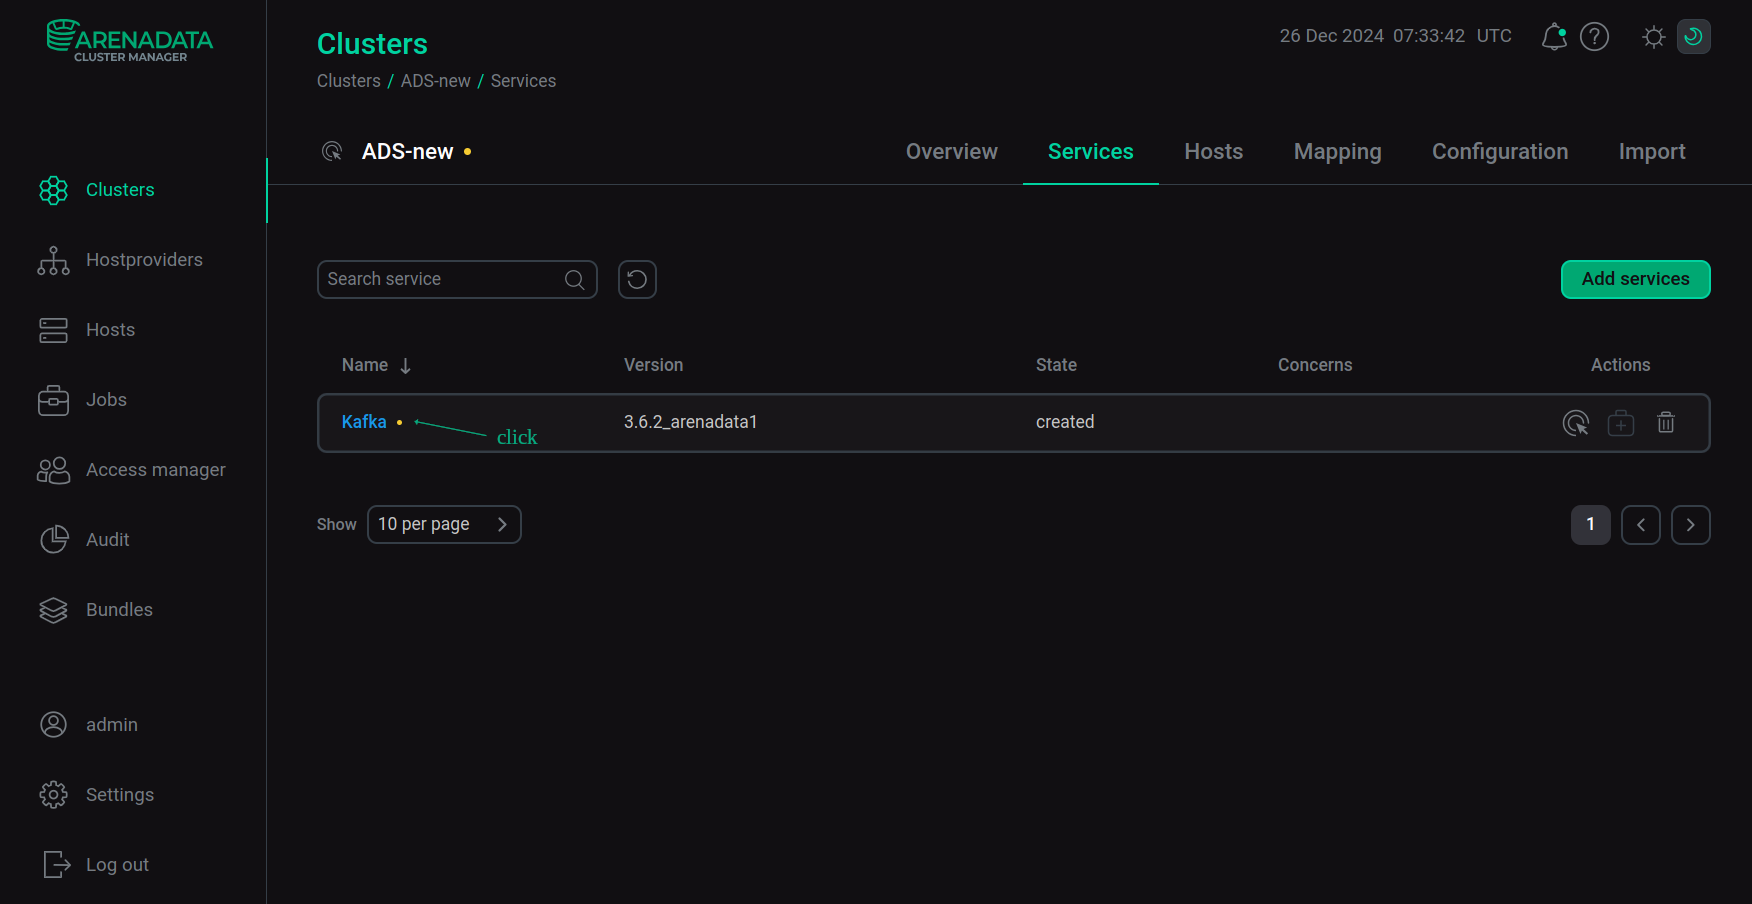 Switch to the service configuration
 -
In the opened Primary configuration window, in the server.properties group, expand the Add key, value group and using the Add property form, add new parameters:
authorizer.class.name=kafka.security.authorizer.AclAuthorizer
allow.everyone.if.no.acl.found=true
super.users=user:nobody
sasl.kerberos.principal.to.local.rules=DEFAULT
where:
-
authorizer.class.name— the authorizer class name. -
allow.everyone.if.no.acl.found— a flag that determines whether to enable authorization only for topics listed in the ACL. -
super.users— superuser names separated by semicolons. -
sasl.kerberos.principal.to.local.rules— rules for mapping usernames specified in ACLs to the primary part of the Kerberos principal. By default, an exact match is set. To set a mapping rule, theRULE:[n:string](regexp)s/pattern/replacement/format is used (see Customizing SASL User Name for more details).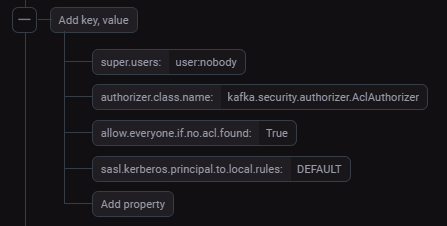 ACL parameters
-
-
After entering the data, save the configuration and restart the Kafka service.
Prepare the authentication environment to create ACLs
SASL PLAINTEXT
To create the user environment specified during authentication using the SASL PLAINTEXT protocol, do the following:
-
On the host with the Kafka broker, enter the command:
$ sudo vim /etc/kafka/conf/client.properties -
In the file that opens, enable (uncomment) the authentication mechanism and fill in the data for the created user:
security.protocol=SASL_PLAINTEXT
sasl.mechanism=PLAIN
# Uncomment and set necessary username/password
#sasl.jaas.config=org.apache.kafka.common.security.plain.PlainLoginModule requi$
#  username="username" \
#  password=password_for_username;
For more information about working with users in the SASL PLAINTEXT authentication environment, see the article Use SASL PLAINTEXT in Kafka.
Kerberos SASL
To create the environment for the user specified during authentication using the Kerberos SASL protocol, do the following:
-
Create a JAAS (Java Authentication and Authorization Service) file for the
userprincipal that manages the ACLs. Run command:$ sudo vim /tmp/client.jaas -
Write data to file:
KafkaClient { com.sun.security.auth.module.Krb5LoginModule required useTicketCache=true; }; -
Create a ticket for user
user:$ kinit -p user@ADS-KAFKA.LOCAL -
Check ticket:
$ klistTicket cache: FILE:/tmp/krb5cc_1000 Default principal: user@ADS-KAFKA.LOCAL Valid starting Expires Service principal 08/10/2022 20:44:12 08/11/2022 20:44:12 krbtgt/ADS-KAFKA.LOCAL@ADS-KAFKA.LOCAL
-
Export the generated client.jaas file as a JVM option for the given user using the
KAFKA_OPTSenvironment variable:
$ export KAFKA_OPTS="-Djava.security.auth.login.config=/tmp/client.jaas"For more information about working with users in a Kerberos SASL authentication environment, see the article Use MIT Kerberos in Kafka.
ACL configuration
Working with the ACL-based authorizer occurs by running the kafka-acls.sh script on the command line from any cluster host on which the Kafka service is installed.
|
NOTE
To view all options for the kafka-acls.sh script, run the command: |
Assign rights and prohibitions to individual actions in Kafka for users
Assignment of rights or prohibitions to individual actions to the user occurs by running the kafka-acls.sh script with the --operation option, and specifying the operation to which access is given.
Permissions are assigned using the --add option.
The --allow-principal option enables the action, and --deny-principal disables the action.
Removing a user from the ACL is done with the command option --remove.
The main operations for which user rights can be set are:
-
Describe— view topic or group metadata. -
DescribeConfigs— view topic configuration. -
Alter— change a topic or a group. -
IdempotentWrite— write to a topic for idempotent and transactional APIs. -
Read— the right to read from a topic or from a group. -
Delete— delete a topic or a group. -
Create— create a topic or a group. -
All— all rights. -
Write— write to a topic or a group. -
AlterConfigs— change the topic configuration.
|
NOTE
For users authenticated using the Kerberos SASL or LDAP protocol, the ACLs use the username without the authentication realm. |
In order to allow the username user to perform the WRITE operation on the test-topic topic, on the host with the Kafka broker, enter the command:
$ /usr/lib/kafka/bin/kafka-acls.sh --bootstrap-server localhost:9092 --command-config /etc/kafka/conf/client.properties --add --allow-principal User:username --operation WRITE --topic test-topicIn order to prevent the username1 user from performing the WRITE operation on the test-topic topic, on the host with the Kafka broker, enter the command:
$ /usr/lib/kafka/bin/kafka-acls.sh --bootstrap-server localhost:9092 --command-config /etc/kafka/conf/client.properties --add --deny-principal User:username1 --operation WRITE --topic test-topicAs a result of each addition to the list, a message appears about the successful addition of rights or a ban and an ACL list with current user rights for the topic:
Adding ACLs for resource `ResourcePattern(resourceType=TOPIC, name=test-topic, patternType=LITERAL)`:
 	(principal=User:username, host=*, operation=WRITE, permissionType=ALLOW)

Current ACLs for resource `ResourcePattern(resourceType=TOPIC, name=test-topic, patternType=LITERAL)`:
 	(principal=User:username, host=*, operation=CREATE, permissionType=ALLOW)
	(principal=User:username1, host=*, operation=CREATE, permissionType=DENY)
Assign producer and consumer rights to a user
It is possible to assign several producer rights to the user at once — create, write, view metadata (describe).
To assign producer rights to the writer user for the test-topic topic, enter the command on the host with the Kafka broker:
$ /usr/lib/kafka/bin/kafka-acls.sh --bootstrap-server localhost:9092 --command-config /etc/kafka/conf/client.properties --add --allow-principal User:writer --producer --topic test-topicAs a result, a message appears about the successful addition of producer rights and an ACL list with current user rights for the topic:
Adding ACLs for resource `ResourcePattern(resourceType=TOPIC, name=test-topic, patternType=LITERAL)`:
 	(principal=User:writer, host=*, operation=CREATE, permissionType=ALLOW)
	(principal=User:writer, host=*, operation=WRITE, permissionType=ALLOW)
	(principal=User:writer, host=*, operation=DESCRIBE, permissionType=ALLOW)

Current ACLs for resource `ResourcePattern(resourceType=TOPIC, name=test-topic, patternType=LITERAL)`:
 	(principal=User:writer, host=*, operation=WRITE, permissionType=ALLOW)
	(principal=User:writer, host=*, operation=CREATE, permissionType=ALLOW)
	(principal=User:writer, host=*, operation=DESCRIBE, permissionType=ALLOW)
It is also possible to assign several consumer rights at once — read, view metadata (describe).
To assign consumer rights to the reader user for the test-topic topic, enter the command on the host with the Kafka broker:
$ /usr/lib/kafka/bin/kafka-acls.sh --bootstrap-server localhost:9092 --command-config /etc/kafka/conf/client.properties --add --allow-principal User:reader --consumer --topic test-topic --group 1|
NOTE
When assigning consumer rights, you must specify both the topic name (topic) and the name of the consumer group (group), even if there is only one consumer.
|
As a result, a message appears about the successful addition of consumer rights and an ACL list with current user rights for the test-topic topic, including those created earlier for the writer user:
Adding ACLs for resource `ResourcePattern(resourceType=TOPIC, name=test-topic, patternType=LITERAL)`:
 	(principal=User:reader, host=*, operation=DESCRIBE, permissionType=ALLOW)
	(principal=User:reader, host=*, operation=READ, permissionType=ALLOW)

Current ACLs for resource `ResourcePattern(resourceType=TOPIC, name=test-topic, patternType=LITERAL)`:
	(principal=User:writer, host=*, operation=WRITE, permissionType=ALLOW)
	(principal=User:writer, host=*, operation=CREATE, permissionType=ALLOW)
	(principal=User:writer, host=*, operation=DESCRIBE, permissionType=ALLOW)
	(principal=User:reader, host=*, operation=DESCRIBE, permissionType=ALLOW)
	(principal=User:reader, host=*, operation=READ, permissionType=ALLOW)
It also displays data about the created rights for the consumer group:
Current ACLs for resource `ResourcePattern(resourceType=GROUP, name=1, patternType=LITERAL)`:
 	(principal=User:reader, host=*, operation=DESCRIBE, permissionType=ALLOW)
	(principal=User:reader, host=*, operation=READ, permissionType=ALLOW)
View ACLs
Viewing ACLs is done with the --list option.
In order to view the list of permissions for the test-topic topic, enter the command:
$ /usr/lib/kafka/bin/kafka-acls.sh --bootstrap-server localhost:9092 --command-config /etc/kafka/conf/client.properties --list --topic test-topicThe result is a listing of all assigned permissions for the test-topic topic:
Current ACLs for resource `ResourcePattern(resourceType=TOPIC, name=test-topic, patternType=LITERAL)`:
 	(principal=User:writer, host=*, operation=WRITE, permissionType=ALLOW)
	(principal=User:writer, host=*, operation=CREATE, permissionType=ALLOW)
	(principal=User:writer, host=*, operation=DESCRIBE, permissionType=ALLOW)
	(principal=User:reader, host=*, operation=DESCRIBE, permissionType=ALLOW)
	(principal=User:reader, host=*, operation=READ, permissionType=ALLOW)
To view the list of rights for all topics, use the same command without specifying the topic name.
How an authorized user works in Kafka
After setting up ACLs for users, work in Kafka proceeds according to the steps described in the articles:
-
Use MIT Kerberos in Kafka — for a user that has a principal in a Kerberos SASL secured environment.
-
SSL channel security in Kafka — for a user that has a principal in a Kerberos SASL secured environment with SSL channel security.
-
Use Kerberos with MS Active Directory in Kafka — for a user that has an Active Directory account and a corresponding LDAP server SSL certificate.
Any action by an unauthorized user will cause an error. For example, attempting to write messages to the test-topic topic for a user who does not have WRITE permission in the ACL for that topic will result in the following errors:
[2022-10-12 13:38:57,301] WARN [Producer clientId=console-producer] Error while fetching metadata with correlation id 9 : {test-topic=TOPIC_AUTHORIZATION_FAILED} (org.apache.kafka.clients.NetworkClient)
[2022-10-12 13:38:57,302] ERROR [Producer clientId=console-producer] Topic authorization failed for topics [test-topic] (org.apache.kafka.clients.Metadata)
[2022-10-12 13:38:57,302] ERROR Error when sending message to topic test-topic with key: null, value: 1 bytes with error: (org.apache.kafka.clients.producer.internals.ErrorLoggingCallback)
org.apache.kafka.common.errors.TopicAuthorizationException: Not authorized to access topics: [test-topic]
|
NOTE
For ADS, there is the ability to create and view access control lists on the ACL page of the ADS Control user interface.
|