

Install ADCM
ADCM requires a separate host. Before installing ADCM, we recommend to read its documentation.
The installation steps are listed below.
Step 1. Check prerequisites
Software and hardware requirements
ADCM is a software that is distributed in the form of a Docker image. To install it, you need:
-
One of the following operating systems:
Ubuntu-
Ubuntu 22.04 LTS
CentOS-
CentOS 7.9
RHEL-
RHEL 7.9
-
RHEL 9
ALT Linux-
ALT Linux 8.4 SP
-
ALT Linux 10.2 SP
Astra Linux SE-
Astra Linux SE 1.7.6 Orel
-
Astra Linux SE 1.8.4 Orel
-
Astra Linux SE 1.7.6 Voronezh
-
Astra Linux SE 1.8.4 Voronezh
RED OS-
RED OS 7.3 Certified edition
-
RED OS 8.0 Certified edition
-
-
A user account with
sudoprivileges. -
Access to the official repositories of CentOS Extras and CentOS Base. These repositories are available in the operating system by default. However, if they were disabled, you need to enable them before proceeding (for example, by editing the repository configuration file in the /etc/yum.repos.d/ directory).
-
The software package installer YUM/APT.
-
The hardware that meets the following conditions:
IMPORTANTThe following system requirements are minimal. The target sizing should be calculated based on the customer requirements.
-
CPU: 4 CPU cores;
-
RAM: 16 GB;
-
HDD: 50 GB.
-
|
IMPORTANT
Starting with ADCM 2.7.0, any Container Registry Client with downloaded images of ADPG, ADCM, and ADCM Installer will be required to install ADPG without the Internet connection and use it as the ADCM database. The installation is done via the ADCM Installer by specifying the URL of the local storage of the ADCM and ADPG images.
|
To grant the user the necessary rights to install ADCM, perform the steps described below.
Grant the root privileges for the user:
Make sure that the /etc/sudoers file contains the record specified below depending on the operating system with the following command:
$ sudo vi /etc/sudoersTo return to the command line, press Esc, type :q!, and press Enter.
## Allows people in group wheel to run all commands
%wheel  ALL=(ALL)       ALL
# Allow members of group sudo to execute any command
%sudo ALL=(ALL:ALL) ALL## Uncomment to allow members of group wheel to execute any command
WHEEL_USERS ALL=(ALL:ALL) ALLInstall Docker
|
CAUTION
Do not install Docker from the official Docker site. Instead, use the official repositories of your Linux distribution. The repositories provided by operating system developers tend to be more stable and secure. |
Below are the step-by-step procedures of Docker installation on the examples of several operating systems supported by ADCM. These steps may differ for operating system versions other than those specified on tabs.
-
Using
rootprivileges, update all packages that are currently installed in your system:$ sudo yum update -y -
Install the packages required for Docker installation and usage:
$ sudo yum install -y yum-utils docker device-mapper-persistent-data lvm2where:
-
yum-utilsis the package that provides theyum-config-managerutility; -
device-mapper-persistent-dataandlvm2are packages required by the devicemapper storage driver.
-
-
Start Docker:
$ sudo systemctl start docker -
Enable Docker as a system service:
$ sudo systemctl enable docker
-
Using
rootprivileges, update all packages that are currently installed in your system:$ sudo apt-get update -
Install the packages required for Docker installation and usage:
$ sudo apt-get install ca-certificates curlwhere:
-
ca-certificatesis the package of Root CA certificates; -
curlis the package for working with web resources.
Confirm the use of additional disk space during the execution of the command.
-
-
Add the official GPG key for the Docker repository:
$ sudo install -m 0755 -d /etc/apt/keyrings $ sudo curl -fsSL https://download.docker.com/linux/ubuntu/gpg -o /etc/apt/keyrings/docker.asc $ sudo chmod a+r /etc/apt/keyrings/docker.asc -
Add the Docker repository:
$ echo \ "deb [arch=$(dpkg --print-architecture) signed-by=/etc/apt/keyrings/docker.asc] https://download.docker.com/linux/ubuntu \ $(. /etc/os-release && echo "jammy") stable" | \ sudo tee /etc/apt/sources.list.d/docker.list > /dev/null -
Update all packages, including packages for the Docker repository:
$ sudo apt-get update -
Install Docker Engine:
$ sudo apt-get install docker-ce docker-ce-cli containerd.io docker-buildx-plugin docker-compose-pluginConfirm the use of additional disk space during the execution of the command.
-
Start Docker:
$ sudo systemctl start docker -
Enable Docker as a system service:
$ sudo systemctl enable docker
-
Using
rootprivileges, update all packages that are currently installed in your system:$ sudo apt-get update -
Install Docker Engine:
$ sudo apt-get install docker-engineConfirm the use of additional disk space during the execution of the command.
-
Start and enable Docker as a system service:
$ sudo systemctl enable --now docker
-
Using
rootprivileges, update all packages that are currently installed in your system:$ sudo apt-get update -
Install the packages required for Docker installation and usage:
$ sudo apt-get install ca-certificates curl net-toolswhere:
-
ca-certificatesis the package of Root CA certificates; -
curlis the package for working with web resources; -
net-toolsis the package for controlling the network subsystem of the Linux kernel, in particular for executing thenetstatcommand.
Confirm the use of additional disk space during the execution of the command.
-
-
Add the official GPG key for the Docker repository:
$ curl -fsSL https://download.docker.com/linux/debian/gpg | sudo apt-key add - -
Add the Docker repository:
$ echo "deb [arch=amd64] https://download.docker.com/linux/debian stretch stable" | sudo tee -a /etc/apt/sources.list -
Update all packages, including packages for the Docker repository:
$ sudo apt-get update -
Install Docker Engine:
$ sudo apt install docker-ce docker-ce-cli containerd.ioConfirm the use of additional disk space during the execution of the command.
-
Start Docker:
$ sudo systemctl start docker -
Enable Docker as a system service:
$ sudo systemctl enable docker
-
Install Docker Engine:
$ sudo dnf install docker-ce docker-ce-cliConfirm the use of additional disk space during the execution of the command.
-
Start and enable Docker as a system service:
$ sudo systemctl enable docker --now
Disable SELinux
|
NOTE
It is recommended to disable SELinux only if CentOS 7.9 or RHEL 7.9 is used.
|
To disable SELinux permanently, set SELINUX=disabled in the /etc/selinux/config file, and reboot your system.
You can edit the file via the vi or vim command:
$ sudo vi /etc/selinux/configThe content of the changed file should look like this:
# This file controls the state of SELinux on the system.
# SELINUX= can take one of these three values:
#       enforcing - SELinux security policy is enforced.
#       permissive - SELinux prints warnings instead of enforcing.
#       disabled - SELinux is fully disabled.
SELINUX=disabled
# SELINUXTYPE= type of policy in use. Possible values are:
#       targeted - Only targeted network daemons are protected.
#       strict - Full SELinux protection.
SELINUXTYPE=targeted
You can also disable SELinux temporarily via the following command:
$ sudo setenforce 0Still, it is strongly recommended to disable SELinux permanently, so that it does not restart on each system reboot.
|
CAUTION
Do not forget to reboot your host after SELinux is disabled. |
Stop firewalld
If you use the firewalld service, stop it before installing ADCM.
Before stopping firewalld, make sure that it is installed, started, and enabled:
$ sudo systemctl status firewalldThe example of the command execution result:
● firewalld.service - firewalld - dynamic firewall daemon
   Loaded: loaded (/usr/lib/systemd/system/firewalld.service; enabled; vendor preset: enabled)
   Active: active (running) since Mon 2024-12-02 10:02:57 UTC; 3min 25s ago
     Docs: man:firewalld(1)
 Main PID: 3023 (firewalld)
    Tasks: 2
   Memory: 22.8M
   CGroup: /system.slice/firewalld.service
           └─3023 /usr/bin/python2 -Es /usr/sbin/firewalld --nofork --nopid
Stop firewalld:
$ sudo systemctl stop firewalldAs an alternative, you can disable the firewalld service, so that it will not apply rules to network packets:
$ sudo systemctl disable firewalldAllow access to the Docker CLI without root privileges
If in the future you want to access the Docker CLI without using root privileges, you should create a docker user group (if it does not exist) and add the current user to this group with the certain rights:
$ sudo groupadd docker
$ sudo usermod -a -G docker $USER
After running these commands, you should re-login under the current user.
Step 2. Install ADCM
Offline ADCM installation includes the following steps:
-
Get an archive with the sh.xz extension that contains a special installation shell script from the Arenadata support team.
-
Make a directory on the host where ADCM should be deployed, and put the received archive into it.
-
Unpack the archive into the created directory using any of the available methods.
NOTERunning the command can take some time. Please wait until it is completed. -
Load the Docker image to the local storage using the received script:
$ sudo bash <script_name> unpack_adcmwhere
<script_name>is the full script name with the extension (for example, adcm_2.5.0.sh).The example of a successful command execution result:
Loaded image: hub.arenadata.io/adcm/adcm:2.5.0
-
Create and start a new container based on the downloaded image:
$ sudo docker run --name adcm -p 8000:8000 -v /opt/adcm:/adcm/data -e DB_HOST="<DATABASE_HOSTNAME_OR_IP_ADDRESS>" -e DB_PORT="<DATABASE_TCP_PORT>" -e DB_USER="<DATABASE_USERNAME>" -e DB_NAME="<DATABASE_NAME>" -e DB_PASS="<DATABASE_USER_PASSWORD>" -e DB_OPTIONS="<DATABASE_OPTIONS>" hub.arenadata.io/adcm/adcm:<version>
Step 3. Start ADCM
ADCM is just a container operated by Docker. So you are able to use simple Docker commands to start and stop ADCM:
-
To stop ADCM, use the following command.
$ sudo docker stop adcm -
To start ADCM, use the following command.
$ sudo docker start adcm -
In order to provide the automatic start of the Docker container after unexpected errors, use the following command.
$ sudo docker update --restart=on-failure adcm
|
NOTE
|
Step 4. Check installation
Check the Docker container status
To make sure that the Docker container adcm is successfully deployed, run the following command:
$ sudo docker container lsThe example of the command execution result is listed below. Make sure that the STATUS value is equal to Up.
CONTAINER ID        IMAGE                               COMMAND             CREATED             STATUS              PORTS                    NAMES
74b5628146e5        hub.arenadata.io/adcm/adcm:2.0   "/etc/startup.sh"   4 days ago          Up 21 minutes       0.0.0.0:8000->8000/tcp   adcm
Check the 8000 port availability
After ADCM is installed and started, its web interface should become available on the 8000 port of the deployed container.
For Ubuntu 22.04, first install the packages required for executing the netstat command:
$ sudo apt-get install net-toolsYou can check the 8000 port availability using these commands:
-
The
netstatcommand — to display information about port listening.$ sudo netstat -ntpl | grep 8000The example of the command execution result:
tcp6 0 0 :::8000 :::* LISTEN 1514/docker-proxy-c
-
The
curlcommand — to check the URL connection.$ curl http://localhost:8000The example of the command execution result:
<!doctype html>
<html lang="en">
<head>
  <meta charset="utf-8">
  <title>Arenadata Cluster Manager</title>
  <base href="/">
  <meta name="viewport" content="width=device-width, initial-scale=1">
  <link rel="icon" type="image/x-icon" href="assets/favicon.ico">
<link rel="stylesheet" href="styles.10db6328264e0907c52f.css"></head>
<body>
  <app-root></app-root>
<script src="runtime-es2015.7eb406ed18bf0258cd35.js" type="module"></script><script src="runtime-es5.7eb406ed18bf0258cd35.js" nomodule defer></script><script src="polyfills-es5.2e224d70daec4412d3c2.js" nomodule defer></script><script src="polyfills-es2015.37e0553ac06970d6a5b5.js" type="module"></script><script src="main-es2015.39851da0ebf9ed6fec45.js" type="module"></script><script src="main-es5.39851da0ebf9ed6fec45.js" nomodule defer></script></body>
</html>
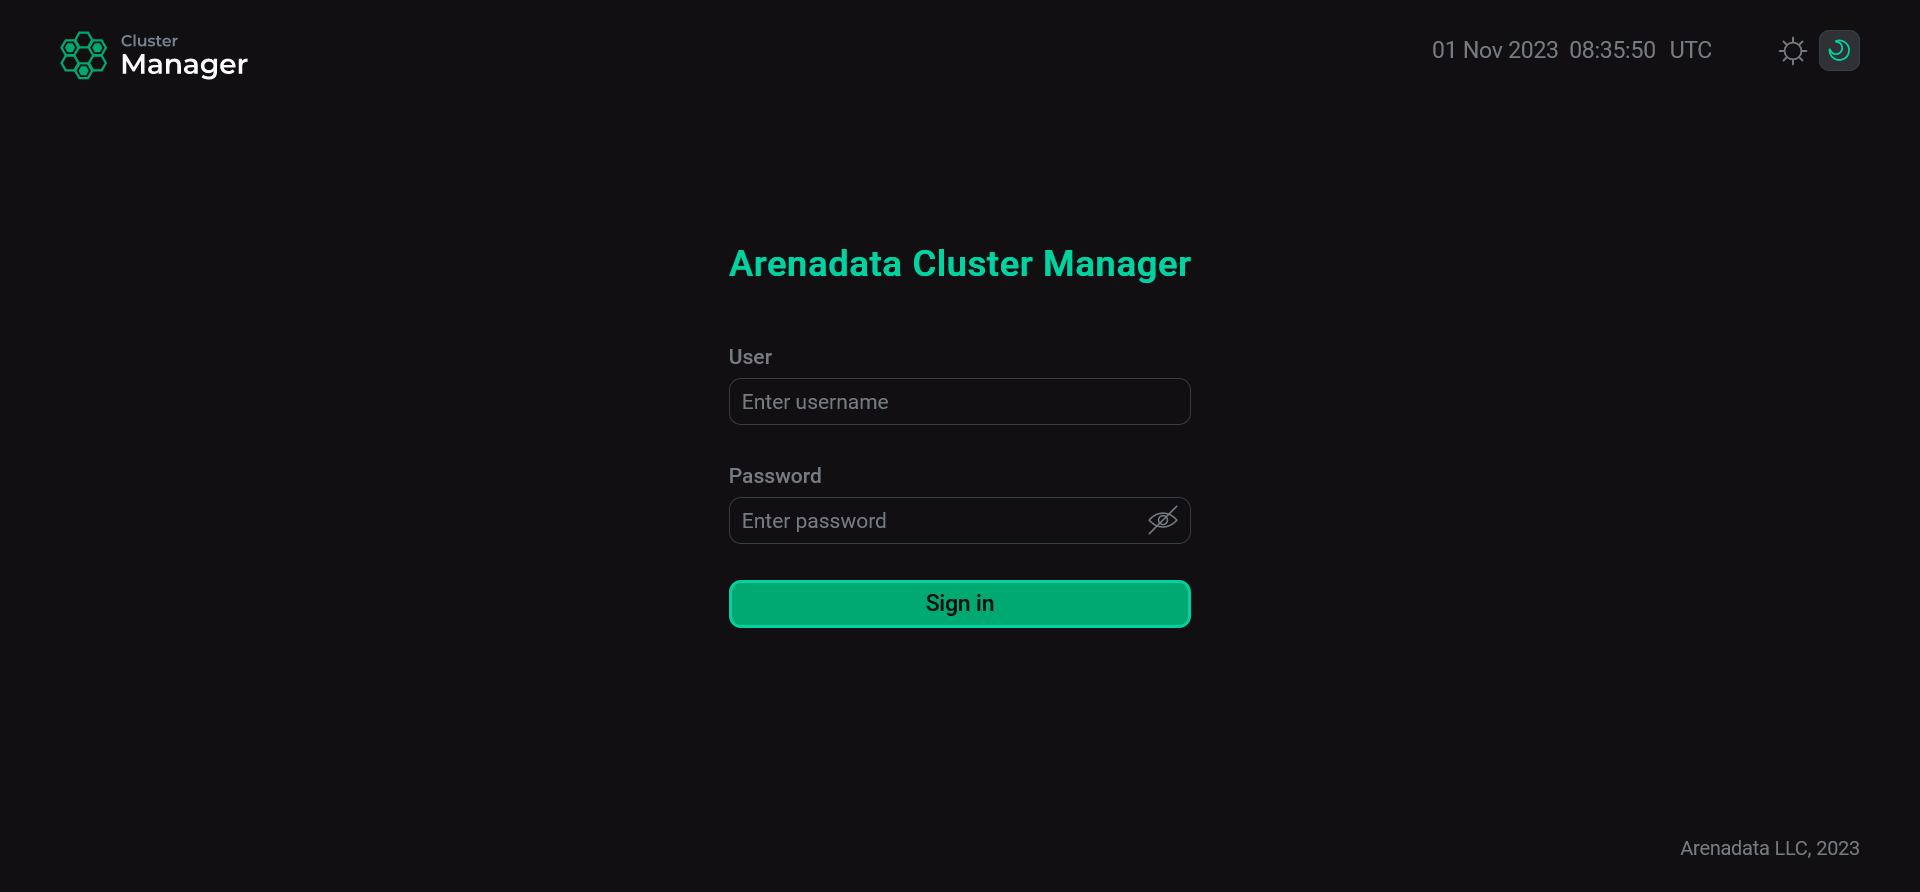
Check the ADCM web-interface
To log in to ADCM, use the user with administrator rights that is created by default:
-
User: admin
-
Password: admin
Later you can change the password if necessary. To do this:
-
Open the user profile in the left navigation menu.
-
Enter the current password in the Current password field.
-
Fill in the New password field.
-
Confirm a new password in the Confirm password field.
-
Click Save.
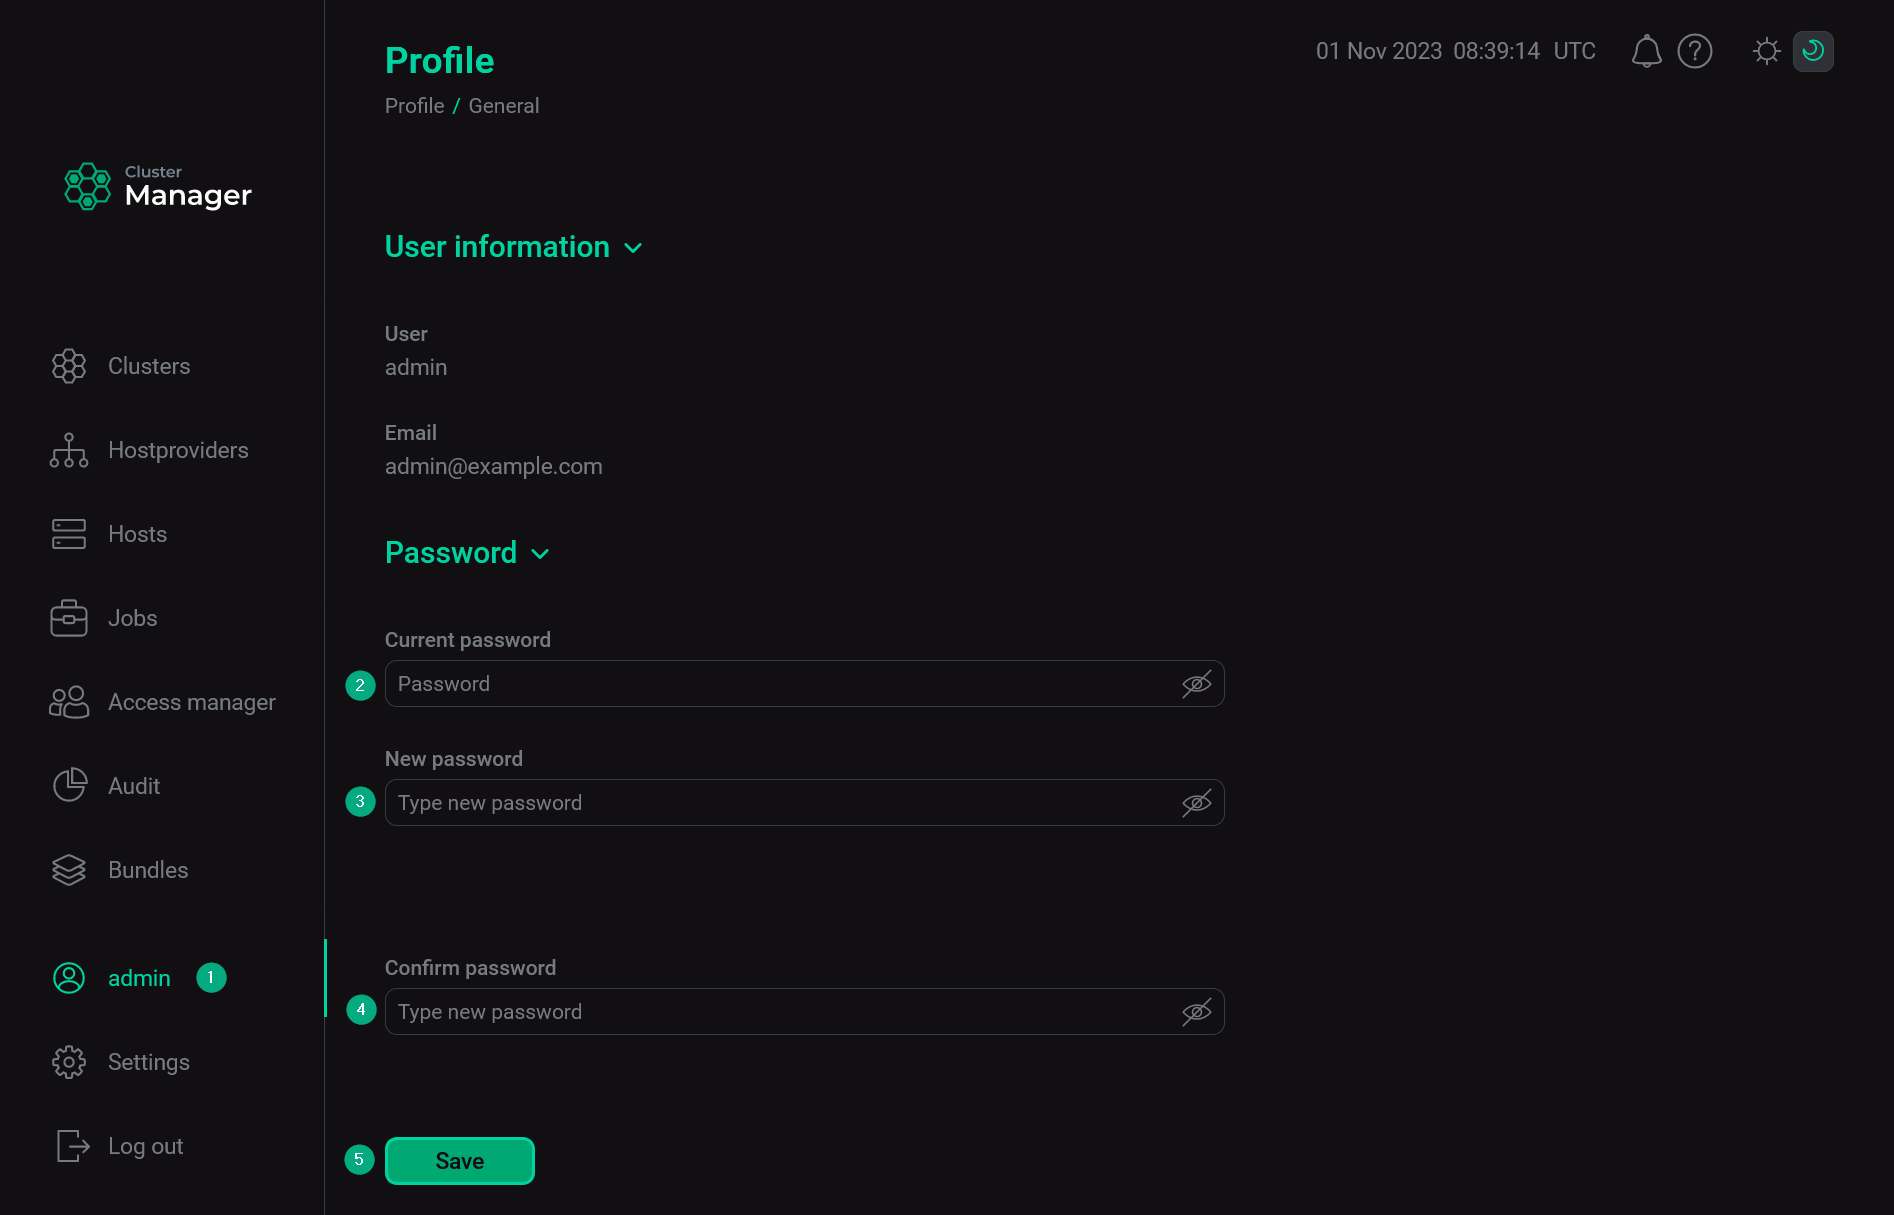 Change the admin password
Set the ADCM URL
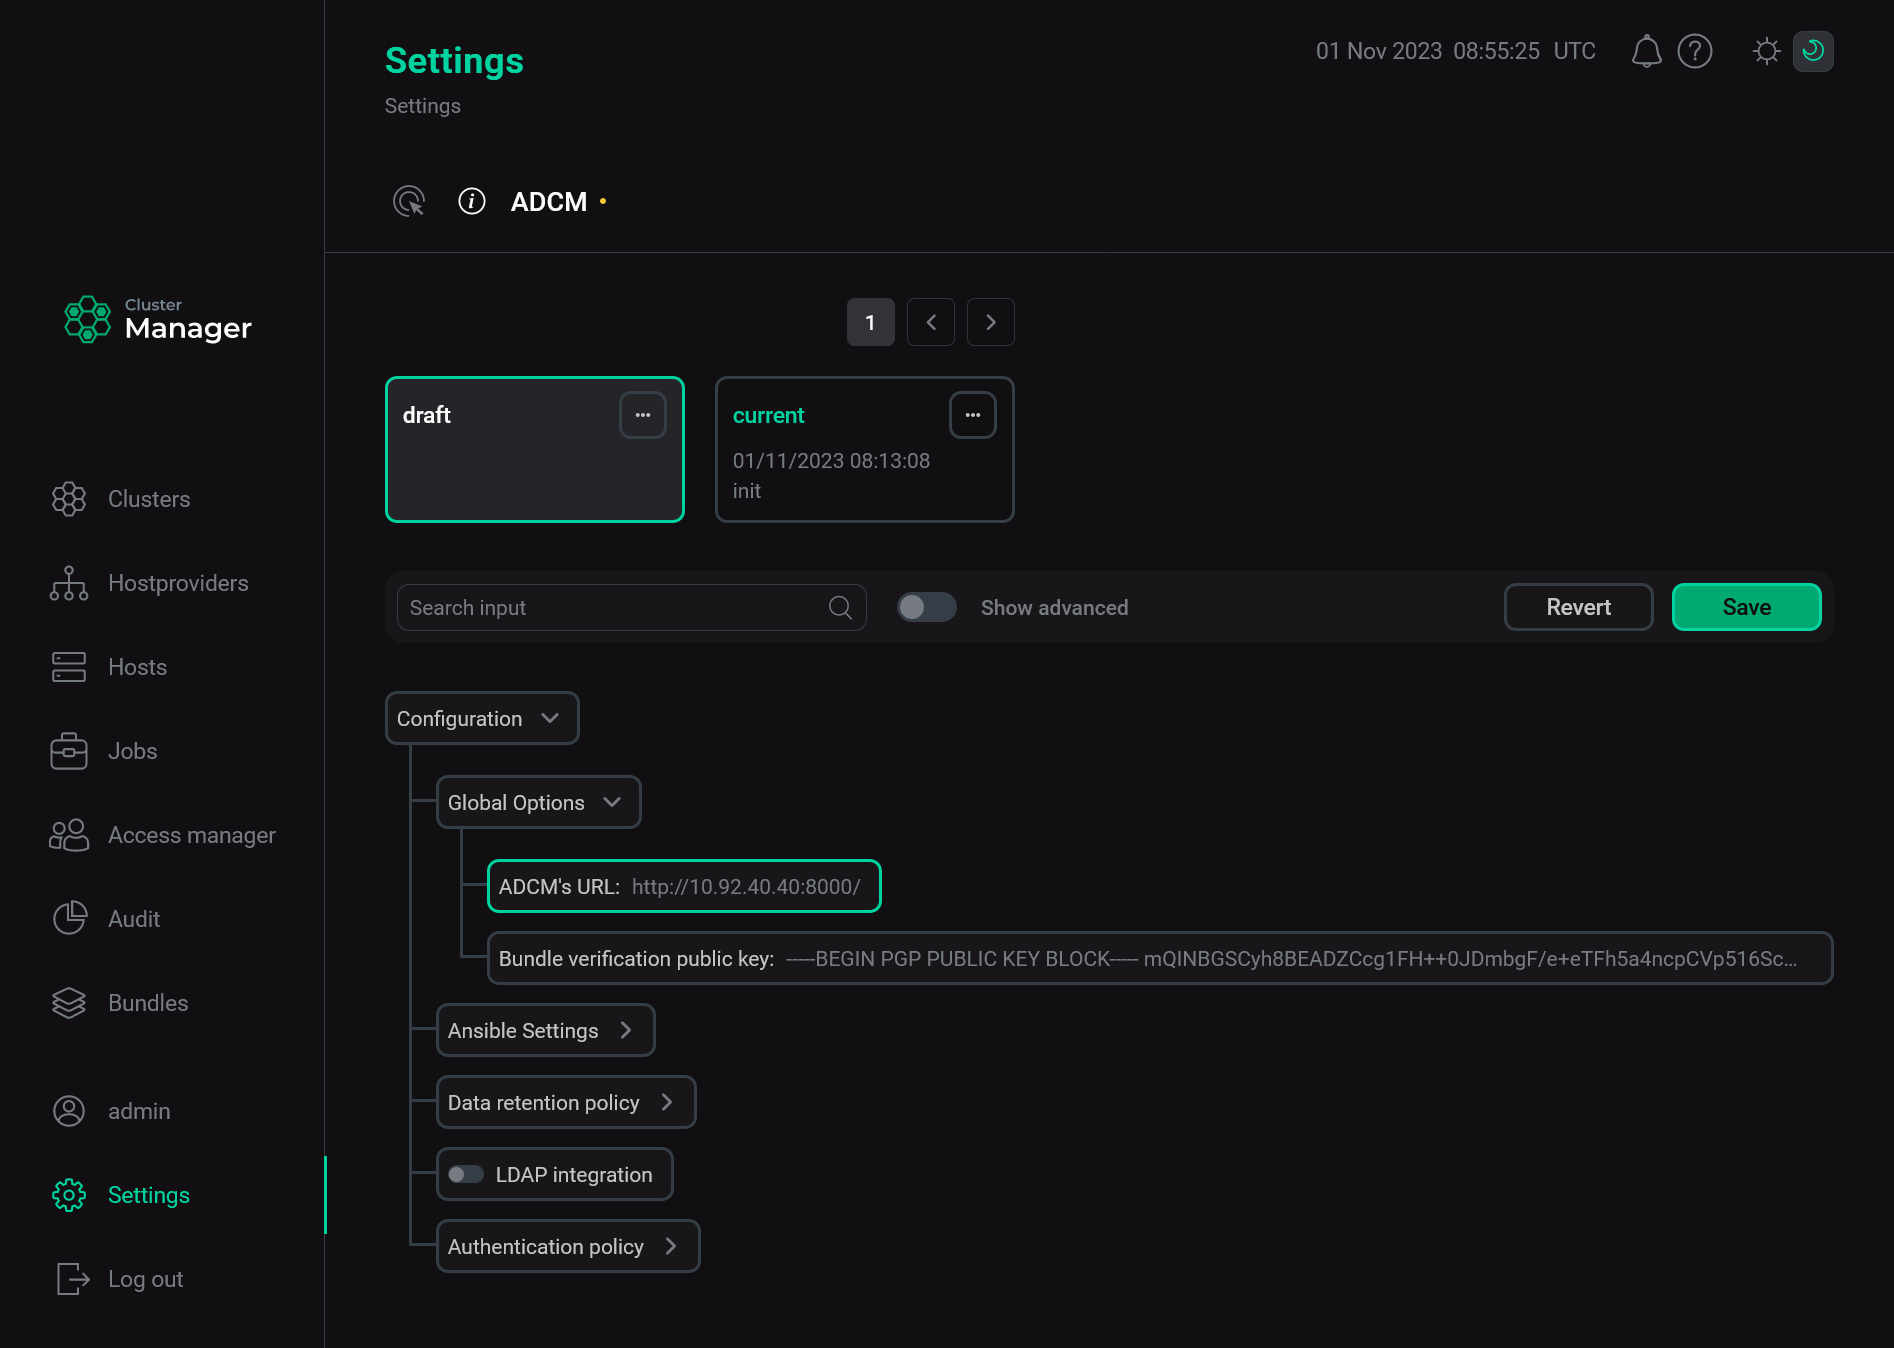
For successful communication between ADCM and product clusters deployed via ADCM, it is important to correctly define the external ADCM address. This address is used by cluster components for sending information about their state to ADCM. To specify the ADCM URL, use the environment variable DEFAULT_ADCM_URL when creating the ADCM container. If you did not specify that variable, you should manually install the URL in the ADCM web interface. To do this, follow the steps:
-
Select the Settings item in the left navigation menu.
-
Expand the Global Options node in the tree of configuration settings.
-
Click the ADCM’s URL field value.
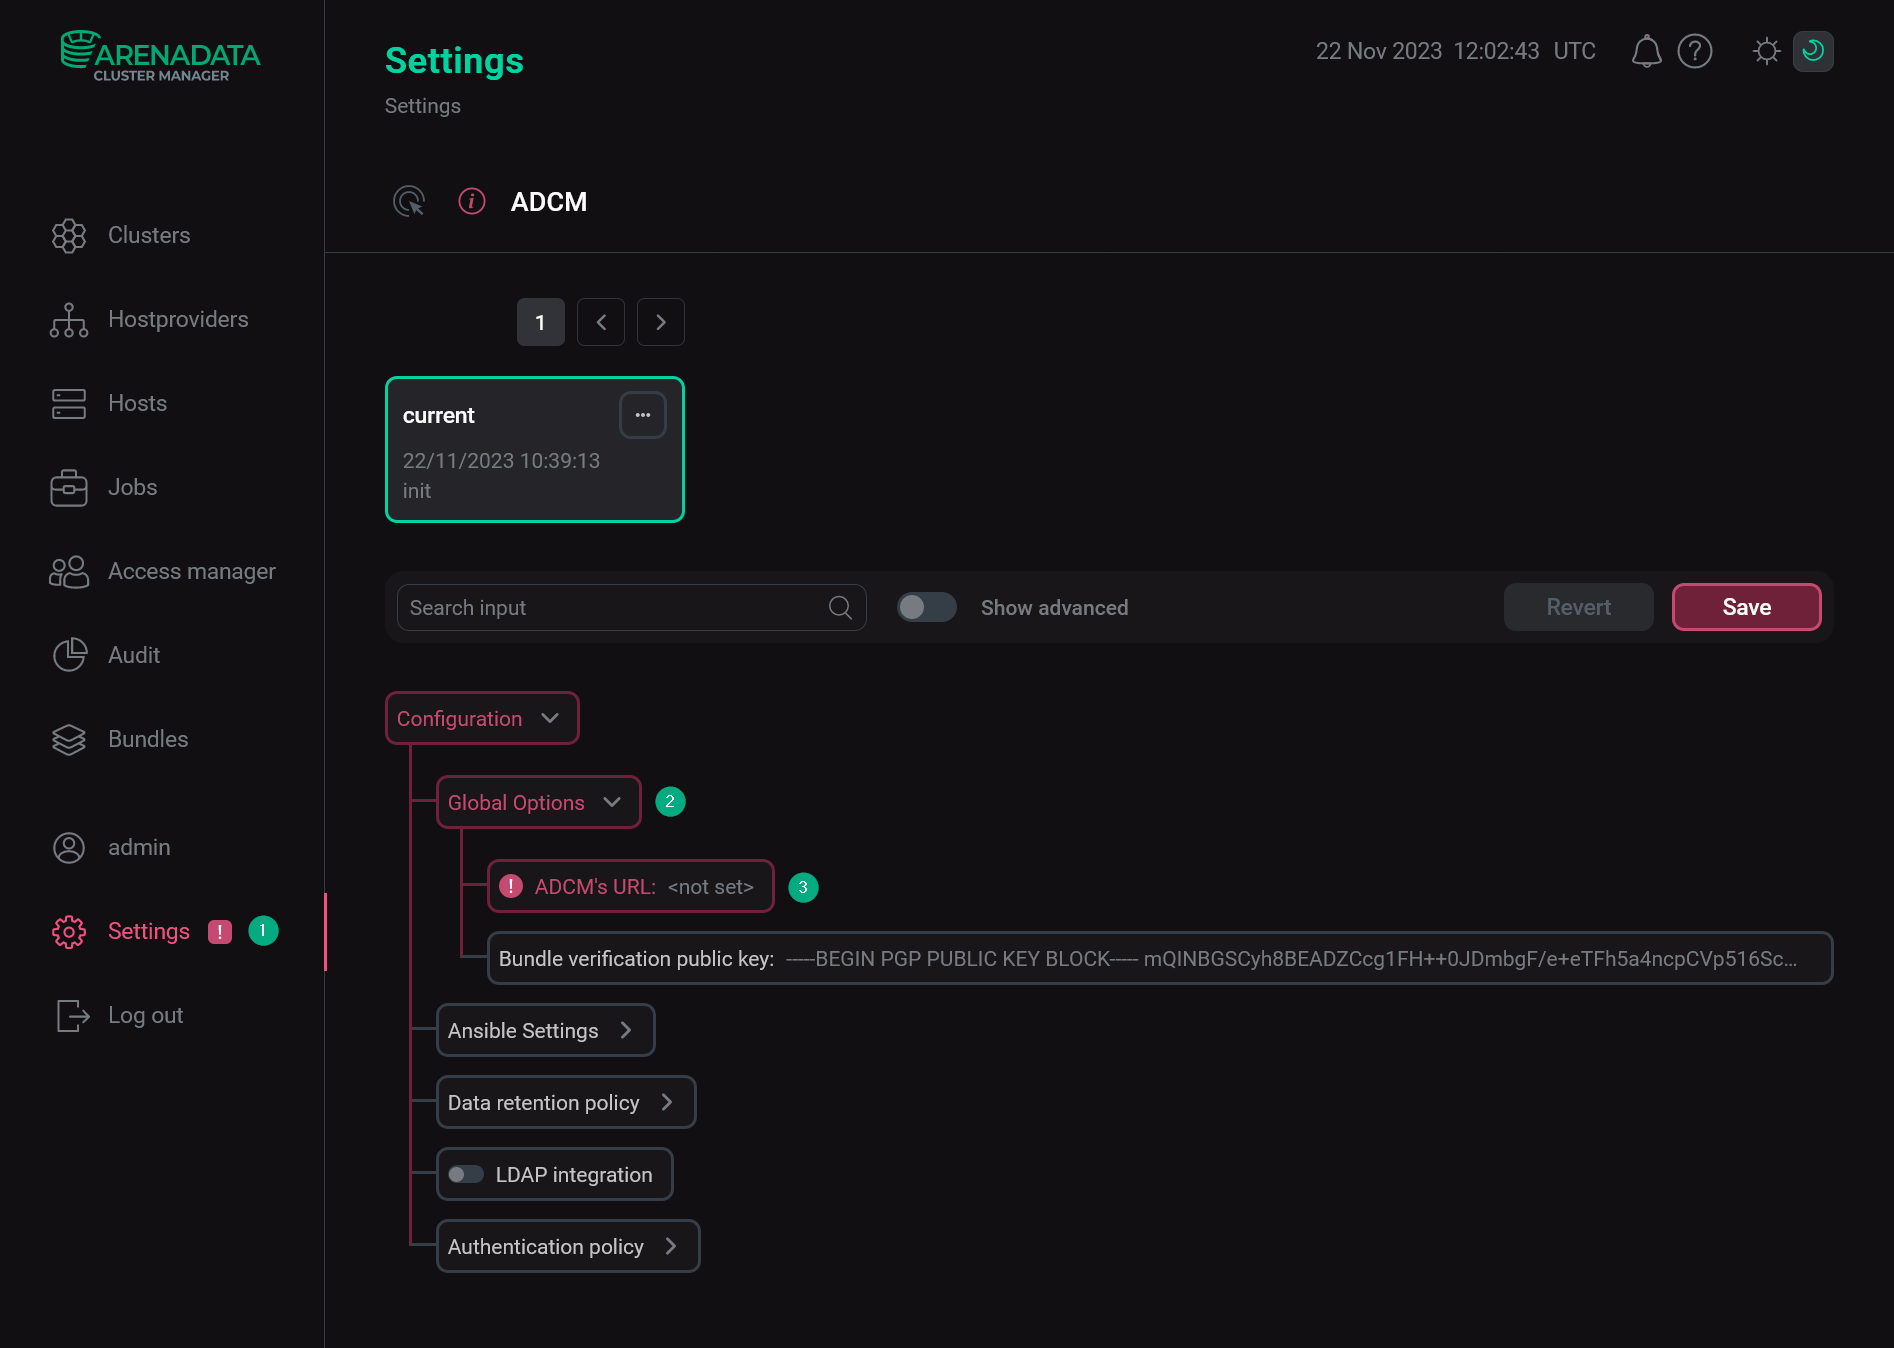 The Settings page
 -
In the window that opens, edit the ADCM’s URL field value and click Apply.
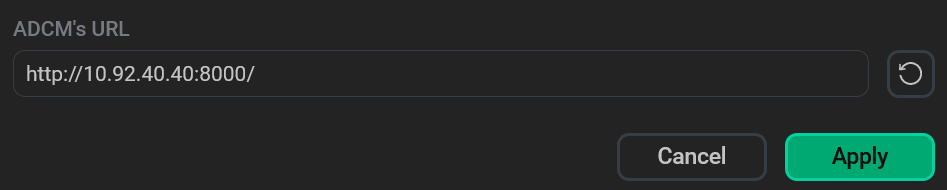 Change the ADCM URL
 -
Click Save to apply changes.
 Save the ADCM URL
Step 5. Update ADCM
|
CAUTION
General recommendations and limitations
Version restrictions during upgrade
|
The ADCM update process depends on the installation method of ADCM.
Update using ADCM Installer
If ADCM was deployed using ADCM Installer, the update is performed by modifying the configuration and applying the changes using the adi utility.
To update ADCM to the required version, follow these steps:
-
Open the adcm.yaml configuration file used during installation.
-
In the section corresponding to ADCM, specify the Docker image of ADCM with the required version tag in the
imageparameter, for example,hub.arenadata.io/adcm/adcm:2.12.0. -
Apply the changes:
$ adi applyAfter the
adi applycommand is executed, the ADCM container will be recreated using the image specified in theimageparameter of the adcm.yaml file.
Online update
If you need to upgrade the previously installed version of ADCM that was installed without using ADCM Installer, do the following:
-
Stop and remove the
adcmcontainer:$ sudo docker rm -f adcm -
Download the required Docker image from the Arenadata Docker Registry:
$ sudo docker pull hub.arenadata.io/adcm/adcm:<version>where
<version>is a desired ADCM image version in one of the following formats:-
<major>.<minor>.<patch>— if you need a specific ADCM patch. For example,2.0.0. -
<major>.<minor>— if you need the last patch within the selected ADCM version. For example,2.0.
IMPORTANT-
latestwas used for earlier versions of ADCM and is no longer supported starting from version2.0.0. -
Before ADCM 2.0.0, the following format was used for versioning:
YYYY.MM.DD.HH.
-
-
Create and start a new container based on the downloaded image:
$ sudo docker run --name adcm -p 8000:8000 -v /opt/adcm:/adcm/data -e DB_HOST="<DATABASE_HOSTNAME_OR_IP_ADDRESS>" -e DB_PORT="<DATABASE_TCP_PORT>" -e DB_USER="<DATABASE_USERNAME>" -e DB_NAME="<DATABASE_NAME>" -e DB_PASS="<DATABASE_USER_PASSWORD>" -e DB_OPTIONS="<DATABASE_OPTIONS>" hub.arenadata.io/adcm/adcm:<version>NOTEFor more information on the environment variables (DB_HOST,DB_PORT,DB_USER,DB_NAME,DB_PASS, andDB_OPTIONS), see the Installation article.
Offline update
You can also try offline ADCM update in situations without Internet access.
To upgrade ADCM that was installed without using ADCM Installer offline, follow these steps:
-
Stop and remove the
adcmcontainer:$ sudo docker rm -f adcmNOTEFor customers who use Enterprise editions of products, it is possible to contact the Arenadata support team to get an archive with the sh.xz extension that contains a special installation shell script. After stopping theadcmcontainer, the ADCM update process includes the installation according to the instruction. -
Download the required Docker image from the Arenadata Docker Registry on a host that has Internet access:
$ sudo docker pull hub.arenadata.io/adcm/adcm:<version>where
<version>is a desired ADCM image version in one of the following formats:-
<major>.<minor>.<patch>— if you need a specific ADCM patch. For example,2.0.0. -
<major>.<minor>— if you need the last patch within the selected ADCM version. For example,2.0.
IMPORTANT-
latestwas used for earlier versions of ADCM and is no longer supported starting from version2.0.0. -
Before ADCM 2.0.0, the following format was used for versioning:
YYYY.MM.DD.HH.
-
-
Save the Docker image to a .tar file:
$ sudo docker save -o <file_name> hub.arenadata.io/adcm/adcm:<version>where
<file_name>is the full name of the created file with the extension (for example, adcm_2.5.0_arenadata.tar).NOTERunning the command can take some time. Please wait until it is completed. -
Copy the saved file from the current host to a host without Internet connection using any available methods.
IMPORTANTMake sure you have configured access to hosts and necessary file permissions. -
Load the Docker image from the .tar file:
$ sudo docker load -i <file_path>where
<file_path>is the absolute path to the .tar file with the Docker image.The example of a successful command execution result:
Loaded image: hub.arenadata.io/adcm/adcm:2.5.0
-
Create and start a new container based on the downloaded image:
$ sudo docker run --name adcm -p 8000:8000 -v /opt/adcm:/adcm/data -e DB_HOST="<DATABASE_HOSTNAME_OR_IP_ADDRESS>" -e DB_PORT="<DATABASE_TCP_PORT>" -e DB_USER="<DATABASE_USERNAME>" -e DB_NAME="<DATABASE_NAME>" -e DB_PASS="<DATABASE_USER_PASSWORD>" -e DB_OPTIONS="<DATABASE_OPTIONS>" hub.arenadata.io/adcm/adcm:<version>NOTEFor more information on the environment variables (DB_HOST,DB_PORT,DB_USER,DB_NAME,DB_PASS, andDB_OPTIONS), see the Installation article.