

Cluster actions
This article describes the actions available for the ADB cluster in the ADCM UI.
Overview
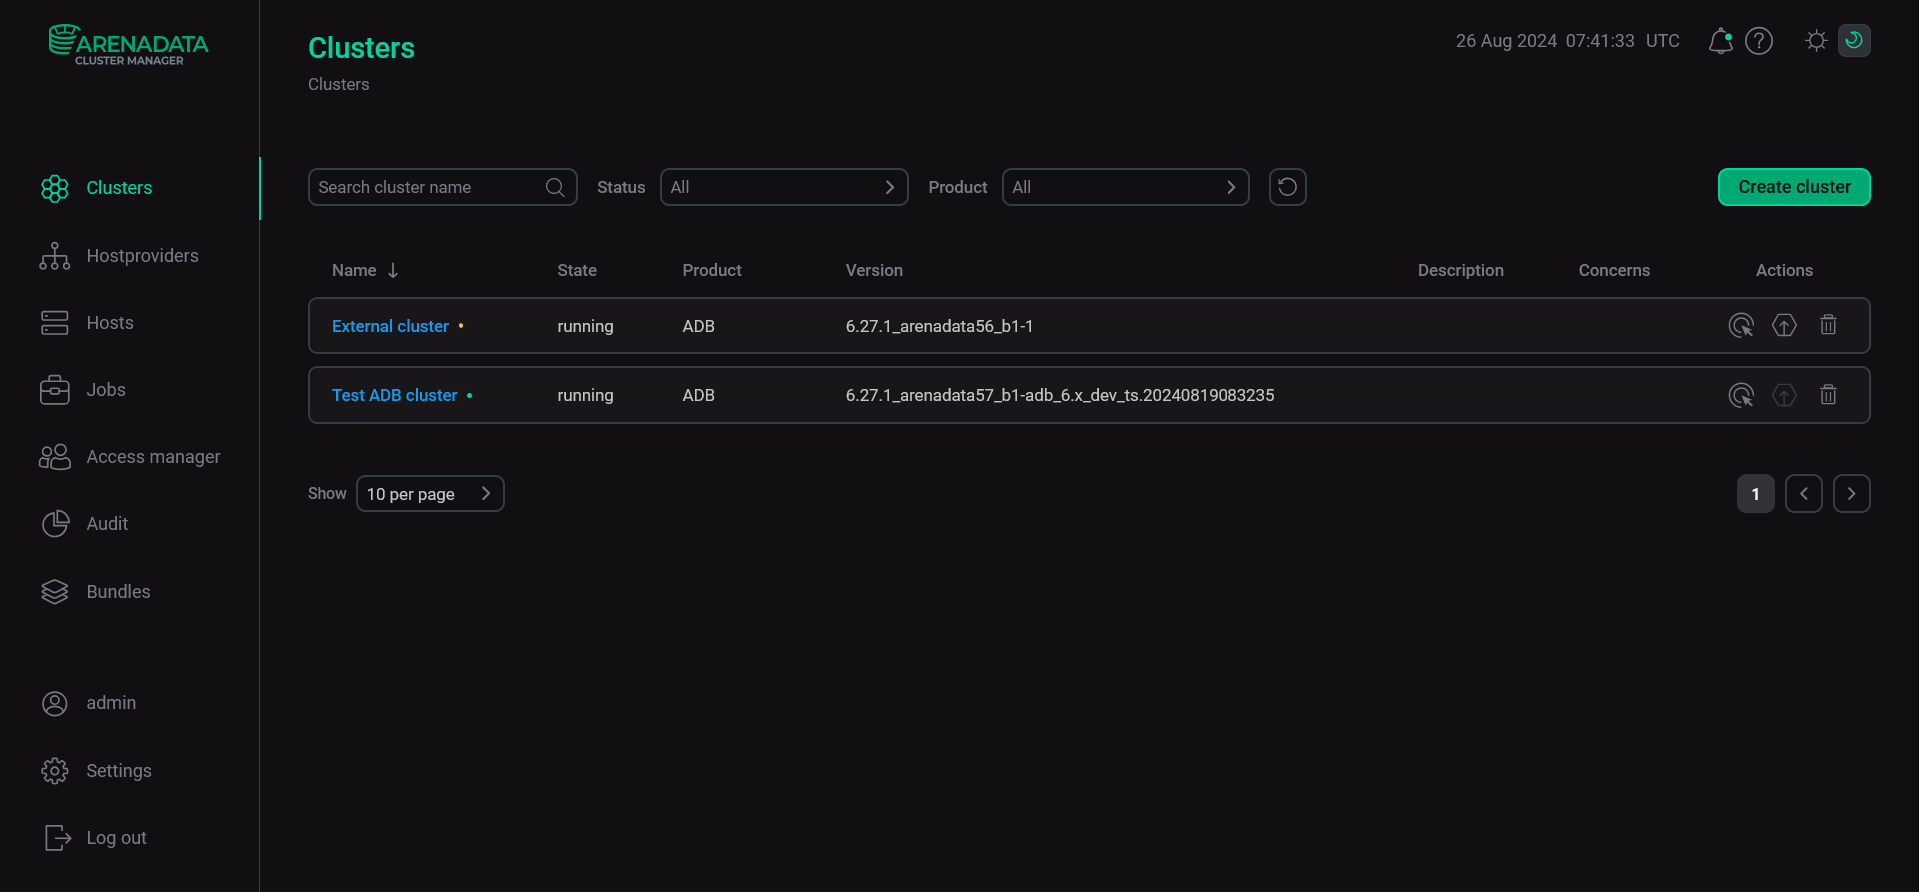
You can find cluster actions on the Clusters page.
Refer to ADCM documentation for an overview of the Clusters page and common actions.
The Actions column shows icons for managing the cluster:
-

 — opens the drop-down list that offers actions to manage the cluster.
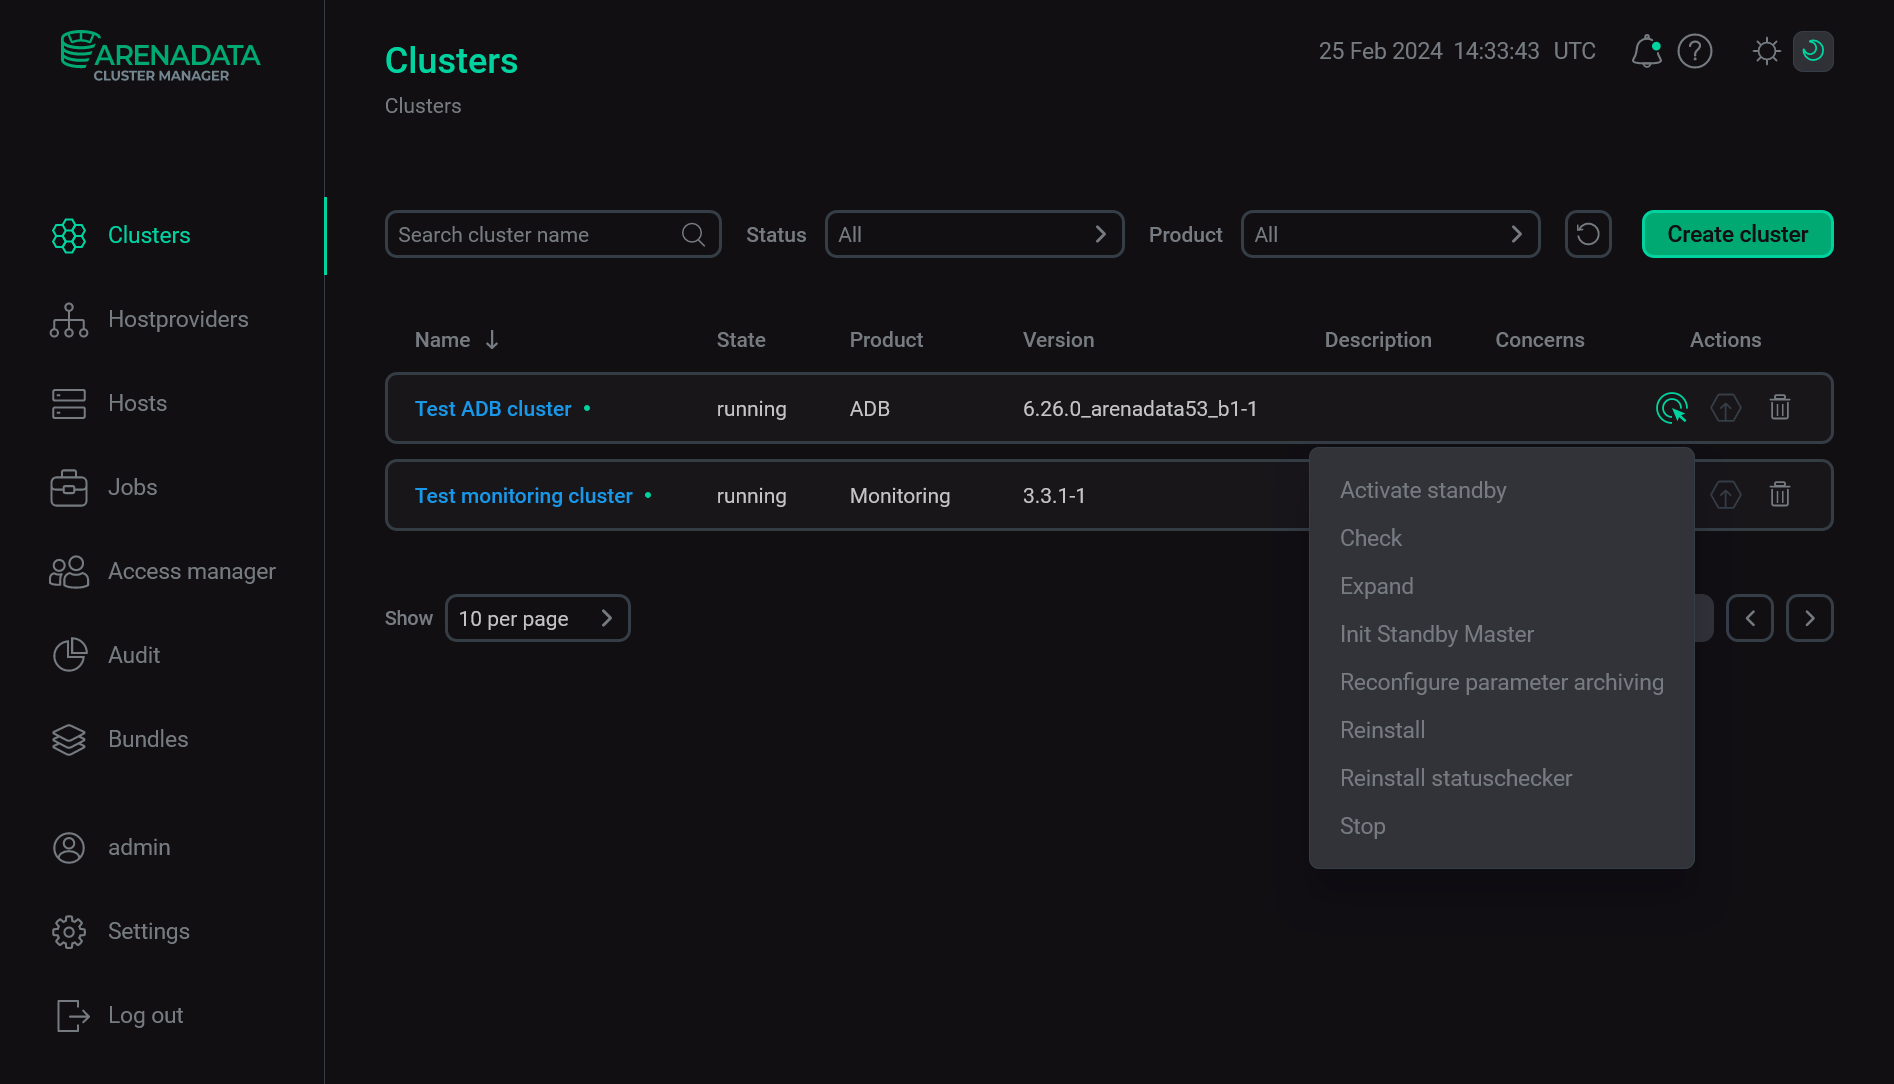 Open a list of available cluster actions
 -
 — indicates whether a new version of a bundle is available and allows you to upgrade the cluster.
 -
 — deletes information about the cluster from ADCM (it does not remove ADB or make any changes to hosts that belong to the cluster).
A set of cluster actions (available after clicking the icon ![]()
![]() ) depends on the current ADB cluster status.
) depends on the current ADB cluster status.
| Status | Condition | Available actions |
|---|---|---|
created |
||
running |
The ADB cluster was successfully installed via ADCM and started |
|
stopped |
The ADB cluster was successfully installed via ADCM and stopped |
|
activating_standby |
As a result of the Activate standby action, the standby master was activated, but some errors occurred during the subsequent configuration process |
|
ready to upgrade |
The ADB cluster is prepared for upgrade — by running the action available after clicking the icon |
For information on the Precheck and Install actions, see Install a cluster. Other actions available for an already installed cluster are listed below.
Activate standby
The Activate standby action activates the standby master in case of failures on the current master.
|
IMPORTANT
|
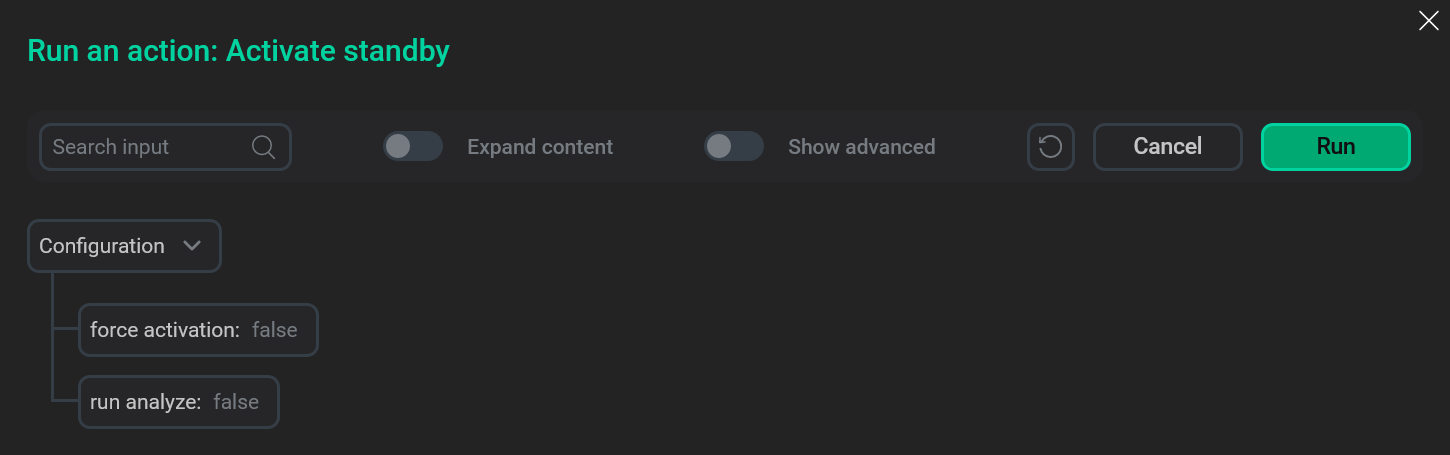
After you select the Activate standby action, a dialog box opens in which you can fill in the following options:
-
force activation — a flag that indicates whether to force switching to the standby master when the host of the active master is available, but the master process inside the operating system is stopped;
-
run analyze — a flag that specifies whether to run
ANALYZEafter switching to standby in all databases excepttemplate0,template1, andpostgres.
To edit any parameter, click its current value. In the window that opens, enter a new value and click Apply.

To run the Activate standby action, click Run in the action form. Then, confirm the action in the standard confirmation dialog.
While the action is running, the ADB cluster has the activating_standby status. If the action succeeds, the cluster status changes to running. If the standby master is activated, but some errors occur during the subsequent configuration process — the cluster remains in the activating_standby status, and the Activate standby postprocess becomes available in the list of cluster actions. In this case, you need to determine the error cause on the Jobs page, make fixes, and run the Activate standby postprocess action.
Activate standby postprocess
The Activate standby postprocess action becomes available if the standby master is activated during the Activate standby action, but some errors occur during the subsequent configuration process. After fixing errors, run Activate standby postprocess to finish processing and switch the ADB status to running.
After you select the Activate standby postprocess action, a dialog box opens in which you can fill in the run analyze option that is described above for the Activate standby action.
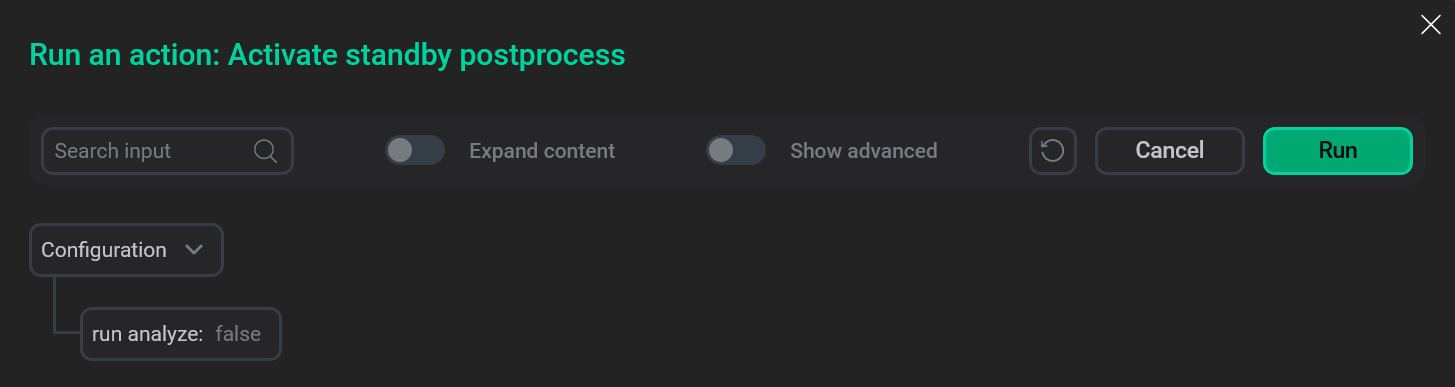
To run the Activate standby postprocess action, click Run in the action form. Then, confirm the action in the standard confirmation dialog.
Init Standby Master
The Init Standby Master action allows you to add or remove the standby master. After you select the action, follow the steps:
-
On the Configuration tab of the window that opens, fill in the options:
-
Reboot new servers after installation — a flag that indicates whether to reboot ADB hosts automatically after the Init Standby Master action is completed. If the flag is reset, you need to restart manually.
-
Reboot timeout, sec — a timeout that is used to wait for the reboot of ADB hosts (in seconds).
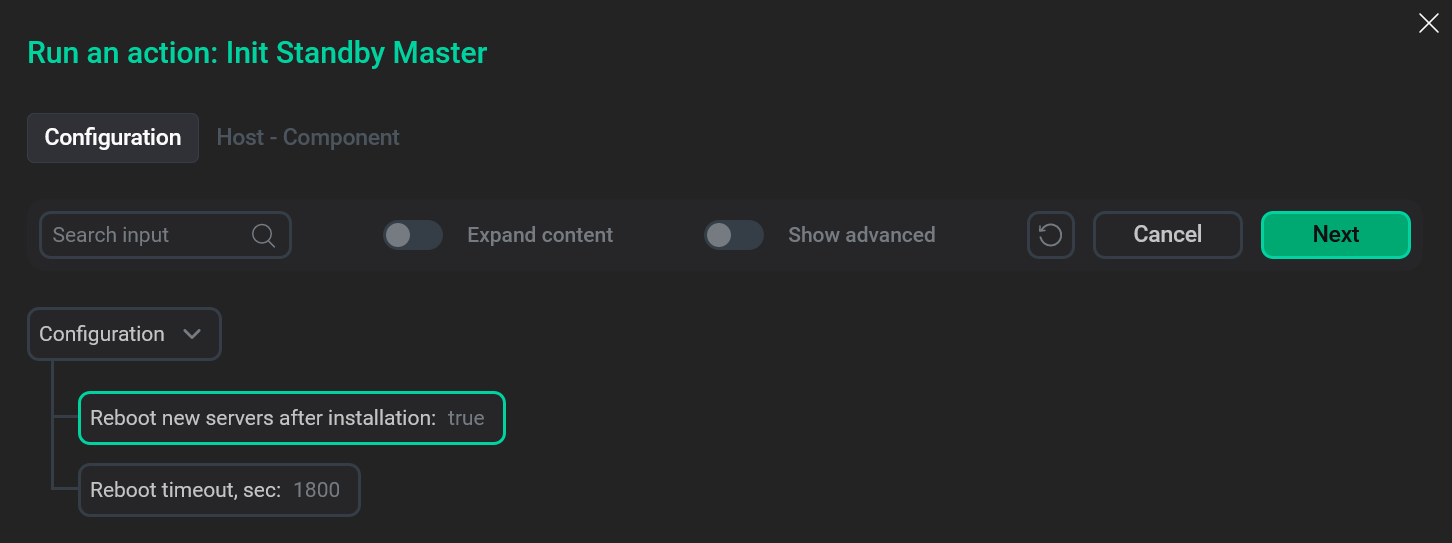 The "Init Standby Master" action form
To edit any parameter, click its current value. In the window that opens, enter a new value and click Apply.
 Enter a new parameter value
-
-
Click Next.
-
On the Host - Component tab that opens, perform one of the following actions:
-
When adding standby — place the ADB Standby component on a separate host. To do this, click Add hosts in the component section and select a host in the dialog that opens.
NOTE-
You can place the standby master on the host that was used for the previous master (before applying the Activate standby action). But you should first rename or delete the data catalog of the outdated master (/data1/master by default).
-
If you use the Monitoring service, map the new standby host to the Greengage Exporter and Process Exporter components using the Host - Component tab.
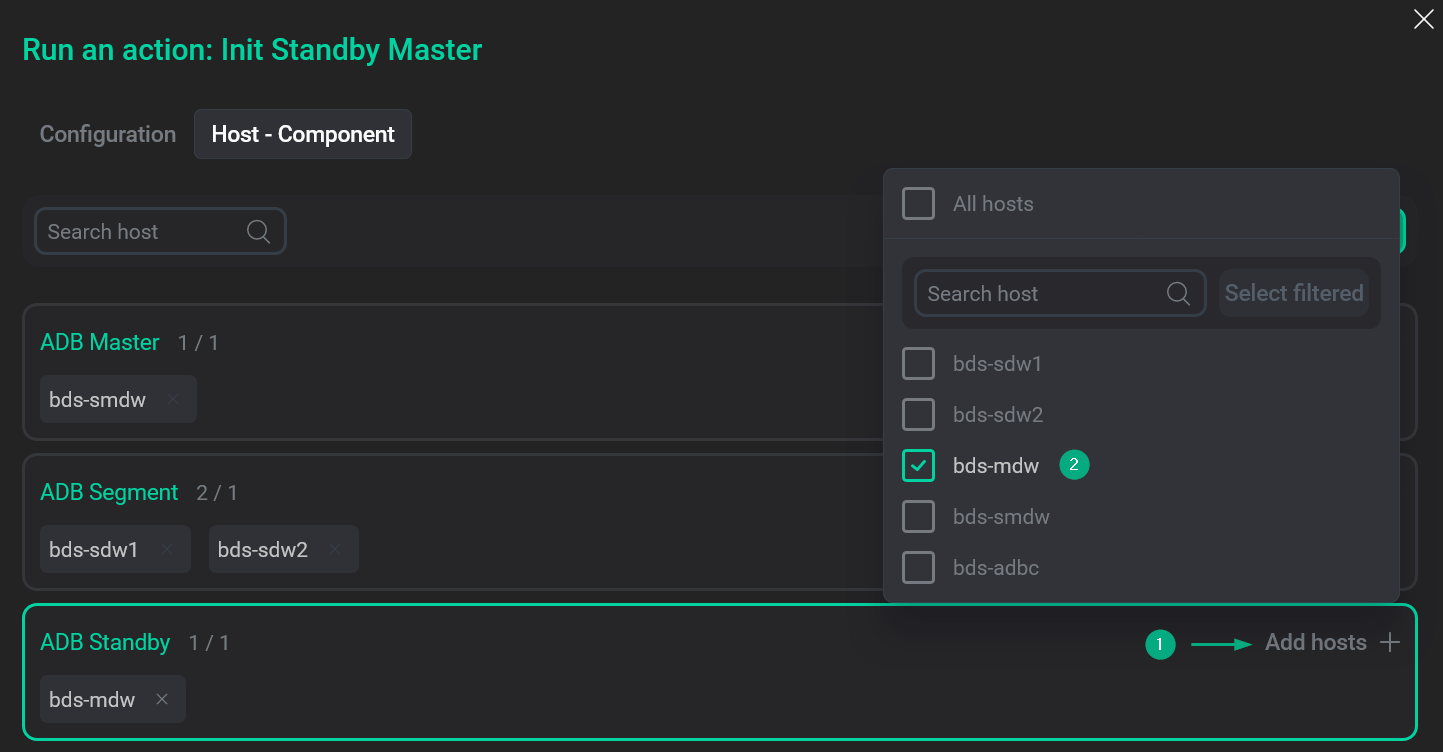 Add the Standby Master component
 -
-
When removing standby — click Remove for the host that is currently assigned to the ADB Standby component.
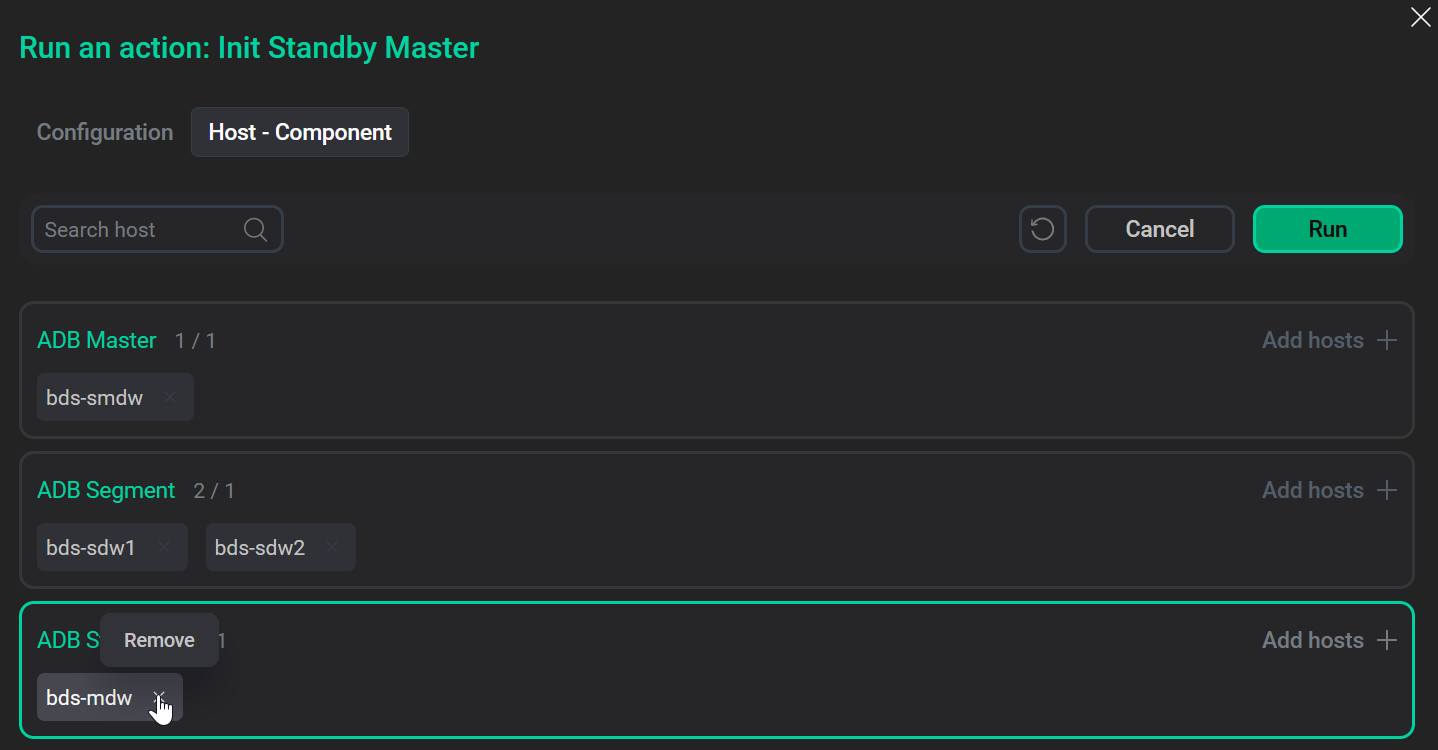 Remove the Standby Master component
-
-
Click Run.
-
Confirm the action in the standard confirmation dialog by clicking Run.
Move Host Segment
The Move Host Segment action is available starting with ADB 6.27.1.59. This action allows you to move segments from one ADB cluster host to another. After you select the action, follow the steps:
-
On the Configuration tab of the window that opens, fill in the options:
-
Source host — a source host from which you need to move data segments. You can select one of the ADB cluster hosts where the ADB Segment component is installed.
-
Destination host — a target host for data segments that should be moved from the source host. You can select one of the ADB cluster hosts that is not mapped to the ADB Segment component.
-
Reboot new segment host after installation — a flag that indicates whether to reboot a new ADB segment host after the Move Host Segment action is completed. If the flag is reset, you need to restart the host manually to apply configuration settings.
-
Reboot timeout, sec — a timeout that is used to wait for the reboot of a new segment host (in seconds).
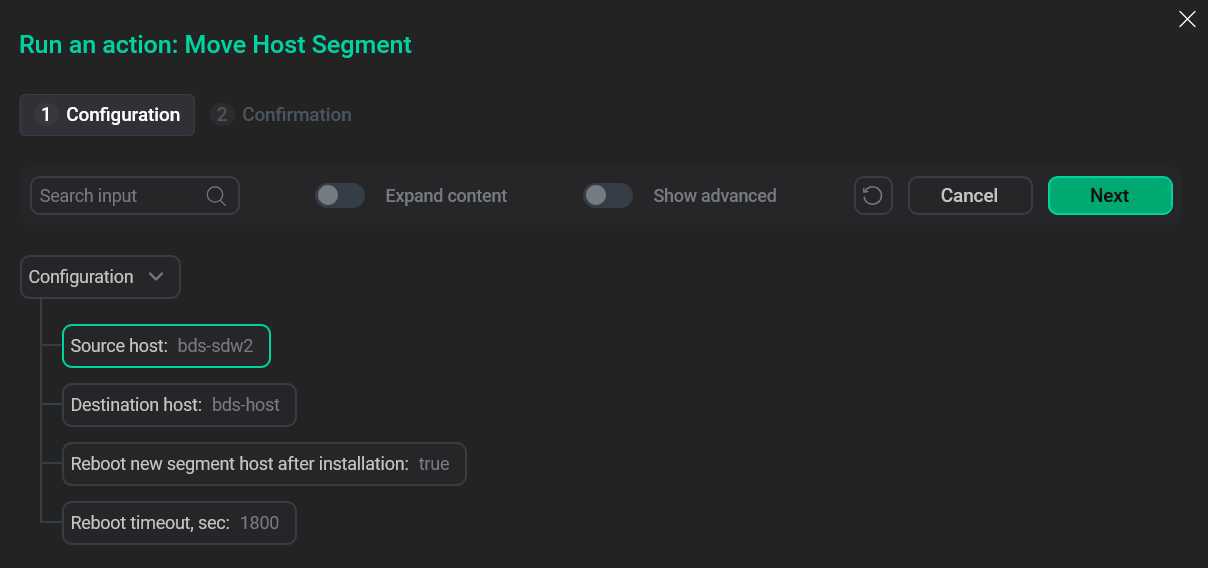 The "Move Host Segment" action form
To edit any parameter, click its current value. In the window that opens, enter a new value and click Apply.
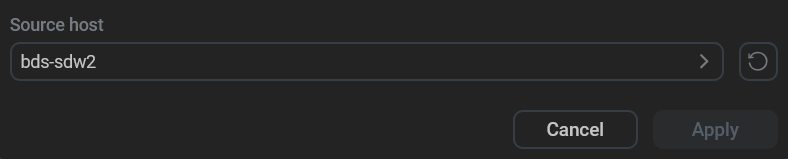 Select a new parameter value
-
-
Click Next.
-
Confirm the action in the standard confirmation dialog by clicking Run.
|
NOTE
In addition to the movement of segments, the Move Host Segment cluster action performs the following for a new segment host:
|
Expand
The Expand action allows you to add new segment hosts to the ADB cluster.
Starting with ADB 6.30.0, the Expand action is performed via ADCM Wizard. Wizard is a tool that makes it easier to run complex actions: the state of the configuration is saved at every step (described below), so you can exit Wizard at any moment and resume it later. You can also validate the configuration before running the action. For a description of the general principles and UI elements of Wizard, refer to the Wizard article of the ADCM documentation.
Prepare
Before starting the cluster expansion:
-
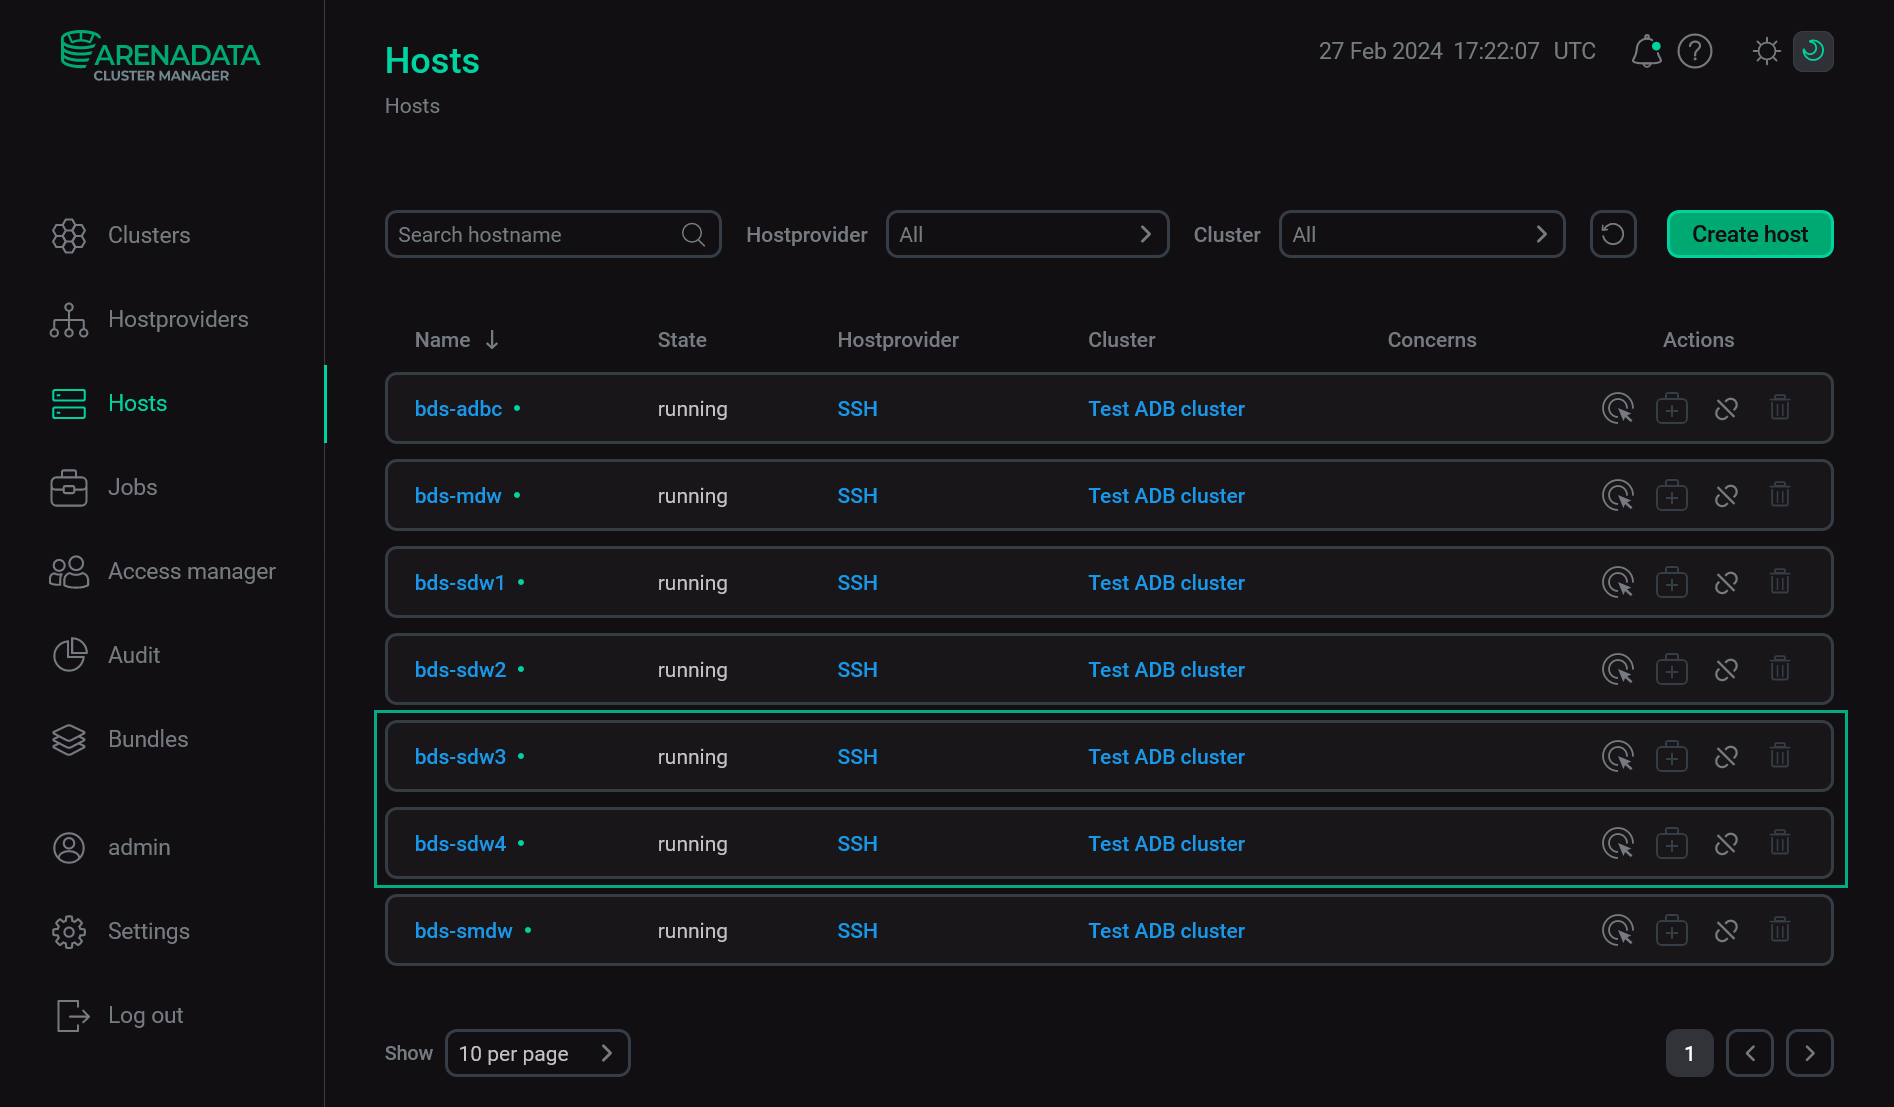
Create and configure new hosts on the Hosts page in ADCM. Use one of the available hostproviders.
-
If the SSH hostprovider is used, for each created host apply the Check connection and Install statuschecker actions. Ensure that all actions are completed successfully and all hosts are available.
-
Add new hosts to the ADB cluster.
|
CAUTION
If the ADB cluster uses mirroring, the number of new hosts should be sufficient to apply one of the mirroring policies: spread or group. If the number of new hosts is greater than the number of segments per host in the current cluster configuration, the spread mirroring will be applied during the cluster expansion, otherwise — group. The group mirroring policy requires at least 2 new hosts, otherwise the action fails with the following error: |
Step 1.1. Configuration
-
On the Configuration tab of the window that opens, fill in the following options:
-
Reboot new servers after installation — a flag that indicates whether to reboot new ADB hosts automatically after the Expand action is completed. A restart is required to apply some of the settings that are changed during the installation process. If the flag is reset, you need to restart manually.
-
Reboot timeout, sec — a timeout that is used to wait for the reboot of ADB hosts (in seconds).
-
Additional primary segment count — a number of primary segments that should be added to all segment hosts (including existing hosts). For example, if existing hosts have two primary segments, using the parameter value
2will initialize two additional primary segments on existing hosts and four primary segments on new hosts. In addition, mirror segments will be added for these new primary segments if mirroring is enabled. The default parameter value is0, which means that new hosts are configured with the same number of primary segments as existing hosts have. -
Attach new data directory (optional) — a directory that will be used to store new segments. All directories used as data catalogs should contain an equal number of segments to avoid data skew. Expansion will fail if segments are unevenly distributed across data catalogs. If the parameter is empty, additional segments are evenly distributed across existing data catalogs.
-
Storage device for data directory (optional) — a name of the block storage device that should be mounted to the directory specified via the Attach new data directory (optional) parameter. For example,
sdc(without the/devprefix). -
Specify path for every non-default tablespace — paths to the directories that are used to store tablespace data. Paths should be specified if the Attach new data directory (optional) parameter is filled in.
-
Check array — a flag that indicates whether to check that all hosts have the same number of primary segments and mirror segments, and that the segment host addresses (the
addressvalue from the gp_segment_configuration table) have thehostname-<n>form (hostname-1,hostname-2,hostname-3, and so on) or have no suffix. -
Directory for gpexpand tar file (optional) — a fully qualified path to the directory on segment hosts where the
gpexpandutility copies a temporary TAR file. This archive contains database files that are used to create segment instances. The default directory is the user home directory. -
Pause before rollback — the duration of the pause (in minutes) before starting the expansion rollback (
gpexpand -r) if the Create expansion schema task fails. The pause may be required if you need to gather logs before the rollback is performed. The default value is0.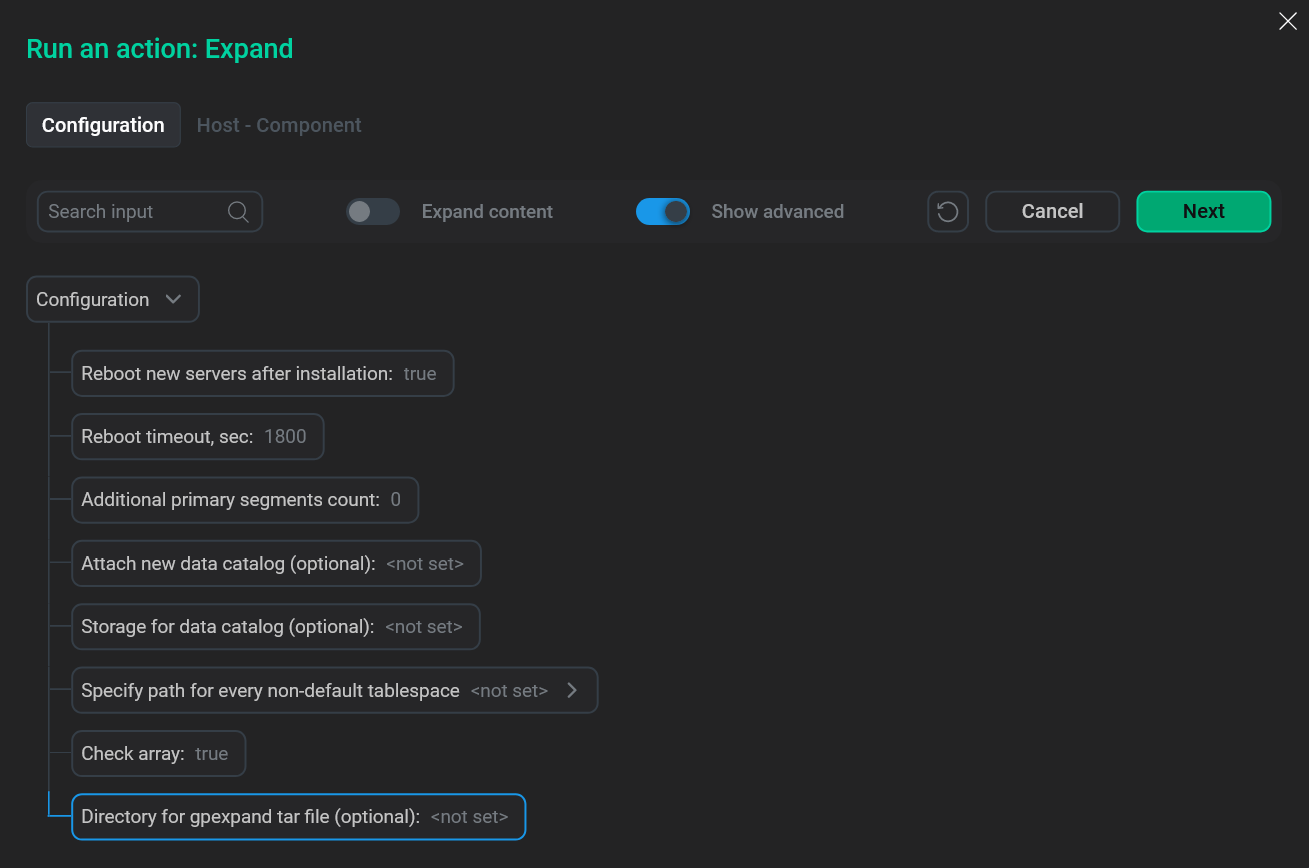 The Expand action form
To edit the Specify path for every non-default tablespace parameter value (like any other parameter that allows adding several values), expand a node with the parameter name and click Add property. In the dialog that opens, enter a tablespace name in the Enter field name field and a directory path in the Enter field value field. Click Apply to save changes.
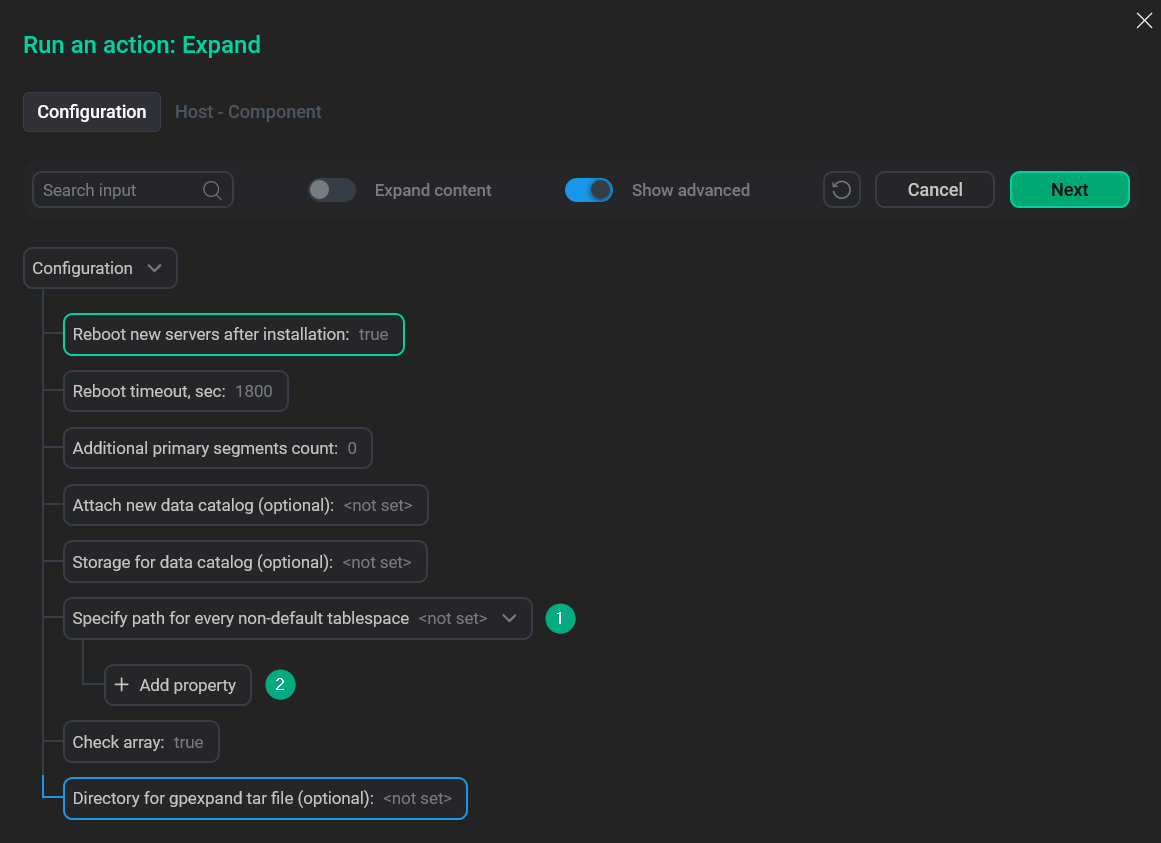 Go to fill in a path for the tablespace
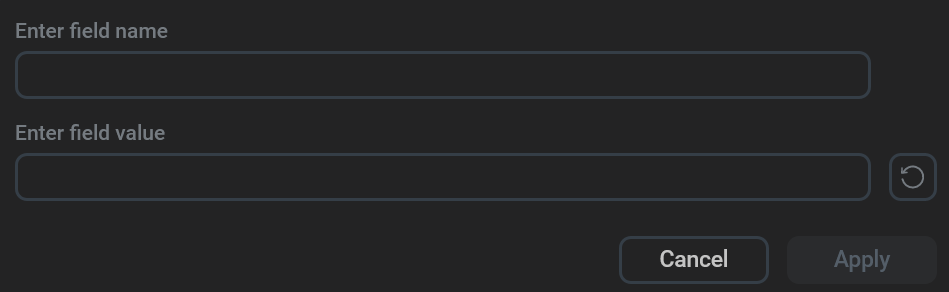 Fill in a path for the tablespace
-
-
Click Next step.
Step 1.2. Host component mapping
-
In the host-component mapping form that opens, assign new segment hosts to the ADB Segment component. To do this, click Add hosts in the component section and select hosts in the dialog that opens.
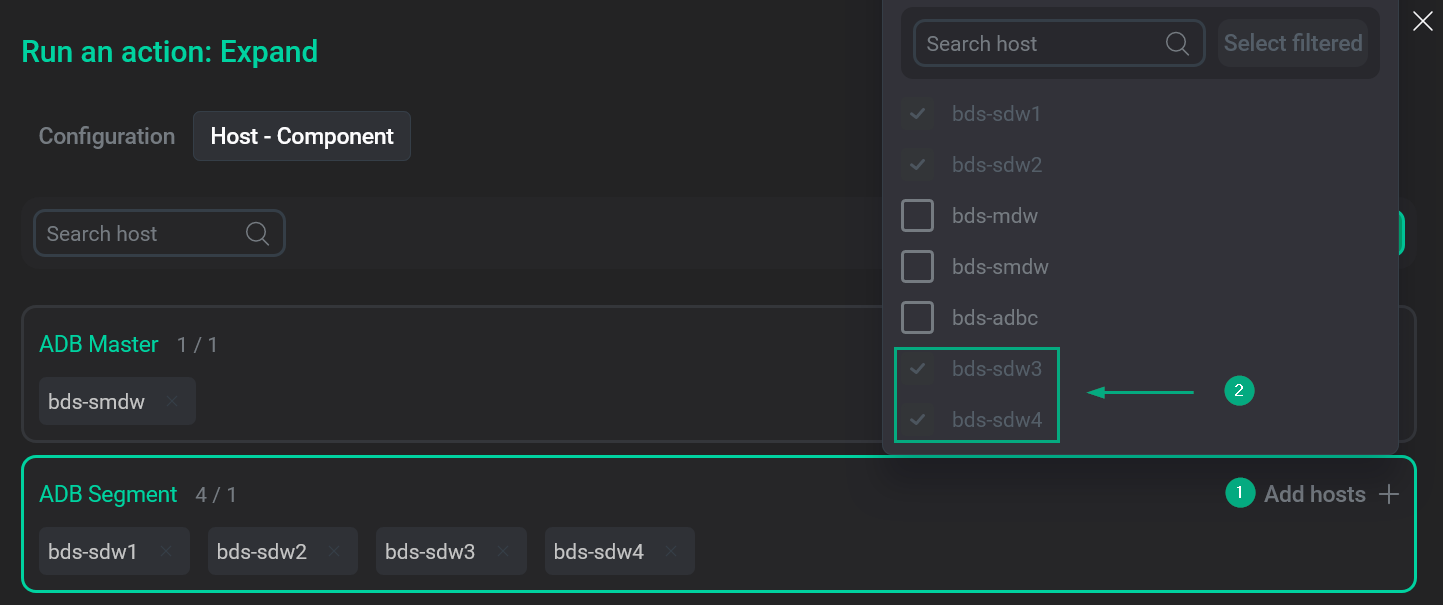 Map hosts to the ADB Segment componentIMPORTANT
If you use the following optional services in the ADB cluster, you should also map their components:
-
PXF for the PXF service;
-
NTP Slave for the Chrony service;
-
Node Exporter and Process Exporter for the Monitoring service.
-
-
Click Next step.
Step 1.3. Validation
-
In the validation step, click Validate. This will run a set of pre-expand checks. If the checks are successful, the step will prepare the added hosts for expansion and install the packages required for proper ADB operation. If the ADB cluster is integrated with an ADB ES cluster, the step will also install the corresponding ADBC agents and ADBM agents on the new hosts.
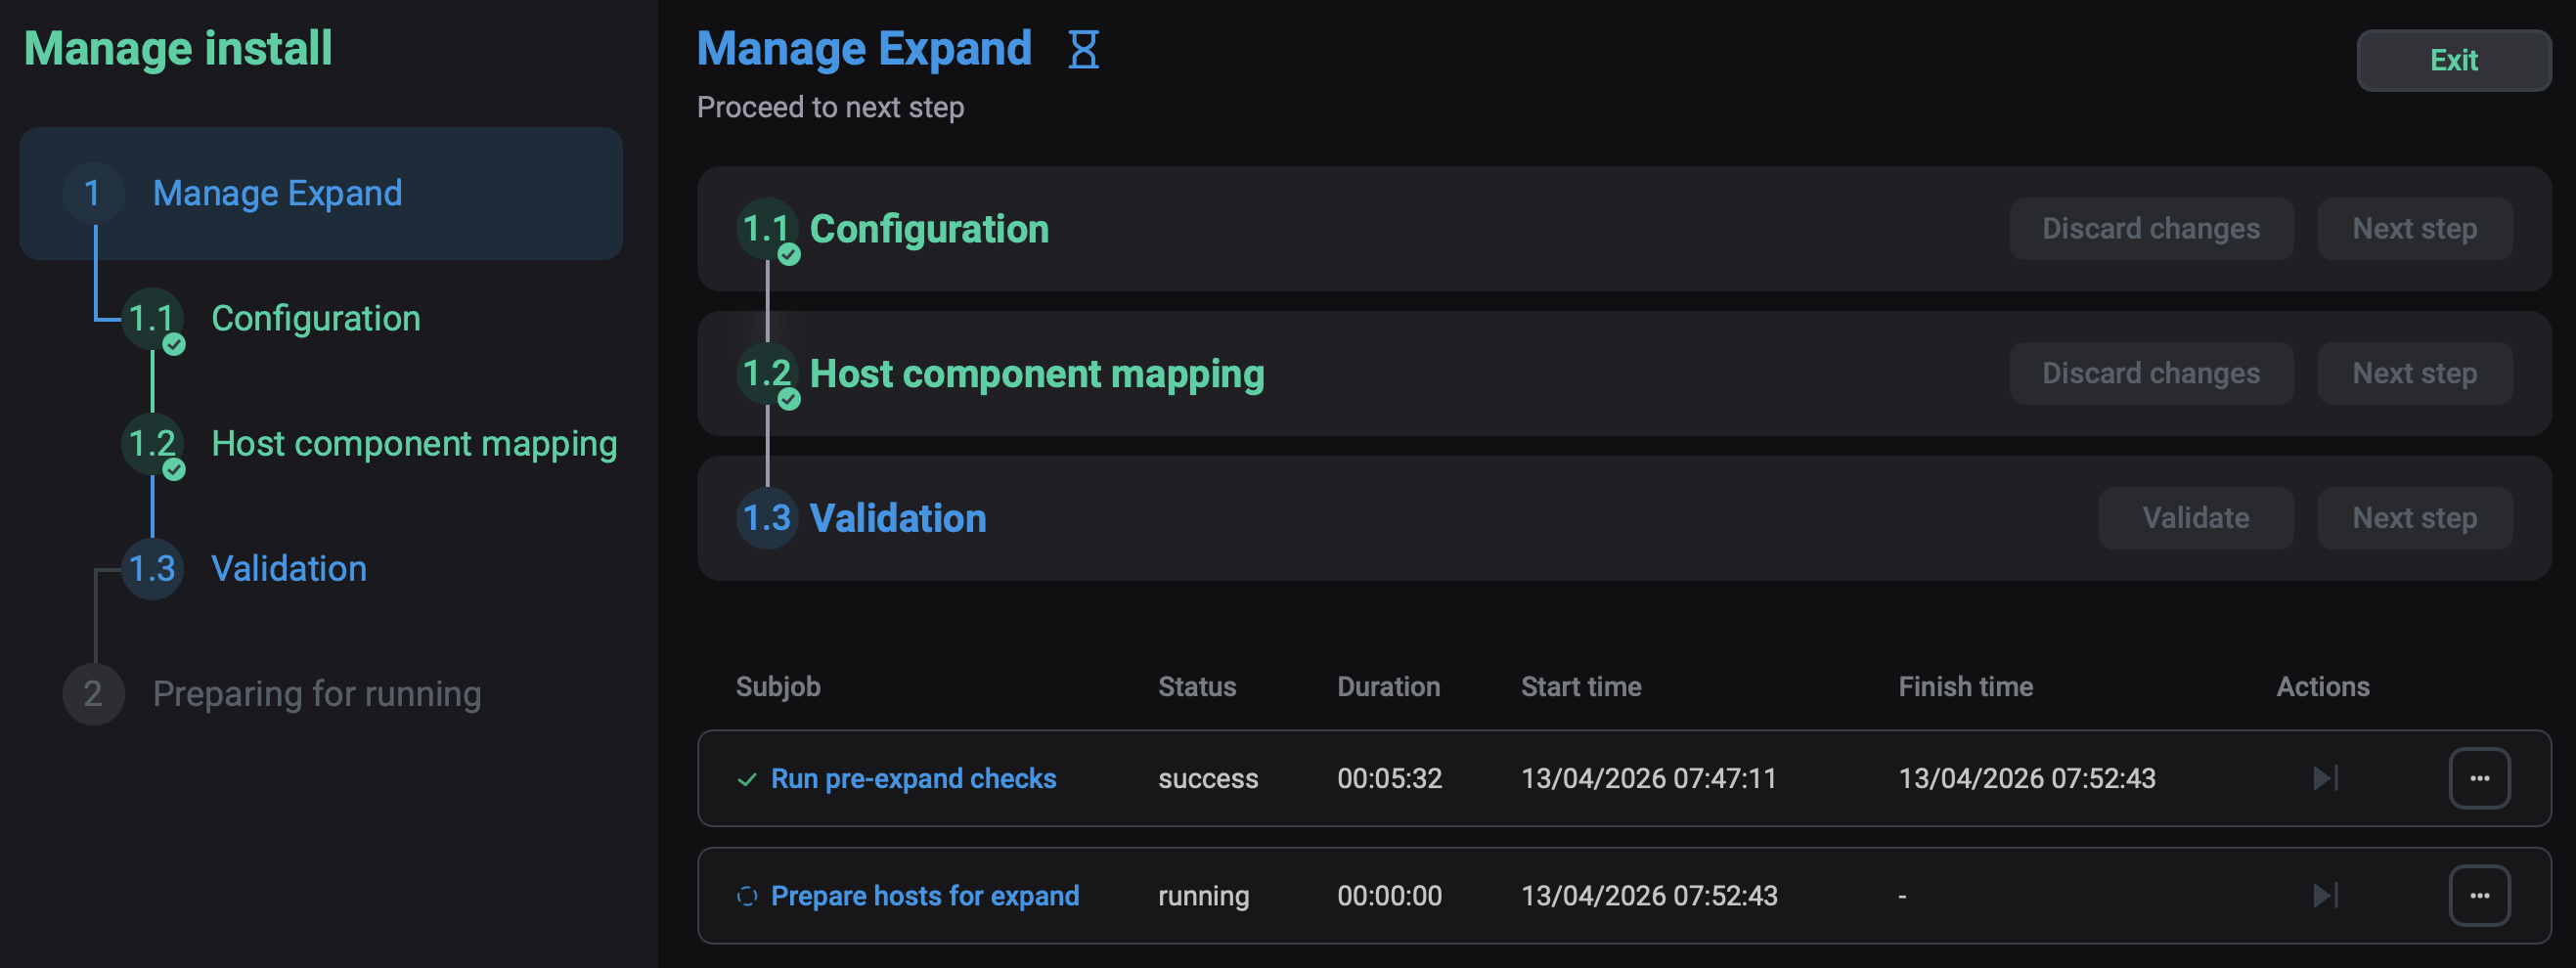 Validate expansion
 -
Wait for the validation to complete and then click Next step.
Step 2. Preparing for running
After the validation step completed successfully, click Run to launch the Expand action.
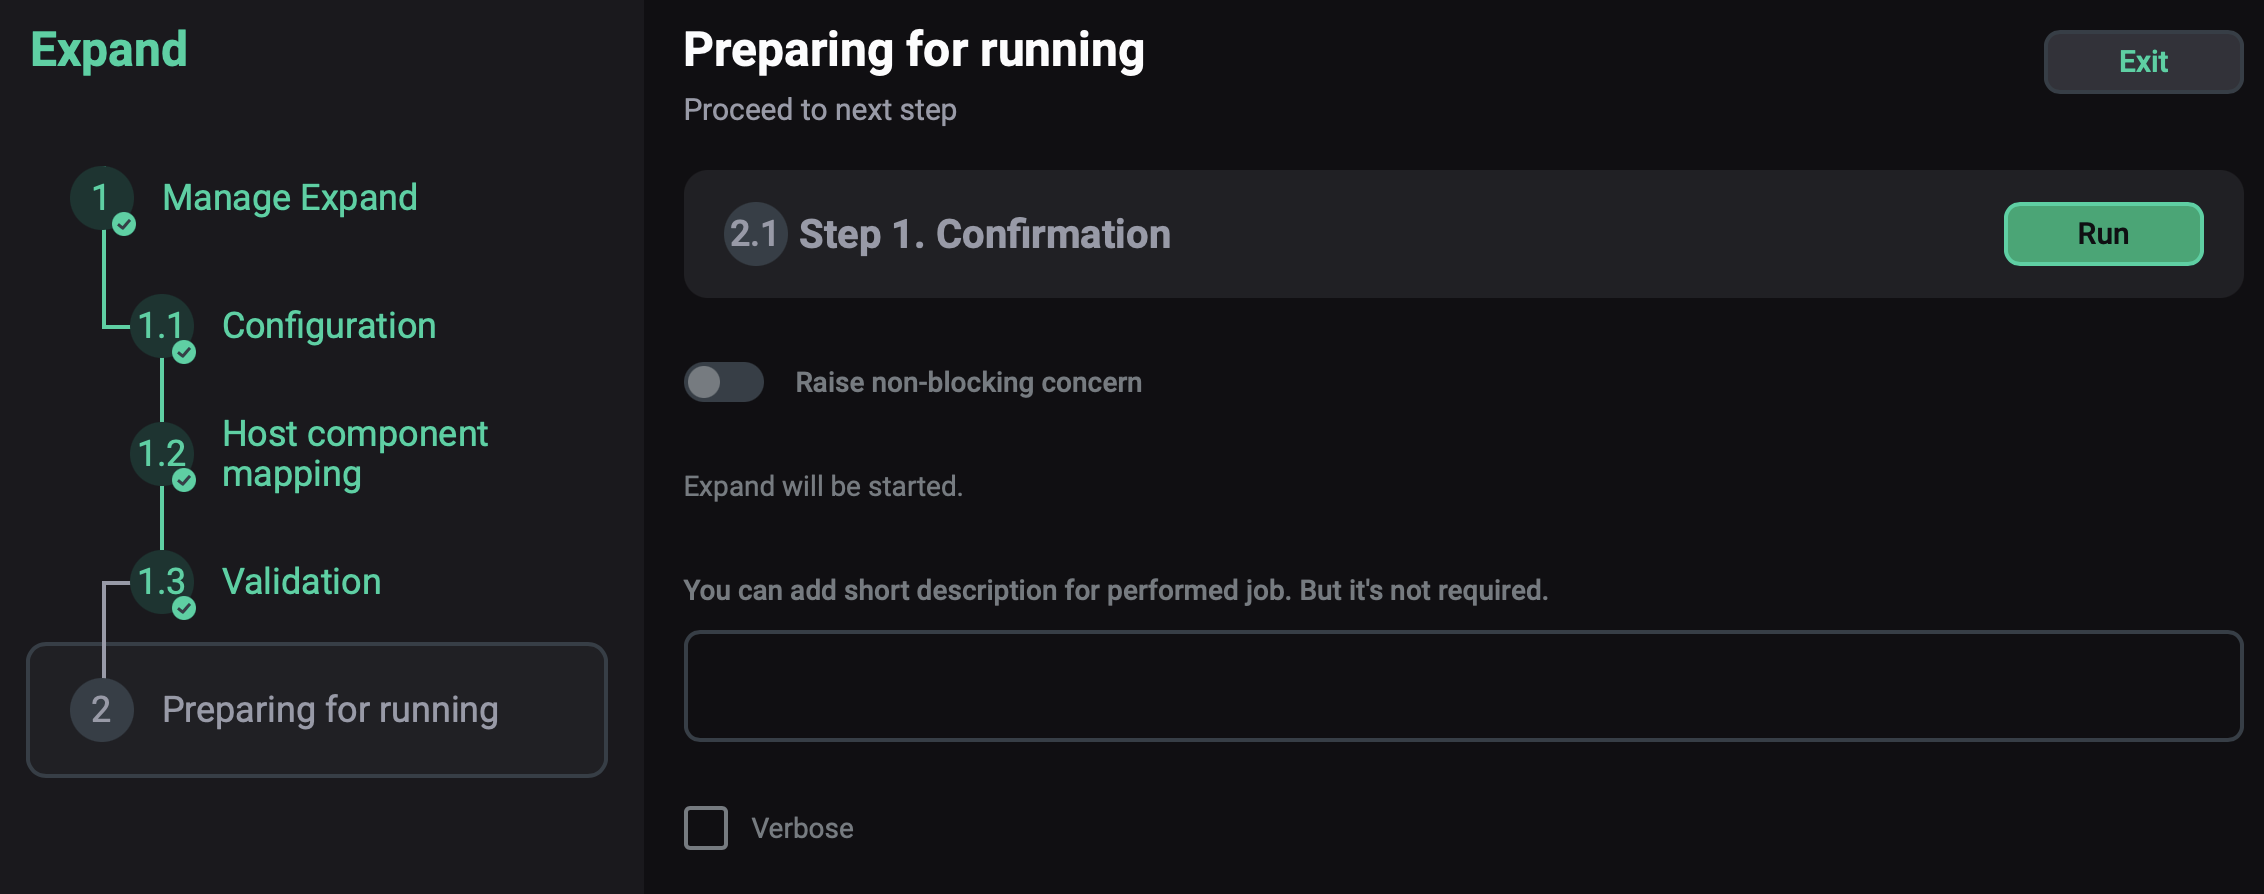
In this step, the gpexpand utility creates the gpexpand schema in the postgres database.
Objects of this schema will be used to store metadata and statistics on the tables that require redistribution over segments after the cluster expansion.
If all action steps are successfully finished, the Redistribute action becomes available in the ADB service.
Without redistribution, tables will keep operating on the original segment hosts.
|
NOTE
Starting with ADB 6.31, the |
Reinstall
The Reinstall action reinstalls the ADB cluster. After you select the action, a dialog box opens in which you can fill in the following options:
-
Reboot cluster servers after installation — a flag that indicates whether to reboot ADB hosts automatically after the Reinstall action is completed. If the flag is reset, you need to restart manually.
-
Reboot timeout, sec — a timeout that is used to wait for the reboot of ADB hosts (in seconds).
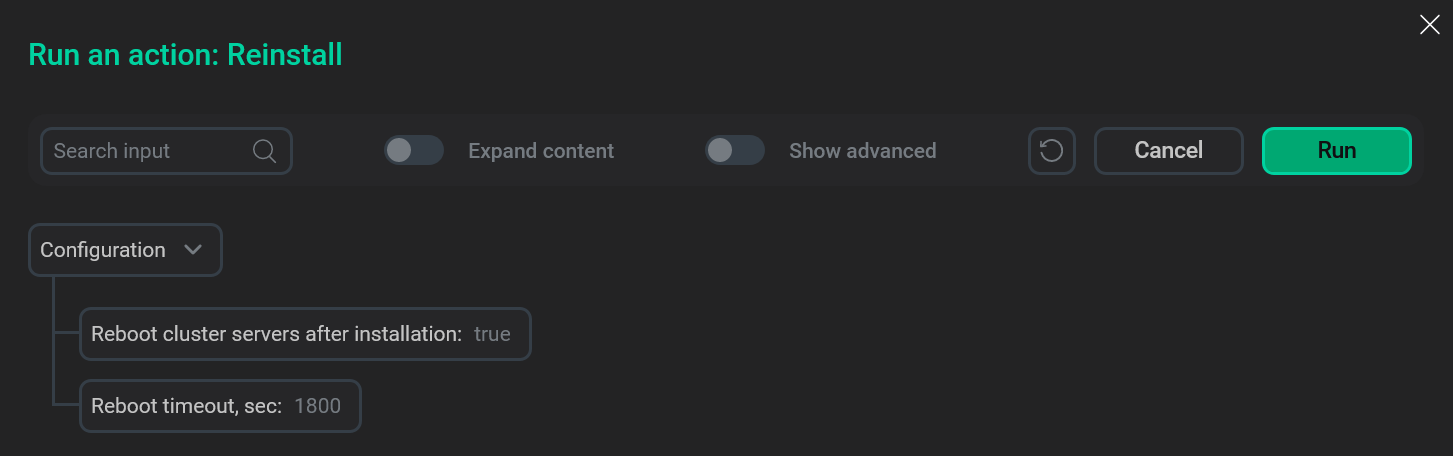
To edit any parameter, click its current value. In the window that opens, enter a new value and click Apply.

To run the Reinstall action, click Run in the action form. Then, confirm the action in the standard confirmation dialog.
Reinstall statuschecker
The Reinstall statuschecker action reconfigures and restarts the statuschecker for all cluster services. Use this action when migrating a cluster to a new ADCM server.
After you select the action, the standard confirmation dialog opens. Click Run to confirm the action. No additional parameters are required.
Reconfigure Vault integration
The Reconfigure Vault integration action is used to apply changes to the Vault integration parameters. These parameters are available on the Configuration tab of the cluster page and allow you to store secrets of ADB services in HashiCorp Vault.
After you select the action, the standard confirmation dialog opens. Click Run to confirm the action. No additional parameters are required.
|
IMPORTANT
|
Reconfigure parameter archiving
The Reconfigure parameter archiving action is used to apply changes to the Parameter archiving/Parameter archiving job setting parameters. These parameters are available on the Configuration tab of the cluster page and allow you to export ADB settings according to the specified schedule.
After you select the action, the standard confirmation dialog opens. Click Run to confirm the action. No additional parameters are required.
|
IMPORTANT
Each time you edit and save the Parameter archiving and Parameter archiving job setting values, run the Reconfigure parameter archiving action. |
Check
The Check action verifies if all hosts, components, and services are configured according to the ADB cluster requirements (like the Precheck action does) and additionally checks whether the installed cluster components operate correctly.
After you select the action, the standard confirmation dialog opens. Click Run to confirm the action. No additional parameters are required.
Start
The Start action starts all services of the stopped ADB cluster.
After you select the action, the standard confirmation dialog opens. Click Run to confirm the action. No additional parameters are required.
After the Start action is completed, the ADB cluster status is changed to running.
Stop
The Stop action stops all services of the running ADB cluster. After you select the action, a dialog box opens in which you can set the ADB shutdown mode:
-
fast— the ADB cluster will be stopped after all transactions are interrupted and rolled back, and all active connections are closed. This is the default mode. -
smart— the ADB cluster will be stopped only if there are no active client connections. Otherwise, the action fails with a warning. -
immediate— the ADB cluster will be stopped after all transactions are aborted and postgres processes are killed. This mode does not allow a database server to complete transaction processing and clean up any temporary or in-process work files. It is not recommended to use theimmediatemode since it can damage databases in some cases.
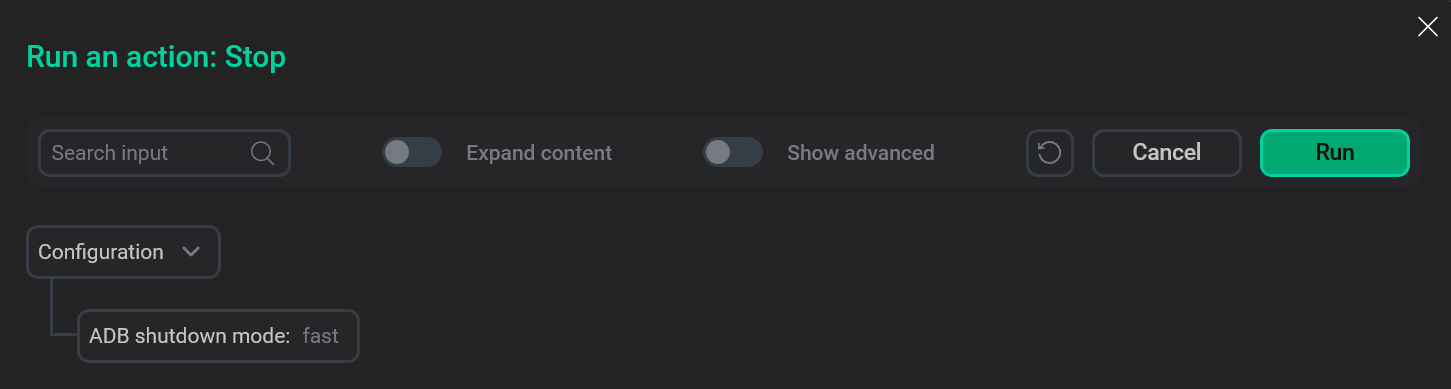
To edit the ADB shutdown mode parameter, click its current value. In the window that opens, select a new value and click Apply.

To run the Stop action, click Run in the action form. Then, confirm the action in the standard confirmation dialog.
After the Stop action is completed, the ADB cluster status is changed to stopped.
Upgrade
To upgrade an ADB cluster version, follow the steps:
-
Upload a new ADB cluster bundle (see the Download a cluster bundle and Upload a cluster bundle to ADCM steps in the Create a cluster article). As a result, the bundle should be displayed on the Bundles page in ADCM.
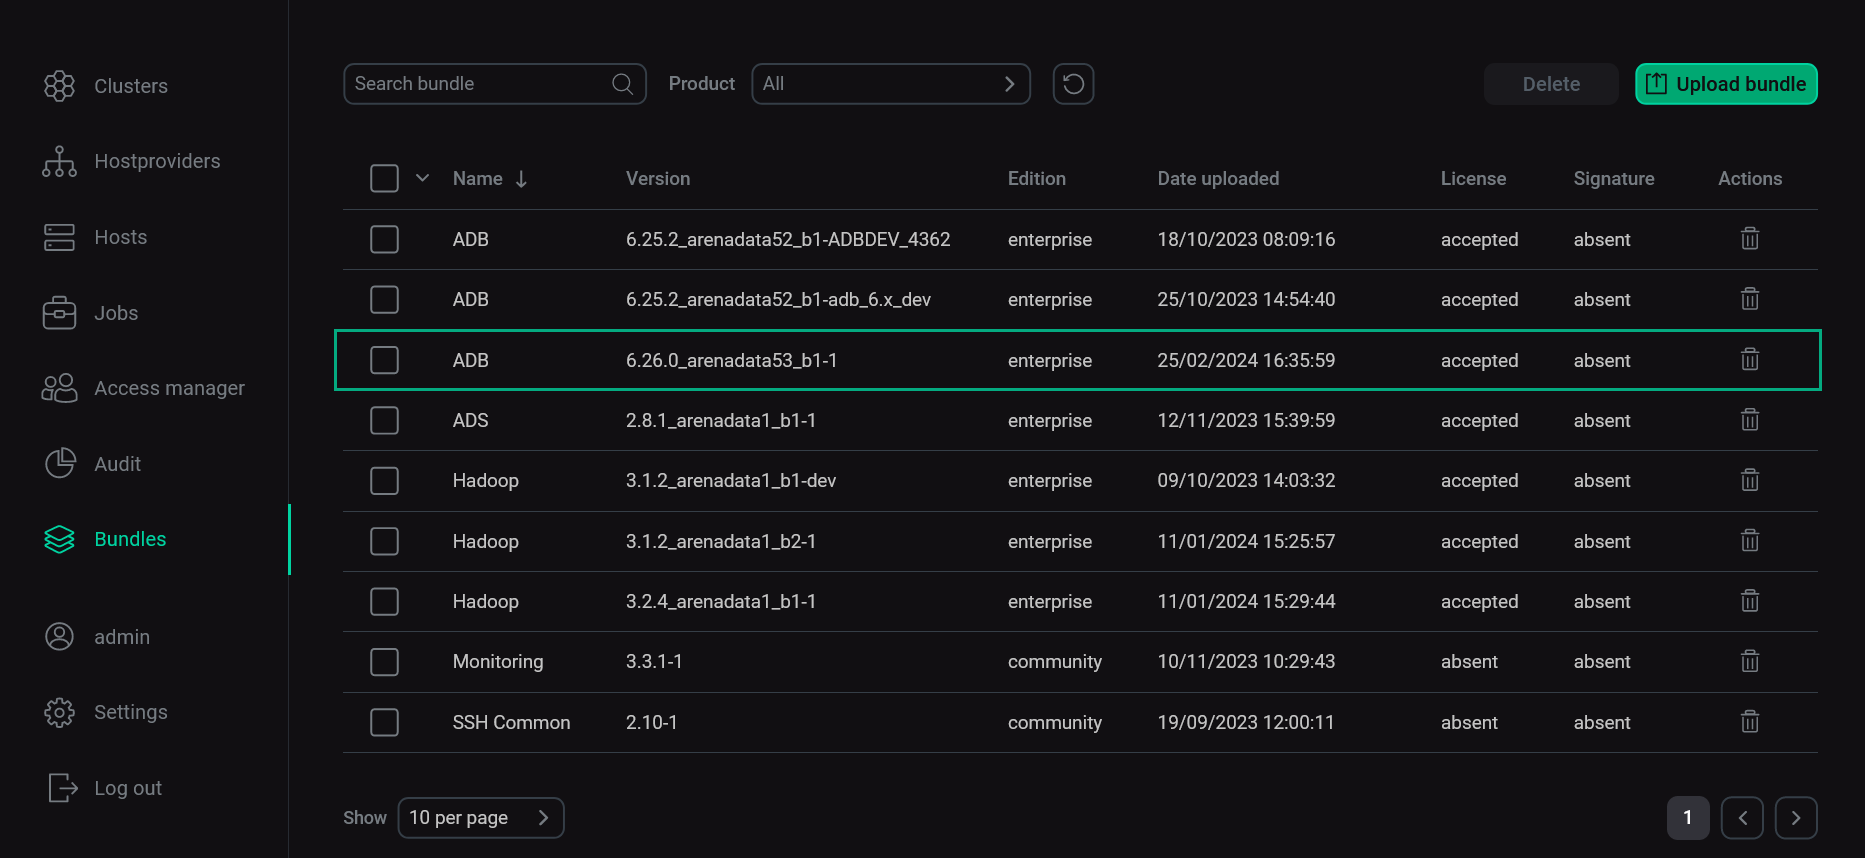 The Bundles page
 -
On the Clusters page, click the icon
for the ADB cluster that you need to upgrade. That icon becomes active after successfully loading the bundle in the previous step. The bundle version should be higher than the current cluster version.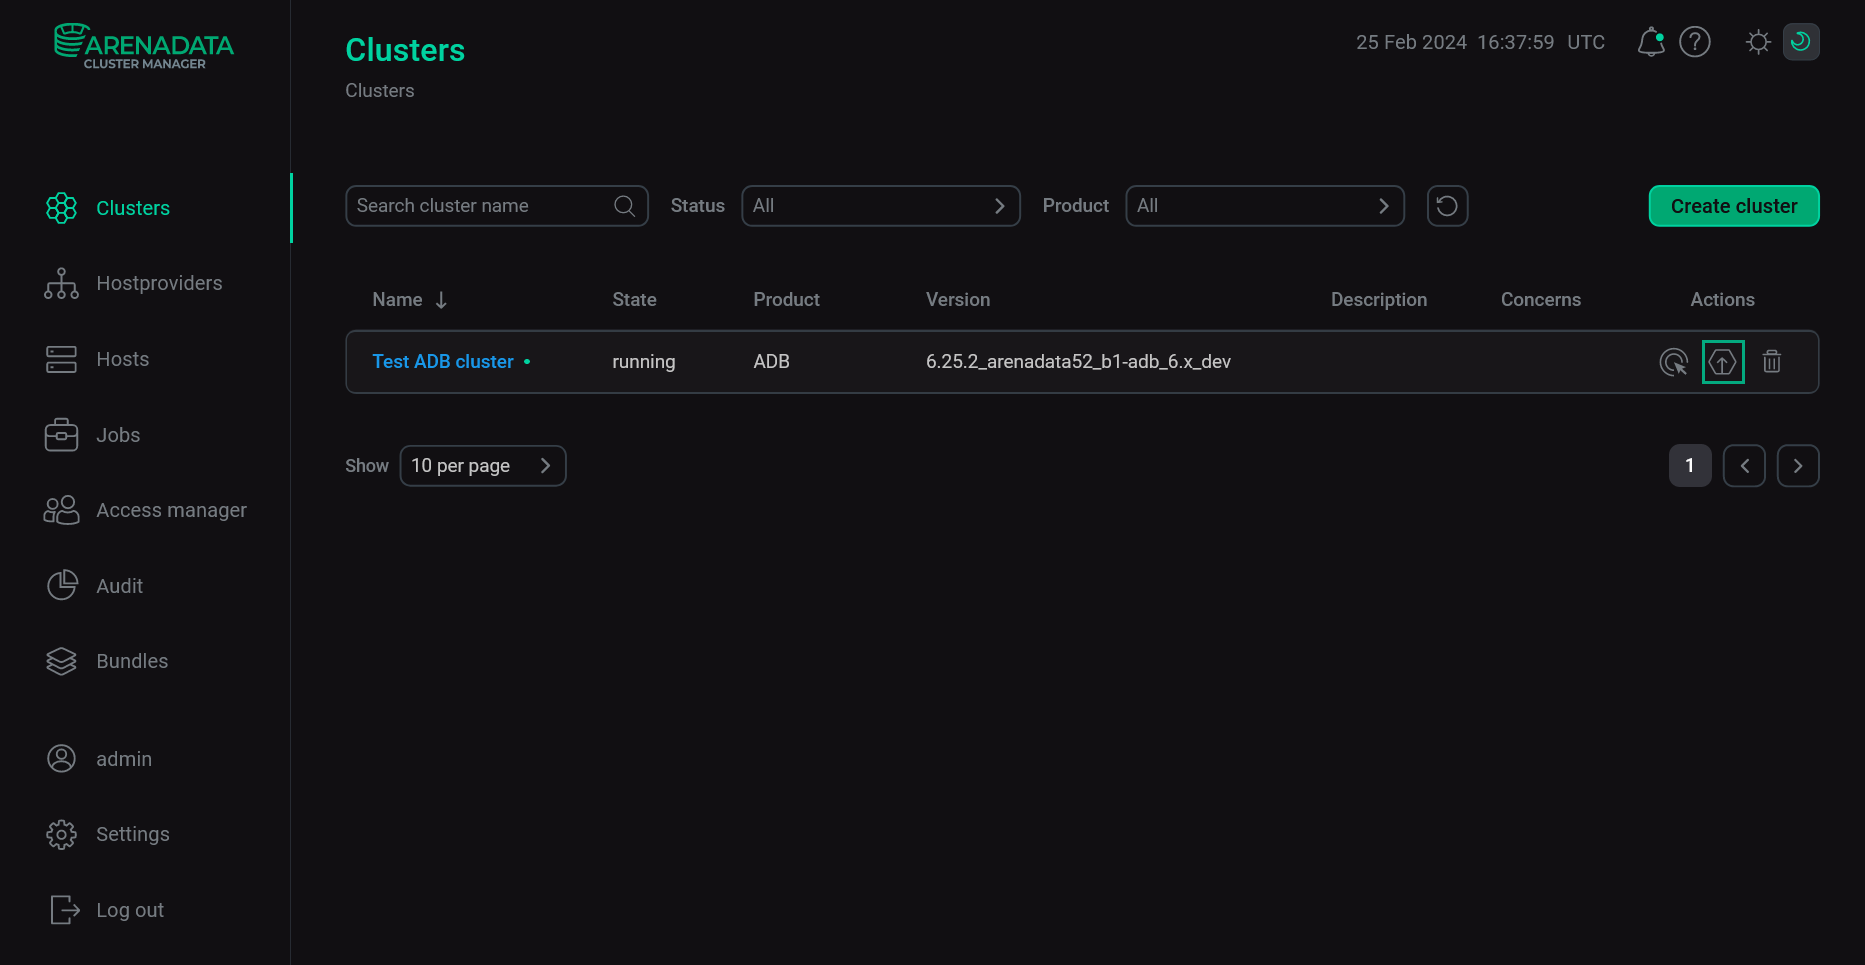 Click the Upgrade icon
 -
In the window that opens, select the bundle version in the Upgrade to version field and click Upgrade.
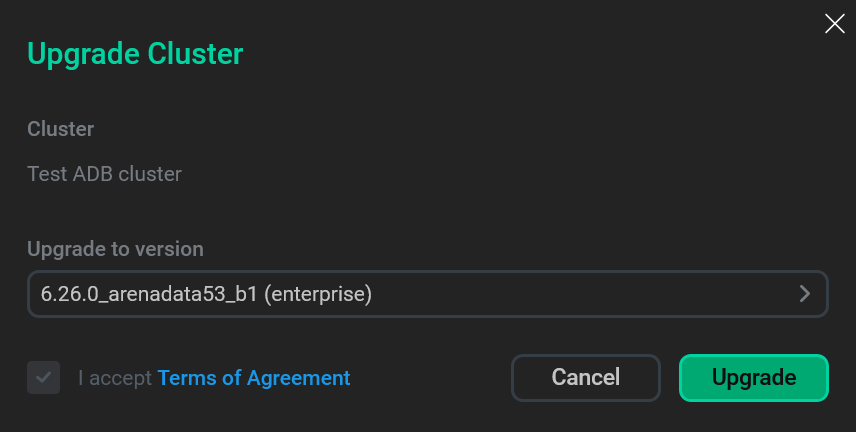 Run preparation for upgrade
 -
In the dialog that opens, confirm the action by clicking Run.
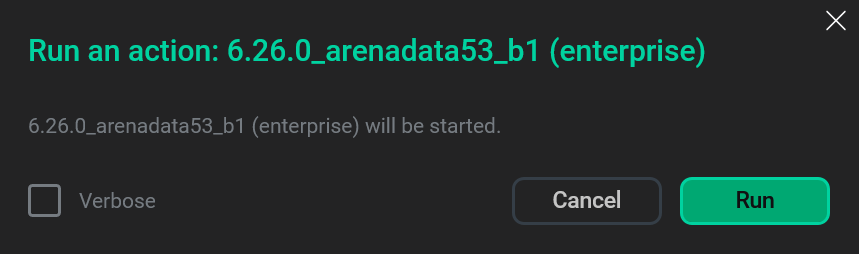 Confirm preparation for upgrade
As a result, the Upgrade: <bundle_version> job starts, where
<bundle_version>is the selected bundle version, e.g. Upgrade: 6.26.0_arenadata53_b1 (enterprise). If the job succeeds, ADCM changes the ADB cluster status toready to upgrade.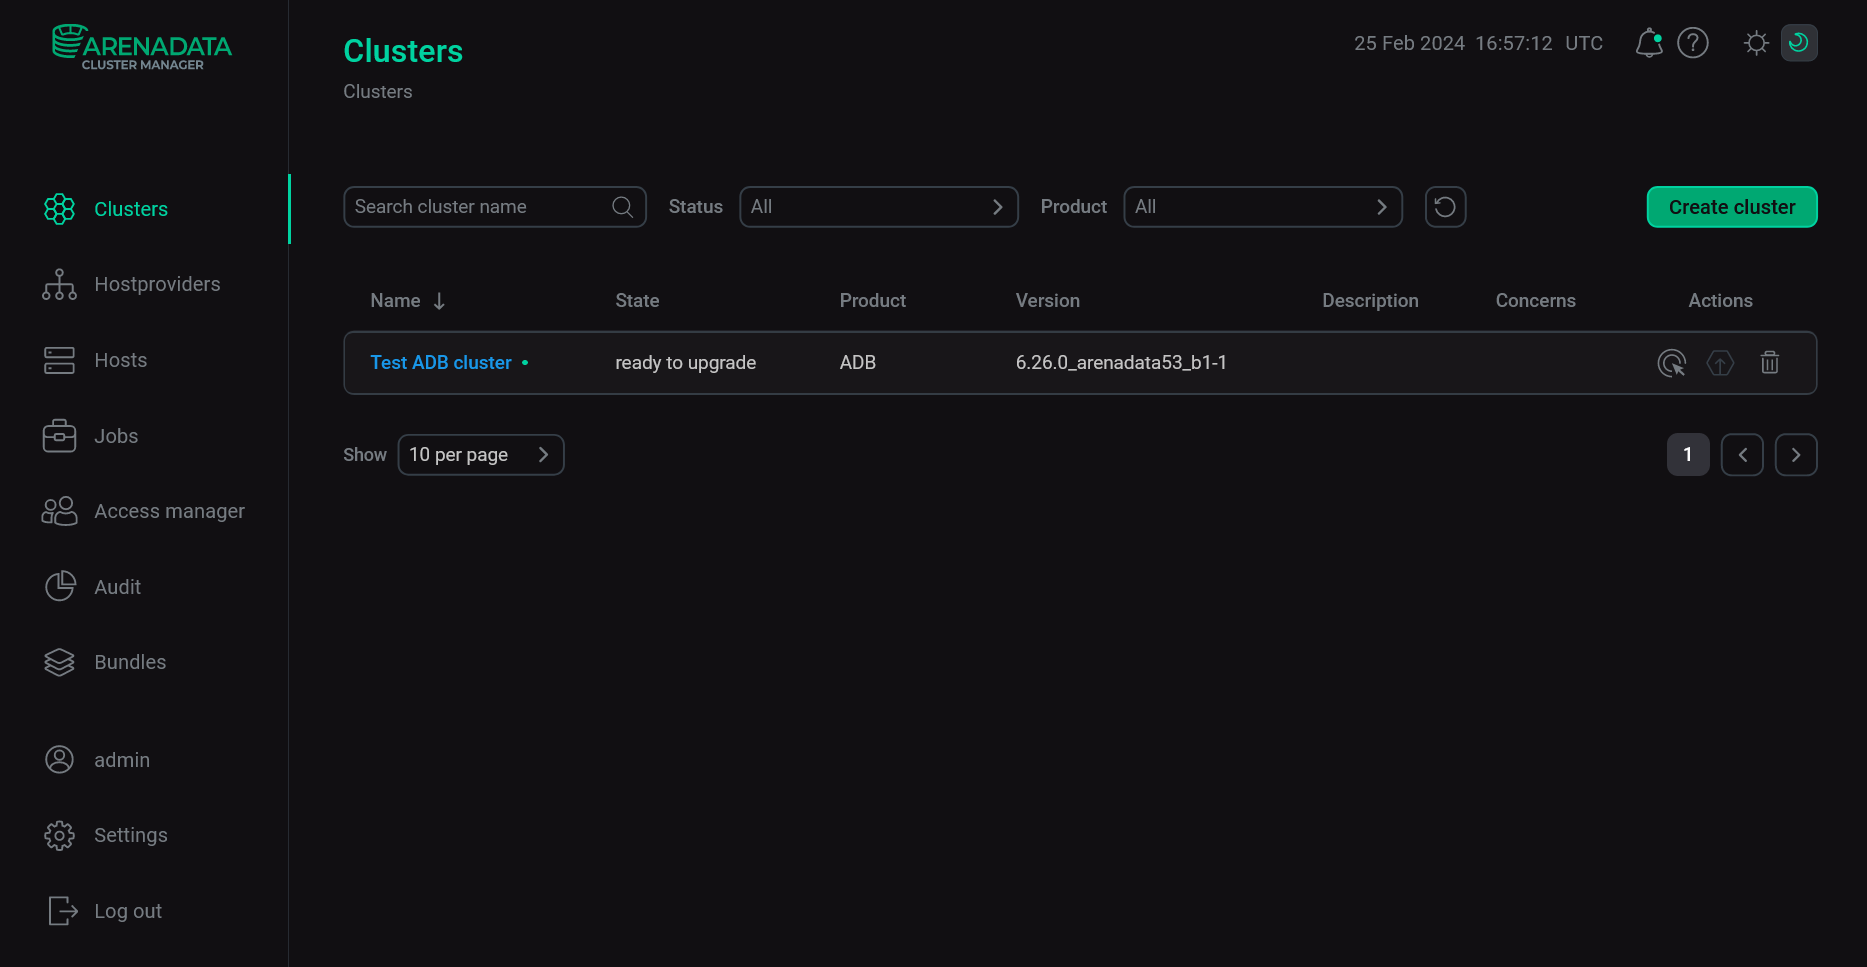 ADB cluster is ready for upgrade
 -
On the Clusters page, click the icon
in the Actions column for the cluster that you need to upgrade. Select the Upgrade action.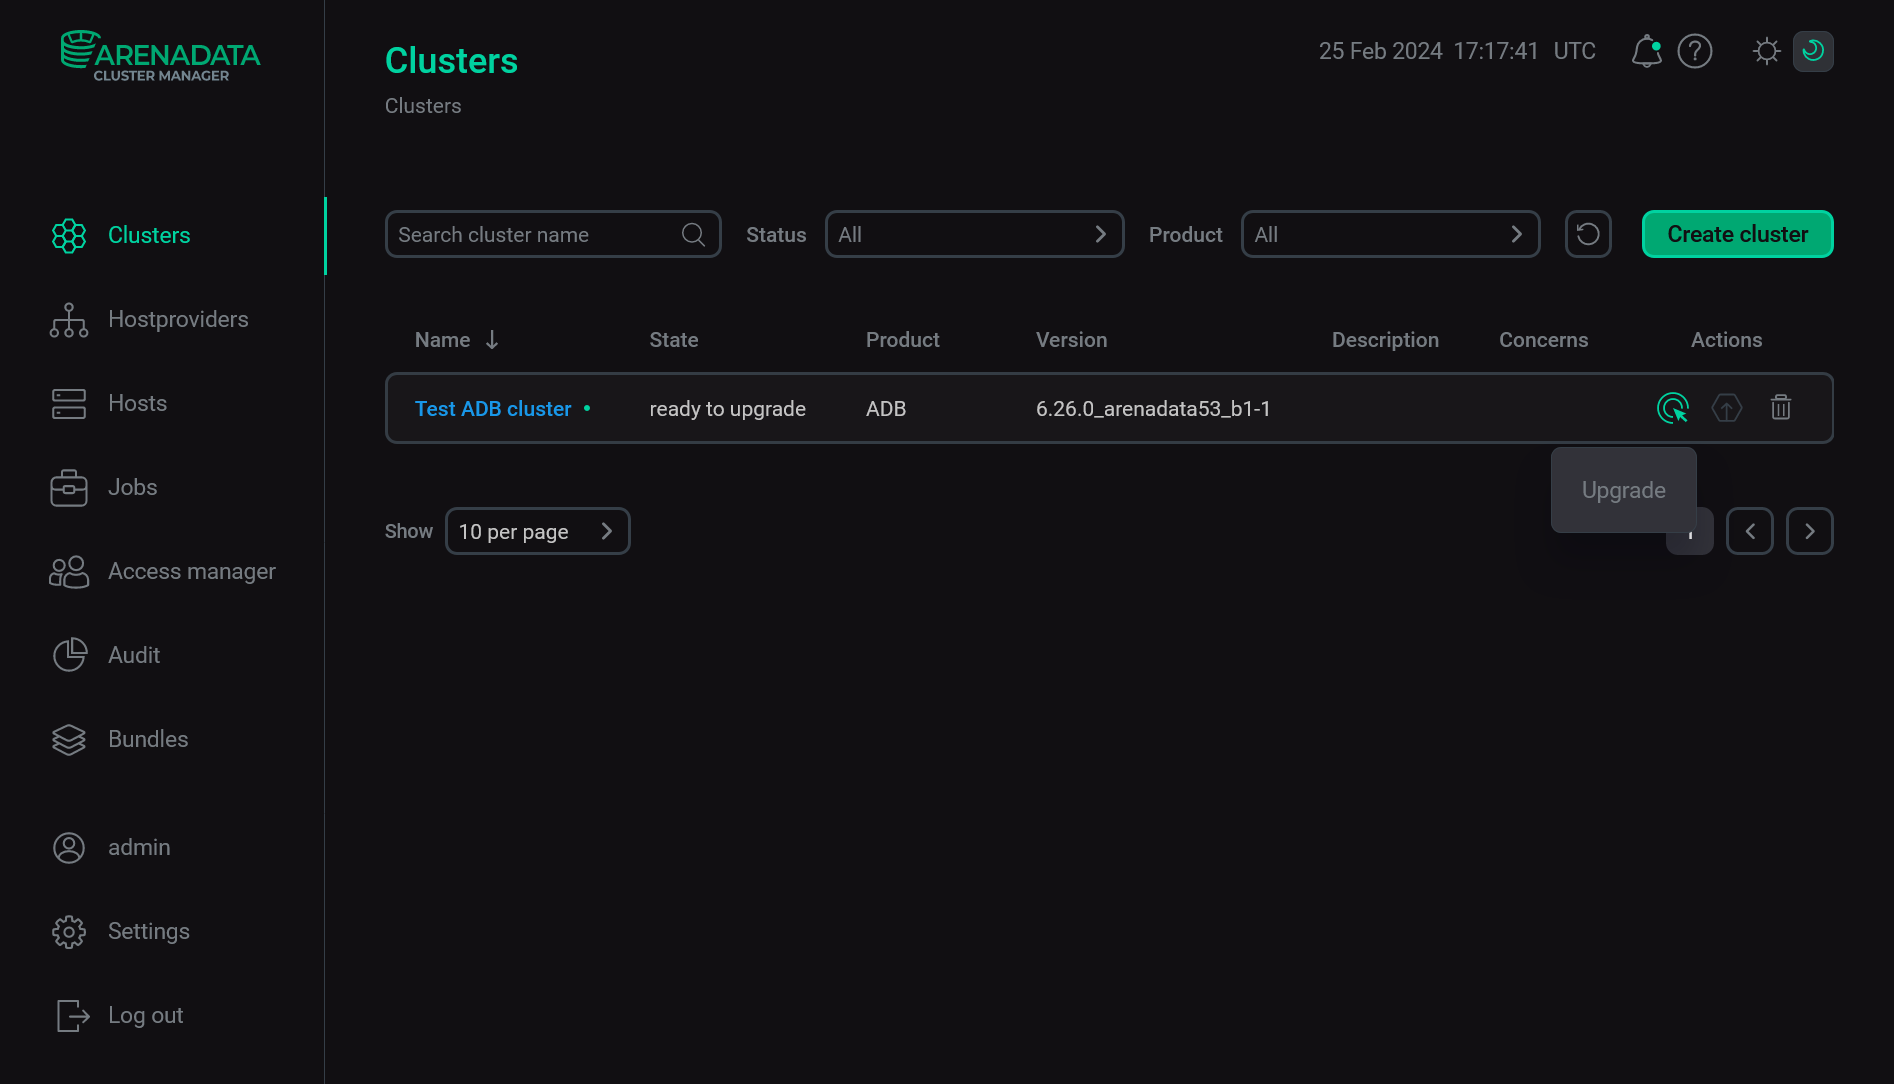 Select the Upgrade action
 -
In the window that opens, fill in the following parameters:
-
Migrate db_files_history table now? — a flag that indicates whether to migrate the arenadata_toolkit.db_files_history table during the upgrade process. If this flag is set, the table will be recreated with loading partitions/compression options and all data into the new table. This process may take a long time for a huge table. Reset the flag if you are going to migrate the
arenadata_toolkit.db_files_historytable later (manually or during the next upgrade). -
Make sure all postgres processes have been stopped — a flag that defines whether to verify that all postgres processes have been stopped before the upgrade.
-
Reboot timeout, sec — a timeout that is used to wait for the reboot of ADB hosts (in seconds).
 The Upgrade action form
To edit any parameter, click its current value. In the window that opens, enter a new value and click Apply.
 Enter a new parameter value
 -
-
Click Run in the action form. Then, confirm the action in the standard confirmation dialog.
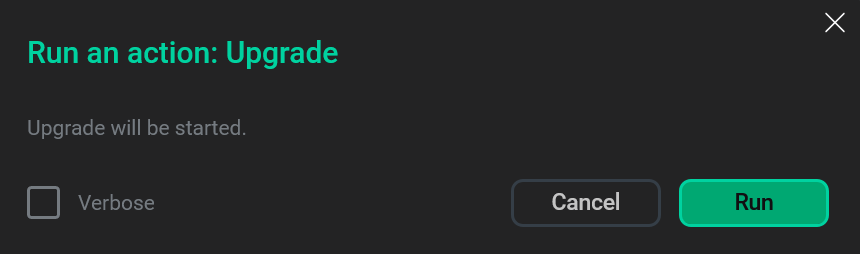 Confirm the Upgrade action
As a successful result, the ADB cluster status is changed to
running, and the actual cluster version becomes available on the Clusters page.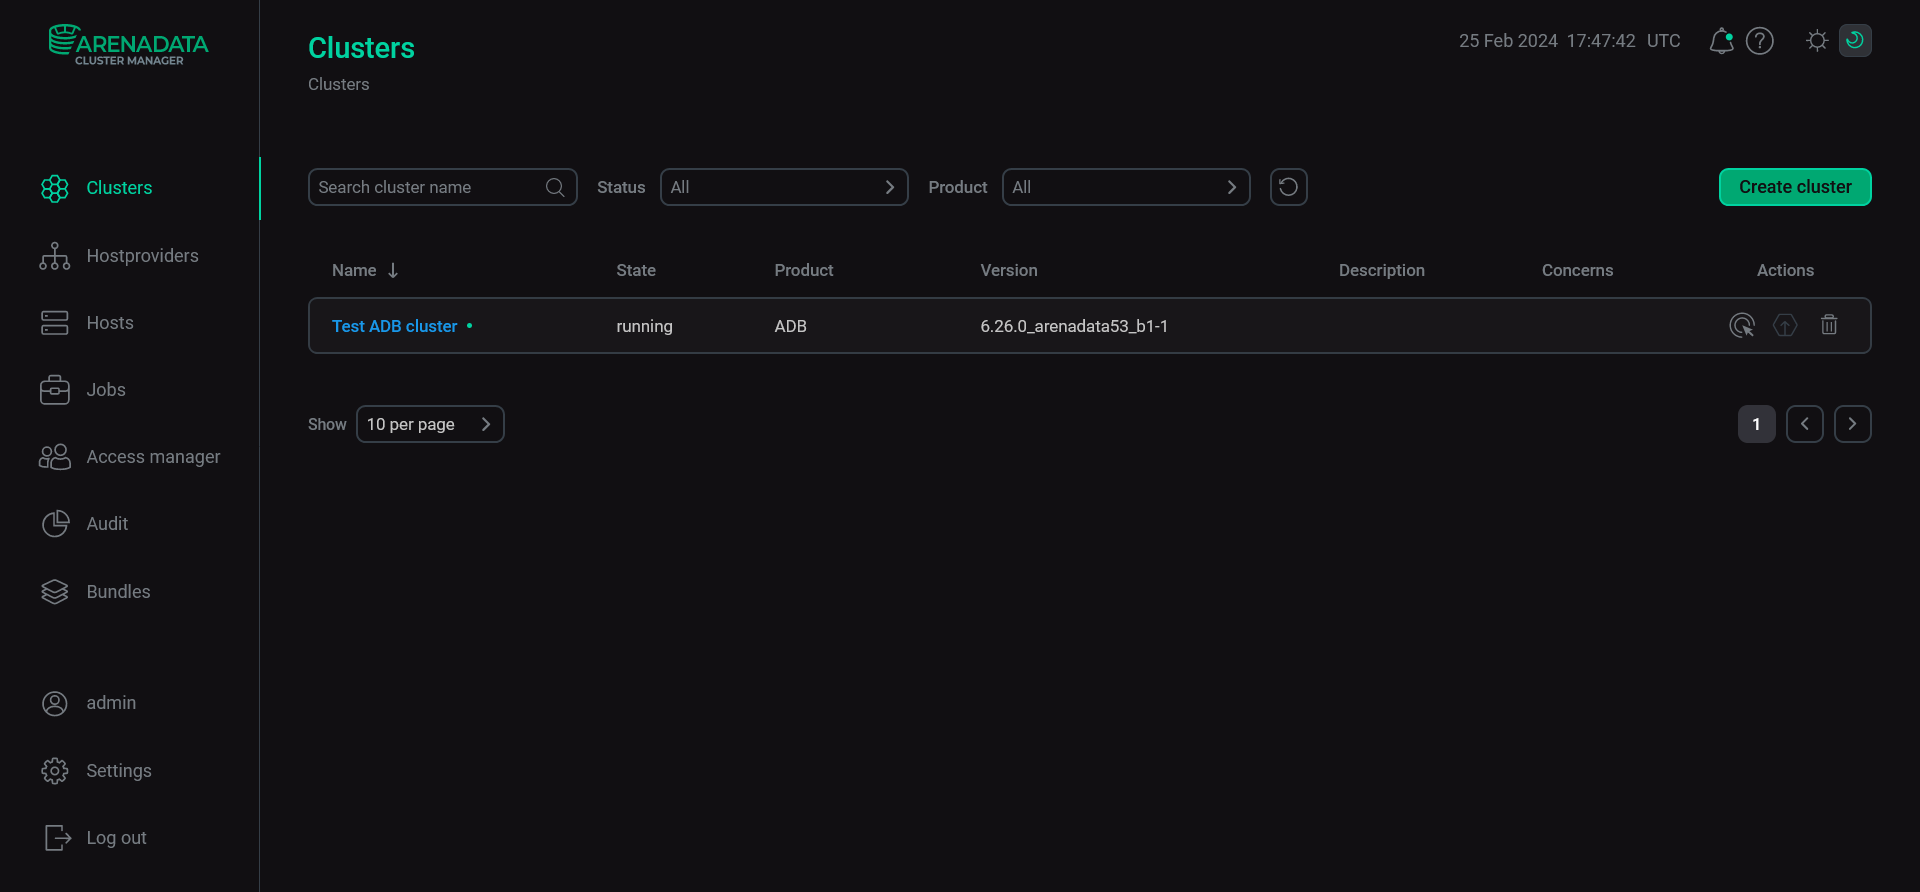 Upgrade is completed