

Install a cluster
Step 1. Precheck
Before installing a new cluster it is recommended to run the Precheck action. By doing this, you make sure that all necessary repositories are available, the cluster does not contain hosts with the same IP addresses, and all other prerequisites are met. Do the following:
-
Apply the Precheck action to the cluster selected on the Clusters page by clicking the
icon in the Actions column.
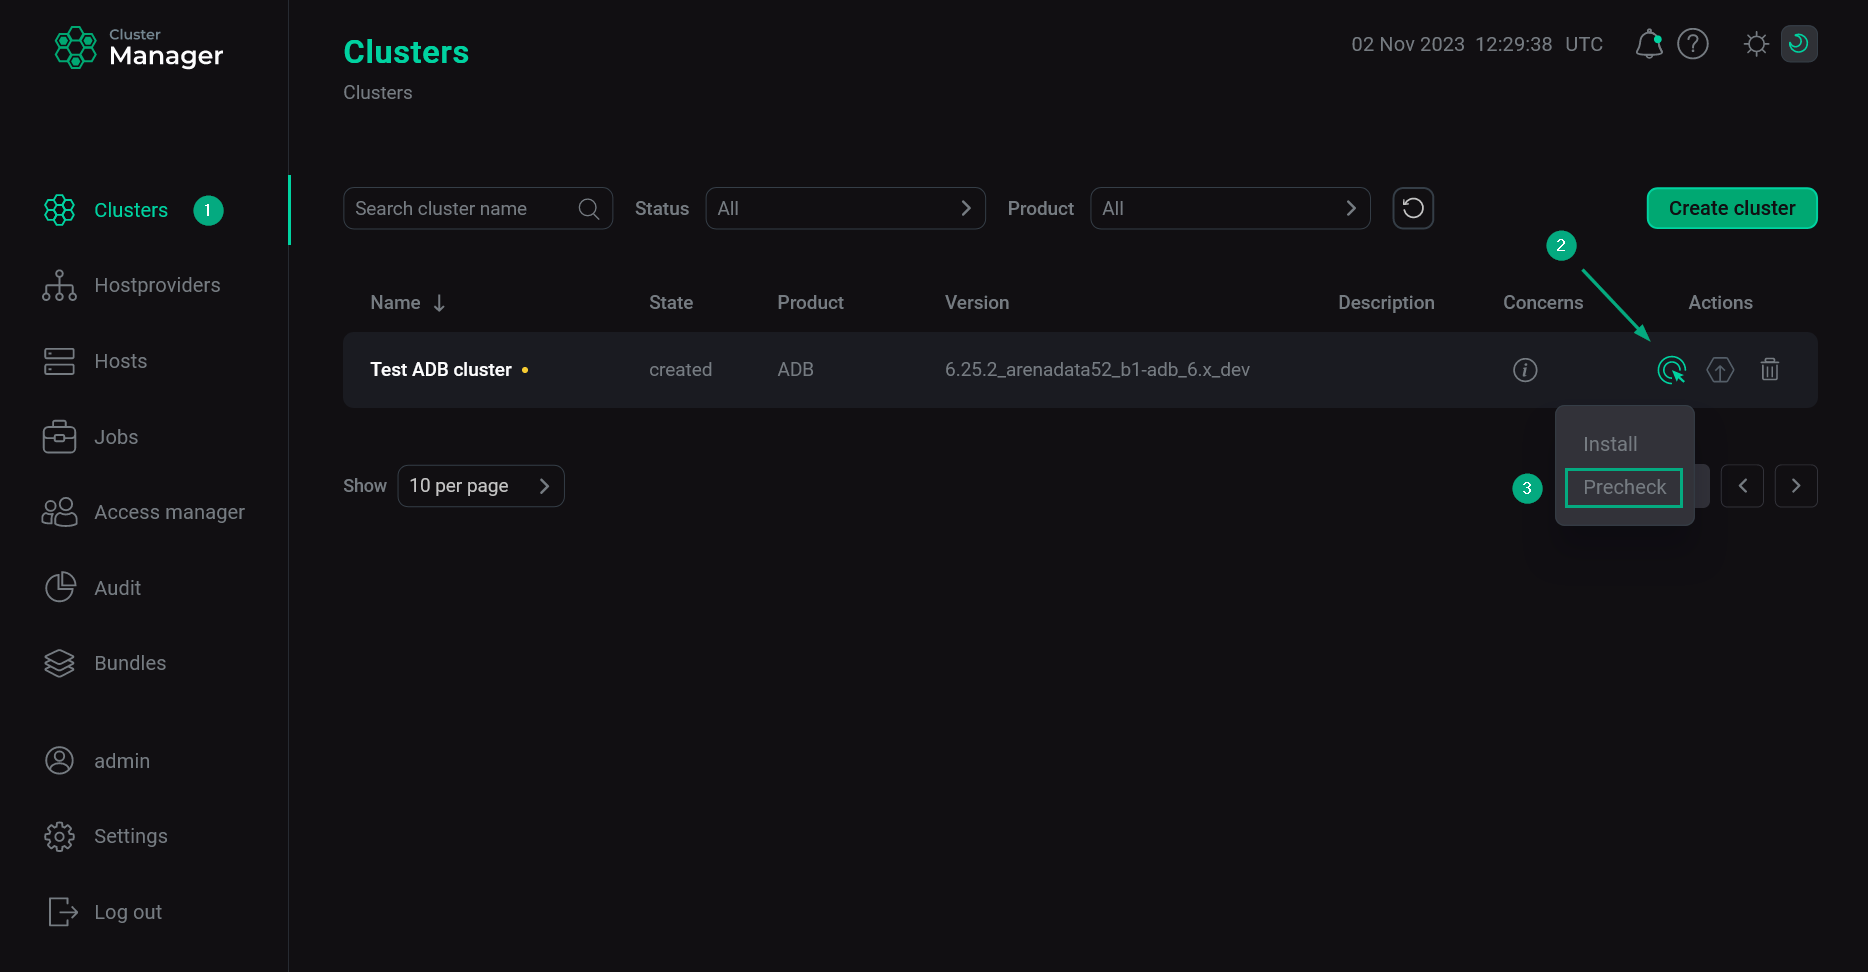 Run the cluster precheck
 -
Confirm the requested action in the window that opens.
-
Open the Jobs page and wait until the running job is completed. After this, click the first item in the job list.
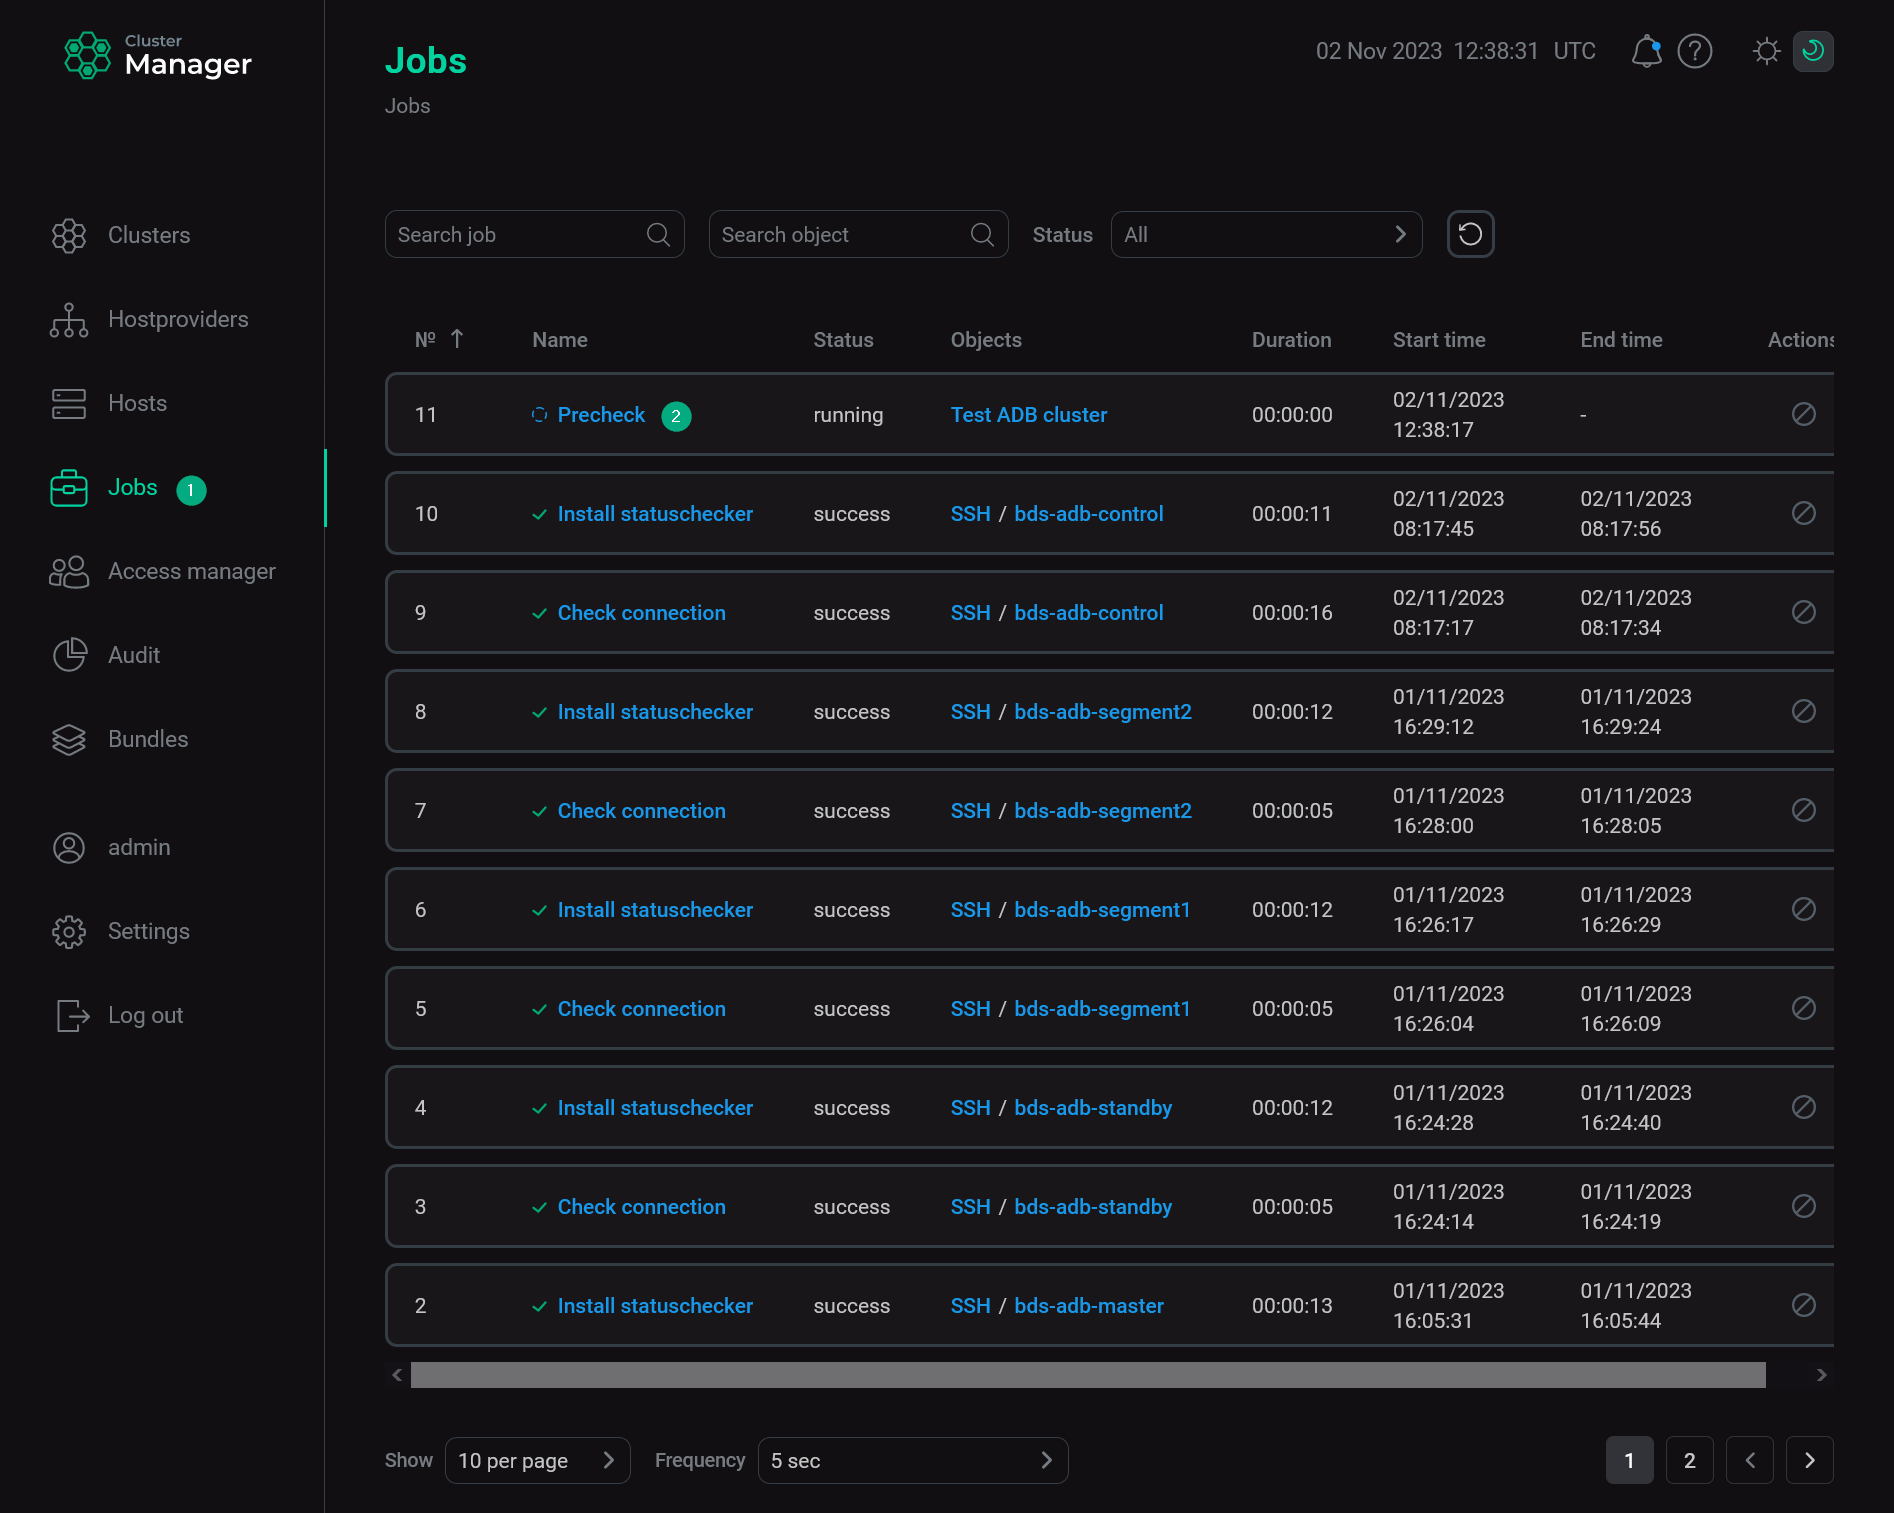 View jobs
 -
View logs in the window that opens. To download logs, click Download.
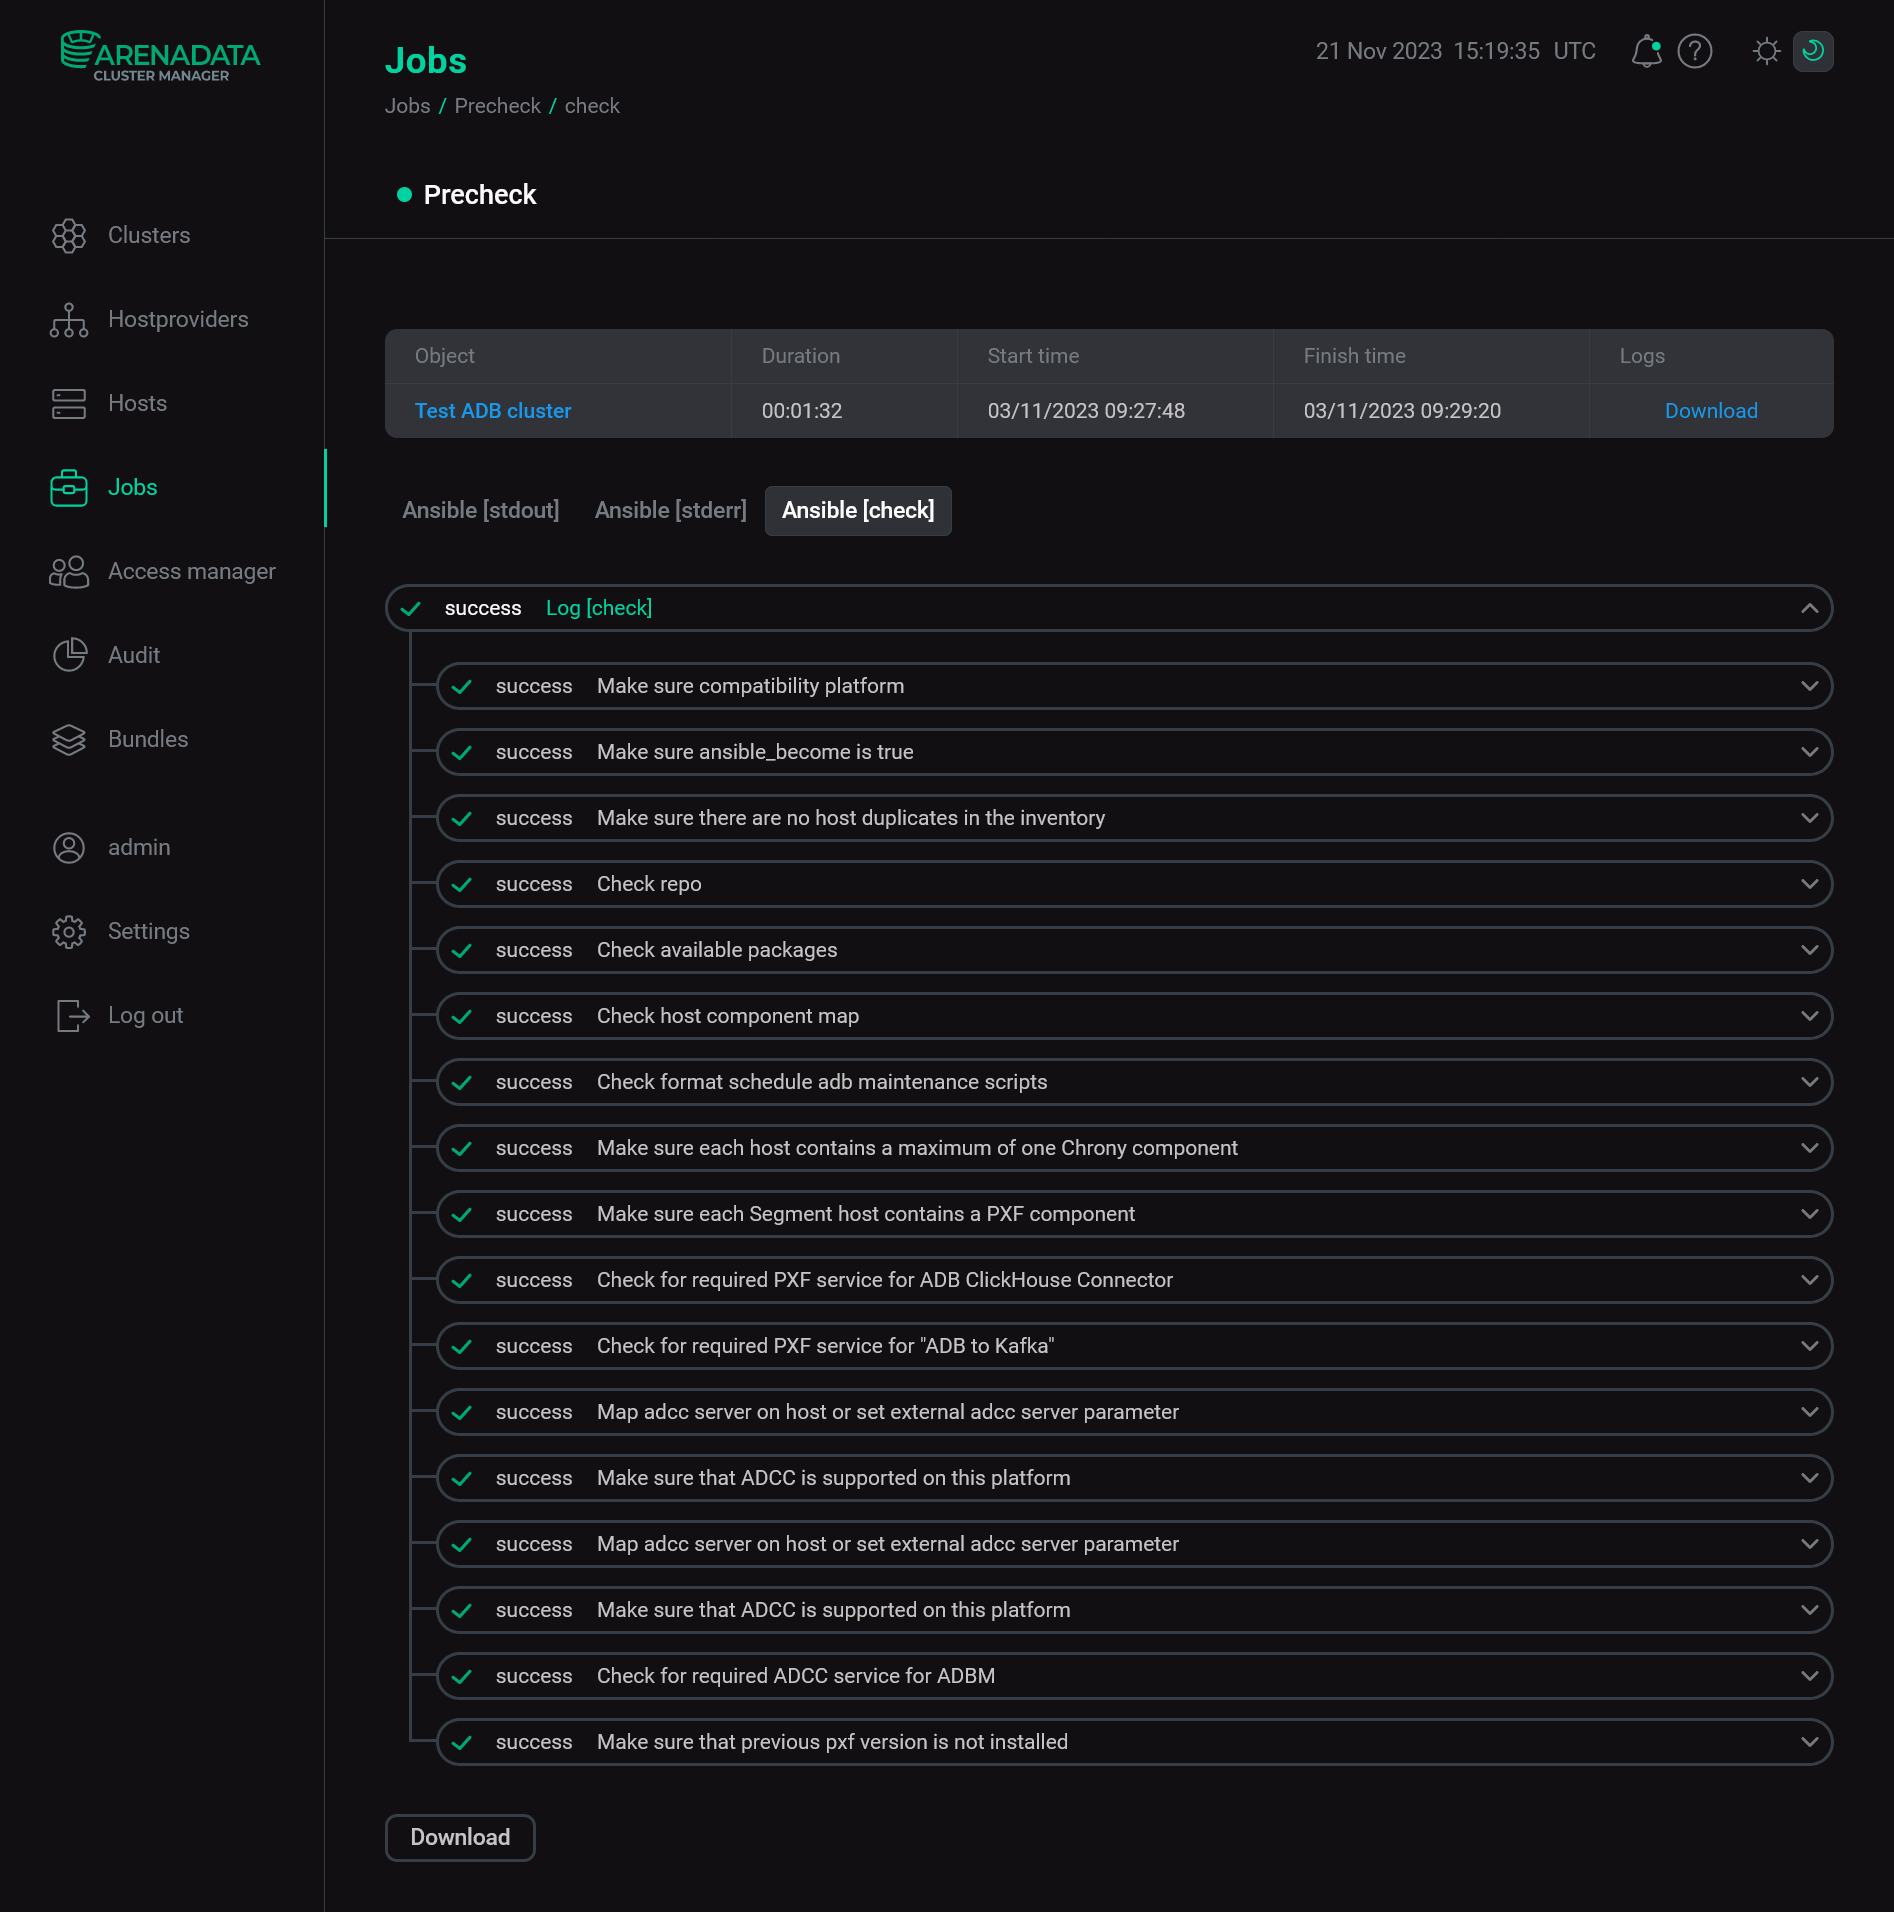 View logs
If the logs contain errors related to host settings (for example, regarding IPv6 or sysctl parameters), make sure the cluster hosts meet operating system prerequisites.
Step 2. Run installation
There are two ways to install cluster services:
-
Whole cluster. In this method all services are installed automatically one by one after applying the Install action to a cluster.
-
Single services. In this method each service is installed manually after applying one or more actions to it. This way is also suitable for installing new services in the already deployed cluster.
In both cases each service starts automatically after installation.
|
NOTE
In case of errors, you can find logs on the Jobs page.
|
Whole cluster
To install all cluster services within a single action, follow the steps:
-
Apply the Install action to the cluster selected on the Clusters page by clicking the
icon in the Actions column.
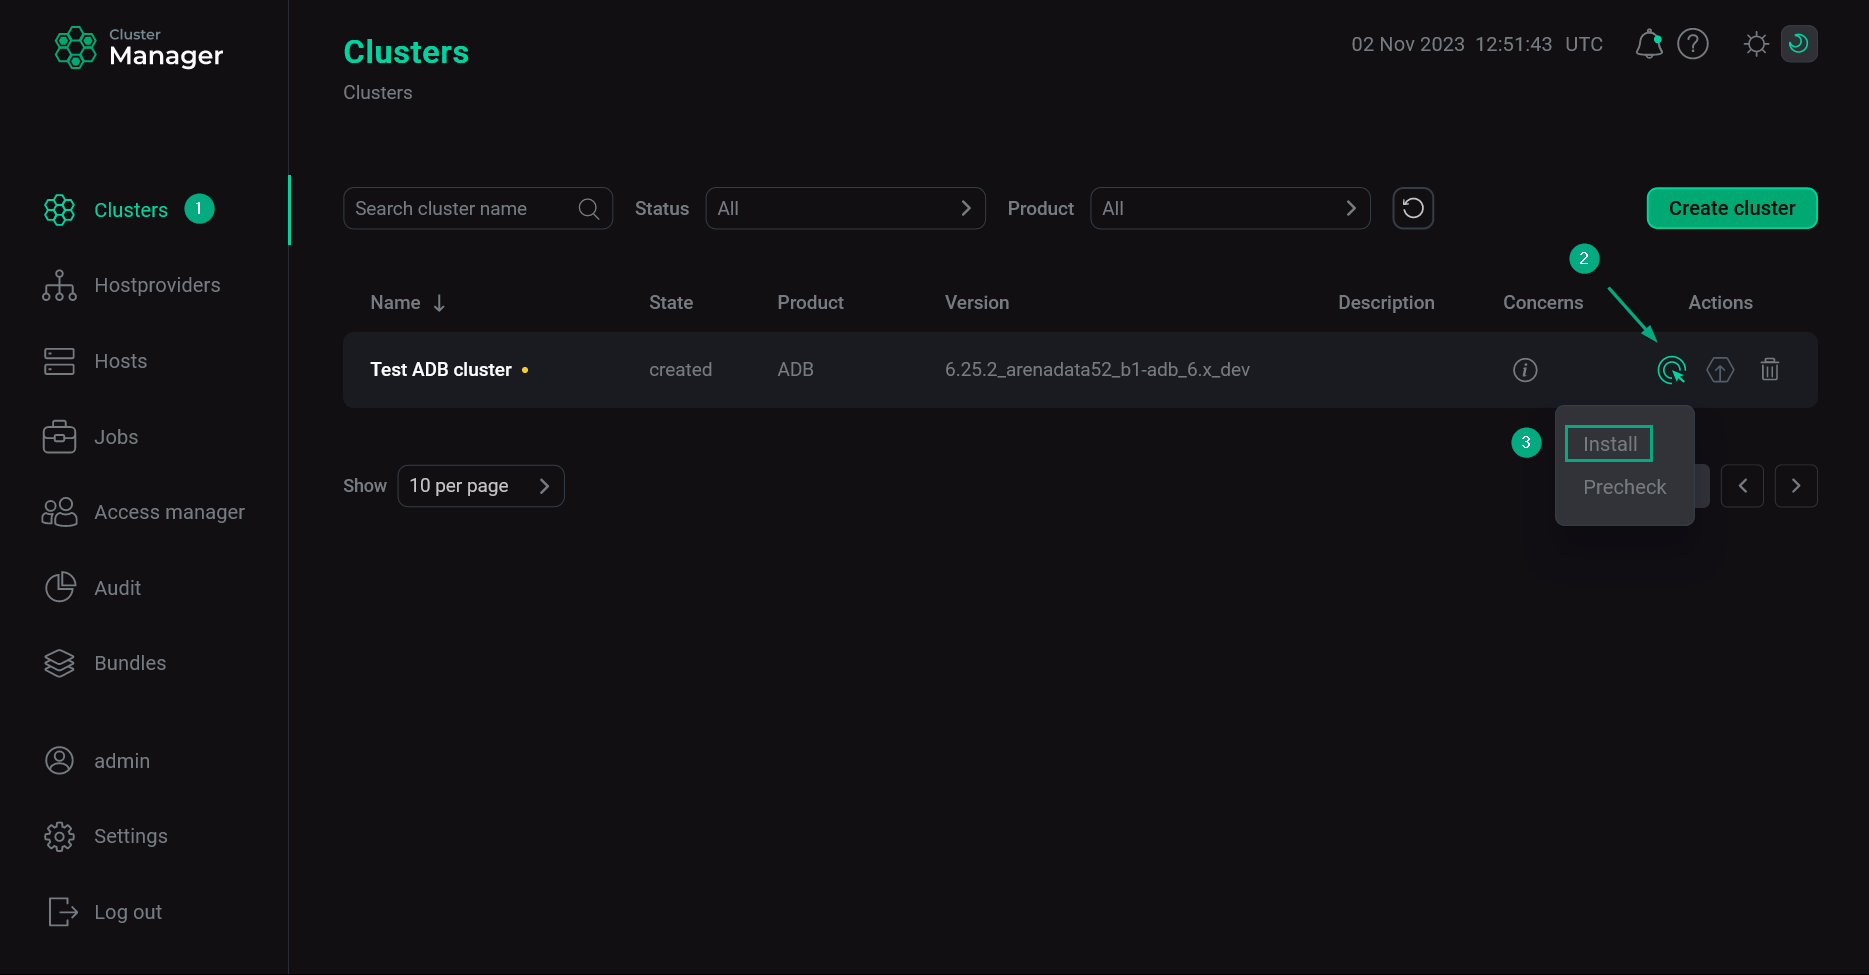 Switch to the whole cluster installation
 -
Verify the requested action in the opened window. Notice that setting the Reboot cluster servers after installation flag leads to the hosts being rebooted after the installation is completed. Otherwise, the reboot should be done manually.
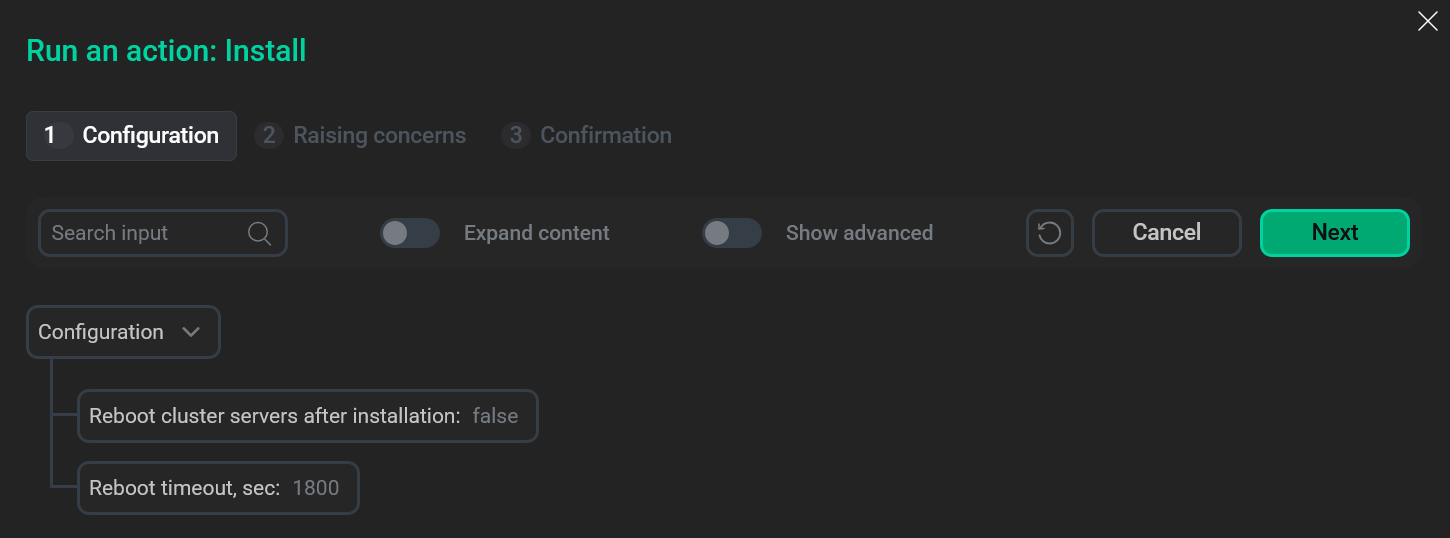 Confirm the action
 -
Wait until the job is completed.
-
If some service fails during installation, but the preceding services are installed successfully, you can try to fix errors and restart installation of all failed services. To do this, select the Reinstall action in the Actions column on the Clusters page.
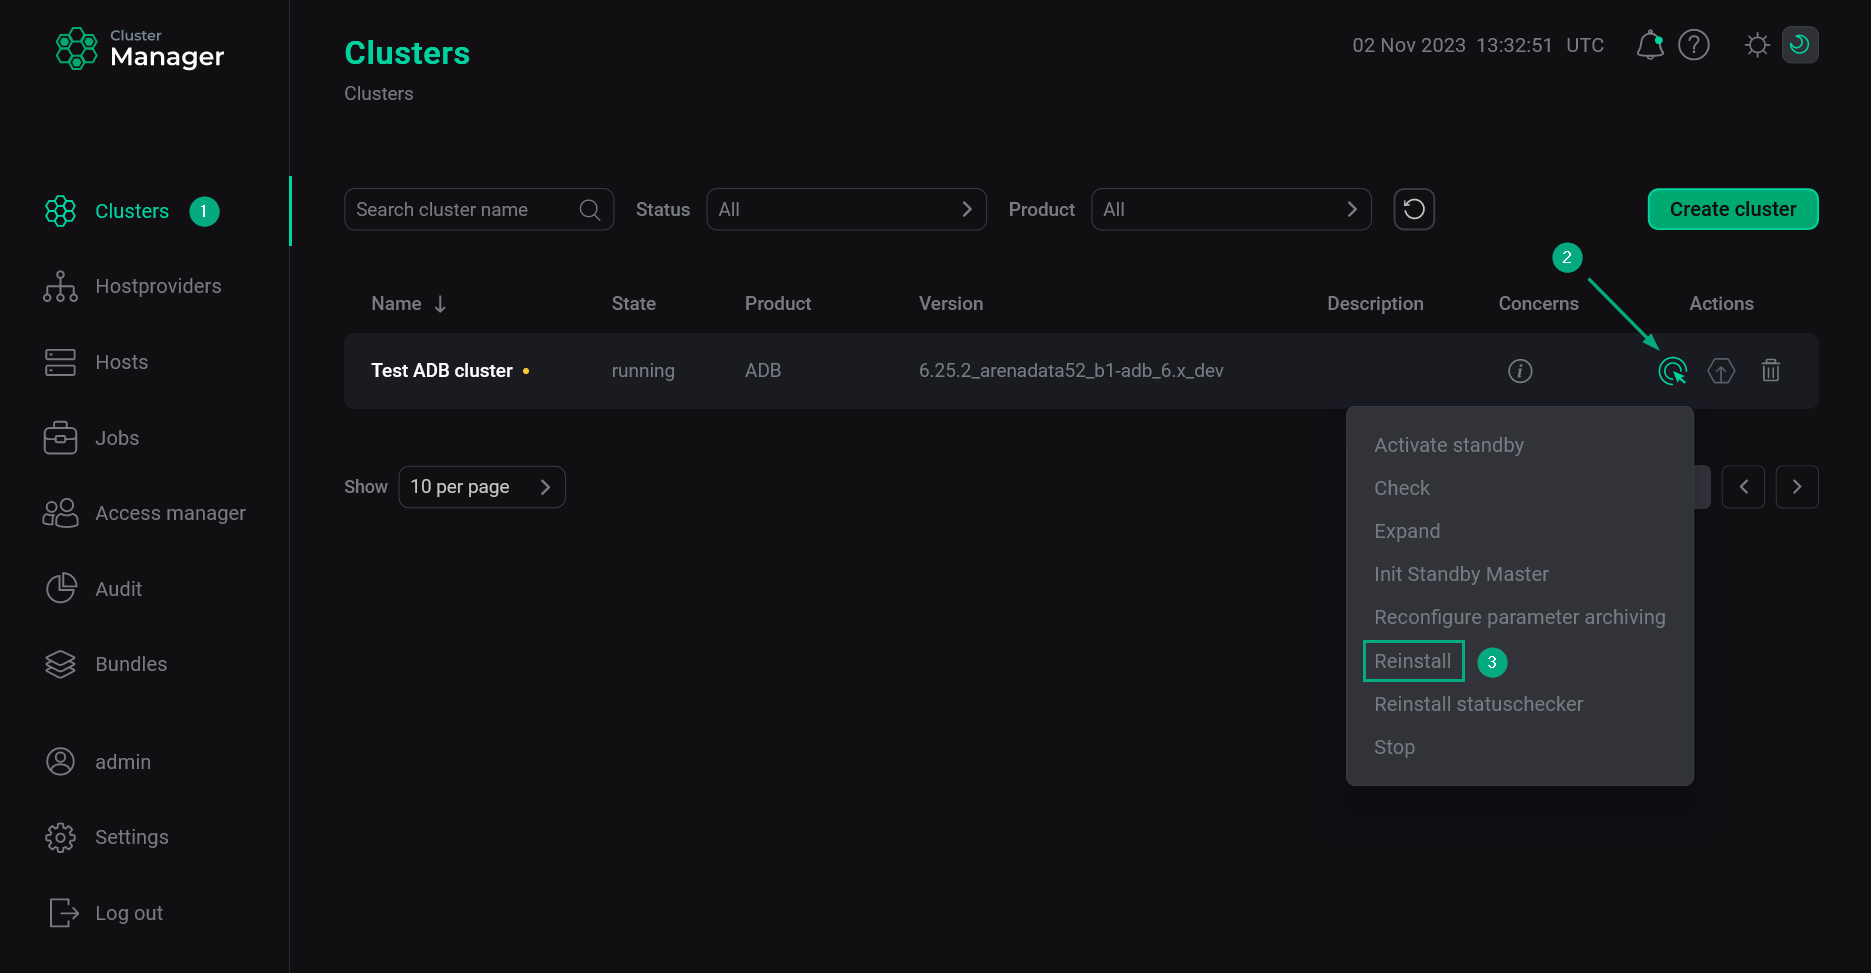 Installation restart
Single services
To install one or several cluster services manually, add these services to the cluster and then perform the actions described in the following subsections. The process of installing the ADB service differs from all other services.
|
CAUTION
Notice that services are installed one by one. Do not install another service until the installation of the previous one is completed.
|
ADB service
-
Open the Services tab on the cluster page. Find the row corresponding to the ADB service, click the
icon in the Actions column, and select the Install ADB action.
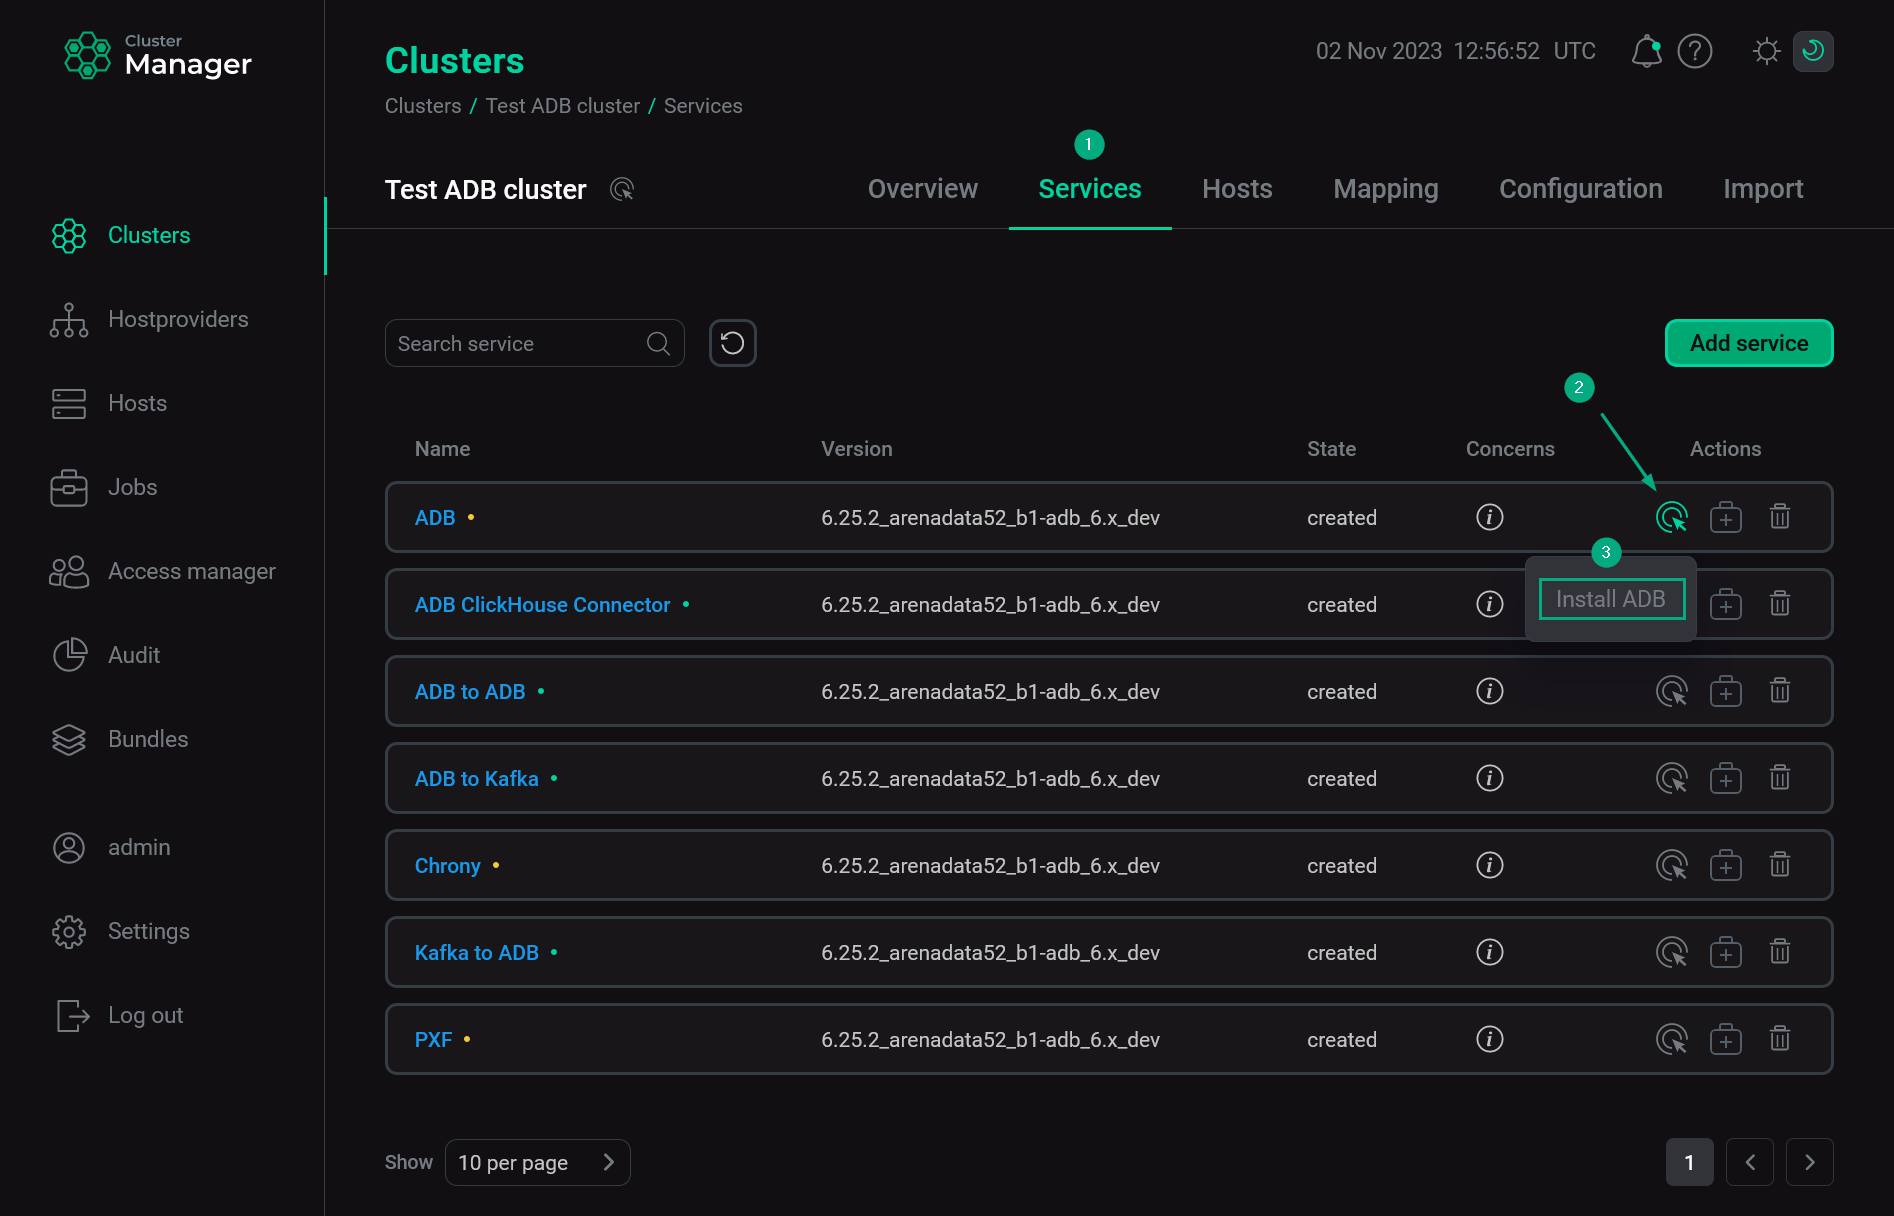 Switch to ADB installation
 -
Confirm the action in the window that opens.
 Confirm the action
 -
Wait until the job is completed. Then check that the ADB service state is changed from
createdtoinstalled.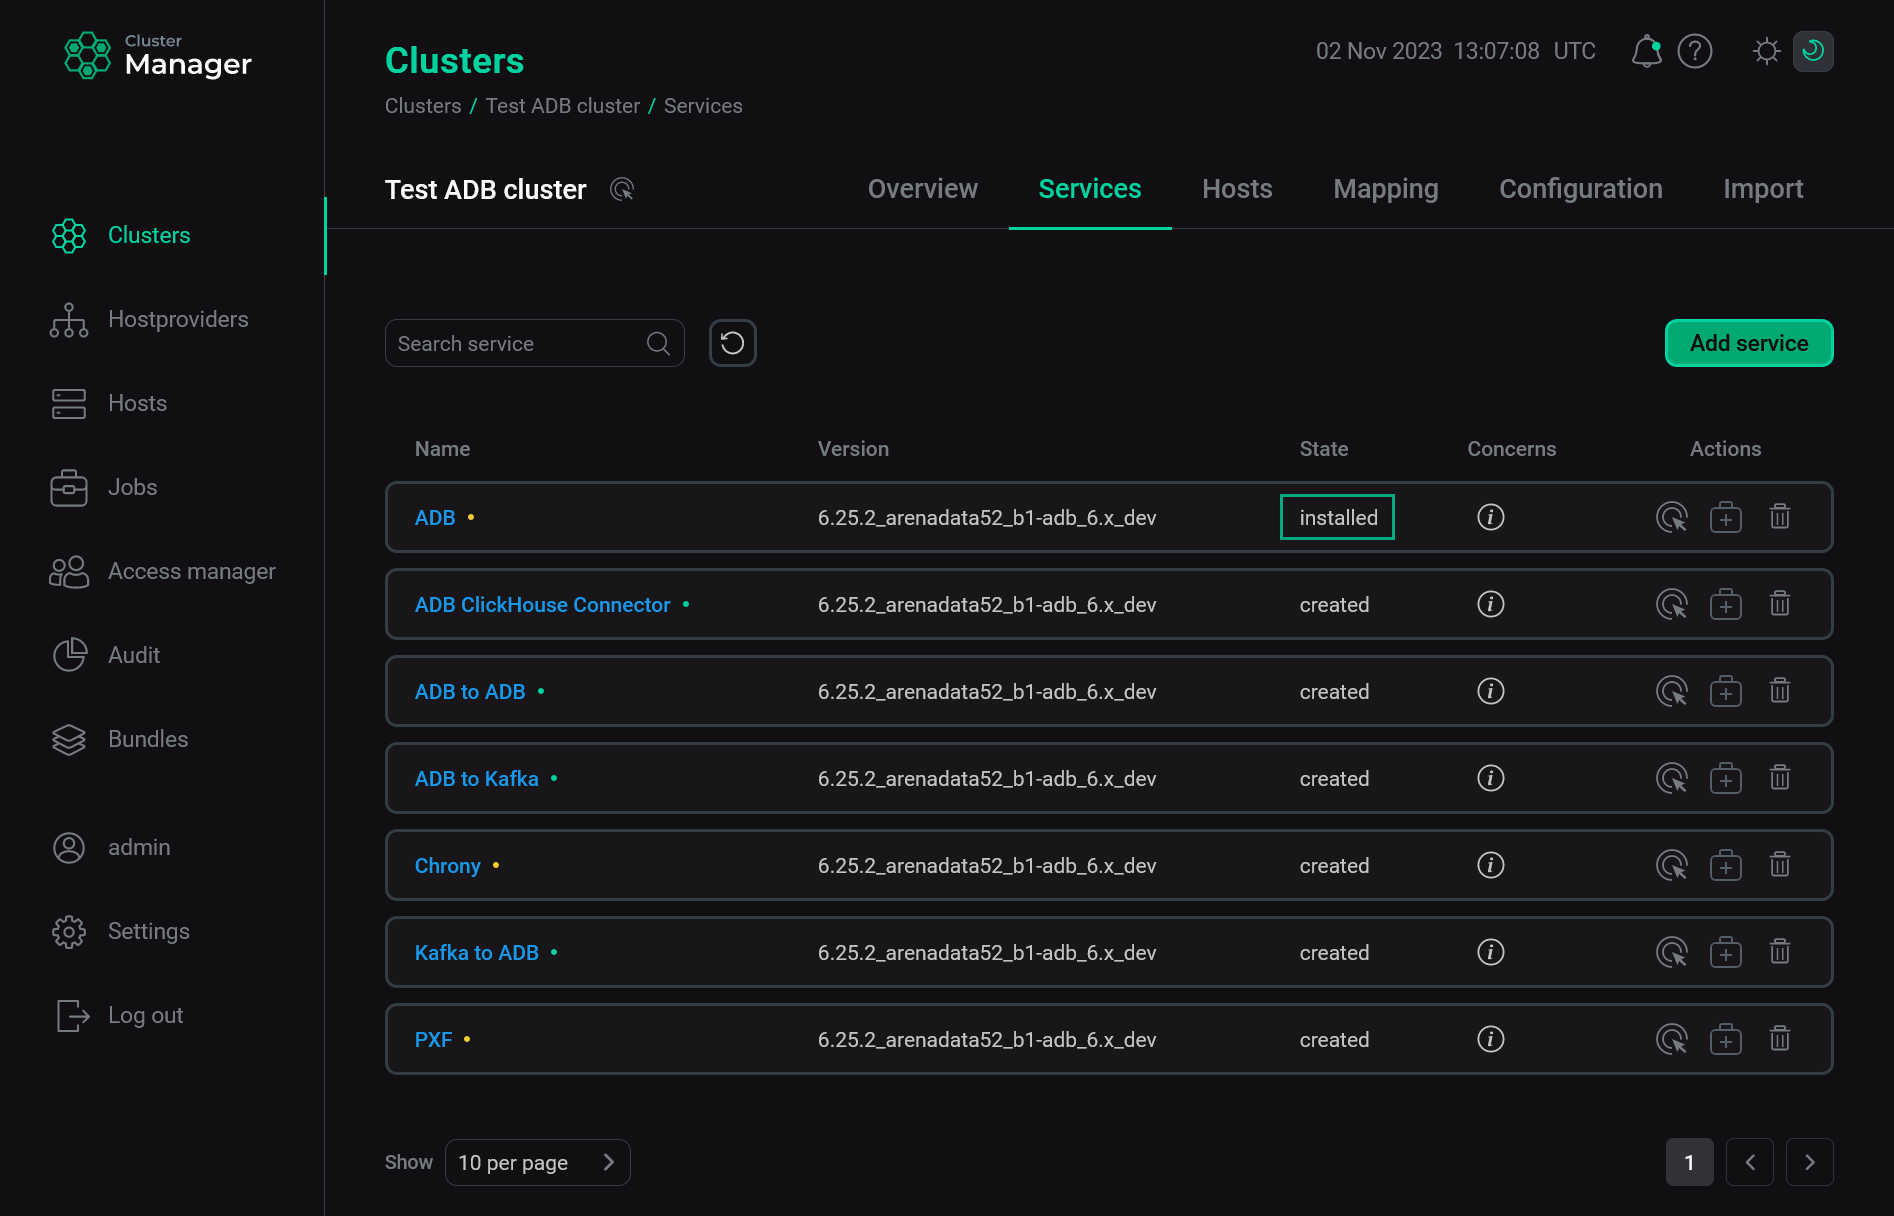 Check the ADB service state after installation
Other services
-
Open the Services tab on the cluster page. For each service that should be installed, click the
icon in the Actions column and select the Install action.
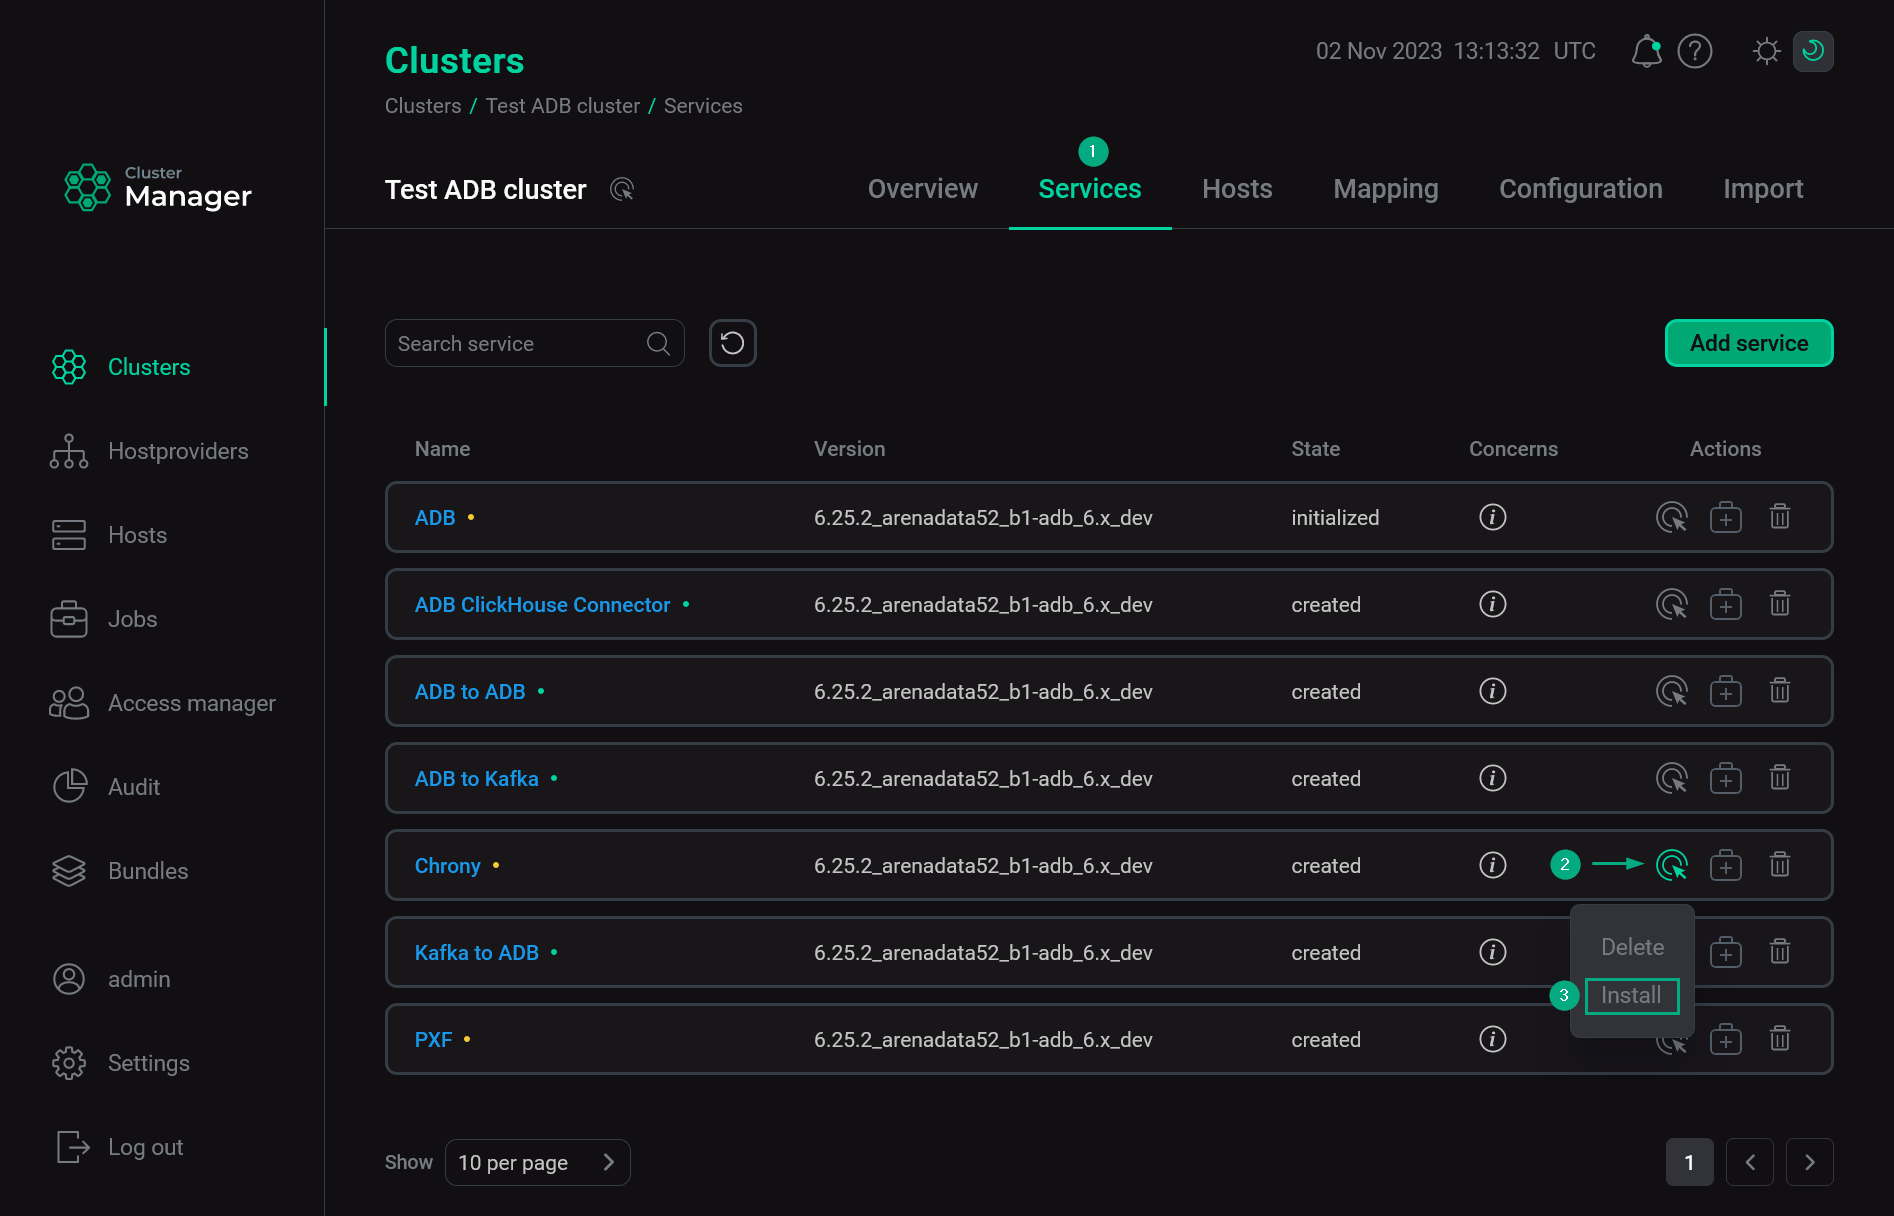 Switch to installation of single services
 -
Confirm the action in the window that opens.
-
Wait until the job is completed. Then check that the service state has changed from
createdto a new value that is shown in the New states of ADB services after installation table. -
Repeat the previous actions for other services that should be installed.
|
IMPORTANT
When you install services manually, one by one, use the following order:
|
Step 3. Check the cluster state after installation
As a result of successful installation, the cluster and its services change their state according to the following rules:
-
The cluster state, displayed in the State field on the Clusters page, is being changed from
createdtoinstalled.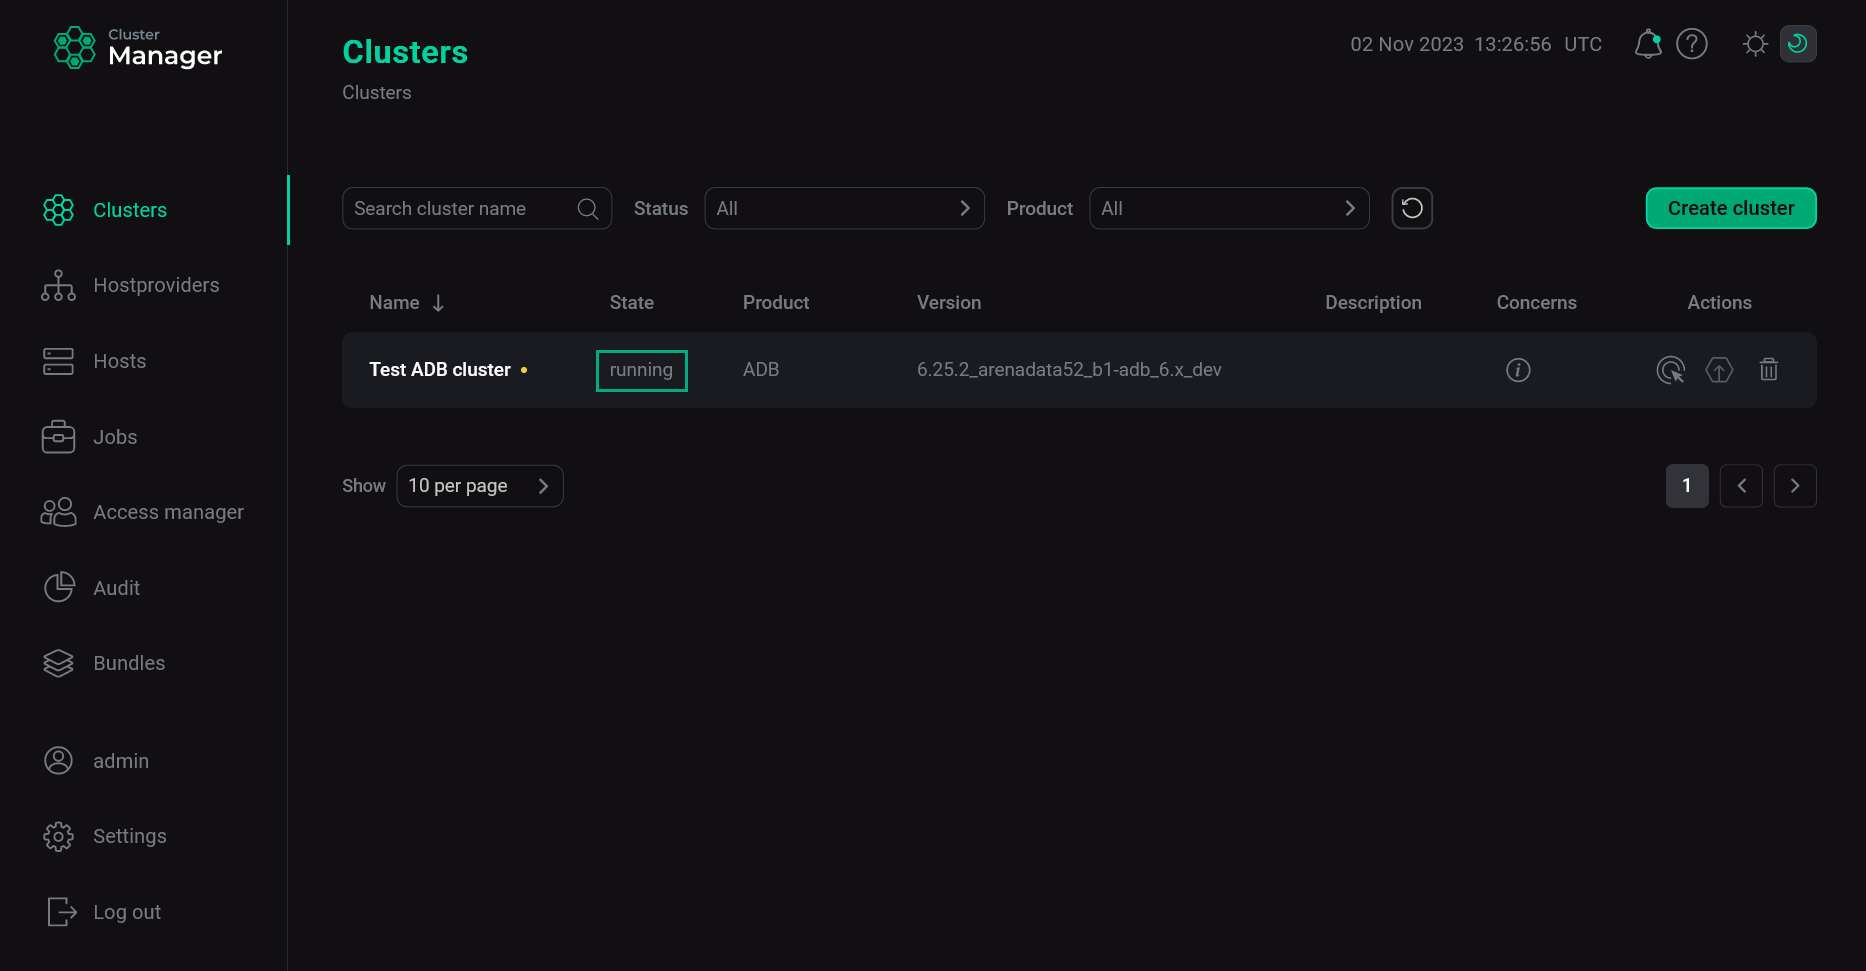 The cluster state after successful installation
 -
The state of cluster services, displayed on the Services tab of the cluster page, is being changed from
createdto a new value that is shown in the table below.New states of ADB services after installation Service New state ADB
installed
Chrony
installed
PXF
installed
ADB ClickHouse Connector
installed
ADB to ADB
installed
ADB to Kafka
installed
Kafka to ADB
installed
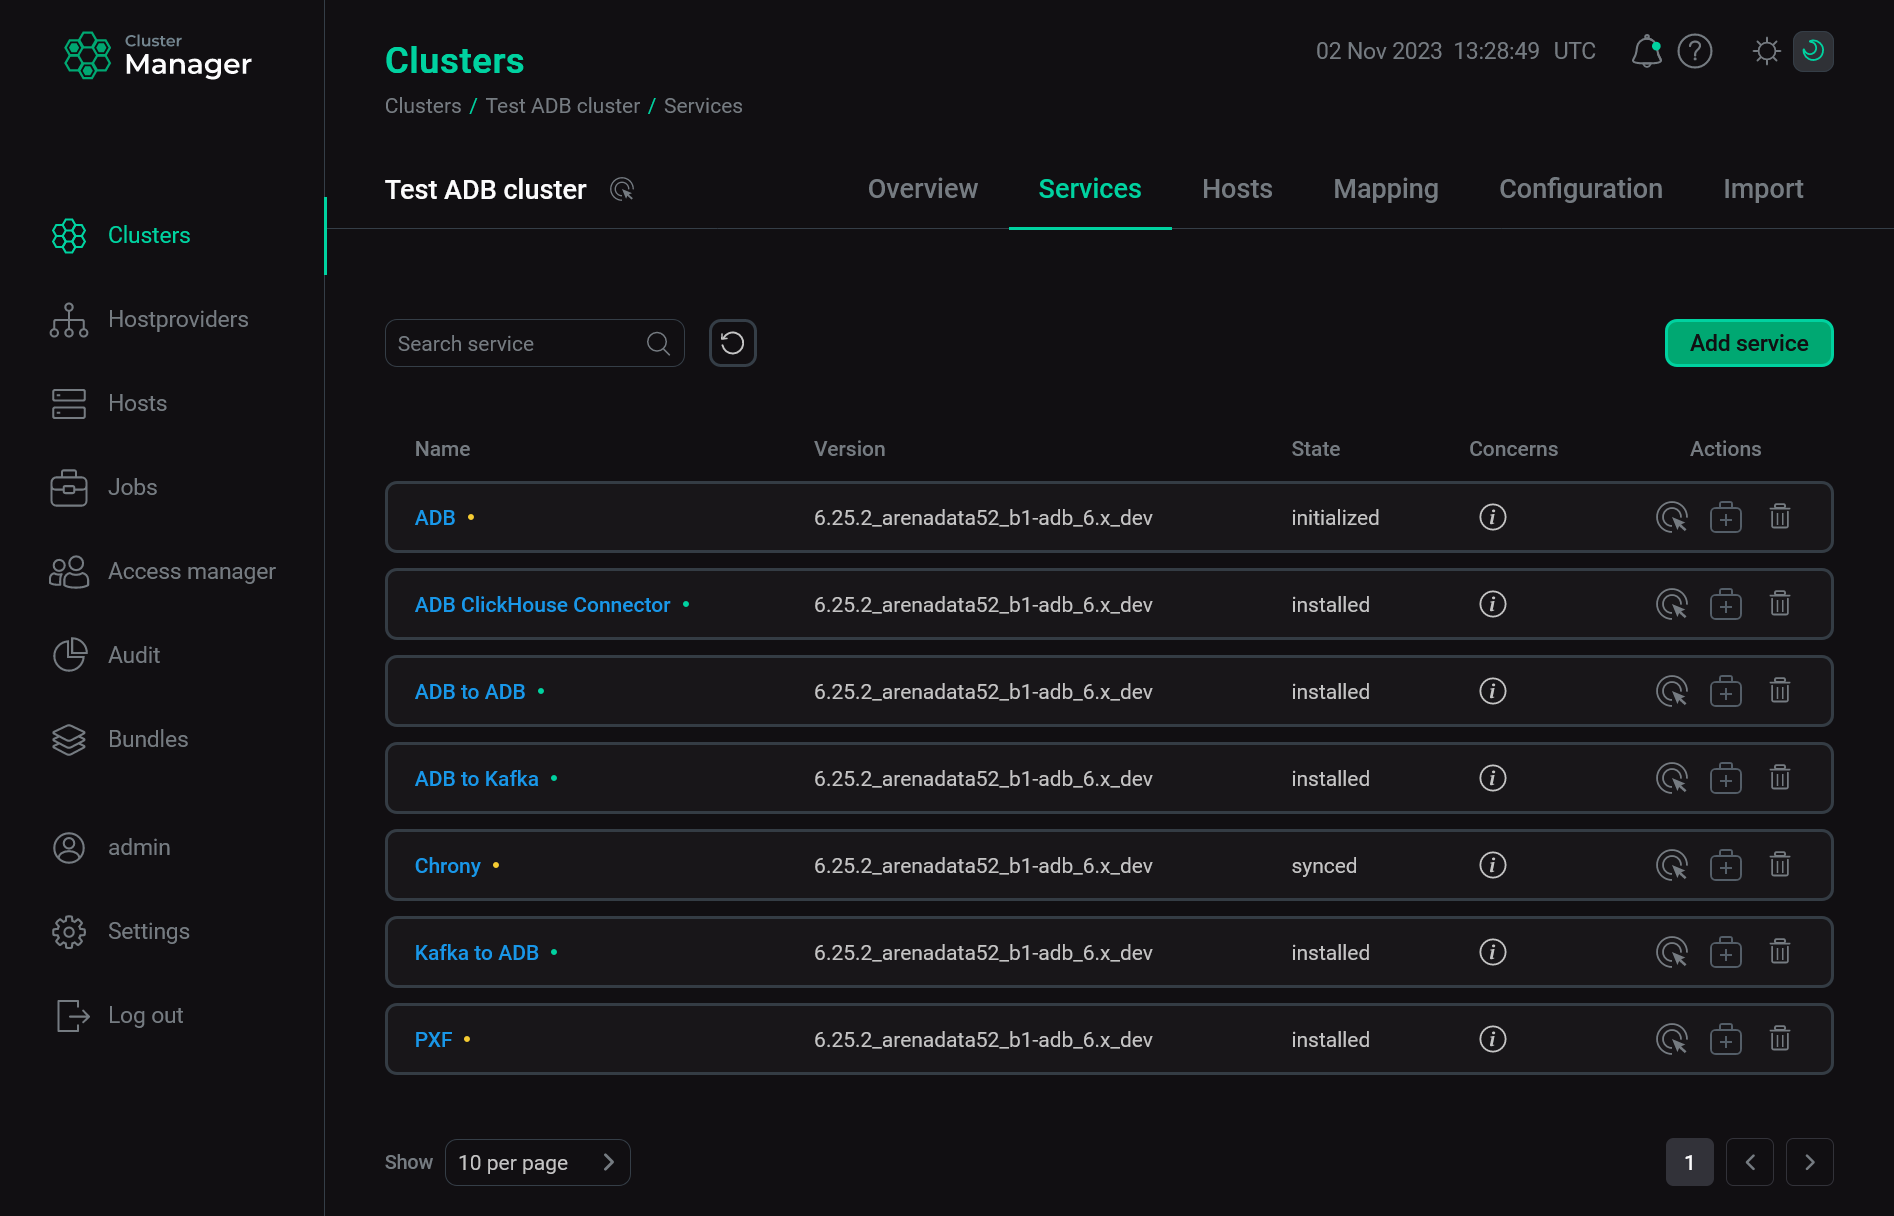 The state of cluster services after successful installation
Step 4. Check the default database
Regardless of the installation method, the default database is created during the ADB service installation. This database is used as default for client connections (for example, during the installation of extensions via ADB service actions). The database name can be specified in the Name of default database configuration parameter of the ADB service before installation. The default name is adb.
To ensure that the default database is successfully created, perform the following steps:
-
Connect to the ADB coordinator host (via SSH, etc.) and log in under the default user
gpadmin.$ sudo su - gpadmin -
List all ADB databases.
psql -lThe command output contains the
adbdatabase:List of databases Name | Owner | Encoding | Collate | Ctype | Access privileges -----------+---------+----------+-------------+-------------+--------------------- adb | gpadmin | UTF8 | en_US.UTF-8 | en_US.UTF-8 | =Tc/gpadmin + | | | | | gpadmin=CTc/gpadmin postgres | gpadmin | UTF8 | en_US.UTF-8 | en_US.UTF-8 | template0 | gpadmin | UTF8 | en_US.UTF-8 | en_US.UTF-8 | =c/gpadmin + | | | | | gpadmin=CTc/gpadmin template1 | gpadmin | UTF8 | en_US.UTF-8 | en_US.UTF-8 | =c/gpadmin + | | | | | gpadmin=CTc/gpadmin (4 rows)