

Disaster recovery
Configure and run
To configure disaster recovery (DR) in ADBM, follow the steps:
-
Using the ADB Control web interface, add a new cluster to which data from the source ADB cluster will be copied. Next, the added cluster will be called target or DR cluster. Note that both ADB Control and ADBM services should be added to the target cluster via ADCM.
-
Open the Backup manager page in the ADB Control web interface. Ensure that the source and target clusters are available on the page in the
UPstatus.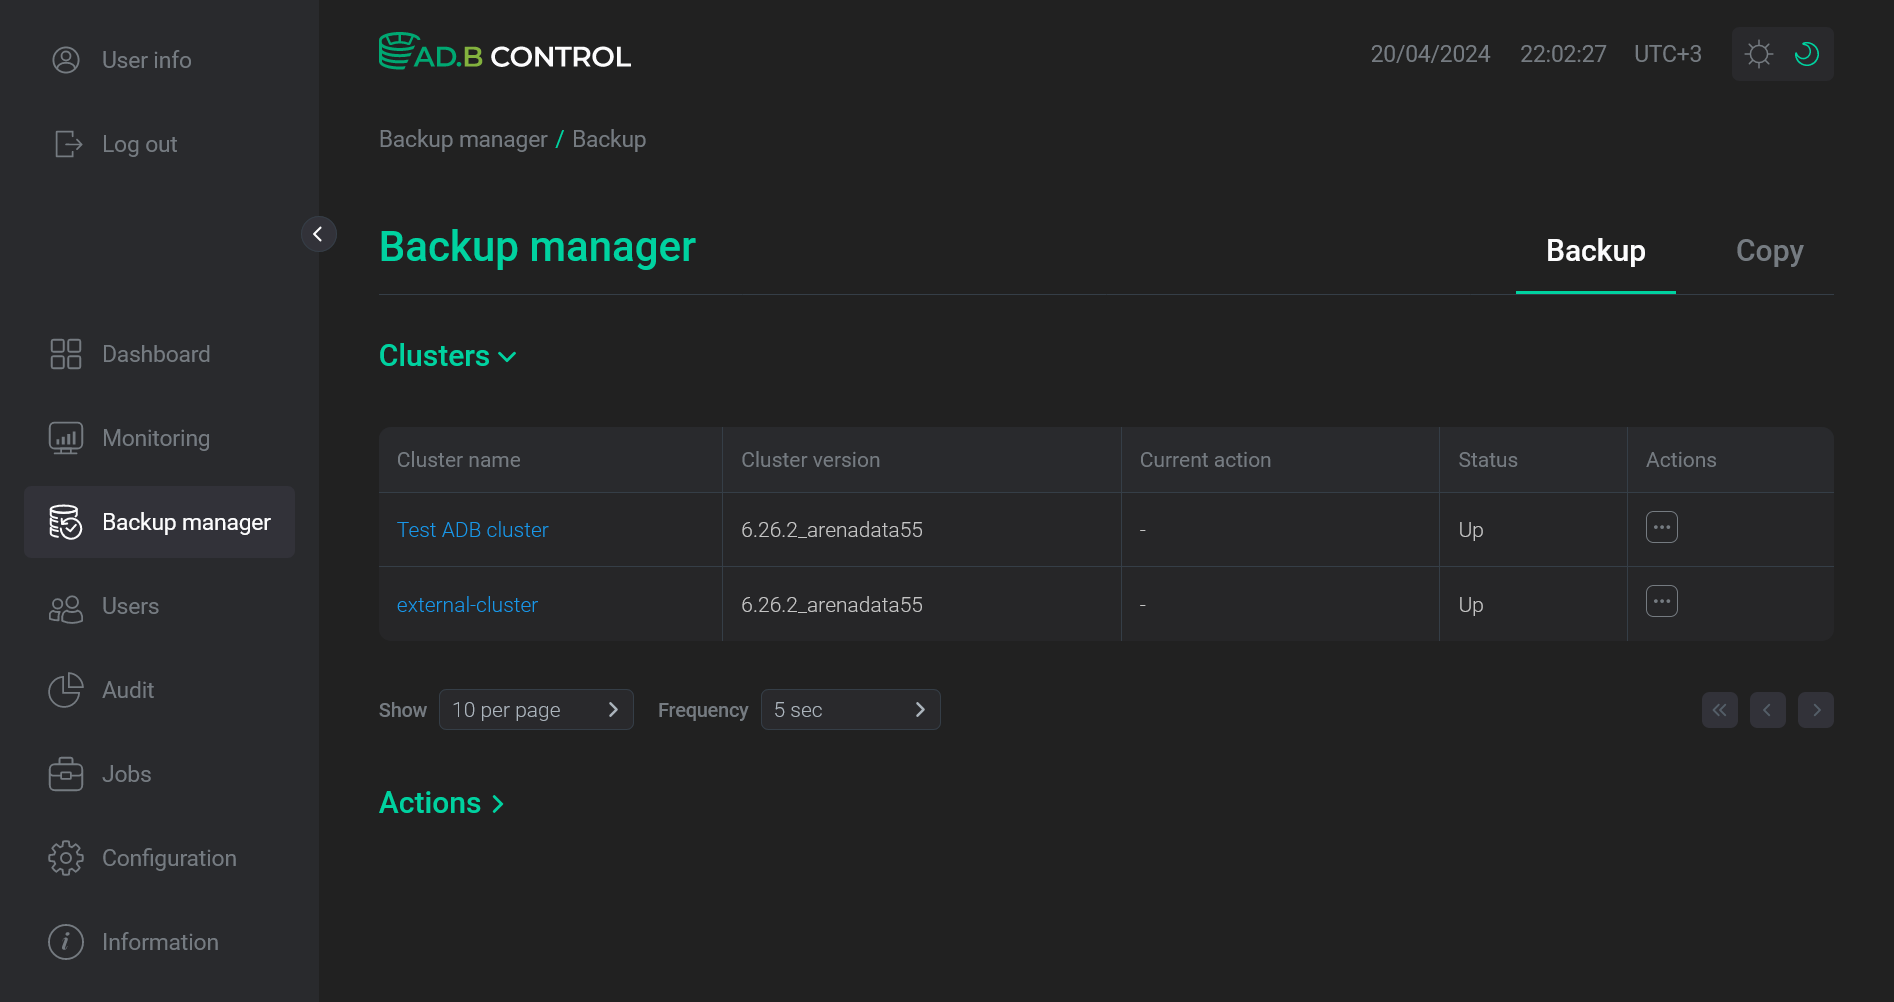 Both clusters are available on the Backup manager page
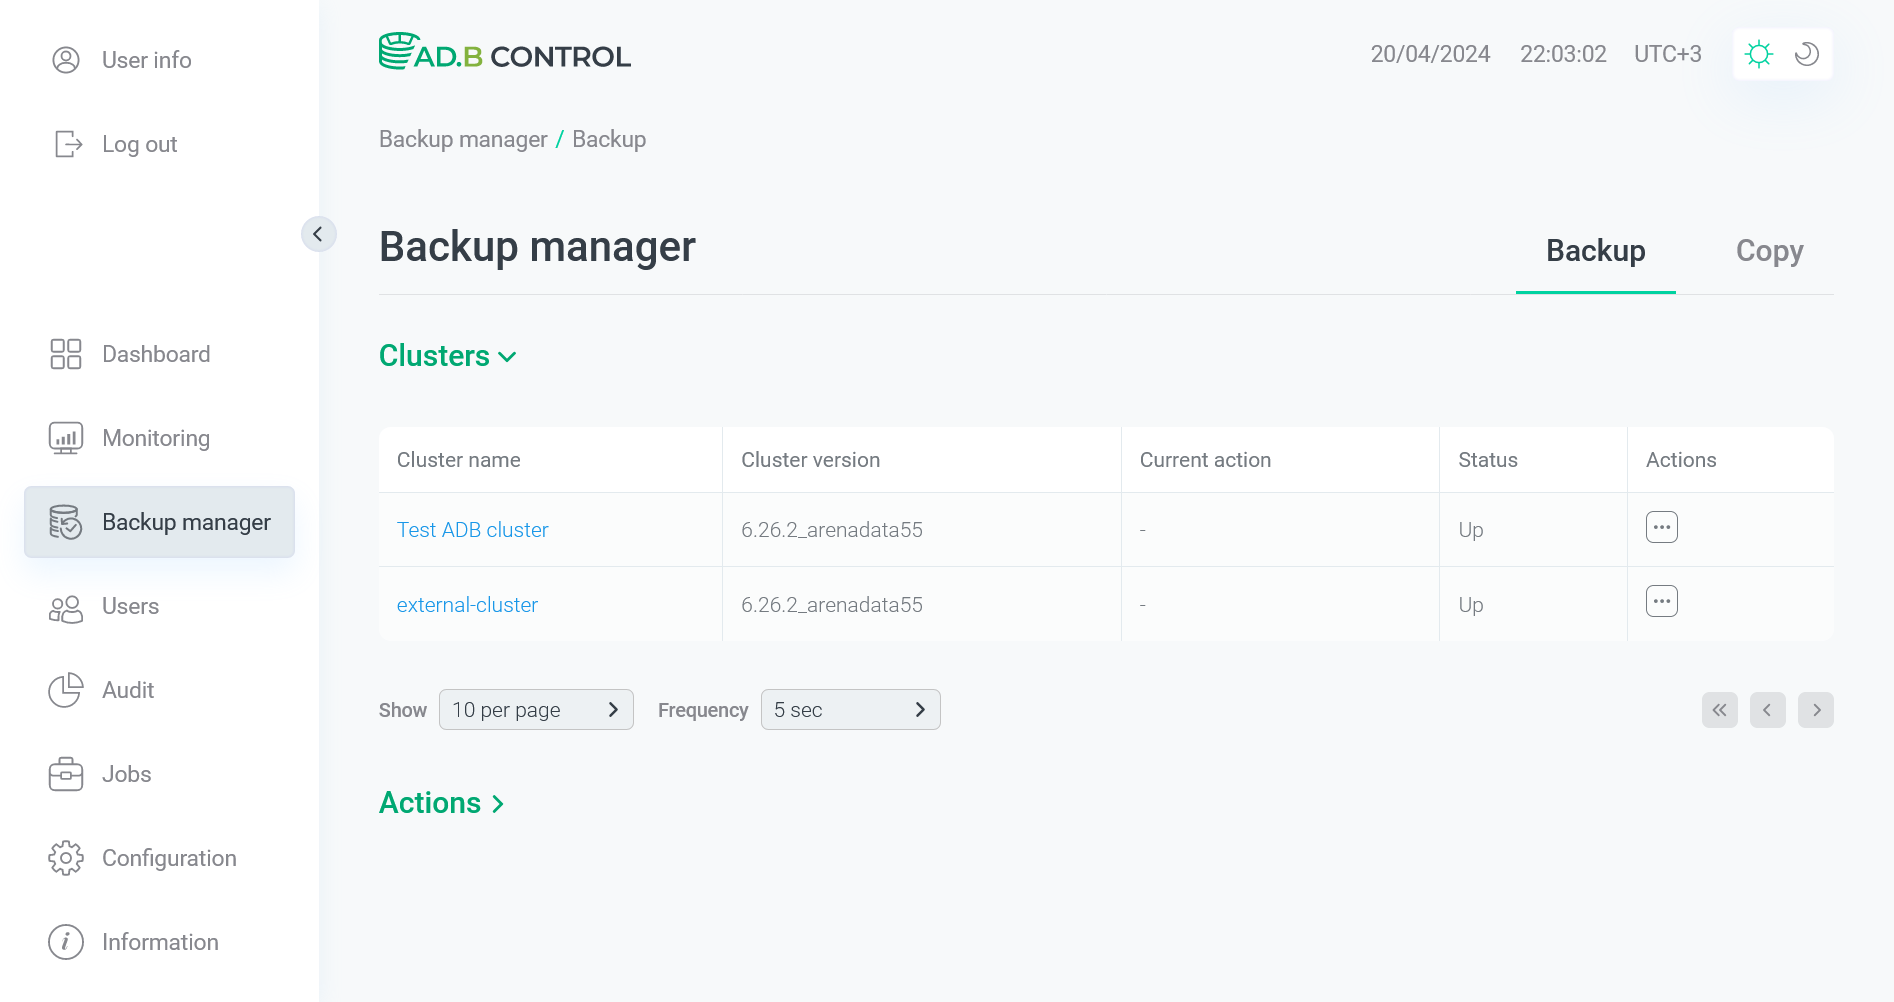 Both clusters are available on the Backup manager pageCAUTION
-
To properly configure data copying, use two clusters with the same major version (the first two digits in the bundle number). For example, clusters with the
6.23.4and6.23.5bundle versions can interact. But you cannot configure data copying between clusters with the6.23.4and6.24.1versions. -
To restore data on a target ADB cluster from a backup created on another cluster, you need the same number of primary segments on both clusters. The rest of the cluster topology settings (such as mirroring, standby, number of host segments) do not affect the restore option.
-
The operating system versions and families should be compatible on the source and target cluster hosts.
-
-
Add backup configurations for both clusters. Note that the source Storage section (which is defined for a source cluster) should describe the storage that is available for both clusters (for example, S3).
Storage section for a source cluster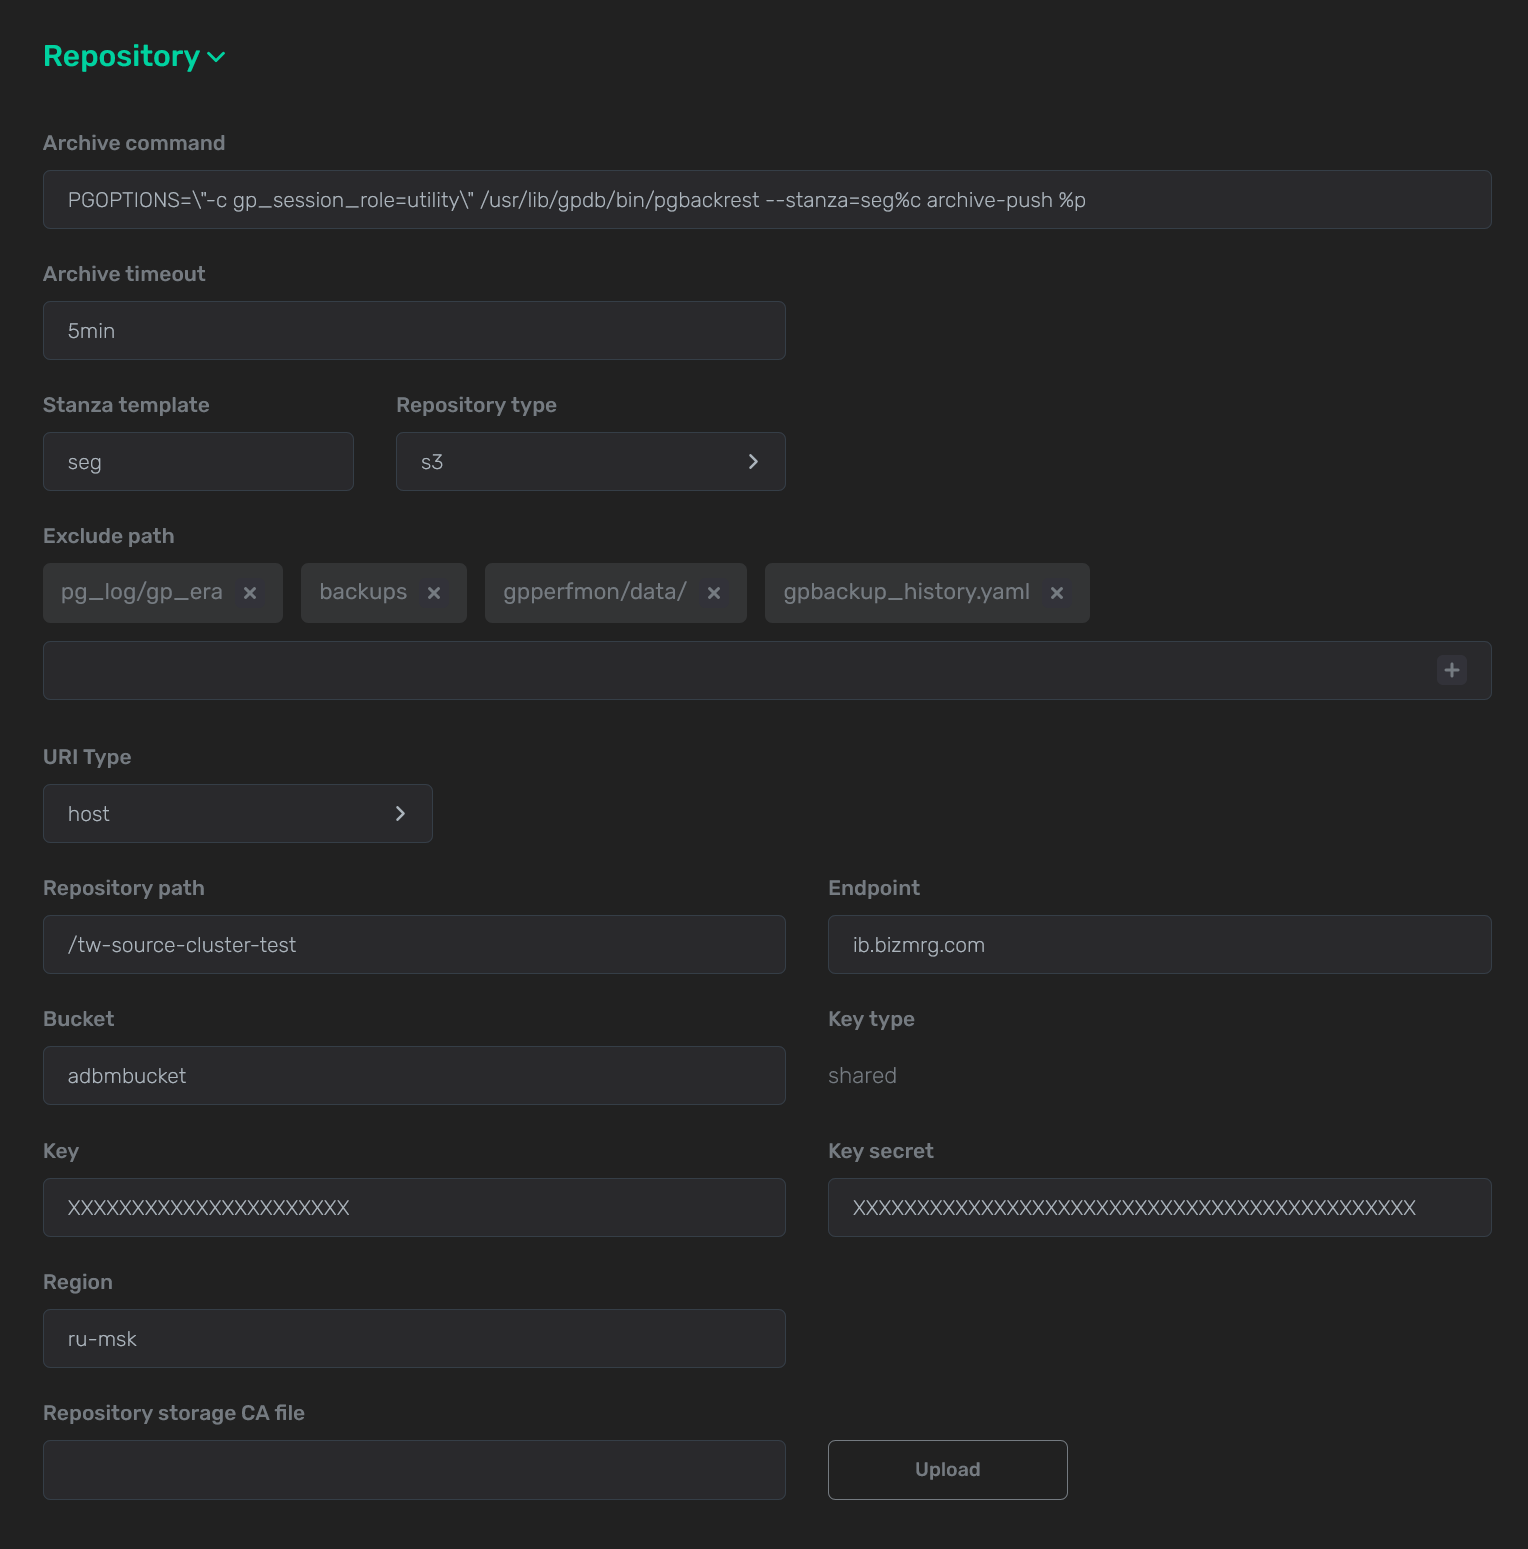 Example of filling the Storage section for a source cluster
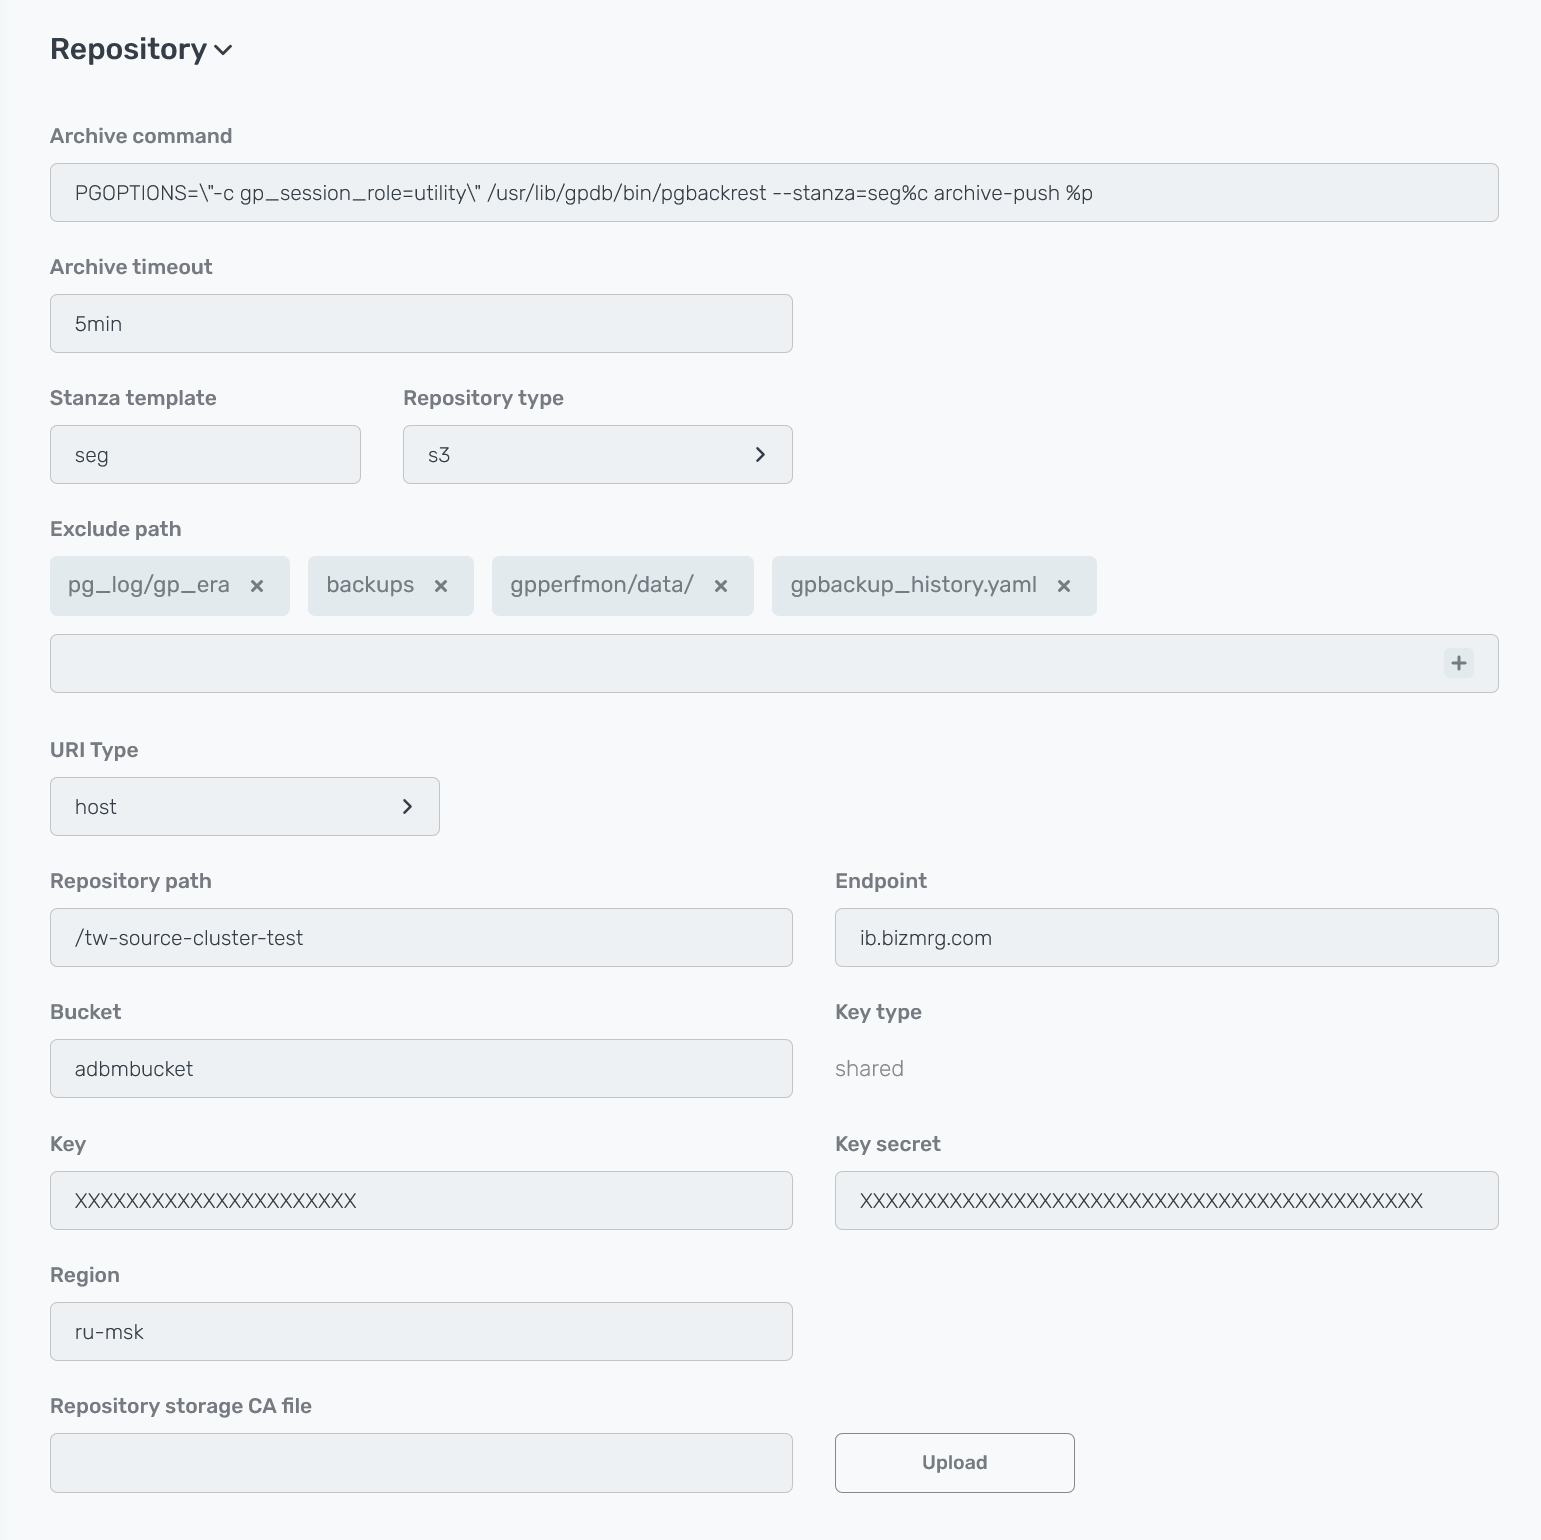 Example of filling the Storage section for a source clusterStorage section for a target cluster
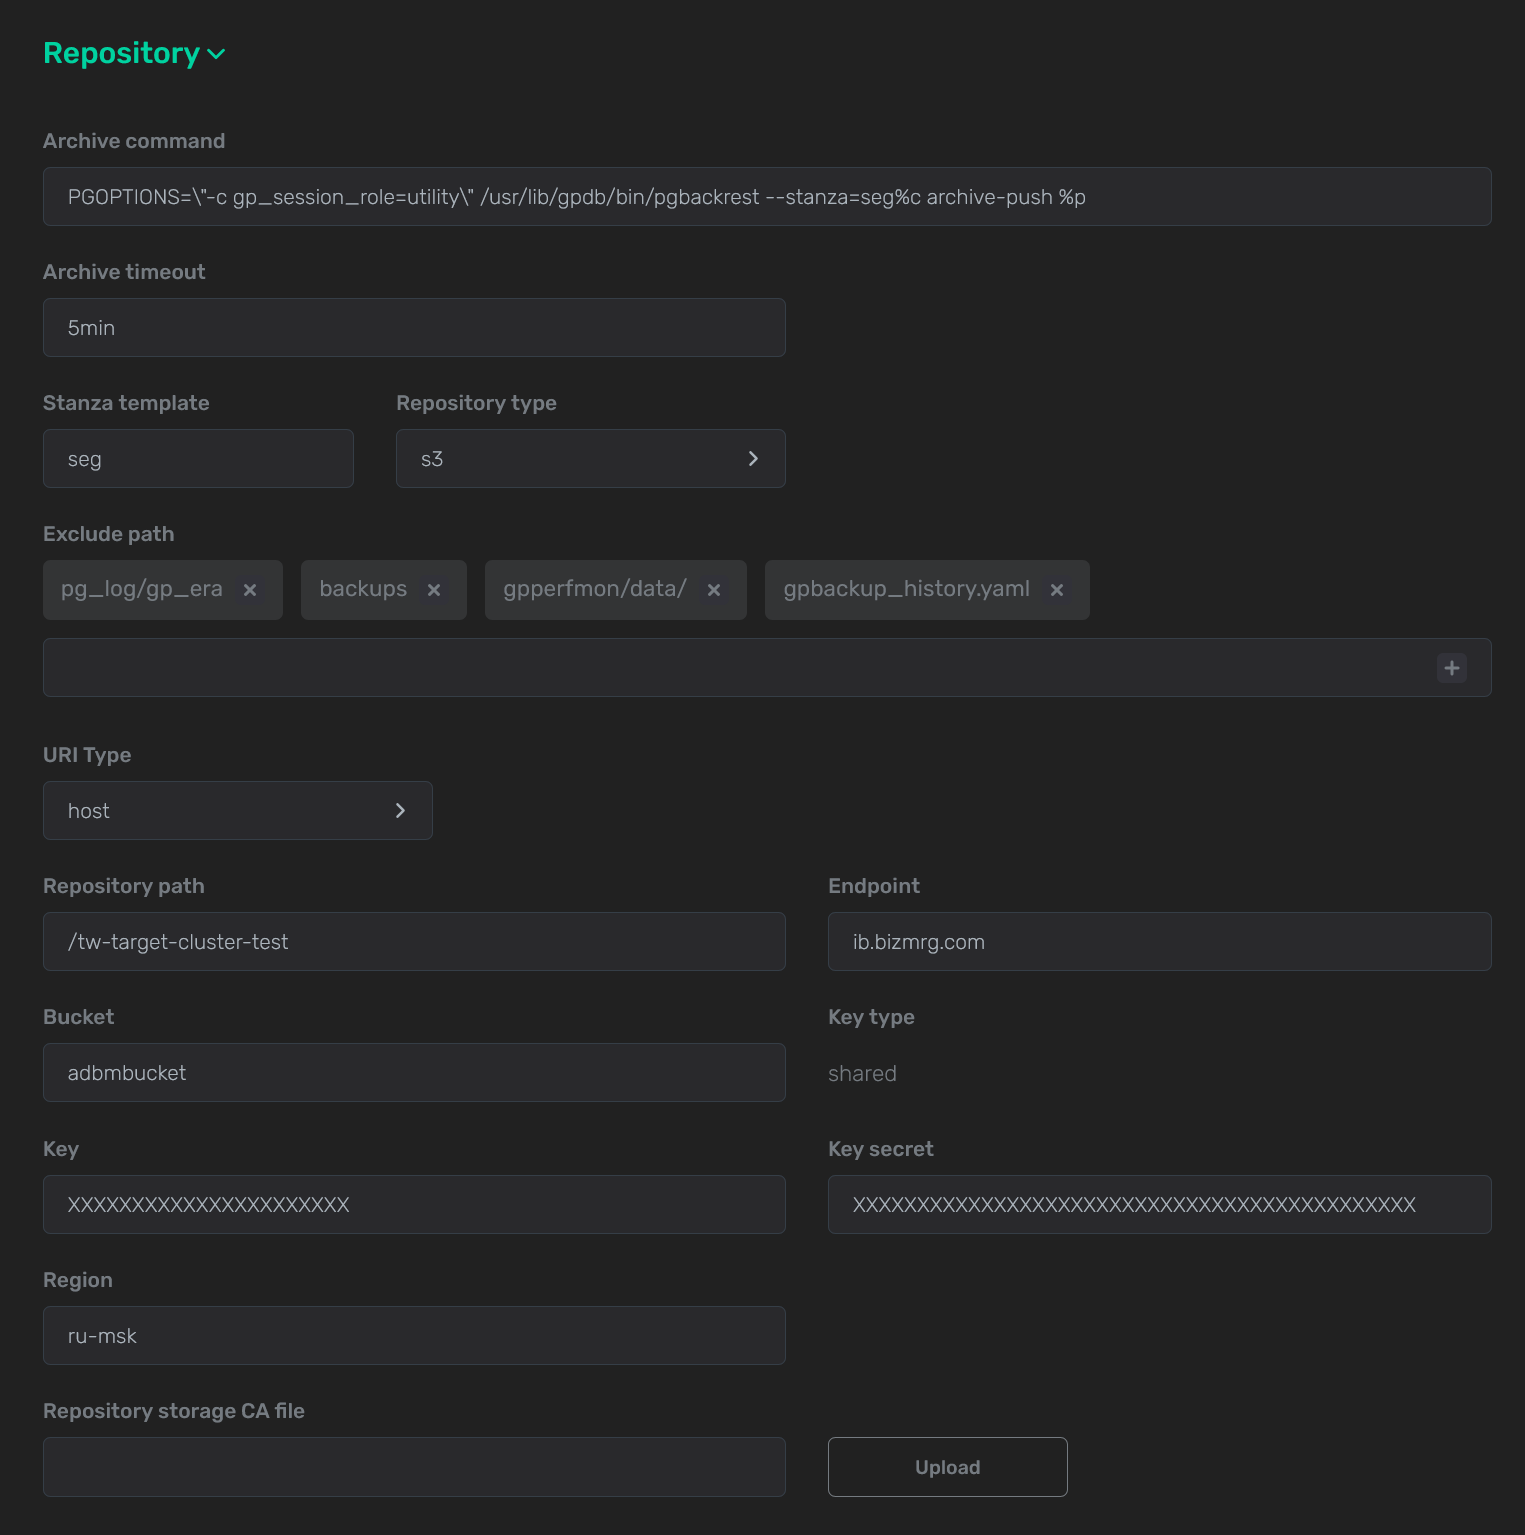 Example of filling the Storage section for a target cluster
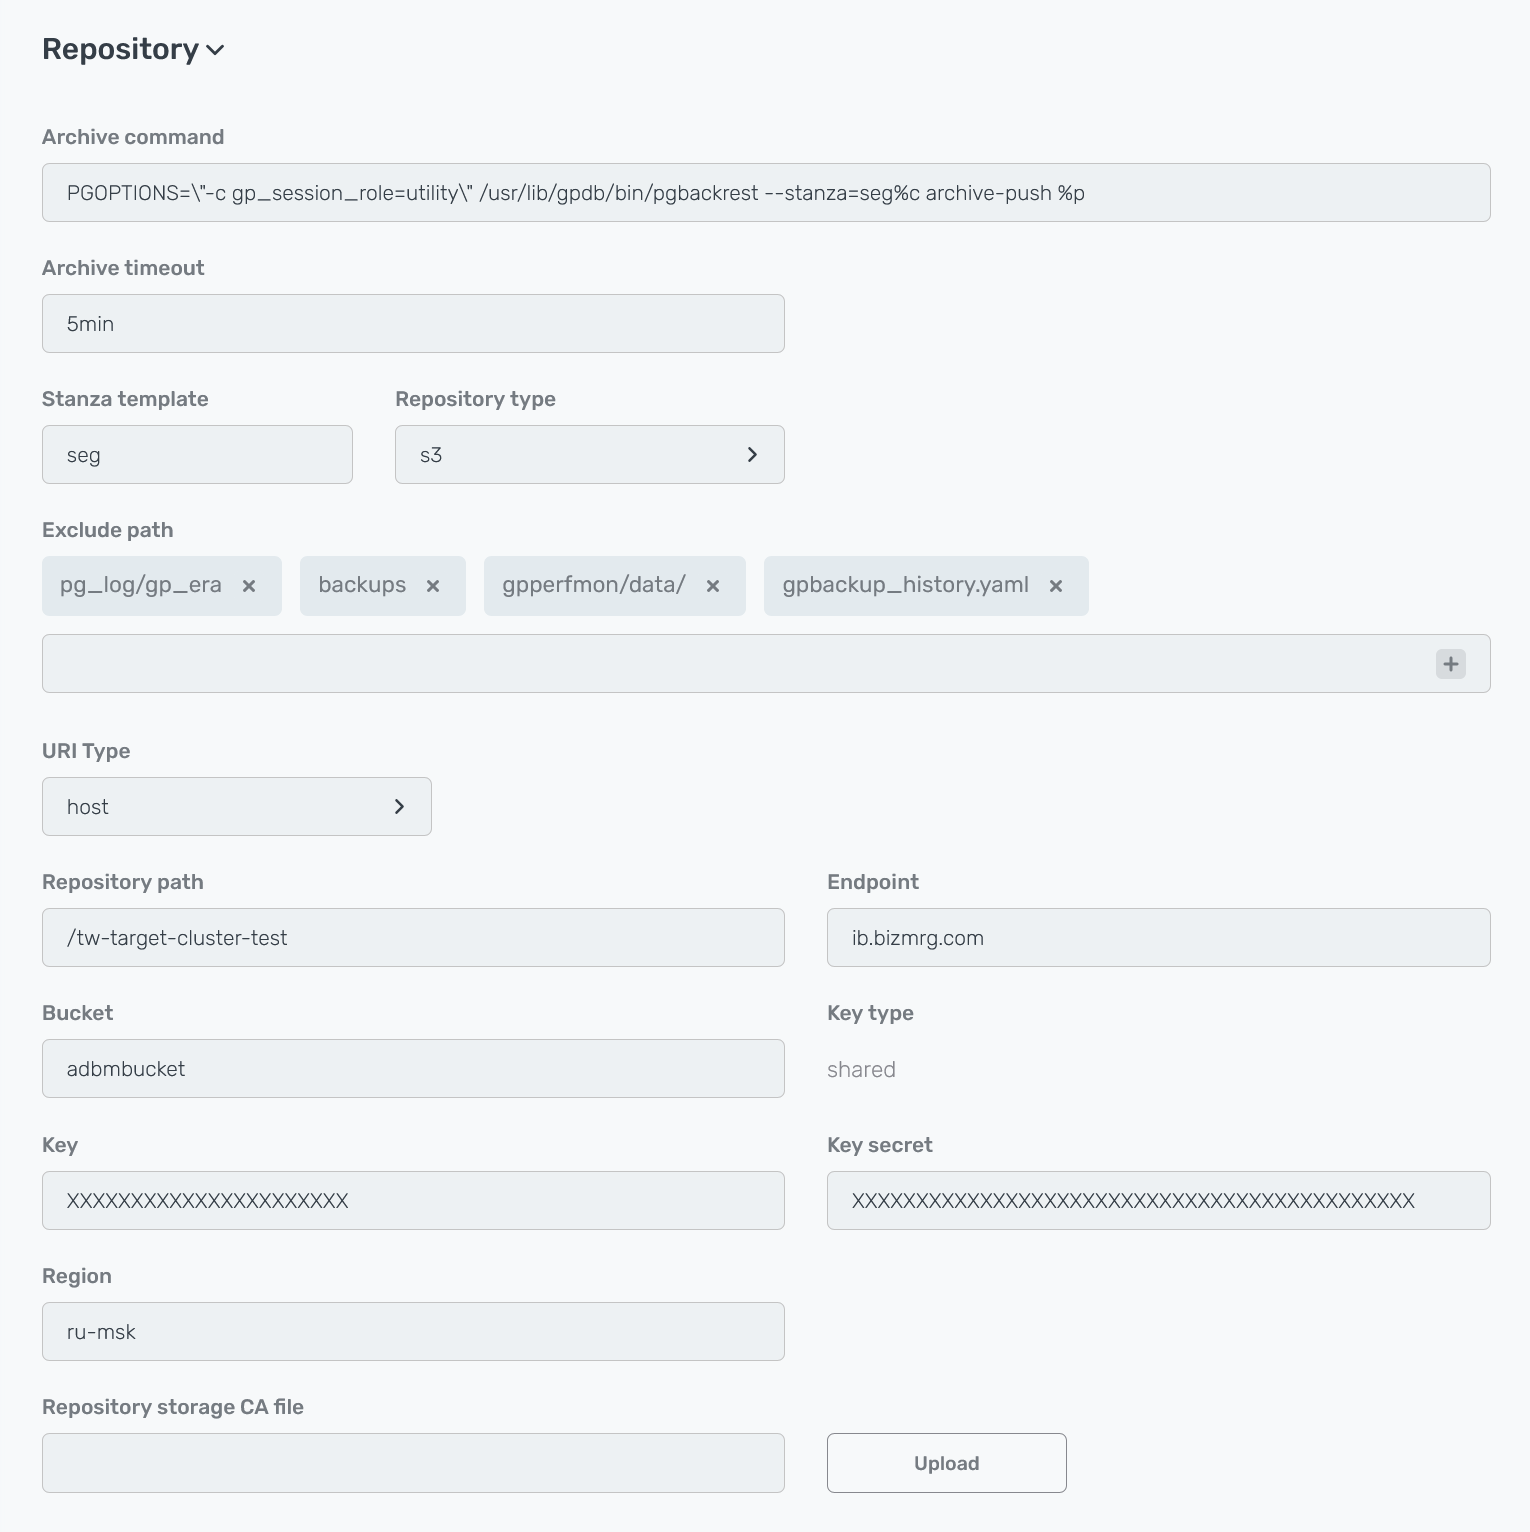 Example of filling the Storage section for a target cluster
 -
To verify the successful result of data copy in the future, check which data is currently available in both clusters.
Check a source cluster-
List tables of the
adbdatabase via the\dtpsqlcommand:\dtResult:
                         List of relations
 Schema |      Name       | Type  |  Owner  |       Storage
--------+-----------------+-------+---------+----------------------
 public | best_books      | table | gpadmin | heap
 public | book_type       | table | gpadmin | heap
 public | spatial_ref_sys | table | gpadmin | heap
 public | test            | table | gpadmin | append only columnar
 public | test2           | table | gpadmin | append only columnar
(5 rows)
-
View the
best_bookstable data:SELECT * FROM best_books;Result:
 id |   author   |         title         | public_year
----+------------+-----------------------+-------------
  1 | Harper Lee | To Kill a Mockingbird |        1960
(1 row)
Check a target cluster
View tables of theadbdatabase via the\dtpsqlcommand:\dtResult:
                  List of relations
 Schema |      Name       | Type  |  Owner  | Storage
--------+-----------------+-------+---------+---------
 public | spatial_ref_sys | table | gpadmin | heap
(1 row)
-
-
On the Data flow → Configurations tab of the Backup manager page, click Create to add a new DR configuration.
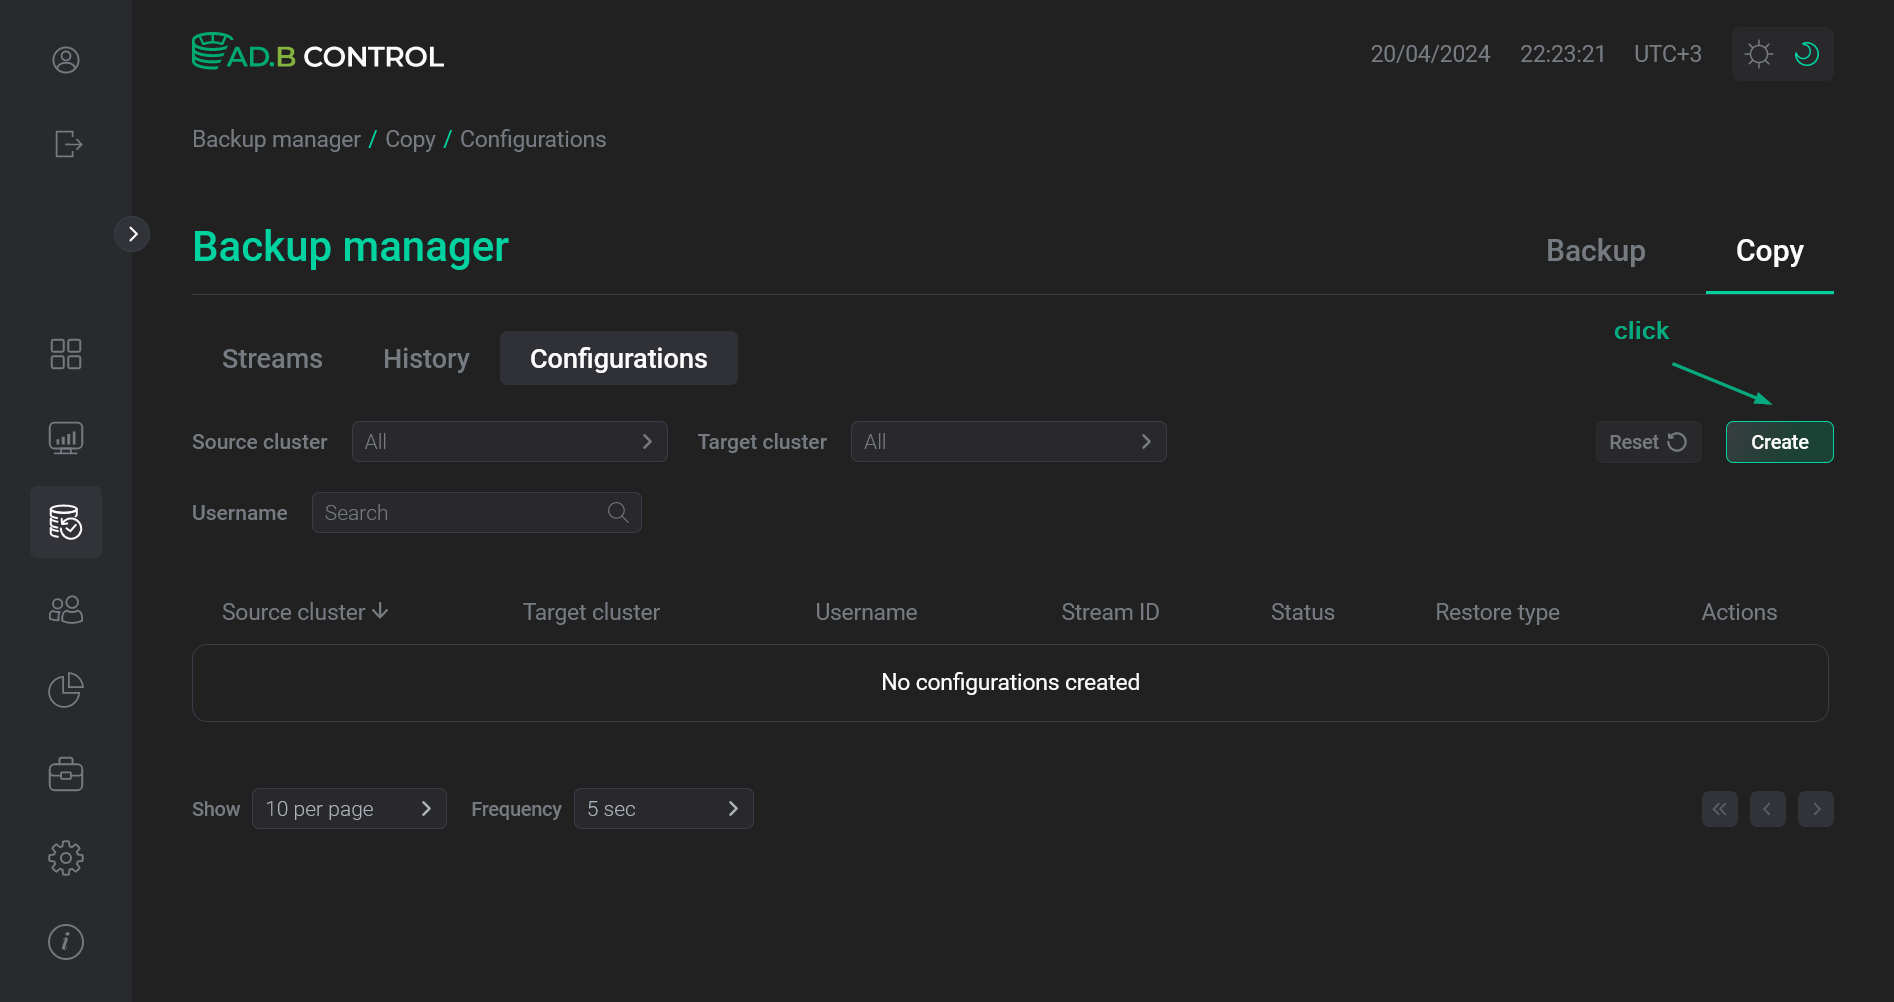 Switch to adding a DR configuration
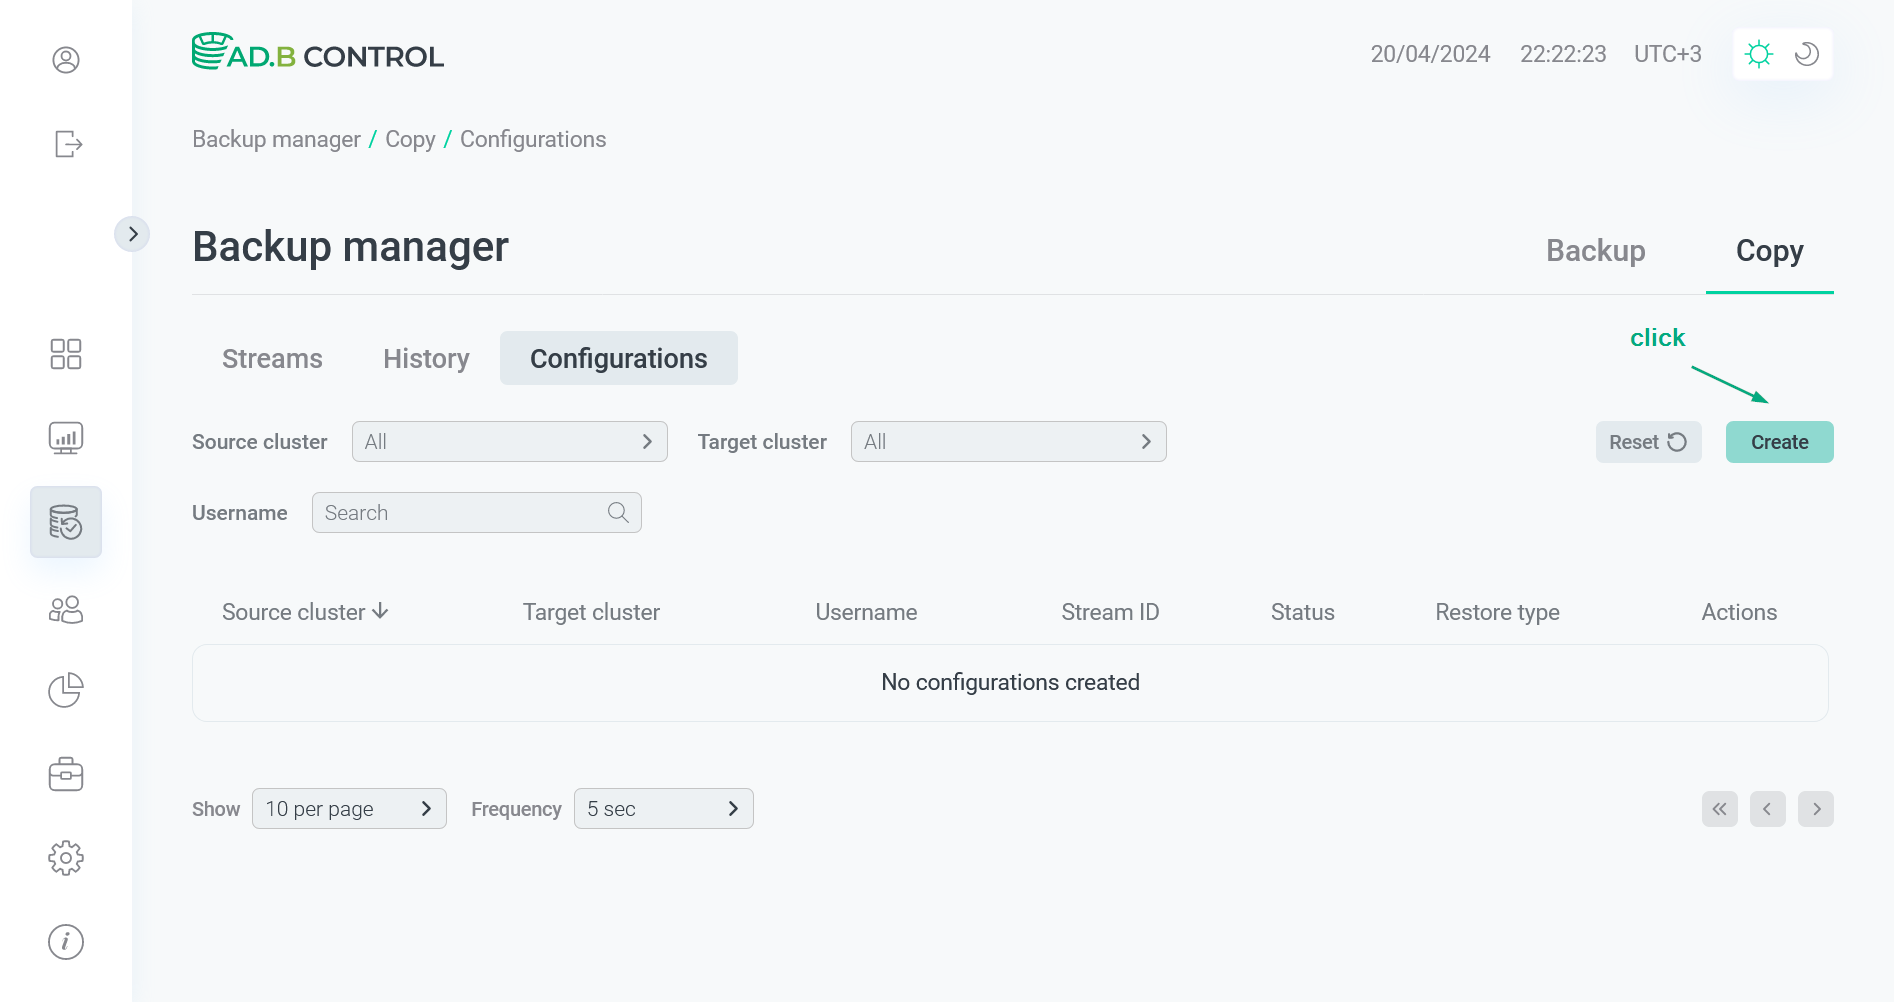 Switch to adding a DR configuration
 -
In the window that opens, fill in the following fields:
-
Source cluster — a source cluster name.
-
Target cluster — a target cluster name.
-
Autostart — a flag that indicates whether to create a data flow with the
Copyrestore type for a selected pair of clusters automatically each time a backup with the Backup type type is created in the source cluster. -
Backup type — types of backups in the source cluster that will trigger copying data (data flow) to the target cluster. The field becomes available if the Autostart flag is set. Possible values:
-
Full— full backups; -
Diff— differential backups; -
Incr— incremental backups.
-
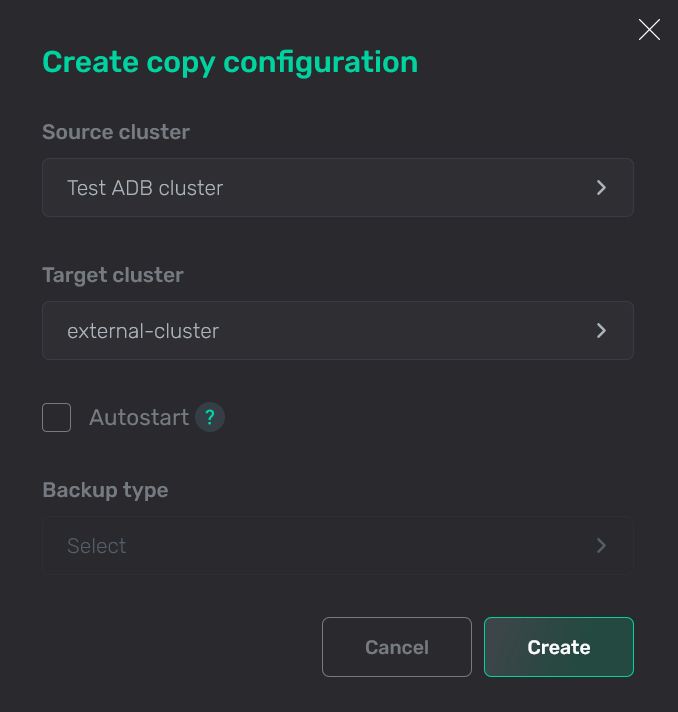 Add a DR configuration
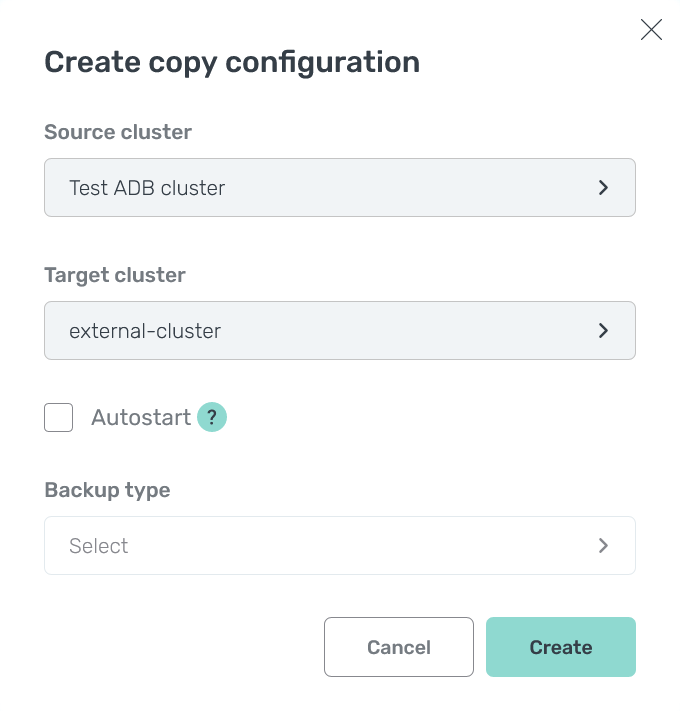 Add a DR configuration
 -
-
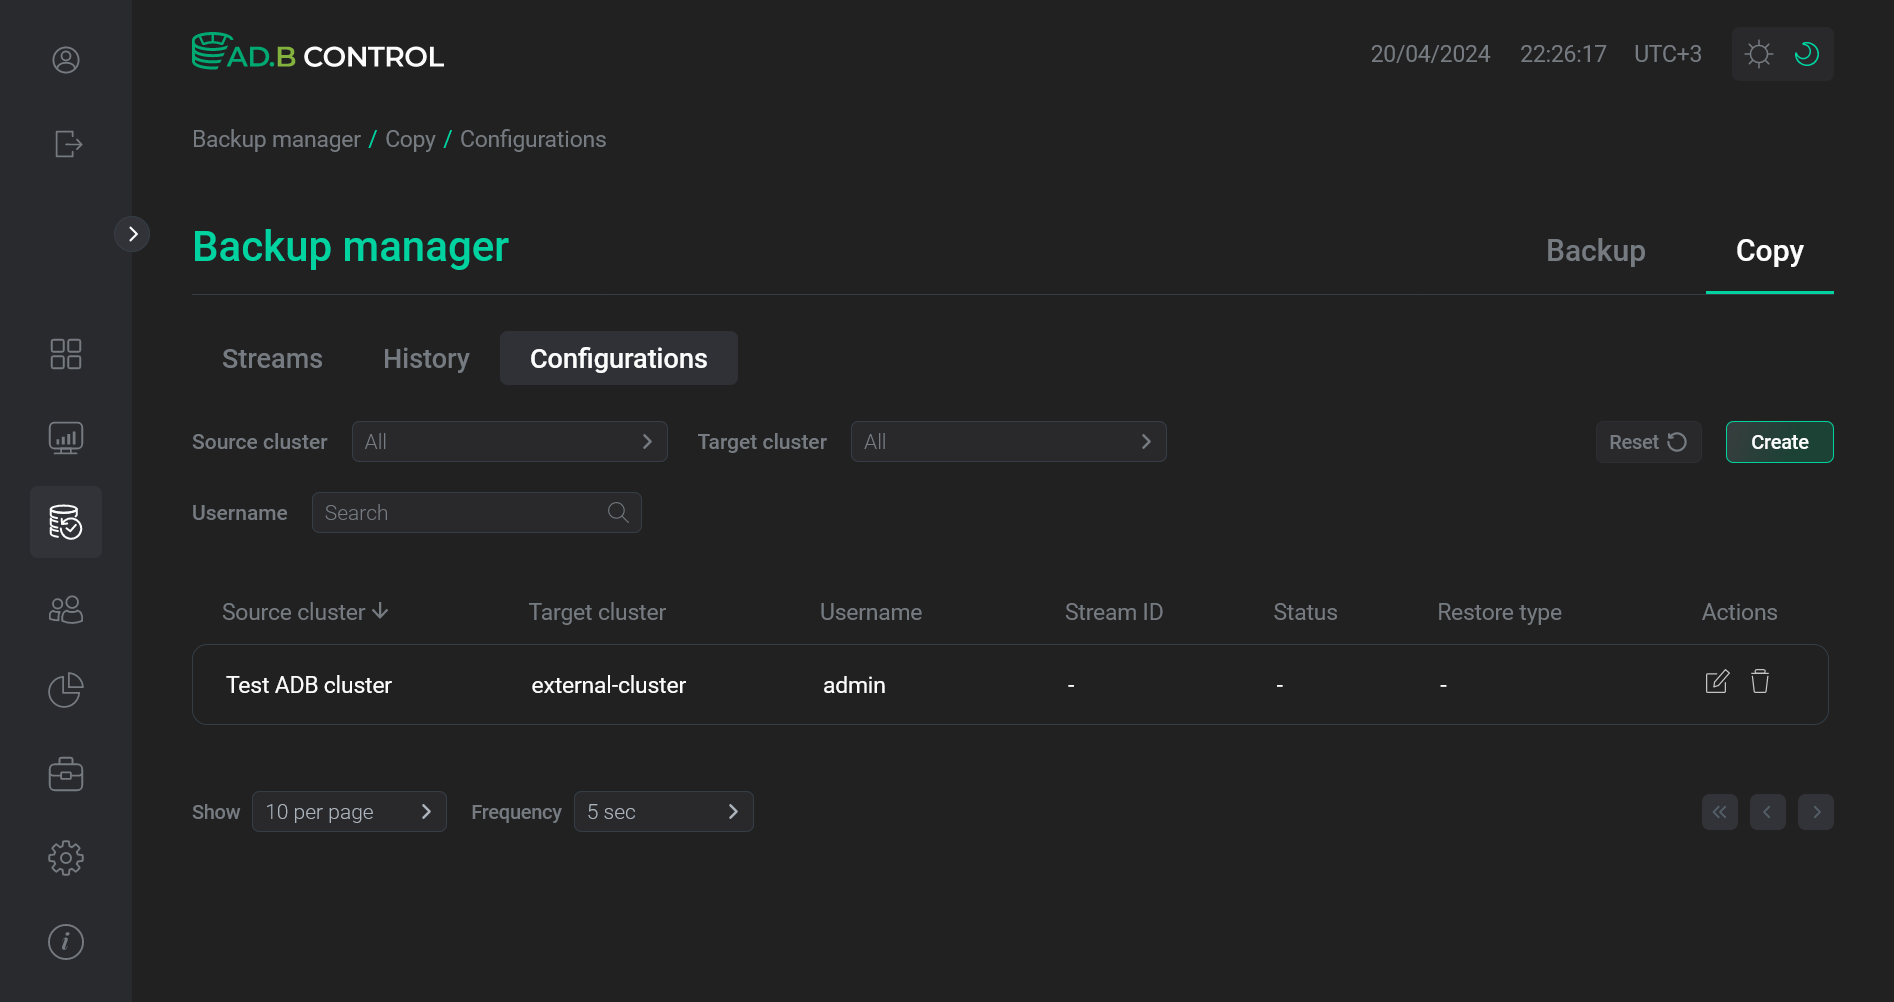
Click Create. As a result, the cluster pair is displayed on the Backup manager → Data flow → Configurations tab.
 Configuration is added
 Configuration is added
 -
Ensure that a source cluster has at least one restore point in ADBM. For this, a cluster should have a backup. Backups can be created either automatically according to the configured schedule or manually using the Backup action.
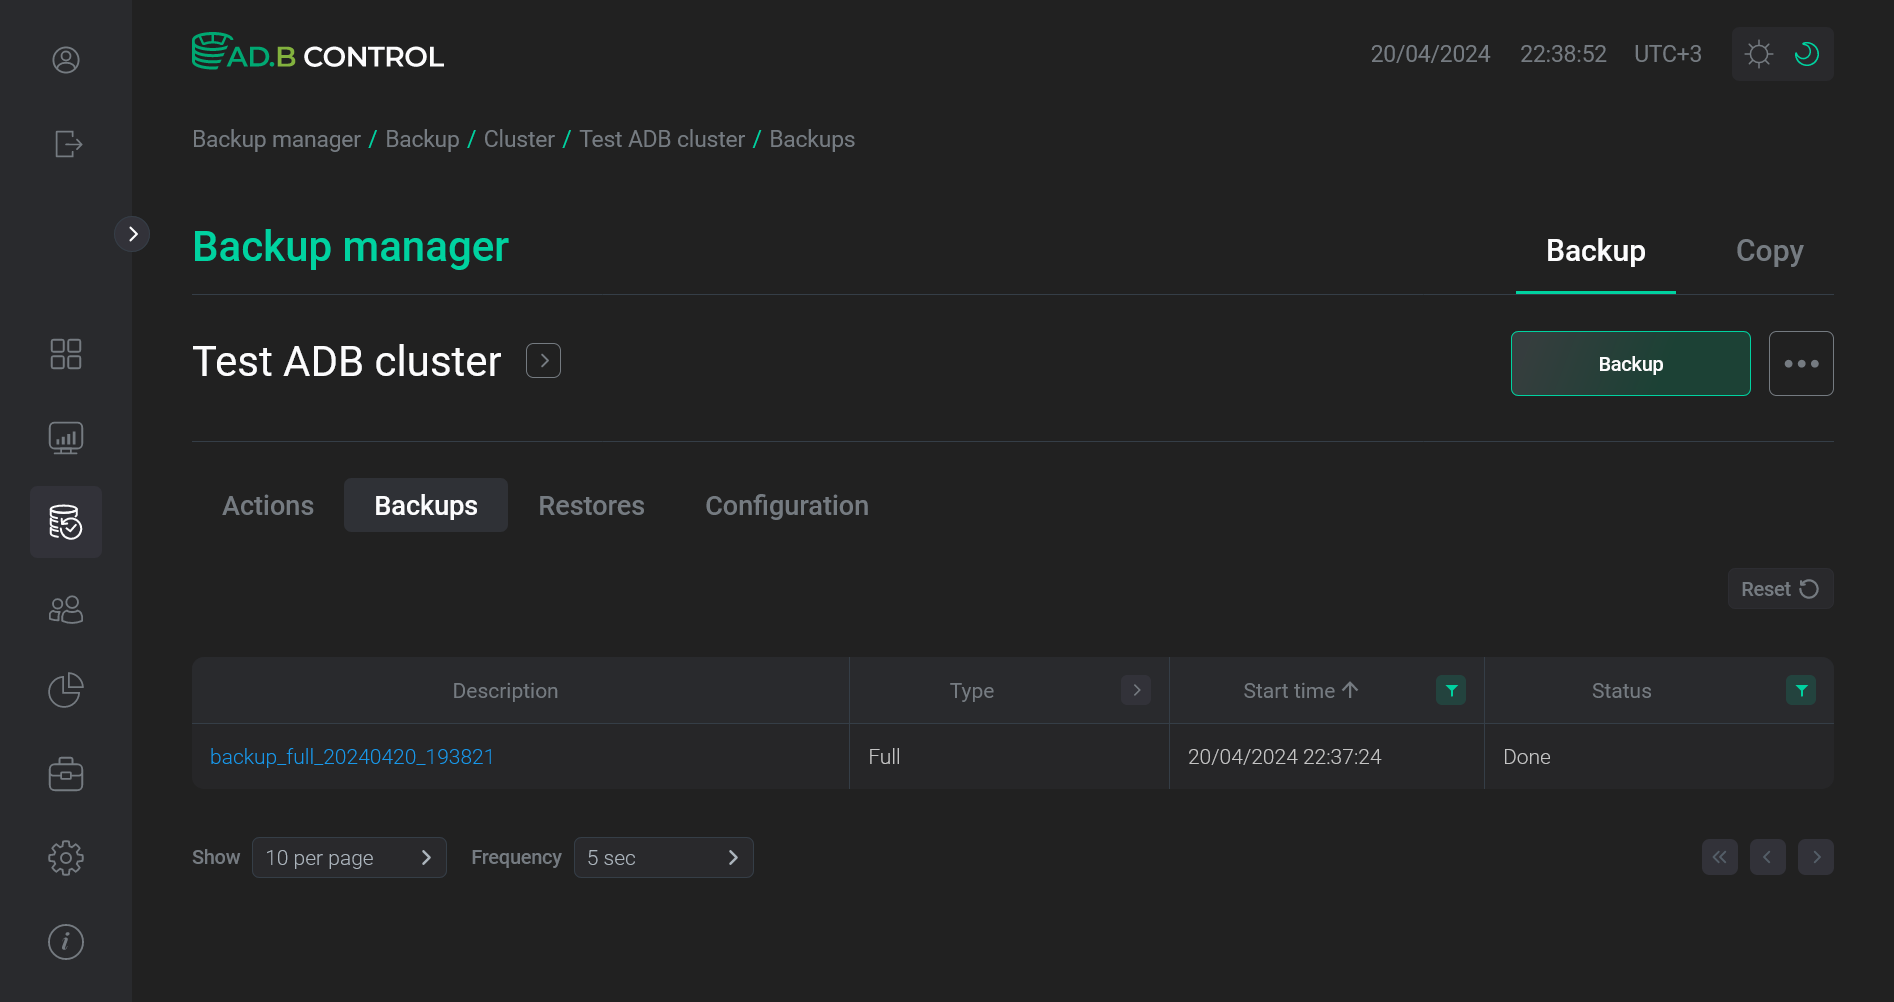 A Full backup exists for a source cluster
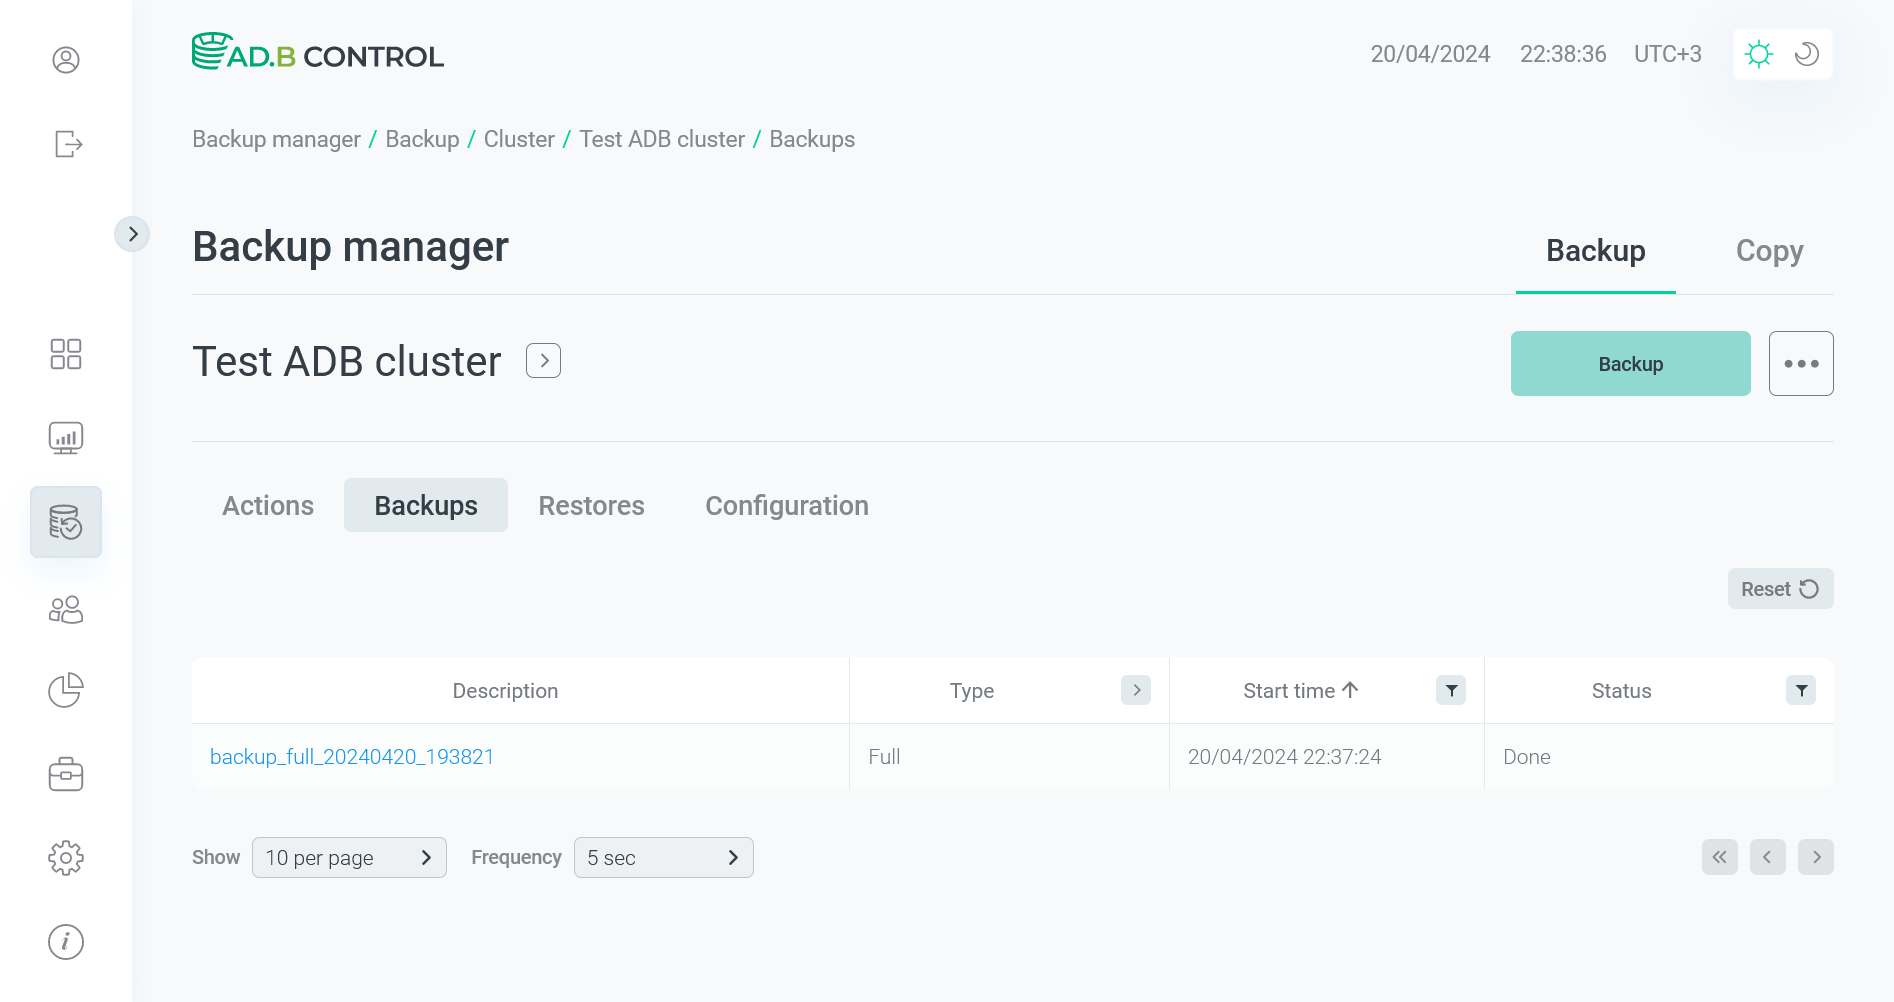 A Full backup exists for a source cluster
 -
Click Create data flow on the Backup manager → Data flow → Data flows tab to switch to configuring a data flow for the selected cluster pair.
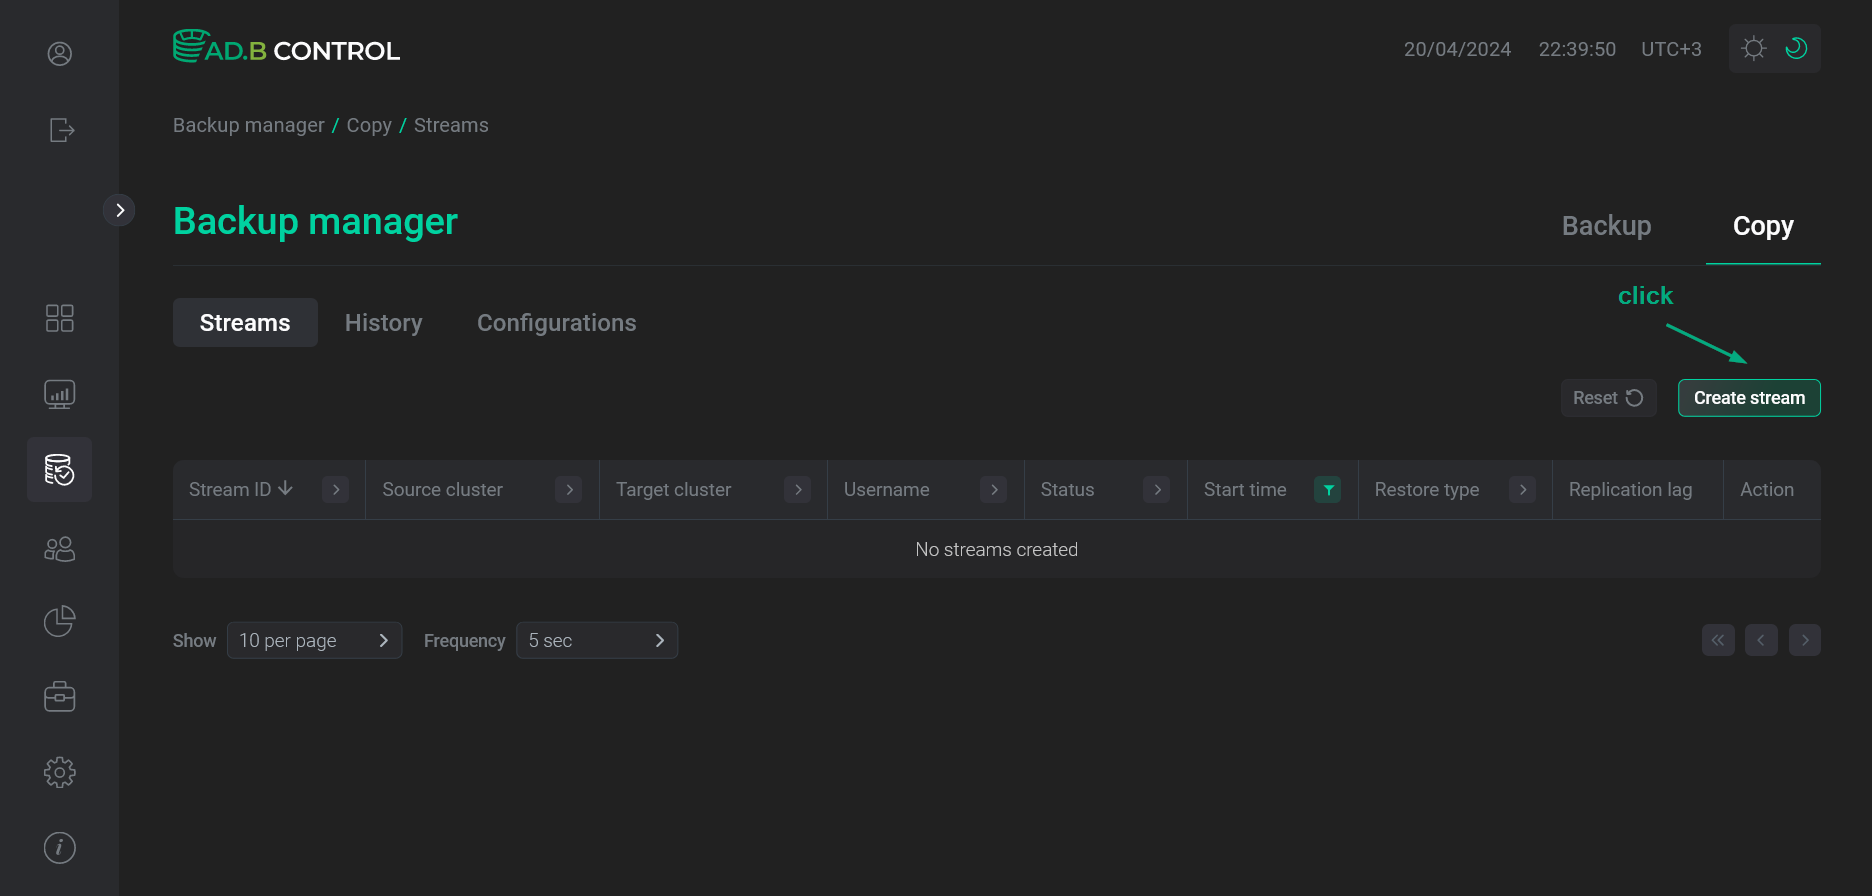 Switch to adding a data flow
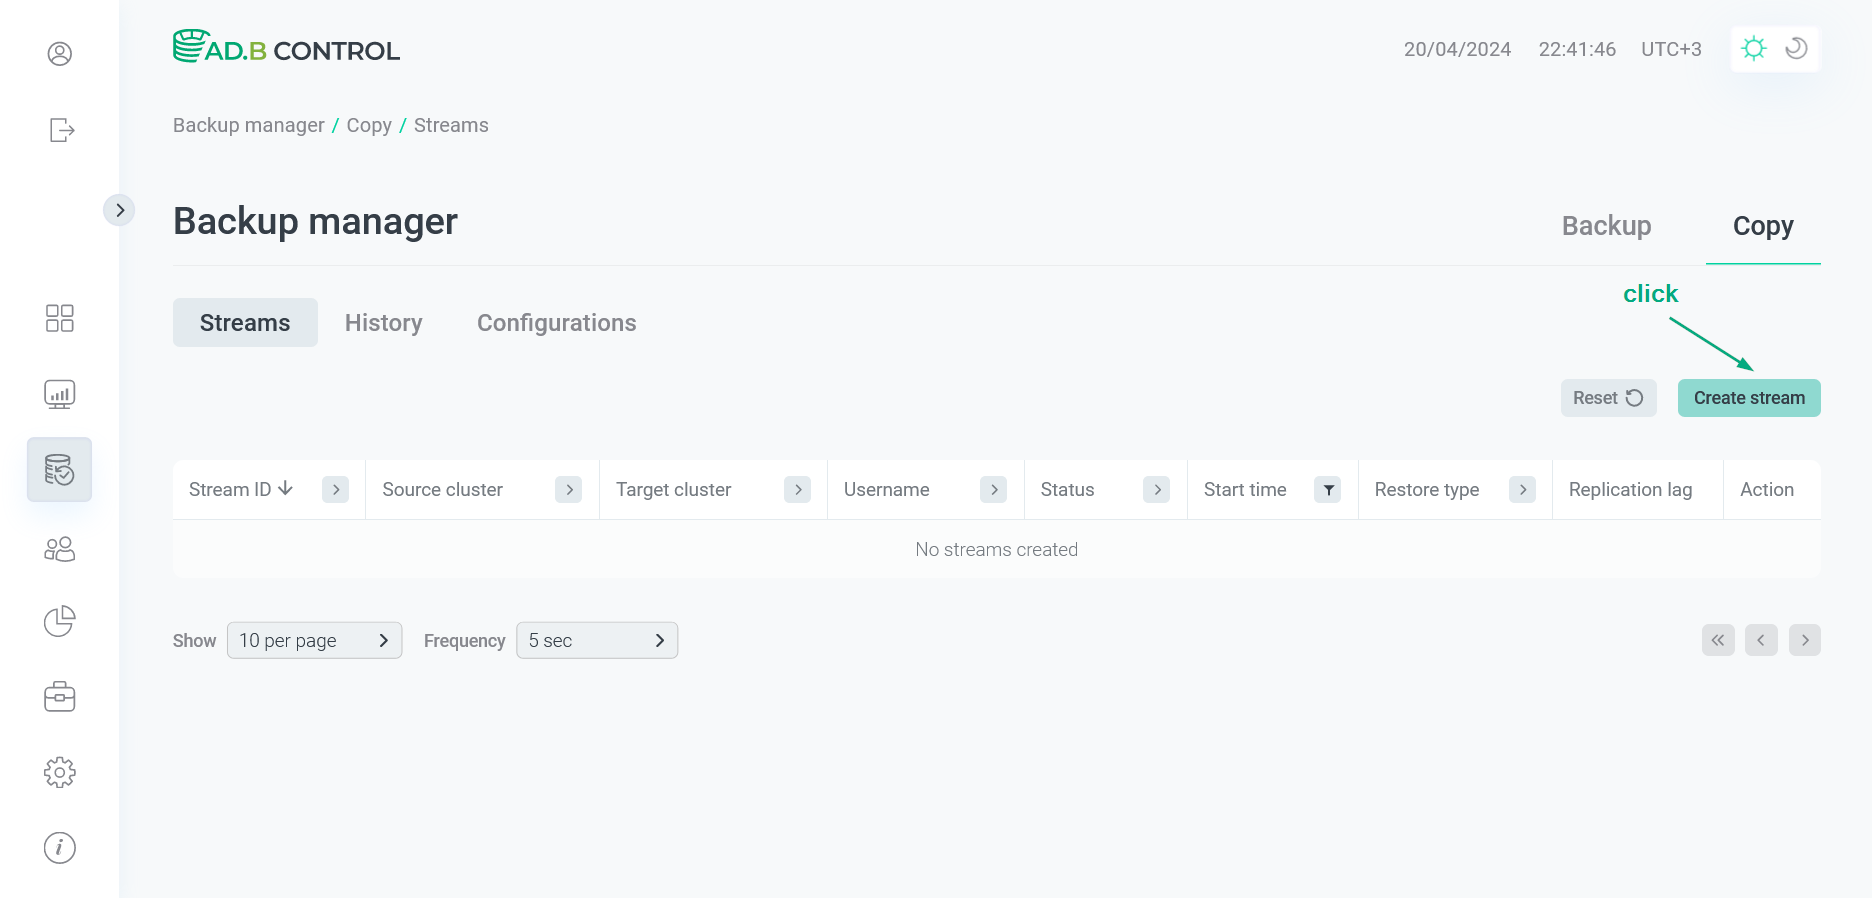 Switch to adding a data flow
 -
In the window that opens, fill in the following fields:
-
Configuration — a configuration that you created earlier (which defines a pair of clusters).
-
Restore type — a restore type. Possible values:
-
Copy— cold standby. The target cluster data is recovered only once based on the selected restore point. -
Streaming— warm standby. The target cluster data is constantly recovered based on the restore points created in the source cluster. After the replication process is terminated, the target cluster data will be actual at the moment of the latest restore point applied from the source cluster.NOTEStarting with ADBM 2.5.0, you can run a data flow with the
Copytype, even if a target cluster is stopped (has theDownstatus). This allows you to restore data in a cluster if it has become inoperative and there are no backups for Common restore.
-
-
Restore point — the restore point at the moment of which you want to restore the source cluster databases in the target cluster. If the
Streamingrestore type is selected, the latest restore point is always used, and the Restore point field is disabled. -
Databases — a list of the source cluster databases to restore in the target cluster.
-
Repository path — a path to the repository that stores the source cluster backups. The default value is extracted from the current backup configuration.
-
Processes — a maximum number of processes to restore one segment.
-
On restore points streaming failure — when the
Streamingrestore type is selected, this field determines the behavior of the system in case of errors during the application of restore points to the target cluster (for example, damage of WAL archives, unplanned data flow interruption, storage unavailability, etc.). The field is available starting with ADBM 2.4.0. Possible values:-
Pause— transfer the data flow to thePausedstatus for its temporary suspension. In this status, two actions become available for the data flow: Resume (to resume the data flow) and Cancel (to completely cancel the data flow). During the Resume action execution, the application of restore points to the target cluster resumes from the state when processing failed last time; and the data flow status returns toStreaming. The Cancel action, in turn, reverts the target cluster state to the previous restore point (preceding the one whose processing failed) and finishes the data flow (the data flow acquires theCancelledstatus).This mode requires you to make manual corrections before resuming the data flow. It is suitable when you need to keep the target cluster state as close to the current state of the source cluster as possible and do not require unlocking the target cluster (for running DB requests) while making corrections.
-
Bring online— revert the target cluster state to the previous restore point (preceding the one whose processing failed), restore data, and finish the data flow (with unlocking the target cluster for running database queries and changing the data flow status toRestored).
-
-
Restore mirrors — the drop-down list, which value indicates whether to restore data for mirrors and standby if they exist in the cluster:
-
No— do not restore mirrors. -
Parallel— restore mirrors concurrently with primary segments. -
Sequential— restore mirrors after all primary segments are restored.
-
-
Flags:
-
Delta — a flag that indicates the need to use checksums during the restore operation.
-
Force — a flag that indicates the need to completely overwrite data and tablespace paths in PostgreSQL.
-
Verify — a flag that indicates the need to verify backup data before data restore.
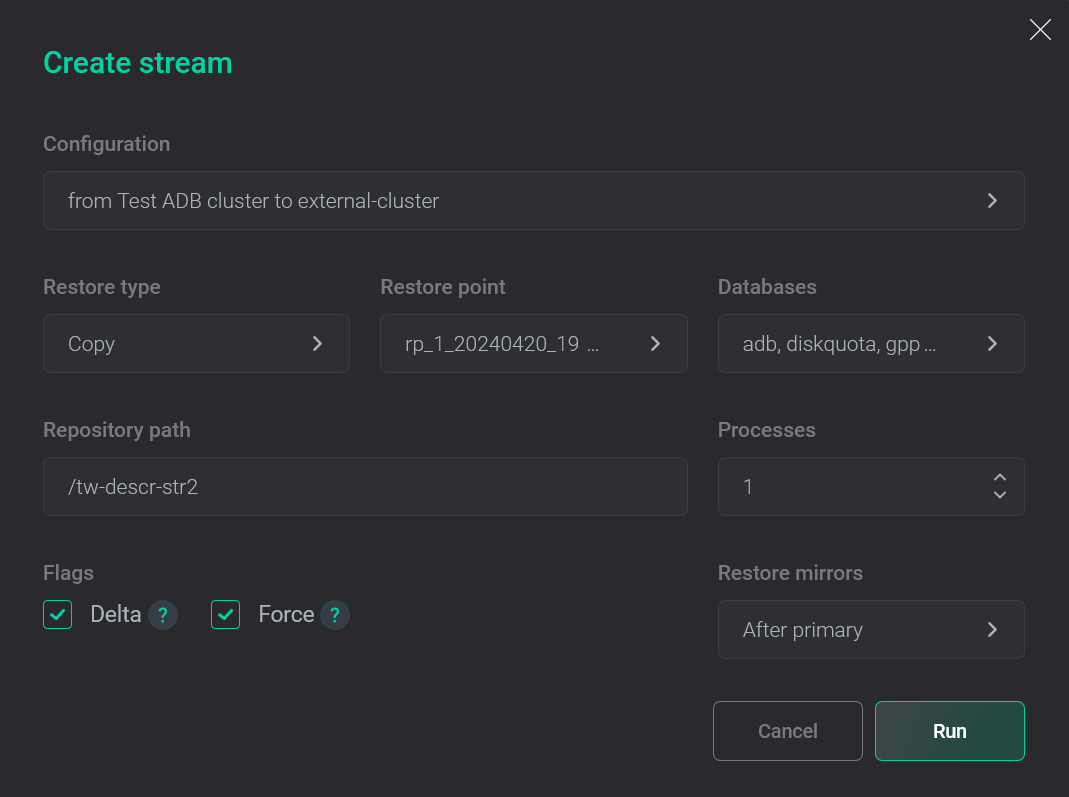 Data flow configuration with the Copy type
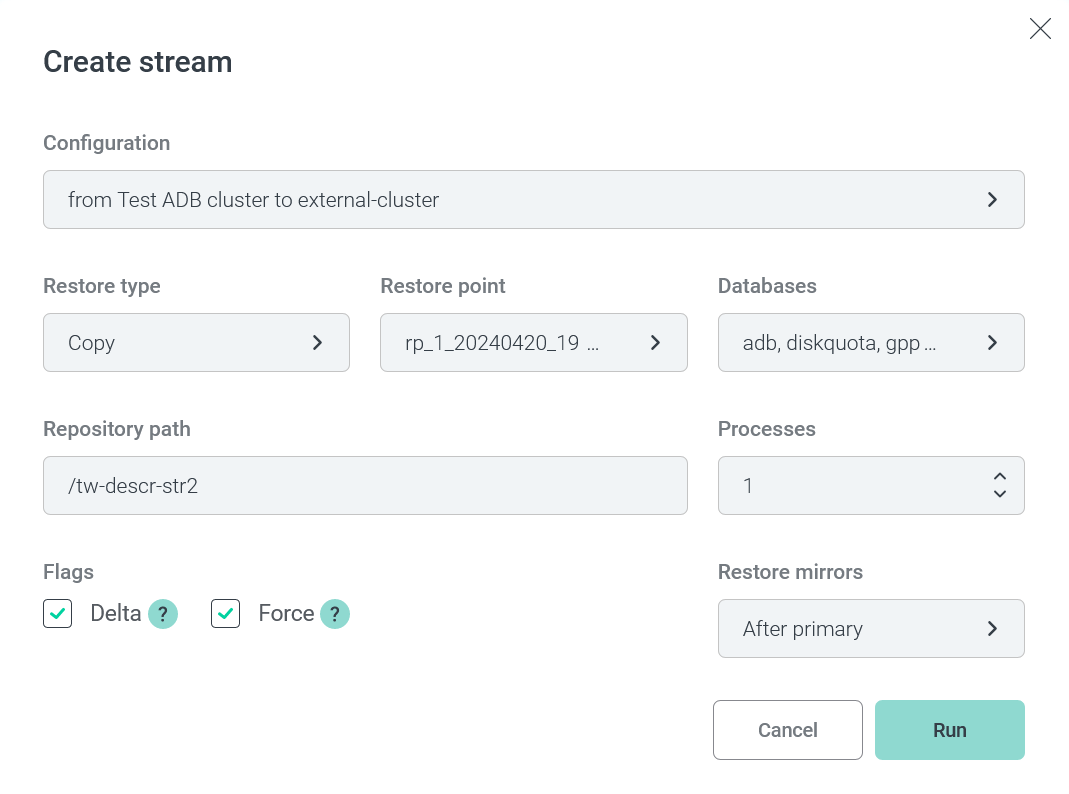 Data flow configuration with the Copy type
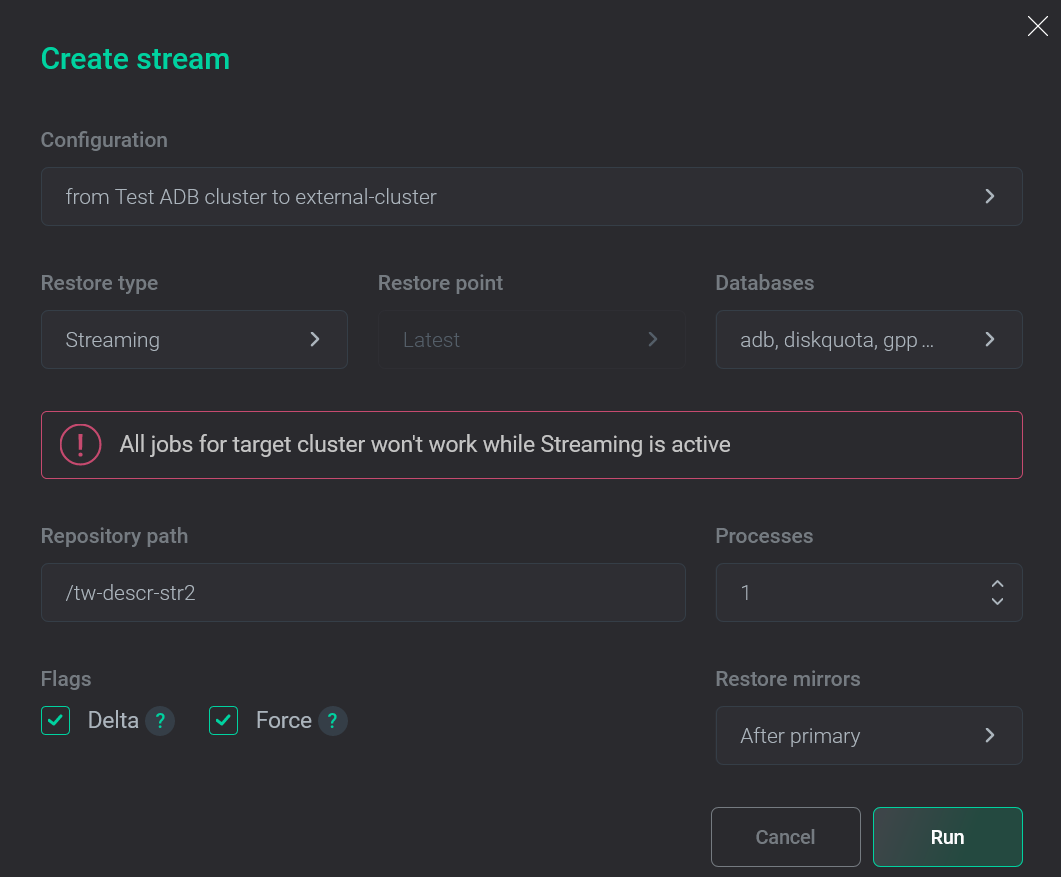 Data flow configuration with the Streaming type
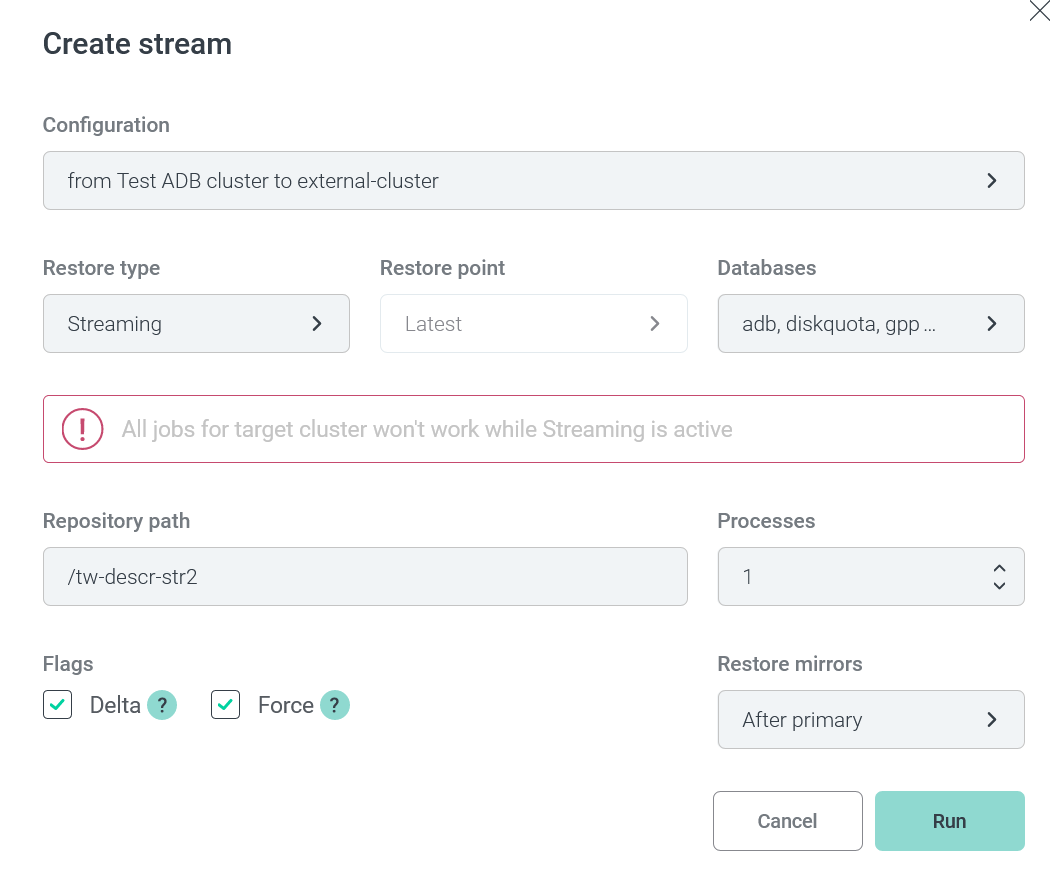 Data flow configuration with the Streaming type
-
-
-
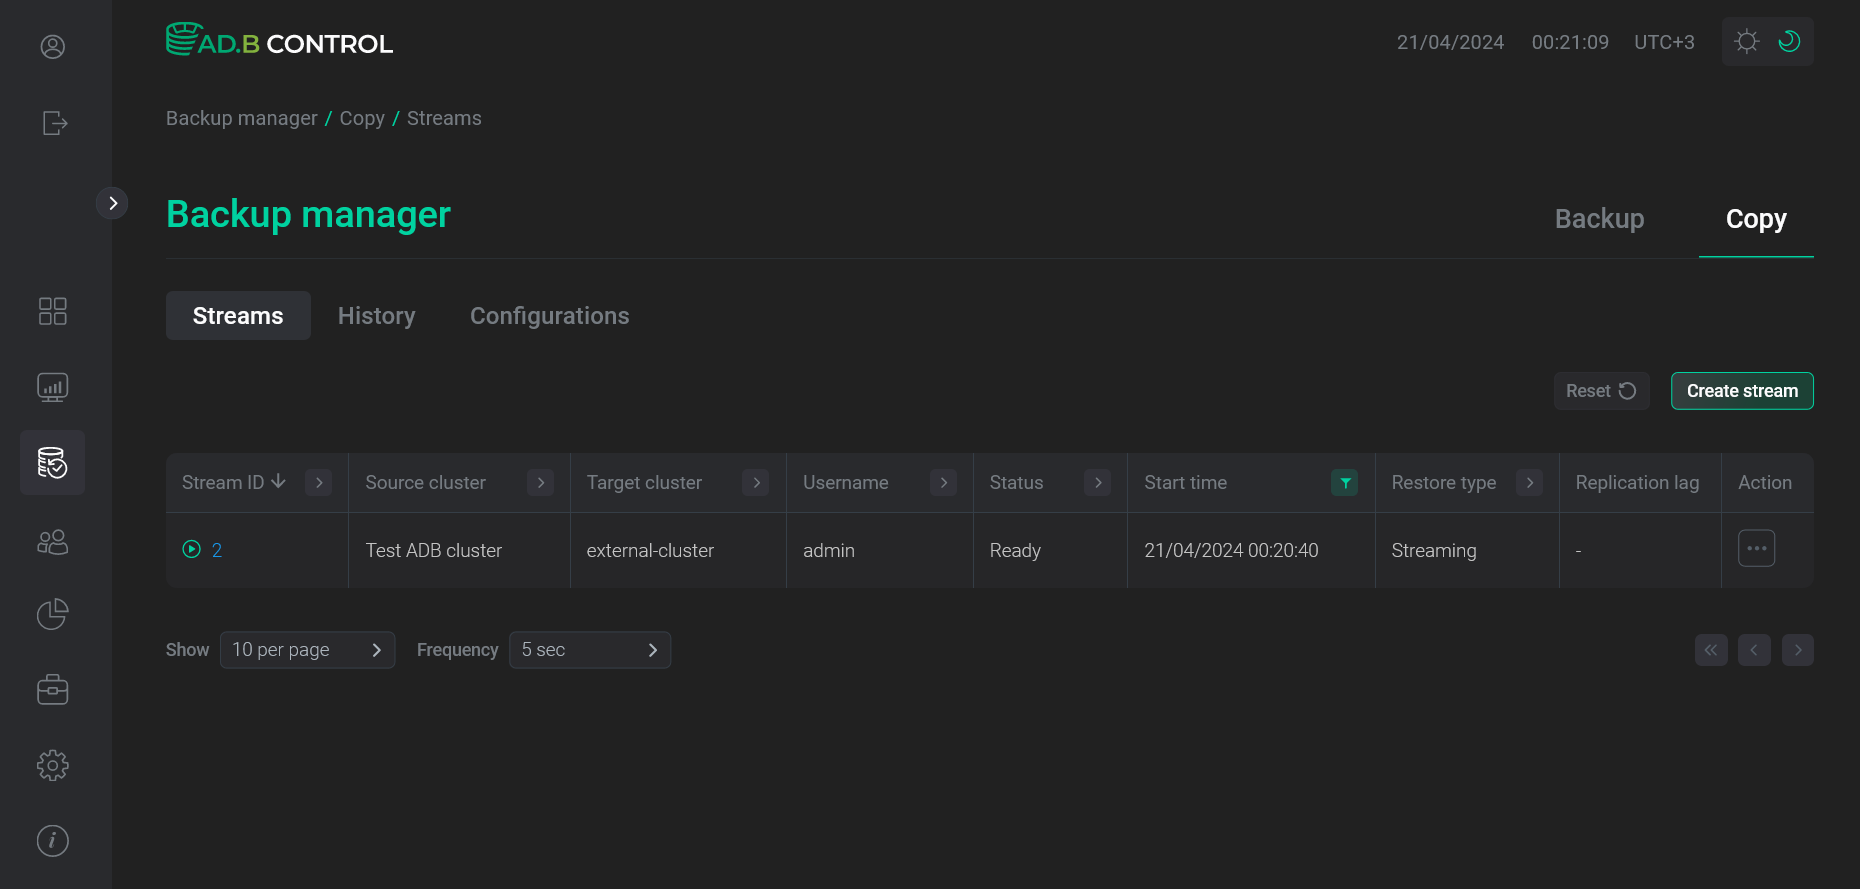
Click Run. As a result, the Stream copy (for the
Copyrestore type) or Streaming cluster (for theStreamingrestore type) action starts for the target cluster. This action, in turn, generates several subactions. You can see all of them on the Actions tab (for more details, see View actions in ADBM).The Streaming cluster action remains in the
Startedstatus until the data flow is terminated (see the note below). During that action, all restore points that are created in the source cluster will be applied to the target cluster. -
As a successful result of all actions, the source cluster data is copied to the target cluster. To ensure this, you can run queries from step 4.
IMPORTANTFor data flows with the
Streamingtype:-
Data restore completes only after terminating a data flow — manually or automatically. Auto termination can be initiated by one of the following events:
-
Common restore of the source cluster.
-
Running a new data flow where the source cluster is selected as a target.
-
Creating a new backup configuration for the source cluster that changes the repository settings.
Only after successful termination, you can run queries in the target cluster.
-
-
The target cluster database will contain the source cluster data at the time of the last restore point that was applied during the streaming process.
-
Restore points are not created when other actions are performed on a cluster since operations on clusters are exclusive. This may lead to the increased streaming lag, for example, when a full backup is performed on a large cluster.
Check a target cluster-
List tables of the
adbdatabase via the\dtpsqlcommand:\dtResult:
                         List of relations
 Schema |      Name       | Type  |  Owner  |       Storage
--------+-----------------+-------+---------+----------------------
 public | best_books      | table | gpadmin | heap
 public | book_type       | table | gpadmin | heap
 public | spatial_ref_sys | table | gpadmin | heap
 public | test            | table | gpadmin | append only columnar
 public | test2           | table | gpadmin | append only columnar
(5 rows)
-
View the
best_bookstable data:SELECT * FROM best_books;Result:
 id |   author   |         title         | public_year
----+------------+-----------------------+-------------
  1 | Harper Lee | To Kill a Mockingbird |        1960
(1 row)
-
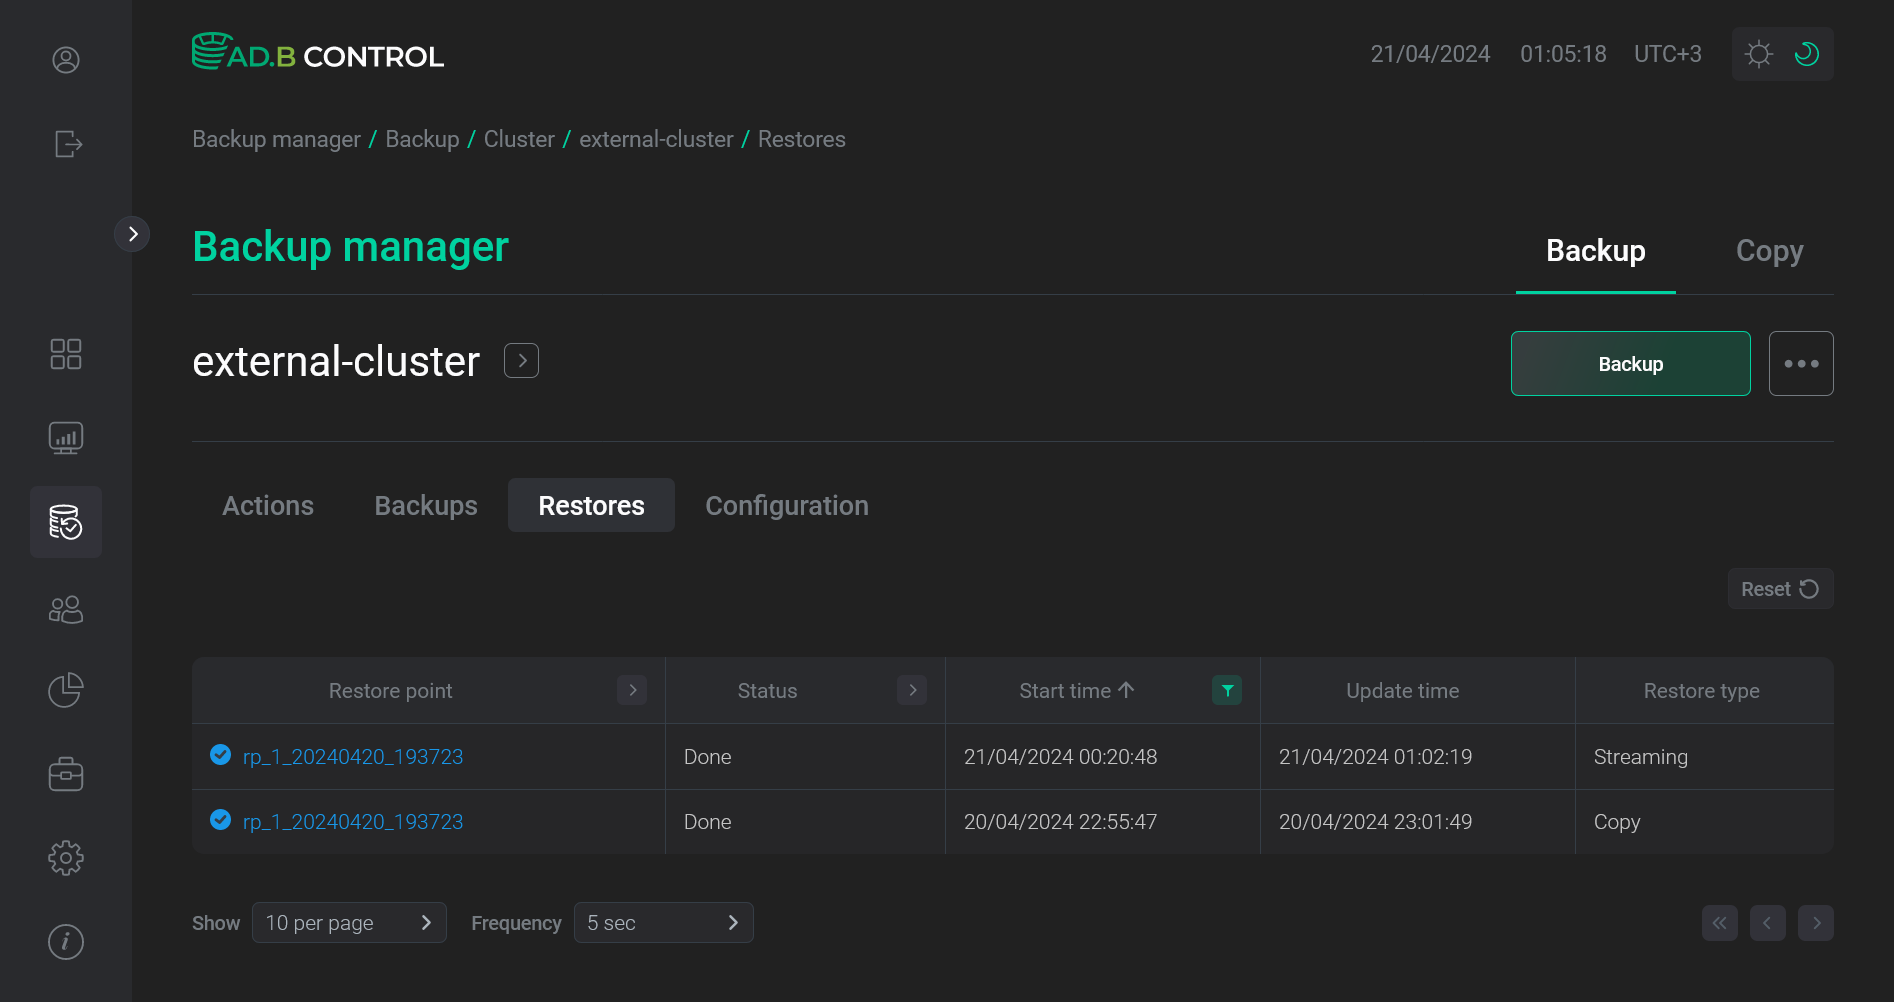
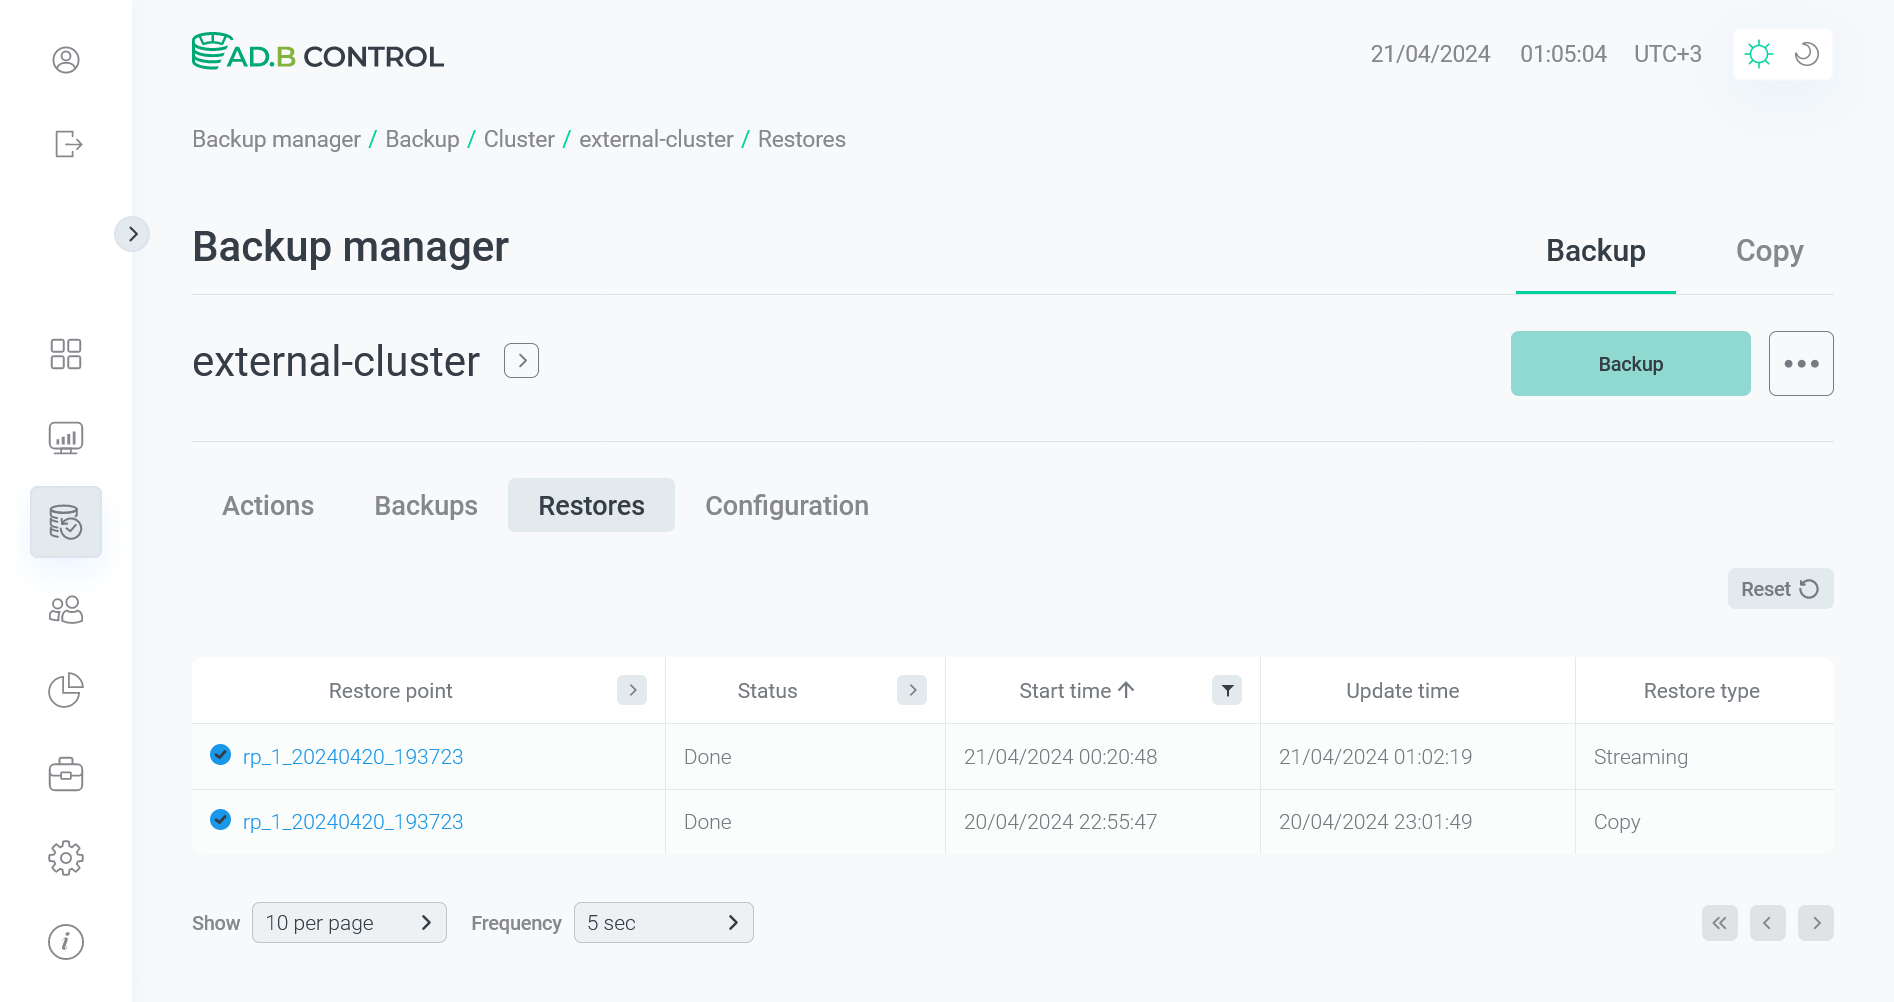
Note that during each data flow launch, the restore operation is created for the target cluster in ADBM. You can view it on the Backup manager → Backup → <target cluster name> → Restores tab as well as a standard data restore that is launched via the Common restore action. For restore operations made as a part of copying data between clusters, the Restore type column contains Copy or Streaming (depending on the selected restore type). For more information, see View restores in ADBM.
For data flows with the Streaming restore type, a restore operation status is changed to Done only after terminating a data flow — manually or automatically (see the note above). Until then, a restore operation has the Running status.
DR configuration management
View a list of configurations
All cluster pairs between which DR is configured are displayed on the Data flow → Configurations tab of the Backup manager page.
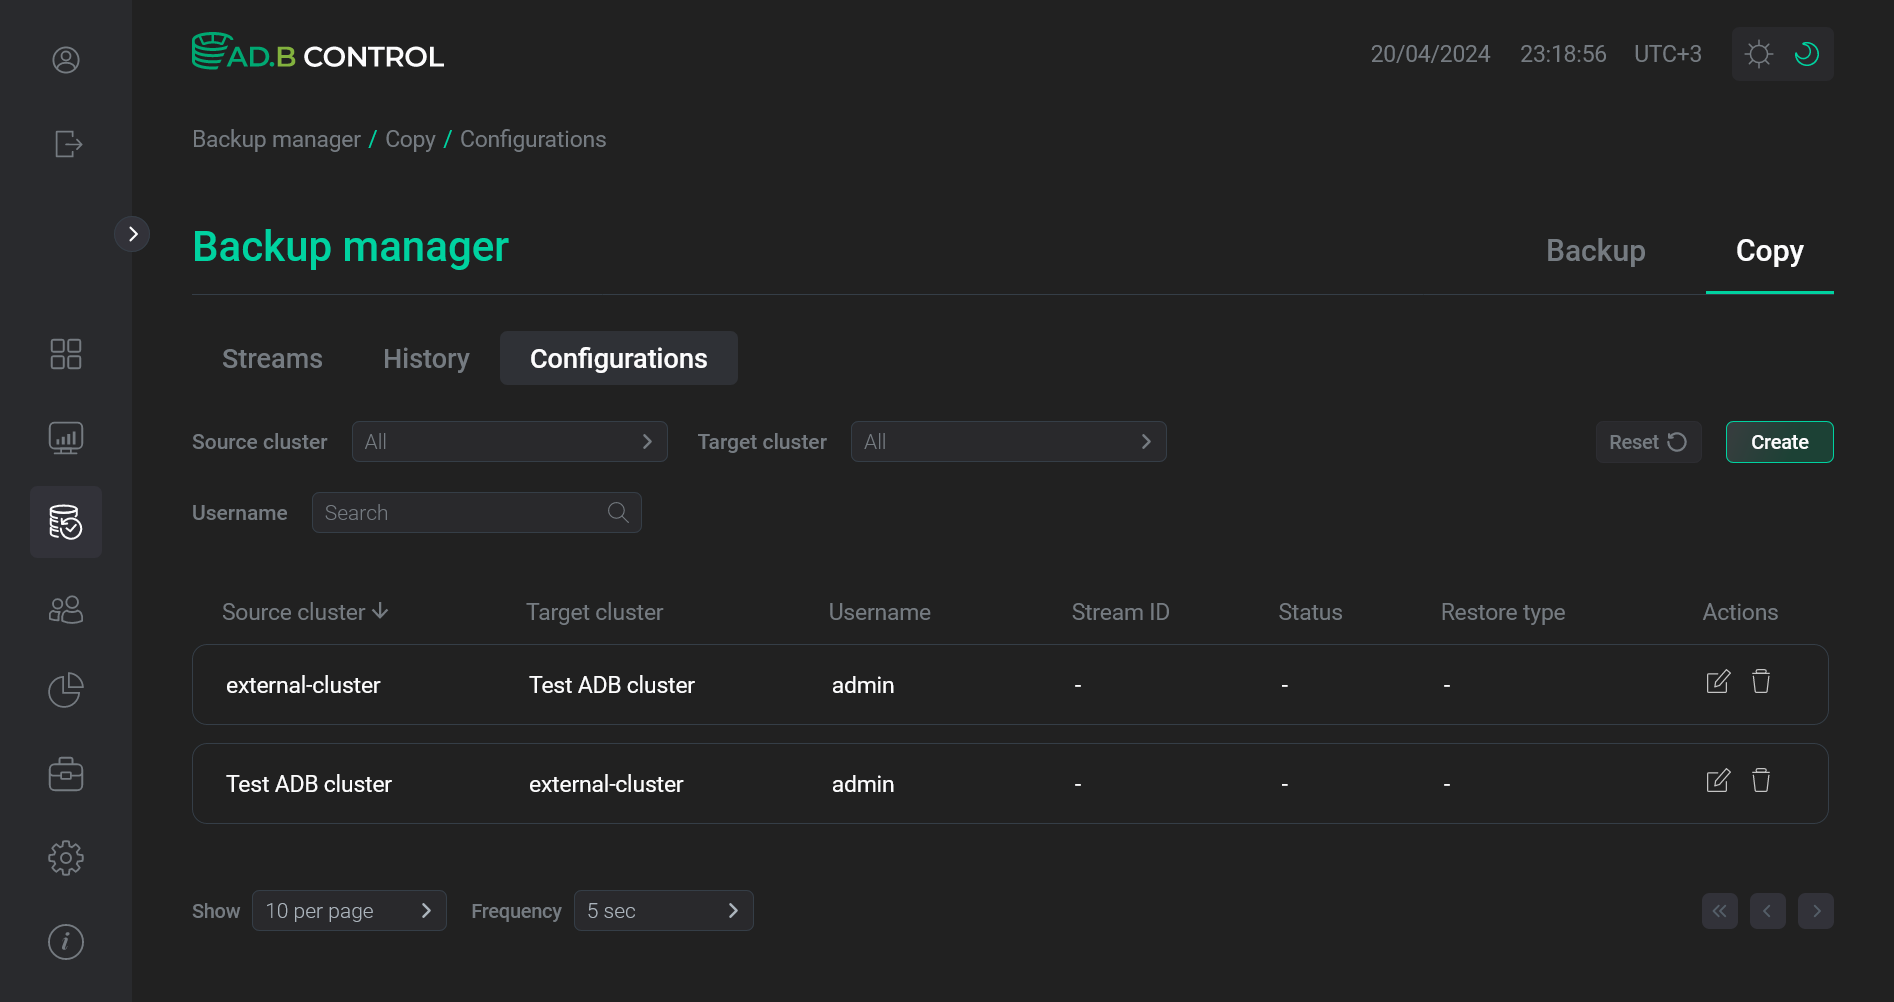

The tab displays the following information.
| Field | Description |
|---|---|
Source cluster |
The source cluster from which the data is to be copied |
Target cluster |
The target cluster to which the data is to be copied |
Username |
A login of the user who created the current configuration via the ADB Control web interface |
Data flow ID |
A unique identifier of the latest data flow that was launched for a pair of clusters defined in the current configuration |
Status |
A status of the Data flow ID data flow. See Status below |
Restore type |
The restore type that was selected during the data flow configuration |
Above the table with DR configurations, there are filters that you can use to select specific data. Available filters are listed below:
-
Source cluster — filter by the source cluster name (see Source cluster above). Select a value from the drop-down list.
-
Target cluster — filter by the target cluster name (see Target cluster above). Select a value from the drop-down list.
-
Username — filter by the user name (see Username above). Enter a full value.


Edit a configuration
To edit a DR configuration, follow the steps:
-
Click the

 icon in the Actions column on the Data flow → Configurations tab of the Backup manager page.
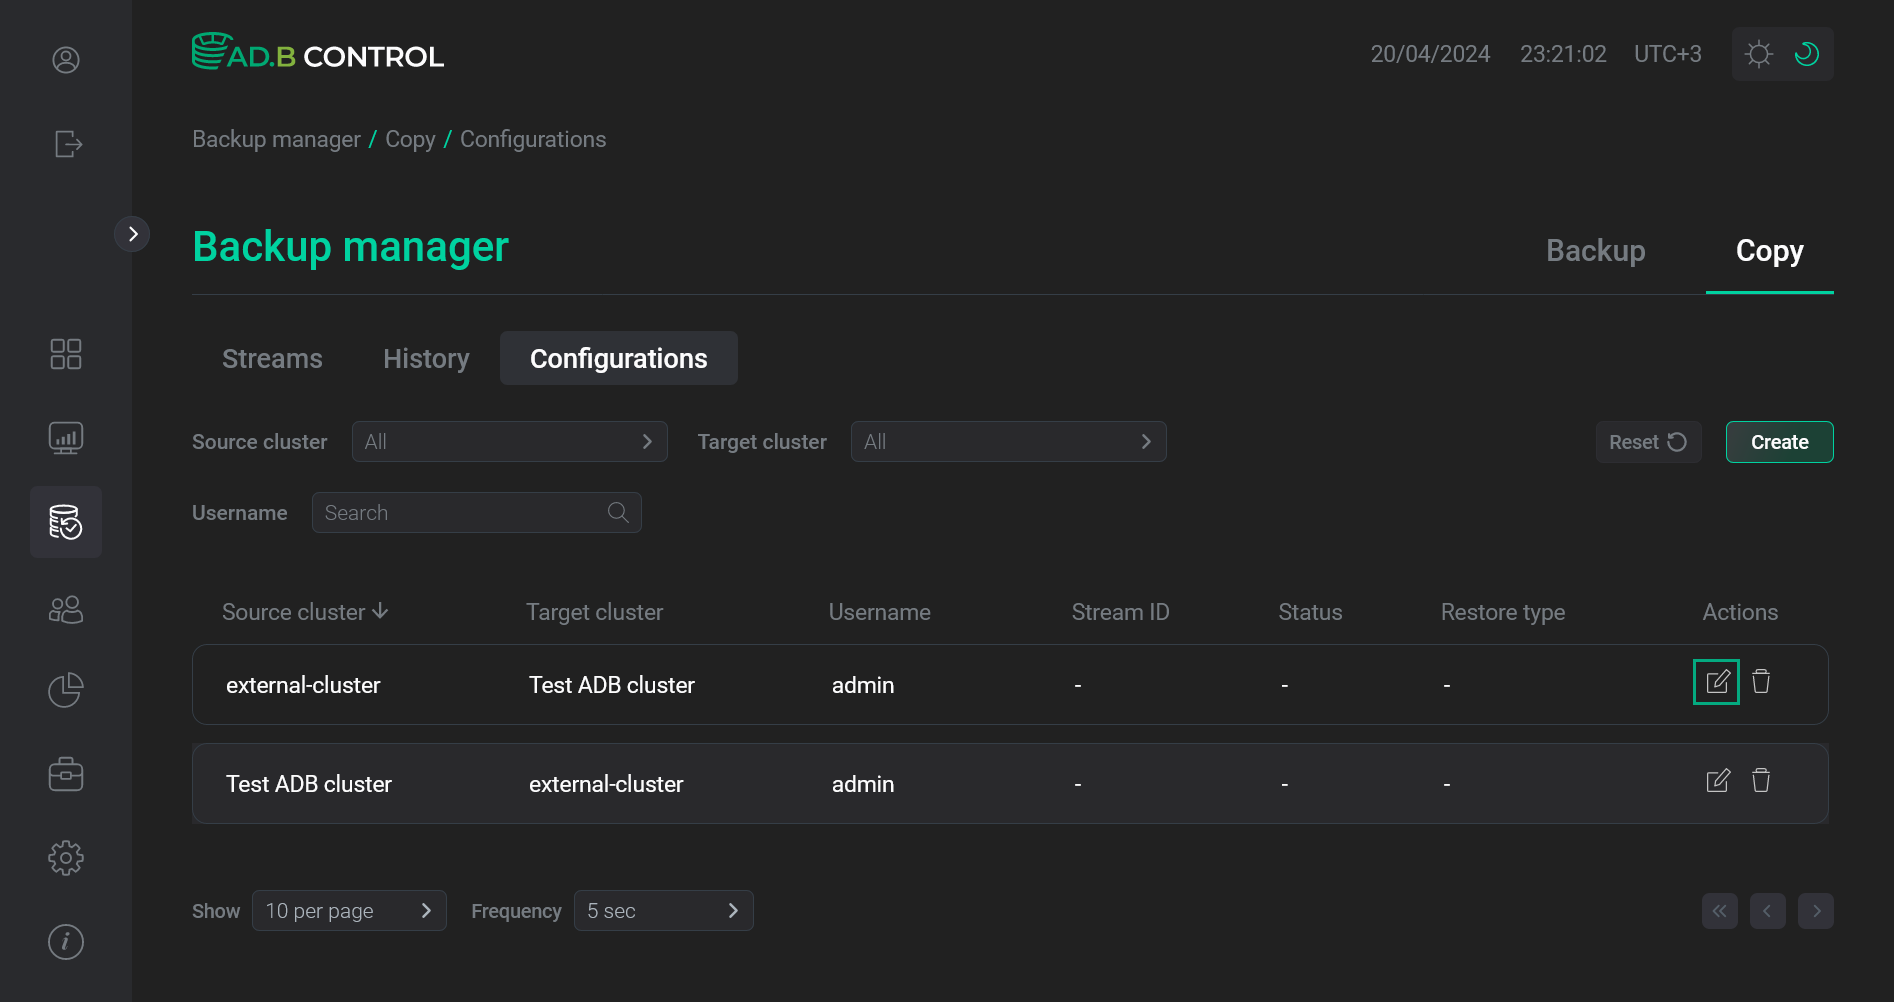 Switch to editing a configuration
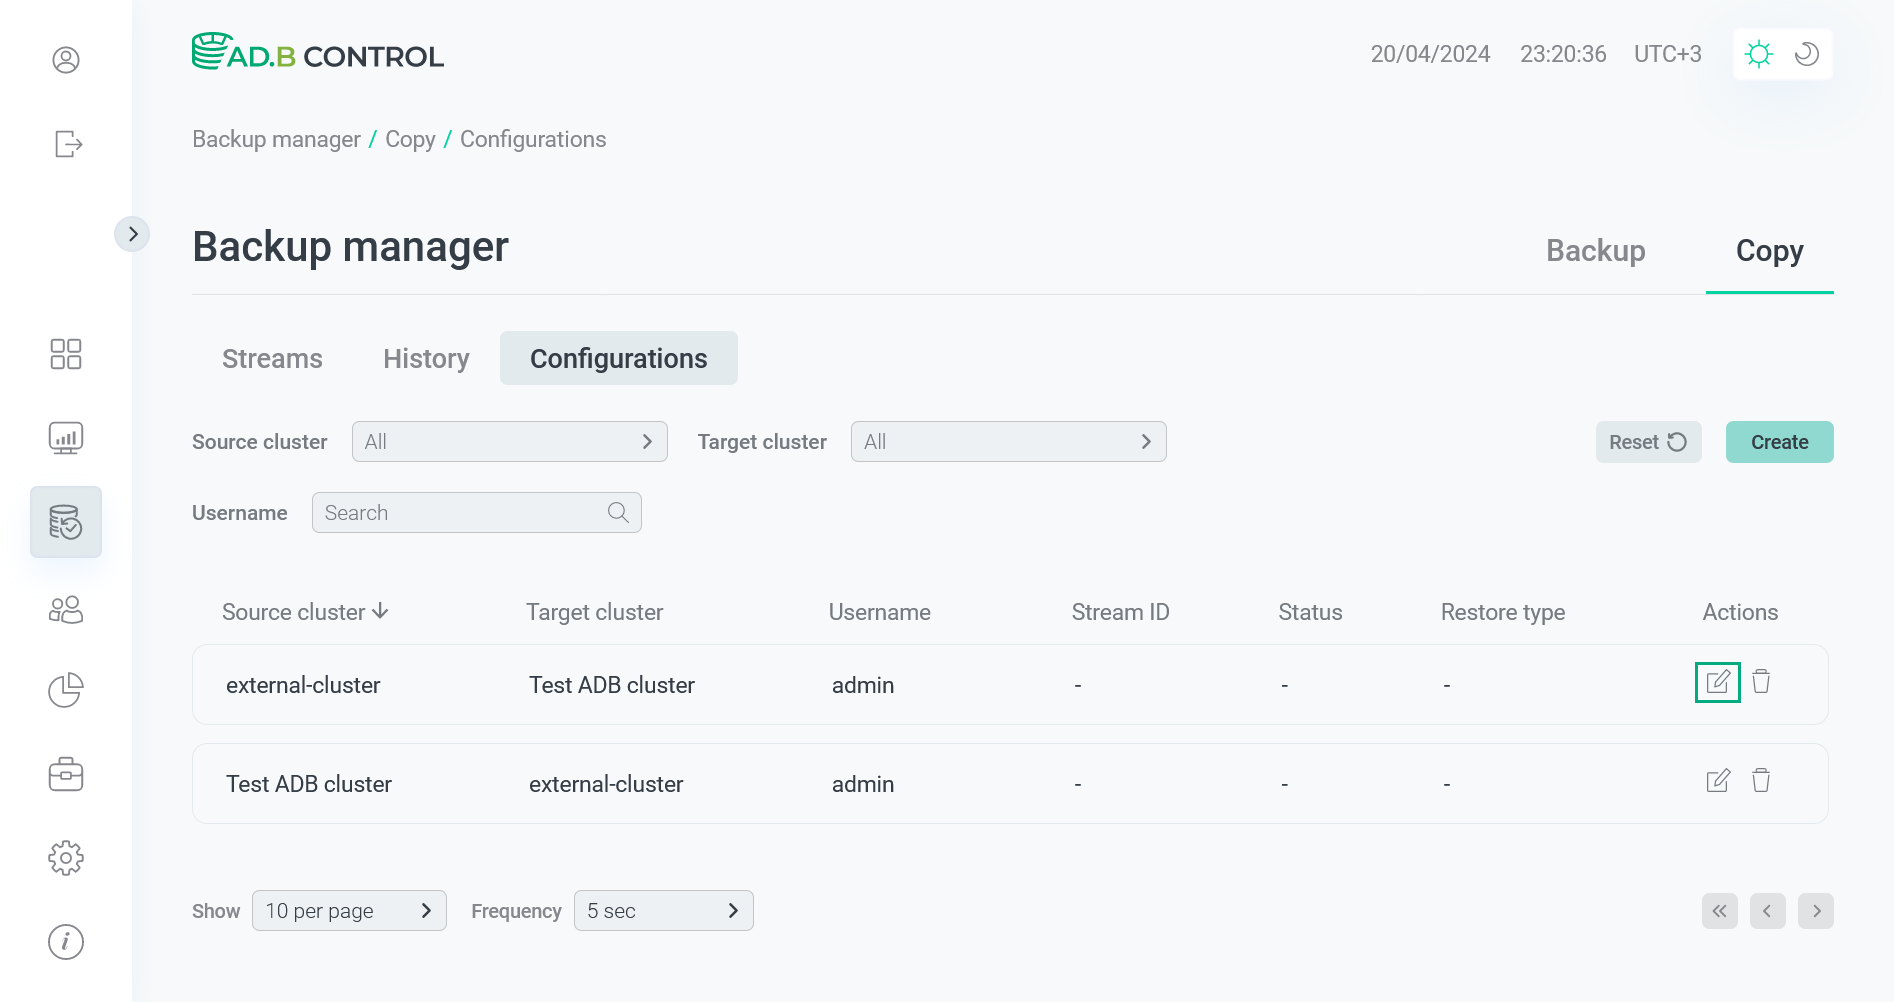 Switch to editing a configuration
 -
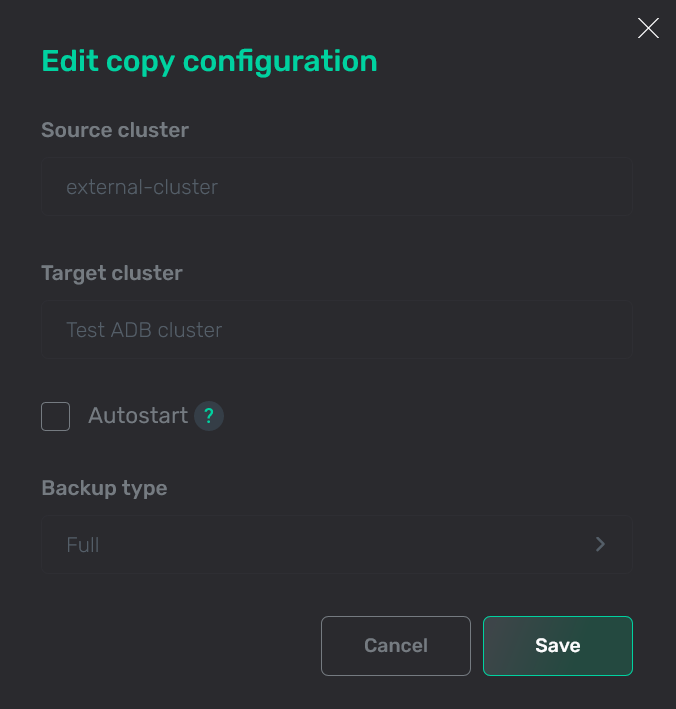
In the window that opens, edit necessary fields. The Source cluster and Target cluster values cannot be changed.
 Edit a configuration
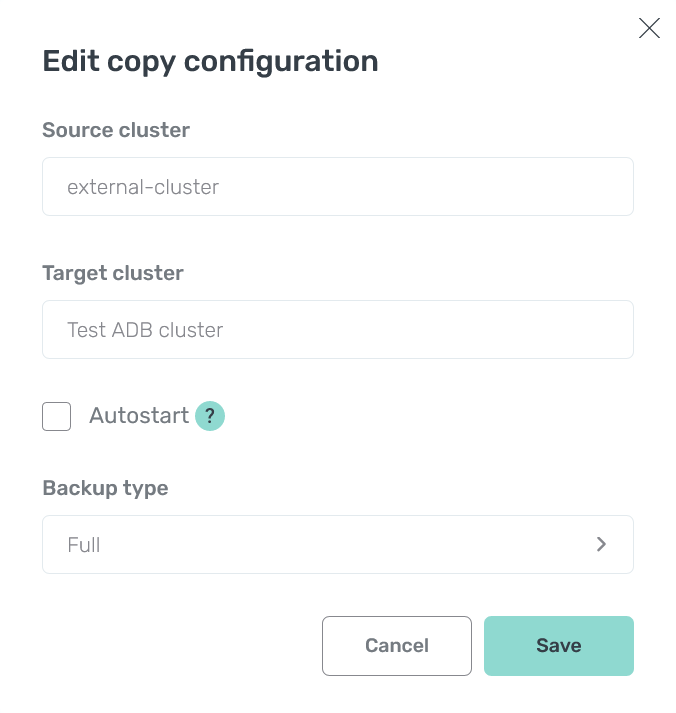 Edit a configuration
 -
Click Save.
Delete a configuration
|
CAUTION
Do not delete a configuration of the currently running data flow.
|
To delete an existing configuration, follow the steps:
-
Click the

 icon in the Actions column on the Data flow → Configurations tab of the Backup manager page.
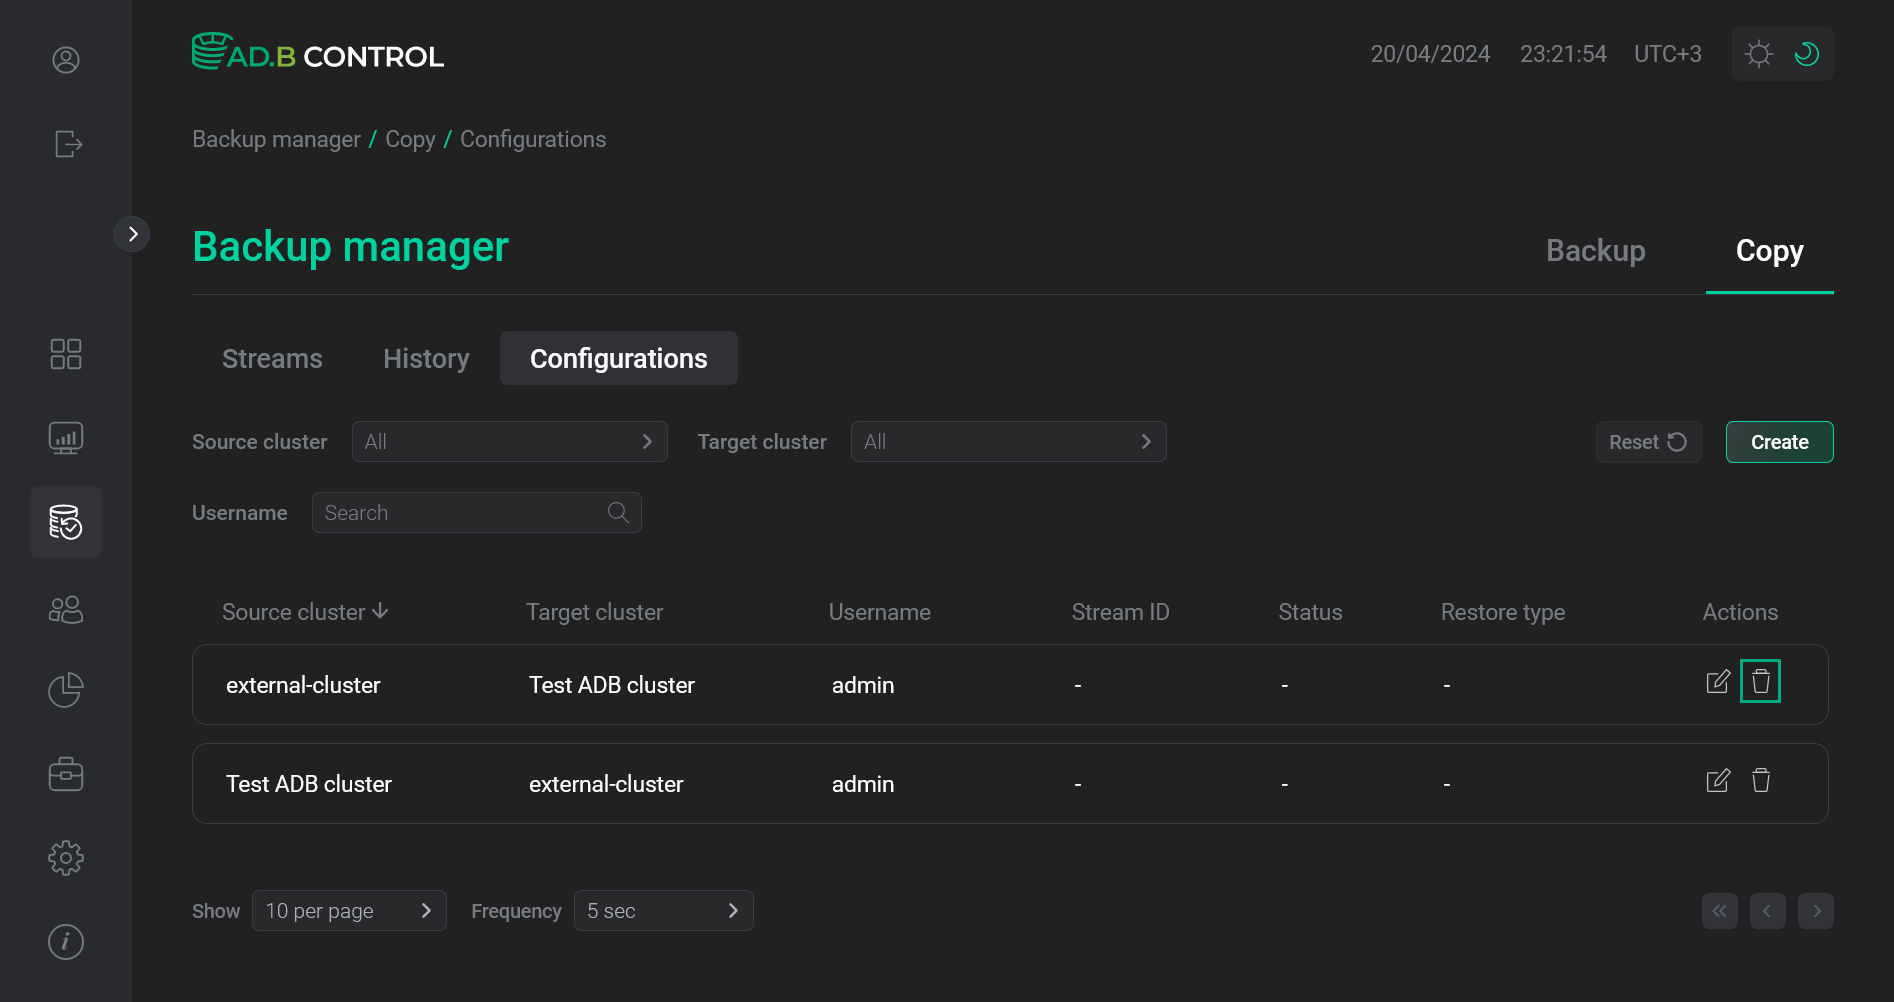 Switch to deleting a configuration
 Switch to deleting a configuration
 -
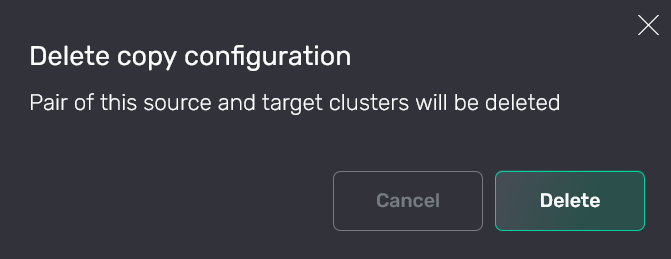
In the window that opens, confirm the operation by clicking Delete.
 Confirm the operation
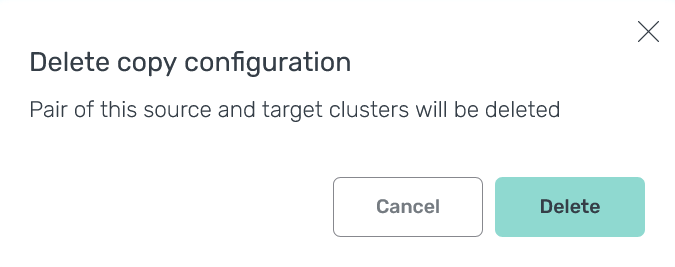 Confirm the operation
As a result, the configuration data is removed from the system and no longer displayed on the Backup manager → Data flow → Configurations tab.
 Configuration is removed
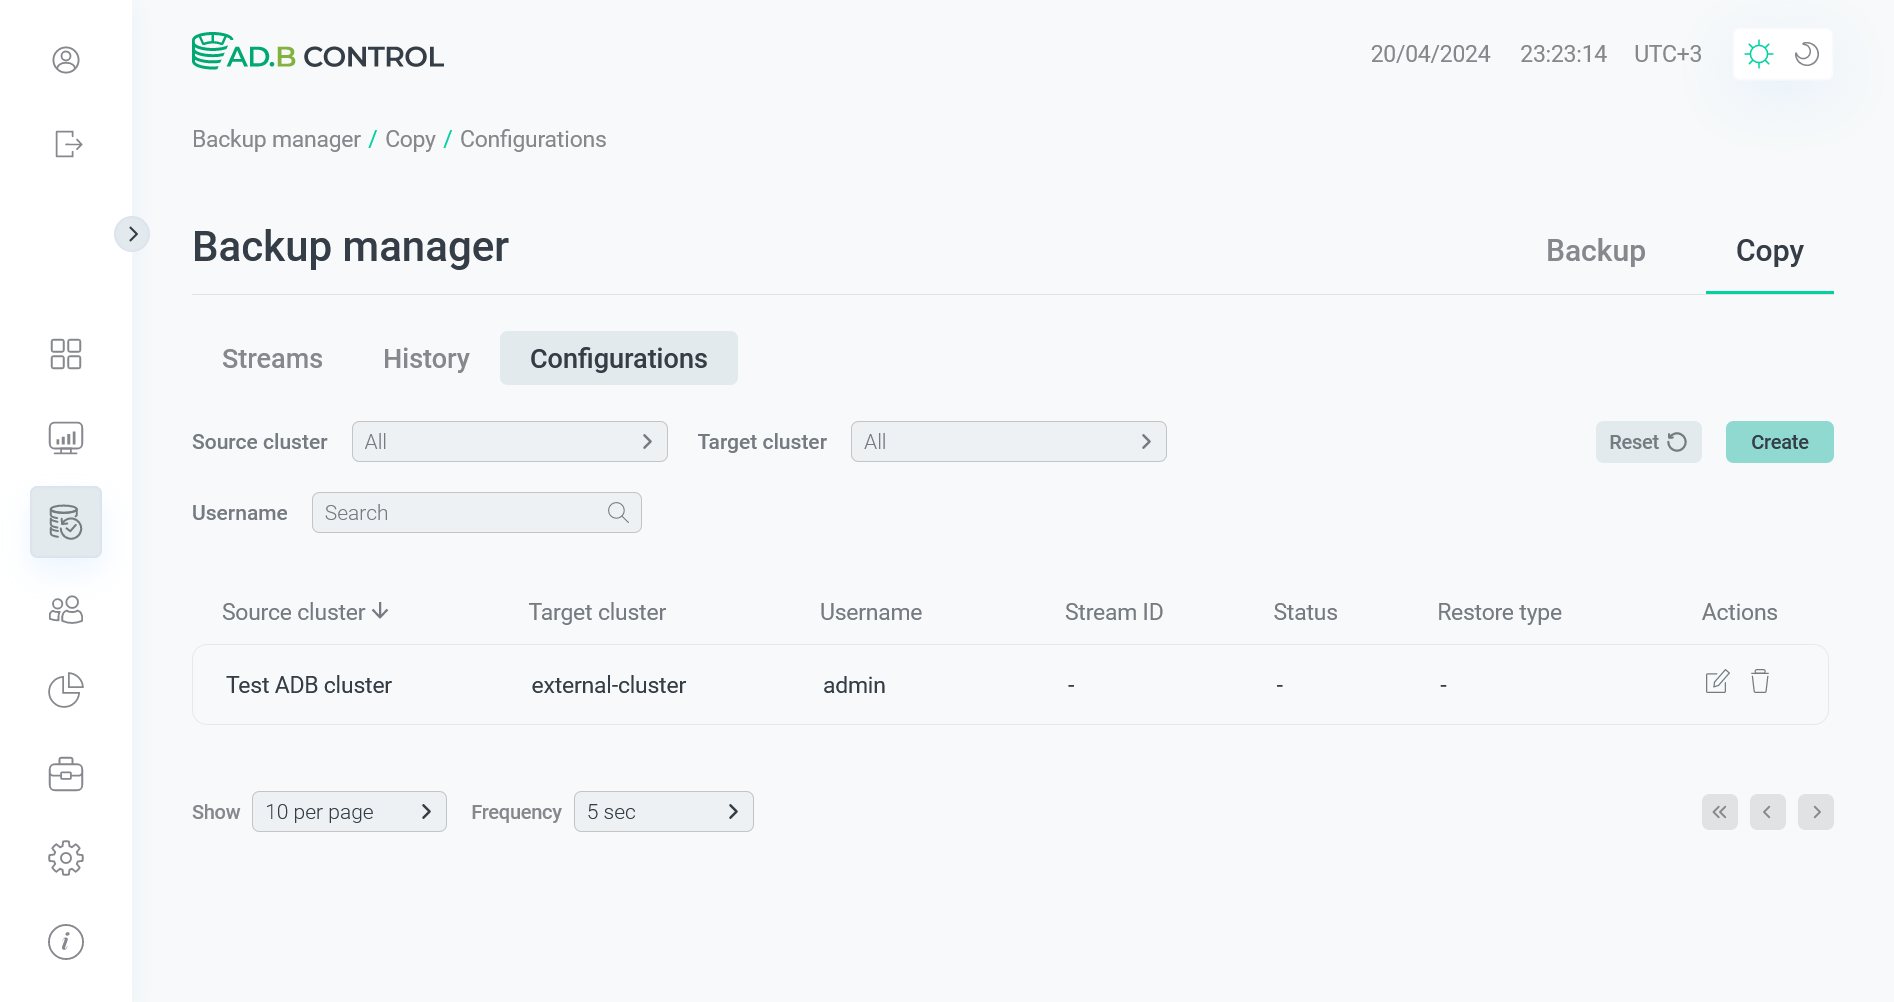 Configuration is removed
Data flow management
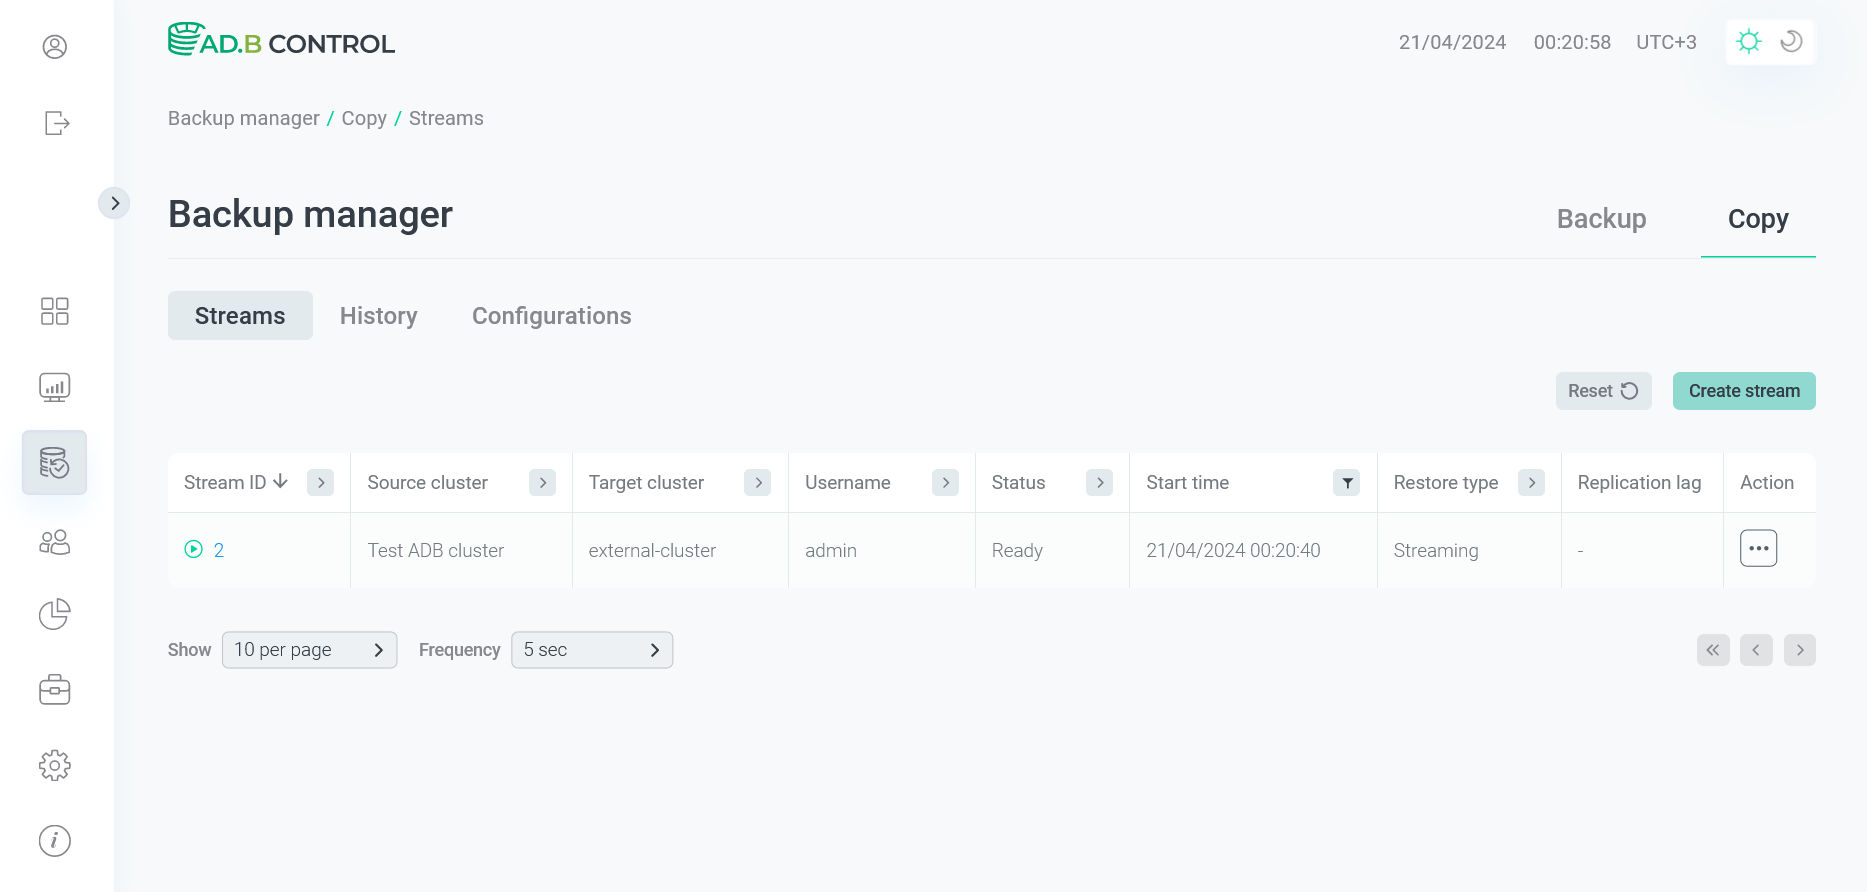
View active data flows
All active data flows that are created to copy data between two clusters are displayed on the Data flow → Data flows tab of the Backup manager page. Active data flows have the statuses different from Impossible, Down, and Restored (the Data flow → History tab is designed to show data flows in these three statuses).
The tab displays the following information.
| Field | Description |
|---|---|
Data flow ID |
A unique identifier of the data flow |
Source cluster |
The source cluster from which the data is to be copied within the current data flow |
Target cluster |
The target cluster to which the data is to be copied within the current data flow |
Username |
A login of the user who created the current data flow via the ADB Control web interface |
Status |
A data flow status. Possible values:
For more information on possible transitions between statuses, see the diagram below |
Start time |
A data flow creation timestamp in the |
Restore type |
The restore type that was selected during the data flow configuration |
Replication lag |
How much the target cluster lags from the source cluster. Calculated as the difference between the current time and the time when the latest restore point was applied to the target cluster during the streaming process. Available only for data flows with the |


In the column headers of the table with a list of data flows,
there are filters that you can use to select specific data. To open a filter, click the ![]()
![]() icon. For those columns where the set of possible values is limited (e.g. Status), you can select a value from the drop-down list.
For some columns (e.g. Username), the search value should be entered.
For columns that show date and time (e.g. Start time), the time range can be selected from the calendar.
icon. For those columns where the set of possible values is limited (e.g. Status), you can select a value from the drop-down list.
For some columns (e.g. Username), the search value should be entered.
For columns that show date and time (e.g. Start time), the time range can be selected from the calendar.
The ![]()
![]() icon means that a filter is defined for the column. To reset all filters, click Reset.
icon means that a filter is defined for the column. To reset all filters, click Reset.
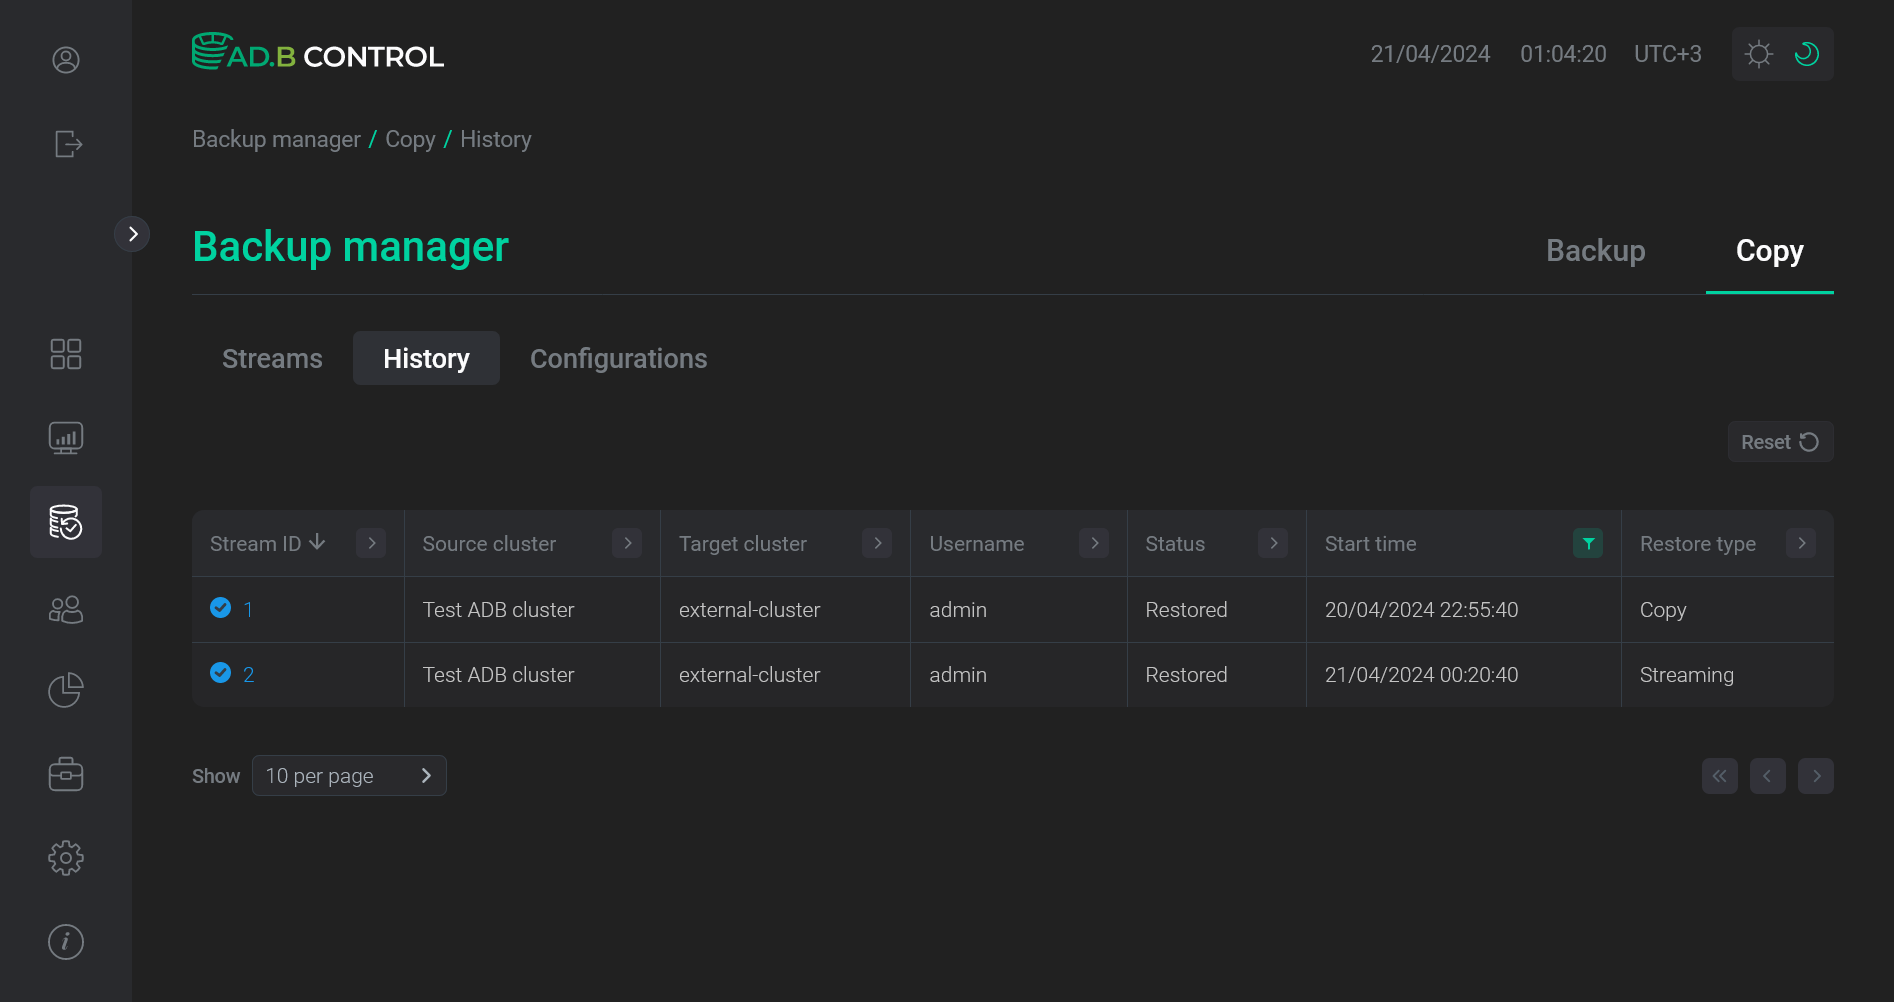
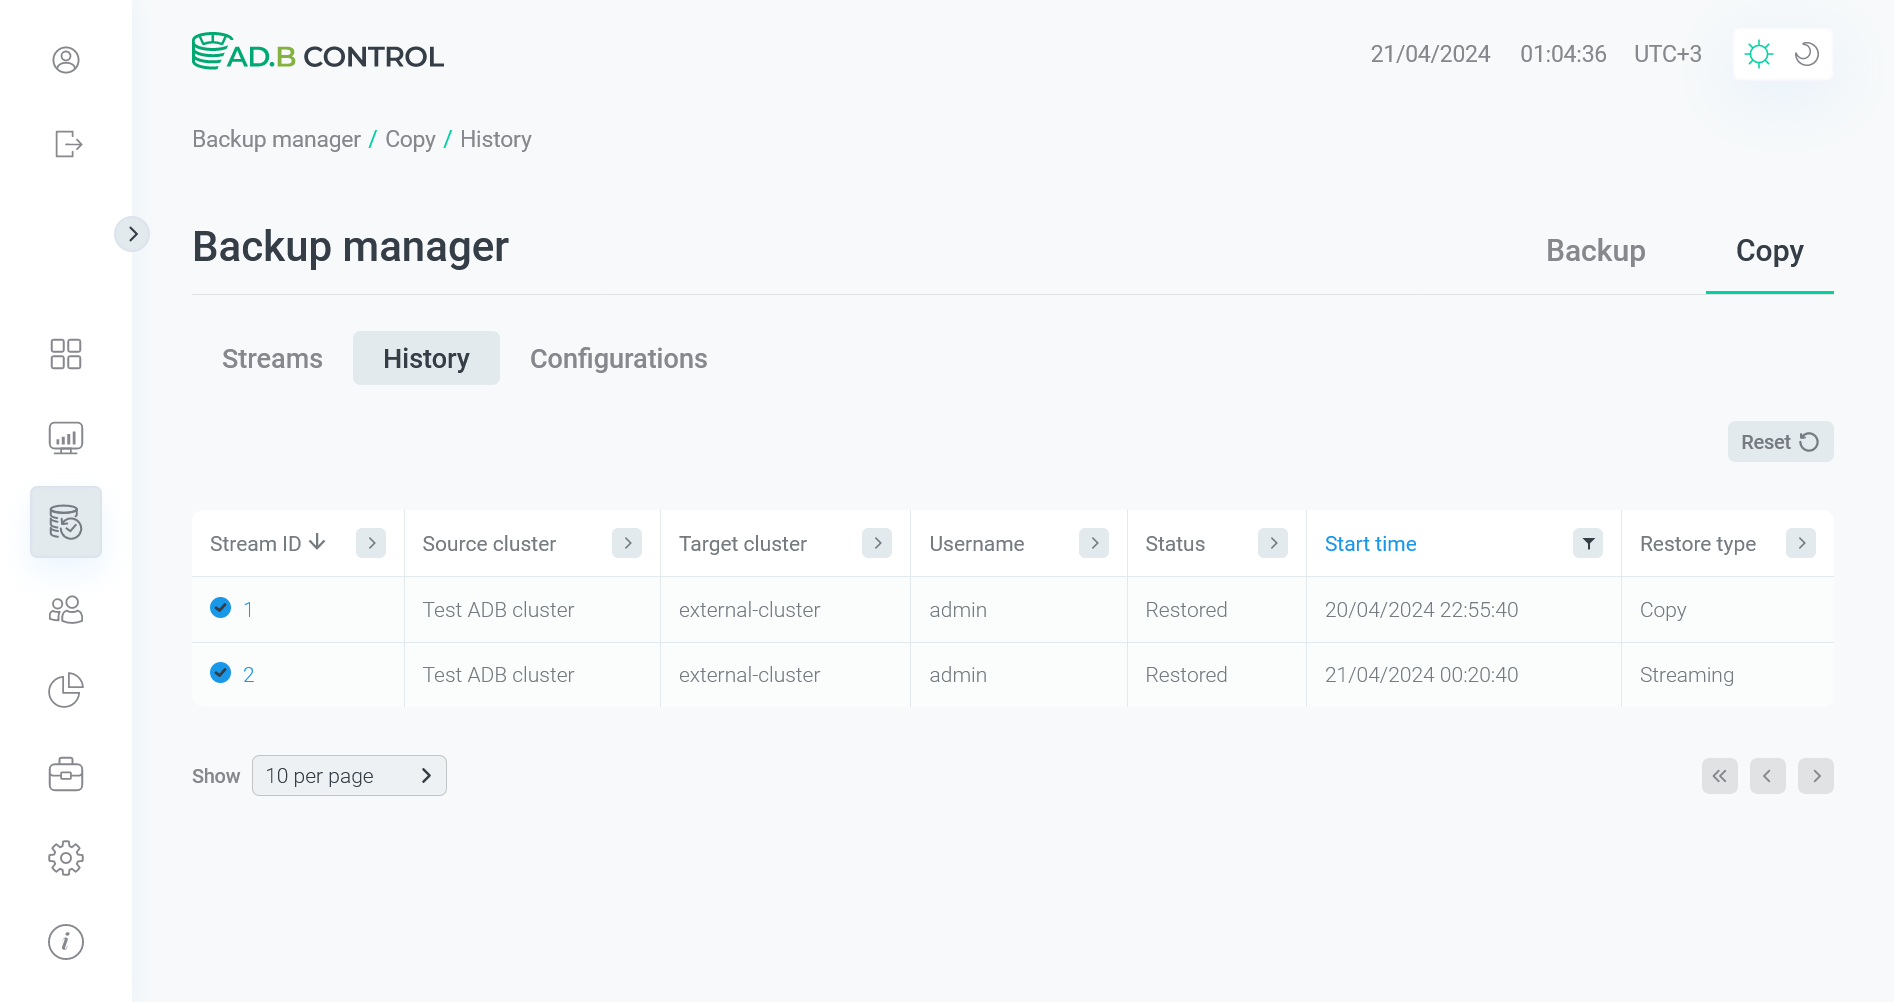
View finished data flows
The Backup manager → Data flow → History tab is used to display completed data flows, which have the following statuses:
The content of the History tab is completely identical to the Data flows tab described above, except that the former does not contain the Replication lag column. Also, there are no available actions for data flows on the History tab.
|
IMPORTANT
By default, the table on the Backup manager → Data flow → History tab shows the current-day data flows. To view all data flows, use the time filters. |
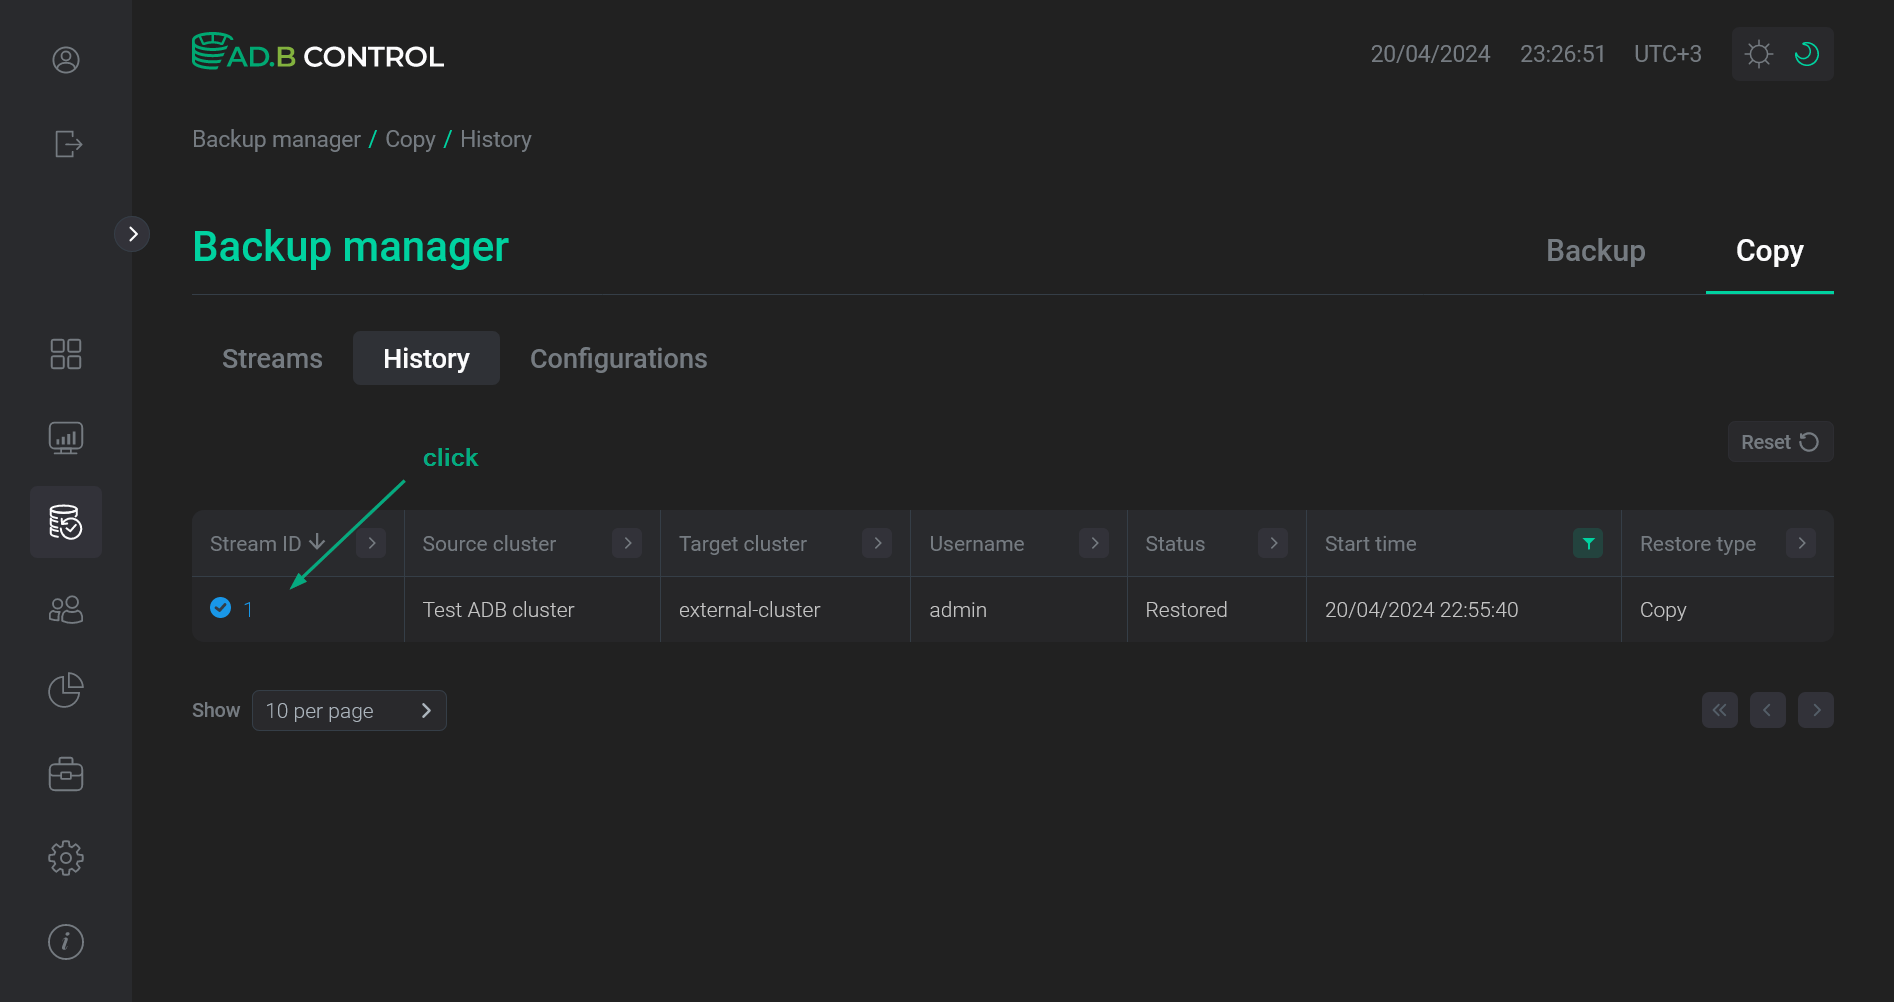
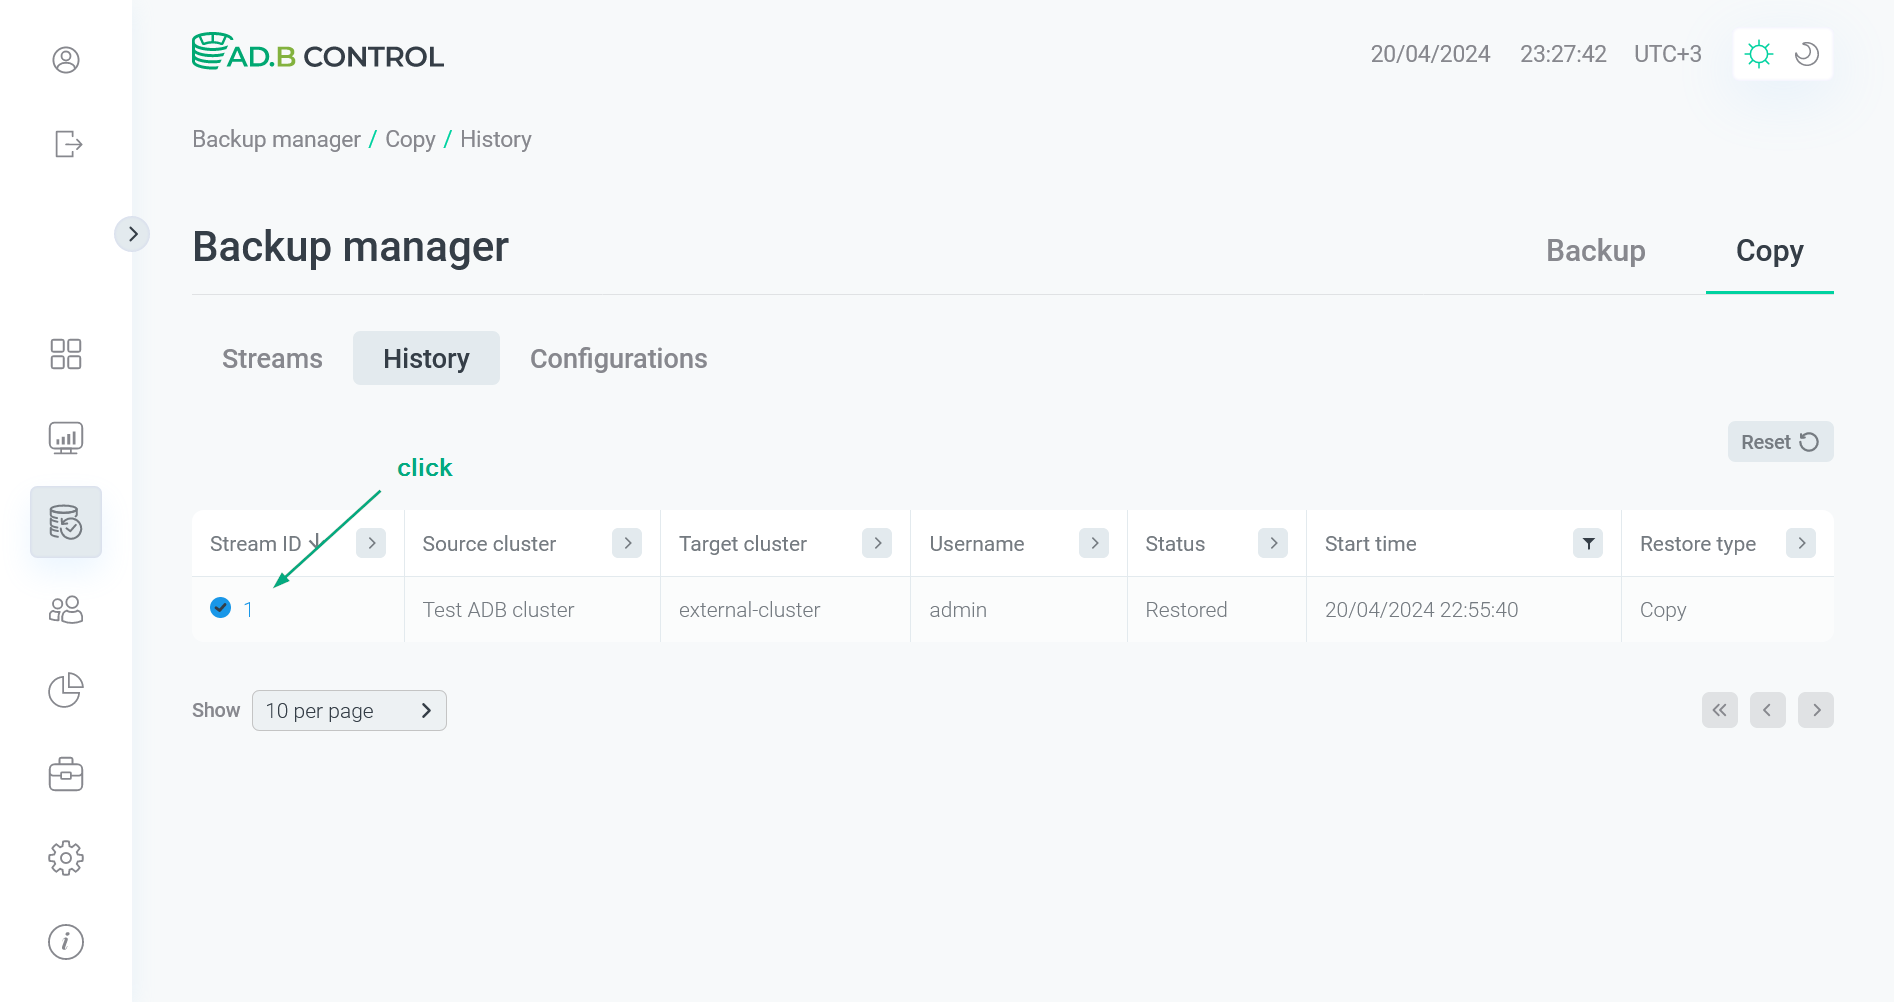
View the data flow details
To view the data flow details, click the data flow identifier (Data flow ID) in the table on the Backup manager → Data flow → Data flows or Backup manager → Data flow → History tab.
The next page contains the following sections:
-
Overview
-
Statuses
-
Restore points (shown only for the
Streamingrestore type)
The Overview section displays the general data flow information.
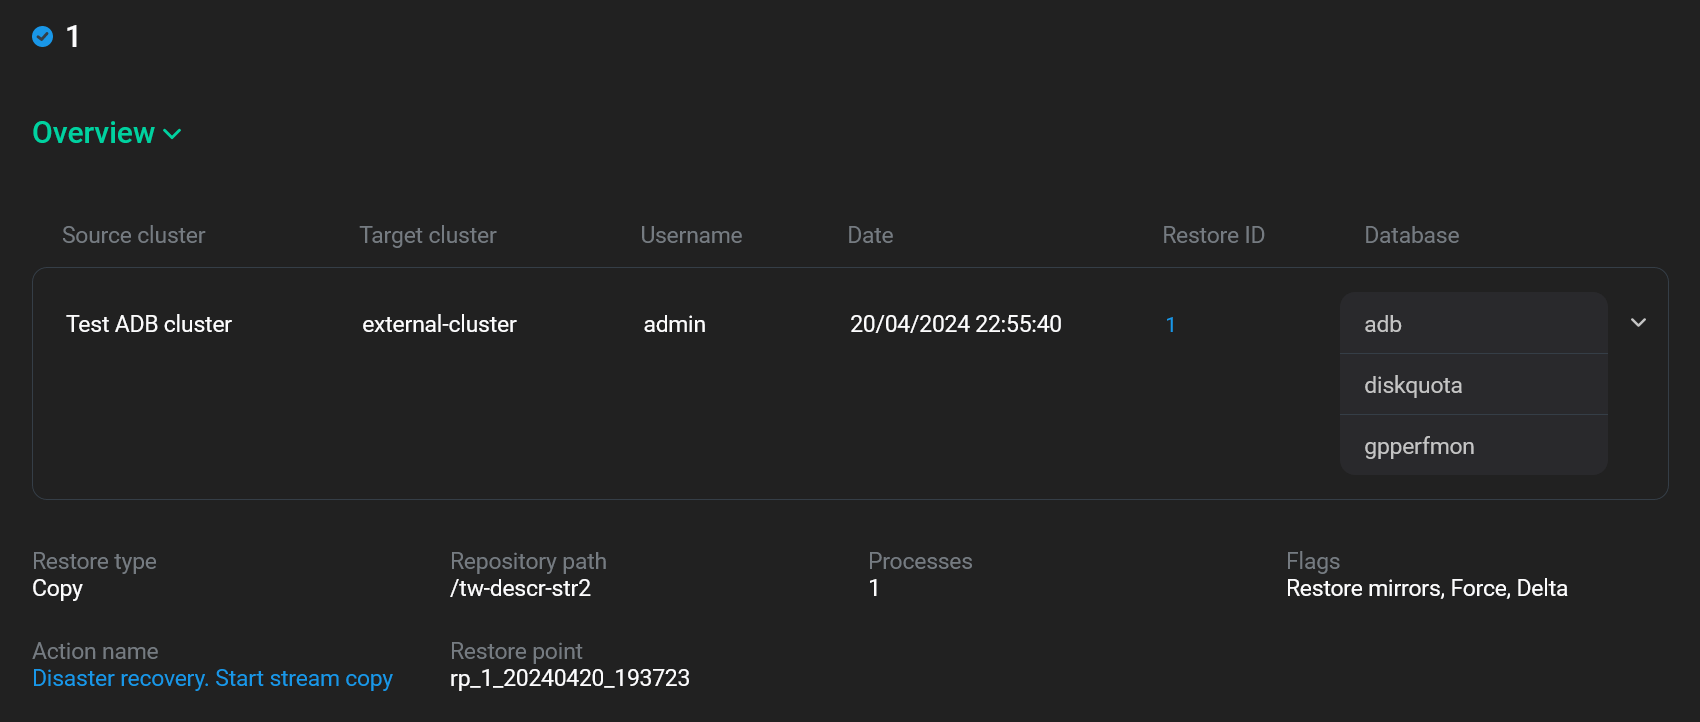
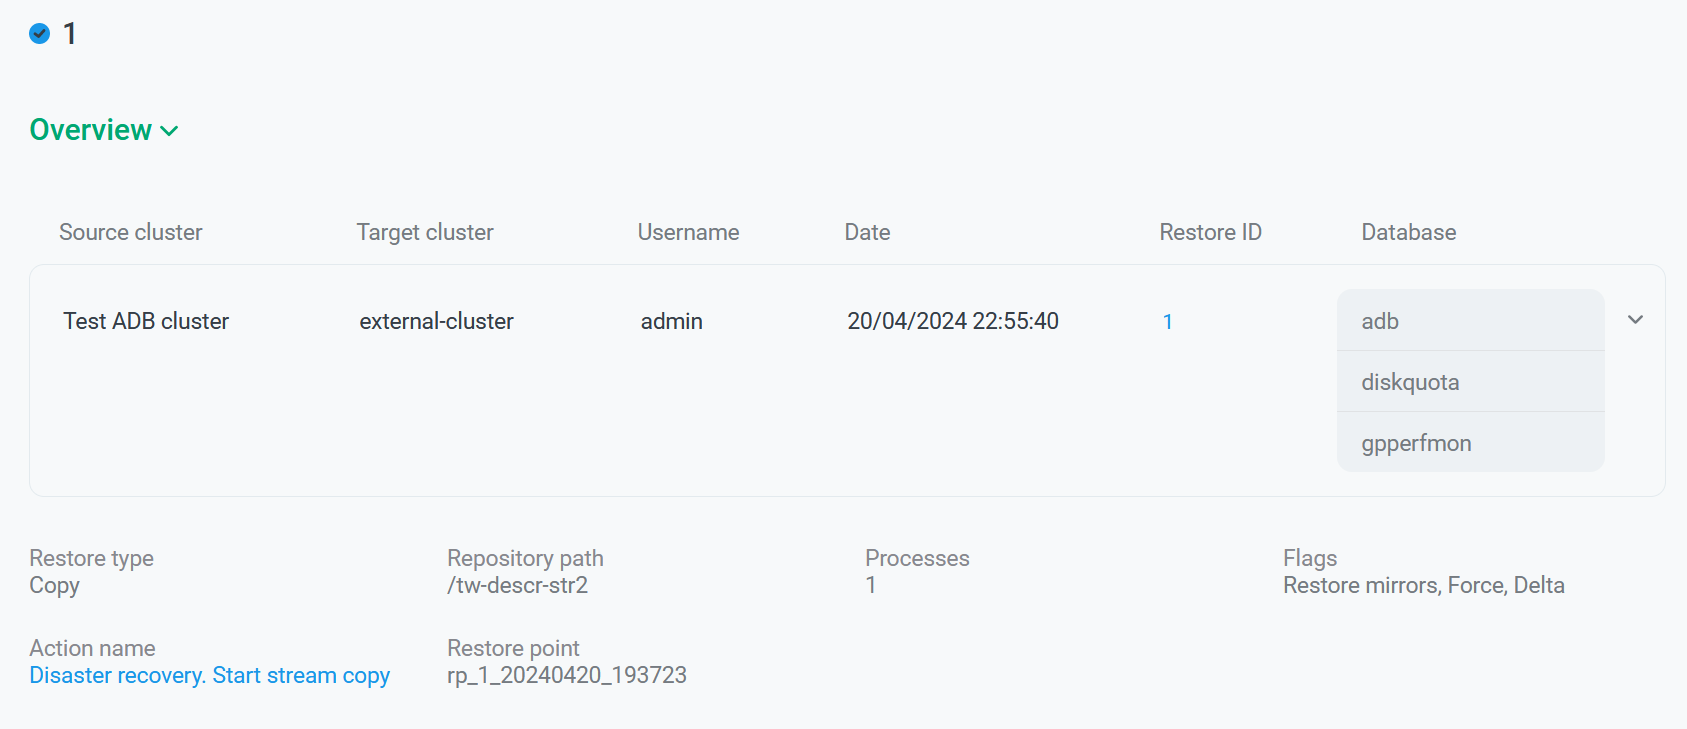
| Field | Description |
|---|---|
Source cluster |
A source cluster name |
Target cluster |
A target cluster name |
Username |
A login of the user who created the current data flow via the ADB Control web interface |
Date |
A data flow creation timestamp in the |
Restore ID |
A unique identifier of the restore operation in the target cluster. To view the restore details, click the identifier |
Database |
A list of databases that were selected during the data flow configuration |
Restore type |
The restore type that was selected during the data flow configuration |
Processes |
A number of processes that was selected during the data flow configuration |
Flags |
The flags that were selected during the data flow configuration (see the Delta, Force, Verify flags above) |
Replication lag |
How much the target cluster lags from the source cluster. Calculated as the difference between the current time and the time when the latest restore point was applied to the target cluster during the streaming process. Available only for data flows with the |
Action name |
A name of the action within which the data flow was launched. To view the action details, click the name |
Restore point |
An identifier of the restore point that was selected during the data flow configuration |
Repository path |
A repository path that was selected during the data flow configuration |
Mirrors restore mode |
The restore mode selected for mirrors during the data flow configuration (see Restore mirrors above) |
Error handling mode |
The error handling mode specified during the data flow configuration (see On restore points streaming failure above) |
The Statuses section displays the history of changing the selected data flow status.
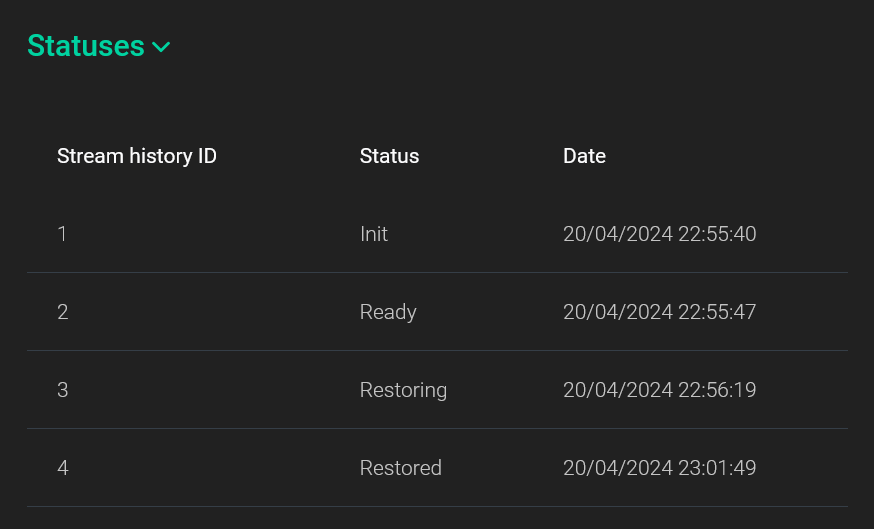
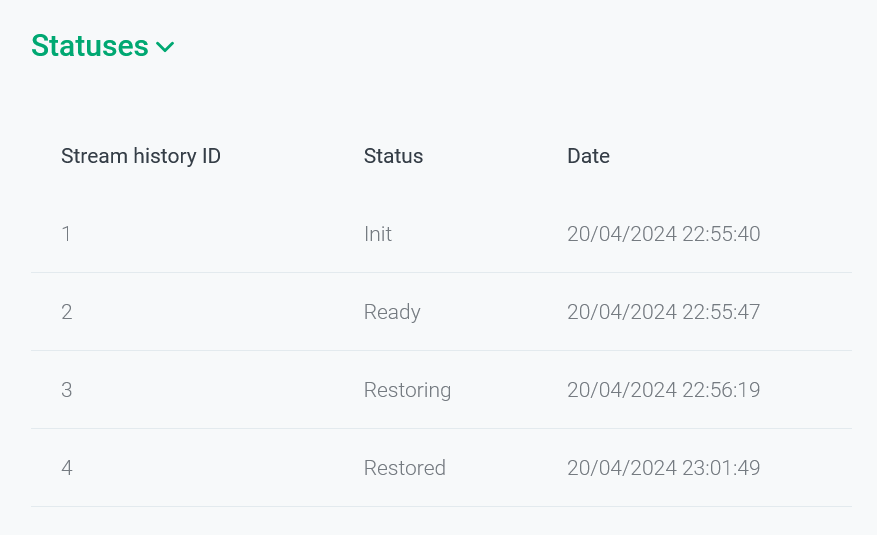
| Field | Description |
|---|---|
Data flow history ID |
A unique identifier of the data flow status change event |
Status |
A data flow status at the time specified in the Date field |
Date |
A timestamp of the data flow status change event in the |
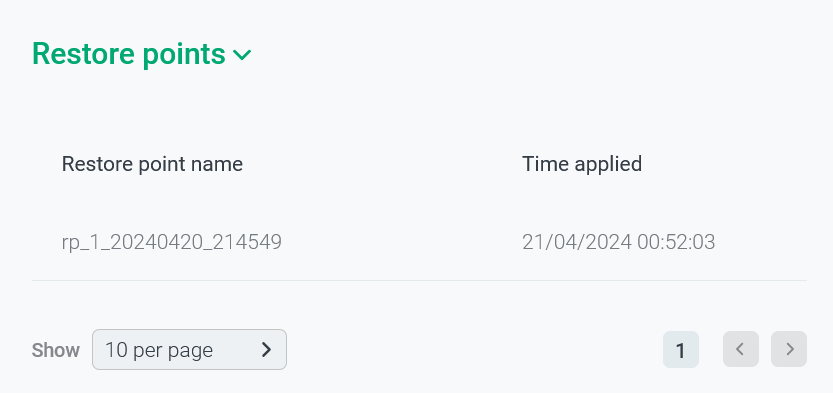
The Restore points section displays a list of restore points that have been applied to the target cluster during the current streaming process. The section is shown only for data flows with the Streaming type.

| Field | Description |
|---|---|
Restore point name |
A name that was assigned to the restore point in the source cluster |
Status |
A status of applying the restore point to the target cluster:
|
Time applied |
A timestamp when the restore point was applied to the target cluster (in the |
Terminate a data flow
|
IMPORTANT
The Terminate action is available only for data flows with the Streaming type in the Streaming status.
|
To terminate a running data flow with the Streaming type, follow the steps:
-
Apply the Terminate action to the specified data flow on the Backup manager → Data flow → Data flows tab. To open a drop-down list with possible actions, click

 in the Action column.
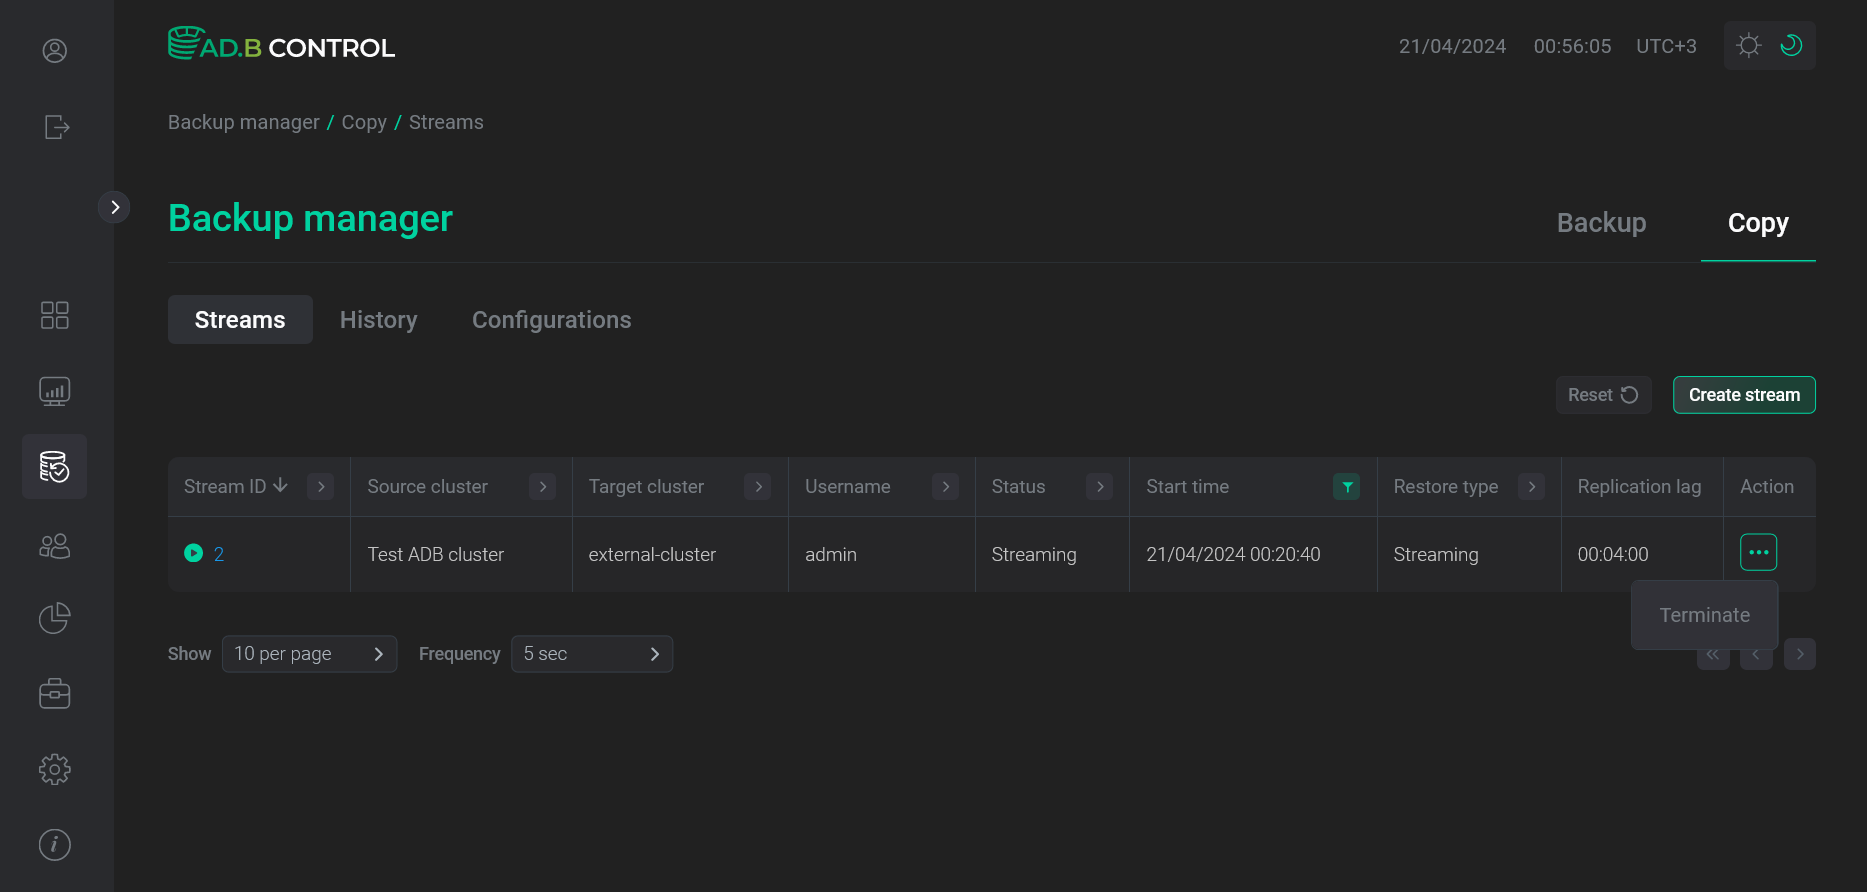 Go to terminating the data flow
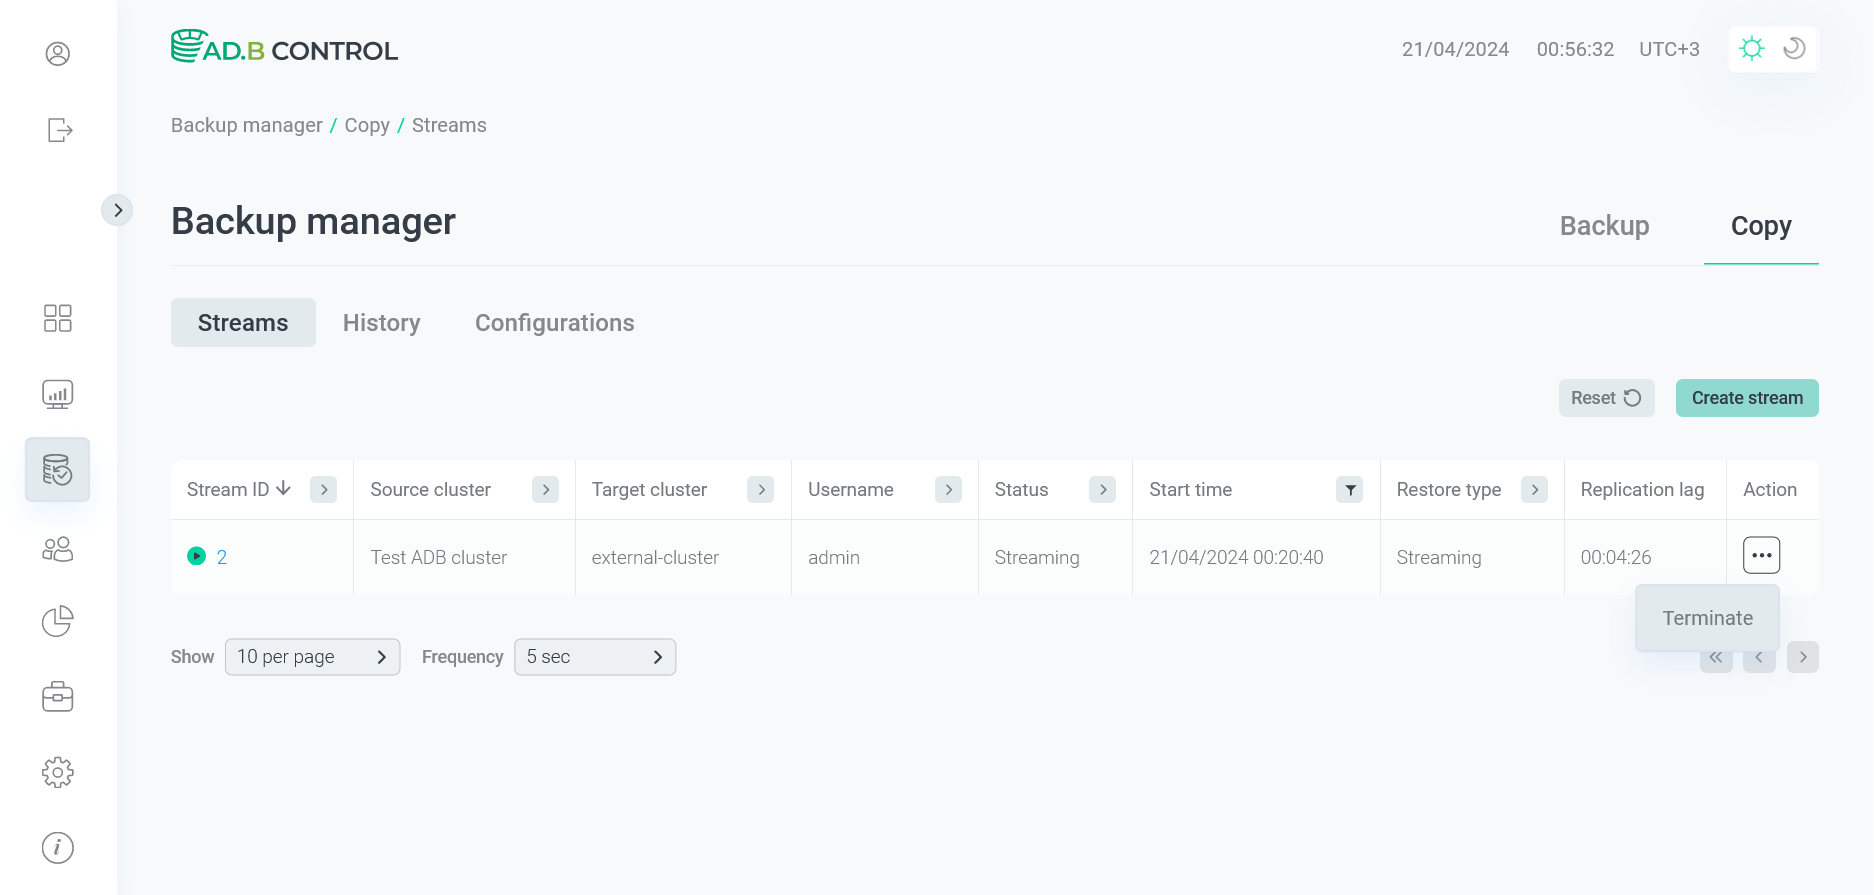 Go to terminating the data flow
 -
In the window that opens, confirm the action by clicking Run.
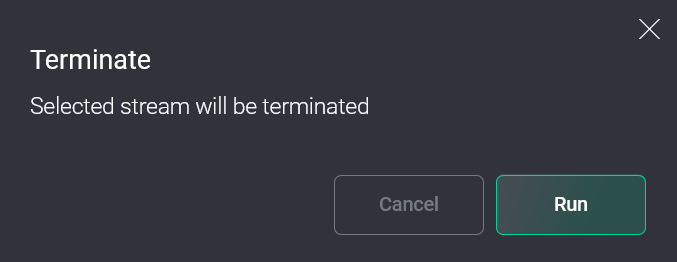 Confirm the action
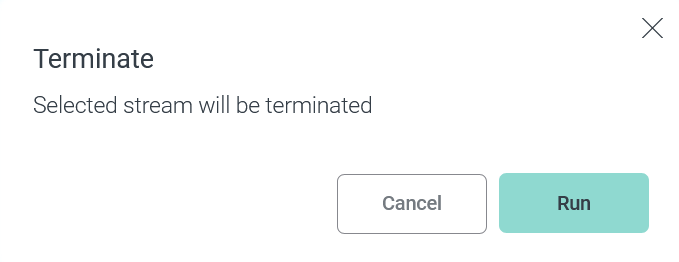 Confirm the action
 -
As a result, the Terminate stream action starts for the target cluster. This action, in turn, generates several subactions. You can see all of them on the Actions tab (for more details, see View actions in ADBM).
During the termination process:
-
A status of the previously created action Streaming cluster is changed to
Done. -
A status of the restore operation for the target cluster is changed to
Done. -
A status of the selected data flow is changed as follows:
Streaming→Terminating→Restoring→Restored. -
The selected data flow is moved from the Backup manager → Data flow → Data flows tab to the Backup manager → Data flow → History tab.
-
Resume a data flow
|
IMPORTANT
The Resume action is available only for data flows with the Streaming type in the Paused status starting with ADBM 2.4.0.
|
To resume a stopped data flow with the Streaming type (see On restore points streaming failure above), follow the steps:
-
Apply the Resume action to the specified data flow on the Backup manager → Data flow → Data flows tab. To open a drop-down list with possible actions, click
in the Action column. Go to resuming a data flow
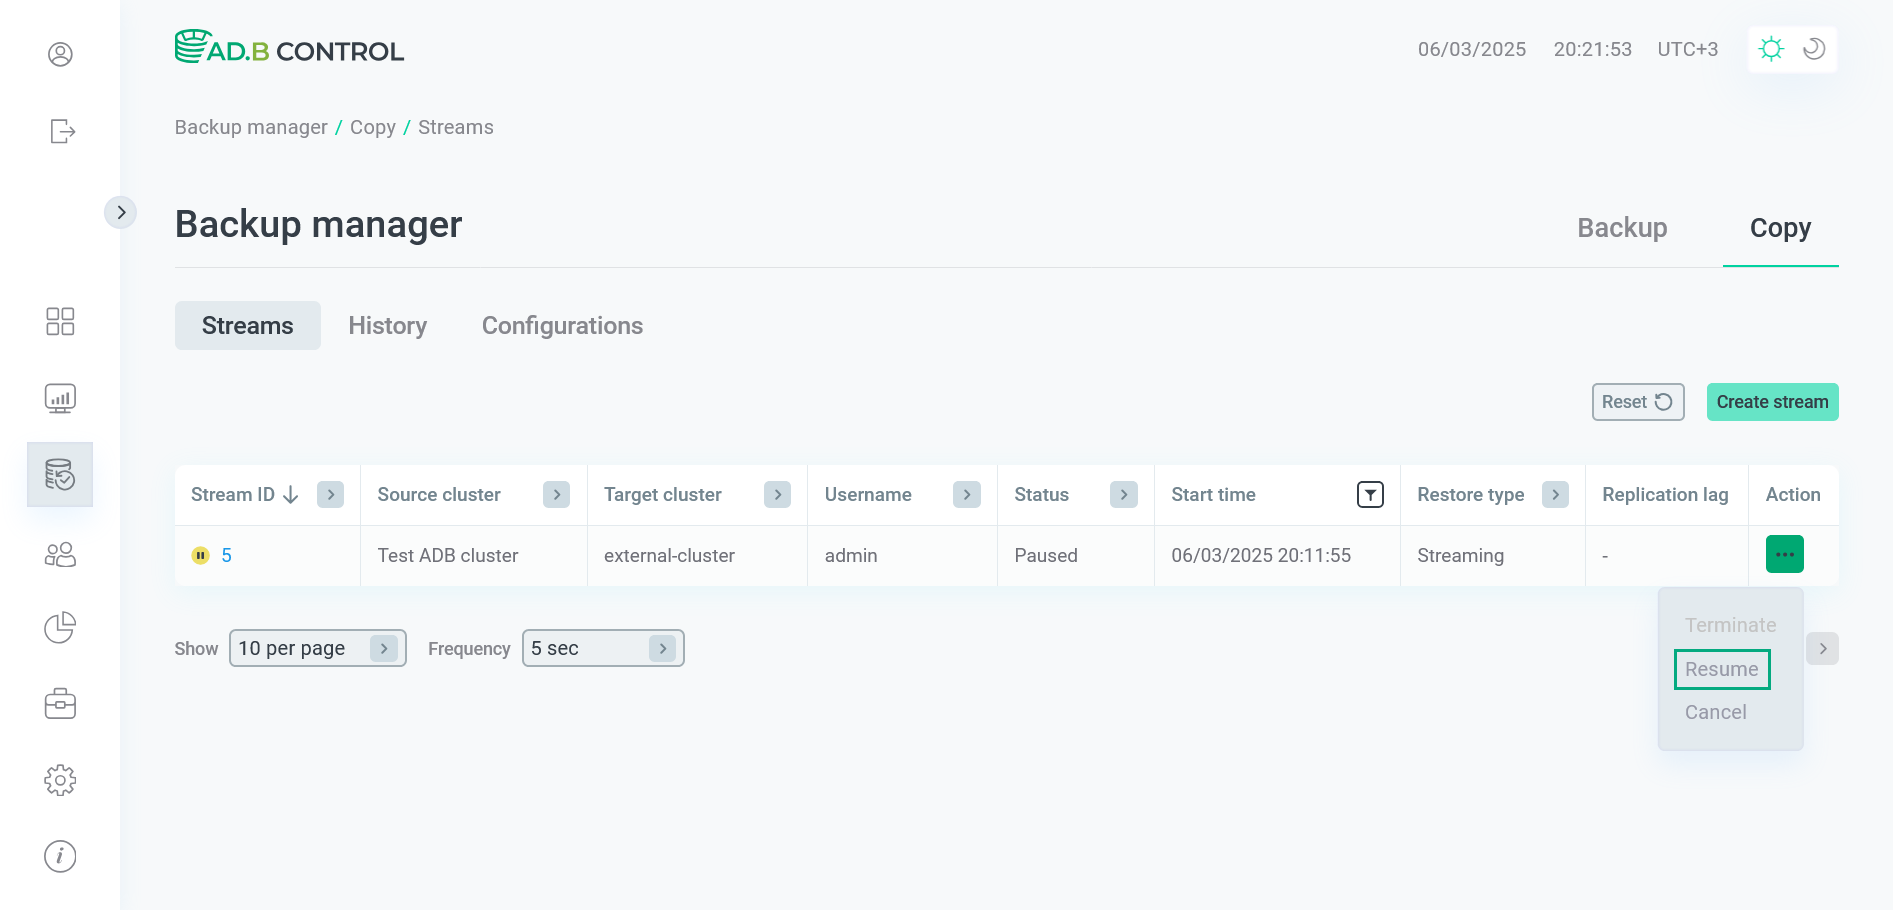 Go to resuming a data flow
 -
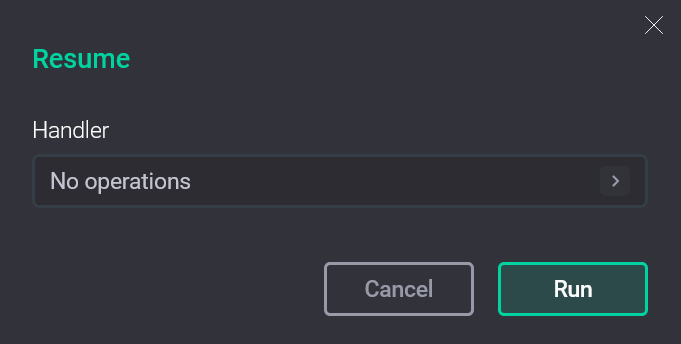
In the window that opens, you can change the data flow error handling mode by selecting one of the values in the Handler field:
-
No operations— leave thePausedata flow handler without any changes (see On restore points streaming failure above). -
Set stream handler to Bring Online— change the data flow error handling mode fromPausetoBring online(see On restore points streaming failure above). -
Immediate recovery— terminate the current data flow immediately and restore the target cluster data at the moment of the last valid restore point.After you select the Handler value, confirm the action by clicking Run.
 Confirm the action
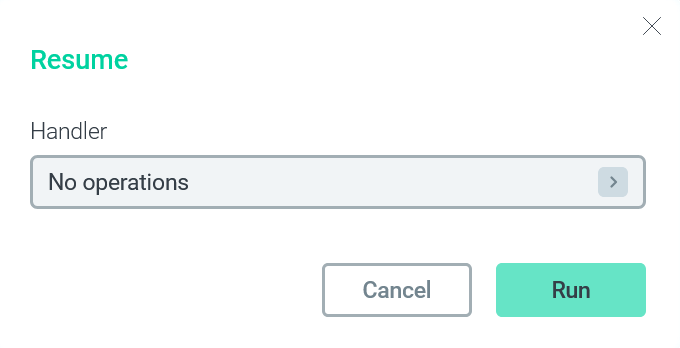 Confirm the action
-
-
As a result, the Resume Stream action starts for the target cluster. This action, in turn, generates several subactions. You can see all of them on the Actions tab (for more details, see View actions in ADBM).
If the data flow resumes successfully, it acquires the
Streamingstatus. If you selected the target cluster restore in the action settings and it does not fail, the data flow status changes toRestored.
Cancel a data flow
|
IMPORTANT
The Cancel action is available only for data flows with the Streaming type in the Paused status starting with ADBM 2.4.0.
|
To cancel a stopped data flow with the Streaming type (see On restore points streaming failure above), follow the steps:
-
Apply the Cancel action to the specified data flow on the Backup manager → Data flow → Data flows tab. To open a drop-down list with possible actions, click
in the Action column.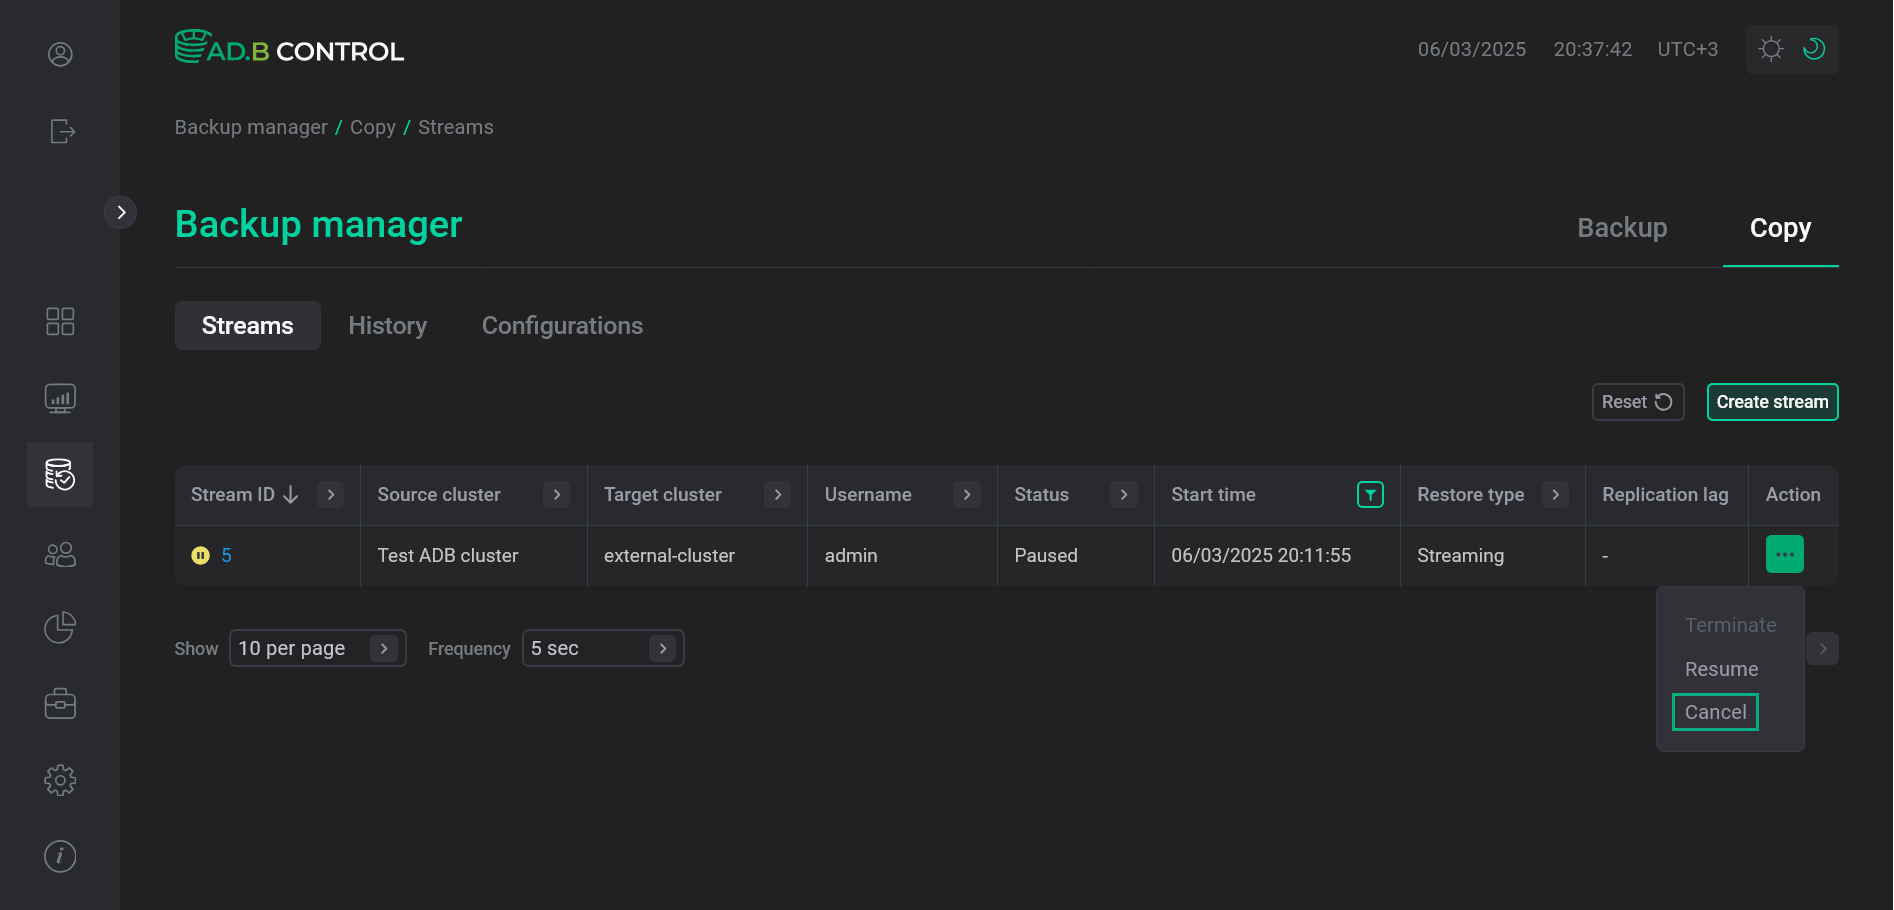 Go to cancelling a data flow
 Go to cancelling a data flow
 -
In the window that opens, confirm the action by clicking Run.
 Confirm the action
 Confirm the action
 -
As a result, the Cancel Stream action starts for the target cluster. This action, in turn, generates several subactions. You can see all of them on the Actions tab (for more details, see View actions in ADBM).
After all actions are successfully finished, the data flow status changes to
Cancelled.