

Overview of the Hosts tab in the ADCM UI
After you install and configure a hostprovider, you can create and manage hosts on the Hosts tab in the ADCM web interface via the host actions described below.
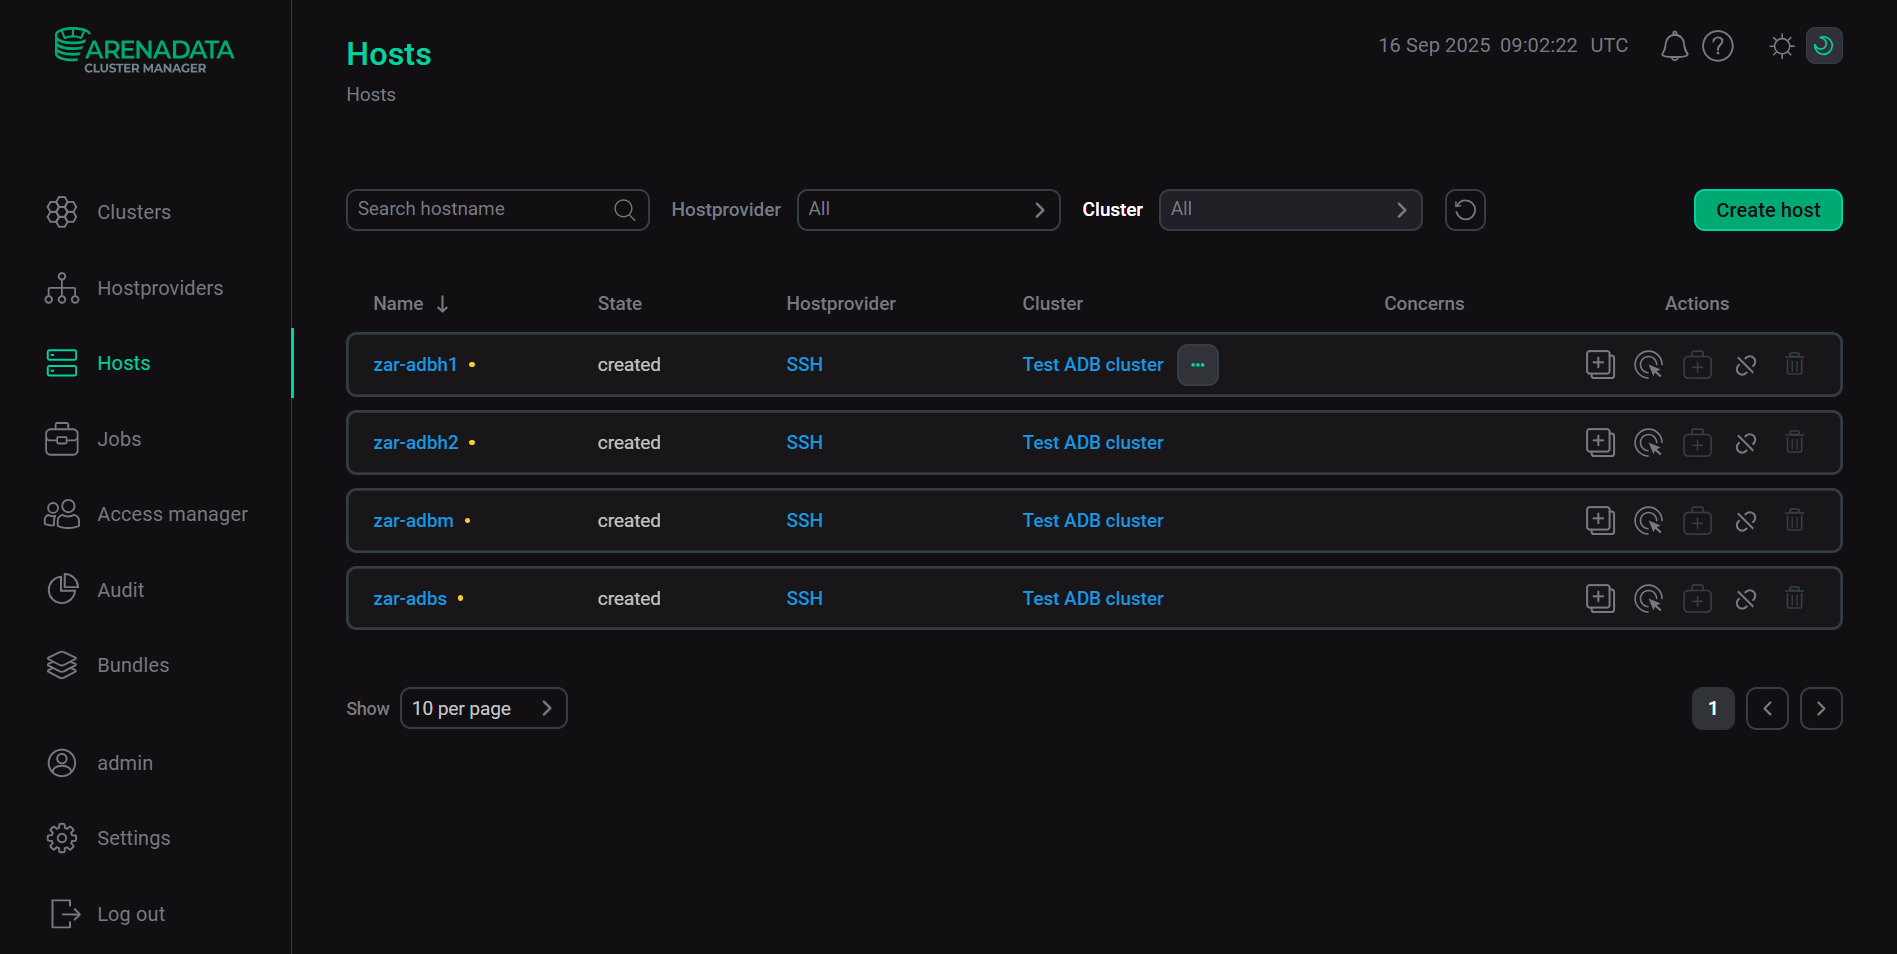
List of hosts
On the Hosts tab, you can see the list of created hosts in tabular form which contains information described below.
| Field | Description |
|---|---|
Name |
Name of the host specified during the host creation. The dot located next to the host name determines the host status. The green dot indicates that statuschecker is installed and the host regularly sends heartbeats. The yellow one indicates that statuschecker is not installed and the host does not send heartbeats to ADCM |
State |
Status of the host. Possible values:
|
Hostprovider |
Name of the hostprovider used to create the host |
Cluster |
Name of the cluster the host belongs to |
Concerns |
One of the following icons:
A pop-up window with the error description appears when hovering over the |
Actions |
Icons for managing the host:
|
|
NOTE
Add/remove and delete options, and the |
To sort the hosts alphabetically, click the ![]()
![]() (from Z to A) or
(from Z to A) or ![]()
![]() (from A to Z) icon in the Name column.
(from A to Z) icon in the Name column.
To search for a host in the list, enter its name in the Search hostname field.
To filter hosts:
-
by hostprovider name — select the required value from the drop-down list in the field next to Hostprovider;
-
by cluster name — select the required value from the drop-down list in the field next to Cluster.
To reset your filters, click the ![]()
![]() icon.
icon.
Operations with a host
Create and configure a host
ADCM allows you to create and configure hosts.
To create and configure a single host, follow these steps:
-
Open the Hosts tab.
-
On the page that opens, click Create host.
-
For further action, refer to the following links, depending on the hostprovider type:
|
NOTE
To add several hosts with the SSH or Yandex Cloud hostproviders simultaneously, run the hostprovider action Create hosts.
|
Run host actions
After you create and configure a new host, you can manage it on the Hosts page. Click the ![]()
![]() icon in the Actions column to select one of the available host actions.
icon in the Actions column to select one of the available host actions.
For more information on actions for hosts based on different hostprovider types, refer to the following links:
|
NOTE
For hosts based on the ADB Cloud Bundle and ADQM Cloud Bundle hostproviders, actions are not yet provided.
|
When you choose an action, ADCM displays a standard dialog box.
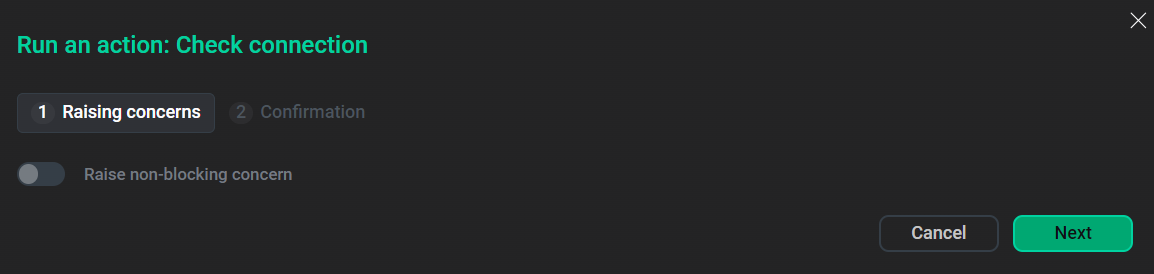
In this dialog box, you can run the action without blocking the object if necessary, add a comment with a brief description of changes, and select the Verbose checkbox to see additional execution details on the Jobs page.

For some actions, such as Create user, you should first fill in additional options on a separate tab.
Enable host sharing
To enable host sharing between multiple clusters that you have created, follow these steps:
-
In the row with the required host, click the

 icon. The window for creating a subhost (representation of the host in the cluster) opens.
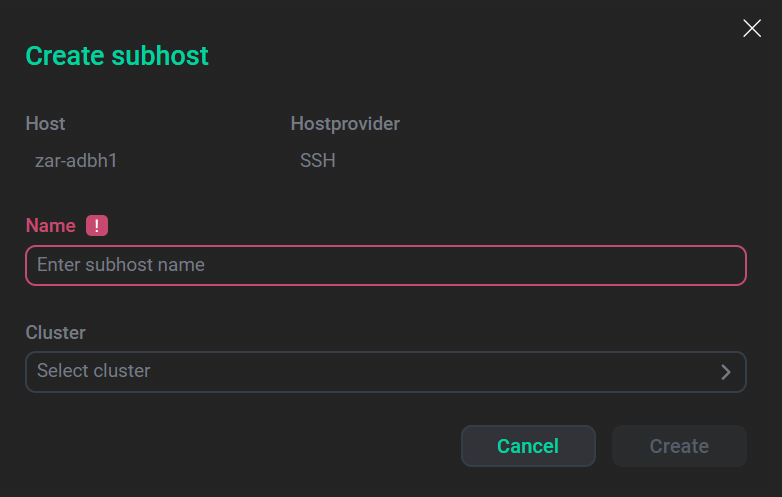 The Create subhost window
 -
In the Create subhost window:
-
in the Name field, enter the name of the subhost;
-
in the Cluster field, select the name of a cluster from the drop-down list to add the subhost (optional).
-
-
Click Create. As a result, the added subhost will be displayed under the row of the corresponding host. The subhost can be used to enable host sharing between multiple clusters.
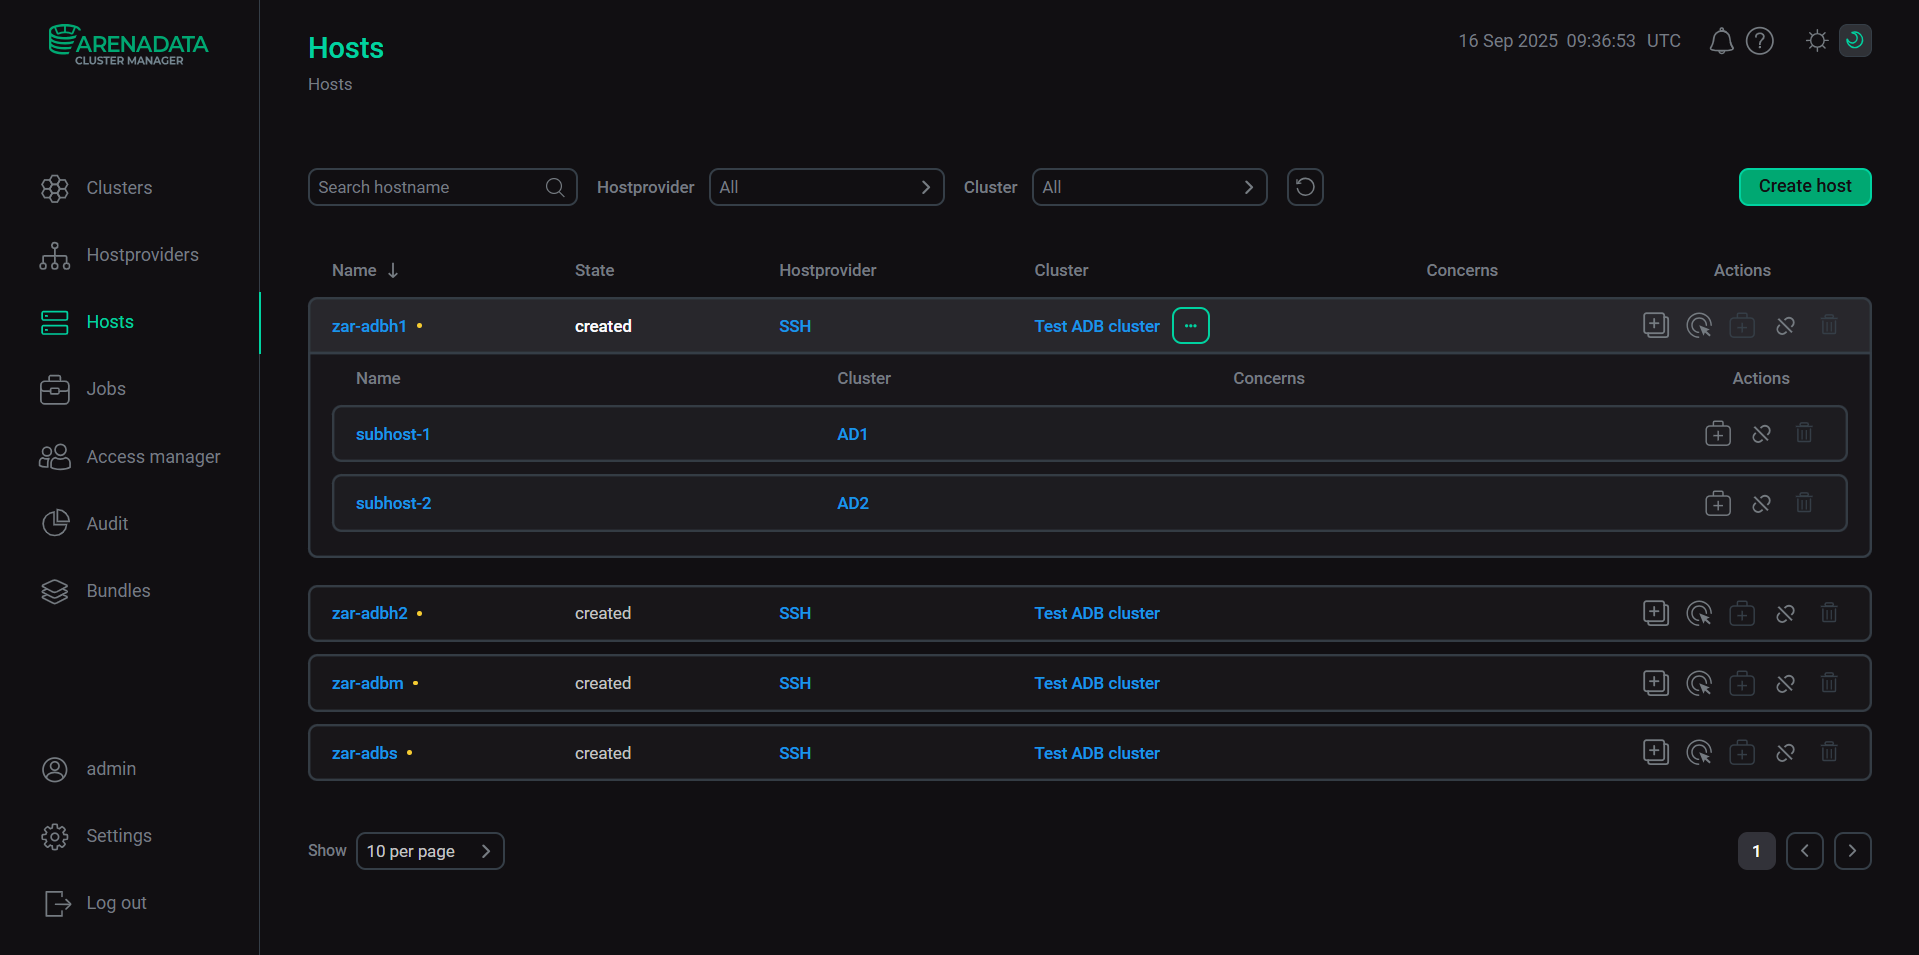 The Hosts tab with the added subhost
The subhost list is displayed in tabular form with the following fields:
-
Name — name of the subhost specified during the subhost creation.
-
Cluster — name of the cluster the subhost belongs to.
-
Concern — one of the following icons:
-

 — indicates the presence of blocking concerns.
 -

 — indicates the presence of non-blocking concerns.
-
-
Actions — icons for managing the subhost:
-
 — turns on the maintenance mode on the subhost if supported by the product in use. If maintenance mode is not supported by the product, the icon image is changed to
 . After the action is executed, the subhost changes its state and the icon is changed to the
 icon. In this state, the subhost can be transferred to normal mode.
 -
 — adds the subhost to a cluster from the drop-down list. After the action is executed, the icon is changed to the
  icon which performs the opposite action.
 -
 — deletes the information about the subhost from ADCM. The subhost removal is possible only after removing the subhost from a cluster using the Unlink action.
-
To expand or collapse the list of subhosts under the row of the corresponding host, click the ![]()
![]() or
or ![]()
![]() icon respectively.
icon respectively.
Host details
To get detailed information about the host, click on the host name in the Name column of the table located on the Hosts tab.
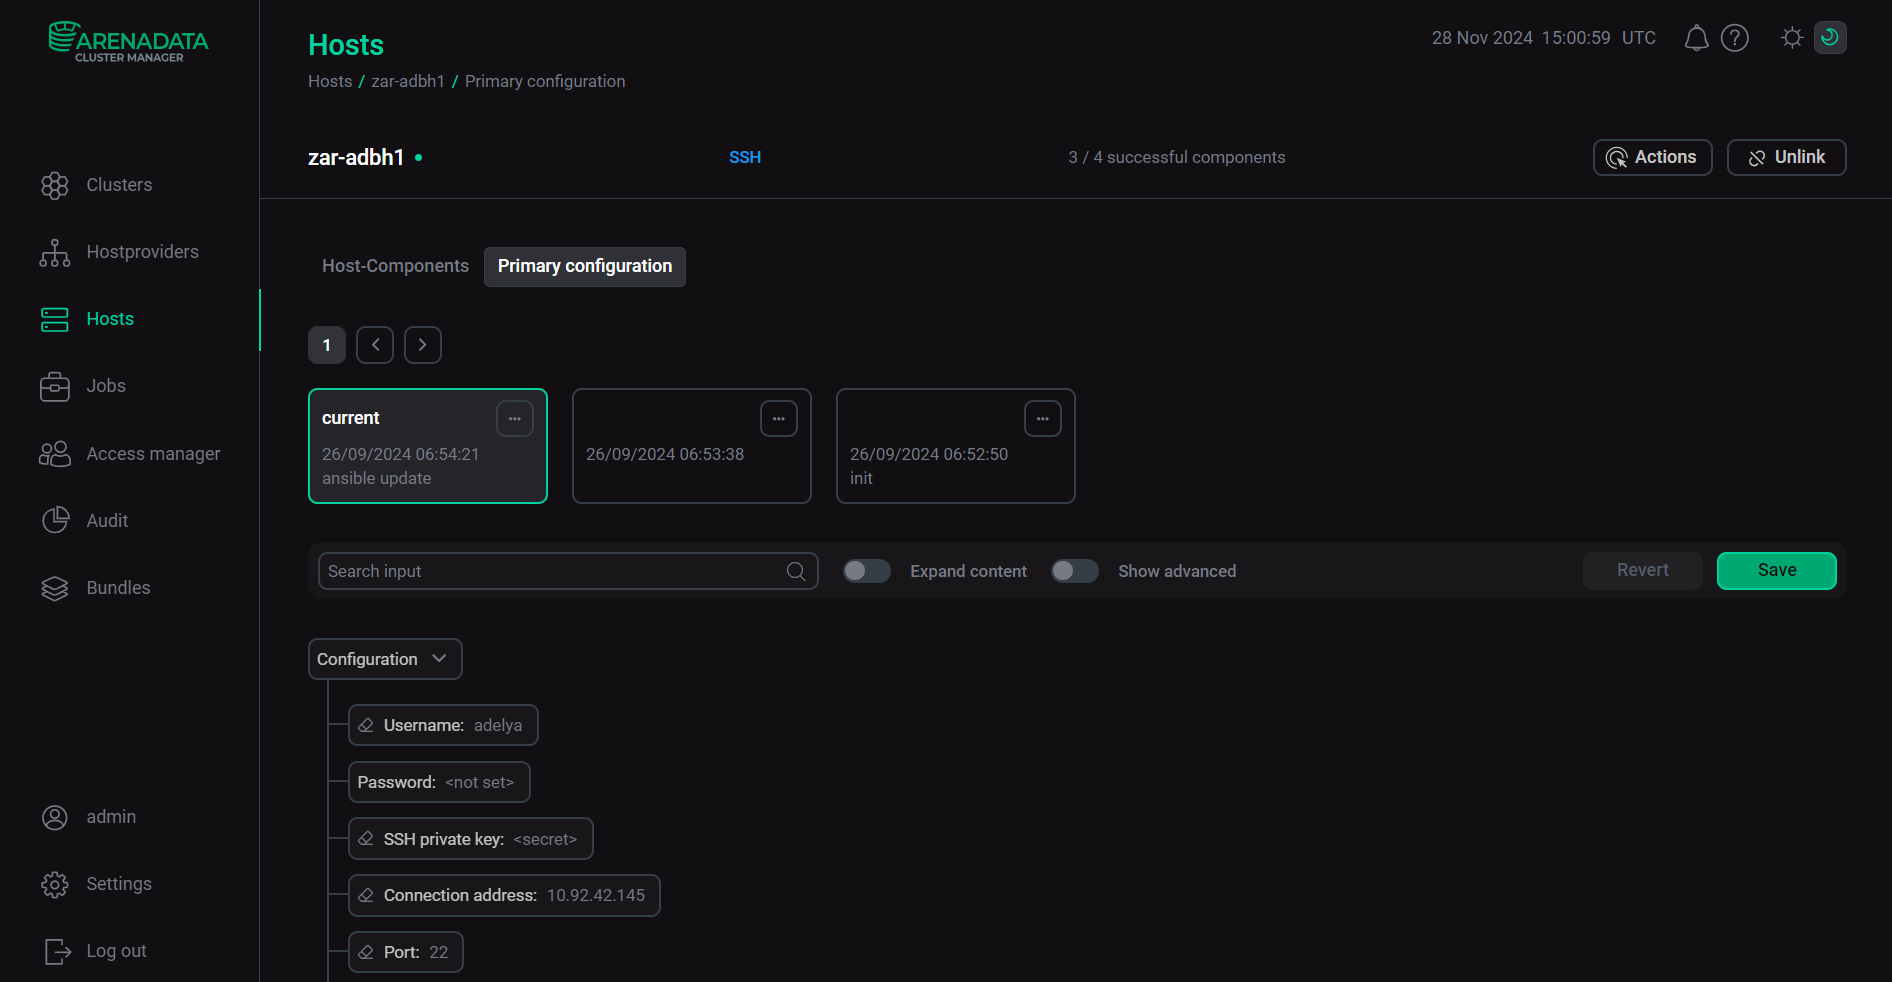
At the top of the host page, the following is displayed:
-
host name with the host status;
-
hostprovider name that contains a link to the hostprovider page;
-
number of components successfully installed on the host;
-
buttons Actions and Link/Unlink (depending on the state of the link between the host and its cluster).
Also, this page includes the following tabs:
-
Host-Components
-
Primary configuration
The Host-Components tab allows you to get more information about the current host, such as the host components and their statuses.
| Field | Description |
|---|---|
Name |
Name of the component. The dot located next to the component name determines the component status. The green dot indicates that a component operates correctly. The yellow one means that a problem occurs |
Concerns |
One of the following icons:
A pop-up window with the error description appears when hovering over the |
Actions |
The |
To sort the components alphabetically, click the ![]()
![]() (from Z to A) or
(from Z to A) or ![]()
![]() (from A to Z) icon in the Name column.
(from A to Z) icon in the Name column.
To search for a component in the list, enter its name in the Search component field.
The Primary configuration tab allows you to configure the general host settings. The tab description and information about working with configuration parameters are given in the Configuration parameters in the ADCM UI article.