
Create hosts with Yandex Cloud hostprovider
|
IMPORTANT
|
The steps for adding a single host are listed below:
-
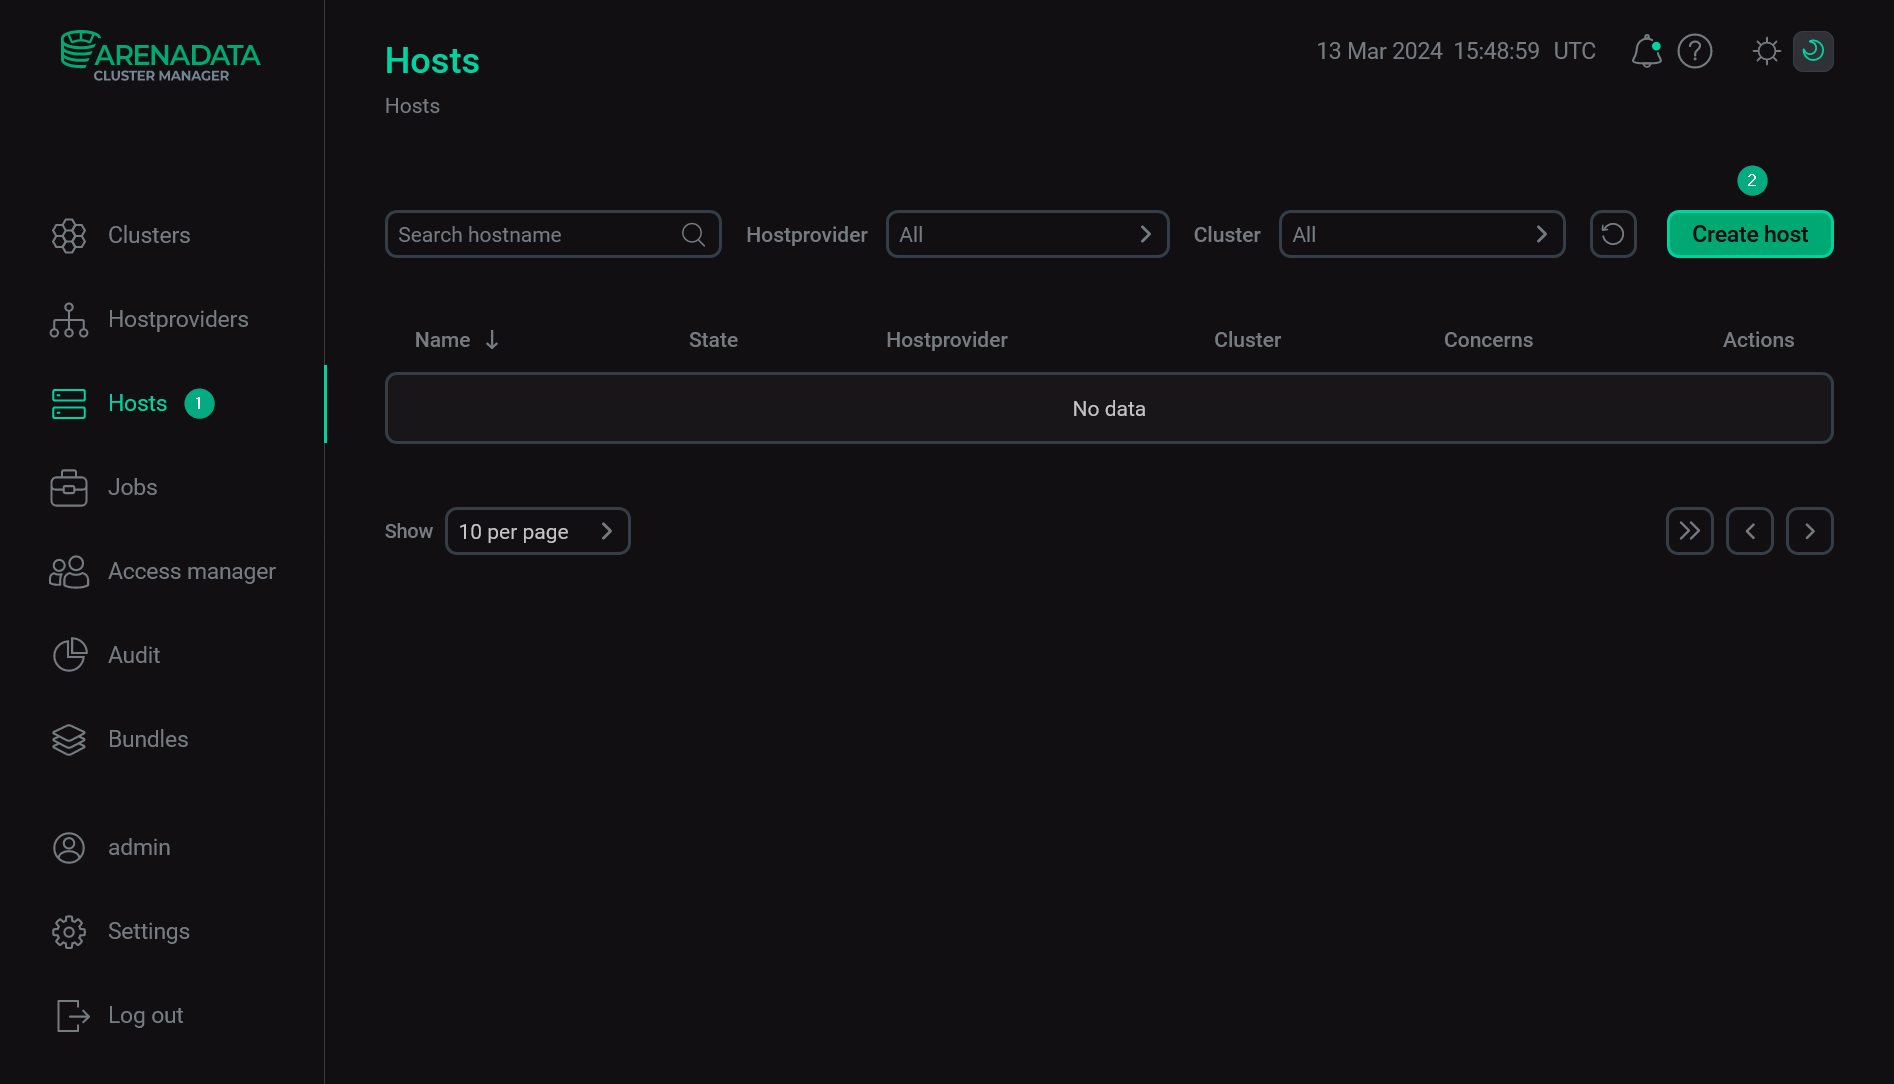
Select the Hosts item in the left navigation menu and click Create host.
 Add a host via ADCM
 -
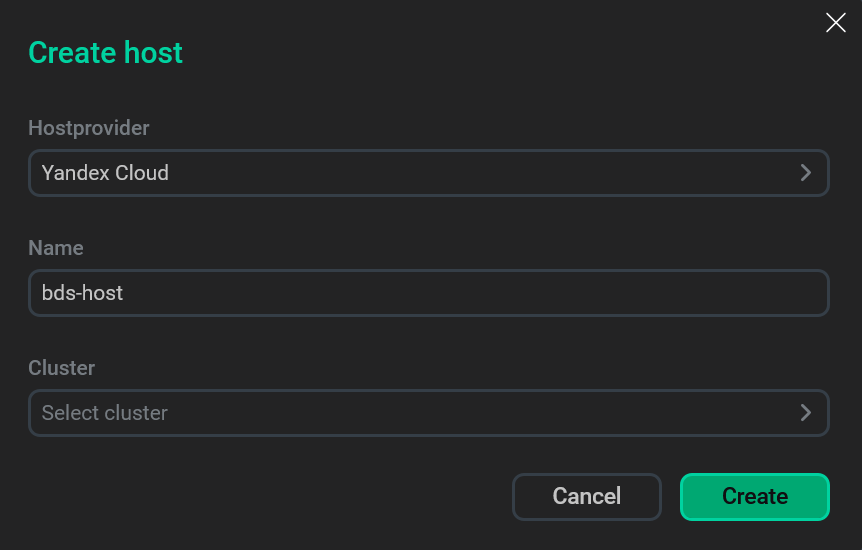
In the opened dialog:
-
Select a hostprovider in the Hostprovider field. Notice that hostproviders are displayed with the names that you have assigned to them.
-
Enter a host name in the Name field.
-
Click Create.
 Describe a new hostCAUTION
-
When creating hosts for the ADH and ADPS products, you should define an FQDN in the Name field (e.g.
test.ru-central1.internal). The maximum FQDN length is 38 symbols for ADH and 49 symbols for ADPS. -
For the ADS and ADS Control products, FQDNs are required if the ADPS product is used. The maximum FQDN length for ADS hosts is 48 symbols.
-
For the ADQM product, FQDNs are required if Kerberos authentication is used.
-
ADB starting with the 6.23.3.44 version supports both FQDN and short host names. For the previous ADB versions, it is not recommended to use FQDNs (as FQDNs cause errors during the Expand action and a workaround is needed).
-
In other cases, both short host names and FQDNs are allowed in the Name field.
-
-
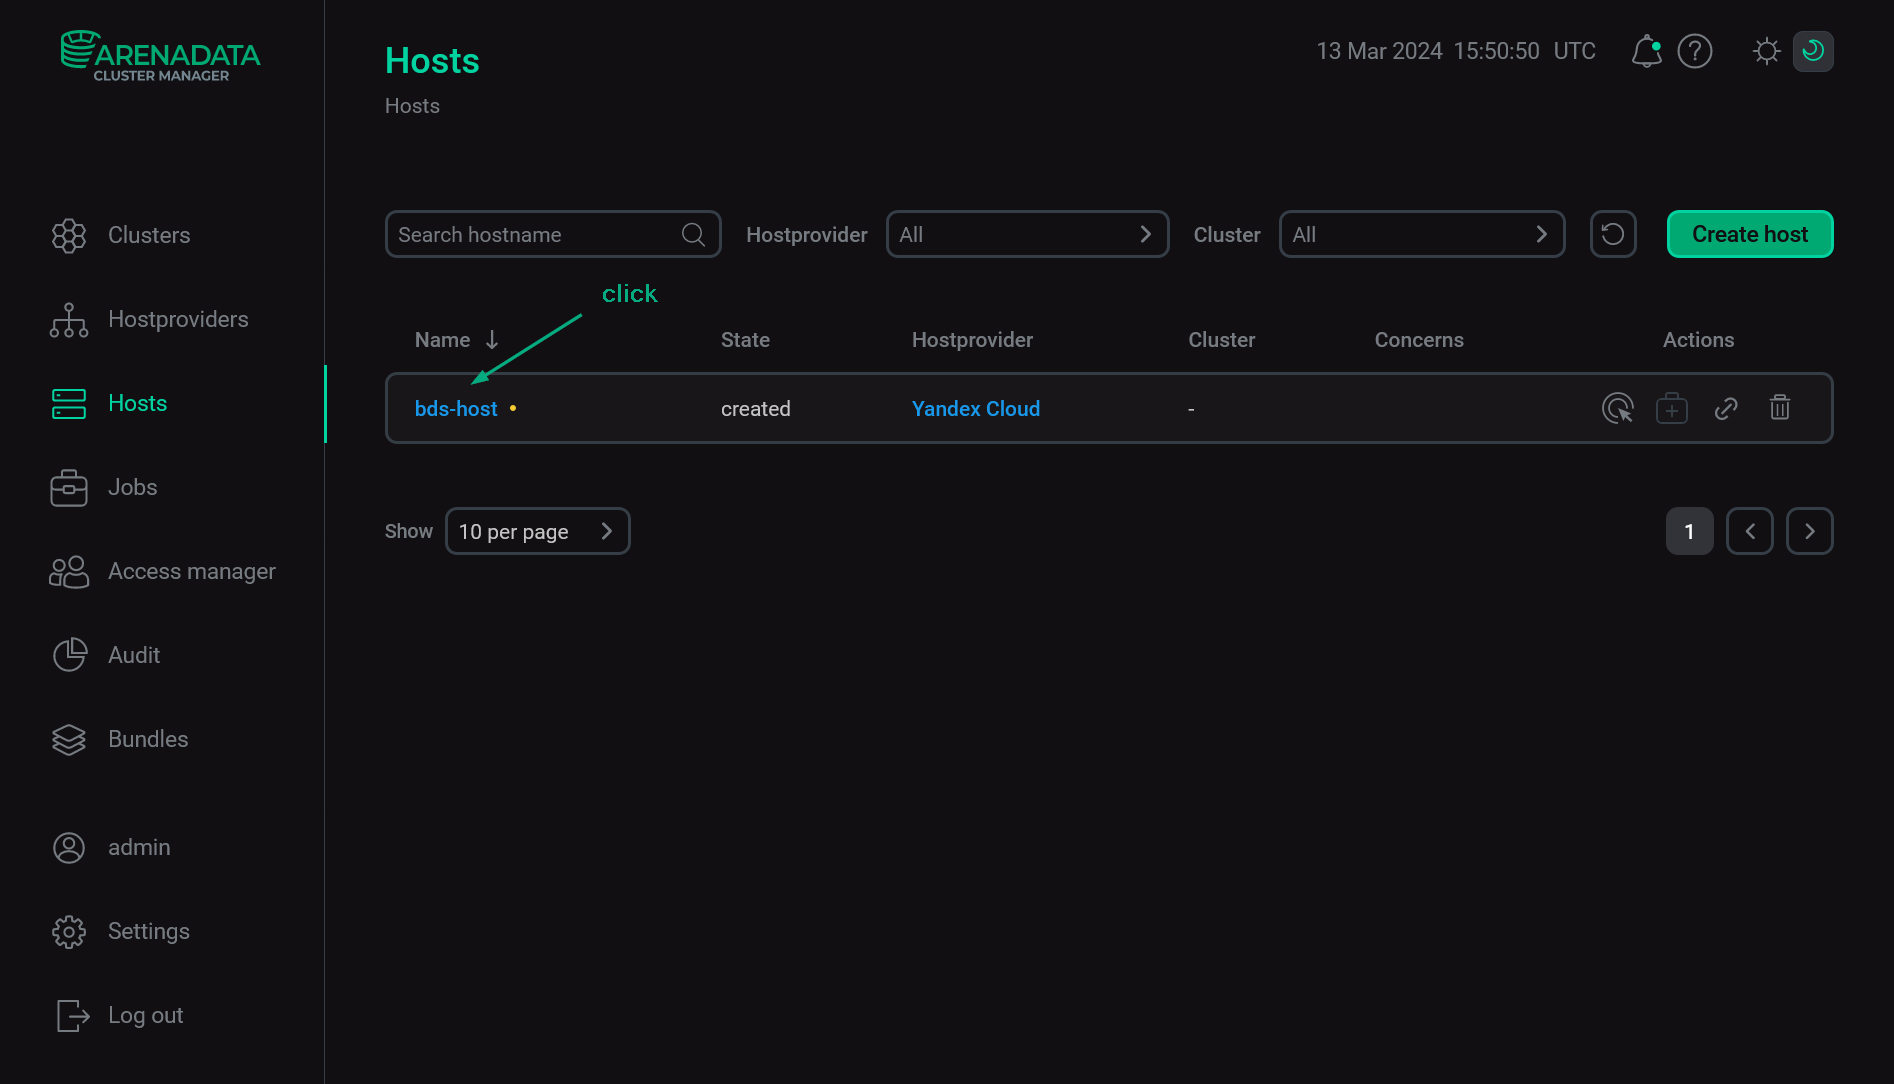
Return to the Hosts page and switch to configuring the added host. To do this, click the host name in the Name column.
 Go to configuring a host
 -
In the opened window, select the Primary Configuration tab, switch on the Show advanced toggle, fill in parameters, and click Save.
 Configure a host
The assignment of parameters is listed in the table below.
Host configuration parameters Parameter Description Default value Connection address
Read-only. An IP address of the created VM. It is filled in automatically during the Init action
—
Secondary NIC IP address
Read-only. An IP address of the second network interface controller (NIC) that is used by the created VM. It is filled in automatically during the Init action
—
Port
Read-only. A port number that is used for connecting to the created VM via SSH
22
Username
Read-only. A user name that is used for connecting ADCM to the created VM via SSH. It is filled in automatically during the Init action
root
Ansible become
Read-only. A flag that grants the superuser privileges to the user specified in the Username field
true
SSH args
Read-only. SSH arguments for Ansible. The
StrictHostKeyChecking=noandUserKnownHostsFile=/dev/nullparameters disable strict host key checking for SSH. Otherwise, when this checking is enabled, the SSH client connects only to the known hosts that are stored in the known host list-o StrictHostKeyChecking=no -o UserKnownHostsFile=/dev/null
Additional users groups
A list of additional Linux groups. All users are added to this list at the moment the VMs are being initialized. For example, in the Alt Linux image the
ansibleuser should be added to thewheelgroup. Each group should exist in the image.Enter each group separately — by clicking the
icon in the Additional users groups node and editing the new list element
Additional users groups [N]subsequently—
Login
Read-only. A name of the user that is created on the new VM. It is filled in automatically during the Init action
—
Public SSH key
Read-only. A public SSH key of the new user with the Login name. It is filled in automatically during the Init action
—
Cloud-init timeout
A timeout for
cloud-initto finish the running tasks (in seconds)600
Init script
The initialization script that is executed at VMs deployment. A shebang (
#!) is not needed. Pay attention that this option is experimental: single or double quotes may break the installation process—
Image family
A family of operating systems based on which VMs are created. The newest image from the specified family is used.
Starting with Yandex Cloud hostprovider 2.13, you can fill in the parameter value manually
centos-7
Snapshot id
An ID of the boot disk snapshot. Incompatible with the Image id parameter
—
Image id
An ID of the boot disk image. Can be obtained via two commands:
-
For public images:
yc compute image list --folder-id standard-images -
For private images:
yc compute image list
Incompatible with the Snapshot id parameter
—
Platform
A processor type. For more information on supported platforms, refer to the Yandex Cloud documentation.
Possible values:
-
Intel Broadwell -
Intel Cascade Lake -
Intel Ice Lake(starting with Yandex Cloud hostprovider 2.15)
Intel Cascade Lake
vCPU
A number of vCPU
2
Perfomance level (%)
A guaranteed processor performance level that is allocated to VMs. See more details in the Yandex Cloud documentation
100
Memory (GB)
RAM (in GB)
2
Boot disk name
A name of the boot disk that is created for the new VM. If not defined, the
<hostname>-boot-disktemplate is used as a disk name, where<hostname>is the VM name—
Disk type
A storage class of VMs. Possible values:
-
SSD -
HDD -
SSD-NONREPLICATED(starting with Yandex Cloud hostprovider 2.13)
HDD
Disk size, GB
A size of the boot disk that is created for VMs (in GB)
50
Additional disks (JSON)
Parameters of additional disks in the JSON format:
-
name— a name of the disk. If not defined, the following template is used:<hostname>-data-disk-<N>, where<hostname>is the VM name and<N>is the disk number. -
autodelete— a flag that indicates whether to remove a disk after removing a VM. -
description— a disk description. -
type— a disk type (see Disk type above). -
size— a disk size in GB.
All parameters except
nameare required. Example:[ { "name": "Data-disk1", "autodelete": true, "description": "disk1", "type": "ssd", "size": 10 }, { "autodelete": false, "description": "disk2", "type": "hdd", "size": 100 } ]—
Assign public ip
Whether or not to assign public IP addresses to VMs
false
Assign secondary NIC
A flag that indicates whether to use the second network interface controller (NIC) for VM. You need to define the Secondary subnet ID value in the Yandex Cloud hostprovider settings first
false
Security Group IDs
Security group identifiers that will be used for all created VMs by default. The security groups that are specified during the Create hosts action have a higher priority compared to the groups specified at the hostprovider level.
Enter each group separately — by clicking the
icon in the Security Group IDs node and editing the new list element
Security Group IDs [N]subsequently—
Labels
Labels that will be used for all created VMs by default. The labels that are specified during the Create hosts action have a higher priority compared to the labels specified at the hostprovider level.
Enter each label separately — by clicking Add property in the Labels node and editing the new list element
Labels [N]subsequently. In the dialog that opens, enter a label key in Enter field name and a label value in Enter field value—
Preemptible
Whether or not to mark VMs as preemptible. Preemptible machines work for no longer than 24 hours and can be interrupted by the cloud provider at any time. The rental cost in this case is much cheaper. The parameter may be defined only before the VM initialization
false
ADCM control connection address type
An IP address type that is used by ADCM to communicate with VMs. Determines whether the connection between ADCM and the Yandex Cloud should use an external or internal route. If ADCM is deployed in another cloud and VPN is not configured, set the parameter value to
public.Possible values:
-
private— a private address. -
public— a public address.
private
-
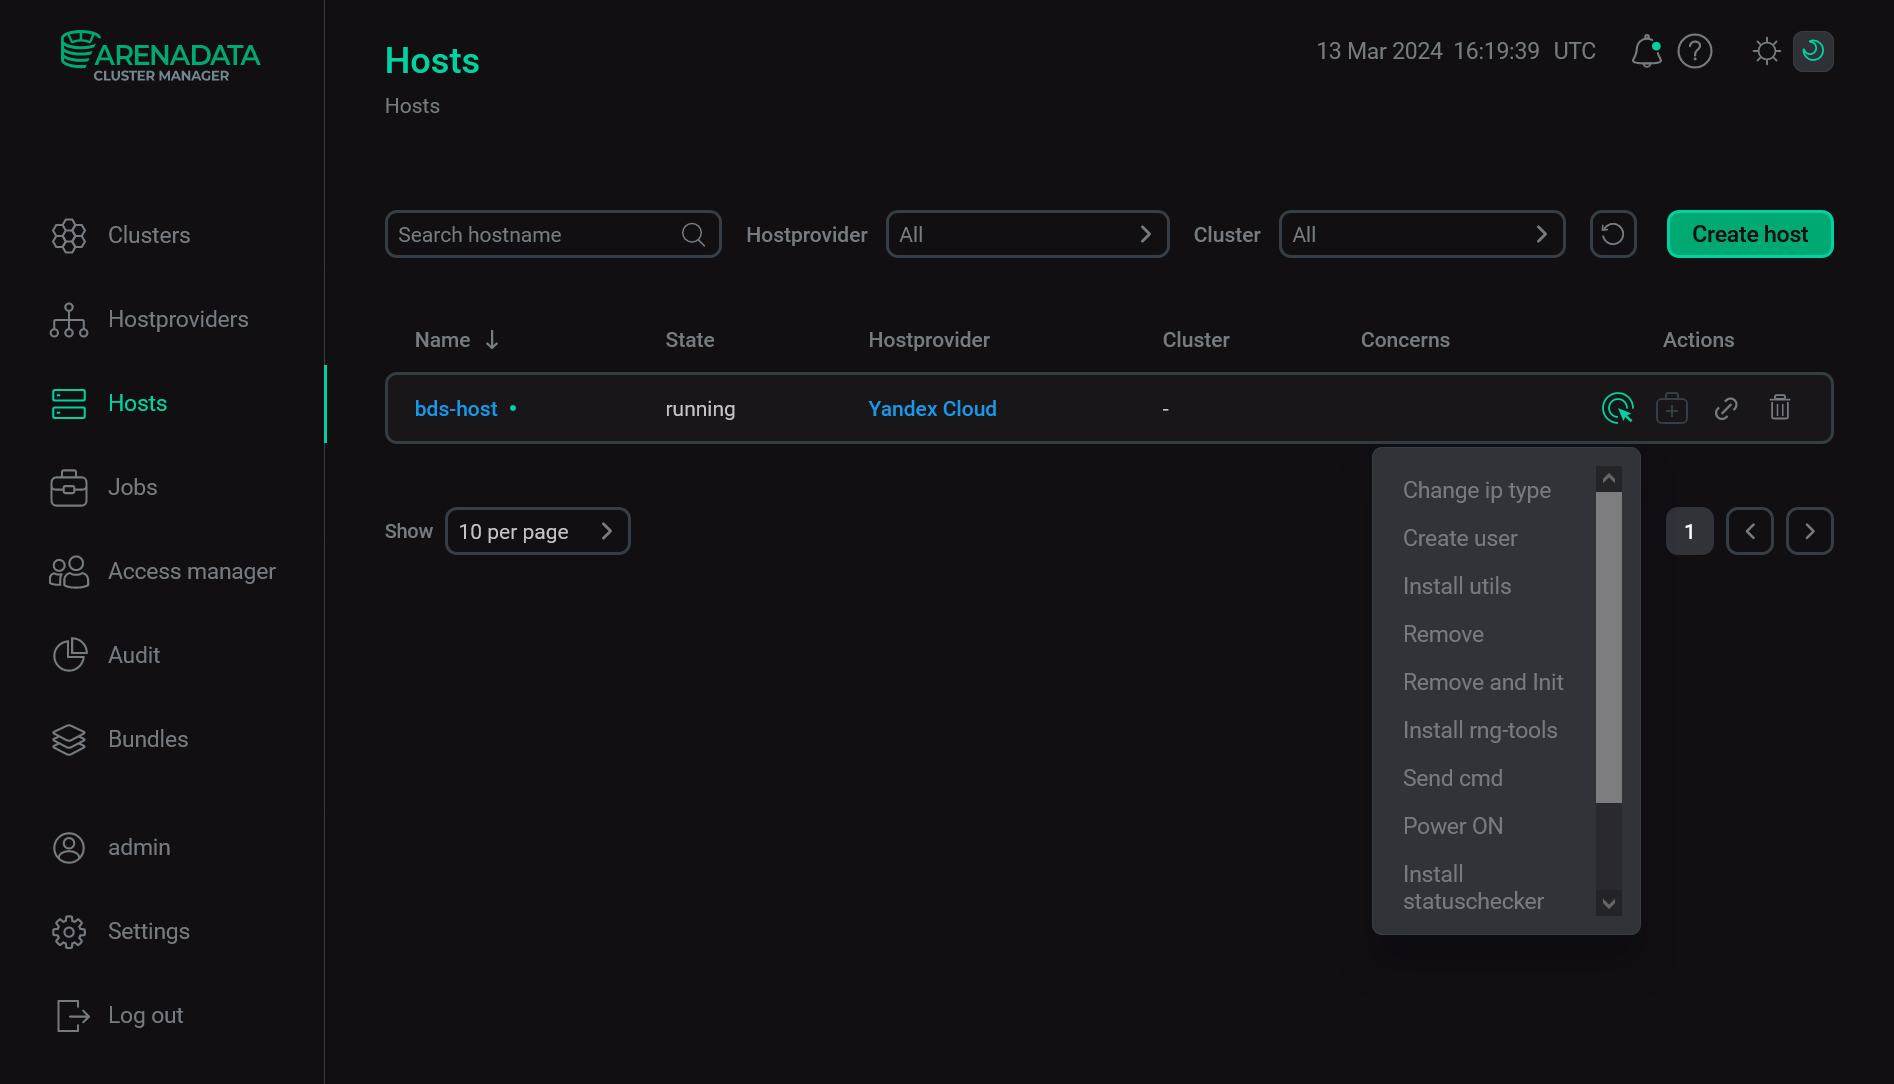
As a result of the completed steps, a virtual machine is created in the Yandex Cloud, and new actions become available for the corresponding host on the Hosts page in ADCM. The statuschecker is installed on the new host automatically. Thus, you do not need to run the Install statuschecker action for the created host.

|
NOTE
|