

Manage a Yandex Cloud hostprovider
Overview
After you create and configure a Yandex Cloud hostprovider, you can manage it on the Hostproviders page of the ADCM web interface. To see available hostprovider actions, click the
icon in the Actions column.
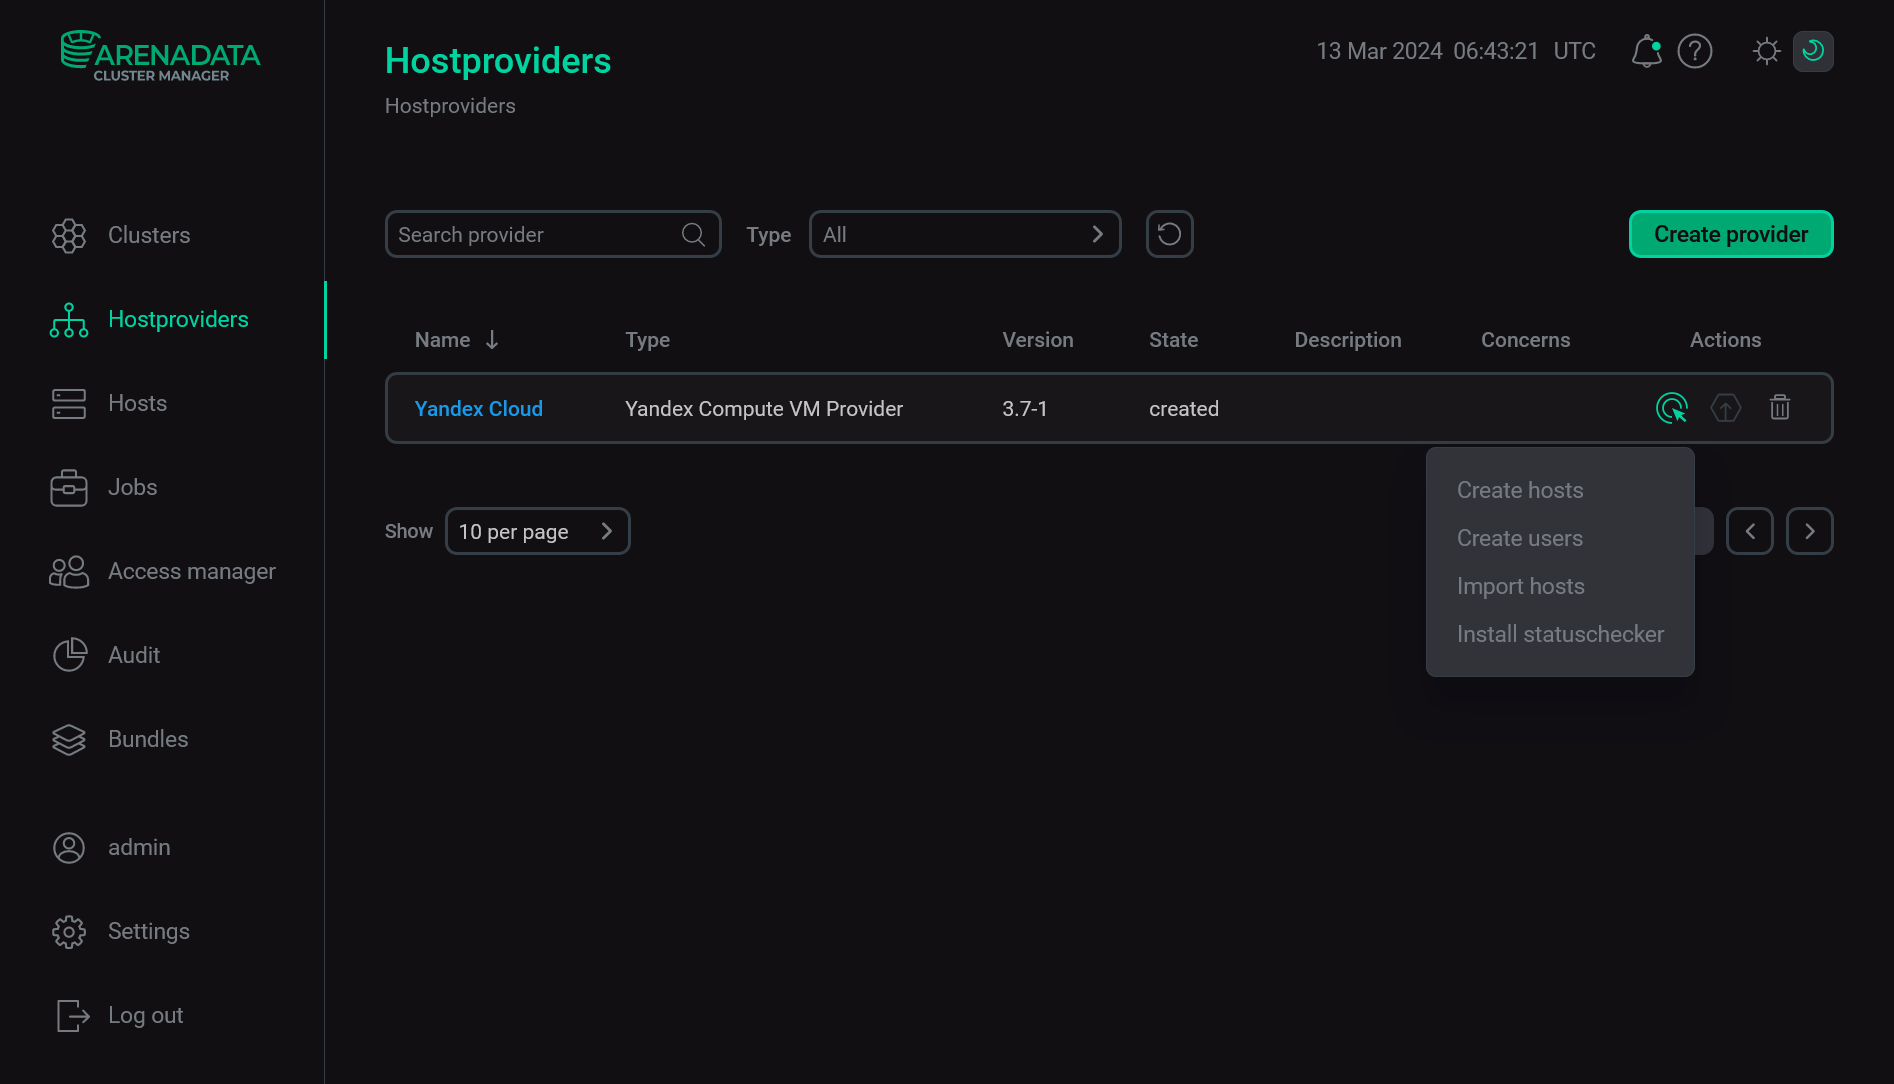
When you choose an action, ADCM displays a dialog window to confirm your choice. In this dialog window, you can select the Verbose checkbox to see additional execution details on the Jobs page. For some actions, you should first fill in additional options in a separate window.

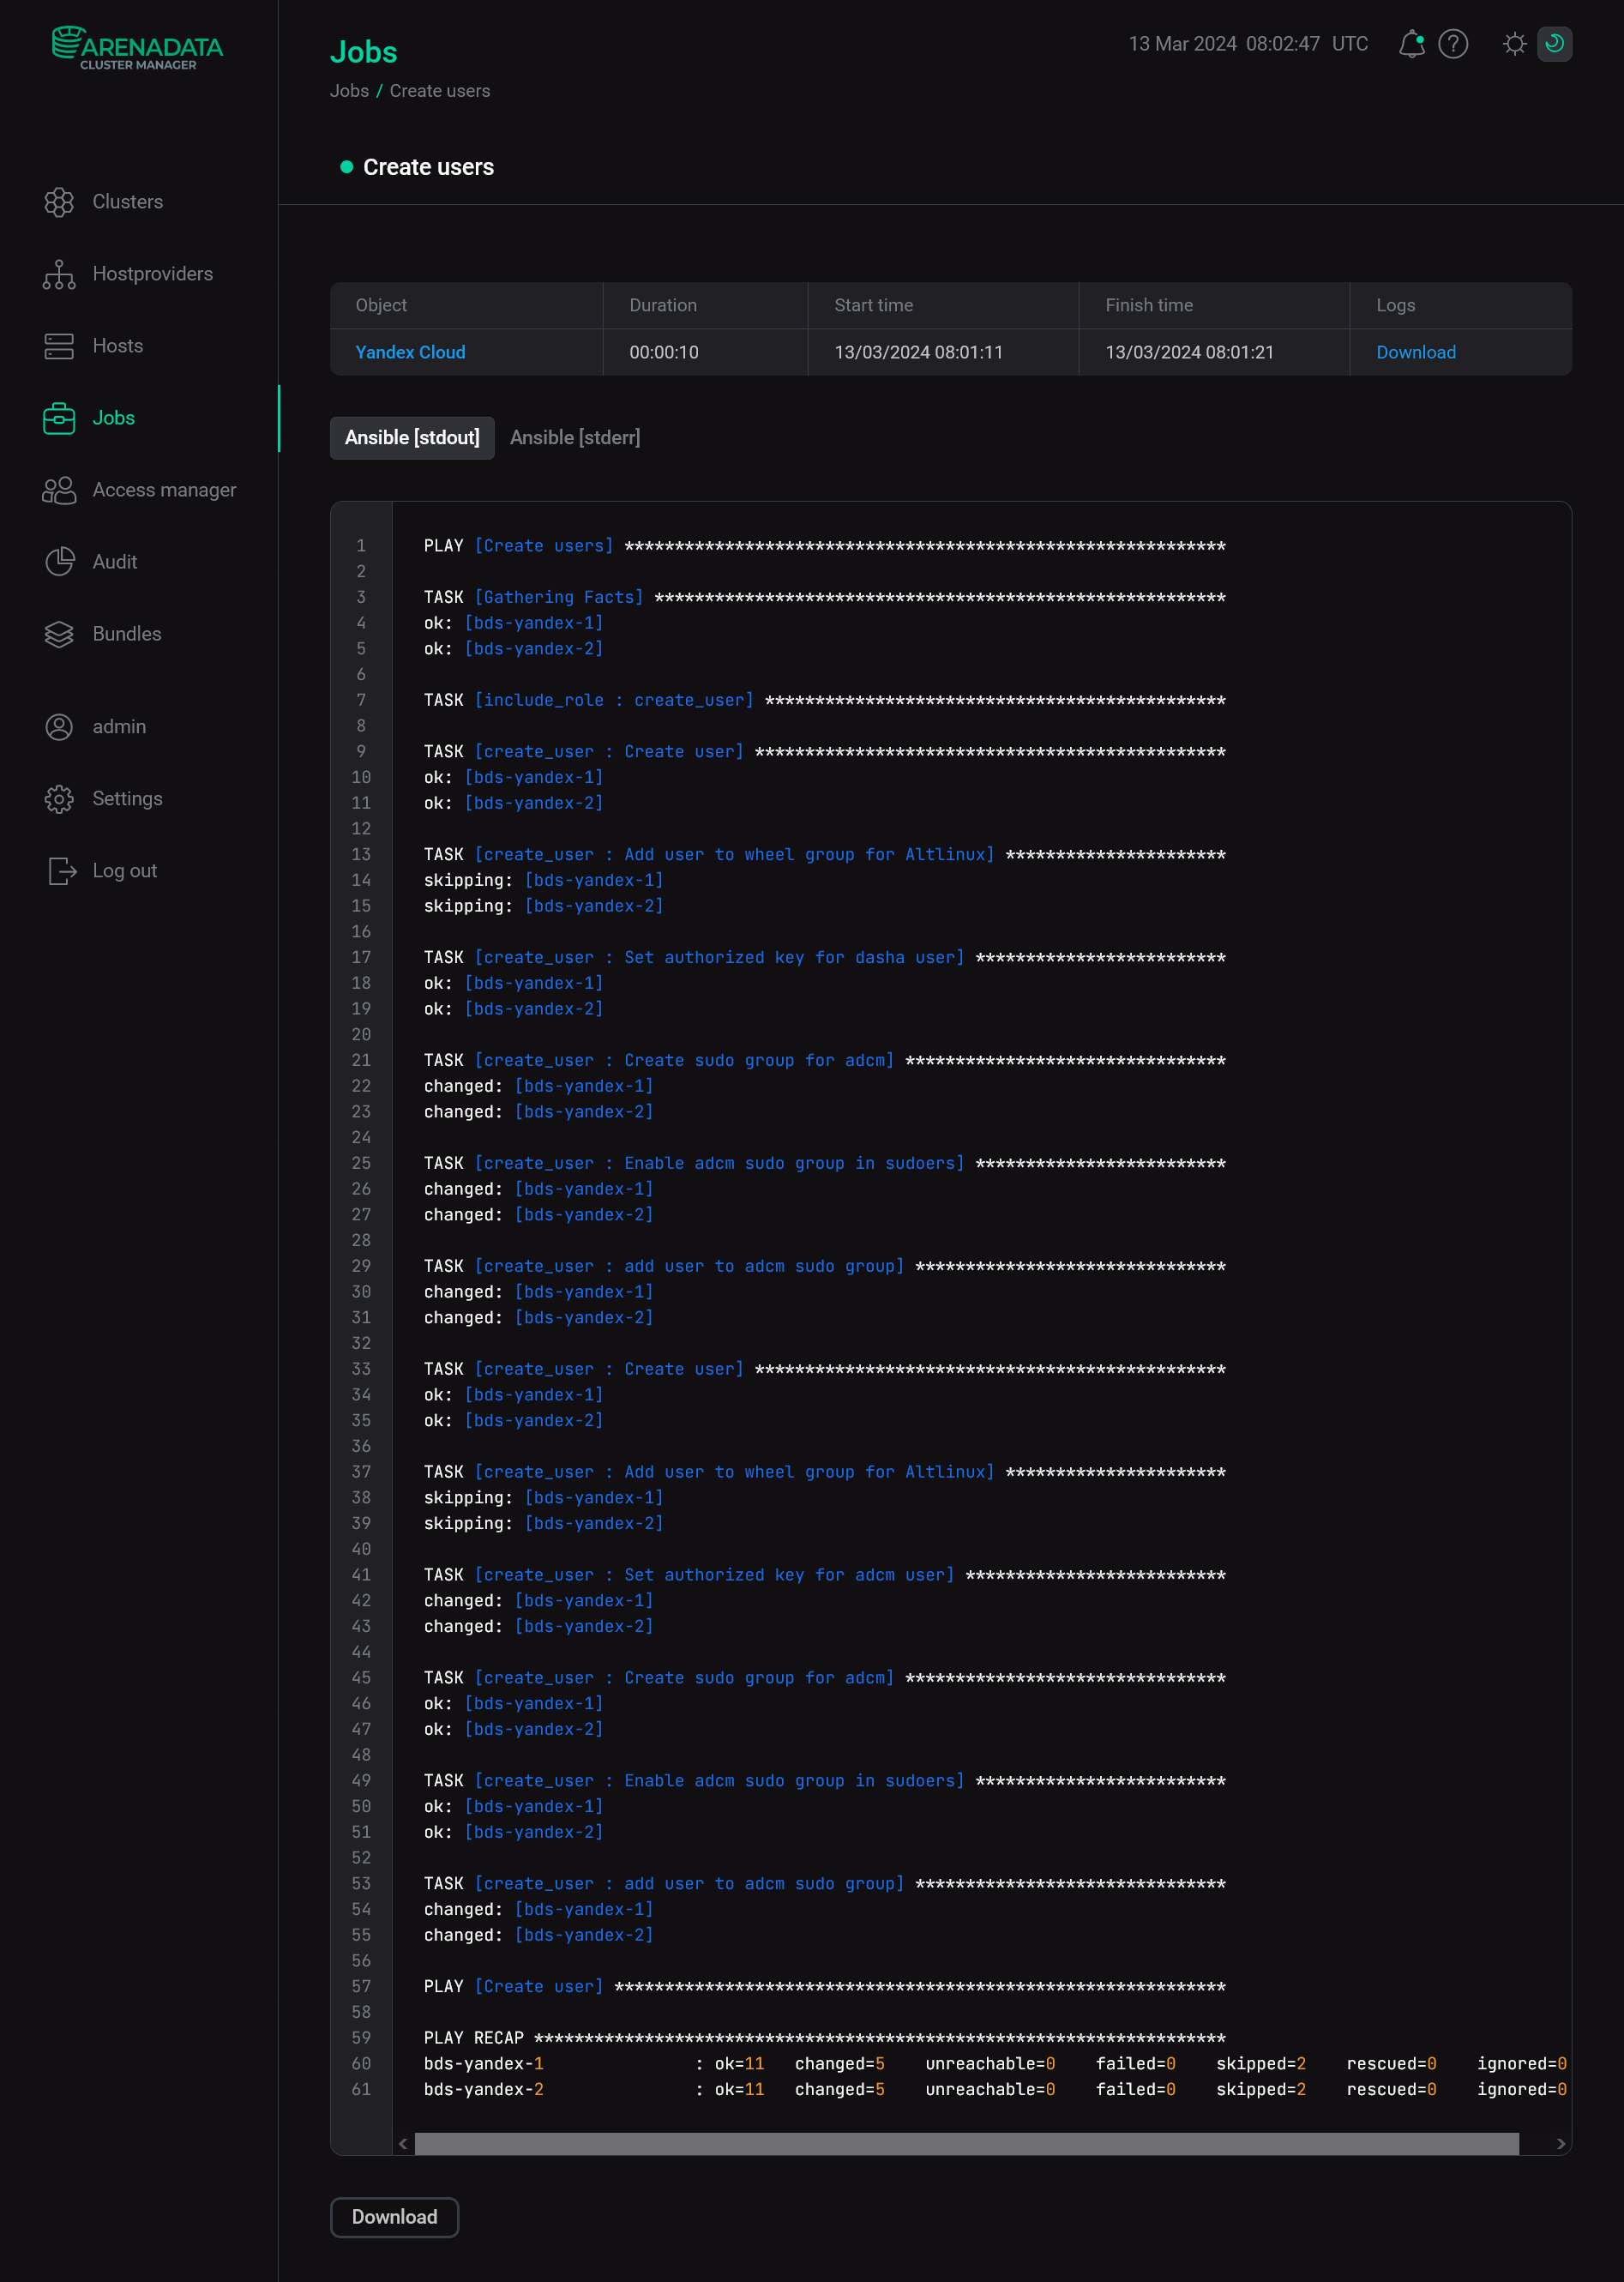
When an action starts, ADCM displays its execution process and result on the Jobs page. From this page, you can navigate to a page with details on an individual job (by clicking a job name) to see inner steps of that job execution and analyze errors, if any.
All available hostprovider actions are listed below.
Create hosts
|
NOTE
|
The Create hosts action allows you to create a group of virtual machines in the Yandex Cloud and add their data to ADCM. For each host, the connection is checked and the statuschecker is installed. Thus, you do not need to run the Install statuschecker action for each created host.
After you select the Create hosts action, a dialog box opens where you can set the following parameters (the fields highlighted in red are mandatory).
| Parameter | Description | Default value |
|---|---|---|
Count |
A number of virtual machines |
— |
FQDN |
A prefix for names of virtual machines. Every name is formed according to the |
— |
Additional users groups |
A list of additional Linux groups. All users are added to this list at the moment the VMs are being initialized. For example, in the Alt Linux image the Enter each group separately — by clicking the |
— |
Cloud-init timeout |
A timeout for |
600 |
Init script |
The initialization script that is executed at VMs deployment. A shebang ( |
— |
Image family |
A family of operating systems based on which VMs are created. The newest image from the specified family is used. Starting with Yandex Cloud hostprovider 2.13, you can fill in the parameter value manually |
centos-7 |
Snapshot id |
An ID of the boot disk snapshot. Incompatible with the Image id parameter |
— |
Image id |
An ID of the boot disk image. Can be obtained via two commands:
Incompatible with the Snapshot id parameter |
— |
Platform |
A processor type. For more information on supported platforms, refer to the Yandex Cloud documentation. Possible values:
|
Intel Cascade Lake |
vCPU |
A number of vCPU |
2 |
Perfomance level (%) |
A guaranteed processor performance level that is allocated to VMs. See more details in the Yandex Cloud documentation |
100 |
Memory (GB) |
RAM (in GB) |
2 |
Disk type |
A storage class of VMs. Possible values:
|
HDD |
Disk size, GB |
A size of the boot disk that is created for VMs (in GB) |
50 |
Additional disks (JSON) |
Parameters of additional disks in the JSON format:
All parameters except |
— |
Assign public ip |
Whether or not to assign public IP addresses to VMs |
false |
Assign secondary NIC |
A flag that indicates whether to use the second network interface controller (NIC) for VM. You need to define the Secondary subnet ID value in the Yandex Cloud hostprovider settings first |
false |
Security Group IDs |
Security group identifiers that will be used for all created VMs by default. The security groups that are specified during the Create hosts action have a higher priority compared to the groups specified at the hostprovider level. Enter each group separately — by clicking the |
— |
Labels |
Labels that will be used for all created VMs by default. The labels that are specified during the Create hosts action have a higher priority compared to the labels specified at the hostprovider level. Enter each label separately — by clicking Add property in the Labels node and editing the new list element |
— |
Preemptible |
Whether or not to mark VMs as preemptible. Preemptible machines work for no longer than 24 hours and can be interrupted by the cloud provider at any time. The rental cost in this case is much cheaper. The parameter may be defined only before the VM initialization |
false |
ADCM control connection address type |
An IP address type that is used by ADCM to communicate with VMs. Determines whether the connection between ADCM and the Yandex Cloud should use an external or internal route. If ADCM is deployed in another cloud and VPN is not configured, set the parameter value to Possible values:
|
private |
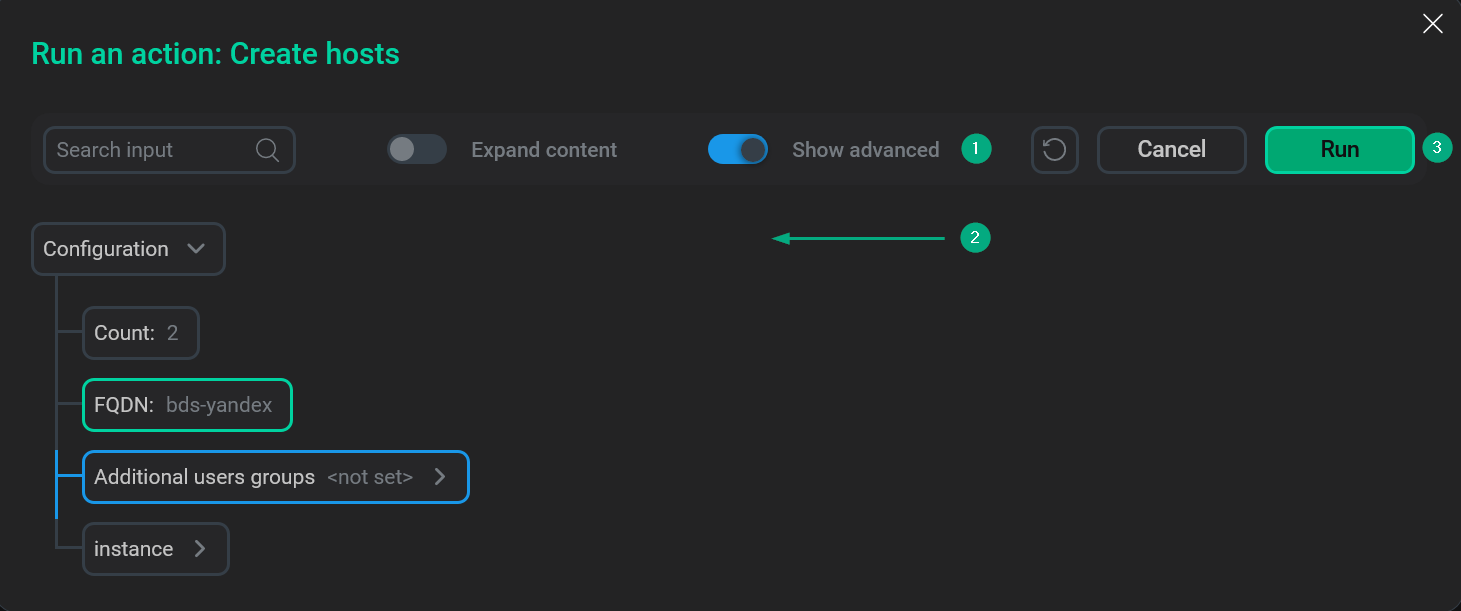
To run the Create hosts action, click Run in the action form. Then, confirm the action in the standard confirmation dialog.
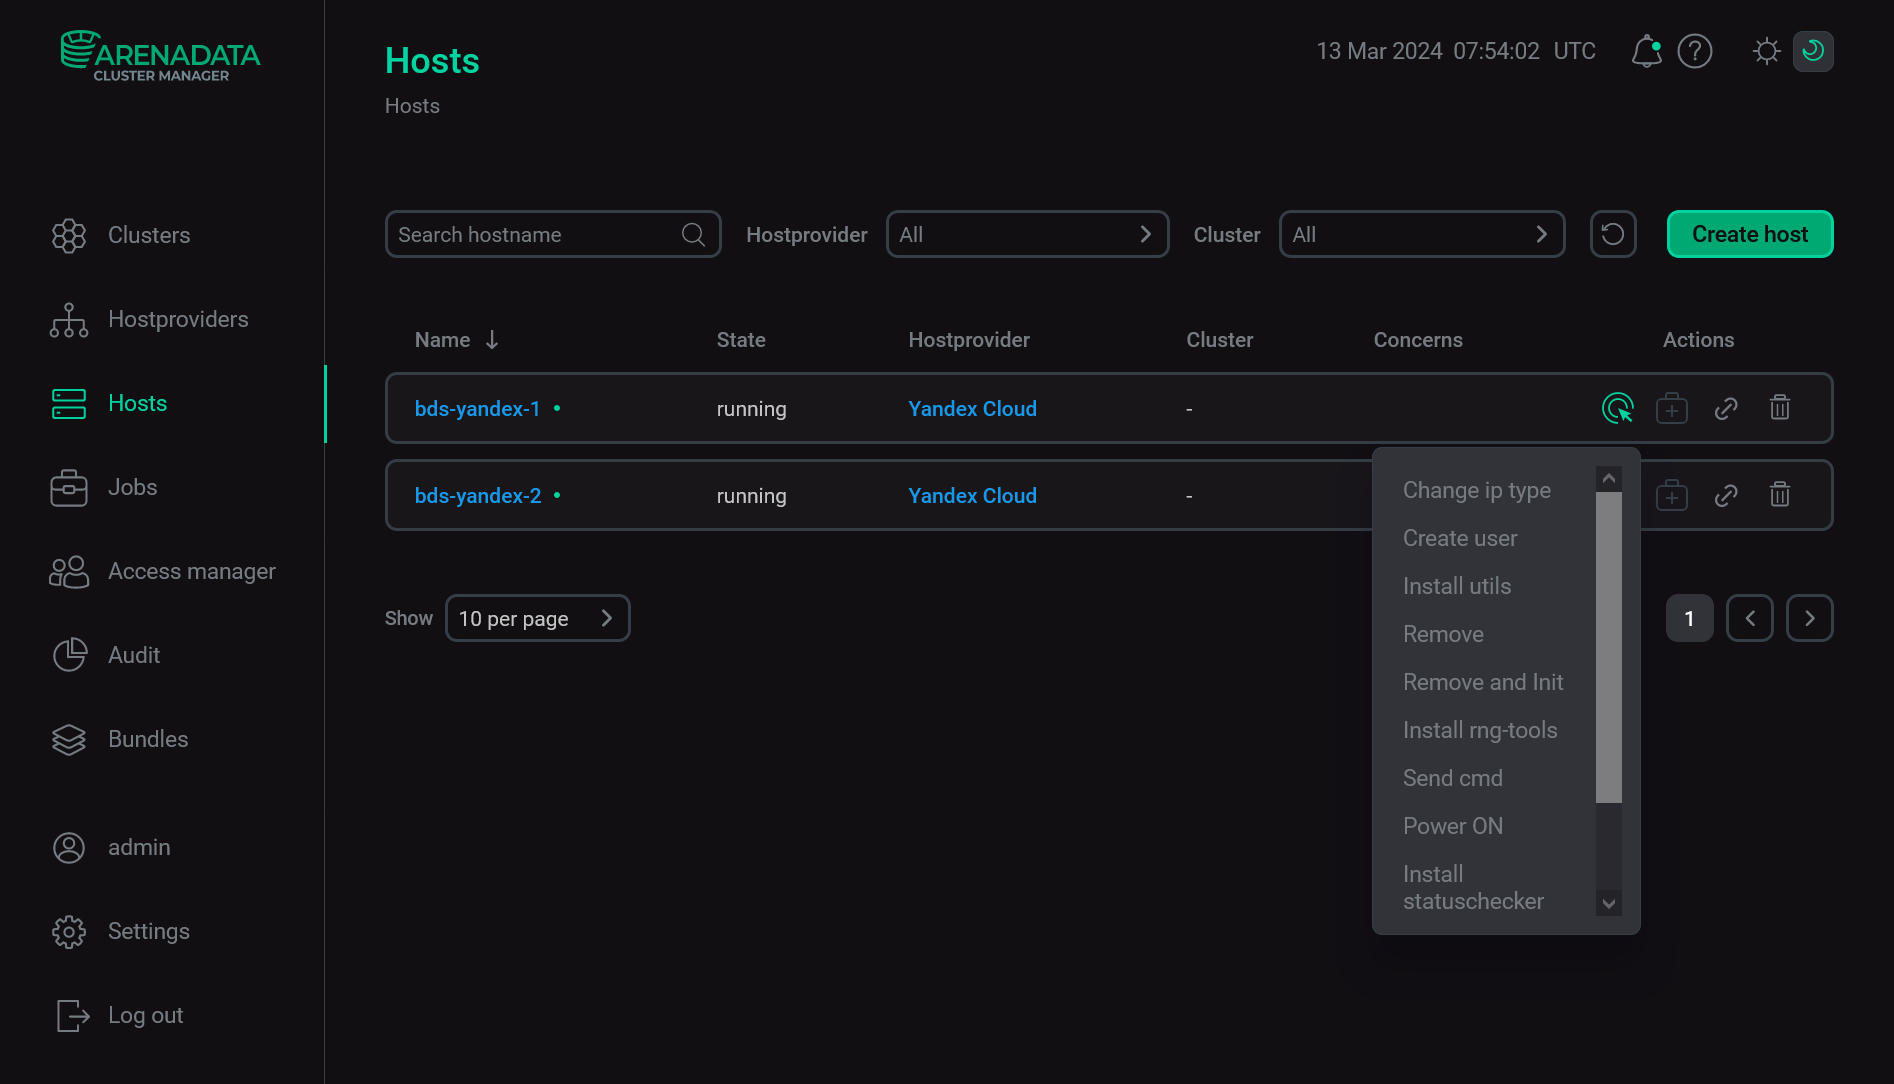
As a successful result, new hosts and their actions become available on the Hosts page.
|
NOTE
|
Create users
The Create users action adds new users to all hosts that were previously created via the Yandex Cloud hostprovider. Names and public SSH keys of created users are extracted from the SSH keys field of the Yandex Cloud hostprovider configuration options. Users will be able to access hosts using their private SSH keys.
After you select the action, the standard confirmation dialog opens. Click Run to confirm the action. No additional parameters are required.
|
IMPORTANT
|
Import hosts
The Import hosts action imports to ADCM information on the hosts that are previously created in the Yandex Cloud. Configuration parameters of the imported virtual machines should be compatible with Yandex Cloud hostprovider settings. All machines should have the Running status in the cloud.
After you select the Import hosts action, a dialog box opens where you can set the following parameters (the fields highlighted in red are mandatory):
-
FQDNs — a fully qualified domain name of the virtual machine in the Yandex Cloud. To enter several names, use a comma-separated list.
-
Ssh username — a user name that is used for connecting to the virtual machine via SSH. The specified user should exist on the host.
-
Ssh user private key — a private SSH key that is used for connecting to the virtual machine via SSH.
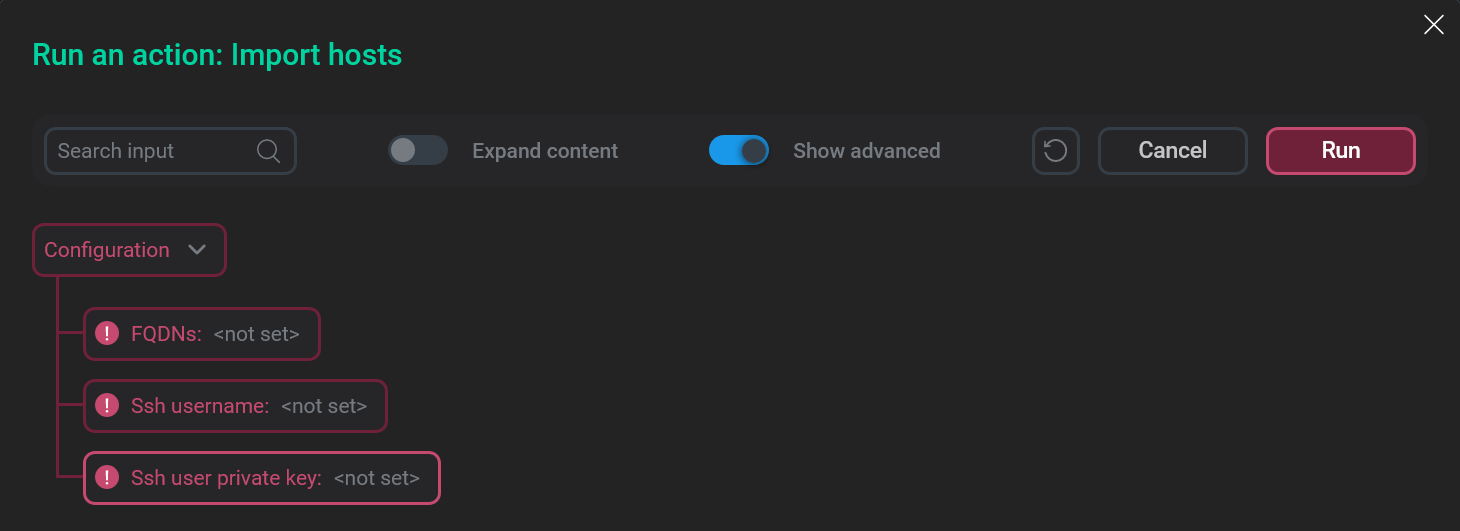
To run the Import hosts action, click Run in the action form. Then, confirm the action in the standard confirmation dialog.
As a successful result, new hosts and their actions become available on the Hosts page. To finish the configuration process, run the Install statuschecker action for each host.
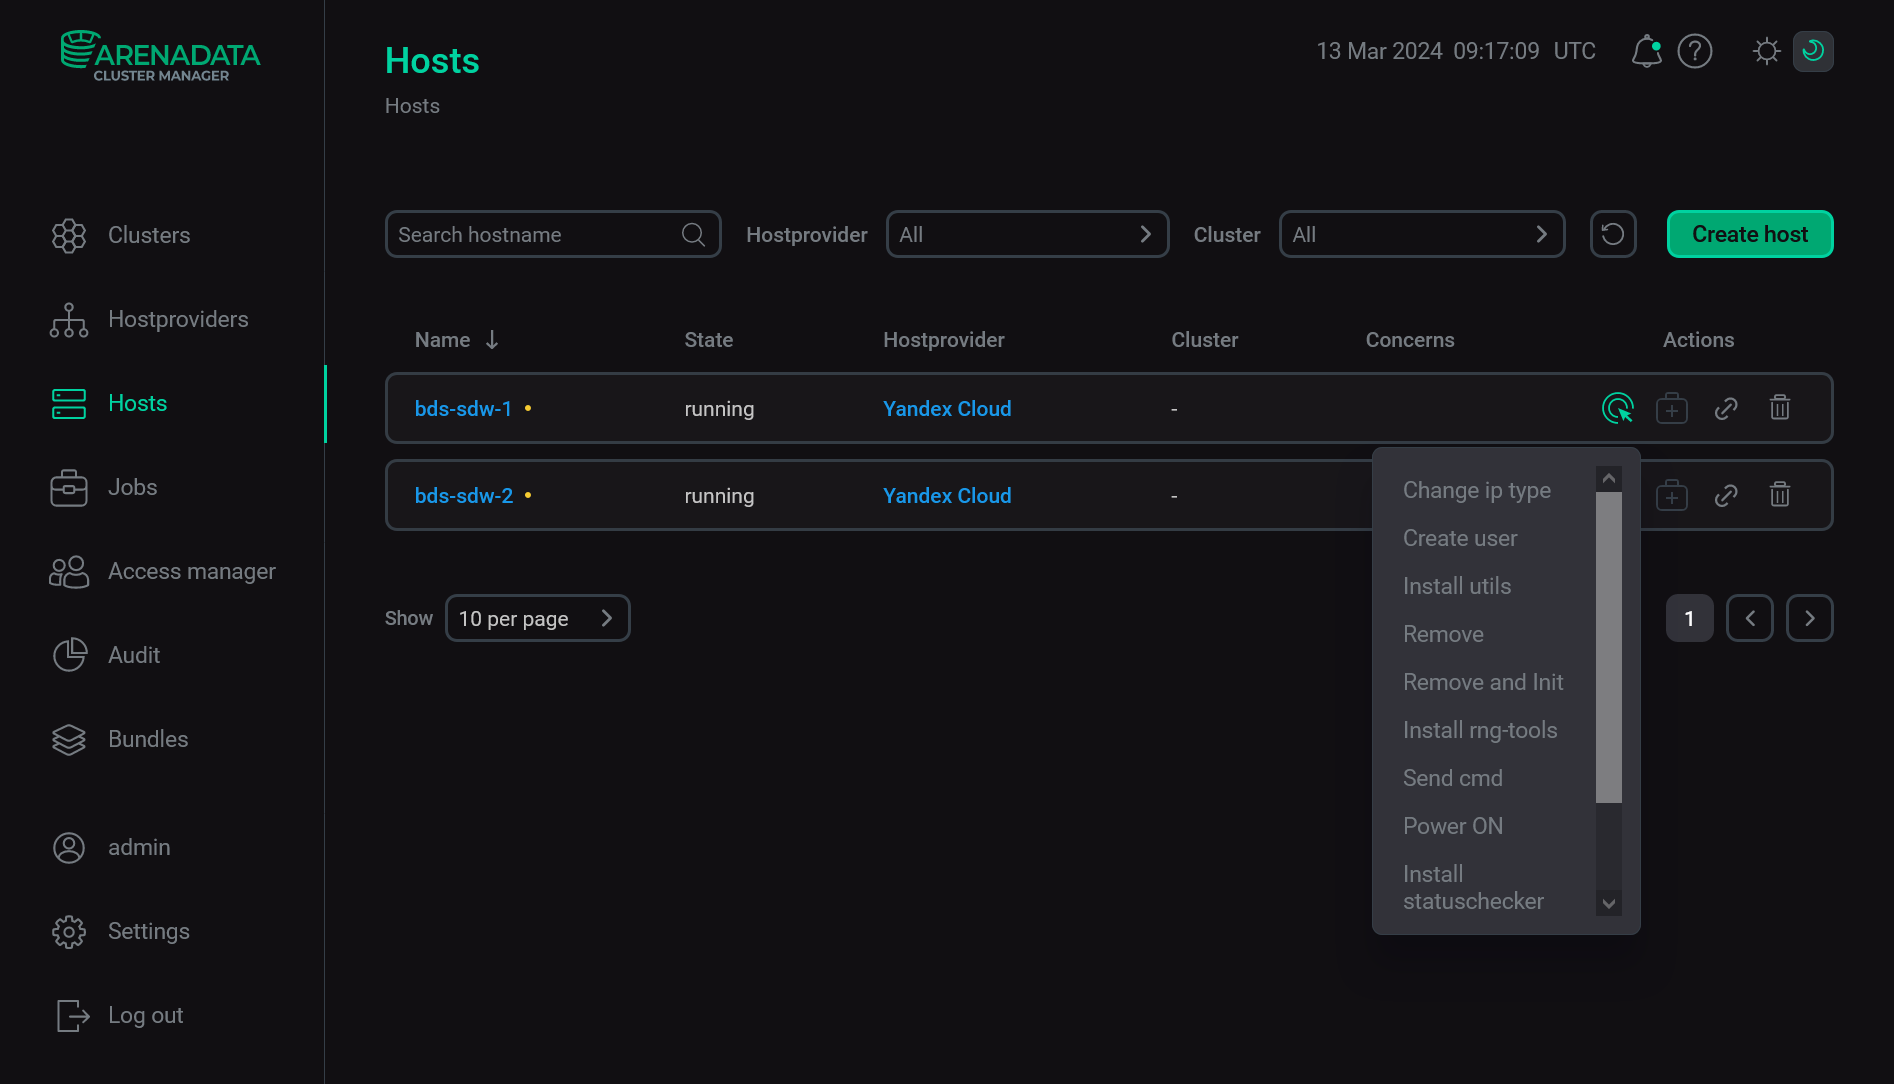
As a result of the Import hosts action, configuration parameters of all hosts are imported from Yandex Cloud to ADCM. You can view them by selecting a specific host on the Hosts page.
|
NOTE
Starting with Yandex Cloud hostprovider 2.12, a result of uploading the additional disk configuration (Additional disks (JSON)) depends on the |
If not all requested VM can be imported to ADCM, only the VM that have passed all checks are added to the ADCM, and the Import hosts action fails. The reasons why Yandex virtual machines can be invalid for import are given below:
-
The VM status is different from
Running. -
Settings of the Yandex Cloud hostprovider and the Yandex Cloud VM are incompatible.
-
It is impossible to connect to the VM from the host where ADCM is deployed.
-
Other problems when obtaining data about virtual machine from Yandex Cloud.
Install statuschecker
The Install statuschecker action installs the statuschecker on all hosts that were previously created via the Yandex Cloud hostprovider. This is a special daemon that periodically checks the status of services and components added to the cluster hosts via ADCM.
After you select the action, the standard confirmation dialog opens. Click Run to confirm the action. No additional parameters are required.
|
IMPORTANT
Before running the action, create and configure all hosts first — using the Create hosts action on the Hostproviders page or the Create host → Init action on the Hosts page. |