

Installation and configuration
Step 1. Download a hostprovider bundle
Hostprovider distributions for ADCM come in bundles. Regarding the Yandex Cloud hostprovider, a bundle is a regular archive that includes a description and logic to interact with the Yandex Cloud.
The steps for downloading a bundle are given below:
-
Go to https://network.arenadata.io/ and select Arenadata Cluster Manager.
-
Navigate to Infrastructure bundles and select the required bundle from the table.
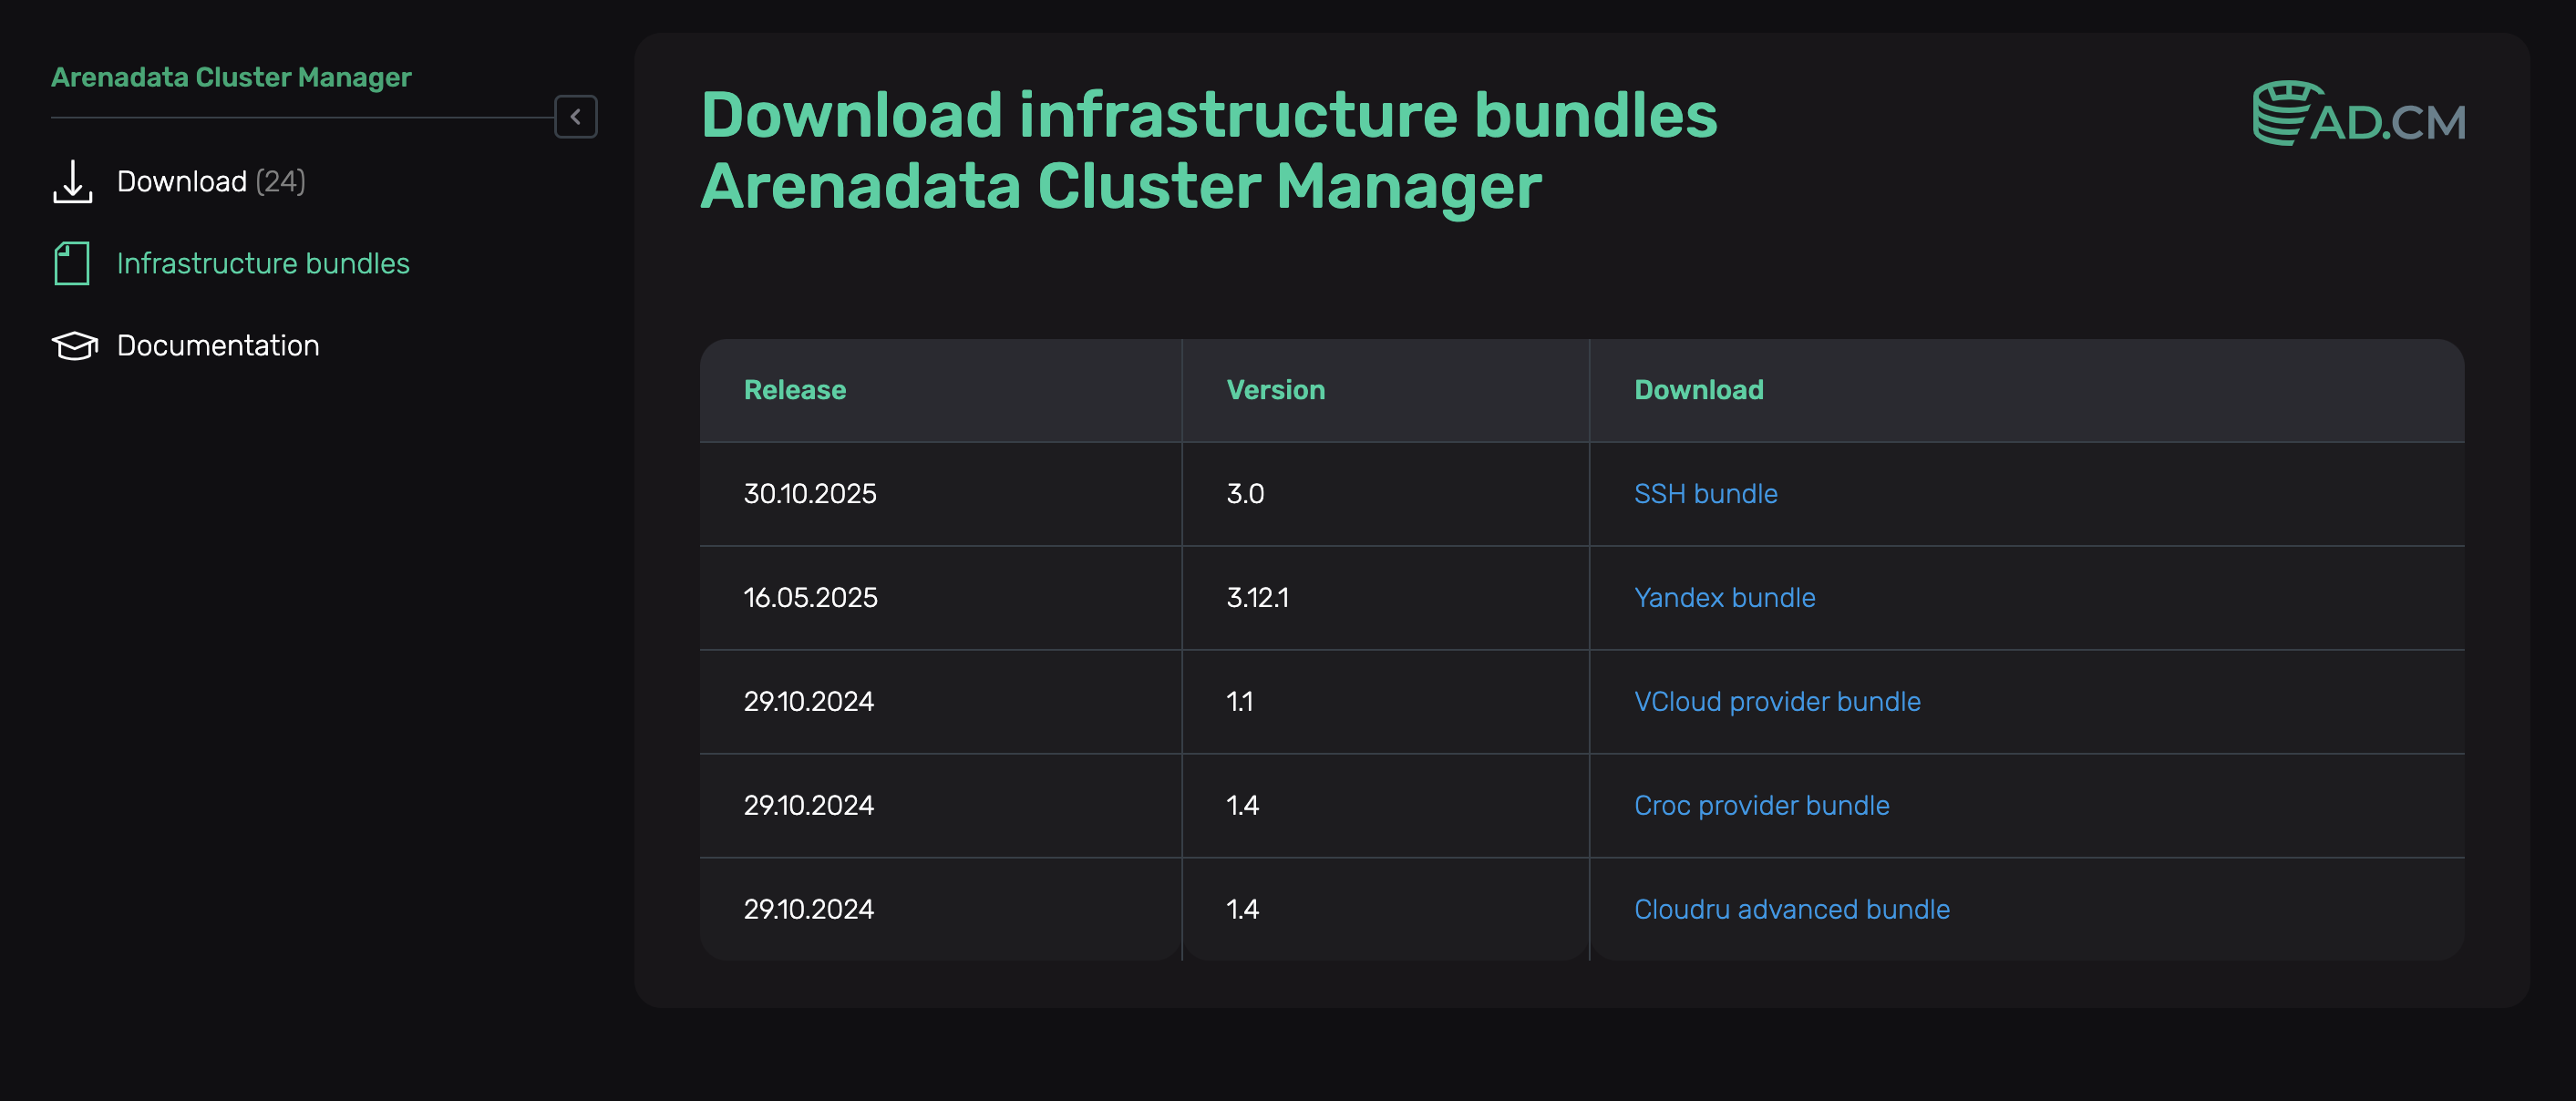 Infrastructure bundles page for ADCM
Yandex Cloud hostprovider bundle is called Yandex bundle.
Step 2. Upload a hostprovider bundle to ADCM
To upload a bundle to ADCM, follow the steps:
-
Select the Bundles item in the left navigation menu and click Upload bundle.
-
Select a bundle in the Open File Dialog.
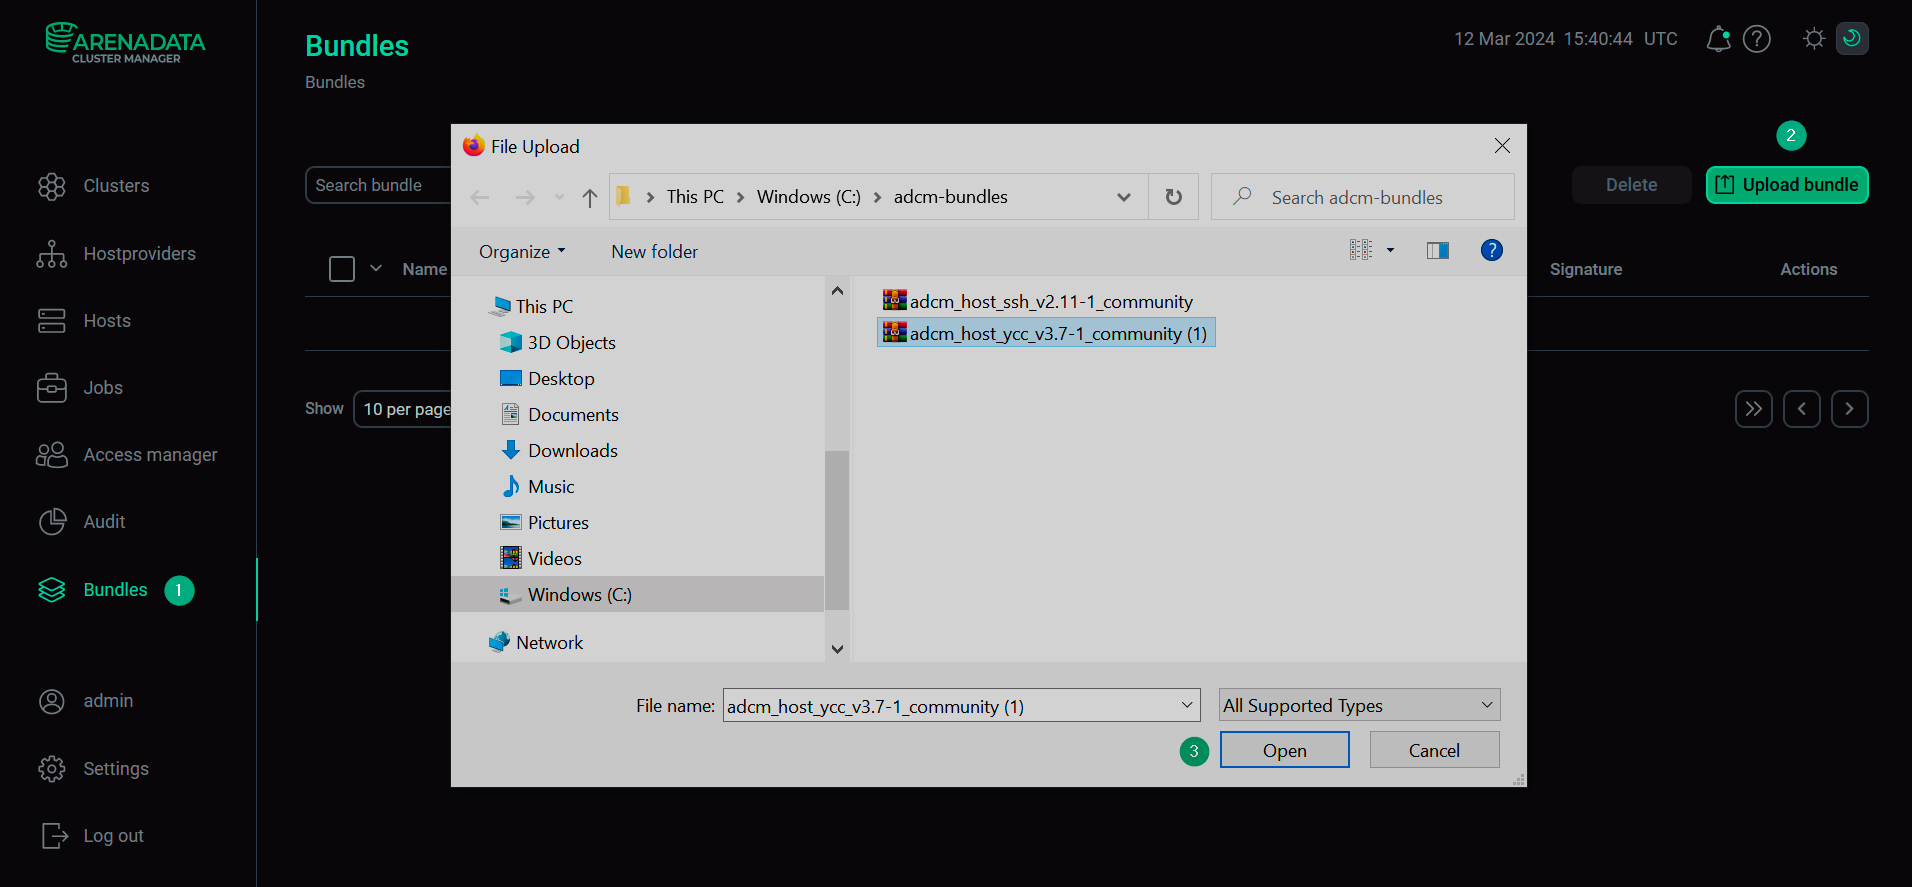 Upload a bundle
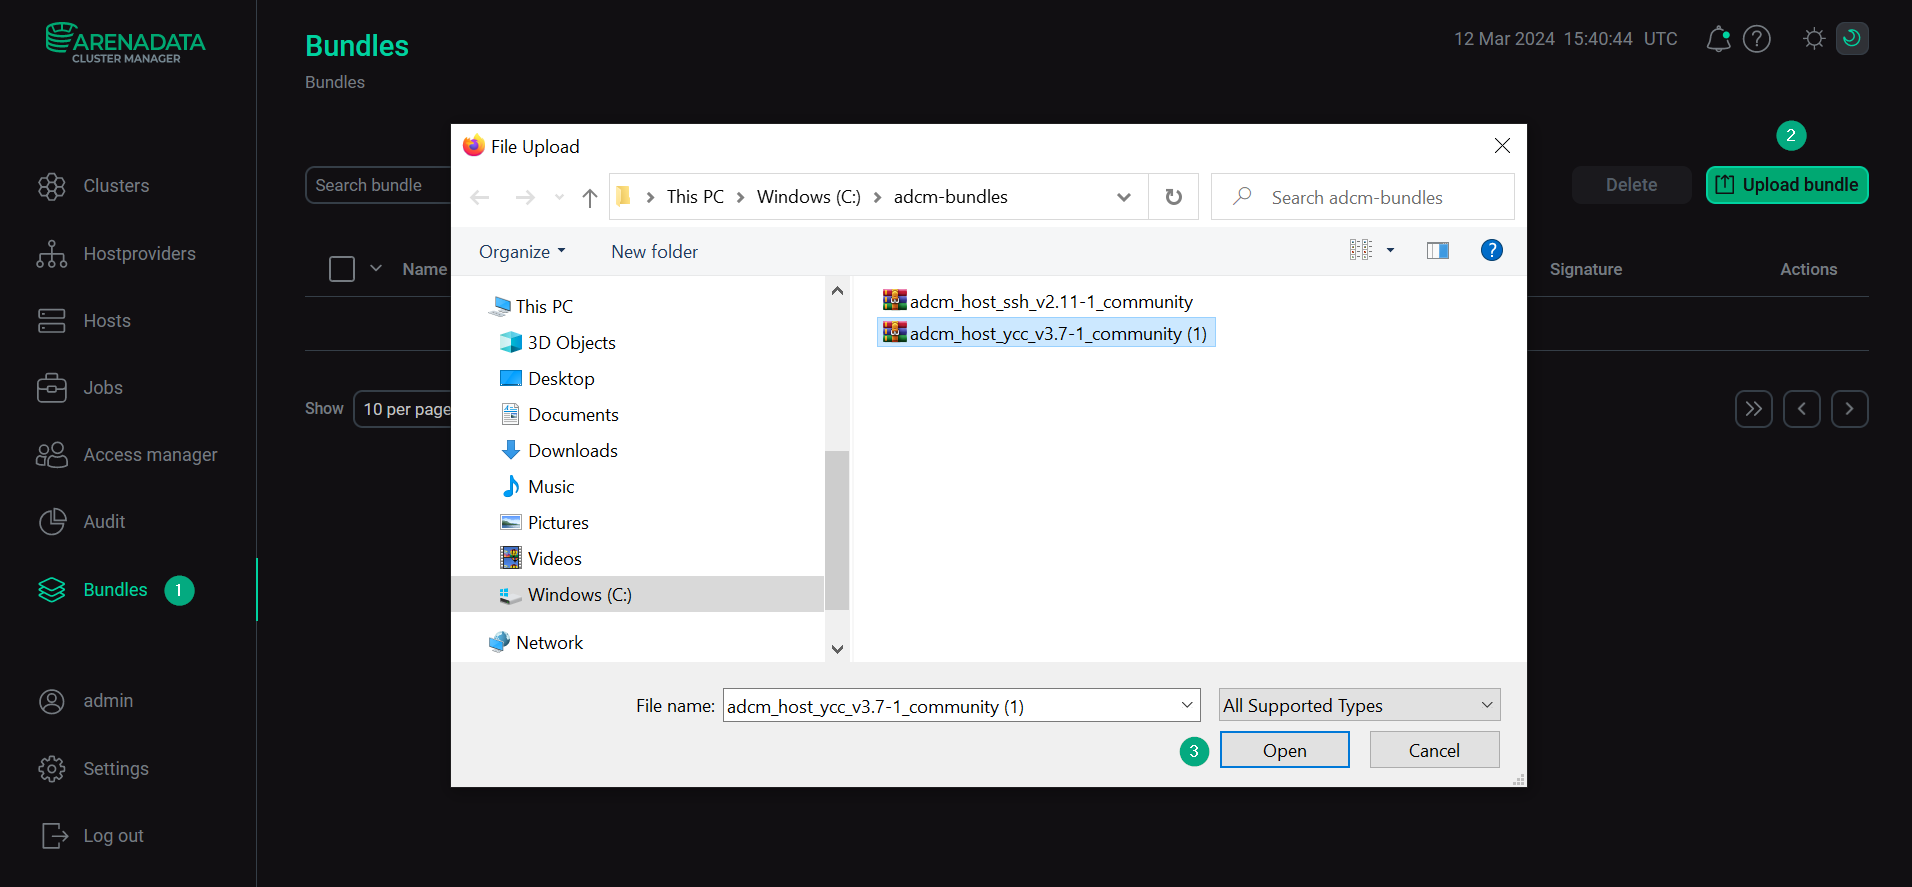 Upload a bundle
 -
As a result of the performed actions, a bundle is displayed on the Bundles page.
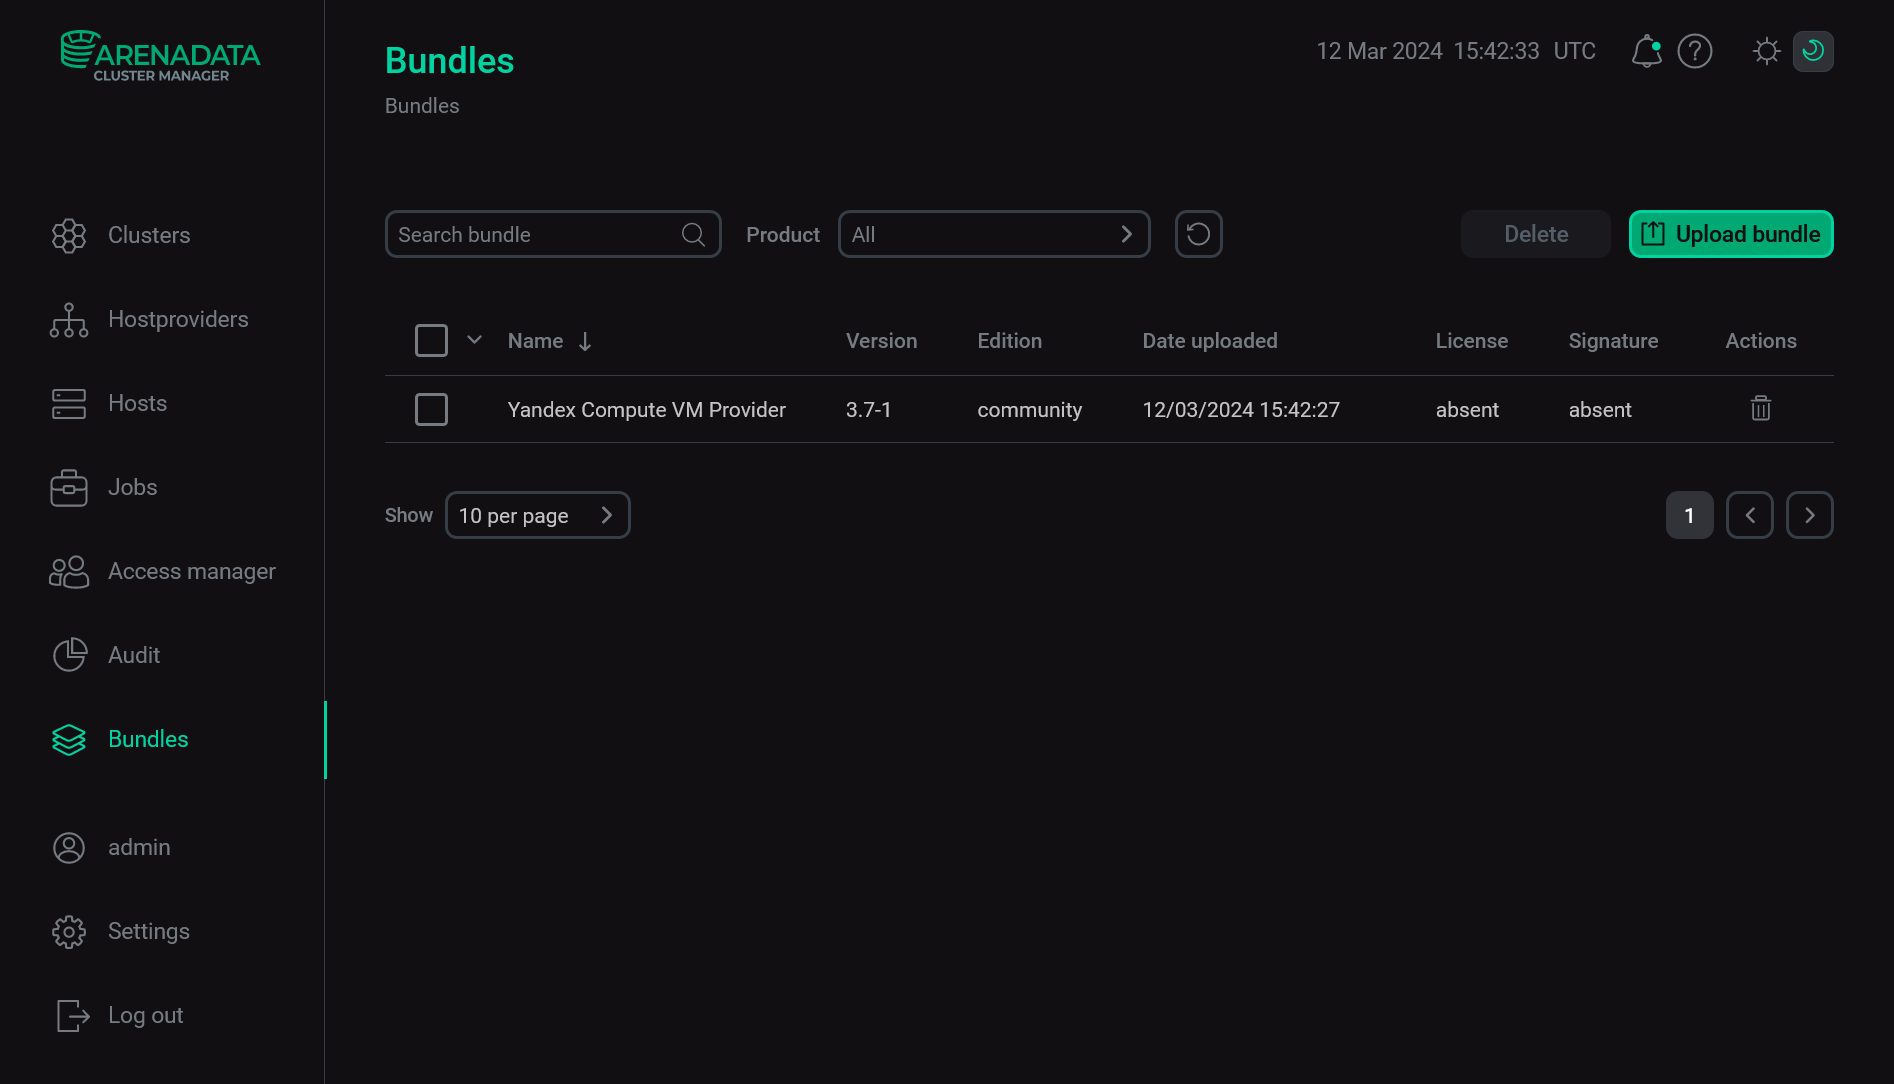 The result of successful uploading a bundle
Step 3. Create a hostprovider based on the uploaded bundle
To add a new hostprovider to ADCM on the base of the uploaded bundle, follow the steps:
-
Select the Hostproviders item in the left navigation menu and click Create provider.
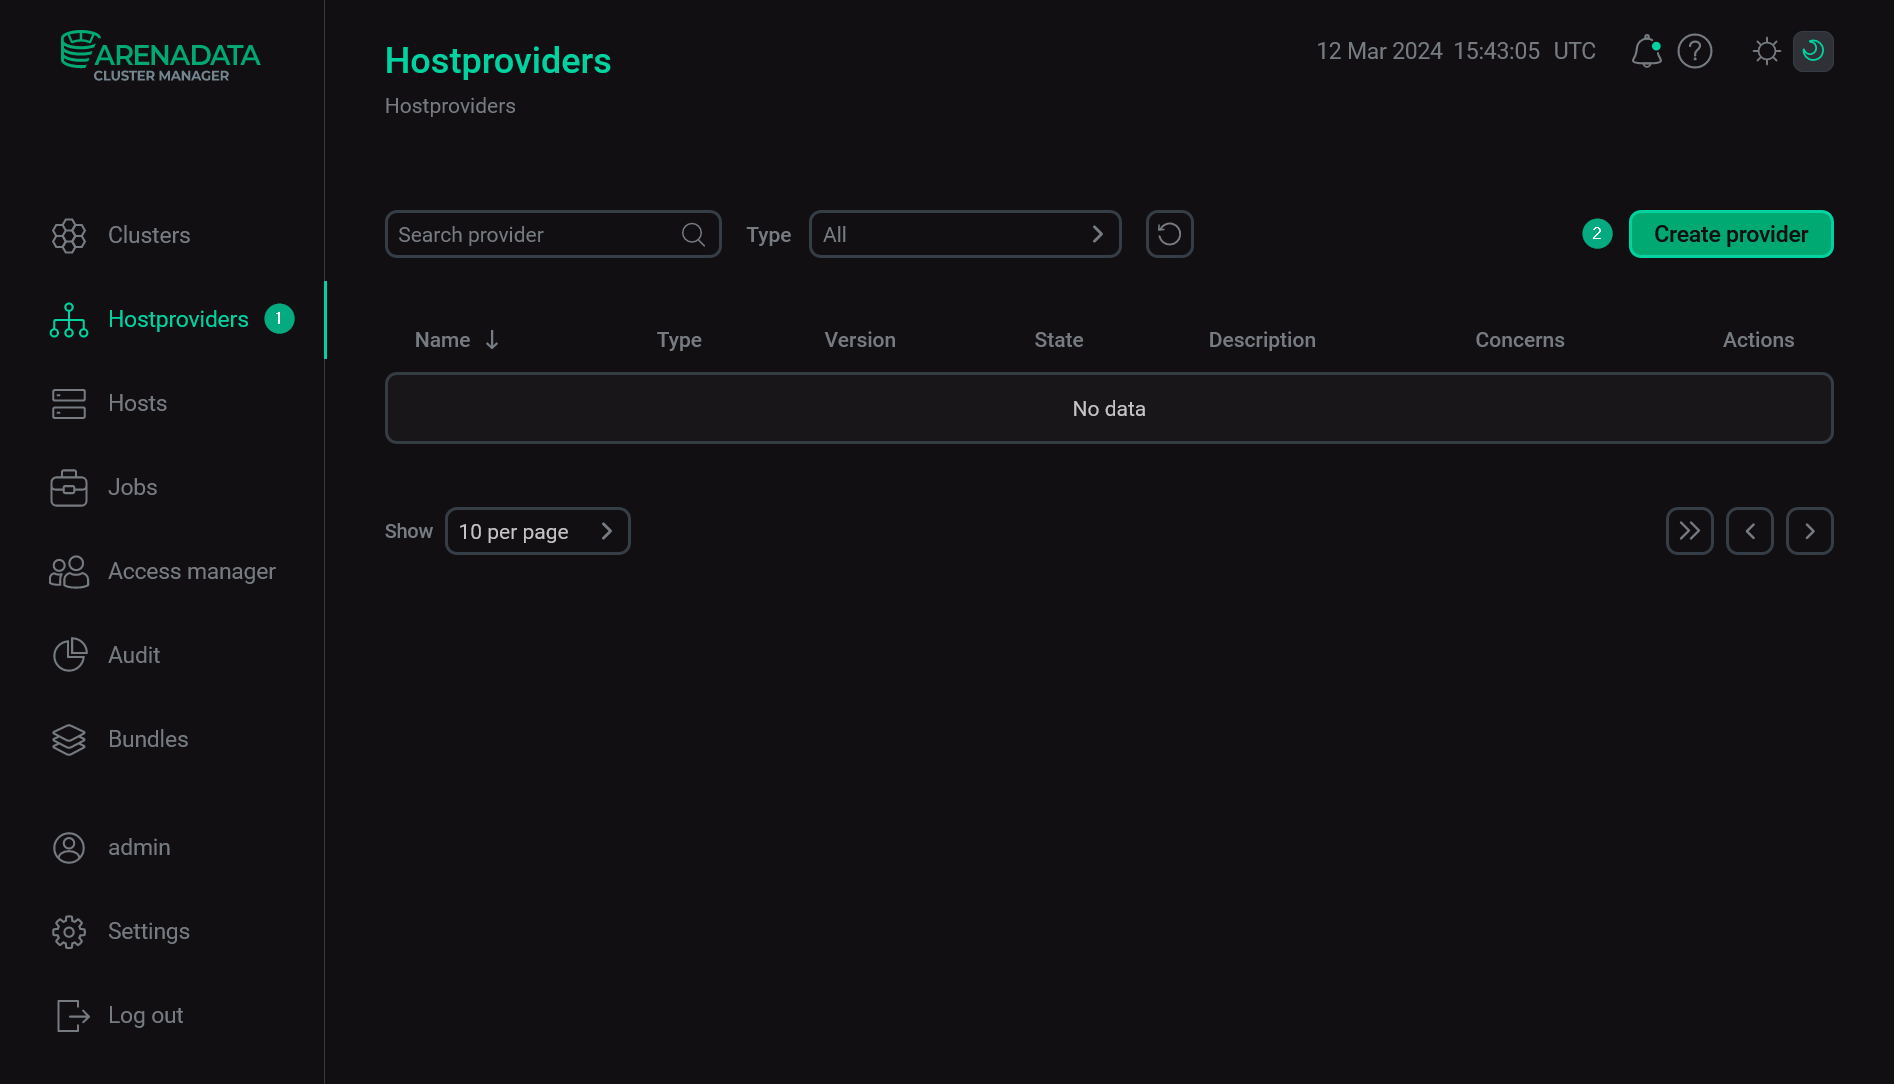 Create a new hostprovider
 -
In the opened window:
-
Select an uploaded bundle in the Type field.
-
Select a bundle version in the Version field. Several versions become available in the case of different versions of the same bundle being uploaded.
-
Enter a hostprovider name in the Name field.
-
Enter a hostprovider description in the Description field if necessary.
-
Click Create.
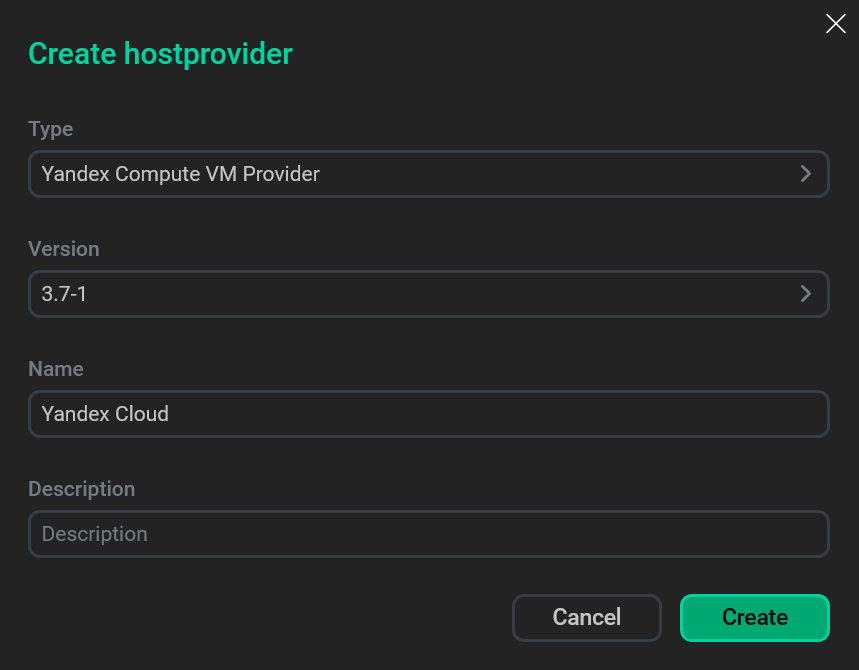 Fill in hostprovider parameters
 -
-
As a result of the performed actions, the created hostprovider is displayed on the Hostproviders page.
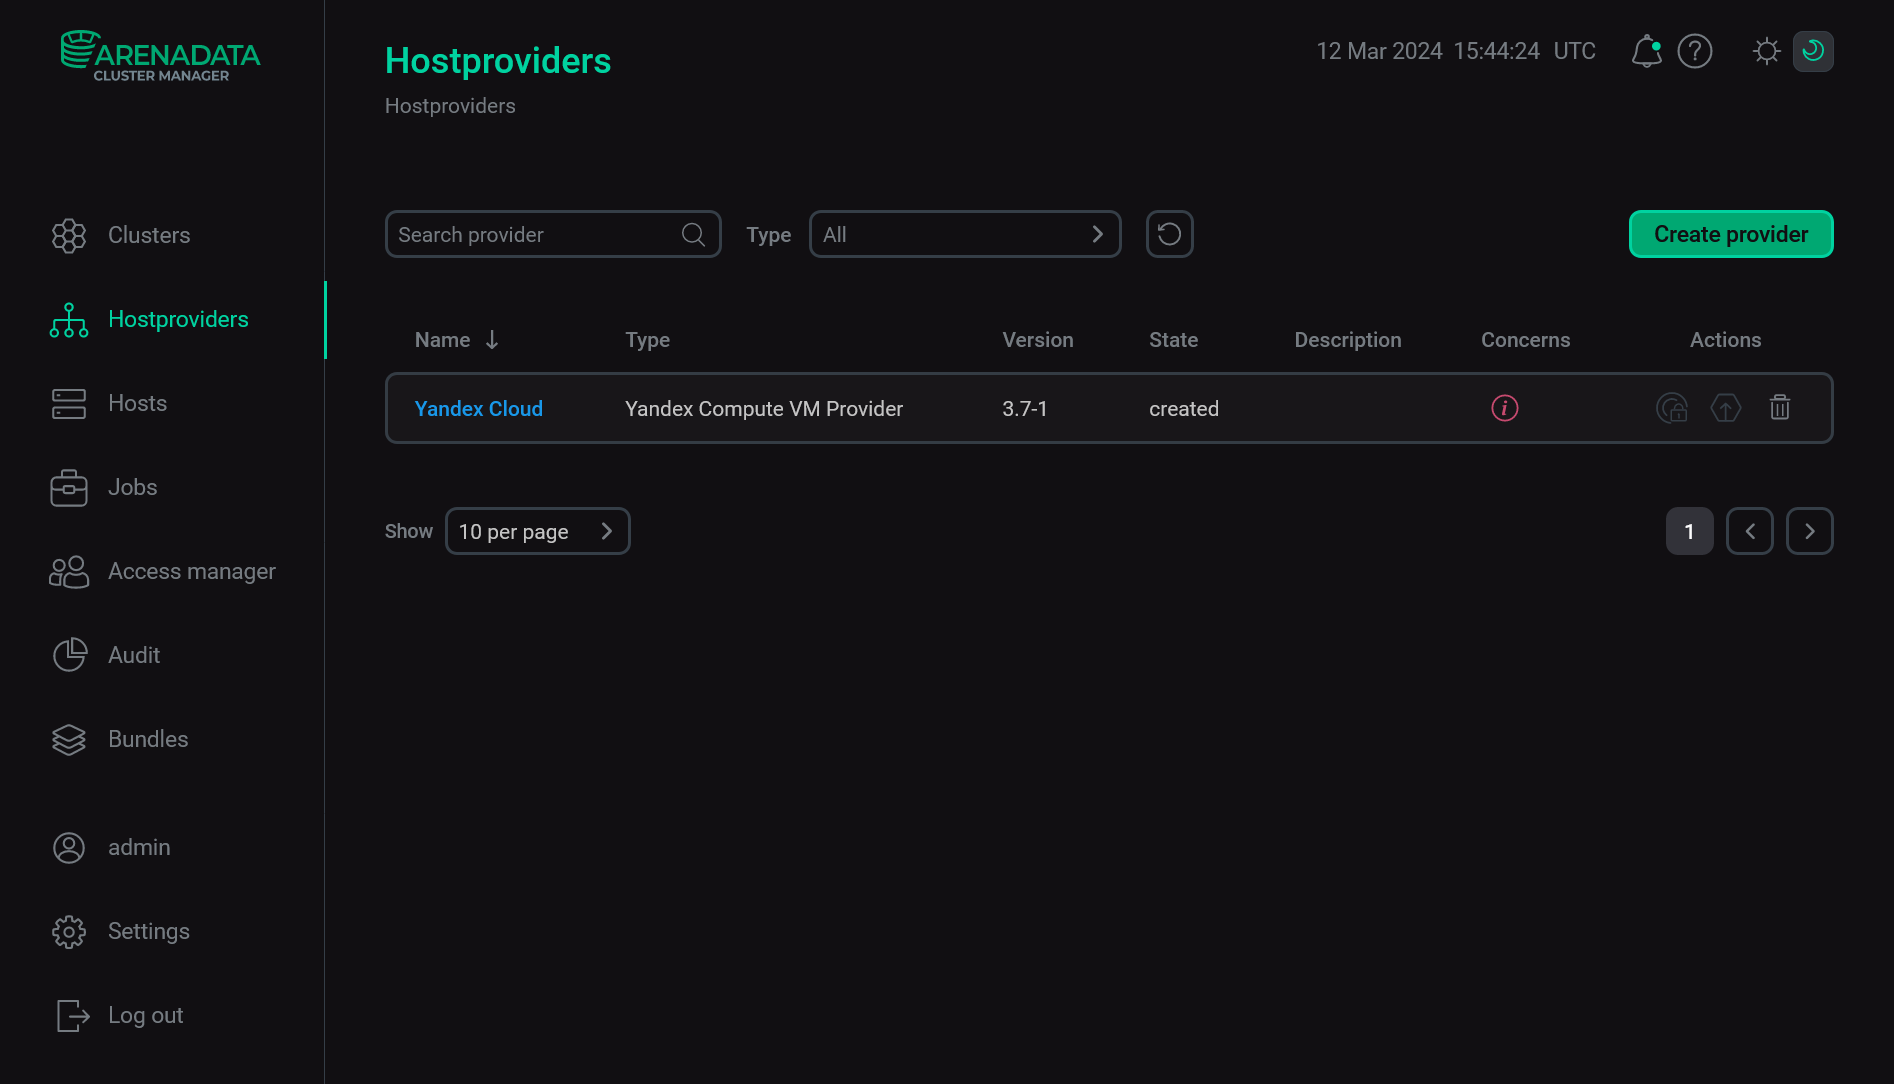 The result of adding a hostprovider successfully
Step 4. Configure a hostprovider
In order to configure the access to the cloud, follow the steps:
-
Select a hostprovider on the Hostproviders page. To do this, click a hostprovider name in the Name column. Alternatively, you can hover over the

 icon in the Concerns column and follow the link in the pop-up window that opens. The icon indicates the presence of critical errors in the current hostprovider configuration (e.g. mandatory fields).
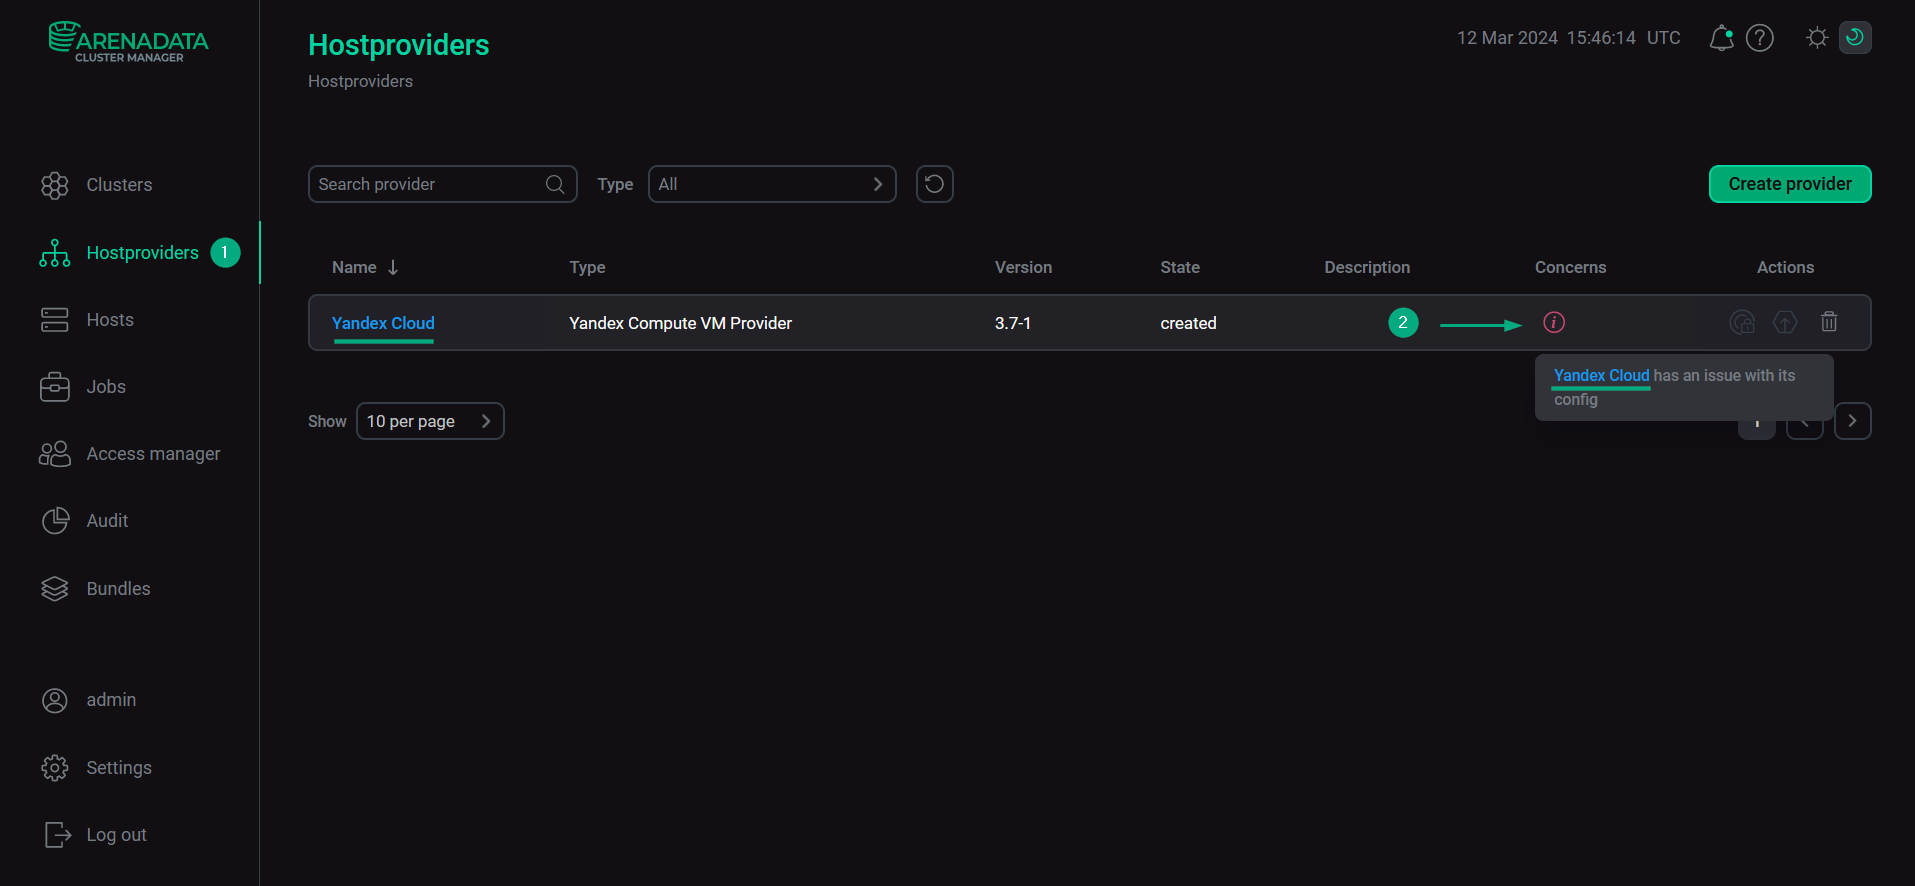 Go to configuring a hostprovider
 -
In the next window, switch on the Show advanced toggle, fill in hostprovider parameters, and click Save. The fields highlighted in red are mandatory.
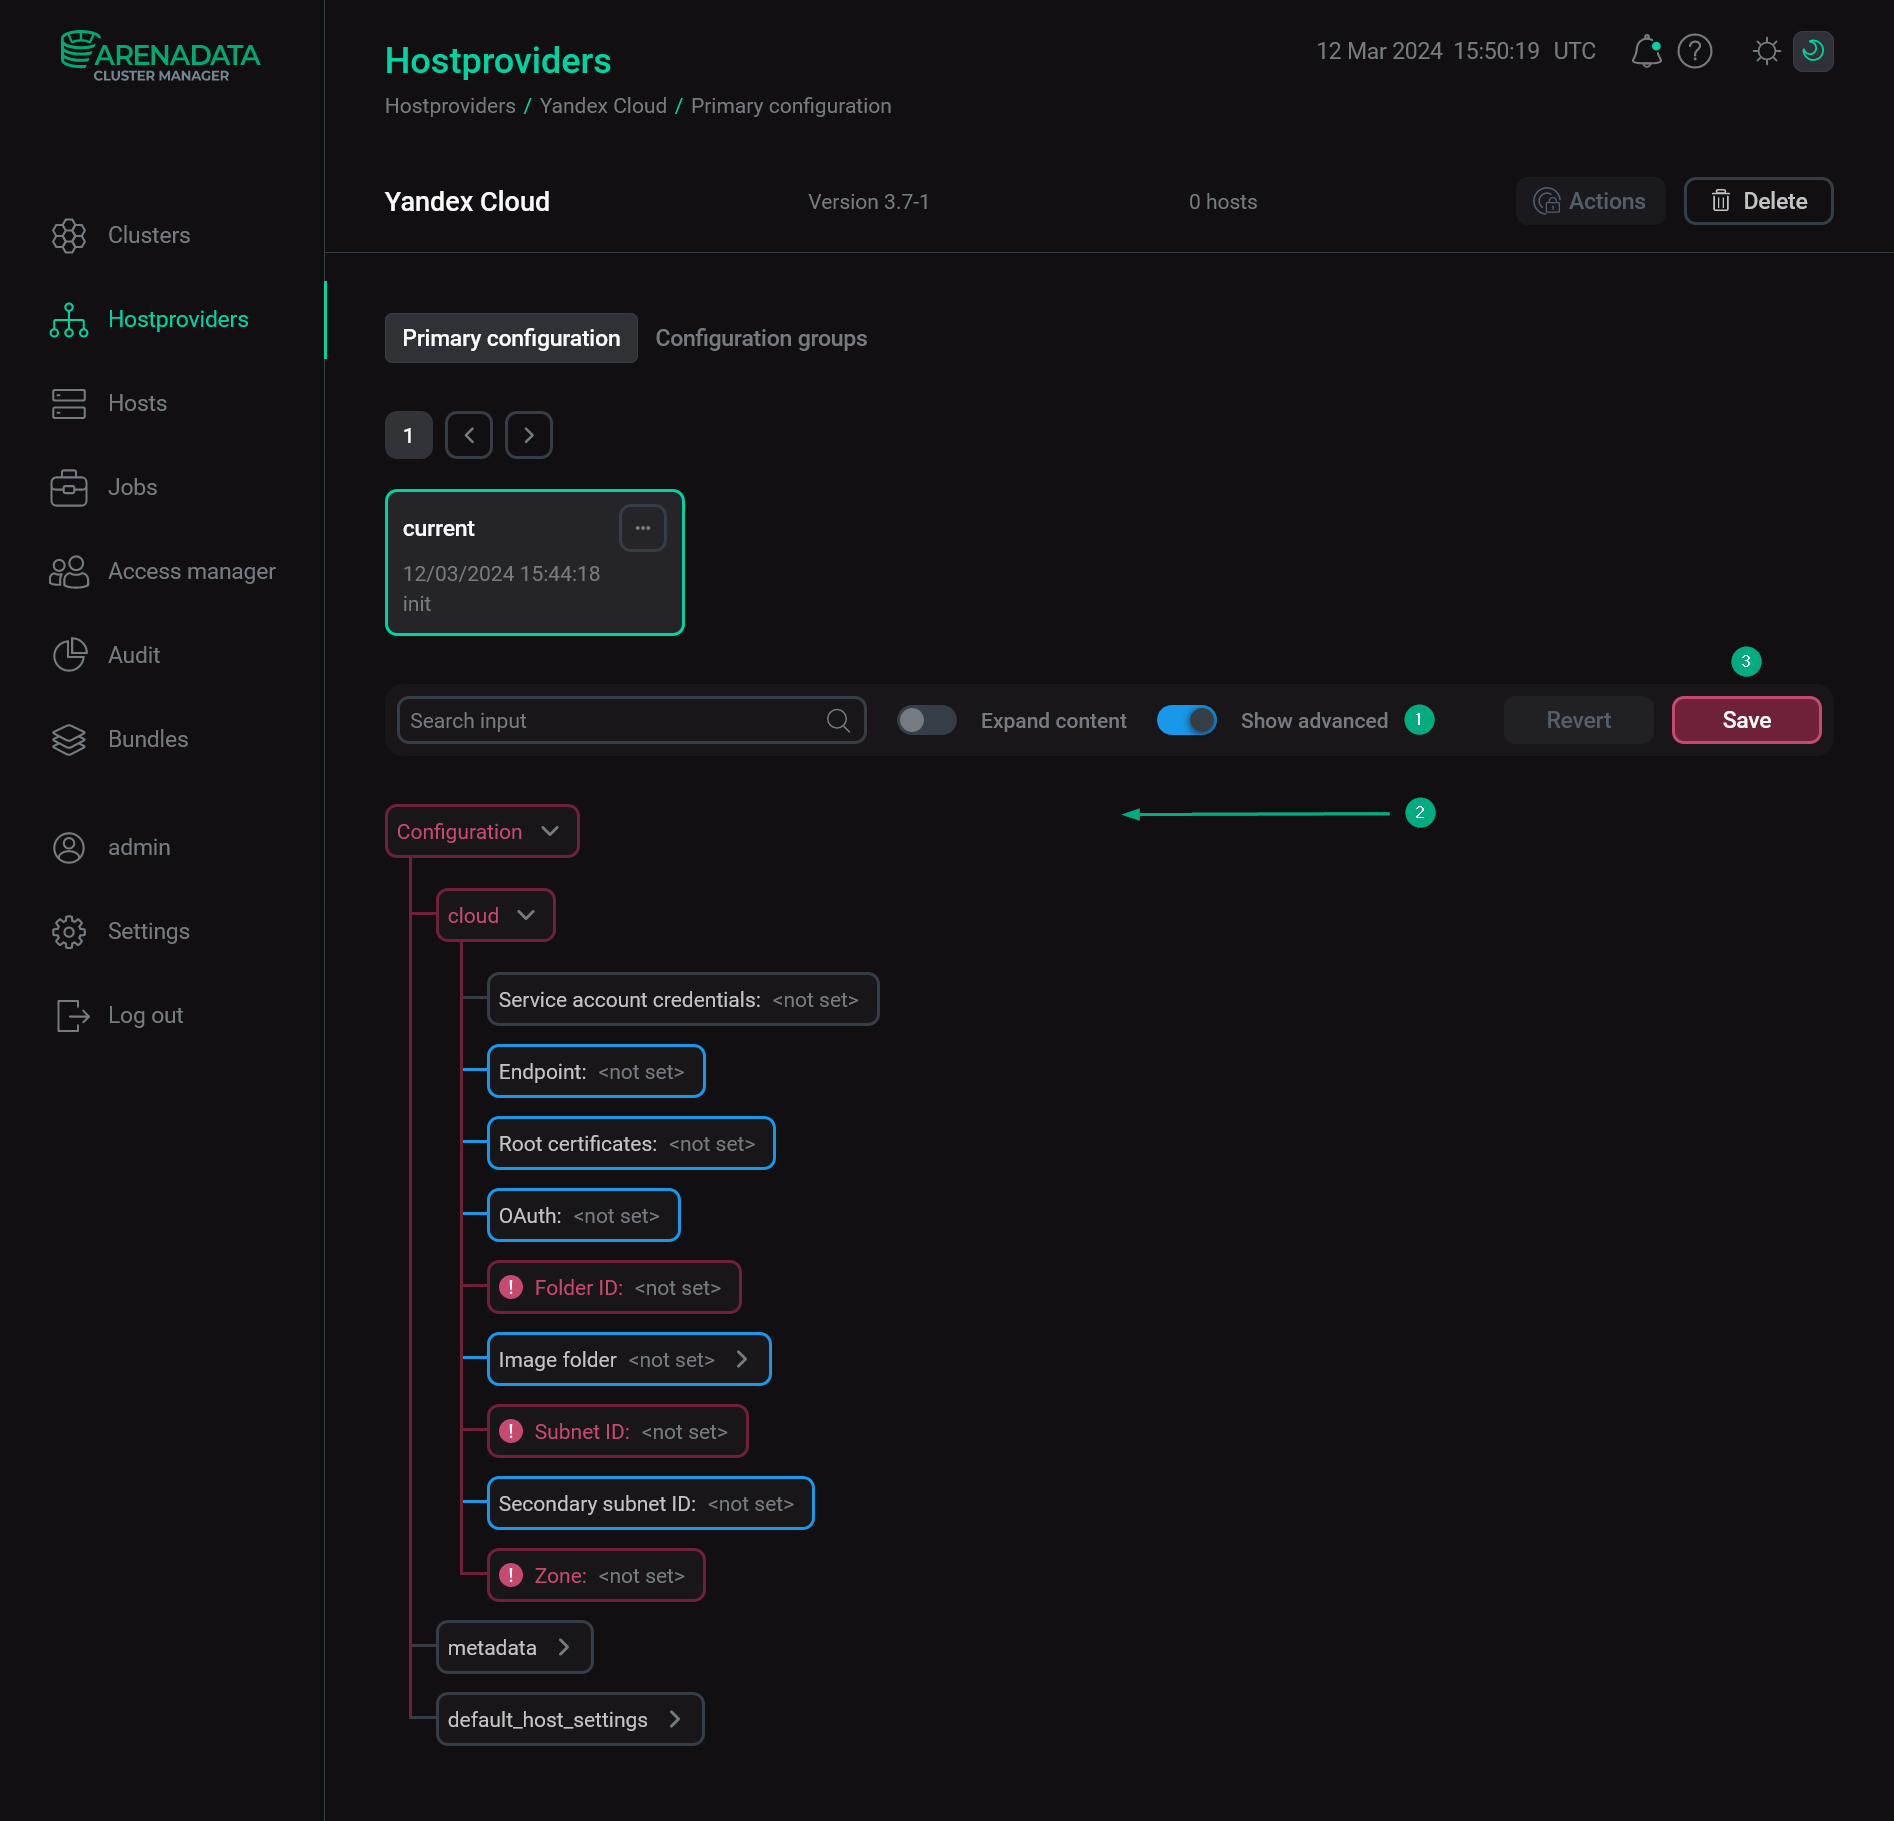 Configure a hostprovider
Hostprovider configuration parameters are given below:
IMPORTANTStarting June 1, 2026, Yandex Cloud no longer supports OAuth tokens obtained through Yandex ID. Previously issued tokens remain valid until they expire. Use service account credentials in the JSON format for authentication.-
cloud:
-
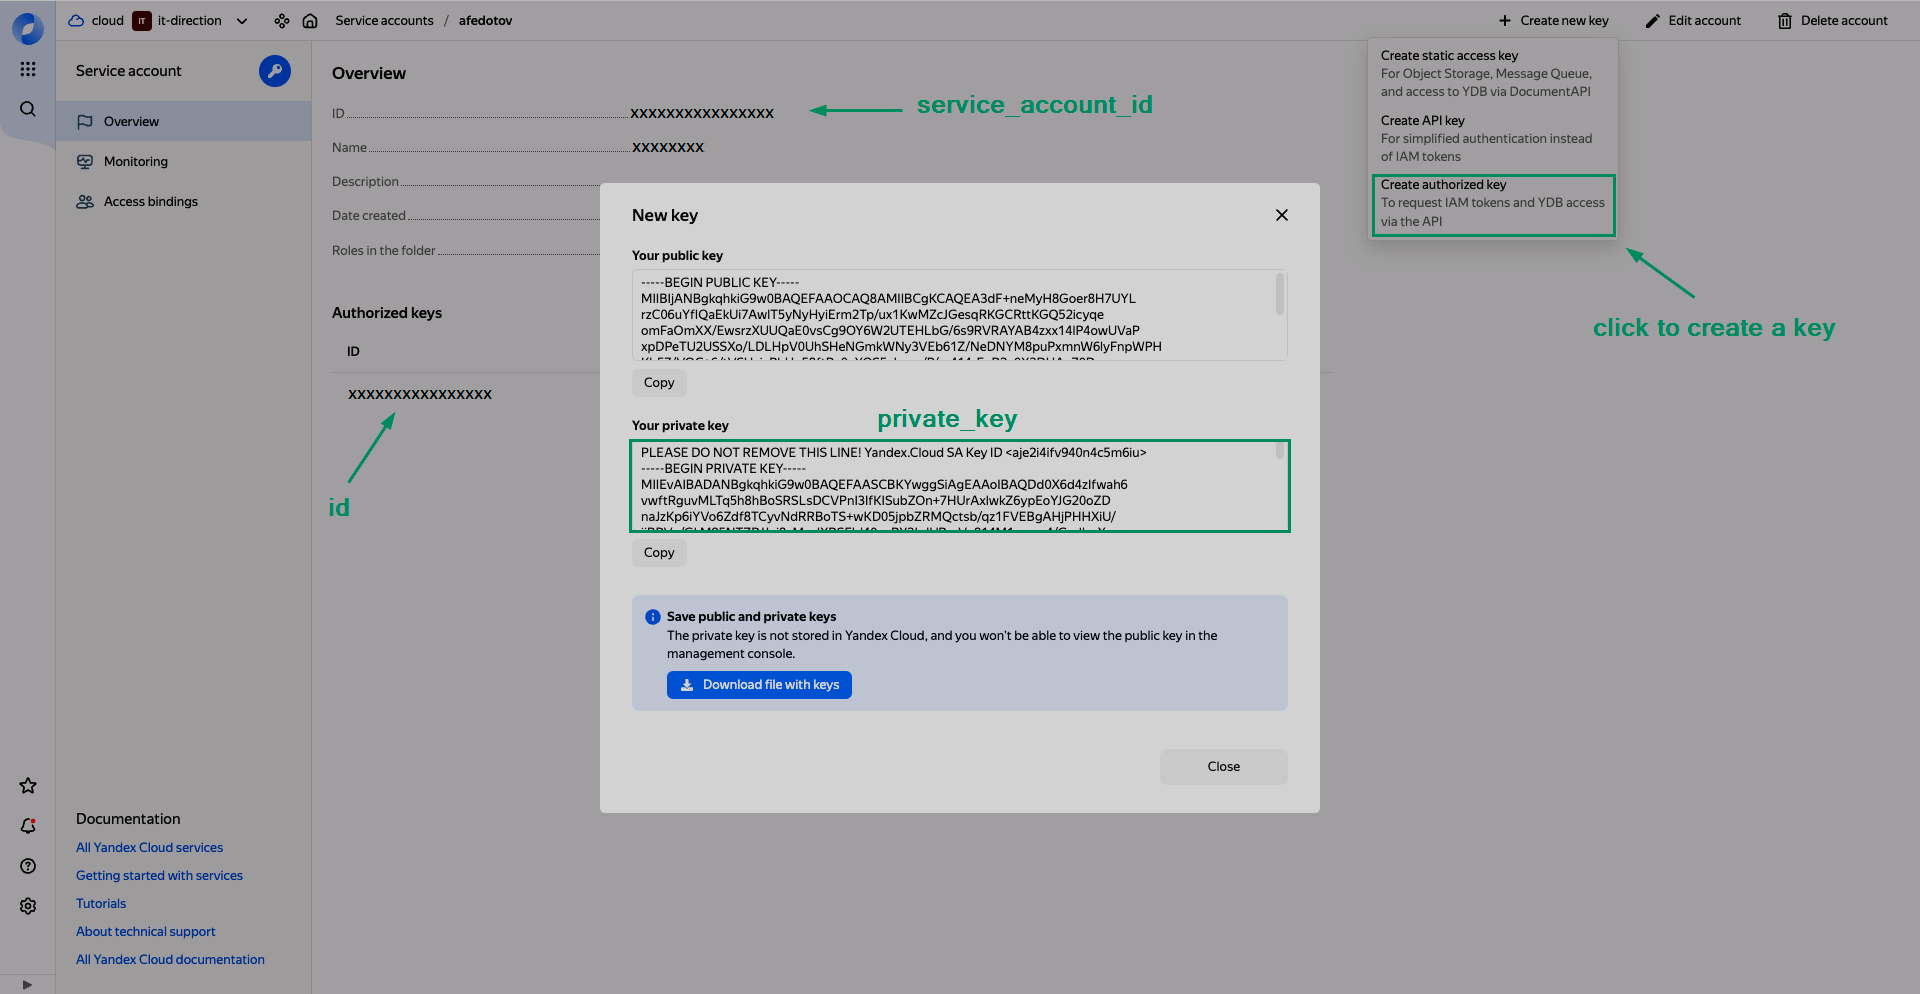
Service account credentials — credentials of the Yandex Cloud service account in the JSON format:
{
    "id": "<Identifier of the authorized key>",
    "service_account_id":"<Identifier of the service account>",
    "private_key":"<Private part of the authorized key>"
}
Authorized keys can be obtained for the service account according to the Yandex Cloud documentation. To create a new key, click Create new key → Create authorized key on the service account page.
 Define service account credentials
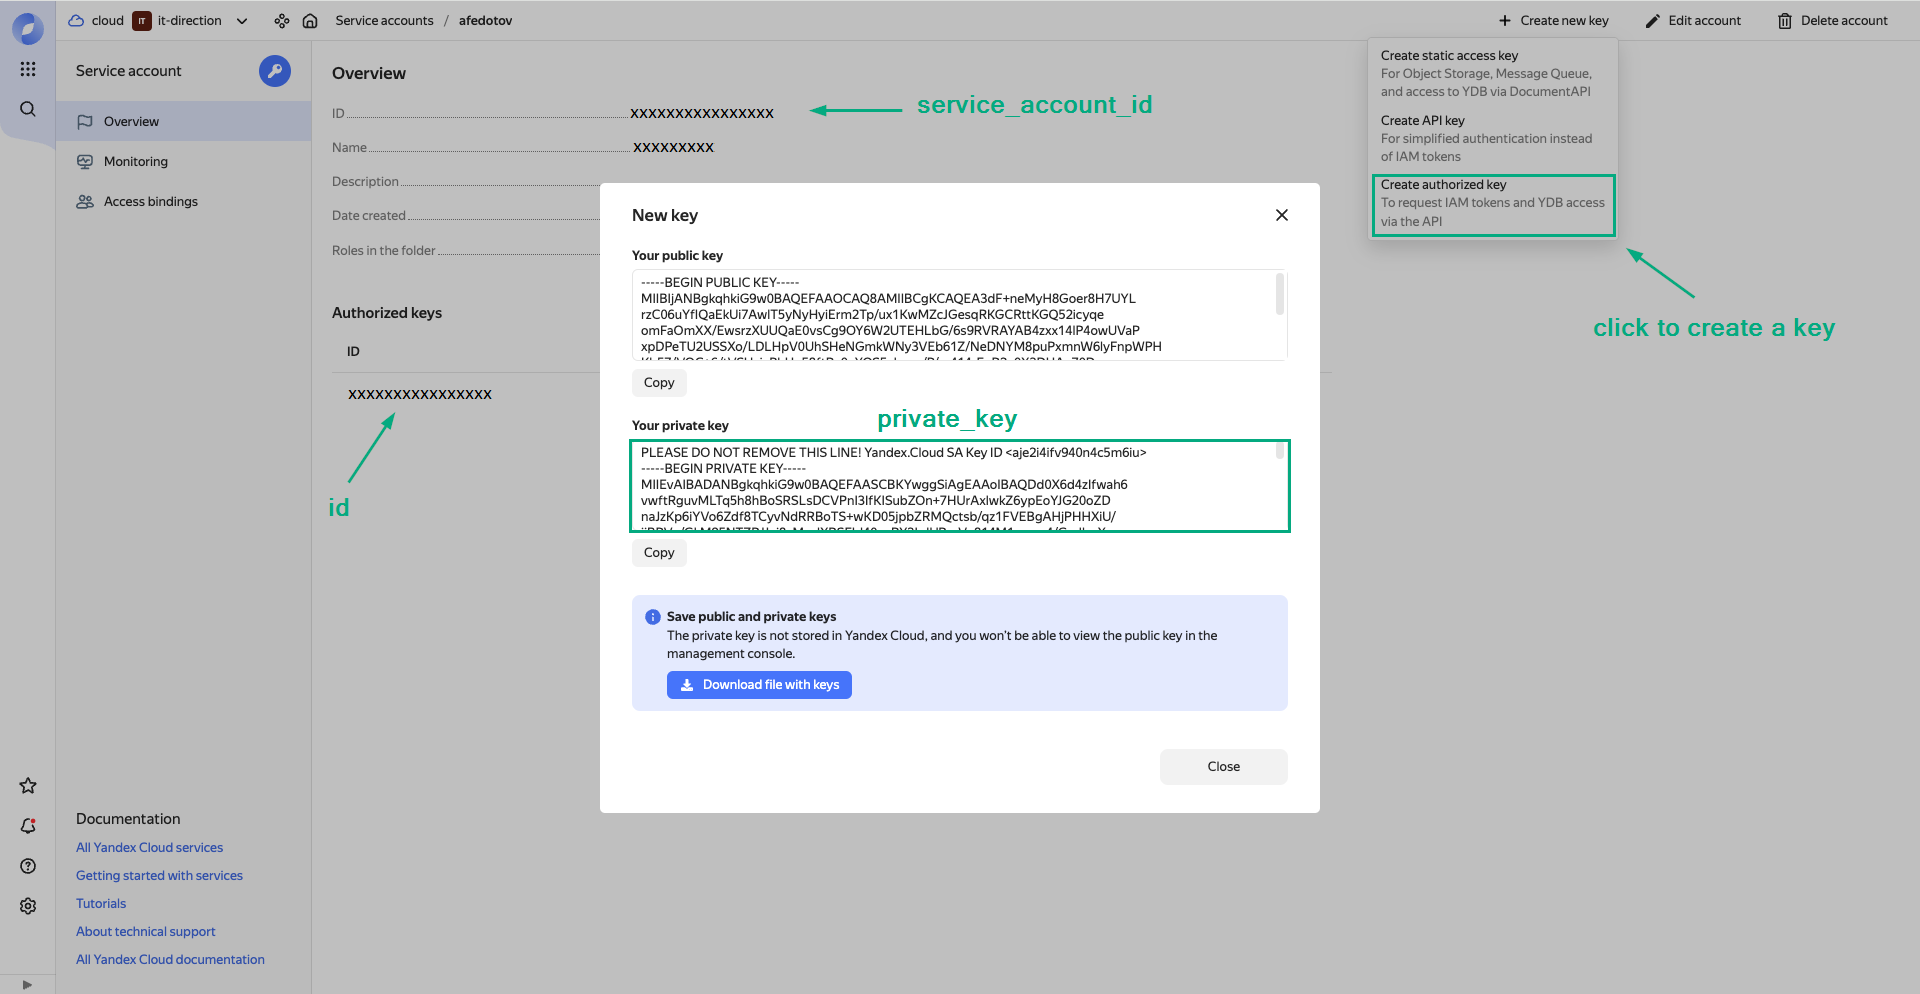 Define service account credentials
Note that you should convert a private part of the generated key to JSON format before copying its value to the Service account credentials field. To do this, use one of available instruments that replace line breaks or run the
dumpsmethod from the json Python library.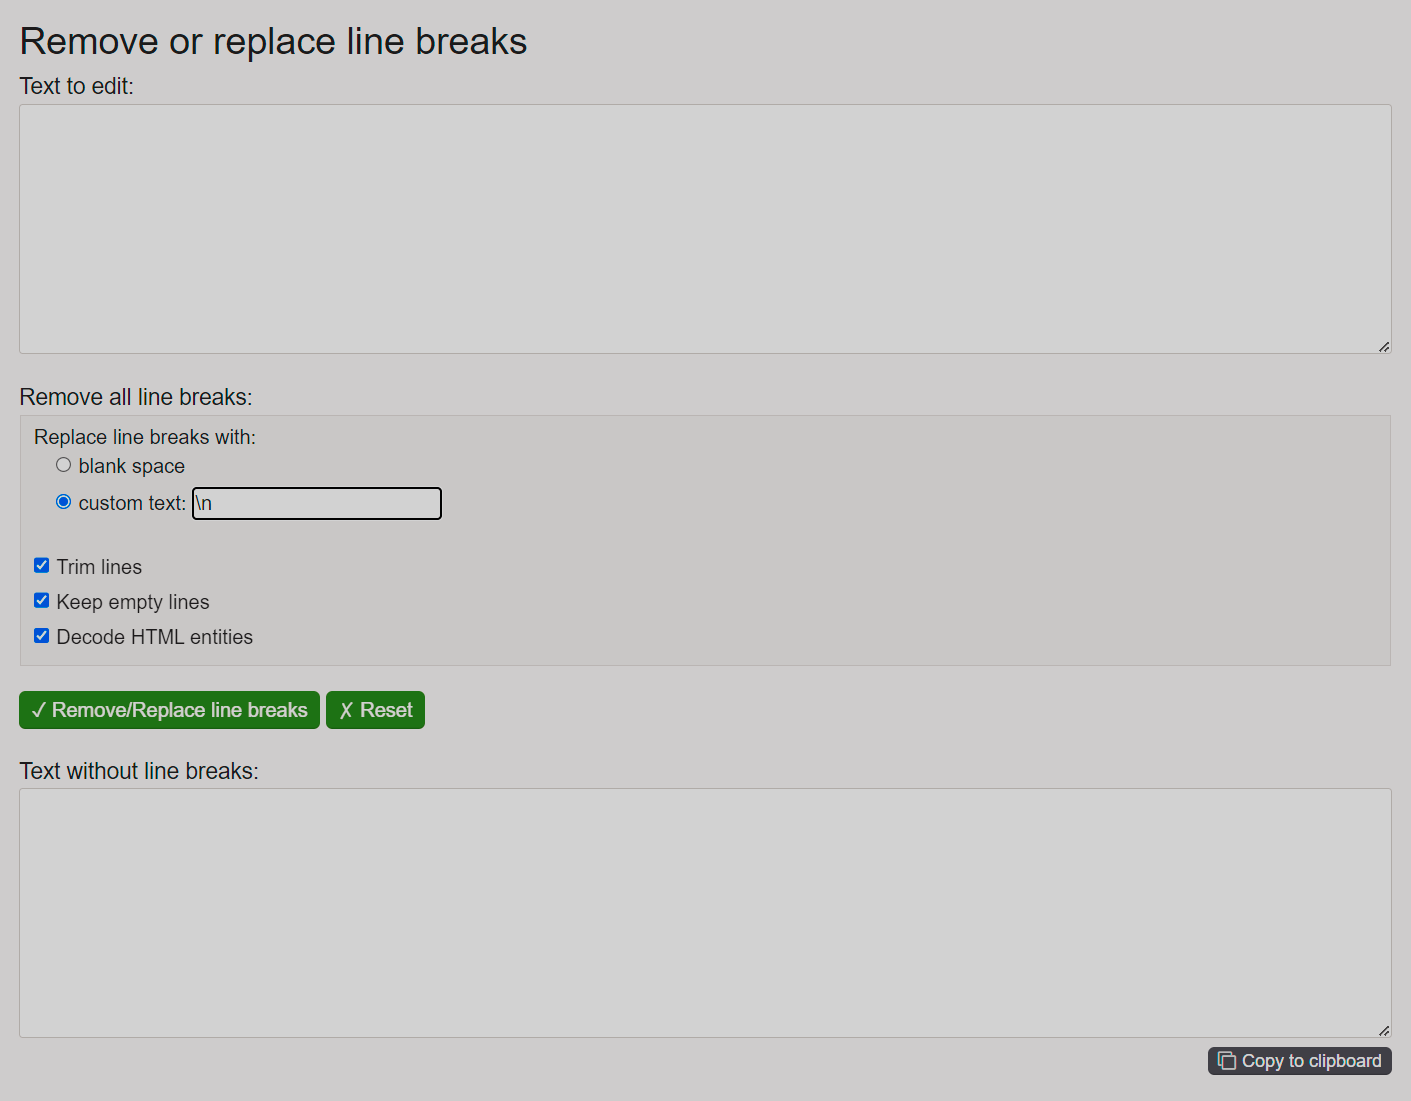 Convert a private key to the JSON format
 Convert a private key to the JSON format
The Service account credentials field is incompatible with OAuth, you should use only one of these fields for authentication.
-
Endpoint — a custom endpoint that is used to connect to a private Yandex Cloud installation. The default endpoint is
api.cloud.yandex.net. -
Root certificates — root certificates that are used to connect to a private Yandex Cloud installation.
-
OAuth — an OAuth token that can be obtained according to the Yandex Cloud documentation. The OAuth field is incompatible with Service account credentials, you should use only one of these fields for authentication.
-
Folder ID — a target folder for new virtual machines. Can be copied from the ID column in the folder list of the Yandex Cloud.
 Find a folder identifier
 Find a folder identifier
 -
Image folders — identifiers of the folders that are used to store all organization images. Images can be obtained via the get-latest-from-family function. Enter each folder identifier separately — by clicking the

 icon in the Image folders node and editing the new list element
 Image folder [N]subsequently. -
Subnet ID — a target subnet for new virtual machines. To get the Subnet ID value, open the Virtual Private Cloud service in the Yandex Cloud console, click the desired network in the Cloud networks section, and copy the value of the ID column from the row that contains the desired subnet in the list of subnets that opens.
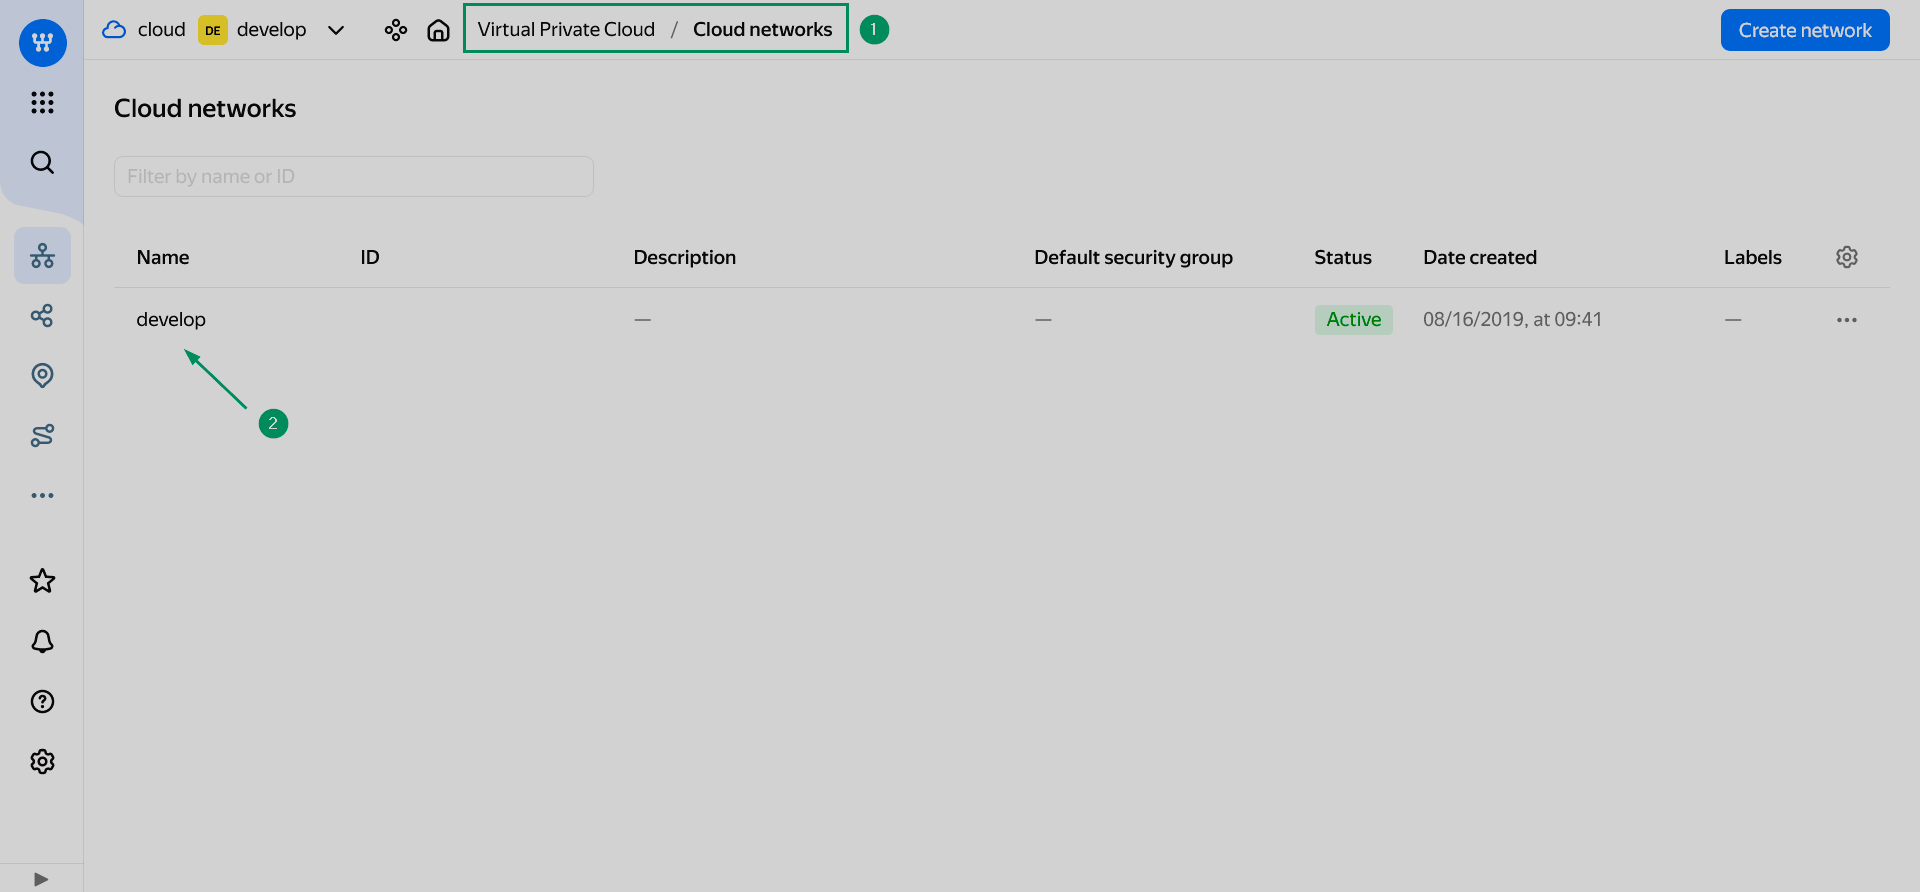 Select a network
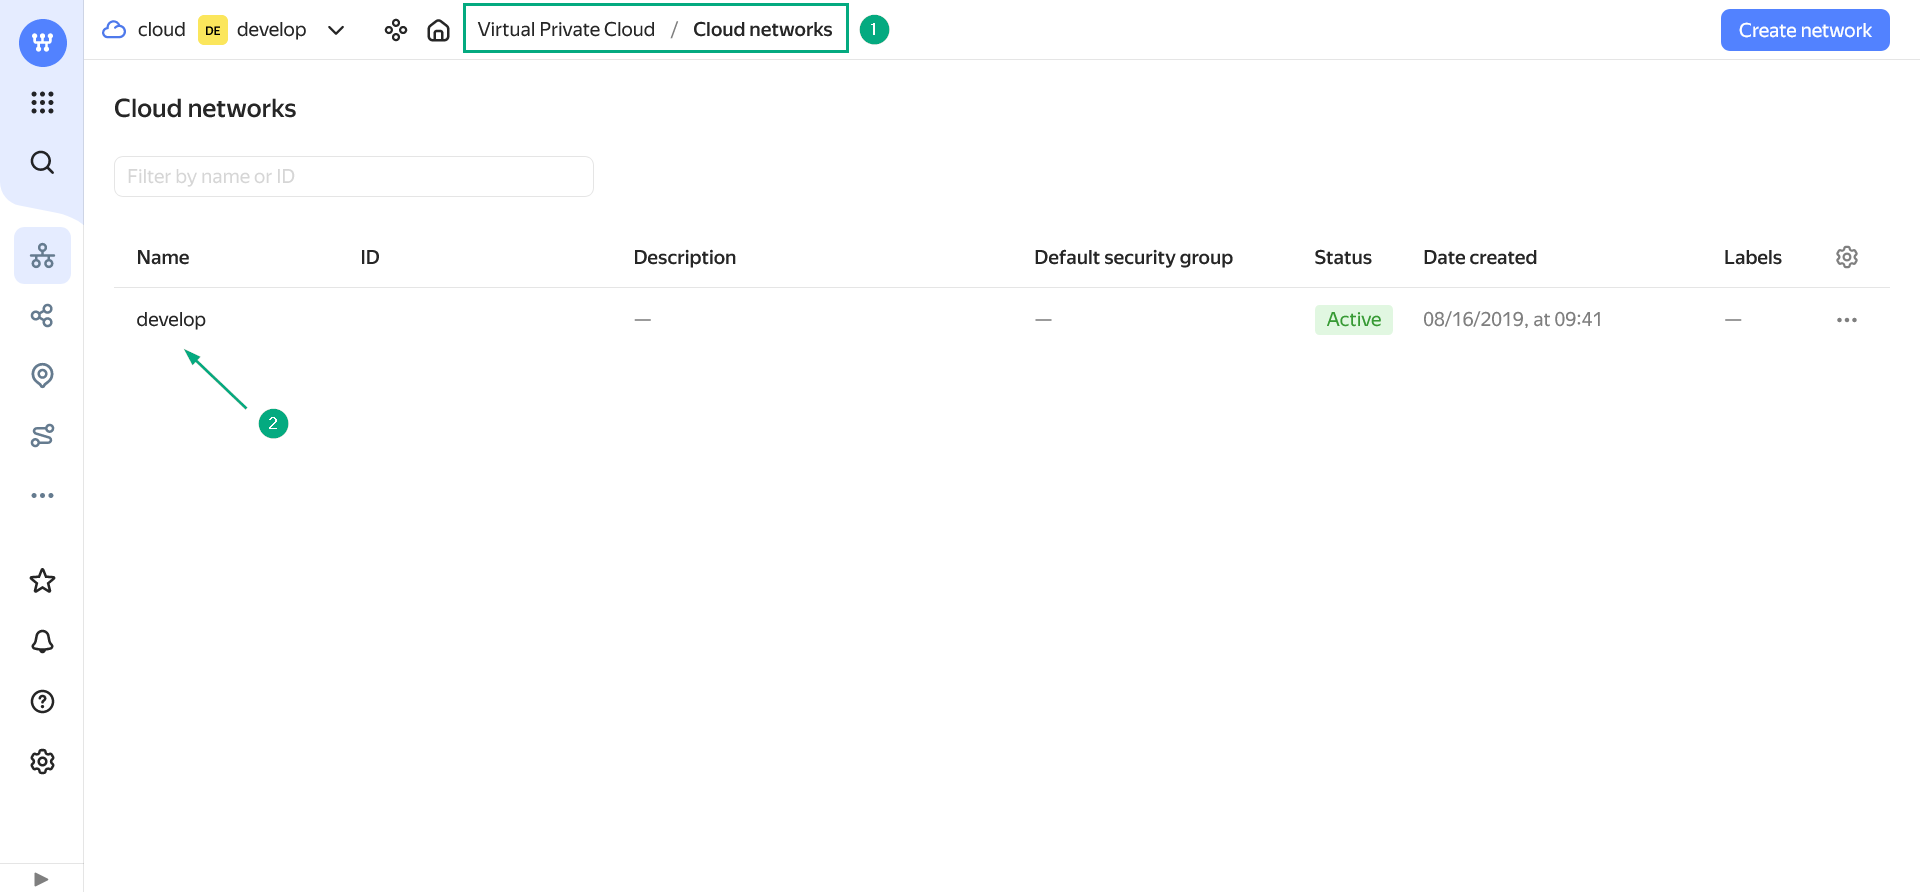 Select a network
 Find a subnet identifier
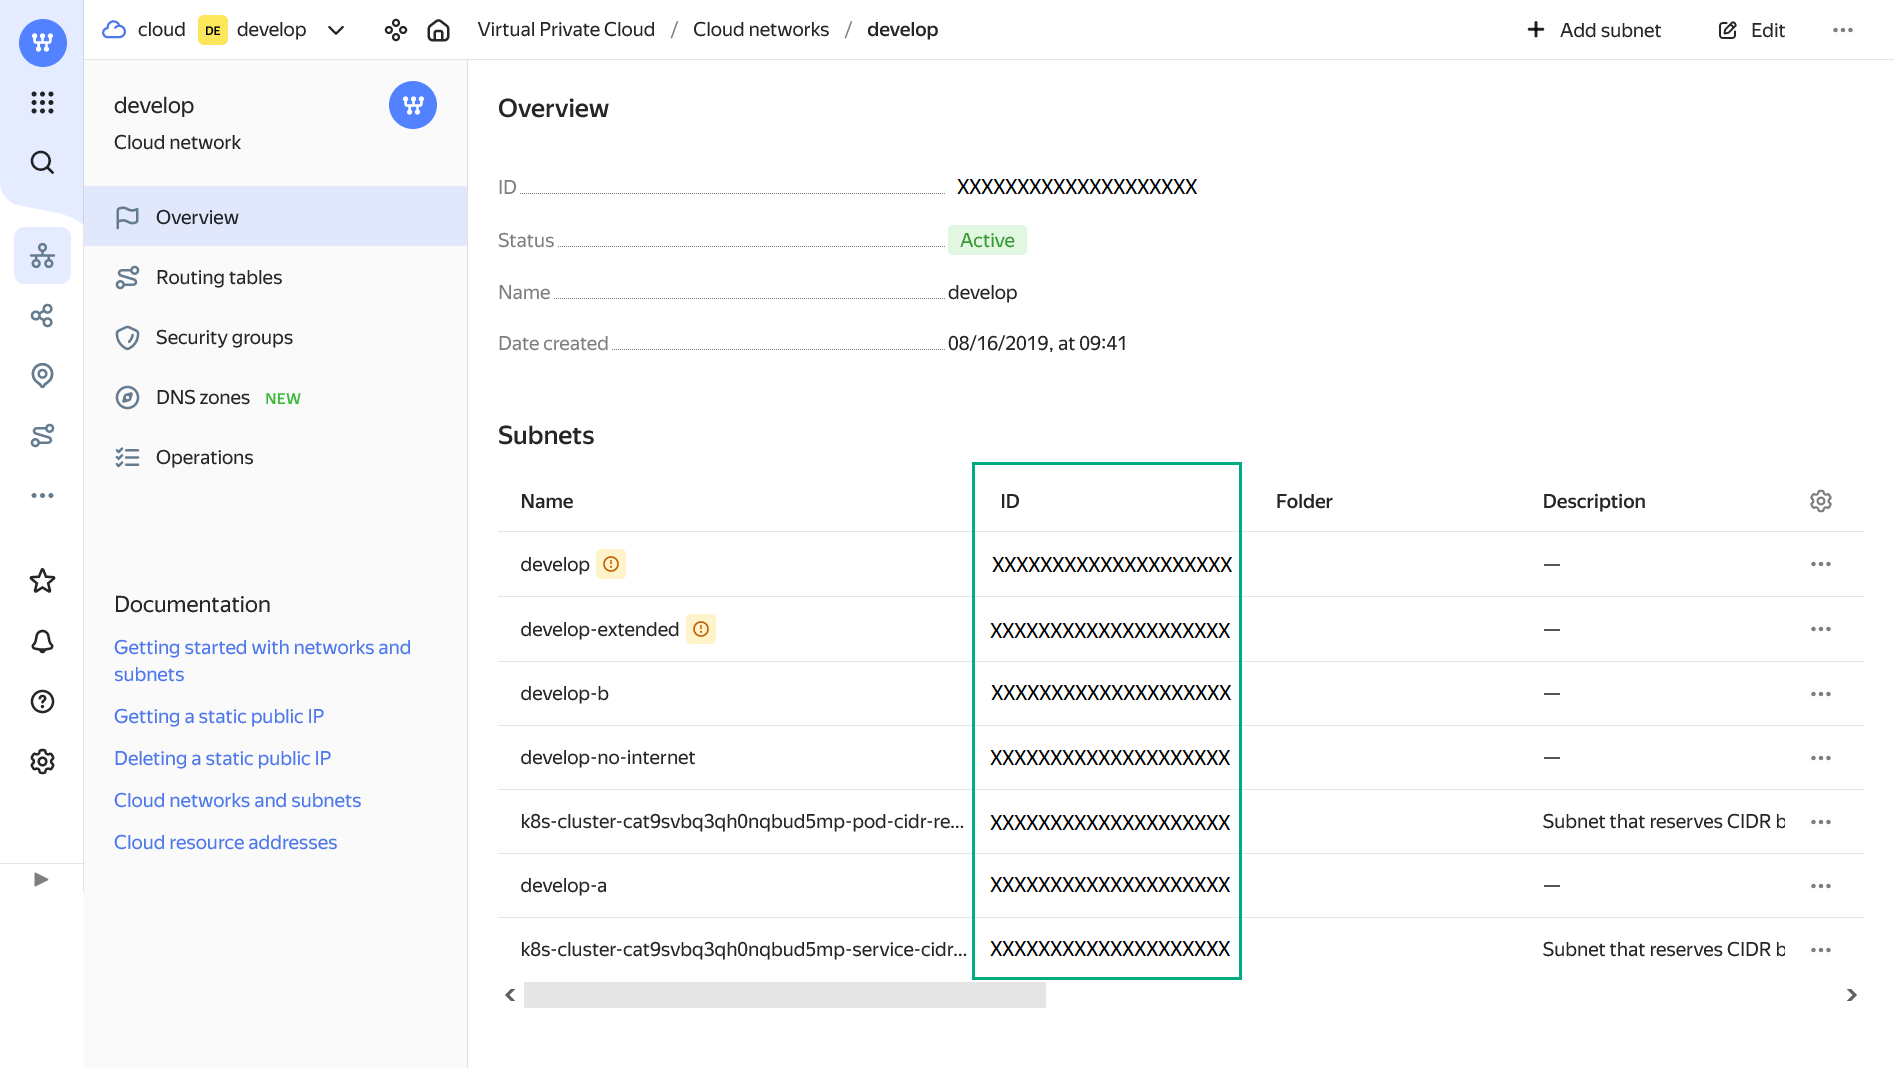 Find a subnet identifier
 -
Secondary subnet ID — an identifier of the additional subnet that is used to create a second network interface on virtual machines. The second subnet must be within the same VPC in the Yandex Cloud as the Subnet ID subnet.
-
Zone — a target availability zone (AZ) for new virtual machines. Every zone corresponds to the specific data center. Currently, the following zones are available:
ru-central1-a,ru-central1-b,ru-central1-d. Theru-central1-czone will be decommissioned. To get the Zone value, open the Virtual Private Cloud service in the Yandex Cloud console, click the desired network in the Cloud networks section, and copy the value of the Zone column from the row that contains the desired subnet in the list of subnets that opens.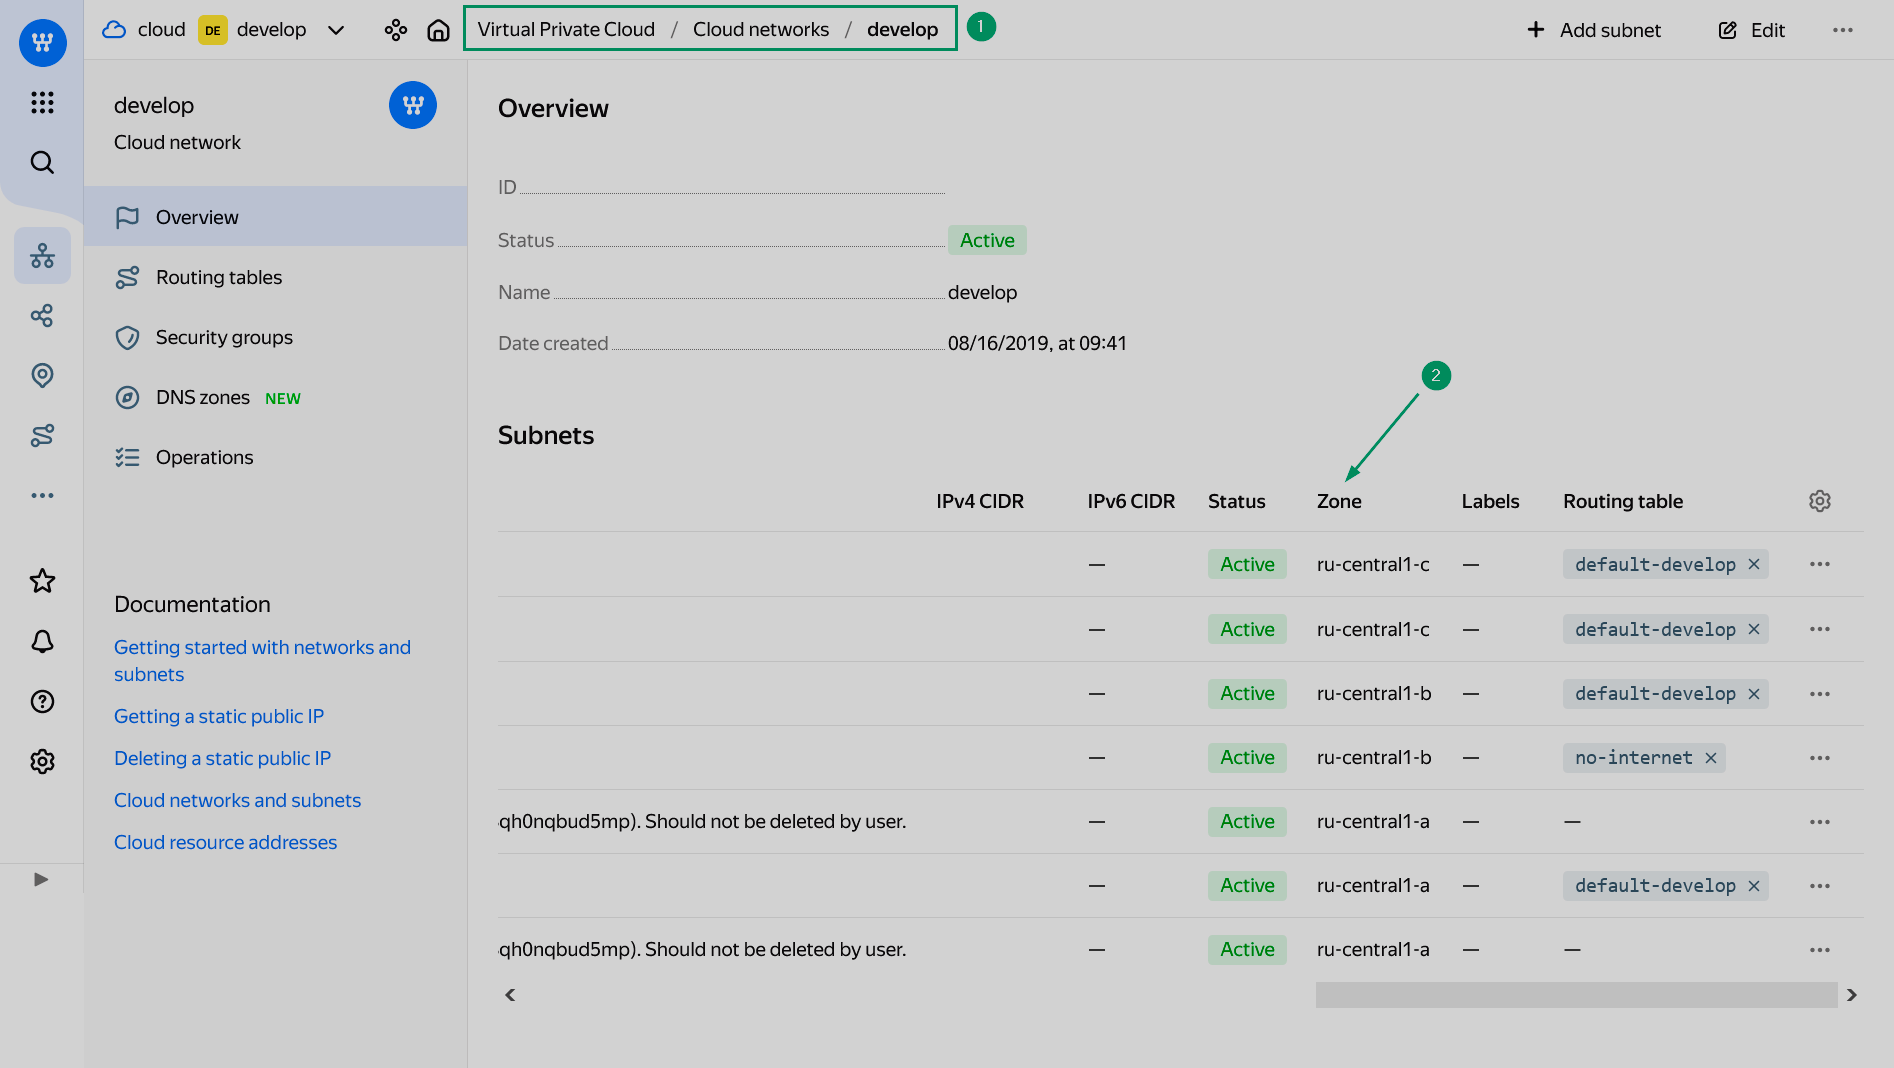 Find an availability zone
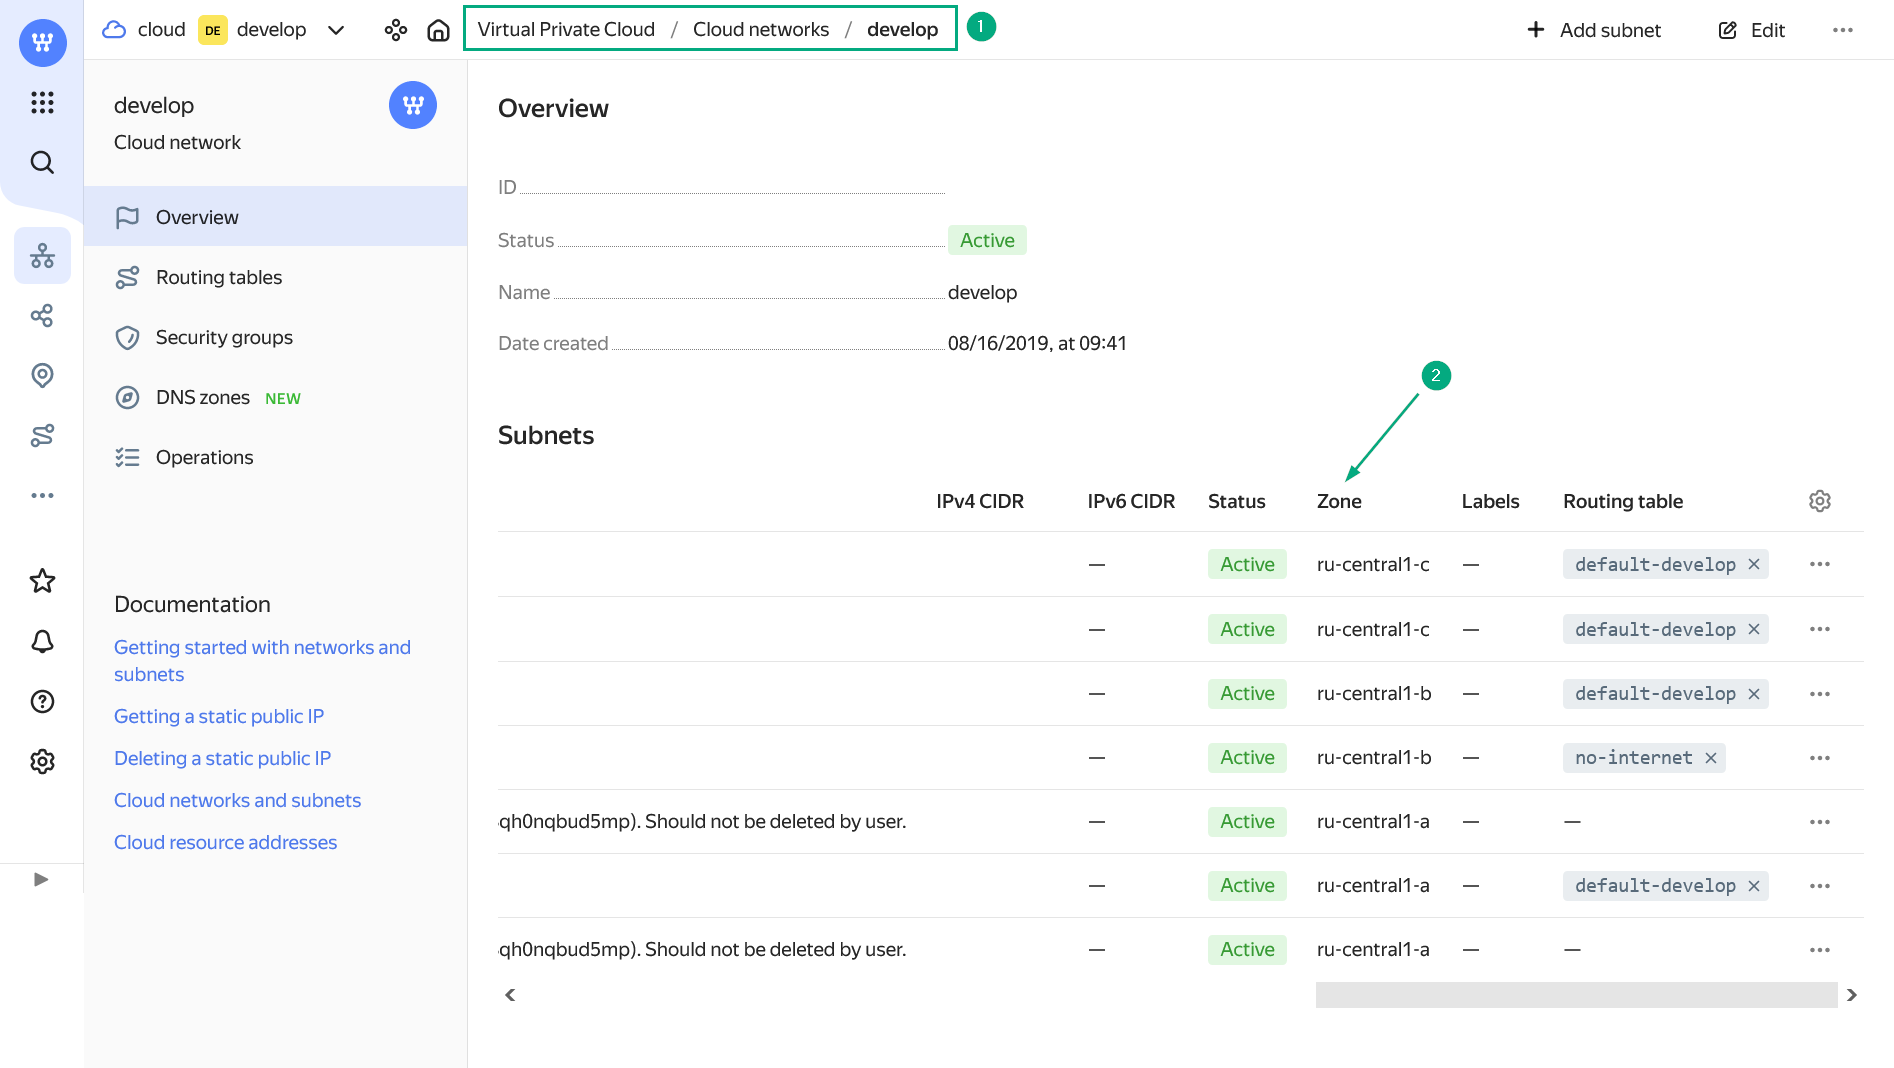 Find an availability zone
-
-
metadata:
-
Ssh keys — a set of public keys that will be used to create users during the Create hosts, Create users, and Create host → Init actions. Enter each key separately — by clicking the
icon in the Ssh keys node and editing the new list element Ssh keys [N]subsequently. Each public key should start withssh-rsaand end withusername@hostname.
-
-
default_host_settings:
-
Active operations limit timeout — a timeout that is activated when the quota of simultaneously performed operations is exceeded (resulting in errors returned by the Yandex Cloud gPRC). If empty, the timeout is not activated. If
0, the waiting time is unlimited. Any positive integer in the field equals the waiting time, during which the operation should move from the queue to the execution stage. Measured in seconds. -
Labels — labels that will be used for all created VMs by default. The labels that are specified for VMs (during the Create hosts and Create host → Init actions) have a higher priority compared to the labels specified at the hostprovider level. Enter each label separately — by clicking Add property in the Labels node and editing the new list element
Labels [N]subsequently. In the dialog that opens, enter a label key in Enter field name and a label value in Enter field value. -
Security Group IDs — security group identifiers that will be used for all created VMs by default. The security groups that are specified for VMs (during the Create hosts and Create host → Init actions) have a higher priority compared to the groups specified at the hostprovider level. Enter each group separately — by clicking the
icon in the Security Group IDs node and editing the new list element Security Group IDs [N]subsequently.
-
-
-
Return to the Hostproviders page. As a result, the
icon stops being displayed in the Concerns column. The actions available for the configured hostprovider can be opened by clicking the 
 icon in the Actions column.
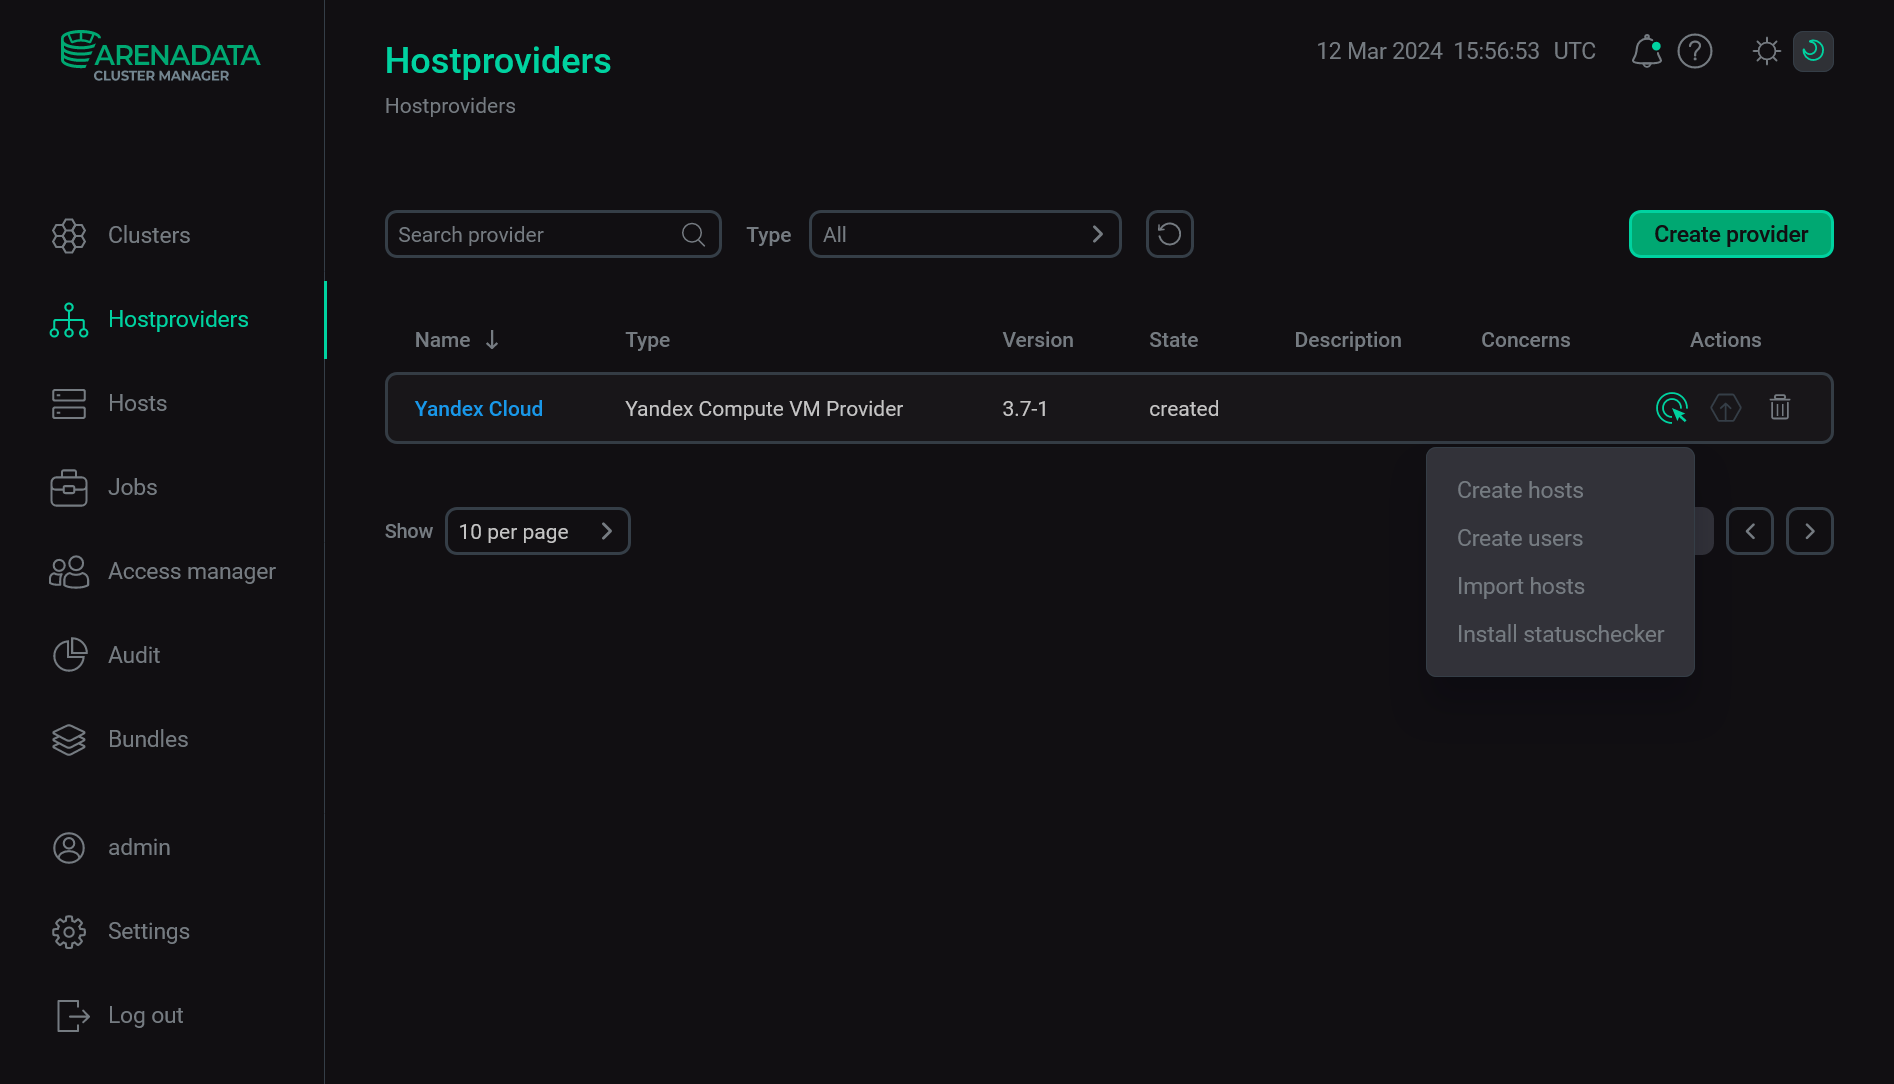 The result of configuring a hostprovider successfully