

Manage hosts with Yandex Cloud hostprovider
Overview
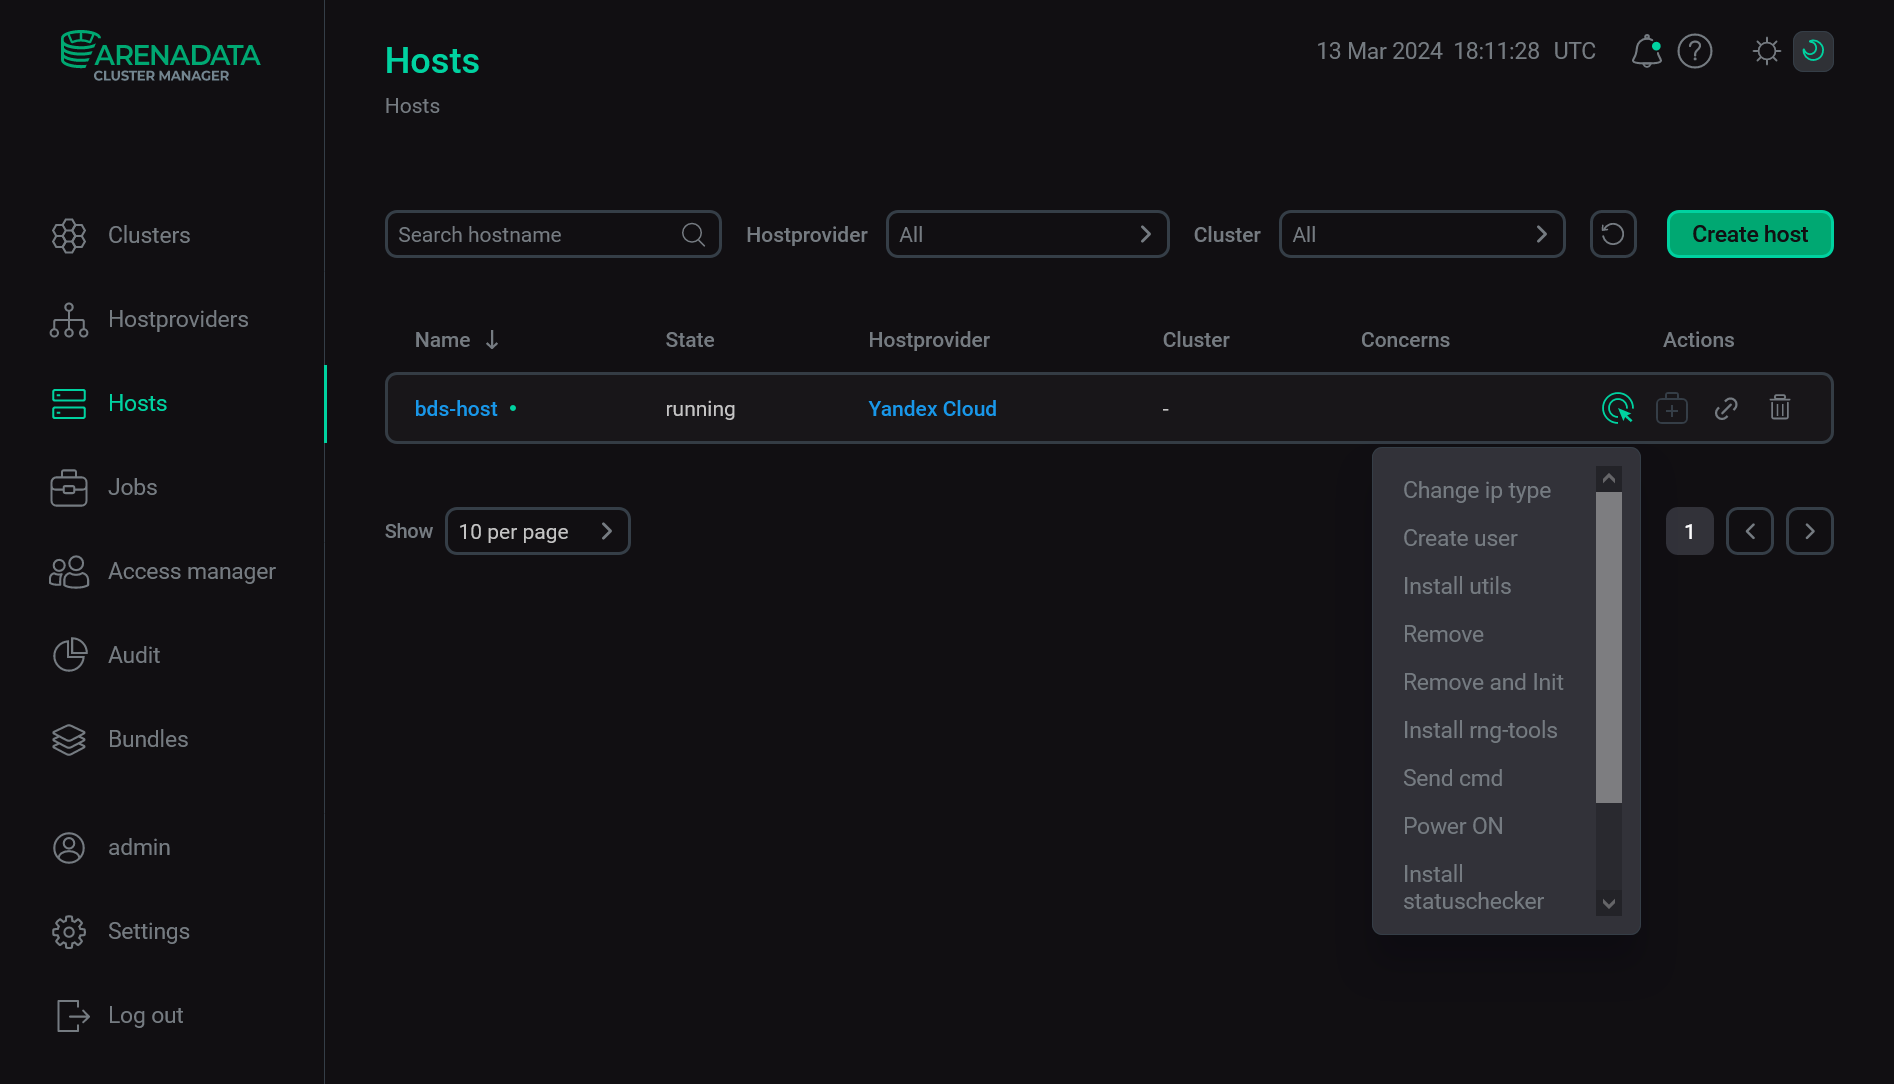
After you create and configure new hosts based on the Yandex Cloud hostprovider (by running the Create hosts or Create host → Init action), you can manage them on the Hosts page of the ADCM web interface. To see available host actions, click the ![]()
![]() icon in the Actions column.
icon in the Actions column.
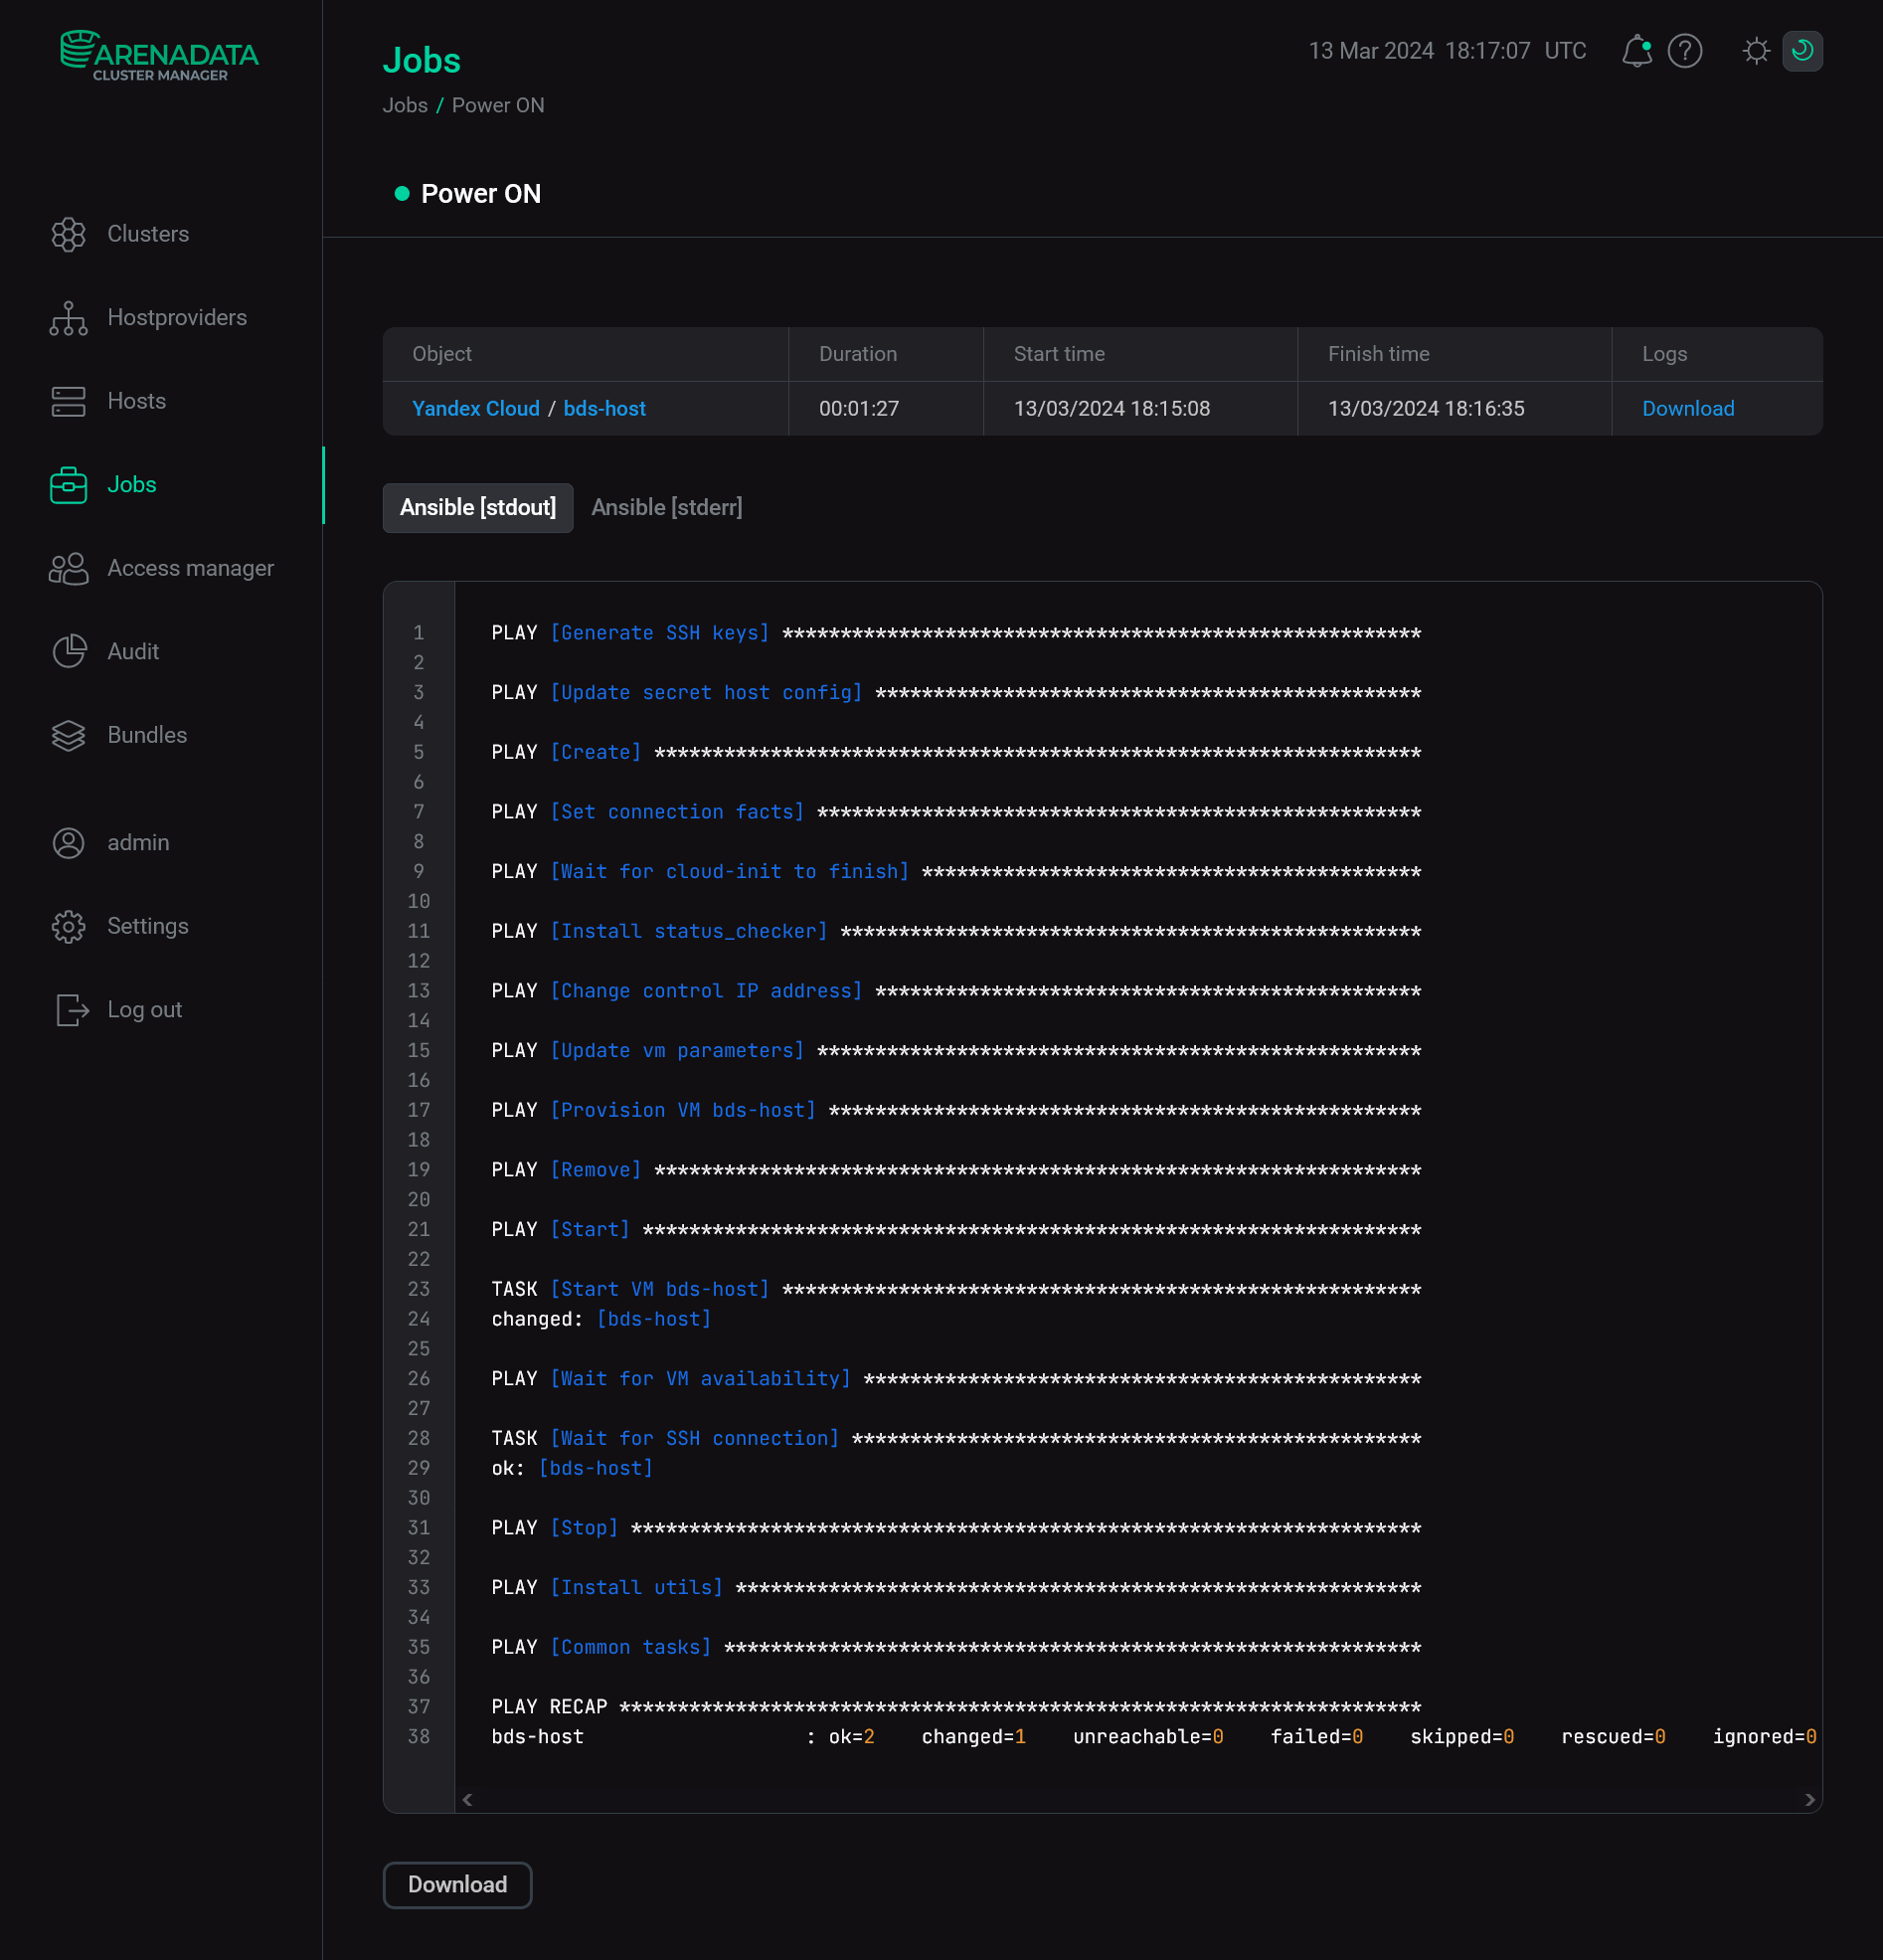
When you choose an action, ADCM displays a dialog window to confirm your choice. In this dialog window, you can select the Verbose checkbox to see additional execution details on the Jobs page. For some actions, you should first fill in additional options in a separate window.
When an action starts, ADCM displays its execution process and result on the Jobs page. From this page, you can navigate to a page with details on an individual job (by clicking a job name) to see inner steps of that job execution and analyze errors, if any.
All available host actions are listed below.
Change ip type
The Change ip type action allows you to change the host IP address type to public or private. After you select the action, a dialog box opens where you can select one of the following types in the IP-address type field:
-
private -
public
|
IMPORTANT
The action only changes the IP address that is used to manage a host by ADCM. The virtual machine IP address is not changed. |
To run the Change ip type action, click Run in the action form. Then, confirm the action in the standard confirmation dialog.
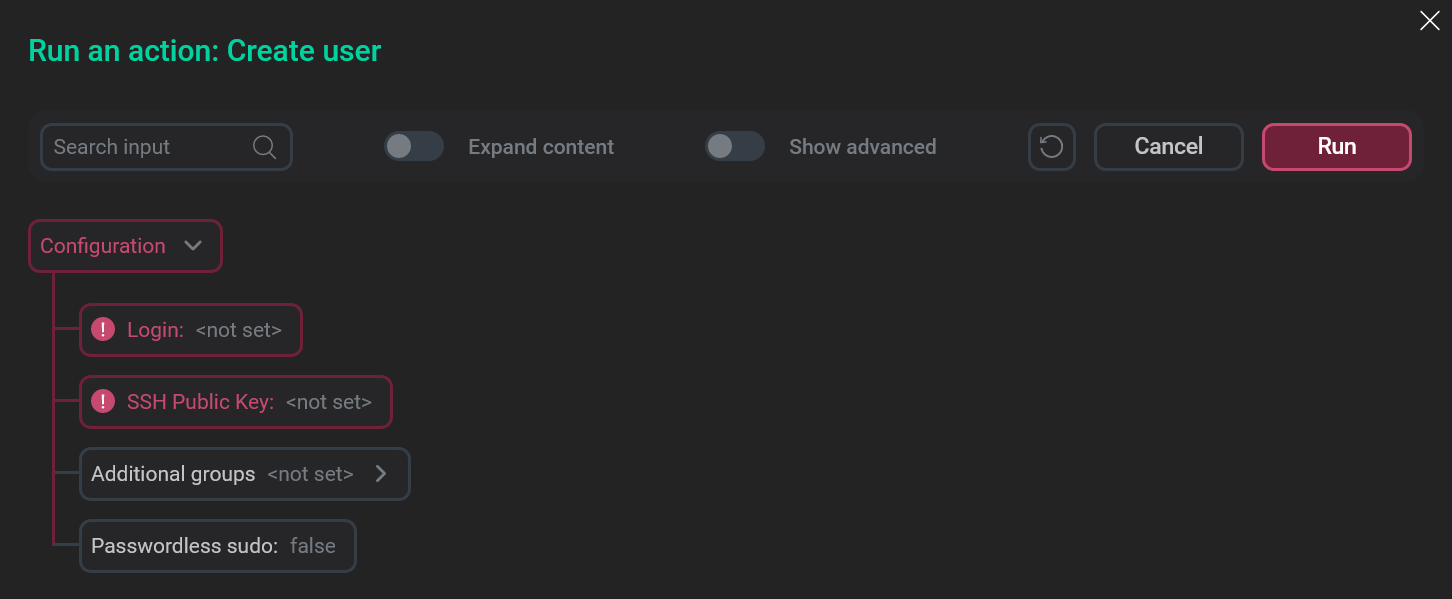
Create user
The Create user action creates a user on the host. After you select the action, a dialog box opens where you can fill in the following parameters (the fields highlighted in red are mandatory):
-
Login — a name of the created user.
-
SSH Public Key — a public SSH key of the created user. It should start with
ssh-rsaand end withusername@hostname. -
Additional groups — a list of Linux groups to which a user will be added (optionally). Enter each group separately — by clicking the

 icon in the Additional groups node and editing the new list element
 Additional groups [N]subsequently. -
Passwordless sudo — a flag that indicates whether the user can escalate their privileges to
sudowithout password. If set, the user will also be added to theadcm_sudogroup.
To run the Create user action, click Run in the action form. Then, confirm the action in the standard confirmation dialog.
|
NOTE
If you need to add users to all hosts that are based on the Yandex Cloud hostprovider, run the Create users action. |
Install utils
The Install utils action installs packages (utilities) on the host (e.g. nano, wget, etc.). After you select the action, a dialog box opens where you can specify the packages you need.
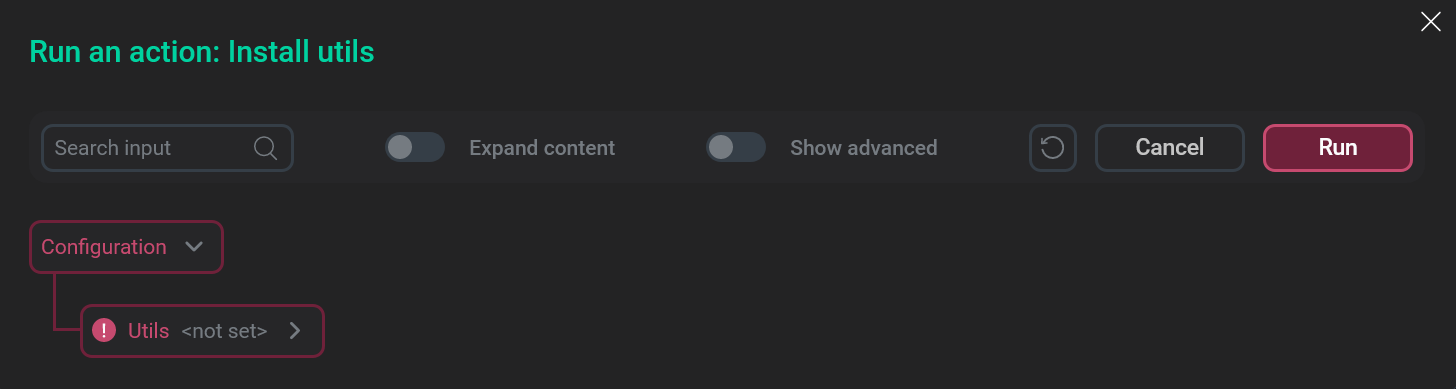
Enter each package separately — by clicking the ![]()
![]() icon in the Utils node and editing the new list element
icon in the Utils node and editing the new list element Utils [N] subsequently.

To run the Install utils action, click Run in the action form. Then, confirm the action in the standard confirmation dialog.
Remove
The Remove action removes the virtual machine from the Yandex Cloud and ADCM.
After you select the action, the standard confirmation dialog opens. Click Run to confirm the action. No additional parameters are required.
Remove and Init
The Remove and Init action recreates the virtual machine in the Yandex Cloud (removes and creates).
After you select the action, the standard confirmation dialog opens. Click Run to confirm the action. No additional parameters are required.
Install rng-tools
The Install rng-tools action installs the rngd utility from the rng-tools package. This utility fills the Linux system entropy pool. The contents of this pool are used by the random number generator (RNG).
After you select the action, the standard confirmation dialog opens. Click Run to confirm the action. No additional parameters are required.
Send cmd
The Send cmd action allows you to send a bash command to the host. After you select the action, a dialog box opens where you can enter a command text in the Command field. A shebang (#!) is not needed.
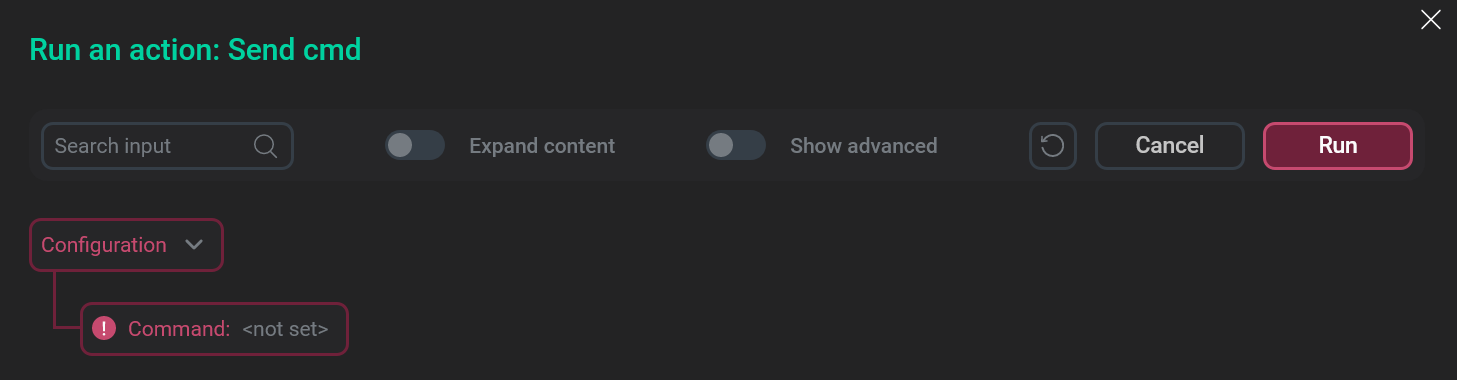
To run the Send cmd action, click Run in the action form. Then, confirm the action in the standard confirmation dialog.
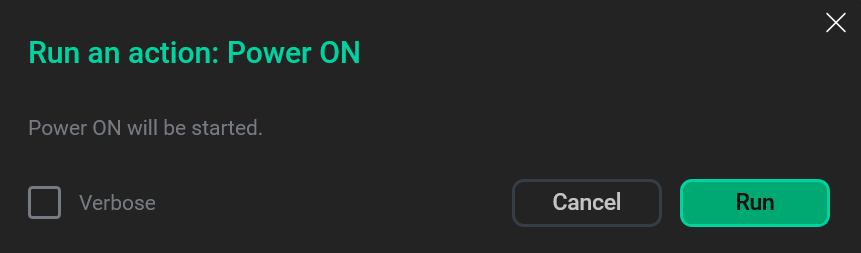
Power ON
The Power ON action starts the virtual machine in the Yandex Cloud.
After you select the action, the standard confirmation dialog opens. Click Run to confirm the action. No additional parameters are required.
After the Power ON action is completed, the host status changes to running in ADCM and to Running in the Yandex Cloud.
Install statuschecker
The Install statuschecker action installs the statuschecker on the host. This is a special daemon that periodically checks the status of services and components added to the cluster hosts via ADCM.
After you select the action, the standard confirmation dialog opens. Click Run to confirm the action. No additional parameters are required.
Power OFF
The Power OFF action stops the virtual machine in the Yandex Cloud.
After you select the action, the standard confirmation dialog opens. Click Run to confirm the action. No additional parameters are required.
After the Power OFF action is completed, the host status changes to stopped in ADCM and to Stopped in the Yandex Cloud.
Update
The Update action sets new labels and Security Group IDs for the virtual machine in the Yandex Cloud. In this case, the previous data (saved during the VM initialization or the last launch of the Update action) is completely overwritten. After you select the action, a dialog box opens where you can fill in the following parameters:
-
Labels — new labels for VM. Enter each label separately — by clicking Add property in the Labels node and editing the new list element
Labels [N]subsequently. In the dialog that opens, enter a label key in Enter field name and a label value in Enter field value. -
Security Group IDs — new identifiers of security groups for VM. Enter each group separately — by clicking the
icon in the Security Group IDs node and editing the new list element Security Group IDs [N]subsequently.
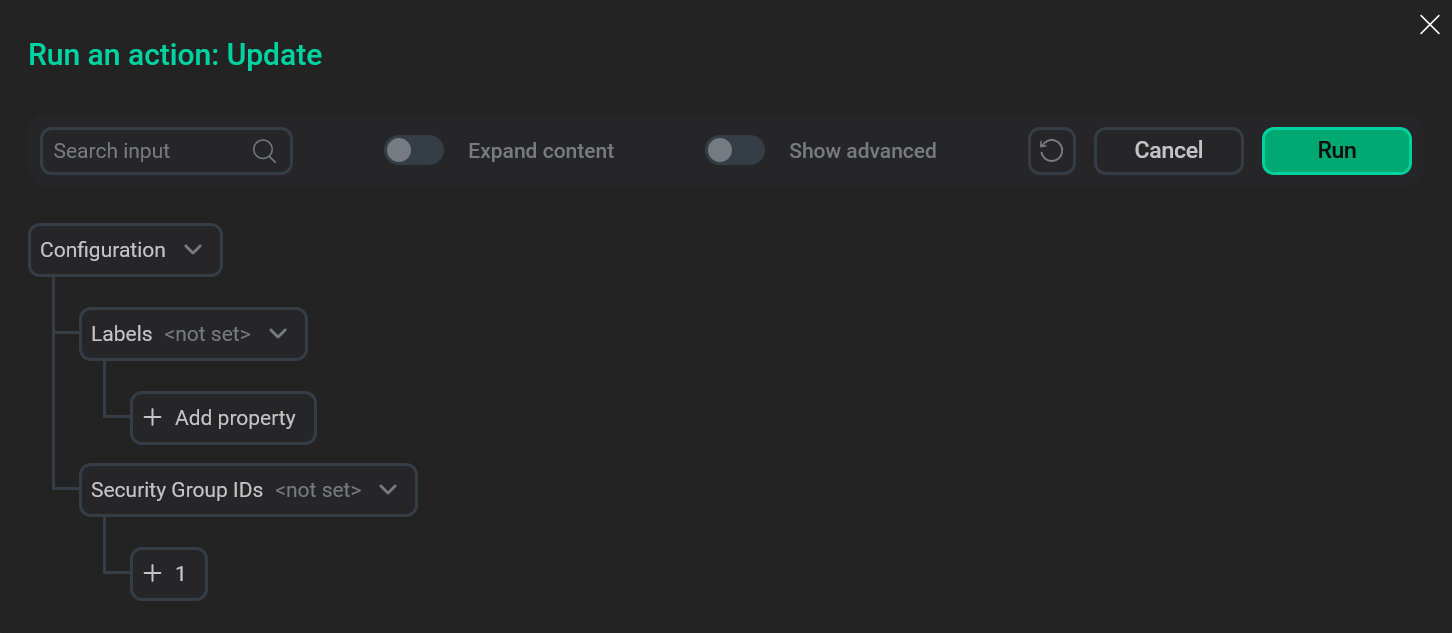
To run the Update action, click Run in the action form. Then, confirm the action in the standard confirmation dialog.