

Overview of the Clusters tab in the ADCM UI
After you upload a cluster bundle, you can install and manage clusters on the Clusters tab in the ADCM web interface via the cluster actions that are described below.
List of clusters
On the Clusters tab, you can see the list of created clusters in tabular form which contains information described below.

| Field | Description |
|---|---|
Name |
Name of the cluster specified during the cluster creation. The dot located next to the cluster name determines the cluster status. The green dot indicates that all cluster components and hosts work. The yellow one indicates that any of the components or hosts is stopped or is not available. If needed, it is possible to rename the cluster if it has the |
State |
Status of the cluster. The list of possible values depends on a product in use |
Product |
Product name |
Version |
Version of the cluster bundle used to install or upgrade the cluster |
Description |
|
Concerns |
One of the following icons:
A pop-up window with the error description appears when hovering over the |
Actions |
Icons for managing the cluster:
|
|
NOTE
The |
To sort the clusters alphabetically, click the ![]()
![]() (from Z to A) or
(from Z to A) or ![]()
![]() (from A to Z) icon in the Name column.
(from A to Z) icon in the Name column.
To search for a cluster in the list, enter its name in the Search cluster name field.
To filter clusters:
-
by status — select the required value from the drop-down list in the field next to Status;
-
by product name — select the required value from the drop-down list in the field next to Product.
To reset your filters, click the ![]()
![]() icon.
icon.
Change a name and description of a cluster
To change the name of a cluster that has the created status, follow these steps:
-
Hover over the cluster row.
-
Click the

 icon located in the Name column.
 -
In the dialog box, specify a new name for the cluster.
-
Click Save.
When renaming a cluster, make sure that a new name meets the following requirements:
-
Consists of 2—150 characters.
-
Begins with Latin uppercase [A-Z] or lowercase [a-z] letter or digit [0-9].
-
Contains only the following characters: Latin uppercase [A-Z] or lowercase [a-z] letters, digits [0–9], period [.], hyphen [-], or underscore [_].
-
Does not end with a space, period [.], hyphen [-], or underscore [_].
To change the cluster description, follow these steps:
-
Hover over the cluster row.
-
Click the
icon located in the Description column. -
In the dialog box, specify a new description for the cluster. Note that a cluster description should not exceed 256 characters.
-
Click Save.
Changing the cluster description is also available on the cluster page in the Description section.
Operations with a cluster
ADCM allows you to install and manage clusters. The installation process includes the following steps:
-
Create a cluster.
-
Add services.
-
Add hosts to a cluster.
-
Map components to hosts.
-
Configure services.
-
Configure a cluster.
-
Launch actions.
-
Upgrade a cluster.
To install a new cluster, see the following Get started guides, depending on the product in use:
After you install the cluster, you can manage it on the Clusters tab. Click the ![]()
![]() icon in the Actions column to select one of the available cluster actions.
icon in the Actions column to select one of the available cluster actions.
For more information on actions for each product cluster, refer to the following links:
When you choose an action, ADCM displays a standard dialog box.
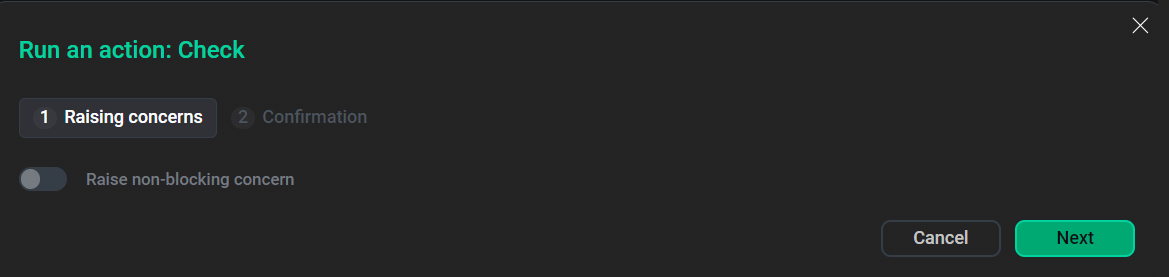
In this dialog box, you can run the action without blocking the object if necessary, add a comment with a brief description of changes, and select the Verbose checkbox to see additional execution details on the Jobs page.
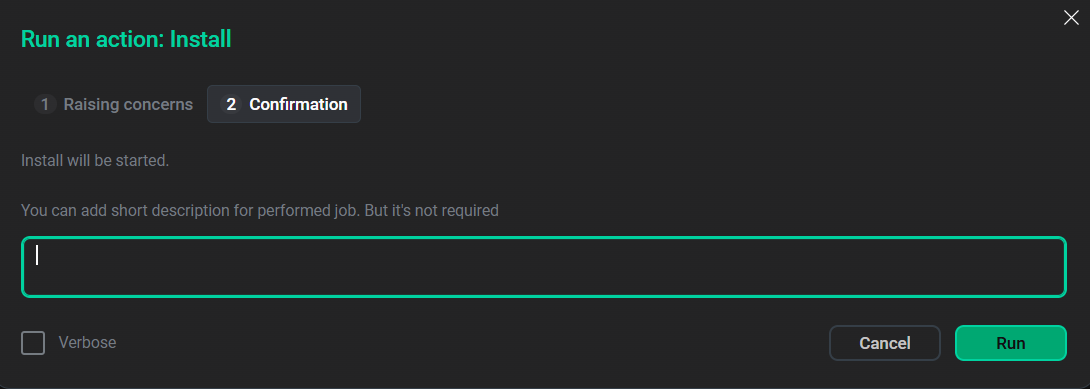
For some actions, you should first fill in additional options on a separate tab.
Cluster details
To get detailed information about the cluster, click on the cluster name in the Name column of the table located on the Clusters tab.
The cluster page includes multiply tabs, each of which is described in detail below. For more examples of tabs, see the Get started guides for each product.
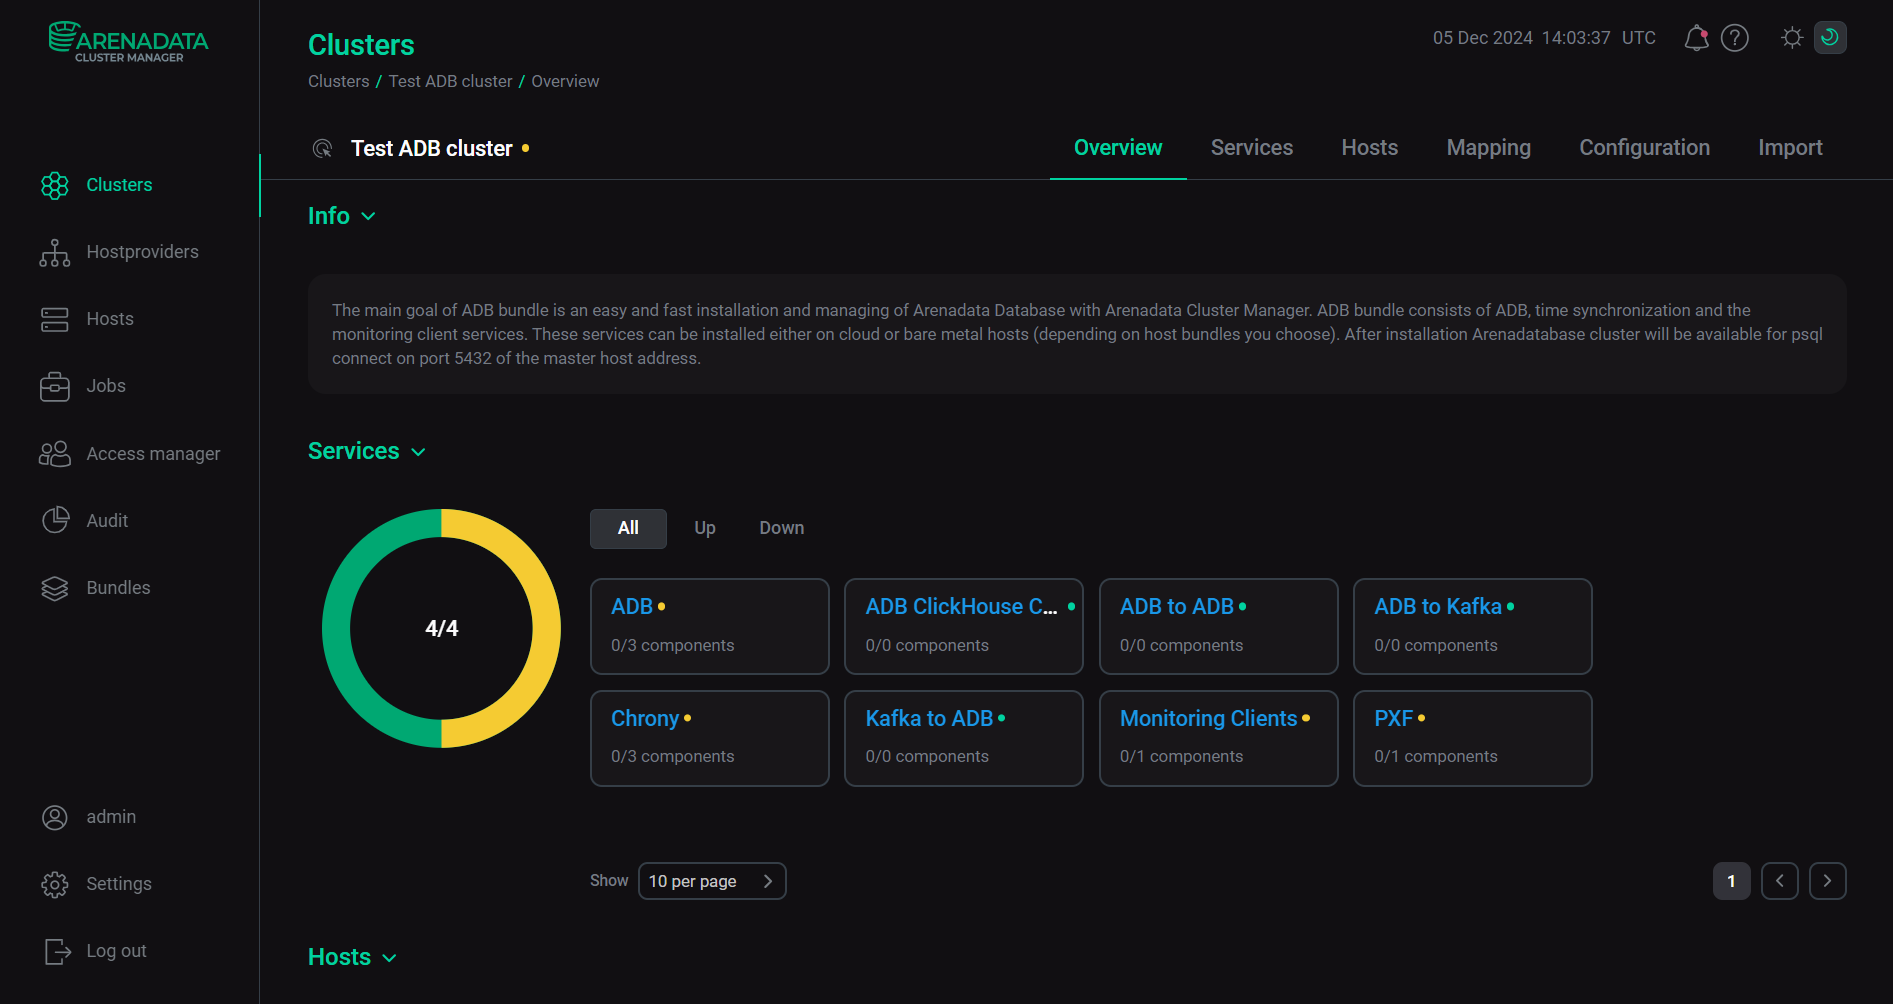
Overview
The Overview tab on a cluster page displays detailed information on the selected cluster. The tab consists of three sections:
-
Description
-
Info
-
Services
-
Hosts
To collapse the section content, click the ![]()
![]() icon.
icon.
The Description section contains a description of the cluster. If necessary, it is possible to change the cluster description.
|
NOTE
The Description section is available starting with ADCM 2.8.0.
|
The Info section displays general information on the purpose and composition of the cluster bundle.
The Services section displays information on the cluster services and includes the circle diagram and the following tabs:
-
All — all services added to the cluster;
-
Up — operational cluster services;
-
Down — inactive cluster services.
|
NOTE
The health of an object in ADCM is determined by its state.
|
For example, to view services that can also work properly, but their status is not transferred from hosts to ADCM, switch to the Down tab. To open the Components tab of the <Cluster name> → Services page, click the service name.
The circle diagram shows the ratio between services in the Up status and services in the Down status.
The Hosts section displays information on the cluster hosts and includes the circle diagram with the following tabs:
-
All — all hosts added to the cluster;
-
Up — hosts that regularly send heartbeats;
-
Down — hosts that do not send heartbeats.
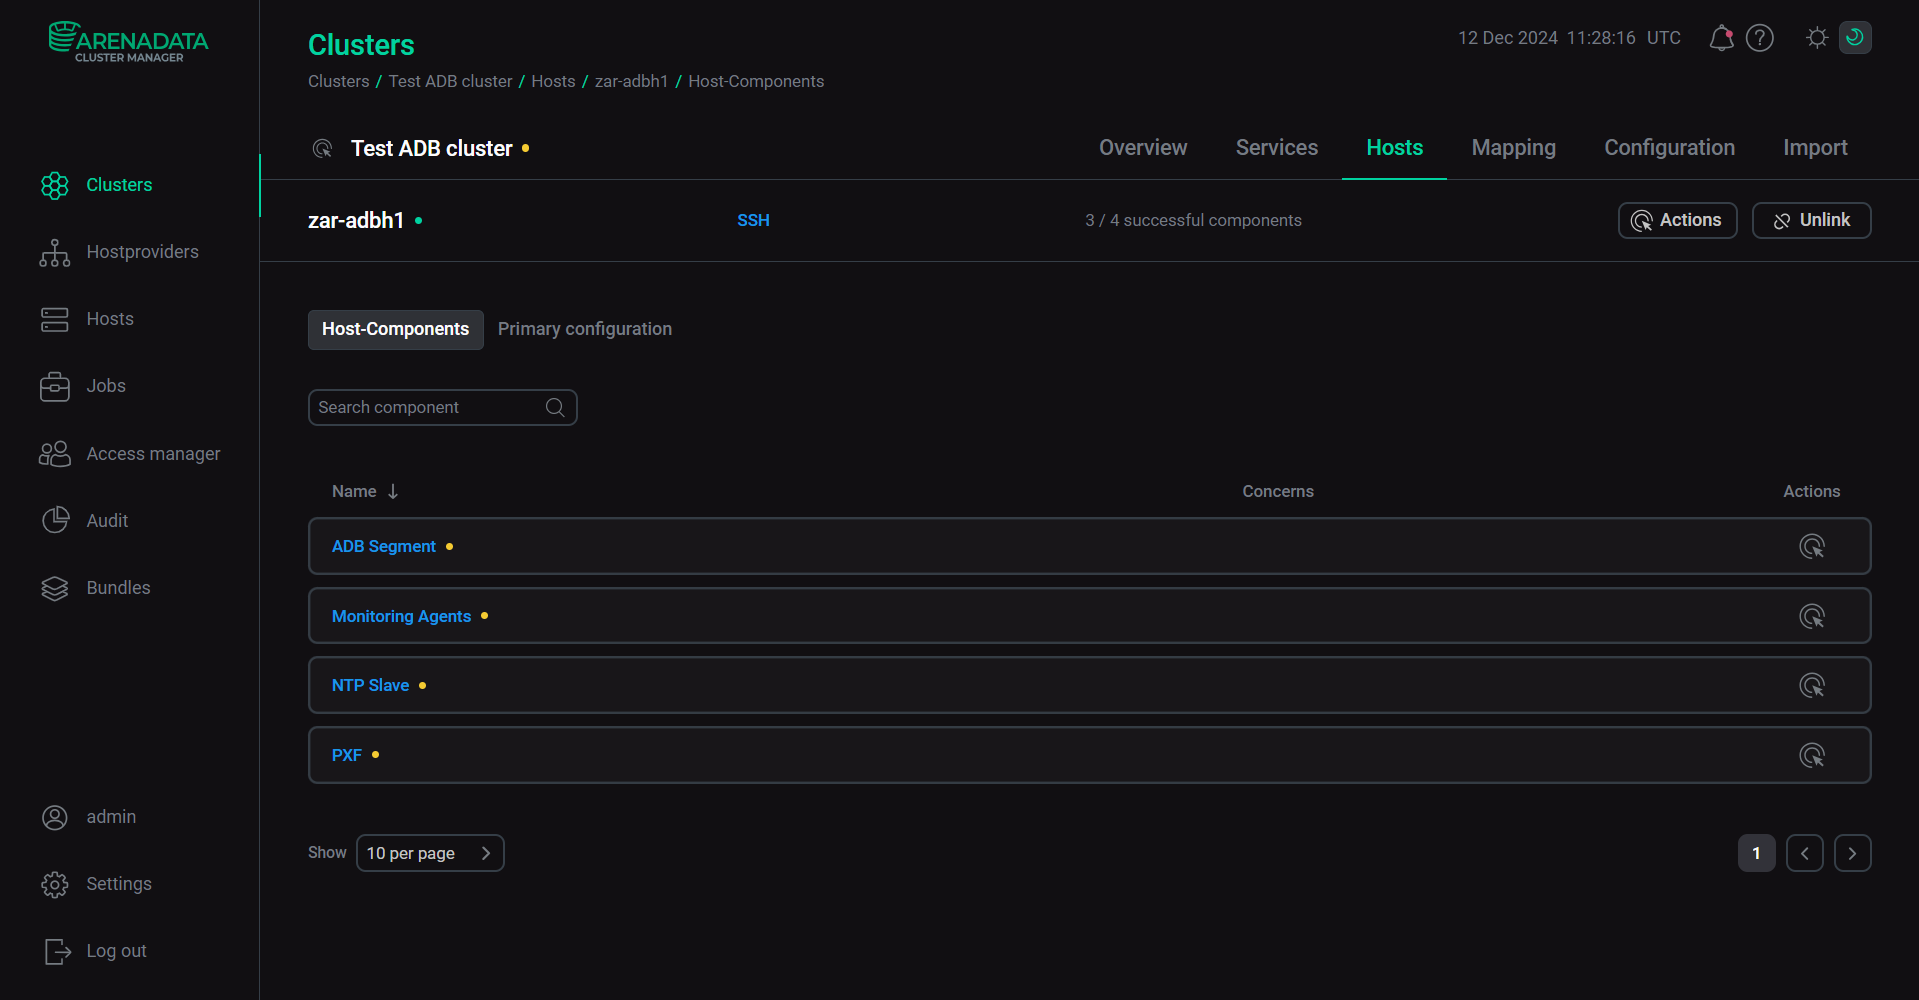
The Host-Components tab of the <Cluster name> → Hosts page opens by clicking the host name.
Services
The Services tab on a cluster page contains information on services added to a cluster.
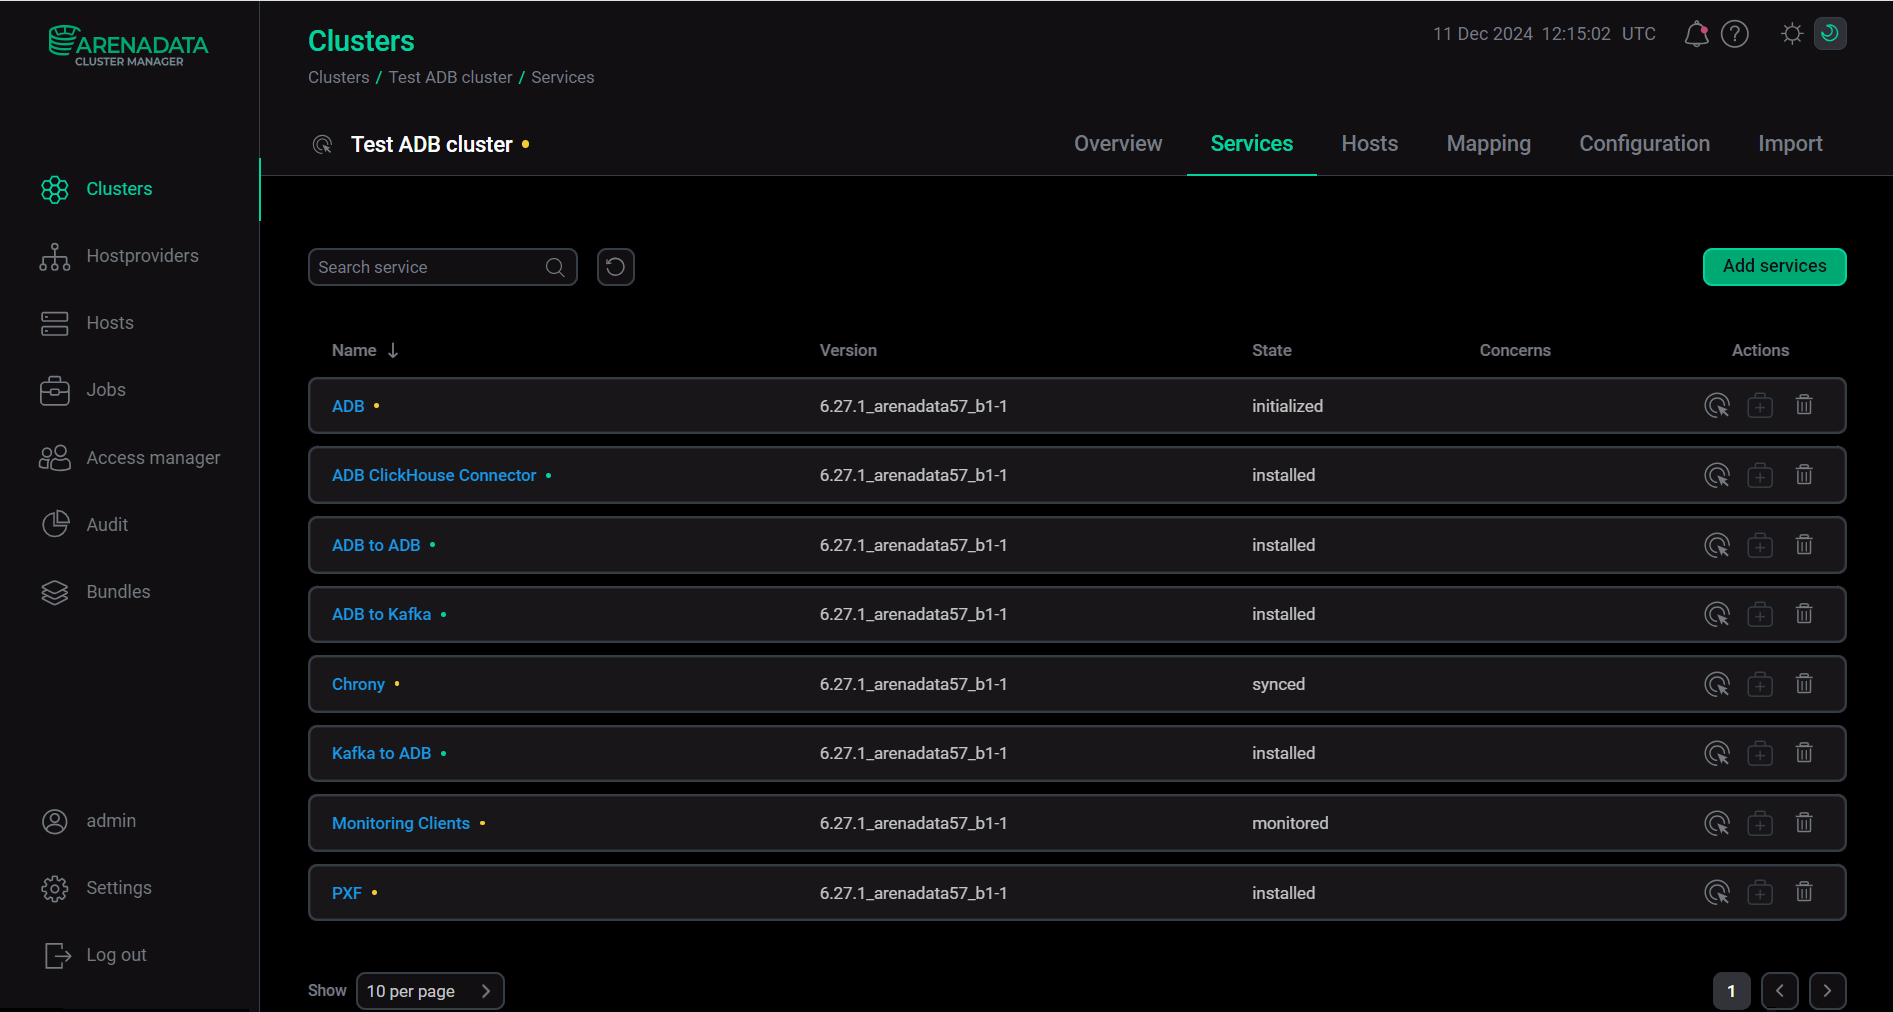
| Field | Description |
|---|---|
Name |
Name of the service |
Version |
Version of the cluster bundle used to install or upgrade the cluster |
State |
Current state of the service (for example, |
Concerns |
One of the following icons:
A pop-up window with the error description appears when hovering over the |
Actions |
Icons for managing the service:
|
For more information on the service actions, refer to the following links, depending on the product in use:
To sort the services alphabetically, click the ![]()
![]() (from Z to A) or
(from Z to A) or ![]()
![]() (from A to Z) icon in the Name column.
(from A to Z) icon in the Name column.
To search for a service in the list, enter its name in the Search service field.
To reset your filters, click the ![]()
![]() icon.
icon.
To add a service to a cluster, follow these steps:
-
On the cluster page, open the Services tab.
-
On the page that opens, click Add services.
-
For further action, see the Add services article of the corresponding Get started guide mentioned above.
To get detailed information about the service, click on the service name in the Name column of the table located on the Services tab of a cluster page.
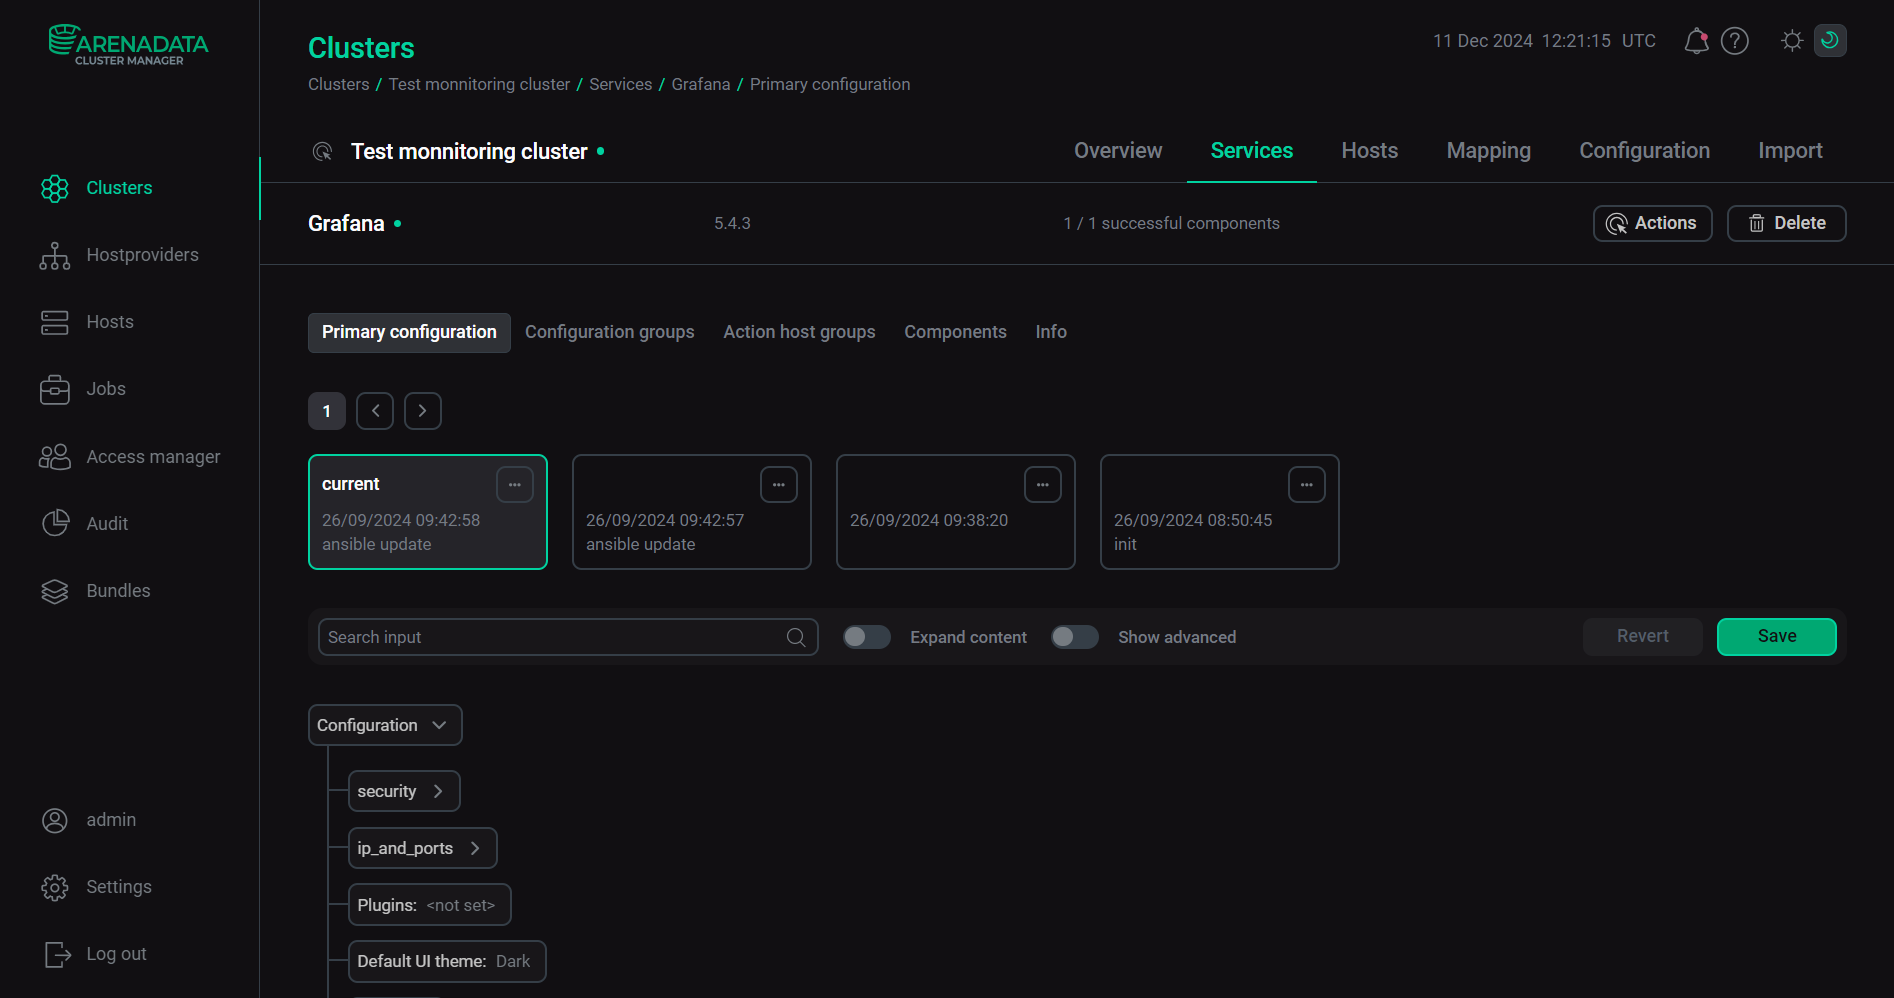
At the top of the service page, the following is displayed:
-
service name with the service status;
-
service version;
-
ratio of components in the
Upstatus to the total number of the service components; -
buttons Actions and Delete.
Also, this page includes the following tabs:
-
Primary configuration — allows you to configure the general service settings. The tab description and information about working with configuration parameters are given in the Configuration parameters in the ADCM UI article.
-
Configuration groups — allows you to set up service configuration groups. For more information, refer to the article Set up configuration groups.
-
Action host groups — enables you to create and manage host groups to run actions allowed for the service separately for each group of hosts. For more information, refer to the article Set up host groups for actions.
-
Components — allows you to work with the service components. The tab description is given below. The example of the ADS components configuration is described in the Configure services article of the Get started guide.
-
Info — displays general information on the purpose of the selected service.
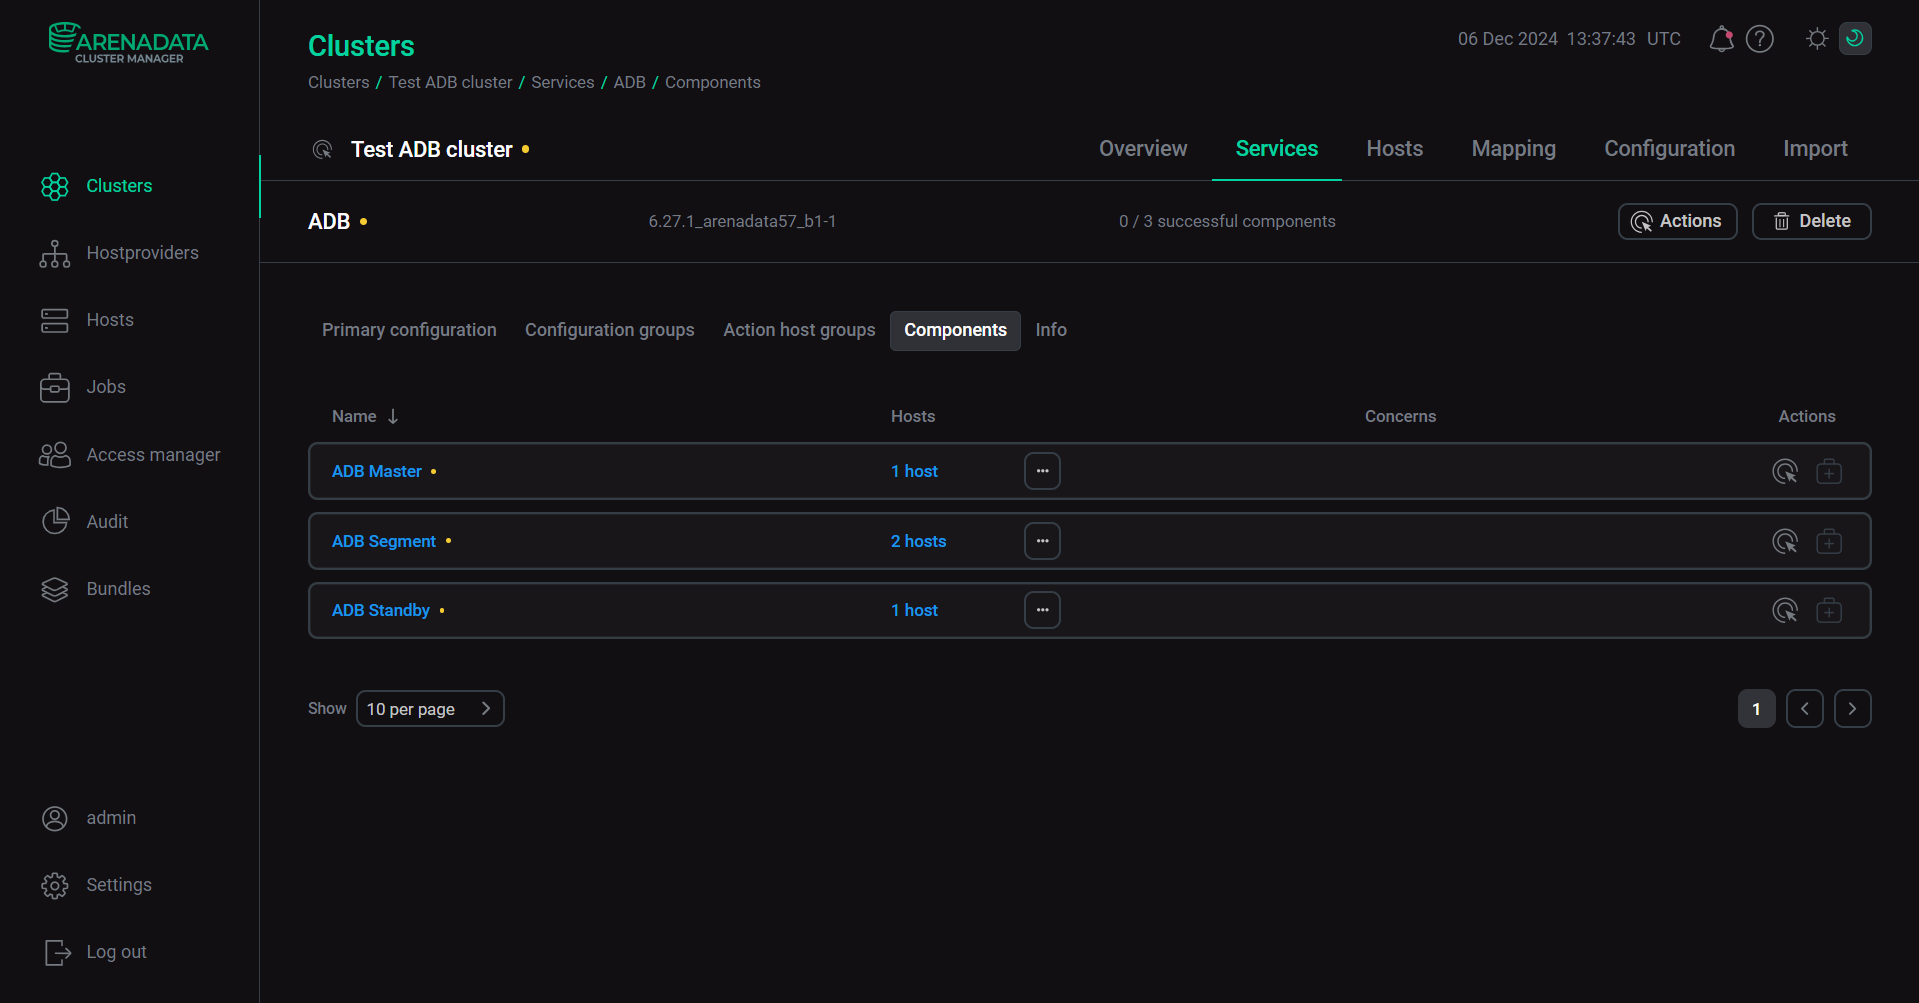
Components
The Components tab on the <Cluster name> → Services → <Service name> page contains information on the service components.
| Field | Description |
|---|---|
Name |
Name of the component that contains a link to the Primary configuration tab of the <Cluster name> → Services → <Service name> → Components page |
Hosts |
Number of hosts assigned for the component that contains a link to the Hosts tab |
Concerns |
One of the following icons:
A pop-up window with the error description appears when hovering over the |
Actions |
Icons for managing the component:
|
To sort components alphabetically, click the ![]()
![]() (from Z to A) or
(from Z to A) or ![]()
![]() (from A to Z) icon in the Name column.
(from A to Z) icon in the Name column.
To expand or collapse the list of hosts assigned for the component under the component row, click the ![]()
![]() or
or ![]()
![]() icon respectively.
icon respectively.
Hosts
The Hosts tab on the cluster page contains information on hosts added to a cluster.

| Field | Description |
|---|---|
Name |
Name of the host that contains a link to the Host-Components tab of the <Cluster name> → Hosts → <Host name> page |
State |
Current state of the host (for example, |
Hostprovider |
Name of the hostprovider used to create the host that contains a link to the Primary configuration tab of the hostprovider page |
Components |
Number of components added to the host that contains a link to the Host-Components tab of the <Cluster name> → Hosts → <Host name> page |
Concerns |
One of the following icons:
A pop-up window with the error description appears when hovering over the |
Actions |
Icons for managing the host:
|
For more information on actions for hosts based on different hostprovider types, refer to the Operations with host section.
To sort the hosts alphabetically, click the ![]()
![]() (from Z to A) or
(from Z to A) or ![]()
![]() (from A to Z) icon in the Name column.
(from A to Z) icon in the Name column.
To search for a host in the list, enter its name in the Search hostname field.
To filter hosts:
-
by hostprovider name — select the required value from the drop-down list in the field next to Hostprovider;
-
by component name — select the required value from the drop-down list in the field next to Component.
To reset your filters, click the ![]()
![]() icon.
icon.
To add one or more hosts to a cluster, follow these steps:
-
On the cluster page, open the Hosts tab.
-
On the page that opens, click Add hosts.
-
In the opened dialog box, select one or more hosts that should be added to the cluster and click Add.
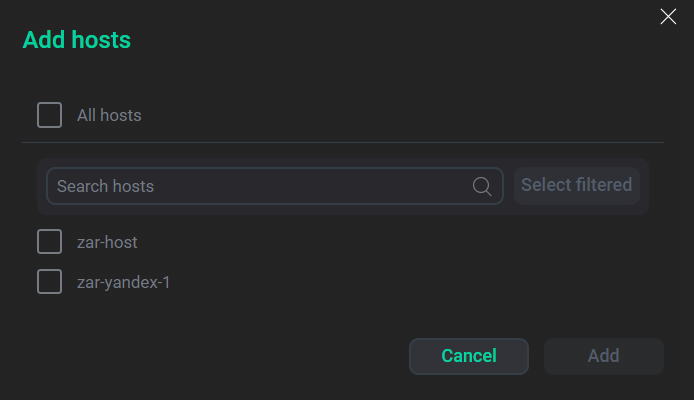 The Add hosts dialog box
As a result, the added hosts are displayed on the Hosts tab.
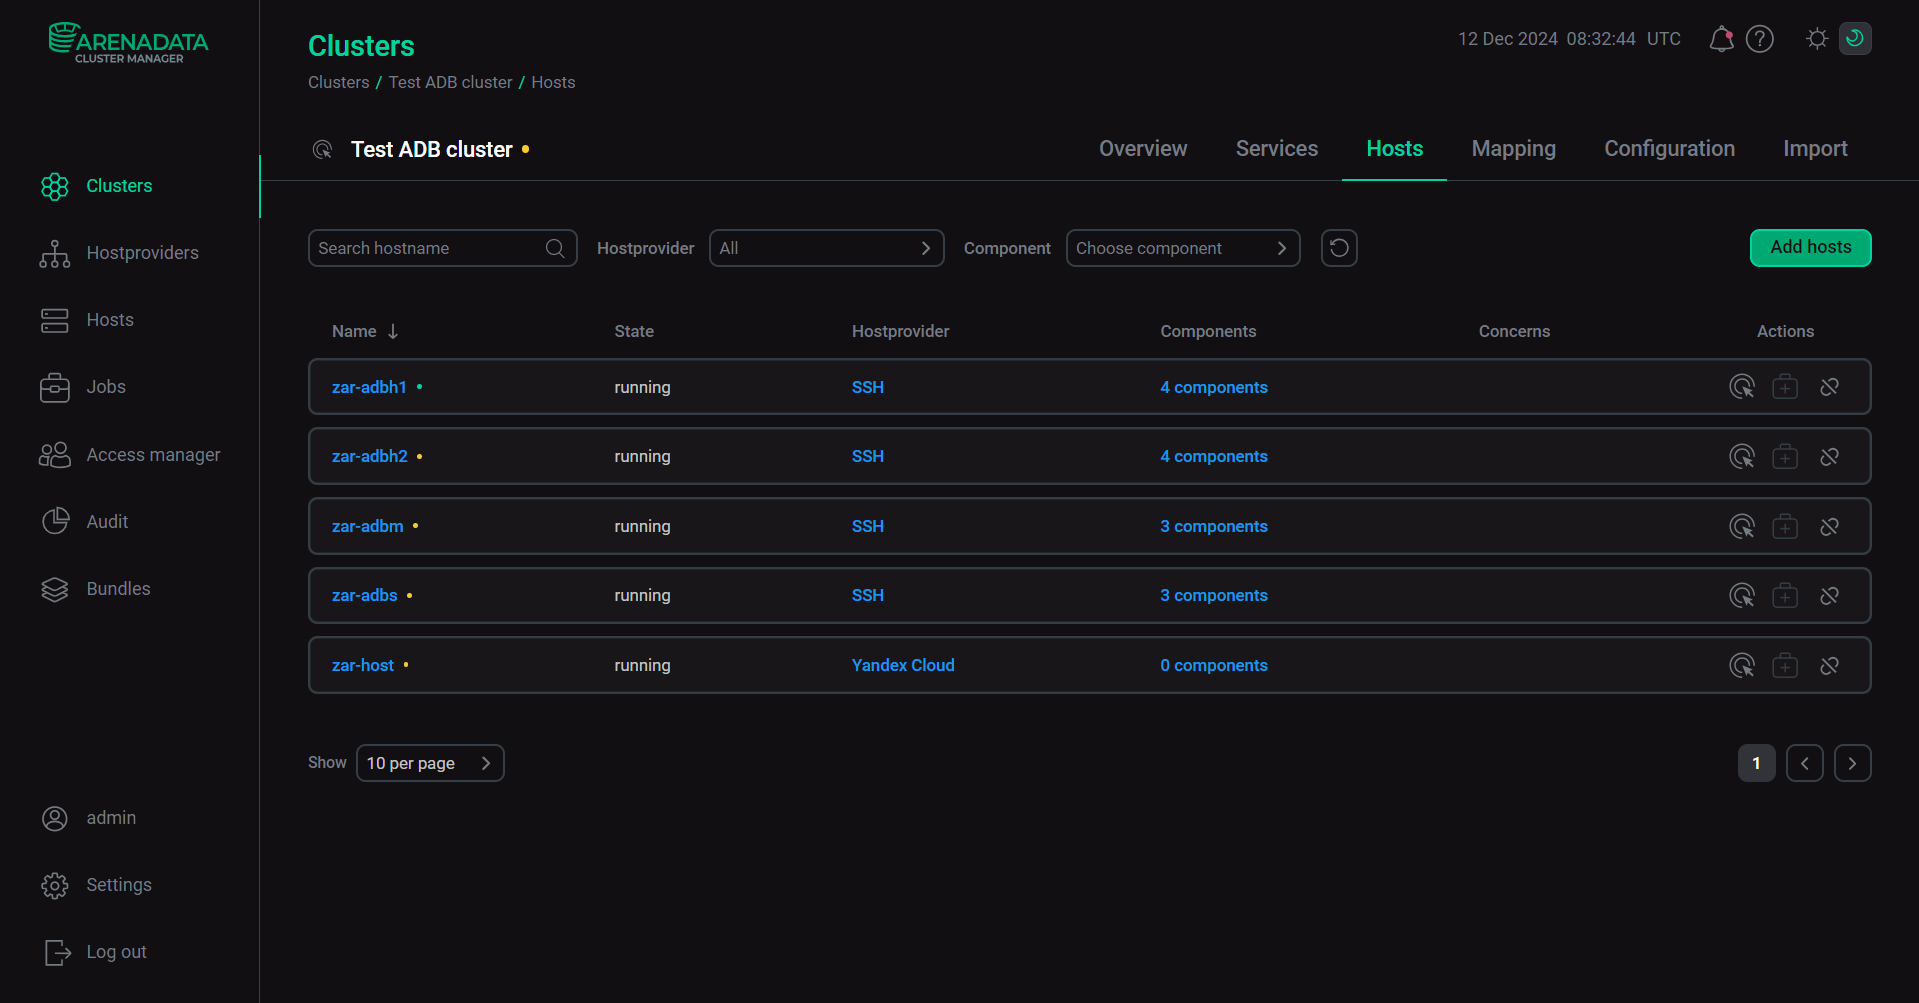 The Hosts tab with added host
To get detailed information about the host, click on the host name in the Name column of the table located on the Hosts tab of a cluster page. The Host-Components tab of the <Cluster name> → Hosts → <Host name> page is opened.
For more information about the host page, refer to the Host details section.
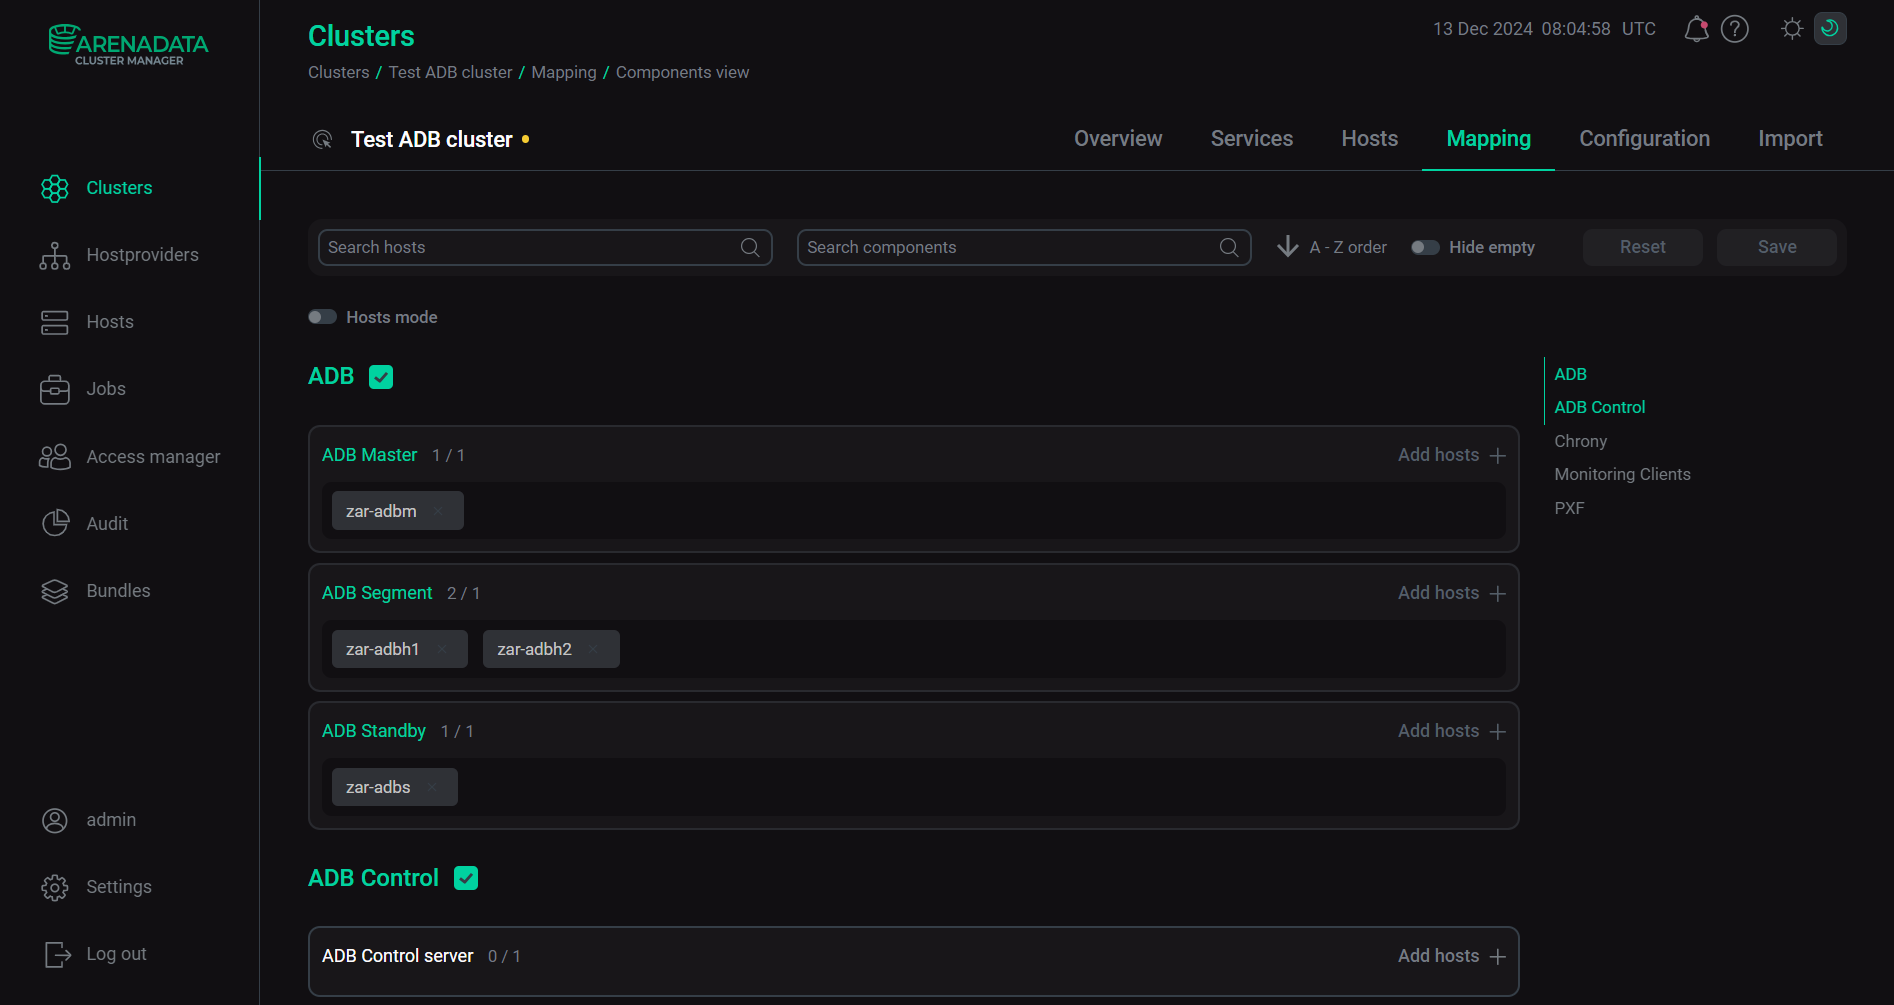
Mapping
The Mapping tab on a cluster page allows you to allocate components among hosts.
For more information on how to allocate components among hosts, see the Add components article of the corresponding Get started guide mentioned above.
To search for a host or component in the list, enter the host or component name in the Search hosts or the Search components field respectively.
To sort components or hosts (depending on the allocation mode selected in the Hosts mode field):
-
in ascending (from A to Z) alphabetical order, click the

 icon next to A-Z order.
 -
in descending (from Z to A) alphabetical order, click the

 icon next to A-Z order.
To hide components without assigned hosts or hosts that do not contain components, switch on the Hide empty toggle.
To save changes in allocating components among hosts, click Save. To revert changes, click Reset.
To select the other way of allocating components among hosts, switch on the Hosts mode toggle.
Configuration
The Configuration tab on a cluster page is designed to configure the cluster after its creation.
This page includes the following tabs:
-
Primary configuration — allows you to configure the general cluster settings. For more information on configuration parameters, refer to the Configure a cluster article of the Get started guide, depending on the product in use.
-
Configuration groups — allows you to set up cluster configuration groups.
-
Ansible settings — allows you to set up Ansible configuration options at the cluster level. The tab is available starting with ADCM 2.2.0. The tab content controls are the same as for the Primary configuration tab. For detailed information on how to work with configuration parameters, see Configuration parameters in the ADCM UI.
-
Action host groups — enables you to set up host groups to run actions allowed for the cluster separately for each group of hosts.
The Primary configuration, Configuration groups, and Action host groups are completely identical to tabs of a service page described above.
Import
The Import tab on a cluster page allows you to import the following settings:
-
settings of other clusters or services from other clusters to the current cluster (the Cluster section);
-
settings of other clusters or services from other clusters to a service of the current cluster from the drop-down list (the Services section).
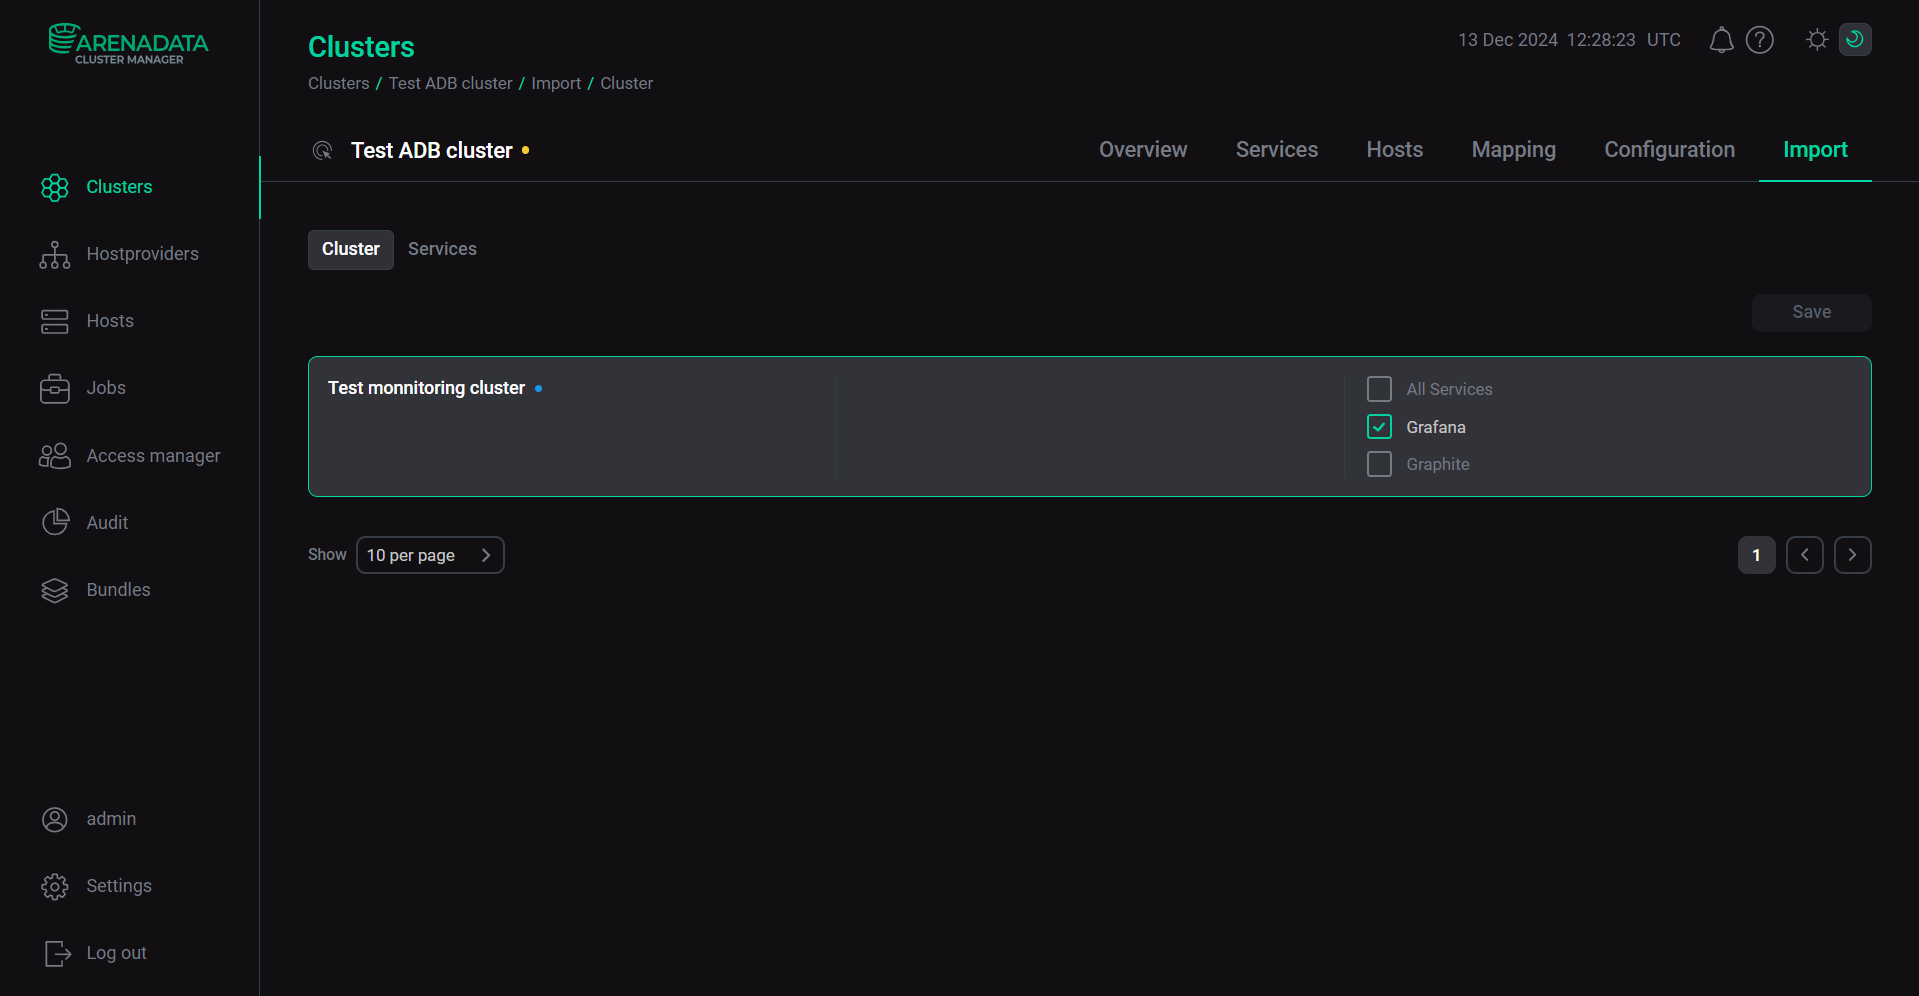
For an example of how to import settings of the monitoring cluster services to the ADS cluster, see Import/export of services.
To save import changes, click Save. The following message will be displayed: Imported objects have been updated.