

Overview of the Bundles tab in the ADCM UI
The Bundles tab in the ADCM web interface allows you to view the uploaded bundles that are used to create clusters and to add hostproviders according to the bundle type.
List of bundles
On the Bundles tab, you can see the list of uploaded bundles in tabular form which contains information described below.
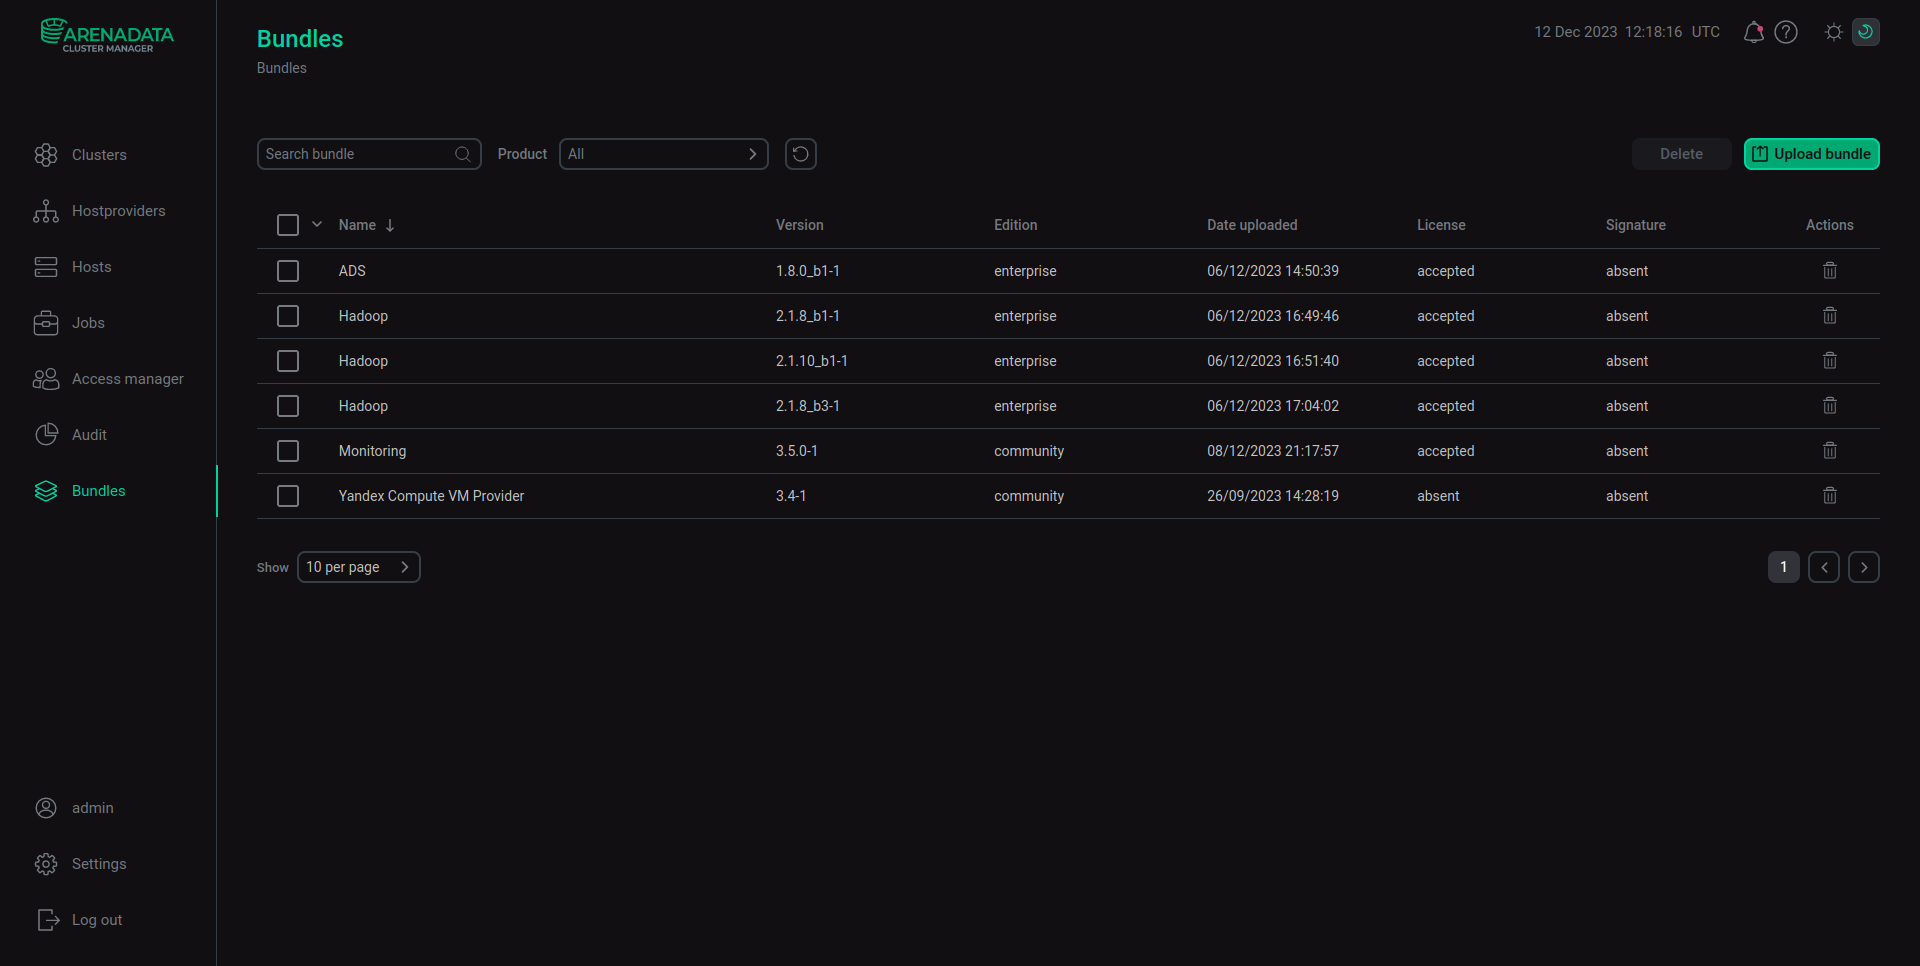
| Field | Description |
|---|---|
Product |
Name of the object (cluster or hostprovider depending on the bundle type) |
Version |
Version of the uploaded bundle |
Edition |
Edition of the object. Possible values:
|
Date uploaded |
Bundle uploading time in the |
License |
Status of the license agreement. Possible values:
|
Signature |
Status of the bundle signature. Possible values:
|
Actions |
Icons for the bundle management. In the current implementation, the |
To sort the bundles alphabetically, click the ![]()
![]() (from Z to A) or
(from Z to A) or ![]()
![]() (from A to Z) icon in the Product column.
(from A to Z) icon in the Product column.
To filter bundles by the object name, select the required value from the drop-down list in the field next to Product. To reset your filters, click the ![]()
![]() icon.
icon.
Operations with a bundle
ADCM allows you to manage bundles using operations described below.
To upload a new bundle, follow these steps:
-
Open the Bundles tab.
-
On the page that opens, click Upload bundle.
-
For further action, refer to the Upload a bundle to ADCM article.
To remove an uploaded bundle from ADCM, follow these steps:
-
Open the Bundles tab.
-
On the page that opens, select the checkbox next to the desired bundle and click Delete.
|
NOTE
The delete option is also available on the bundle page. To delete several bundles at once, select checkboxes next to desired bundles and click Delete.
|
Bundle details
To get detailed information about a bundle, click on the bundle name in the Name column of the table located on the Bundles tab.
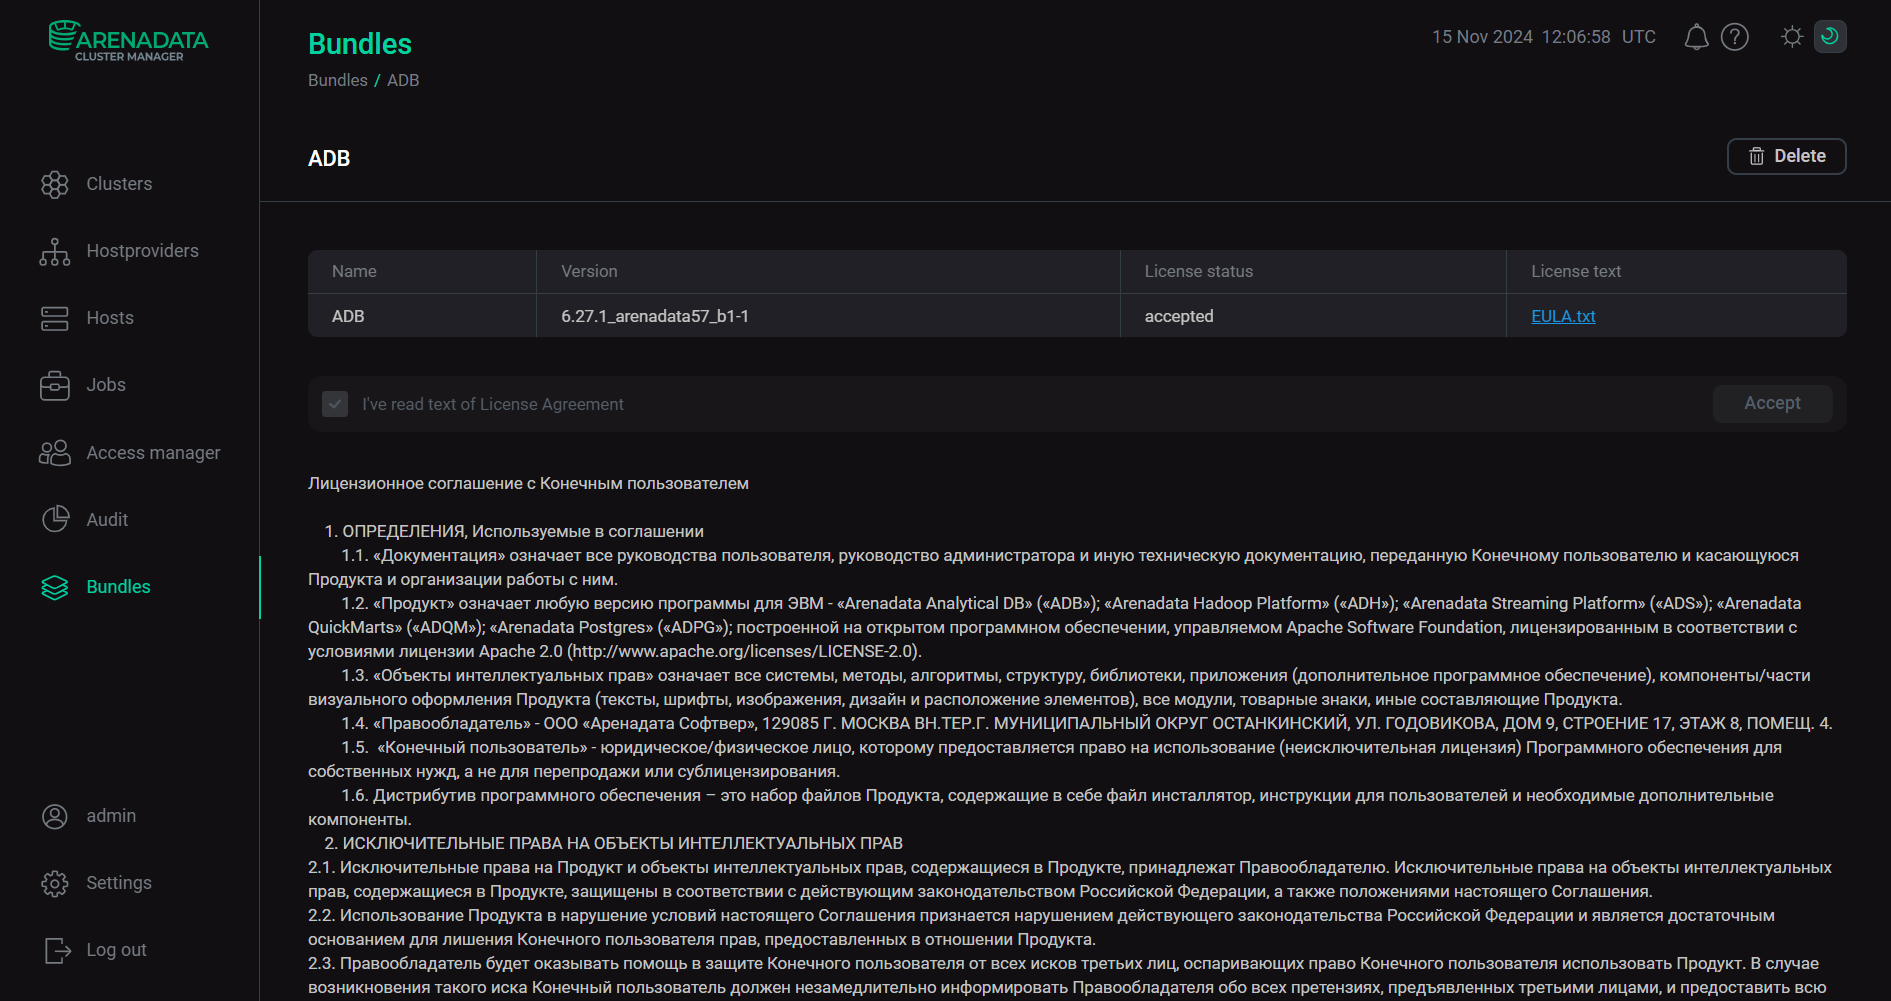
| Field | Description |
|---|---|
Product |
Name of the object. For the detailed description of this field, see Fields of the Bundles tab |
Version |
Version of the uploaded bundle |
License status |
Status of the license agreement. For the detailed description of this field, see Fields of the Bundles tab |
License text |
File of the license agreement in the TXT format |
To accept the license agreement, carefully read the terms of the agreement, select the checkbox next to I’ve read text of License Agreement, and click Accept.
|
NOTE
Signing the license agreement is necessary to create a cluster or a hostprovider.
|
To download the license agreement file, click on its name in the License text column.