
Integration with the bundle
When a new bundle is loaded into ADCM, information about the prototypes is added based on the description specified in the bundle when it was developed. The following sections describe the process of integrating ADCM and the new bundle.
Load the bundle
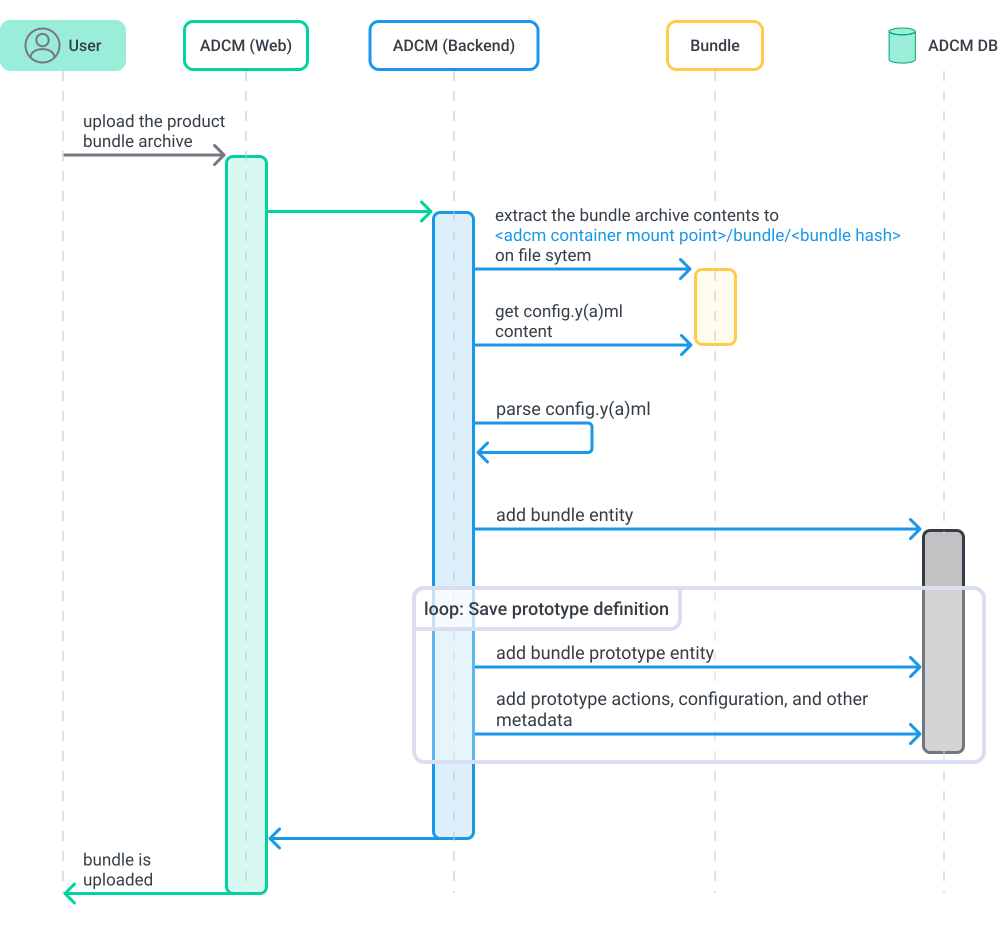
When the bundle is loaded into ADCM, the Backend Server receives a request that triggers the process described below.
All bundle files are unpacked and put into the file system (<adcm container mount point>/bundle/<bundle hash>). Each bundle is unpacked to its corresponding directory and has a unique hash. This allows playbooks and roles of different products not to be mixed up — each playbook is stored inside its corresponding bundle.
After unpacking the bundle, ADCM parses a special file called config.yaml or config.yml. This file can be located in any directory of the bundle. There may be multiple config.yaml files, in which case ADCM finds all files with those names in the bundle.
After searching for the config.yaml files, each of them undergoes processing. This processing involves creating prototype entities in ADCM based on the descriptions contained in these files. This is how metadata about ADCM objects is created. Backend Server interacts with Database: all the described prototypes, their actions, configurations, and other related information are written into Database.
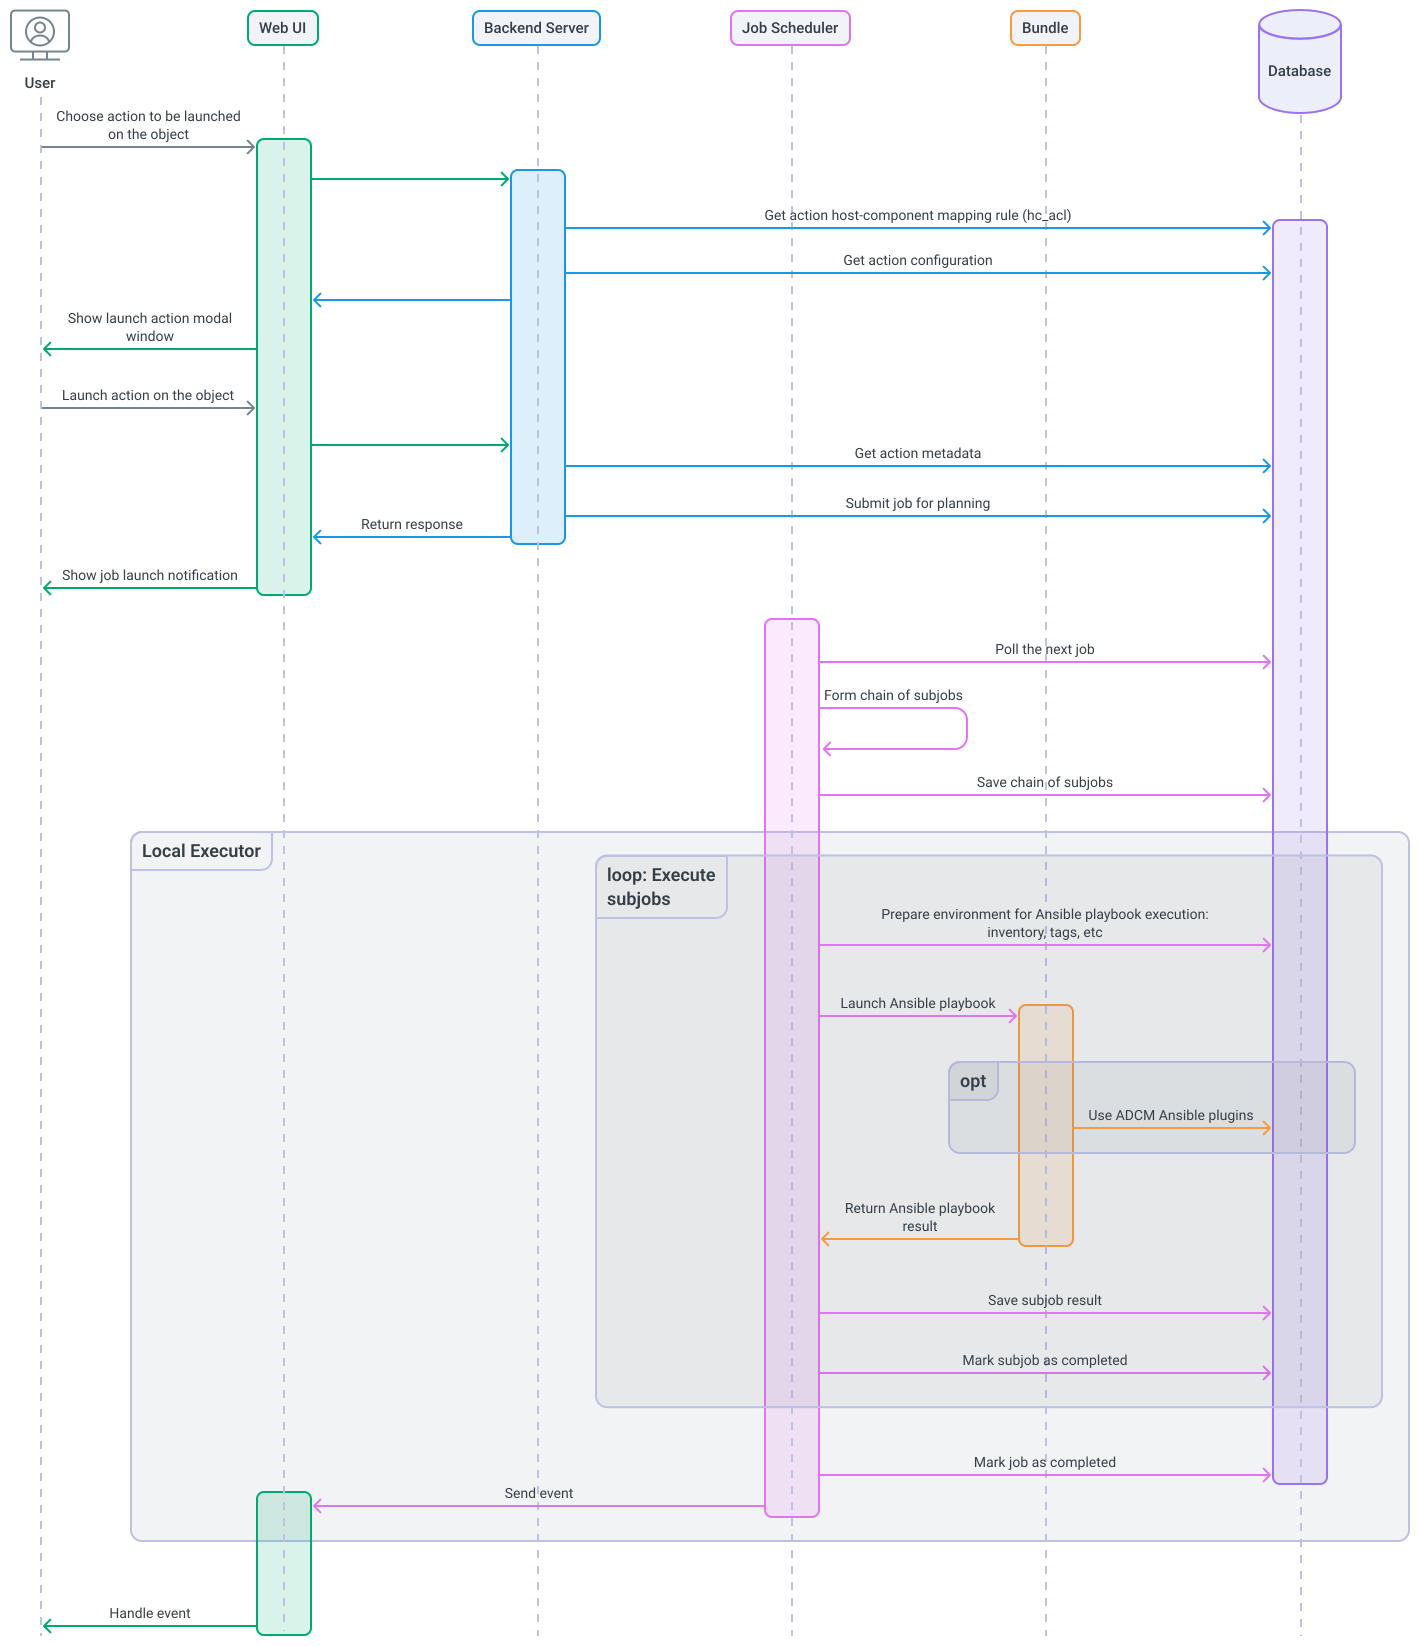
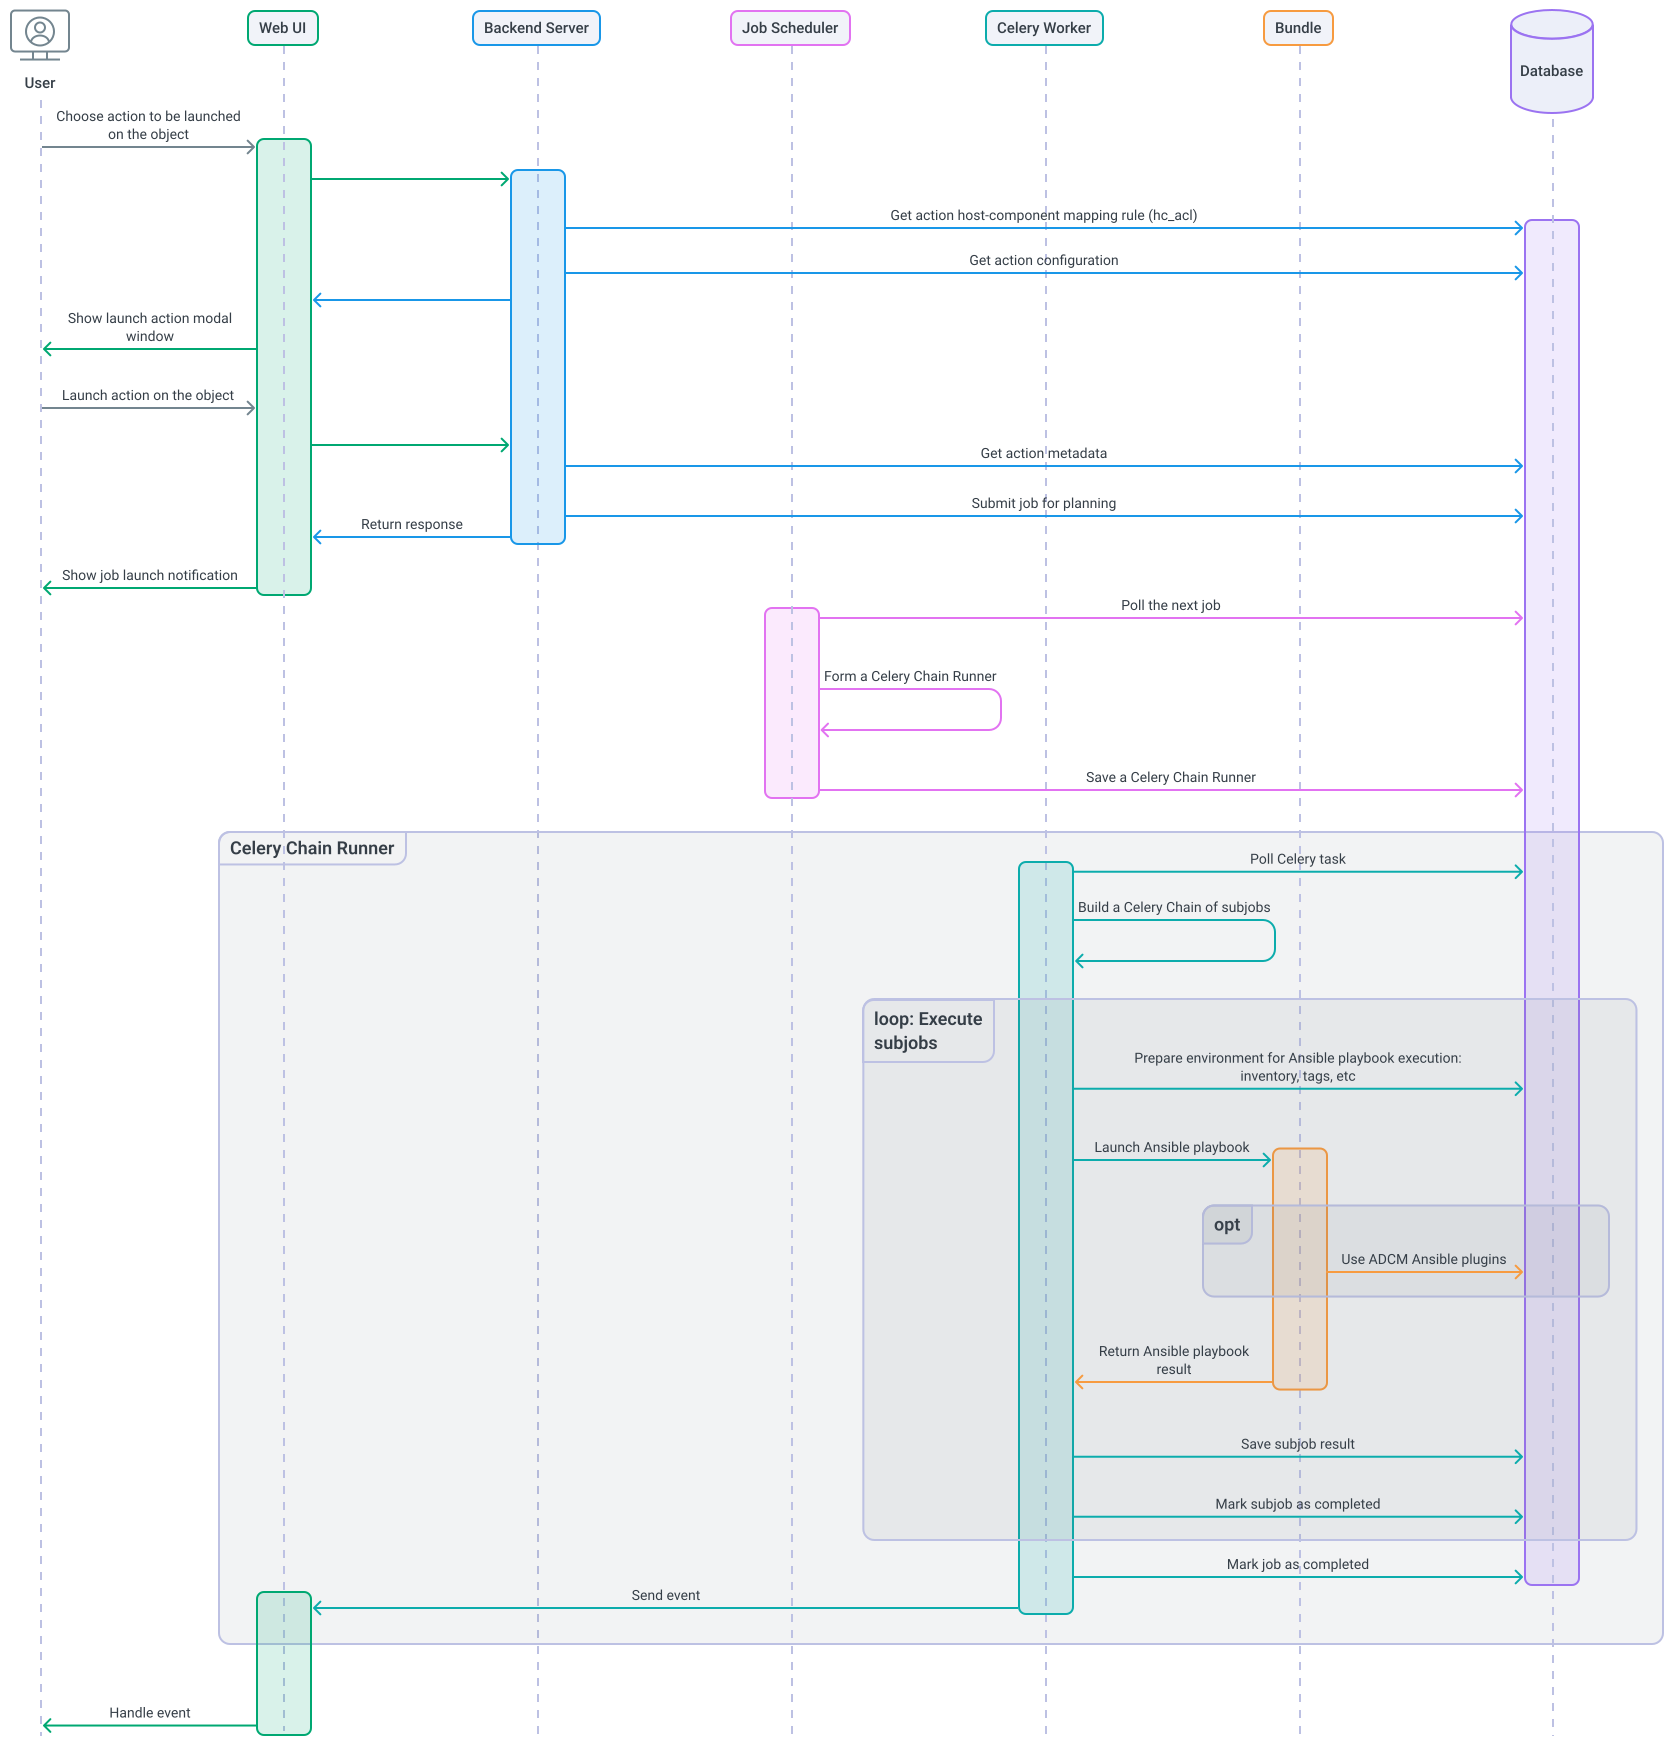
Launch an action
Prepare the launch
After receiving an action launch request, Backend Server retrieves the metadata required to prepare the launch from Database:
-
host-component mapping rules (hc_acl);
-
action configuration (config or config_template) if additional parameters must be requested from the user before the action is launched.
Backend Server returns the retrieved metadata to Web UI, which uses it to generate the appropriate user input forms.
Once the launch is confirmed, Web UI forwards the request to Backend Server. Backend Server retrieves the action metadata from Database, creates a job and saves it to Database for subsequent processing, then returns a response to Web UI, which displays a job start notification to the user.
Plan the subjob chain
Job Scheduler periodically polls Database for new jobs. Depending on the ADCM components in use, subjob chain planning and scheduling follow one of two scenarios:
-
Using Local Executor: Job Scheduler creates a chain of subjobs in Database and initiates their execution via Local Executor.
-
Using Celery Worker: Job Scheduler creates an internal Celery Chain Runner object and stores it in Database. Celery Worker retrieves this object and uses it to build a chain of Celery tasks that ensures sequential execution of the subjobs.
NOTECelery Chain Runner is an internal ADCM mechanism that converts a job into a chain of Celery tasks to ensure sequential execution of subjobs by Celery Worker instances.
Execute subjobs
For each subjob, the standard sequence of operations is performed:
-
The environment to run the Ansible playbook is prepared. It includes generating the inventory file, tags, and other parameters. When Celery Worker is used, Vault also provides the required tokens and sensitive data at this stage.
-
The Ansible playbook specified in the script property of the corresponding action is run. The playbook is launched inside the bundle directory as a separate process in UNIX terminology. Within this process environment, the Ansible playbook uses ADCM modules and plugins for Ansible.
-
The Ansible playbook execution result received from Bundle is saved to Database, after which the subjob is marked as completed.
After the entire subjob chain is completed, the job execution is considered complete. Status Server records the job status change and sends the corresponding event to Web UI over the WebSocket protocol.