

Add Yandex Compute VM hostprovider
This topic shows how to add the Yandex Compute VM hostprovider, which allows to create multiple virtual machines in the Yandex.Cloud.
Before adding the Yandex Compute VM hostprovider, make sure that:
-
The Folder exists in the Yandex.Cloud.
-
The subnet is created in the Yandex.Cloud.
-
ADCM can establish the connection to the specified subnet in the Yandex.Cloud.
-
The user that creates the virtual machine has all necessary rights.
If automatic Red Hat registration is required for virtual machines using RHEL, you should have:
-
A subscription to Red Hat services and the corresponding organization ID.
-
A configured Red Hat activation key.
In comparison with the Yandex.Cloud console, the Yandex Compute VM hostprovider does not support configuring:
-
Static IP addresses.
-
DDoS protection.
-
Additional network adapters.
A typical installation sequence for the Yandex Compute VM hostprovider includes the following steps.
Step 1. Download a hostprovider bundle
Hostprovider distributions for ADCM come in bundles. Regarding the Yandex Compute VM hostprovider, a bundle is a regular archive that includes a description and logic to interact with the Yandex.Cloud.
The steps for downloading a bundle are given below:
-
Go to the Arenadata Cluster Manager product website and click Download.
 Switch to the Arenadata Cluster Manager download page
Another way — go to https://network.arenadata.io/ and select Arenadata Cluster Manager.
-
In the list of ADCM releases that opens, click Download for the ADCM version that you need.
-
On the next page, download a required bundle. Yandex Compute VM hostprovider bundles are called Yandex Compute VM Provider Bundle.
Step 2. Upload a hostprovider bundle to ADCM
To upload a bundle to ADCM, follow the steps:
-
Select the Bundles item in the left navigation menu and click Upload bundle.
-
Select a bundle in the Open File Dialog.
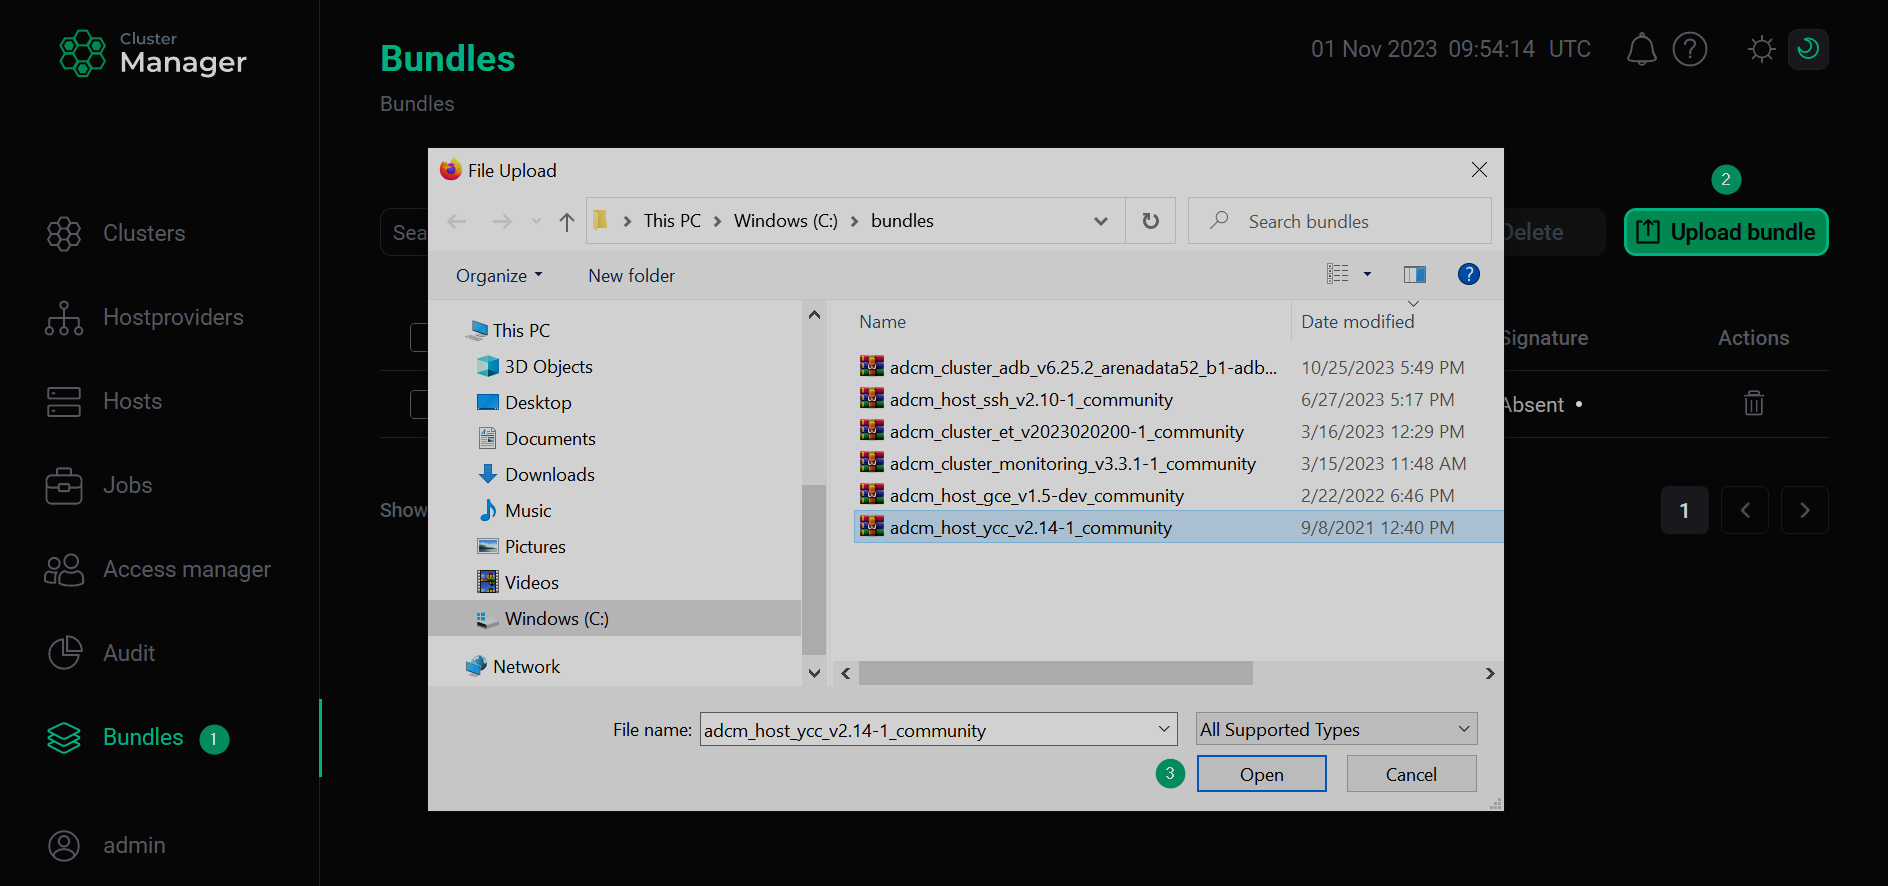 Upload a bundle
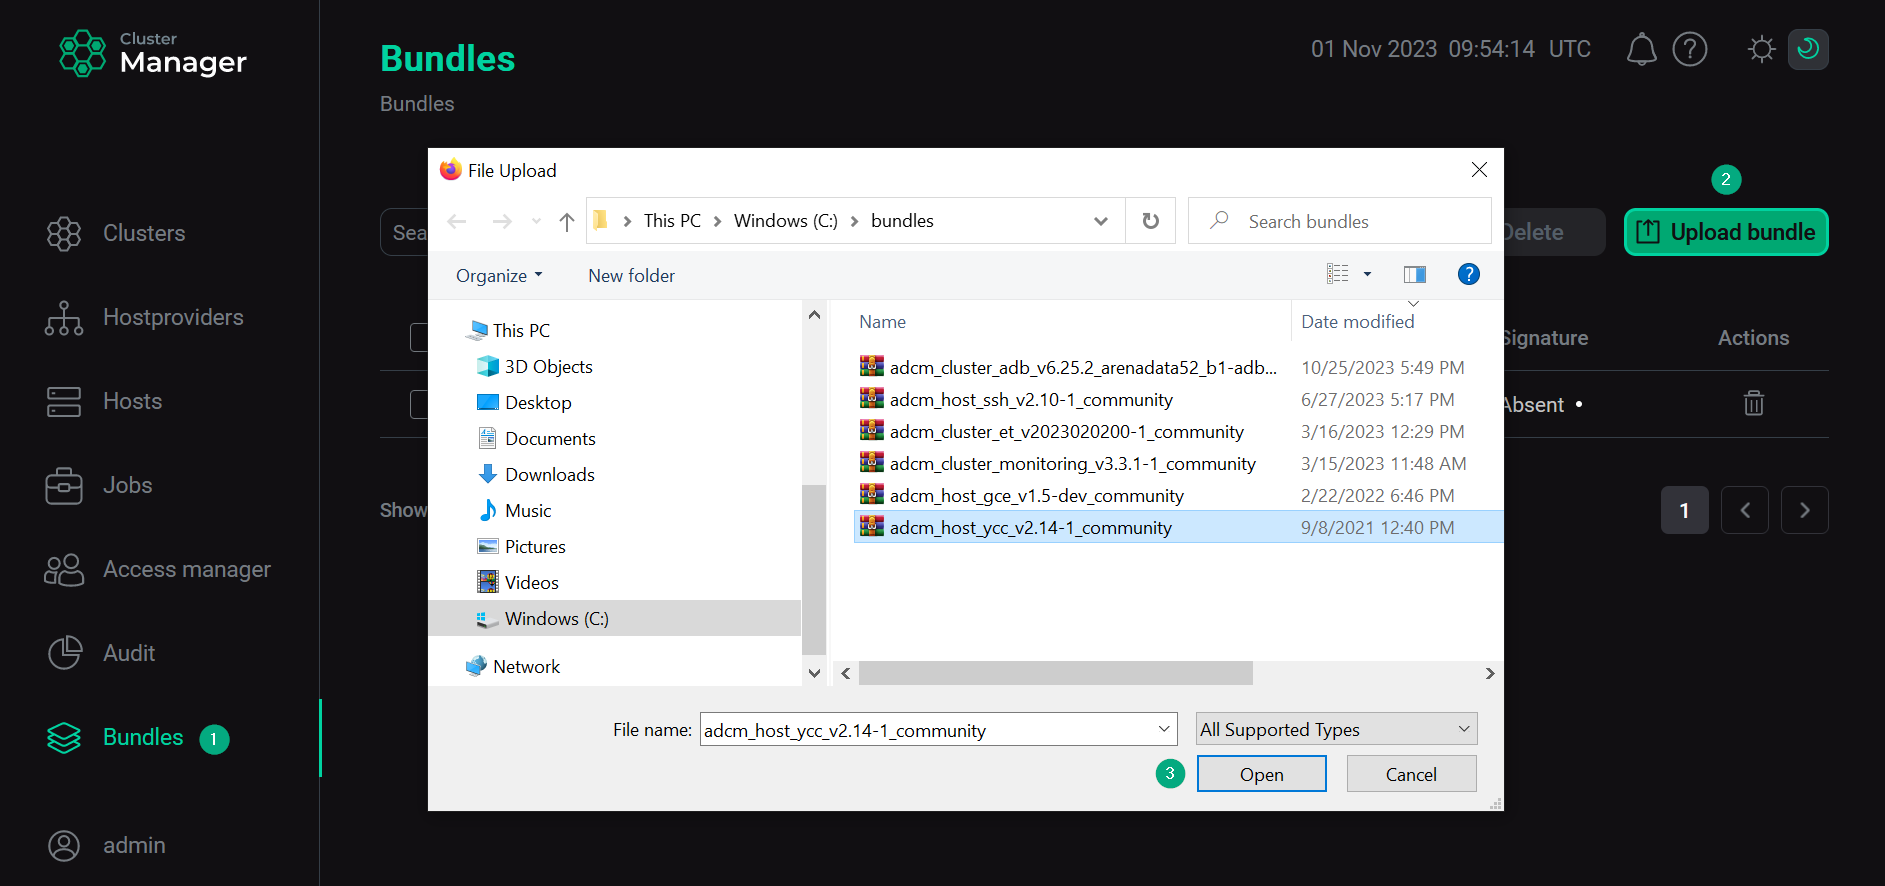 Upload a bundle
 -
As a result of the performed actions, a bundle is displayed on the Bundles page.
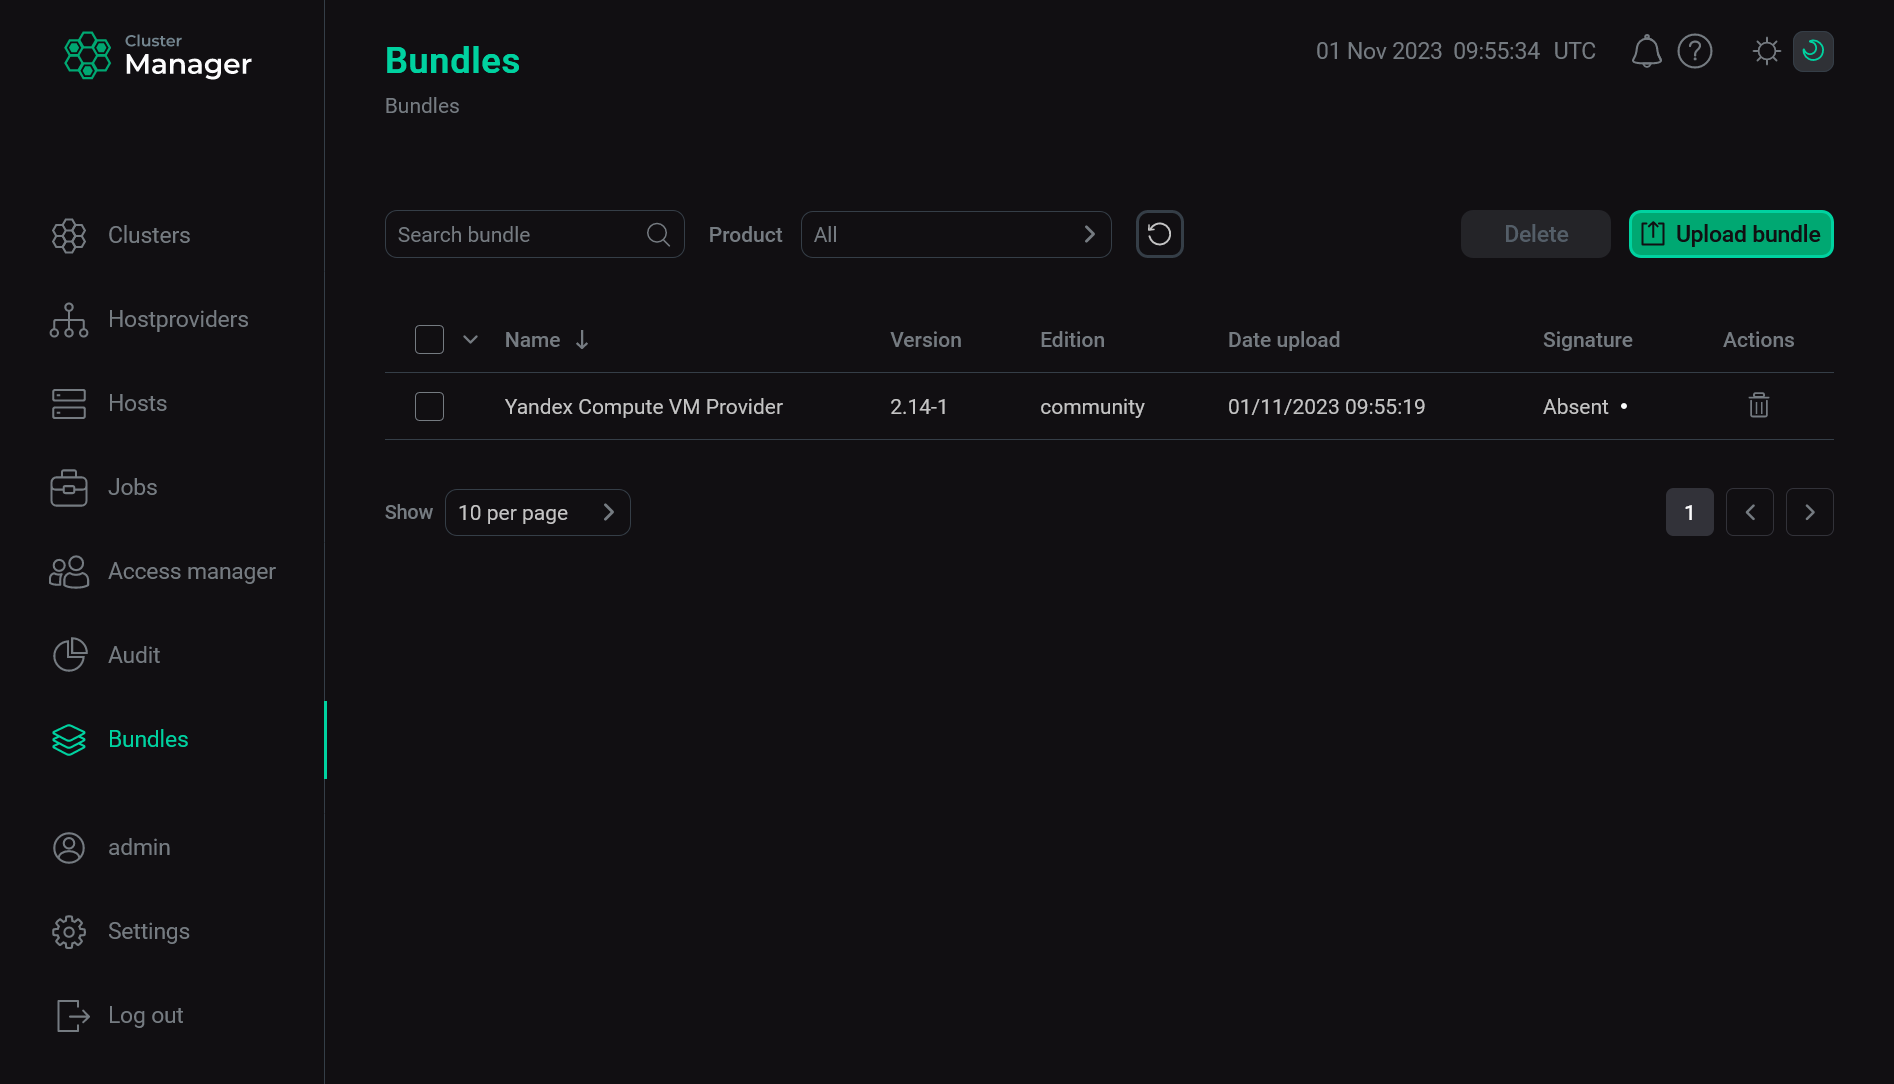 The result of successful uploading a bundle
Step 3. Create a hostprovider based on the uploaded bundle
To add a new hostprovider to ADCM on the base of the uploaded bundle, follow the steps:
-
Select the Hostproviders item in the left navigation menu and click Create provider.
 Create a new hostprovider
 -
In the opened window:
-
Select an uploaded bundle in the Type field.
-
Select a bundle version in the Version field. Several versions become available in the case of different versions of the same bundle being uploaded.
-
Enter a hostprovider name in the Name field.
-
Enter a hostprovider description in the Description field if necessary.
-
Click Create.
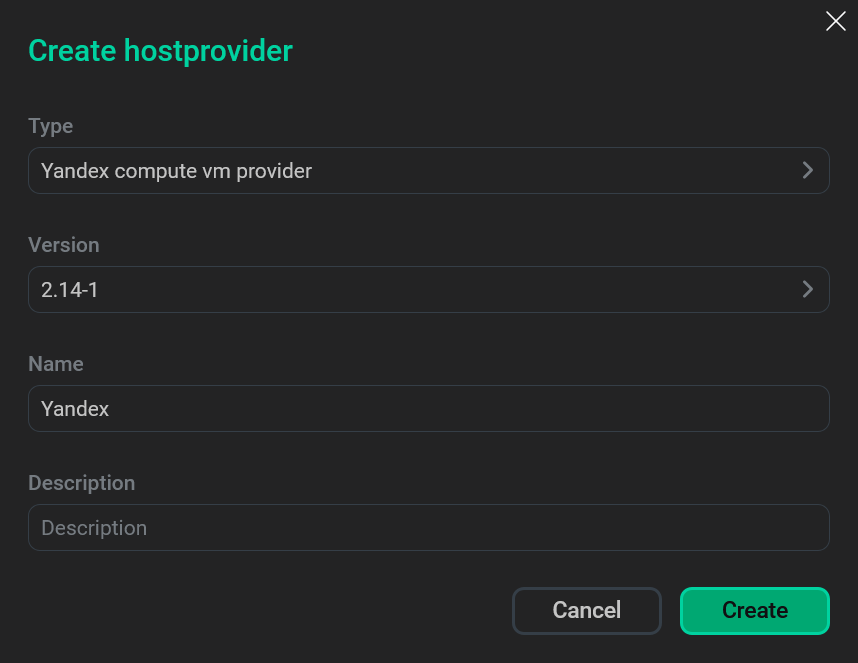 Fill in hostprovider parameters
 -
-
As a result of the performed actions, the created hostprovider is displayed on the Hostproviders page.
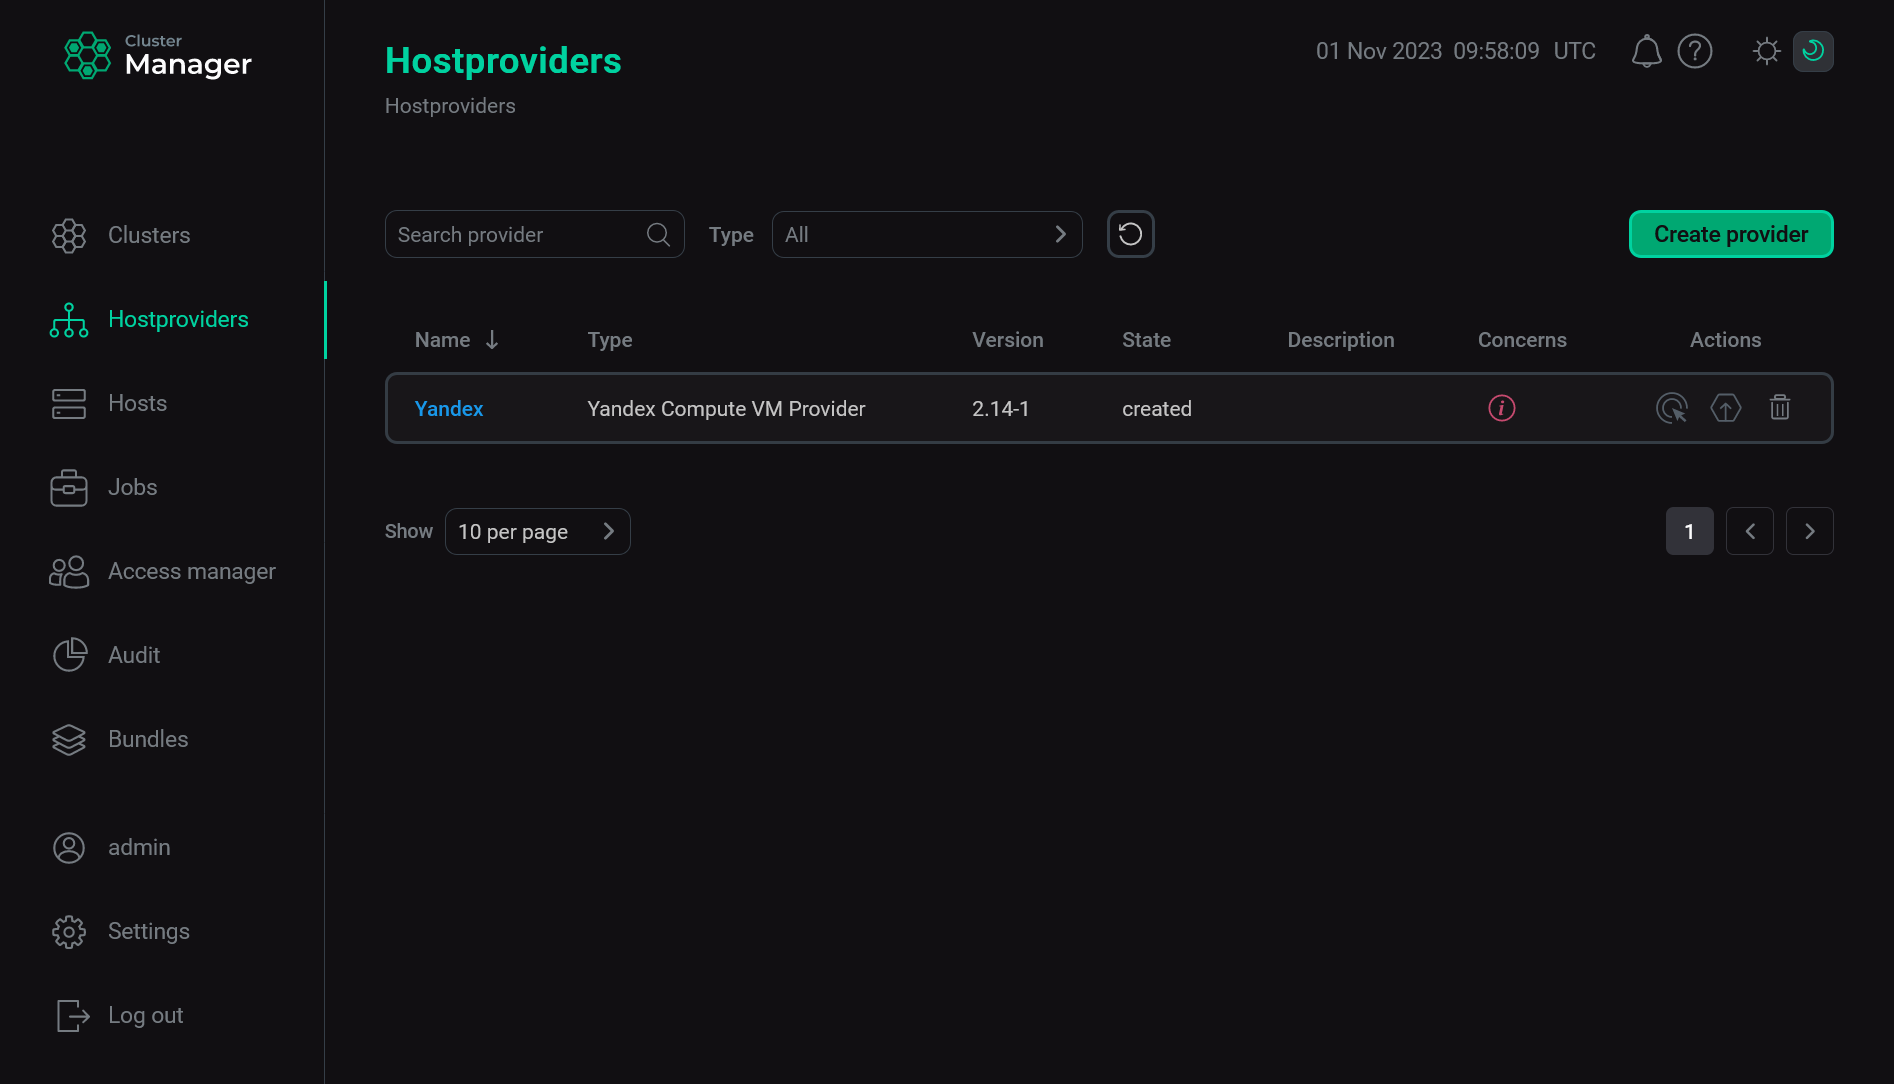 The result of adding a hostprovider successfully
Step 4. Configure a hostprovider
In order to configure the access to the cloud, follow the steps:
-
Select a hostprovider on the Hostproviders page. To do this, click a hostprovider name in the Name column. Alternatively, you can hover over the

 icon in the Concerns column and follow the link in the pop-up window that opens. The icon indicates the presence of critical errors in the current hostprovider configuration (e.g. mandatory fields).
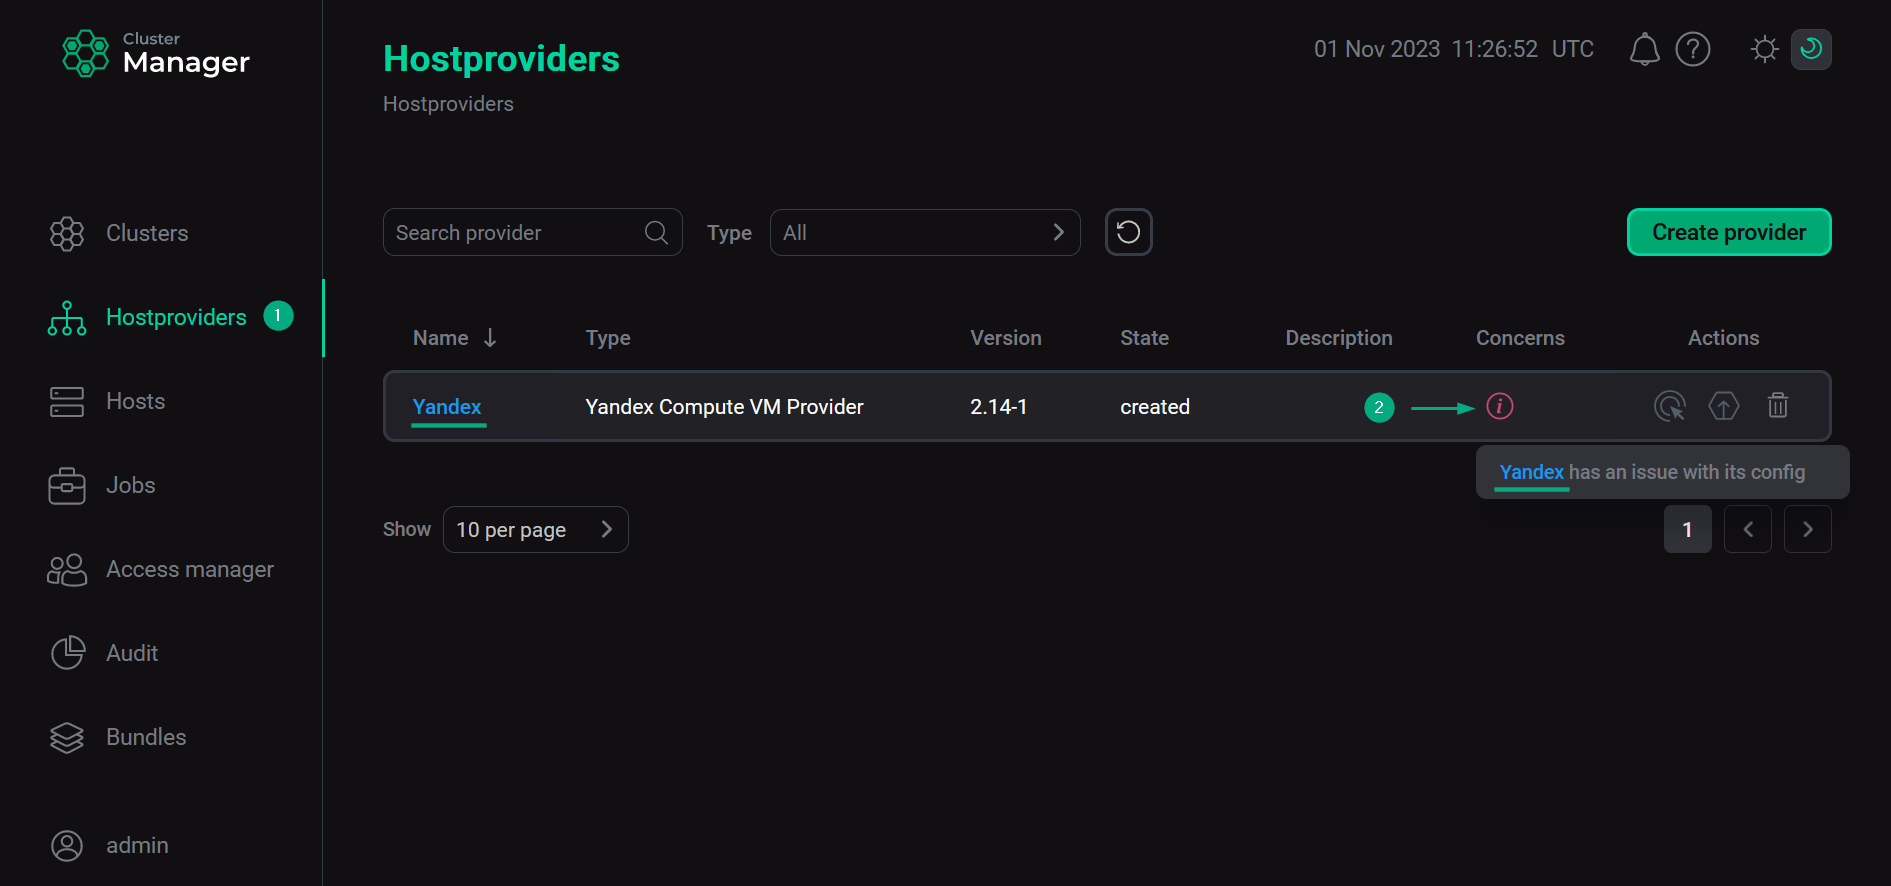 Go to configuring a hostprovider
 -
In the next window, switch on the Show advanced toggle, fill in hostprovider parameters, and click Save. The fields highlighted in red are mandatory.
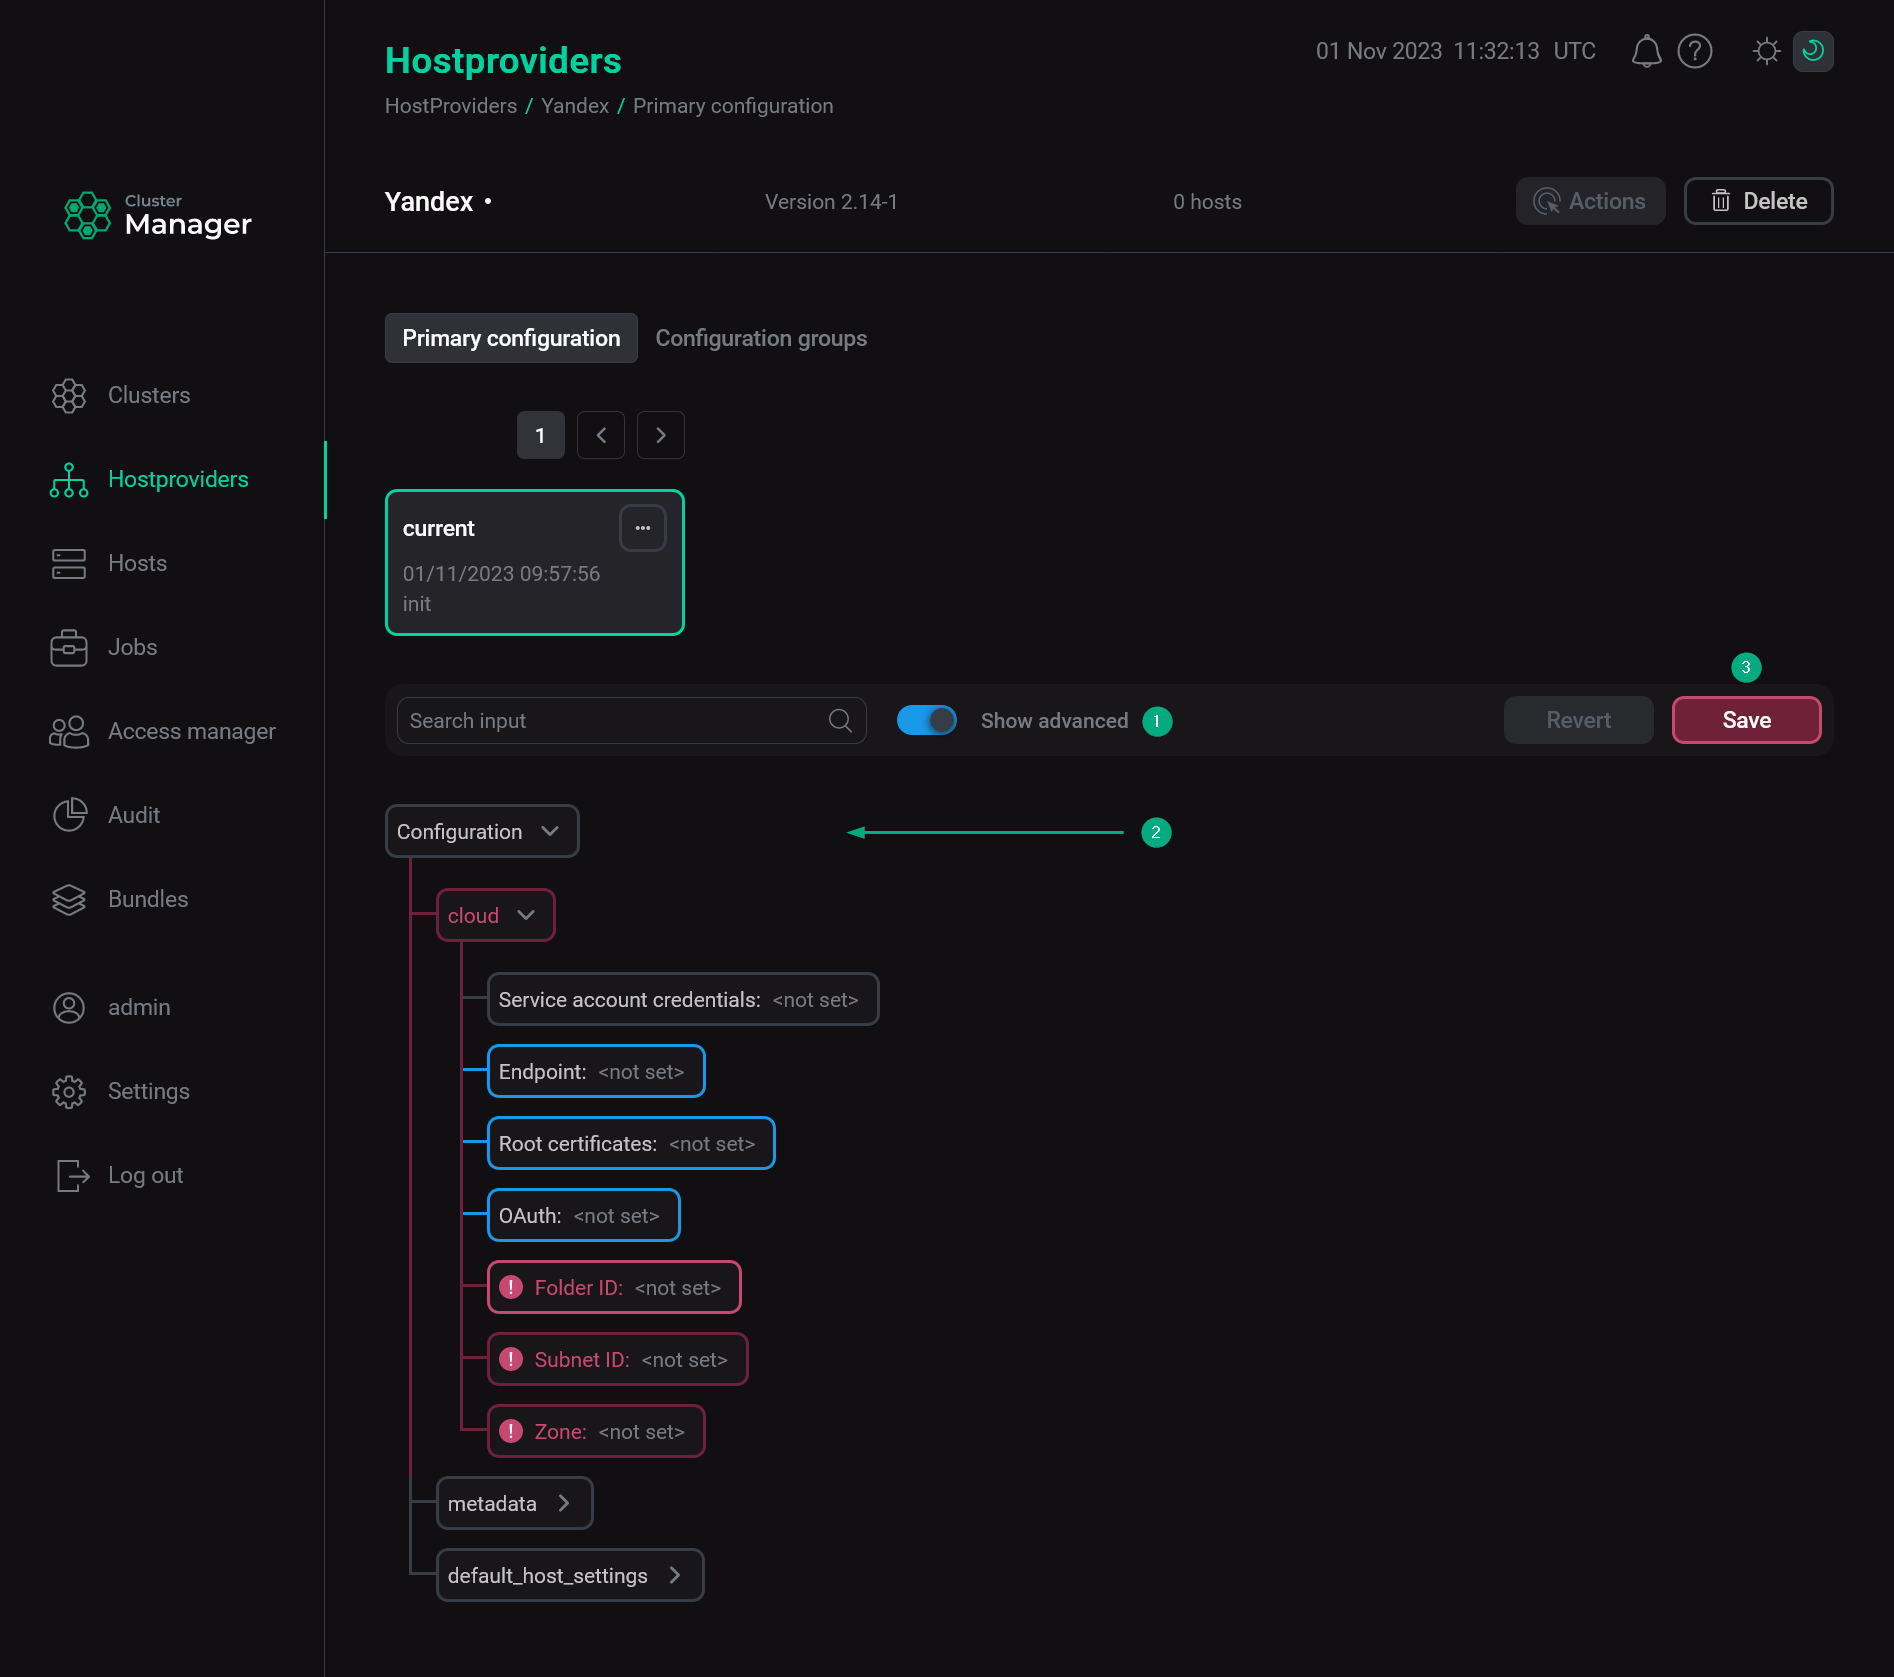 Configure a hostprovider
The assignment of parameters is listed below.
Configuration parameters Group Parameter Mandatory Description cloud
Service account credentials
No
Static access keys that can be obtained for the service account according to the Yandex.Cloud documentation. The
Service account credentialsfield is incompatible withOAuth, you should use only one of these fields for authentication. Pay attention that static keys should be transformed into the JSON format before being inserted into the fieldEndpoint
No
A custom endpoint that is used to connect to a private Yandex.Cloud installation
Root certificates
No
The root certificates that are used to connect to a private Yandex.Cloud installation
OAuth
No
An OAuth token that can be obtained according to the Yandex.Cloud documentation. The
OAuthfield is incompatible withService account credentials, you should use only one of these fields for authenticationFolder ID
Yes
A target folder for new virtual machines, for example
b1gotqhf08176hh183dn. Can be copied from the Id column in the folder list of the Yandex.CloudSubnet ID
Yes
A target subnet for new virtual machines, for example
b0cccgrn656k0nixi92a. To get theSubnet IDvalue, open the Virtual Private Cloud service in the Yandex.Cloud console, click the desired network in the Cloud networks section, and copy the value of the Id column from the row that contains the desired subnet in the list of subnets that opensZone
Yes
A target availability zone for new virtual machines, for example
ru-central1-c. Every zone corresponds to the specific data center . To get theZonevalue, open the Virtual Private Cloud service in the Yandex.Cloud console, click the desired network in the Cloud networks section, and copy the value of the Zone column from the row that contains the desired subnet in the list of subnets that opensmetadata
Ssh keys
No
A list of OpenSSH keys with the
user@hostnamedata in the end. When virtual machines are added, the users list is parsed from this field. Every user is created with the corresponding keydefault_host_settings
Active operations limit timeout
No
A timeout that is activated when the quota of simultaneously performed operations is exceeded (resulting in errors returned by the Yandex.Cloud gPRC). If empty, the timeout is not activated. If
0, the waiting time is unlimited. Any positive integer in the field equals the waiting time, during which the operation should move from the queue to the execution stage. Measured in secondsLabels
No
The default labels that are used for all created VMs. Should be specified in the
key:valueformat. The labels that are specified for VMs have a higher priority compared to the labels specified for the hostproviderredhat_subscription
Organization ID
No
The organization ID that is provided at subscribing to Red Hat services. This ID is available in the Red Hat client portal. Should be filled in simultaneously with the
Activation keyfield if automatic Red Hat registration is required for virtual machines using RHEL. The field is available in the 2.15 bundle version or laterActivation key
No
An activation key that is configured in the Red Hat client portal. Should be filled in simultaneously with the
Organization IDfield if automatic Red Hat registration is required for virtual machines using RHEL. The field is available in the 2.15 bundle version or later -
Return to the Hostproviders page. As a result, the
icon stops being displayed in the Concerns column. The actions available for the configured hostprovider can be opened by clicking the 
 icon in the Actions column.
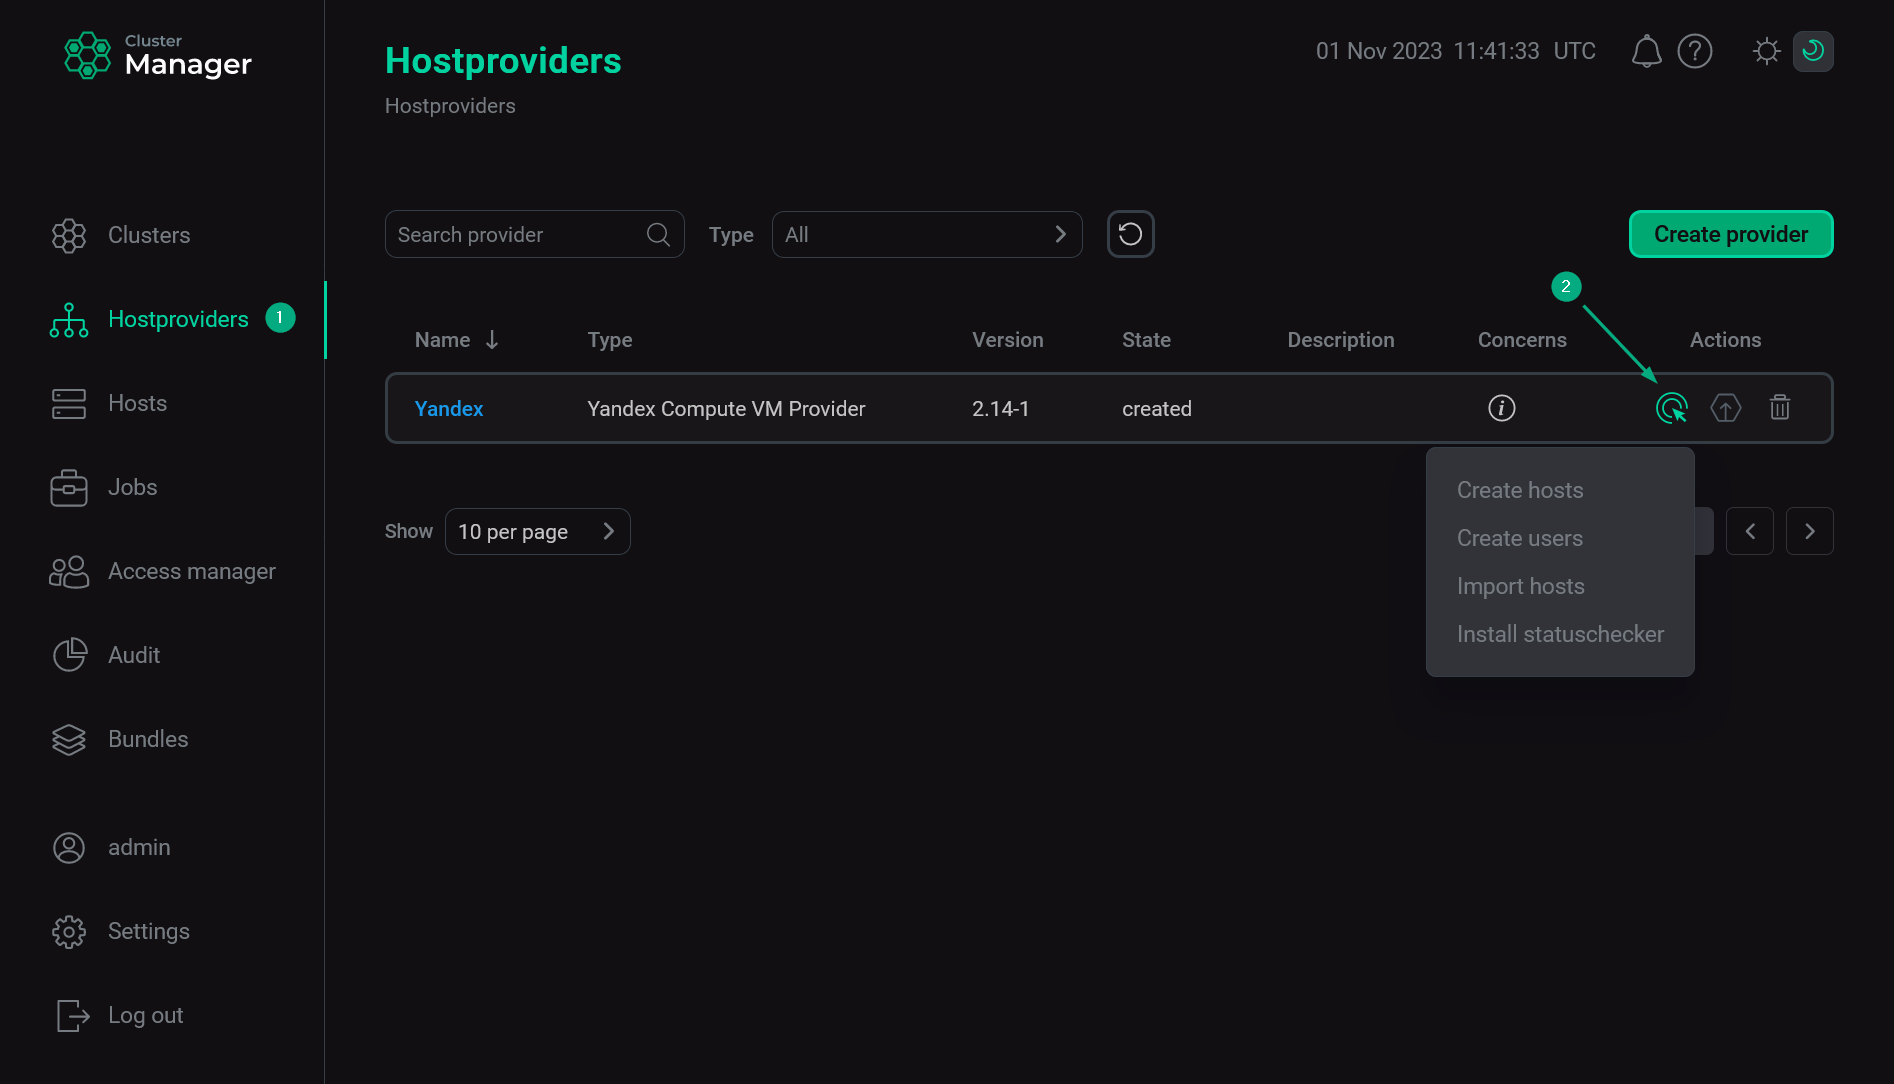 The result of configuring a hostprovider successfully