

Add hosts
In ADCM a host means a representation of a real hardware or virtual host. It doesn’t matter what infrastructure the original host uses — a cloud or bare metal.
The process of configuring hosts in ADCM differs depending on the selected hostprovider. This topic explains how to add and configure hosts in ADCM using the SSH hostprovider, which is, essentially, a connector to already created hosts.
|
IMPORTANT
Before adding hosts in ADCM using the SSH hostprovider, make sure that:
|
The steps for adding hosts that are based on the SSH hostprovider are listed below:
-
Select the Hosts item in the left navigation menu and click Create host.
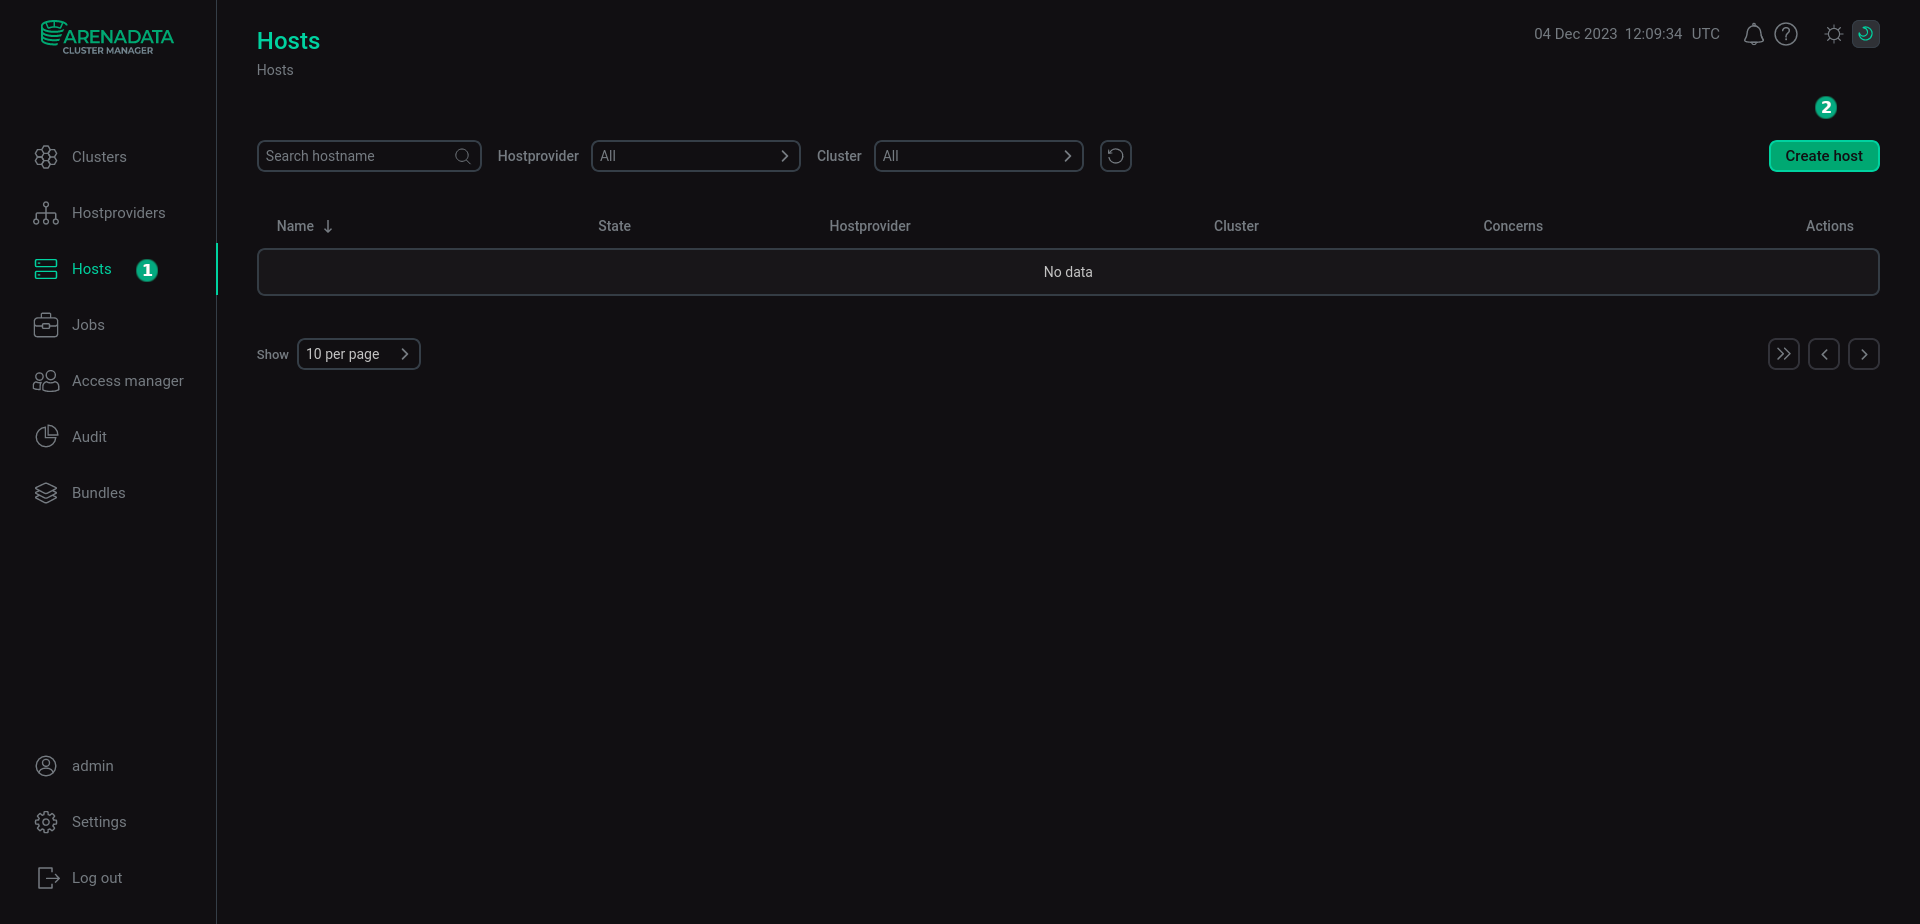 Add a host via ADCM
 -
In the opened dialog:
-
Select a hostprovider in the Hostprovider field. Notice that hostproviders are displayed with the names that you have assigned to them.
-
Enter a host name without domains in the Name field.
-
Click Create.
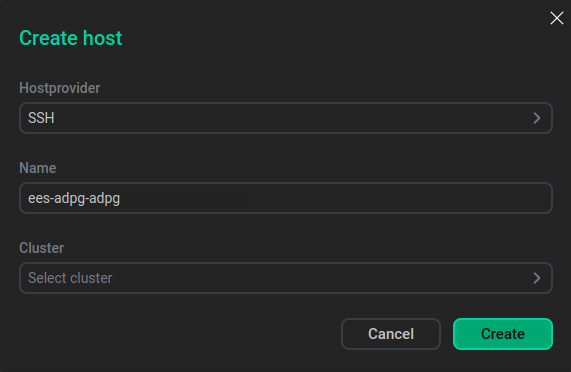 Describe a new host
 -
-
Return to the Hosts page and switch to configuring the added host. To do this, click the host name in the Name column.
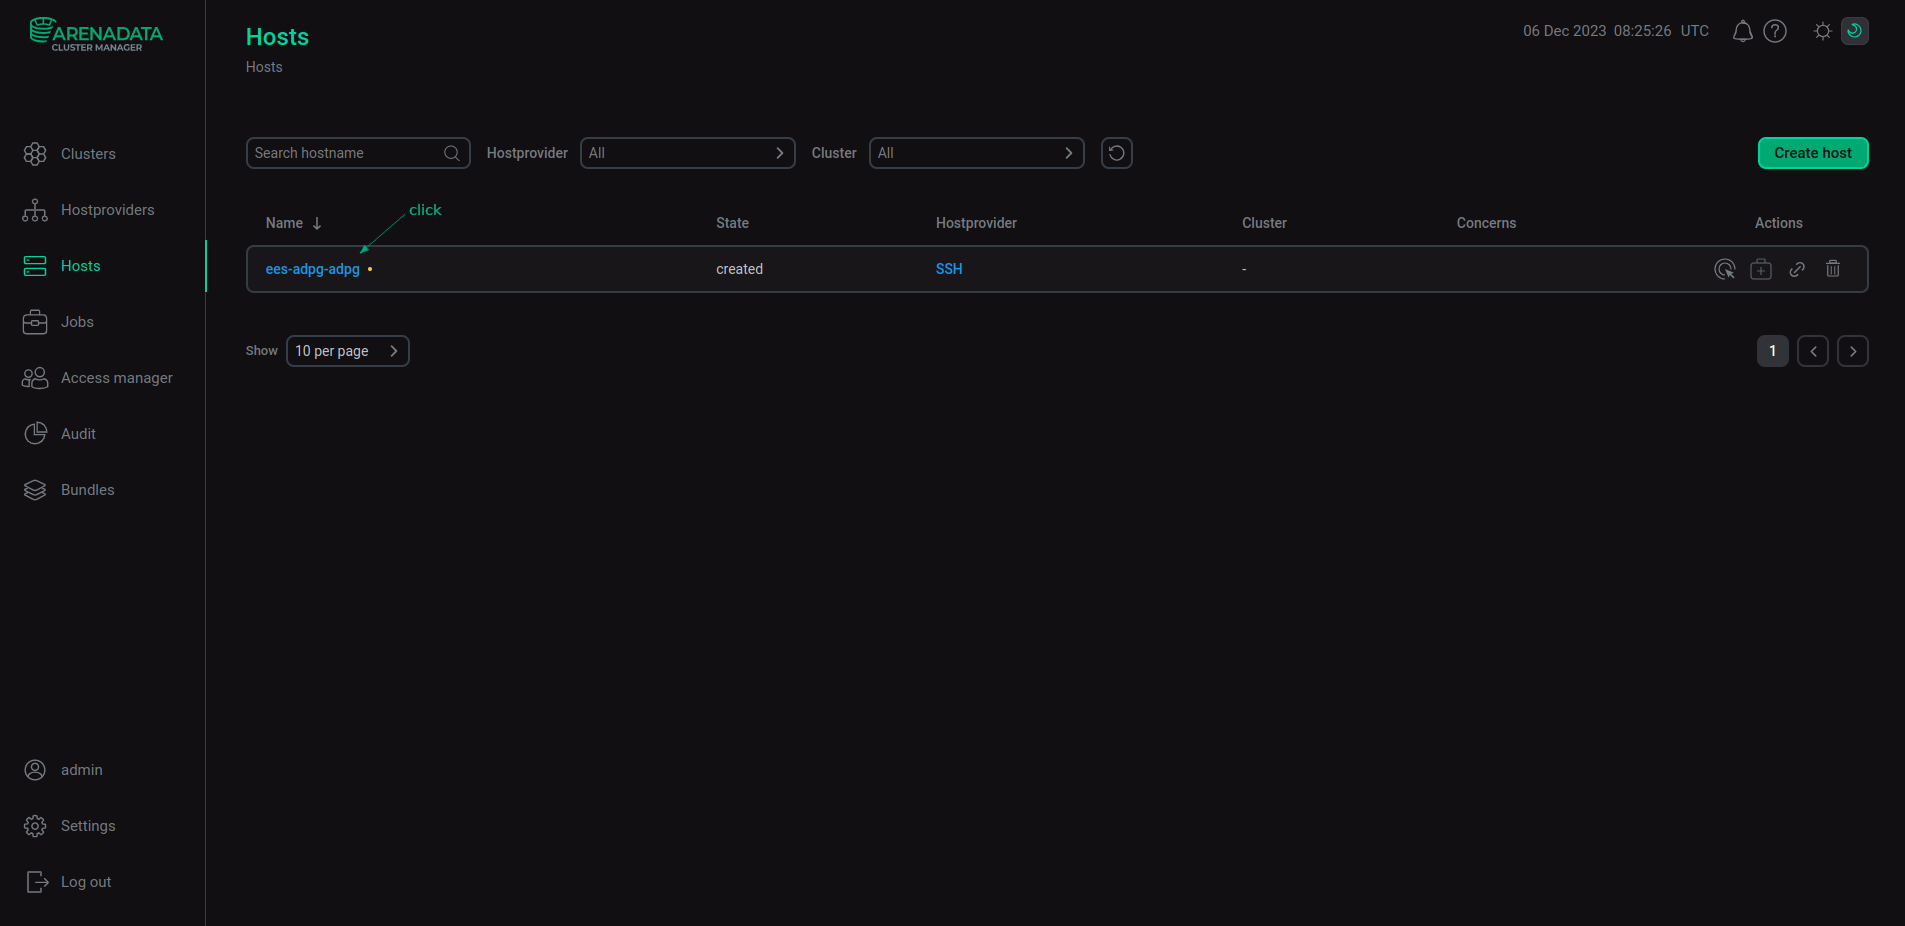 Go to configuring a host
 -
In the opened window, select the Primary Configuration tab, switch on the Show advanced toggle, fill in parameters, and click Save.
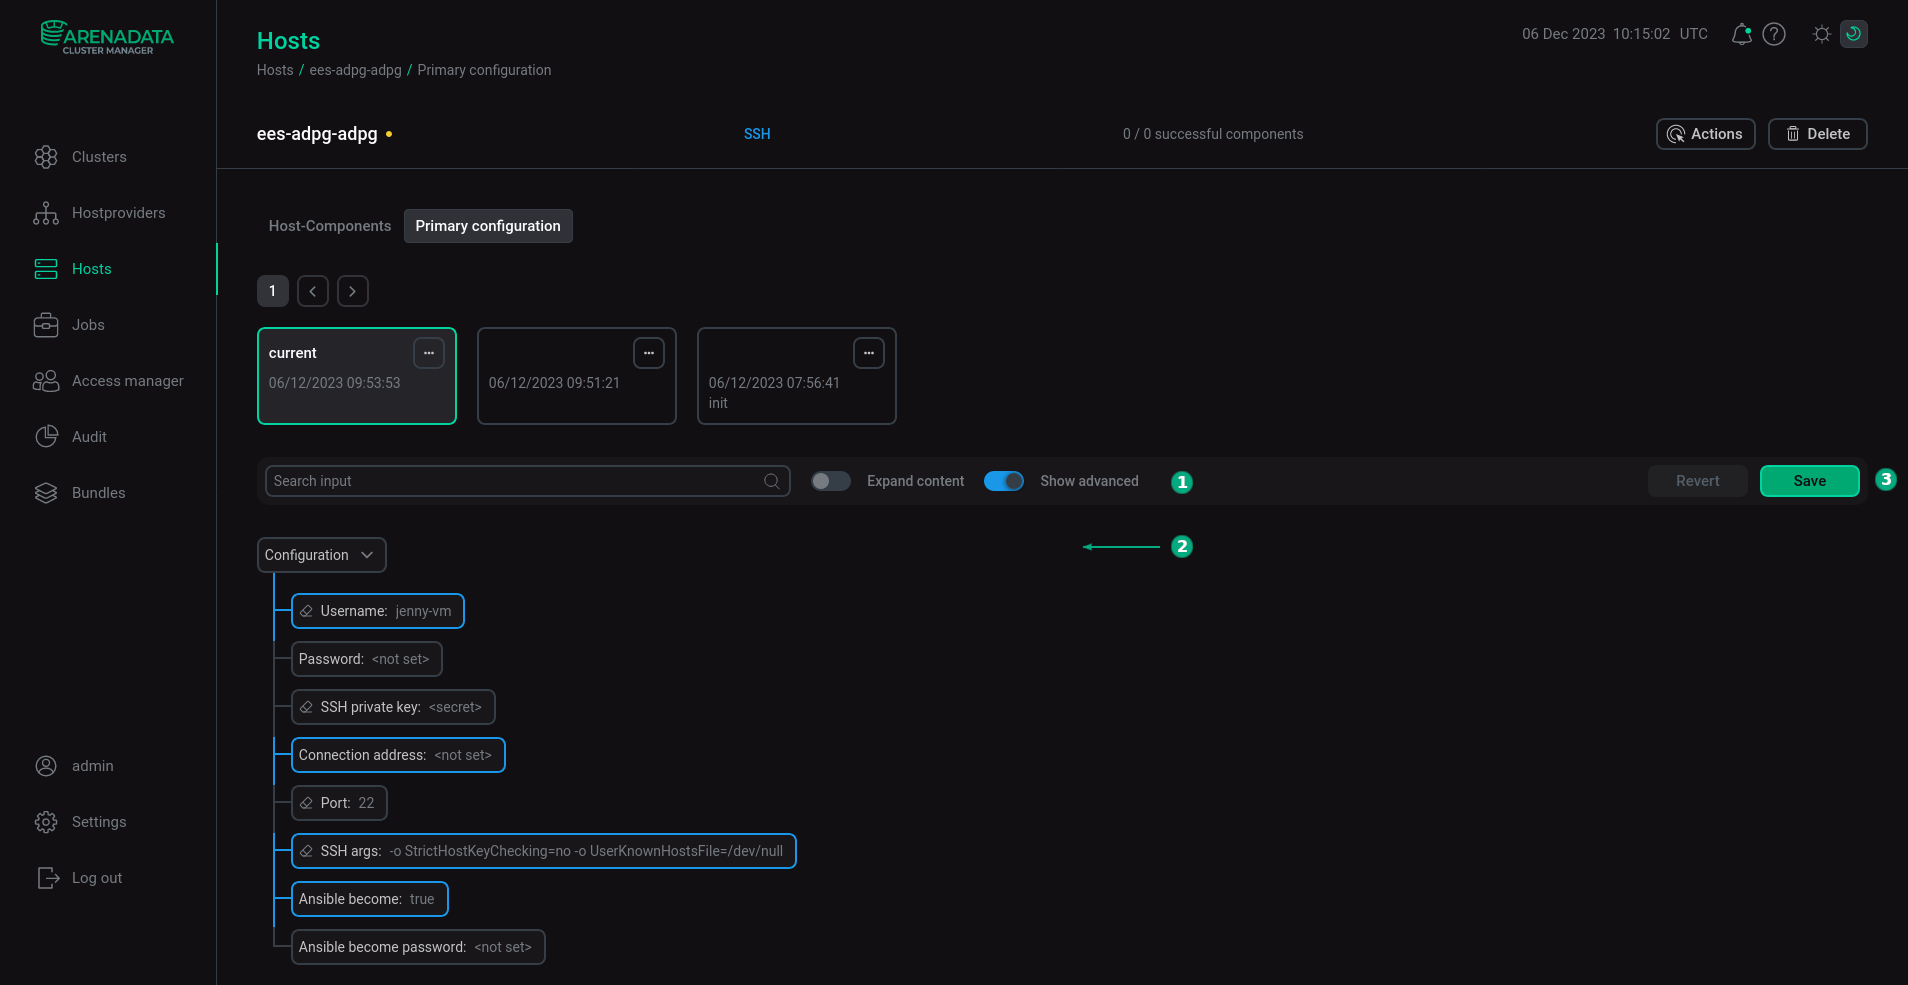 Configure a host
The assignment of parameters is listed in the table below.
Host configuration parameters Parameter Description Username
A user name that is used for connecting to a host via SSH
Password
A user password that is used for connecting to a host via SSH. If you don’t use a password, leave this field blank
SSH private key
A private SSH key that is used for connecting to a host via SSH. It is created in a pair with the public key that you define for a host when configuring it. If you don’t use SSH keys, leave this field blank
Connection address (Hostname in previous hostprovider versions)
An IP address of a host
Port
A port number that is used for connecting to a host via SSH (by default,
22)SSH args
SSH arguments for Ansible. Each parameter requires the following format:
-o <name>=<value>. Several parameters are separated by space:-o StrictHostKeyChecking=no -o UserKnownHostsFile=/dev/null.Thus,
StrictHostKeyChecking=noandUserKnownHostsFile=/dev/nullparameters disable strict host key checking for SSH. Otherwise, when this checking is enabled, the SSH client connects only to the known hosts that are stored in the known hosts list.Can be left at the default value
Ansible become
A flag that grants the superuser privileges to the user specified in the Username field. The default value should be used (flag is set)
Ansible become password
A password that is used during granting of the superuser privileges to the user specified in the Username field. Can be left at the default value
-
Return to the Hosts page. In the row that contains the added host, click the

 icon in the Actions column and select the Check connection drop-down menu item. Confirm the action in the opened window.
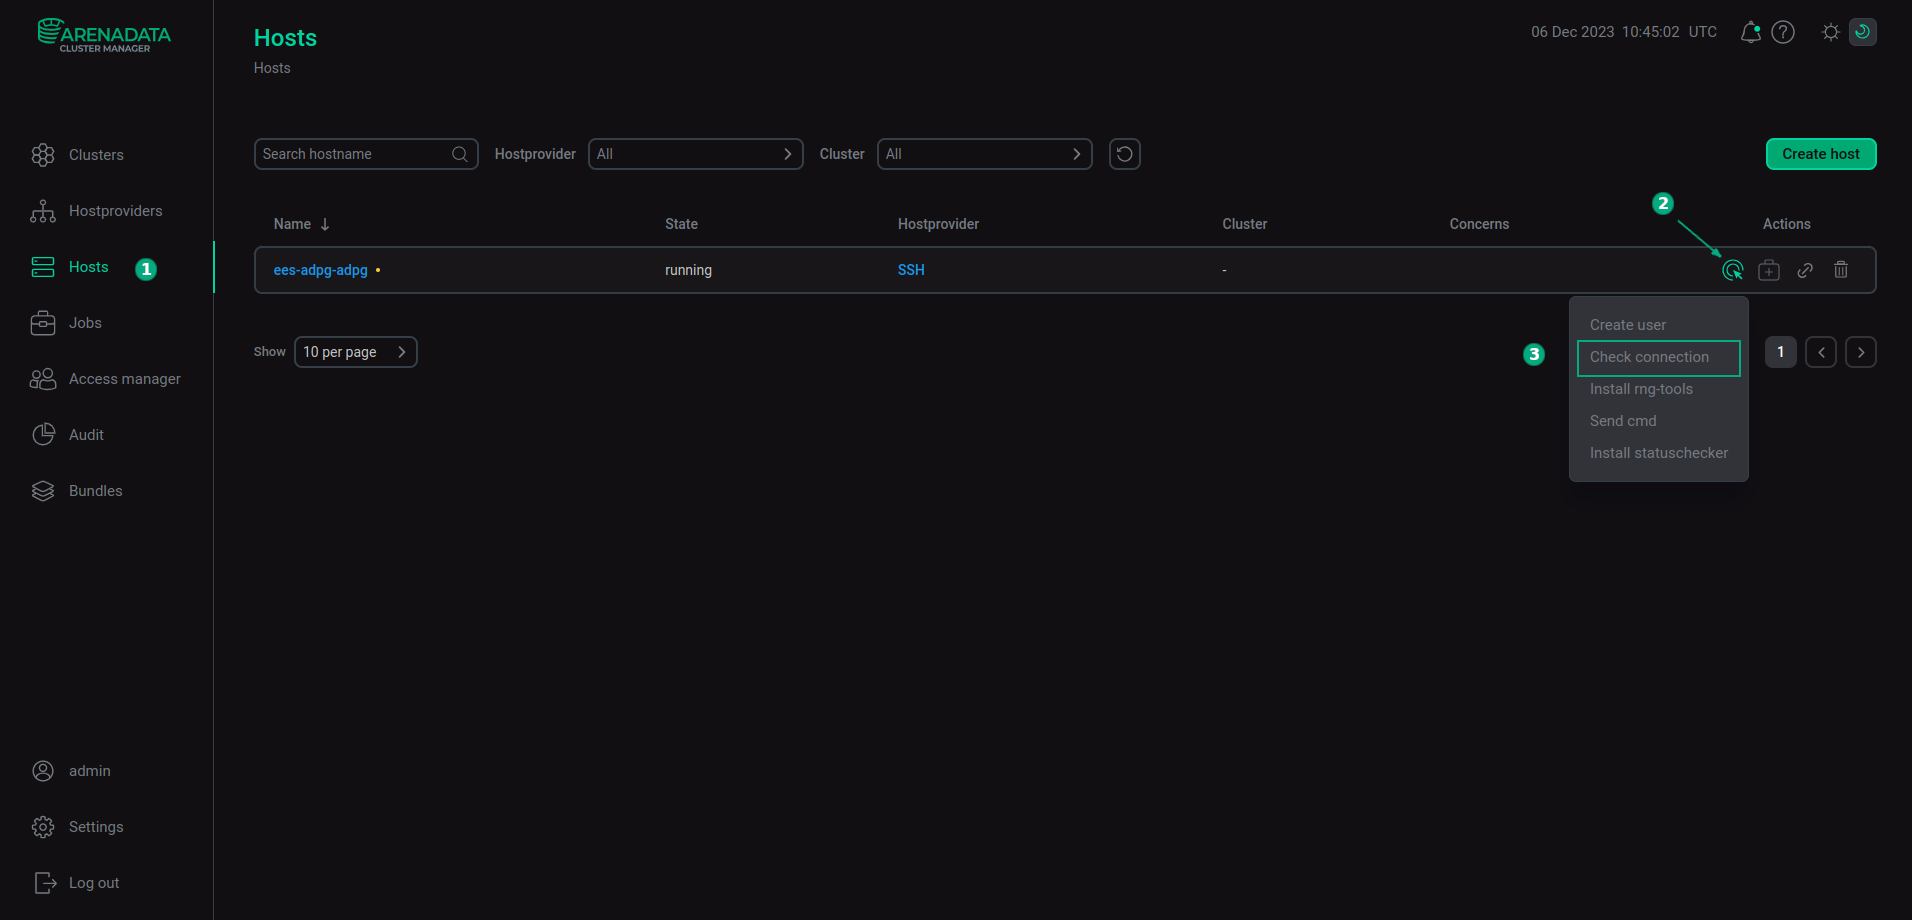 Switch to the connection check
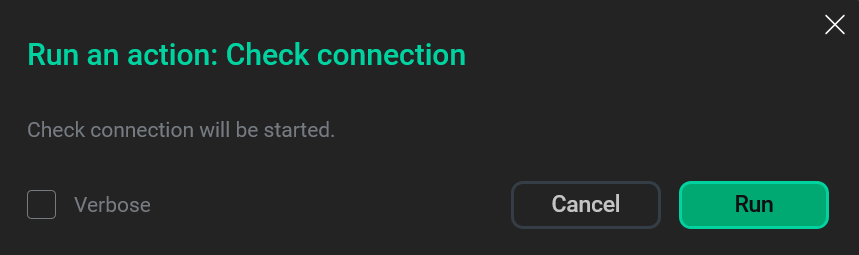 Confirm the connection check
 -
Wait until the connection check is completed. If the connection check runs successfully, it means that the host is configured correctly and can be added to a new cluster.
NOTEIn case of errors, you can find logs on the Jobs page. -
After the connection check is completed, install statuschecker. It is a special daemon that periodically checks the status of the services and components added to the cluster hosts via ADCM. To install this daemon, click the
icon in the Actions column again and select the Install statuschecker drop-down menu item. Then confirm the action in the opened window.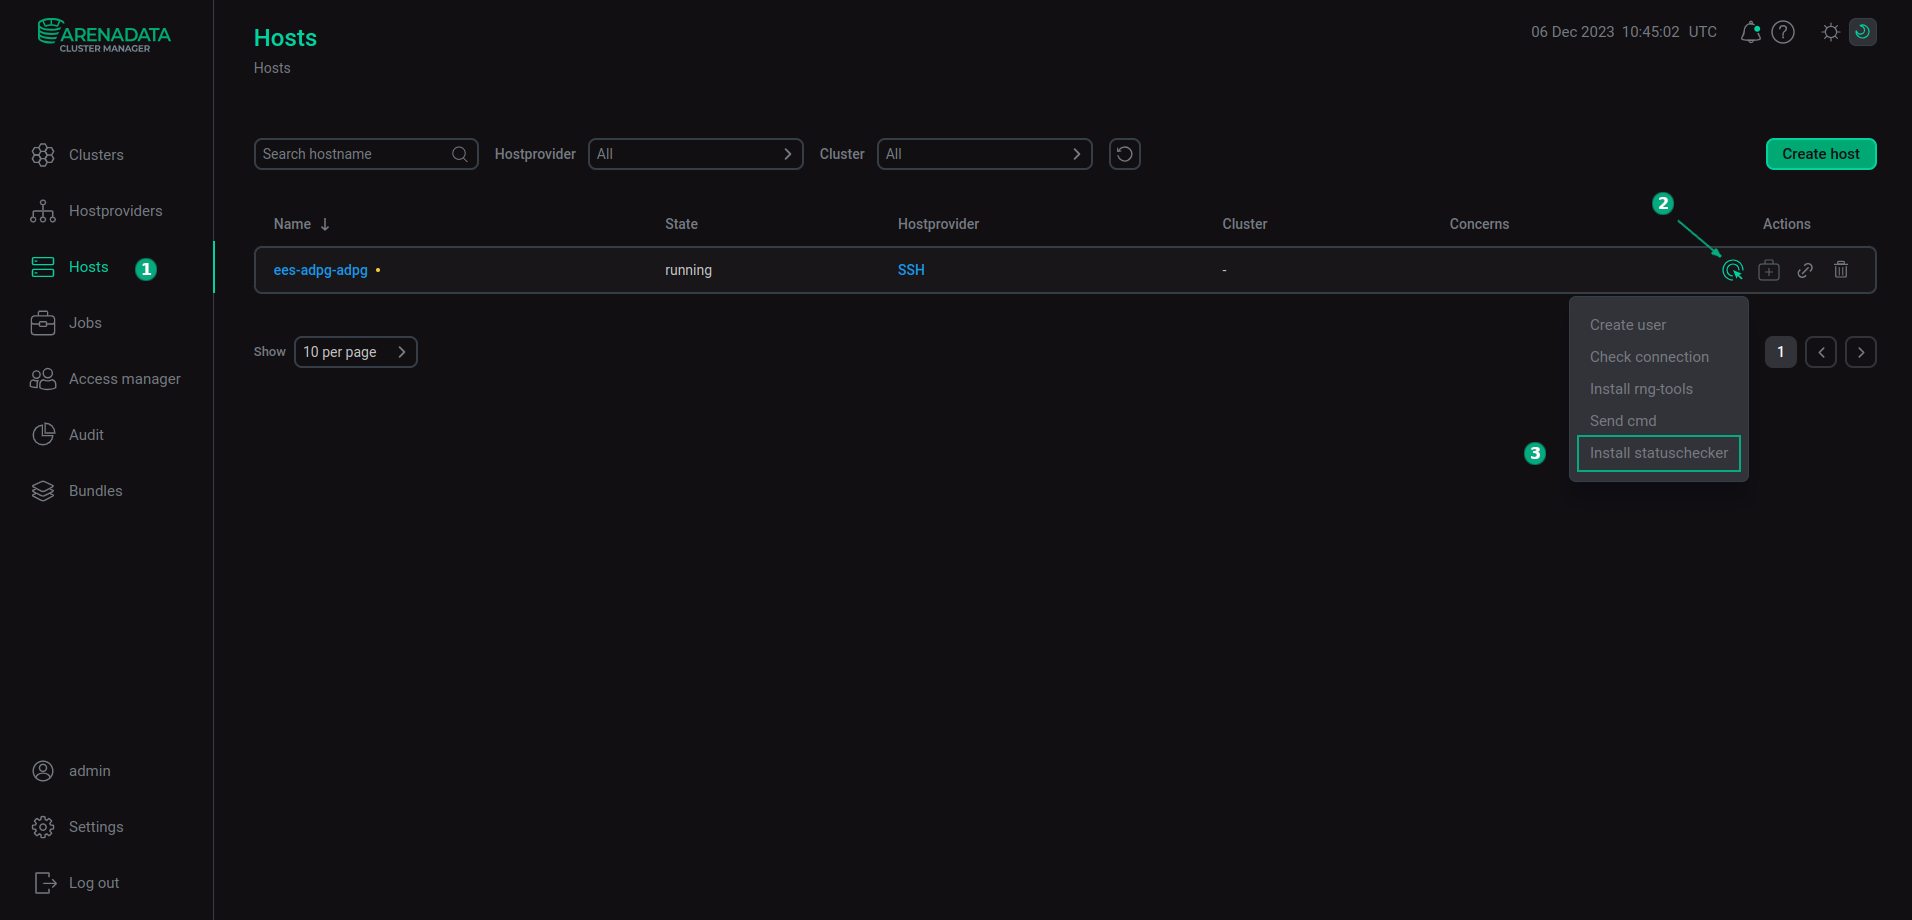 Switch to the statuschecker installation
 Confirm the statuschecker installation
 -
Wait until the statuschecker installation is completed.