

Upgrade ADB ES
|
NOTE
|
Launch upgrade
To upgrade an ADB ES cluster version, follow these steps:
-
Upload a new ADB ES cluster bundle (see the Upload a cluster bundle to ADCM step in the Create a cluster article). As a result, the bundle information is shown on the Bundles page in ADCM.
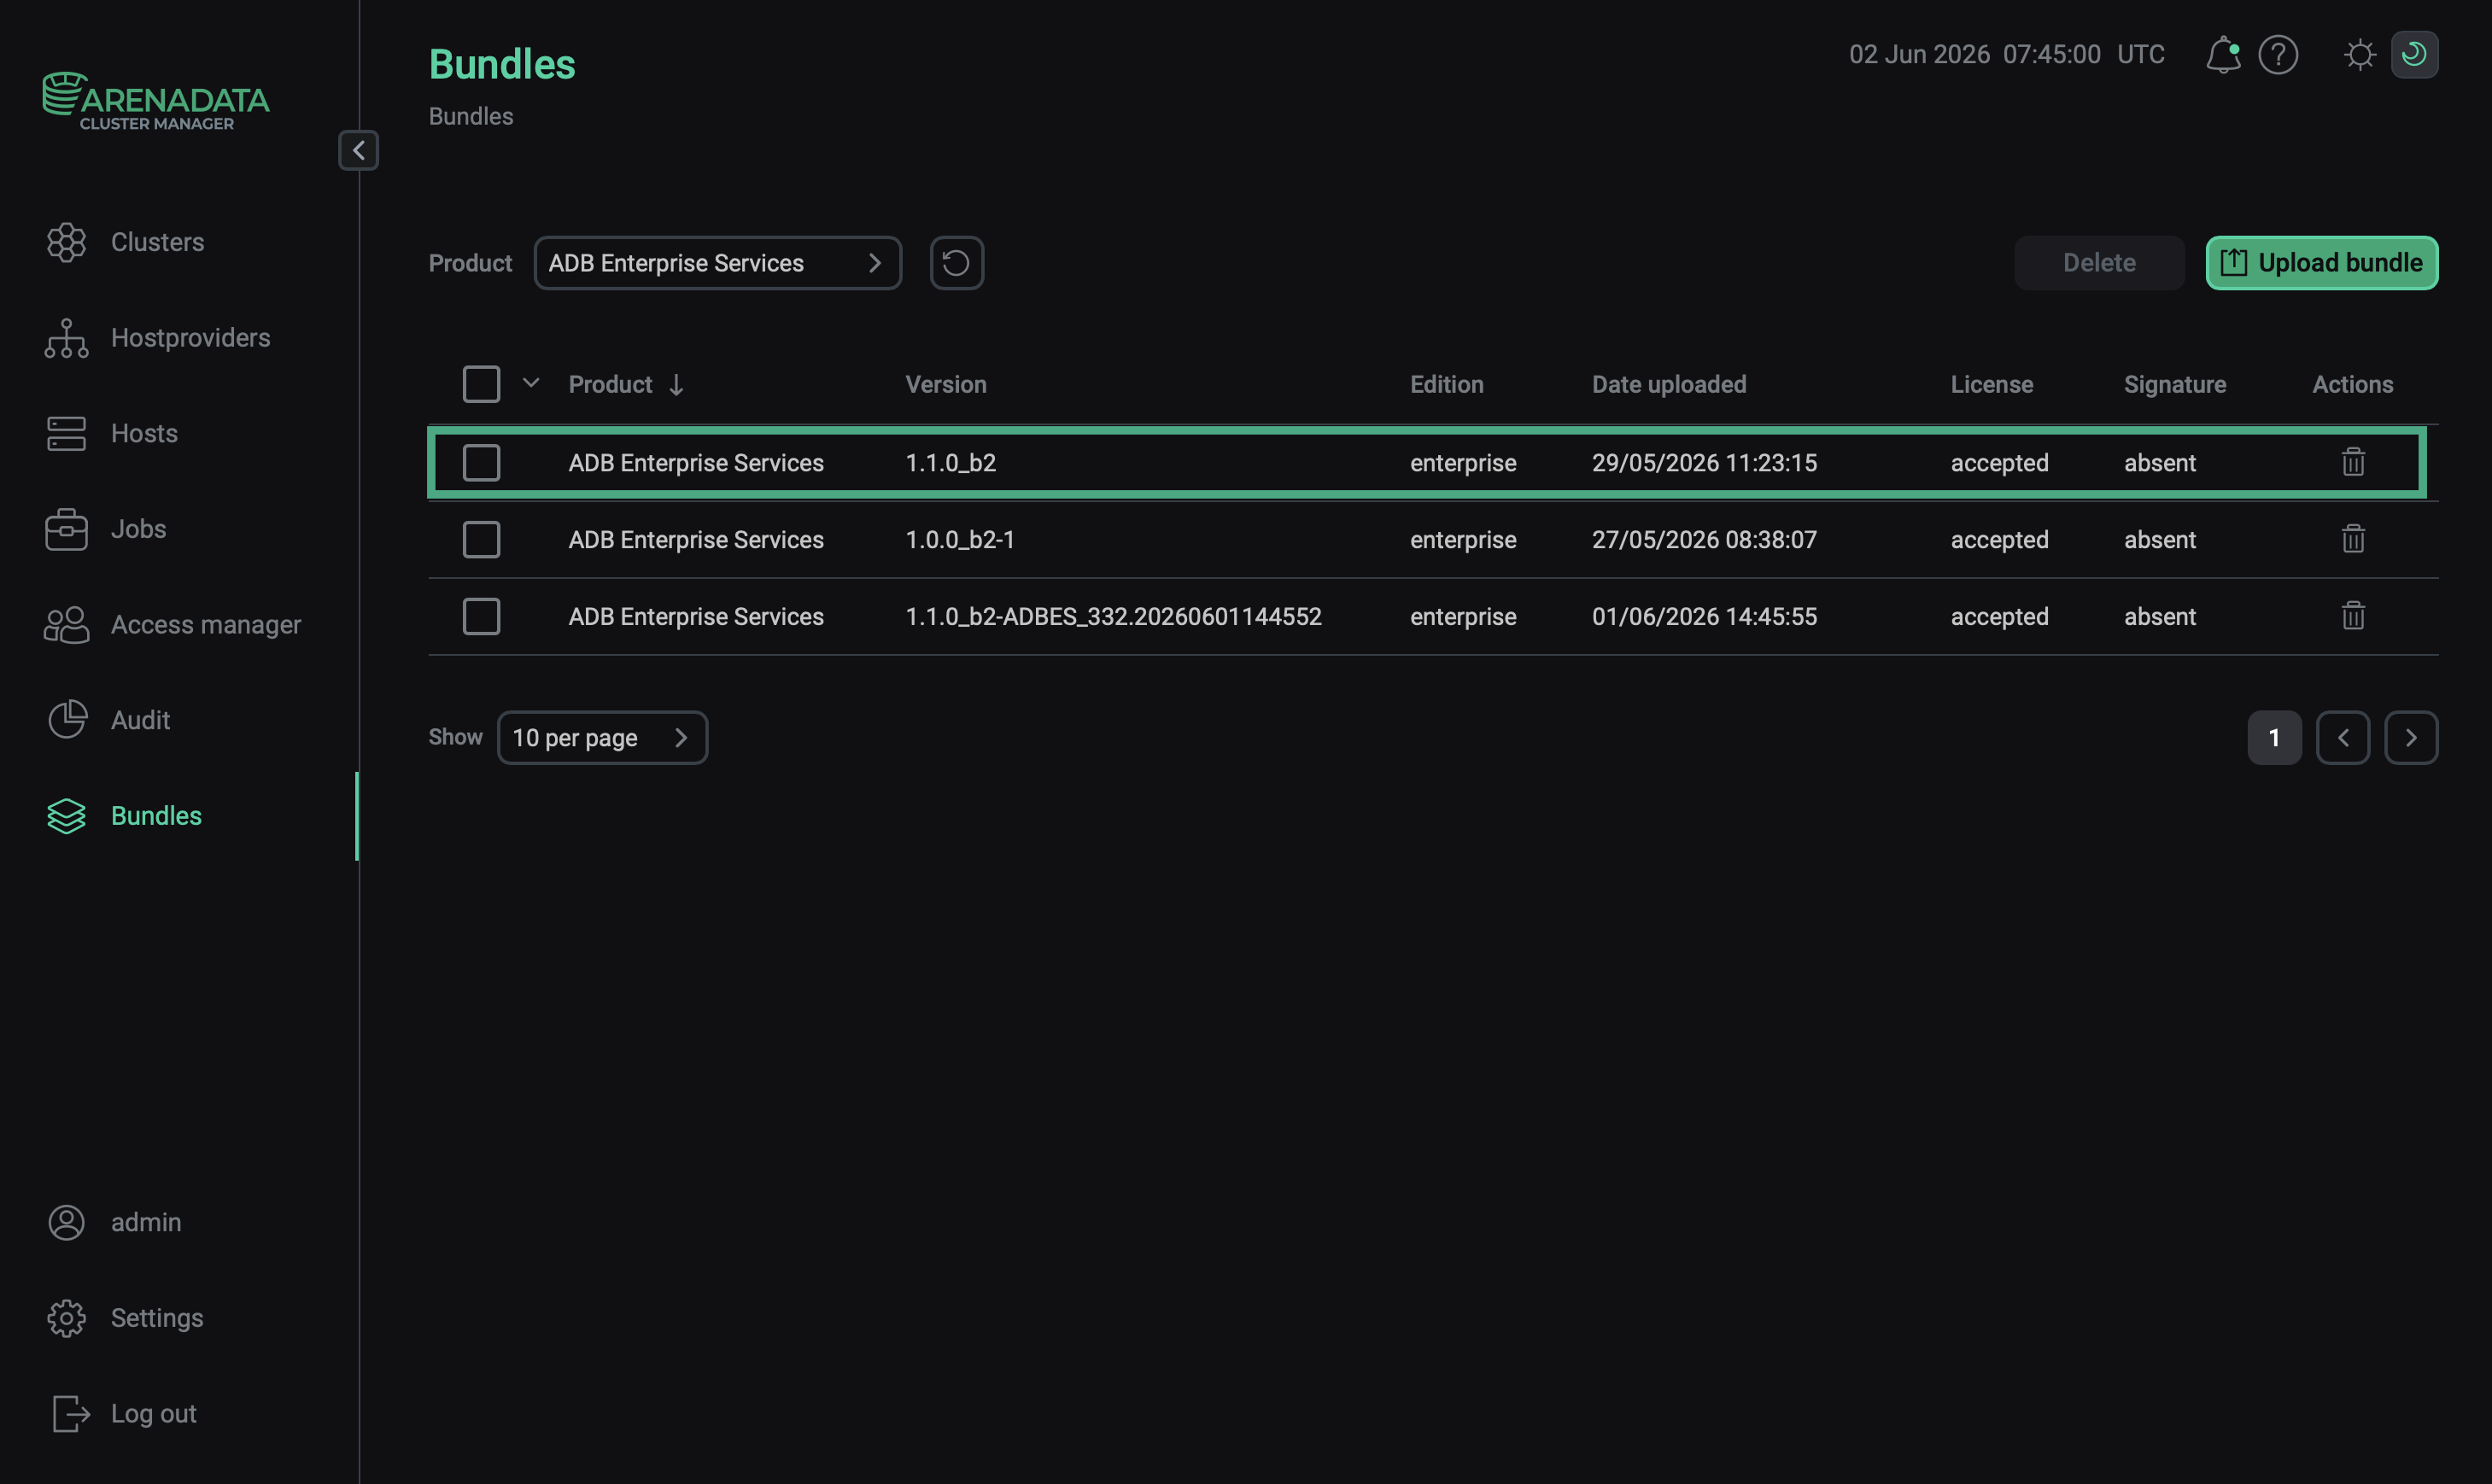 The ADB ES bundle on the Bundles page
 -
On the Clusters page, click the
 icon for the ADB ES cluster that you want to upgrade.
The icon becomes available after the bundle is successfully loaded in the previous step.
The bundle version must be higher than the current cluster version.
icon for the ADB ES cluster that you want to upgrade.
The icon becomes available after the bundle is successfully loaded in the previous step.
The bundle version must be higher than the current cluster version.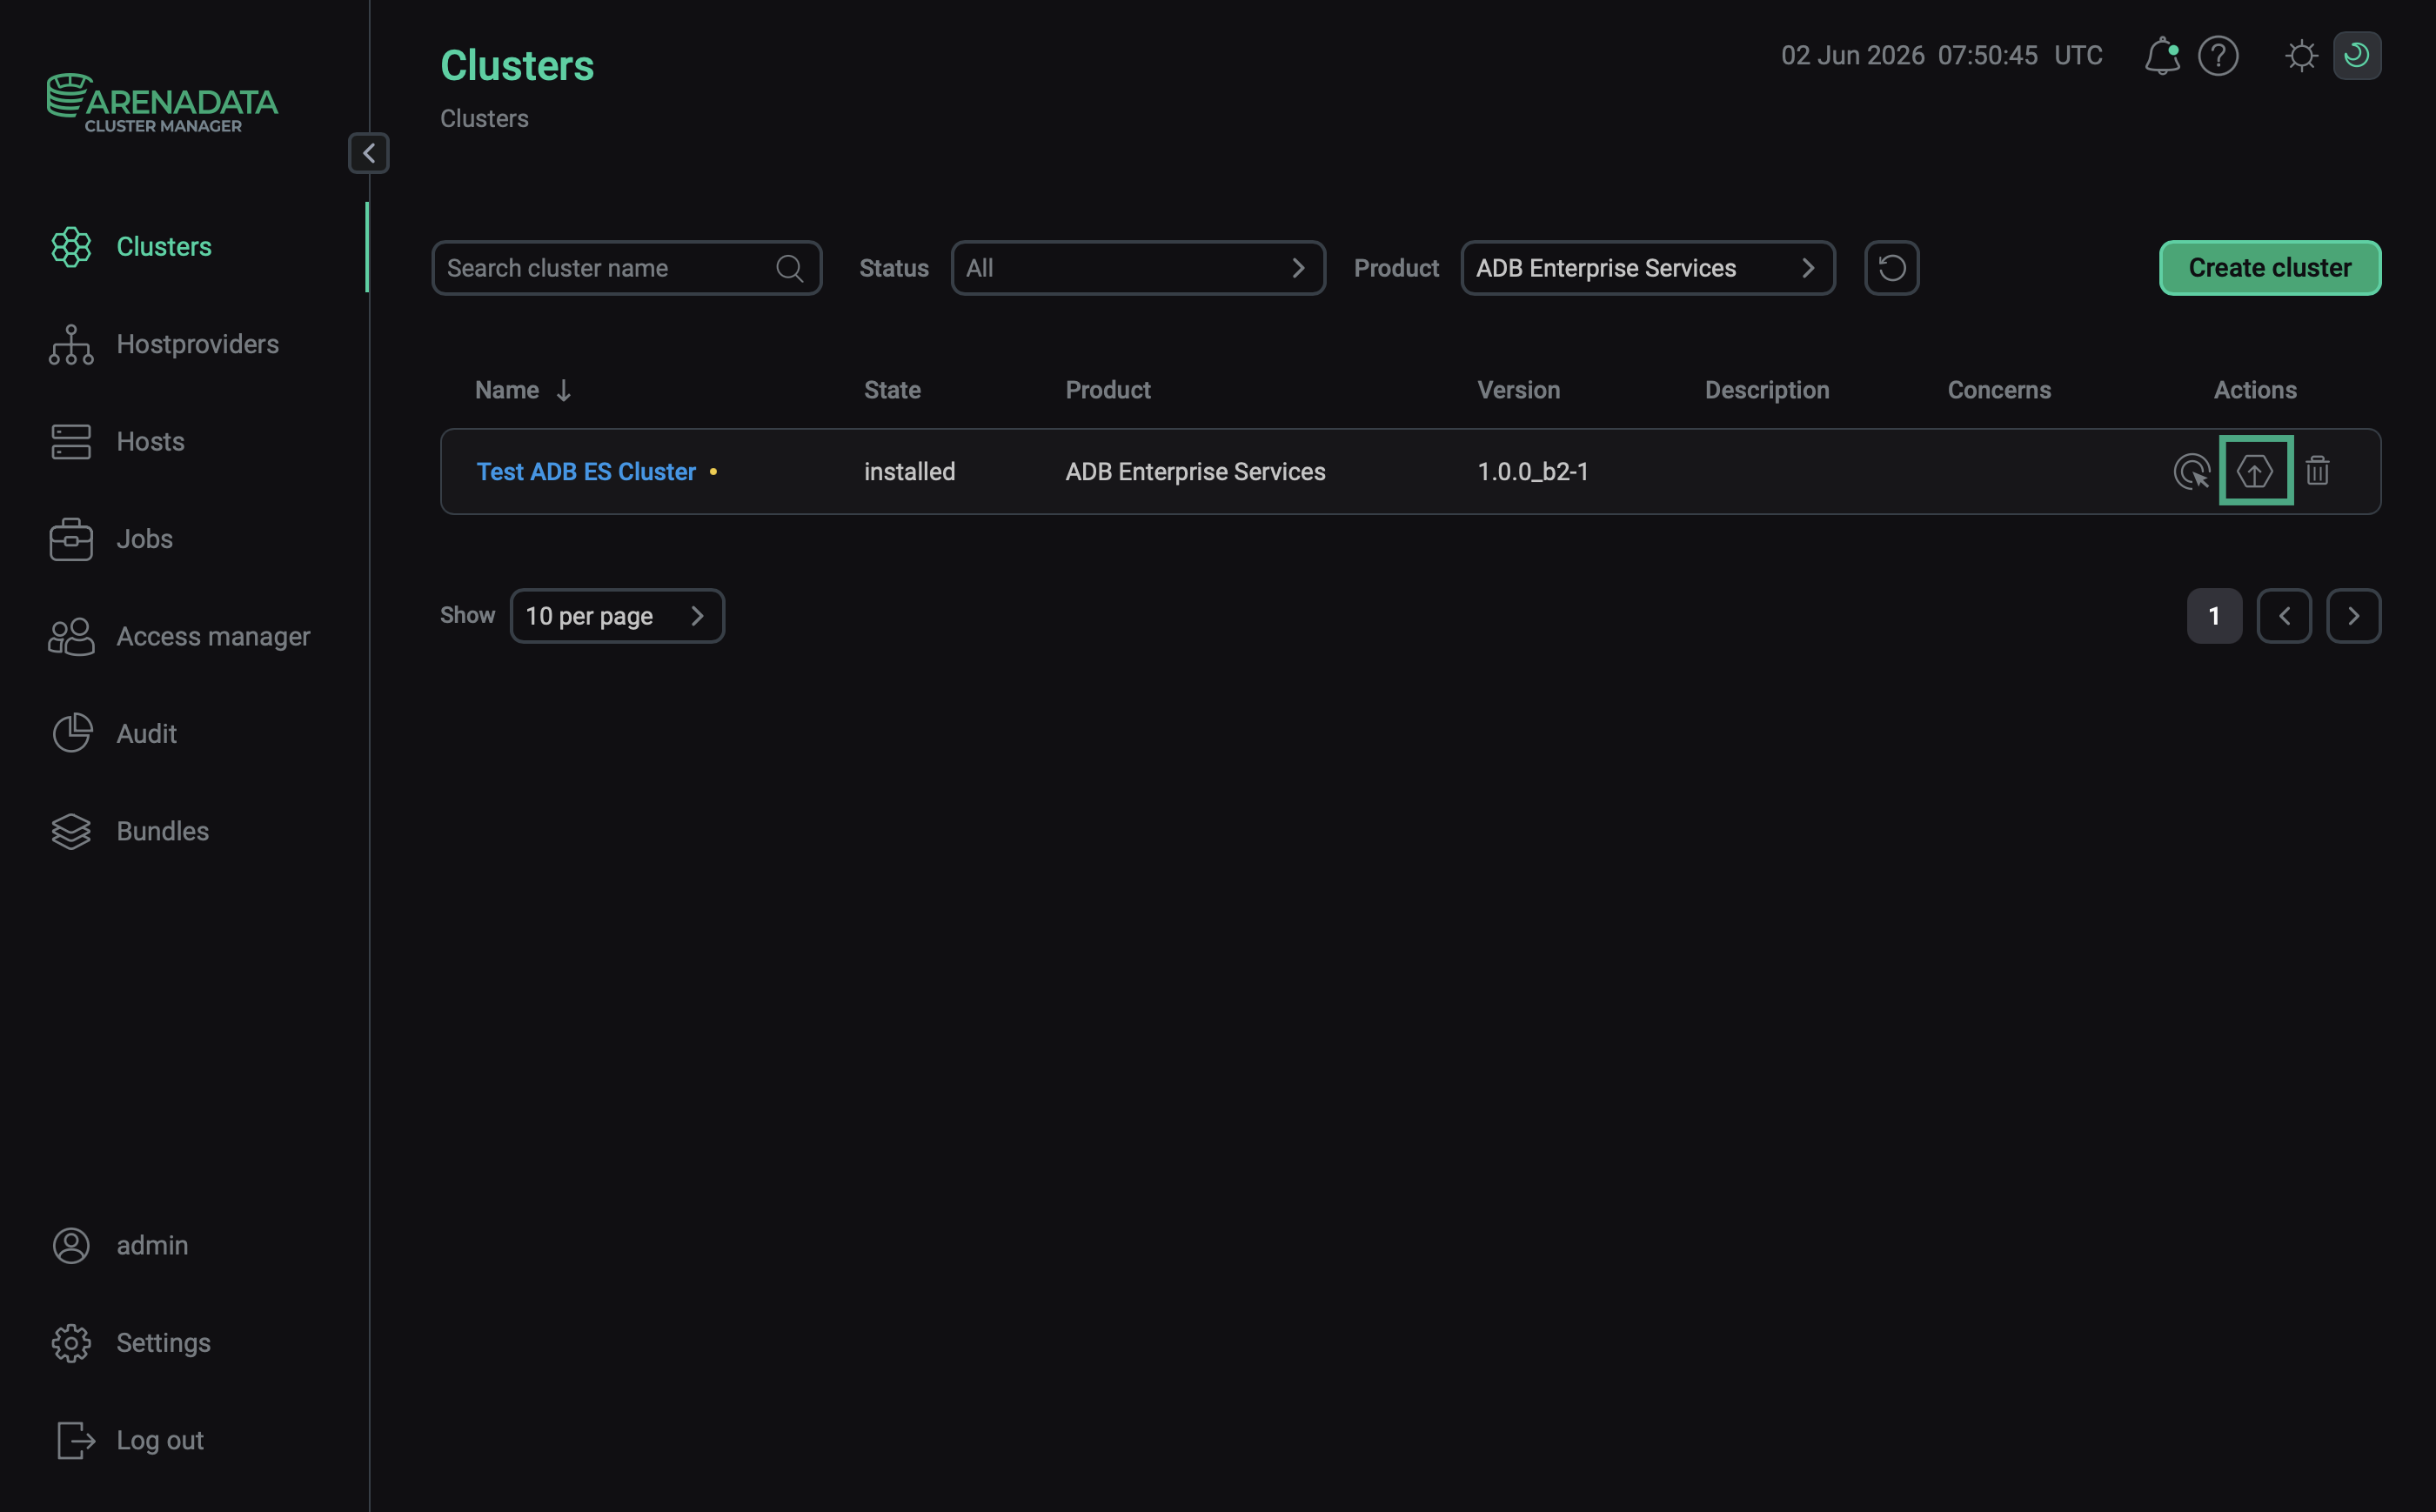 The Upgrade icon
 -
In the window that opens, select the bundle version in the Upgrade to version field and click Upgrade.
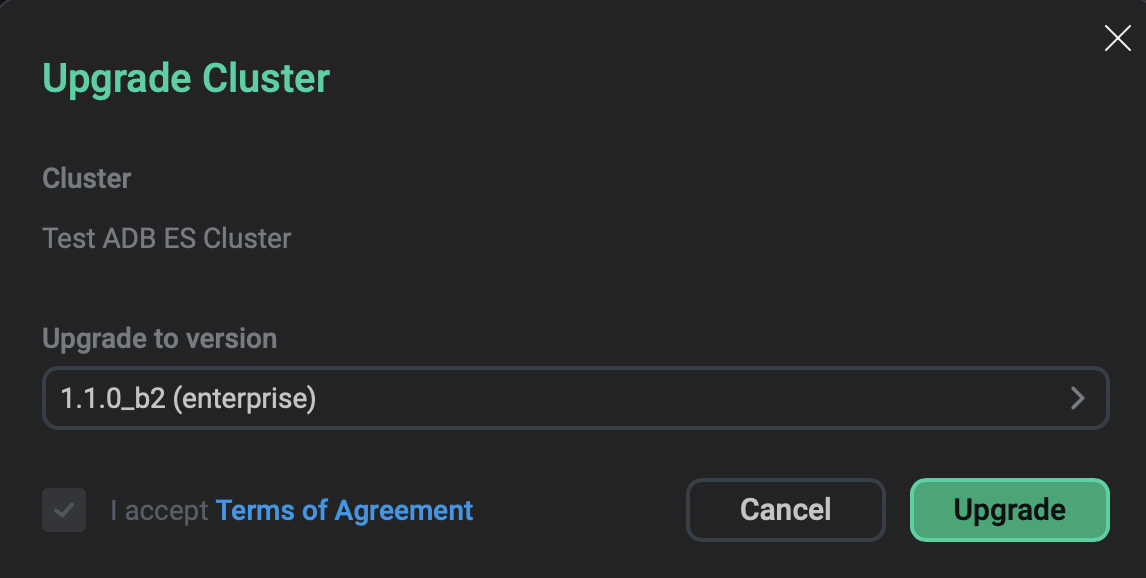 Upgrade preparation dialog
 -
In the dialog that opens, confirm the action by clicking Run.
This starts the upgrade preparation job, Upgrade: <bundle_version>, where
<bundle_version>is the selected bundle version, for example Upgrade: 1.1.0_b2 (enterprise). When the job completes successfully, the ADB ES cluster status changes toready to upgrade. -
On the Clusters page, click the

 icon in the Actions column and select the Upgrade action.
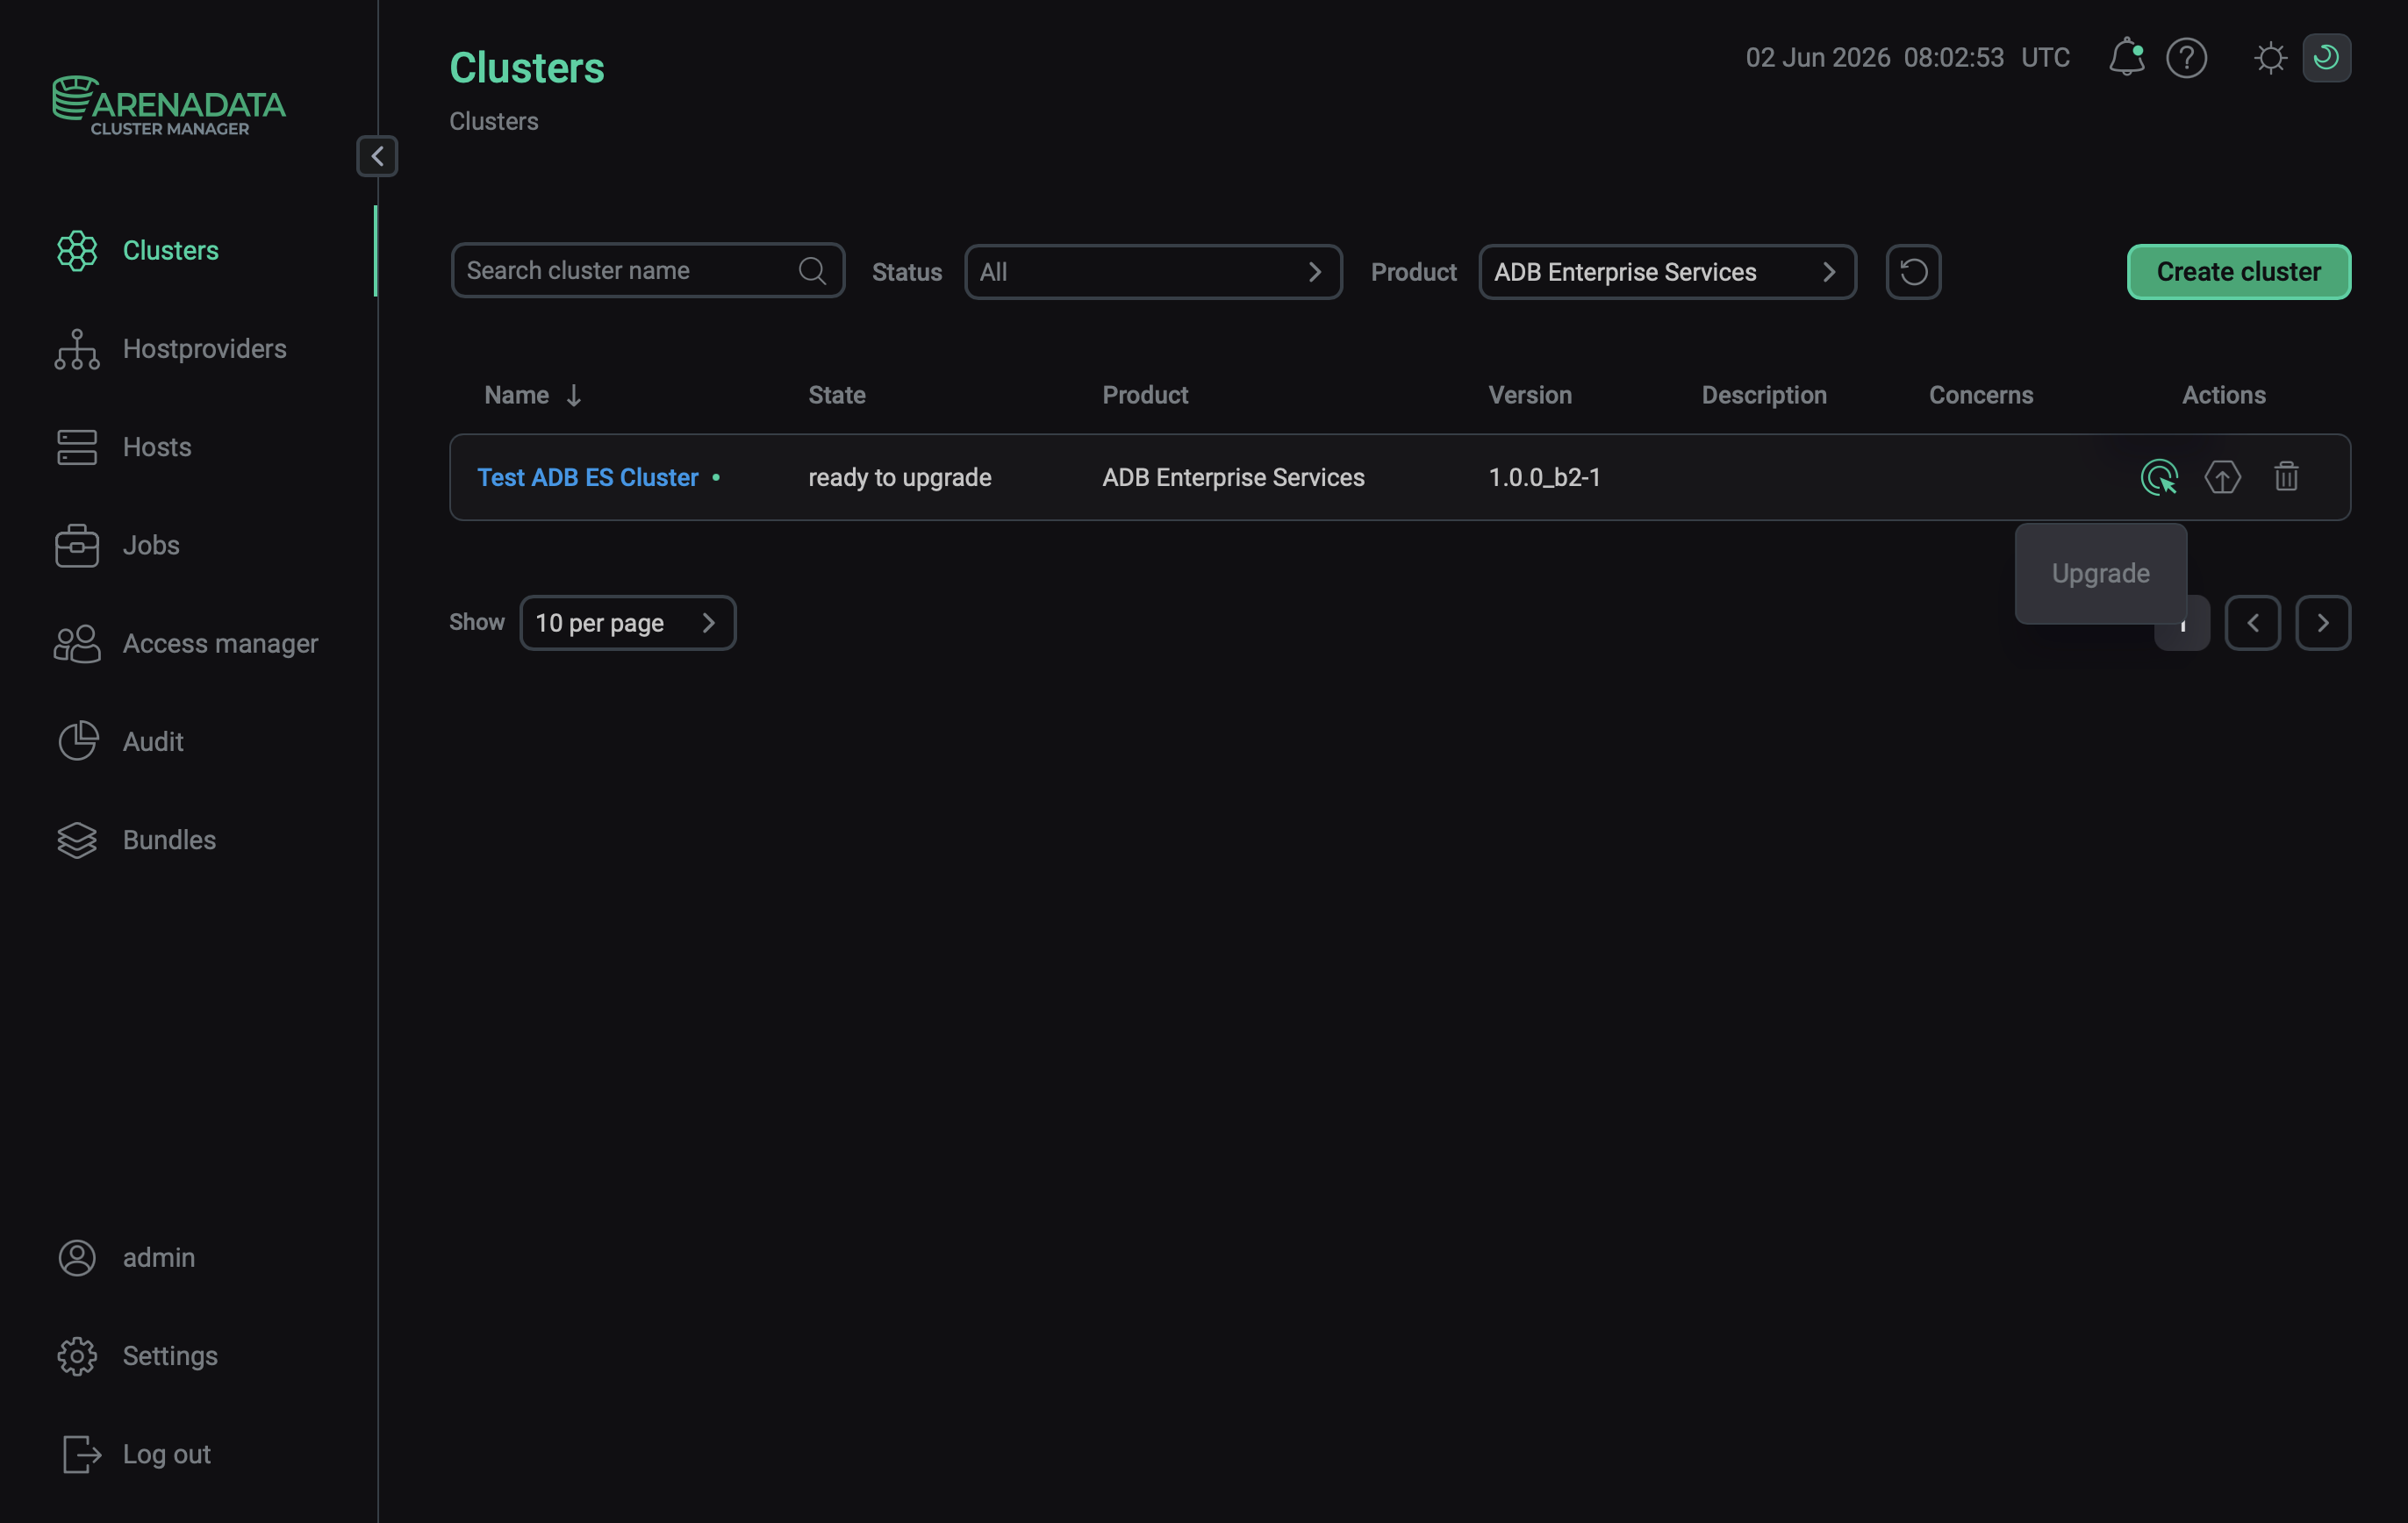 Select the Upgrade action
If you upgrade ADB ES from 1.1.1 or earlier to 1.2.0 or later, the Upgrade action allows you to specify the GID for the adbes system group.
-
In the dialog that opens, confirm the action by clicking Run.
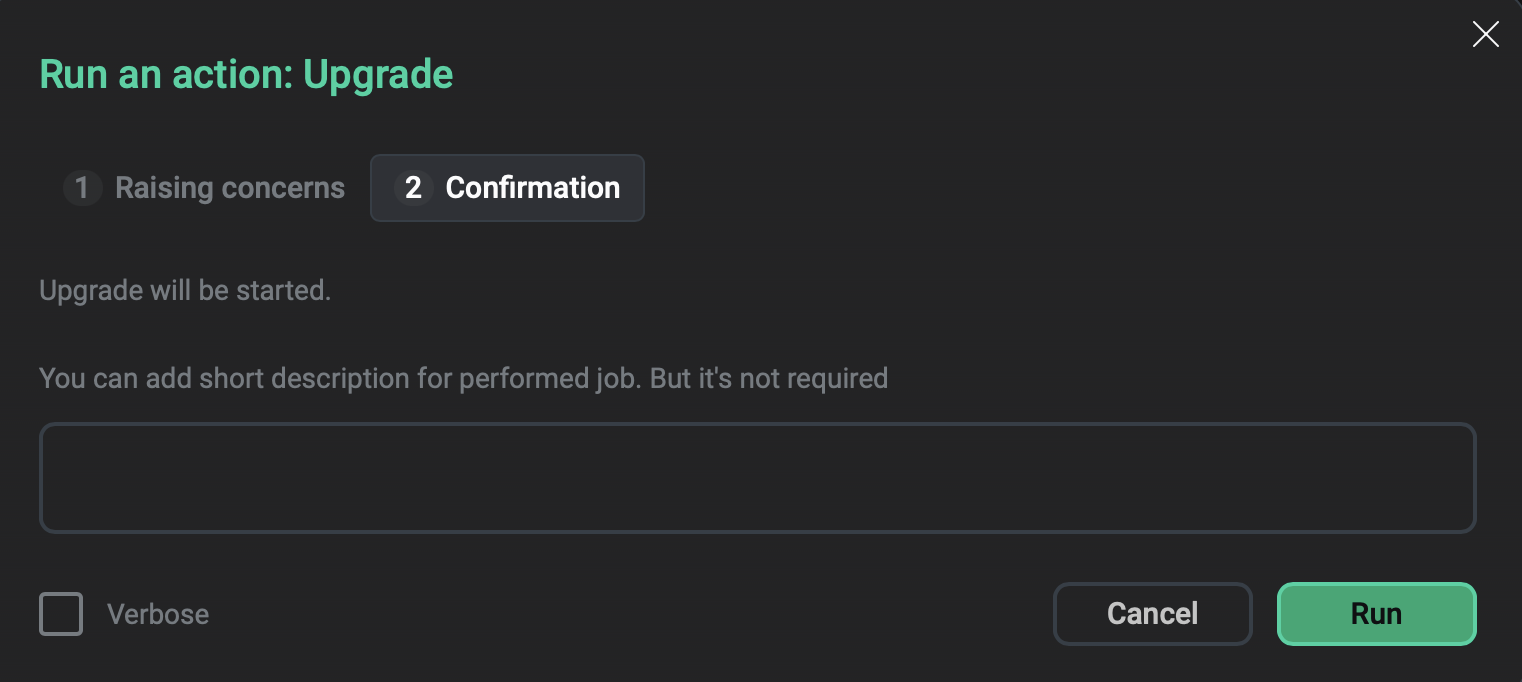 Confirm the Upgrade action
As a result, the Upgrade job starts. To view the upgrade progress of specific components, you can open the job details in the Jobs tab.
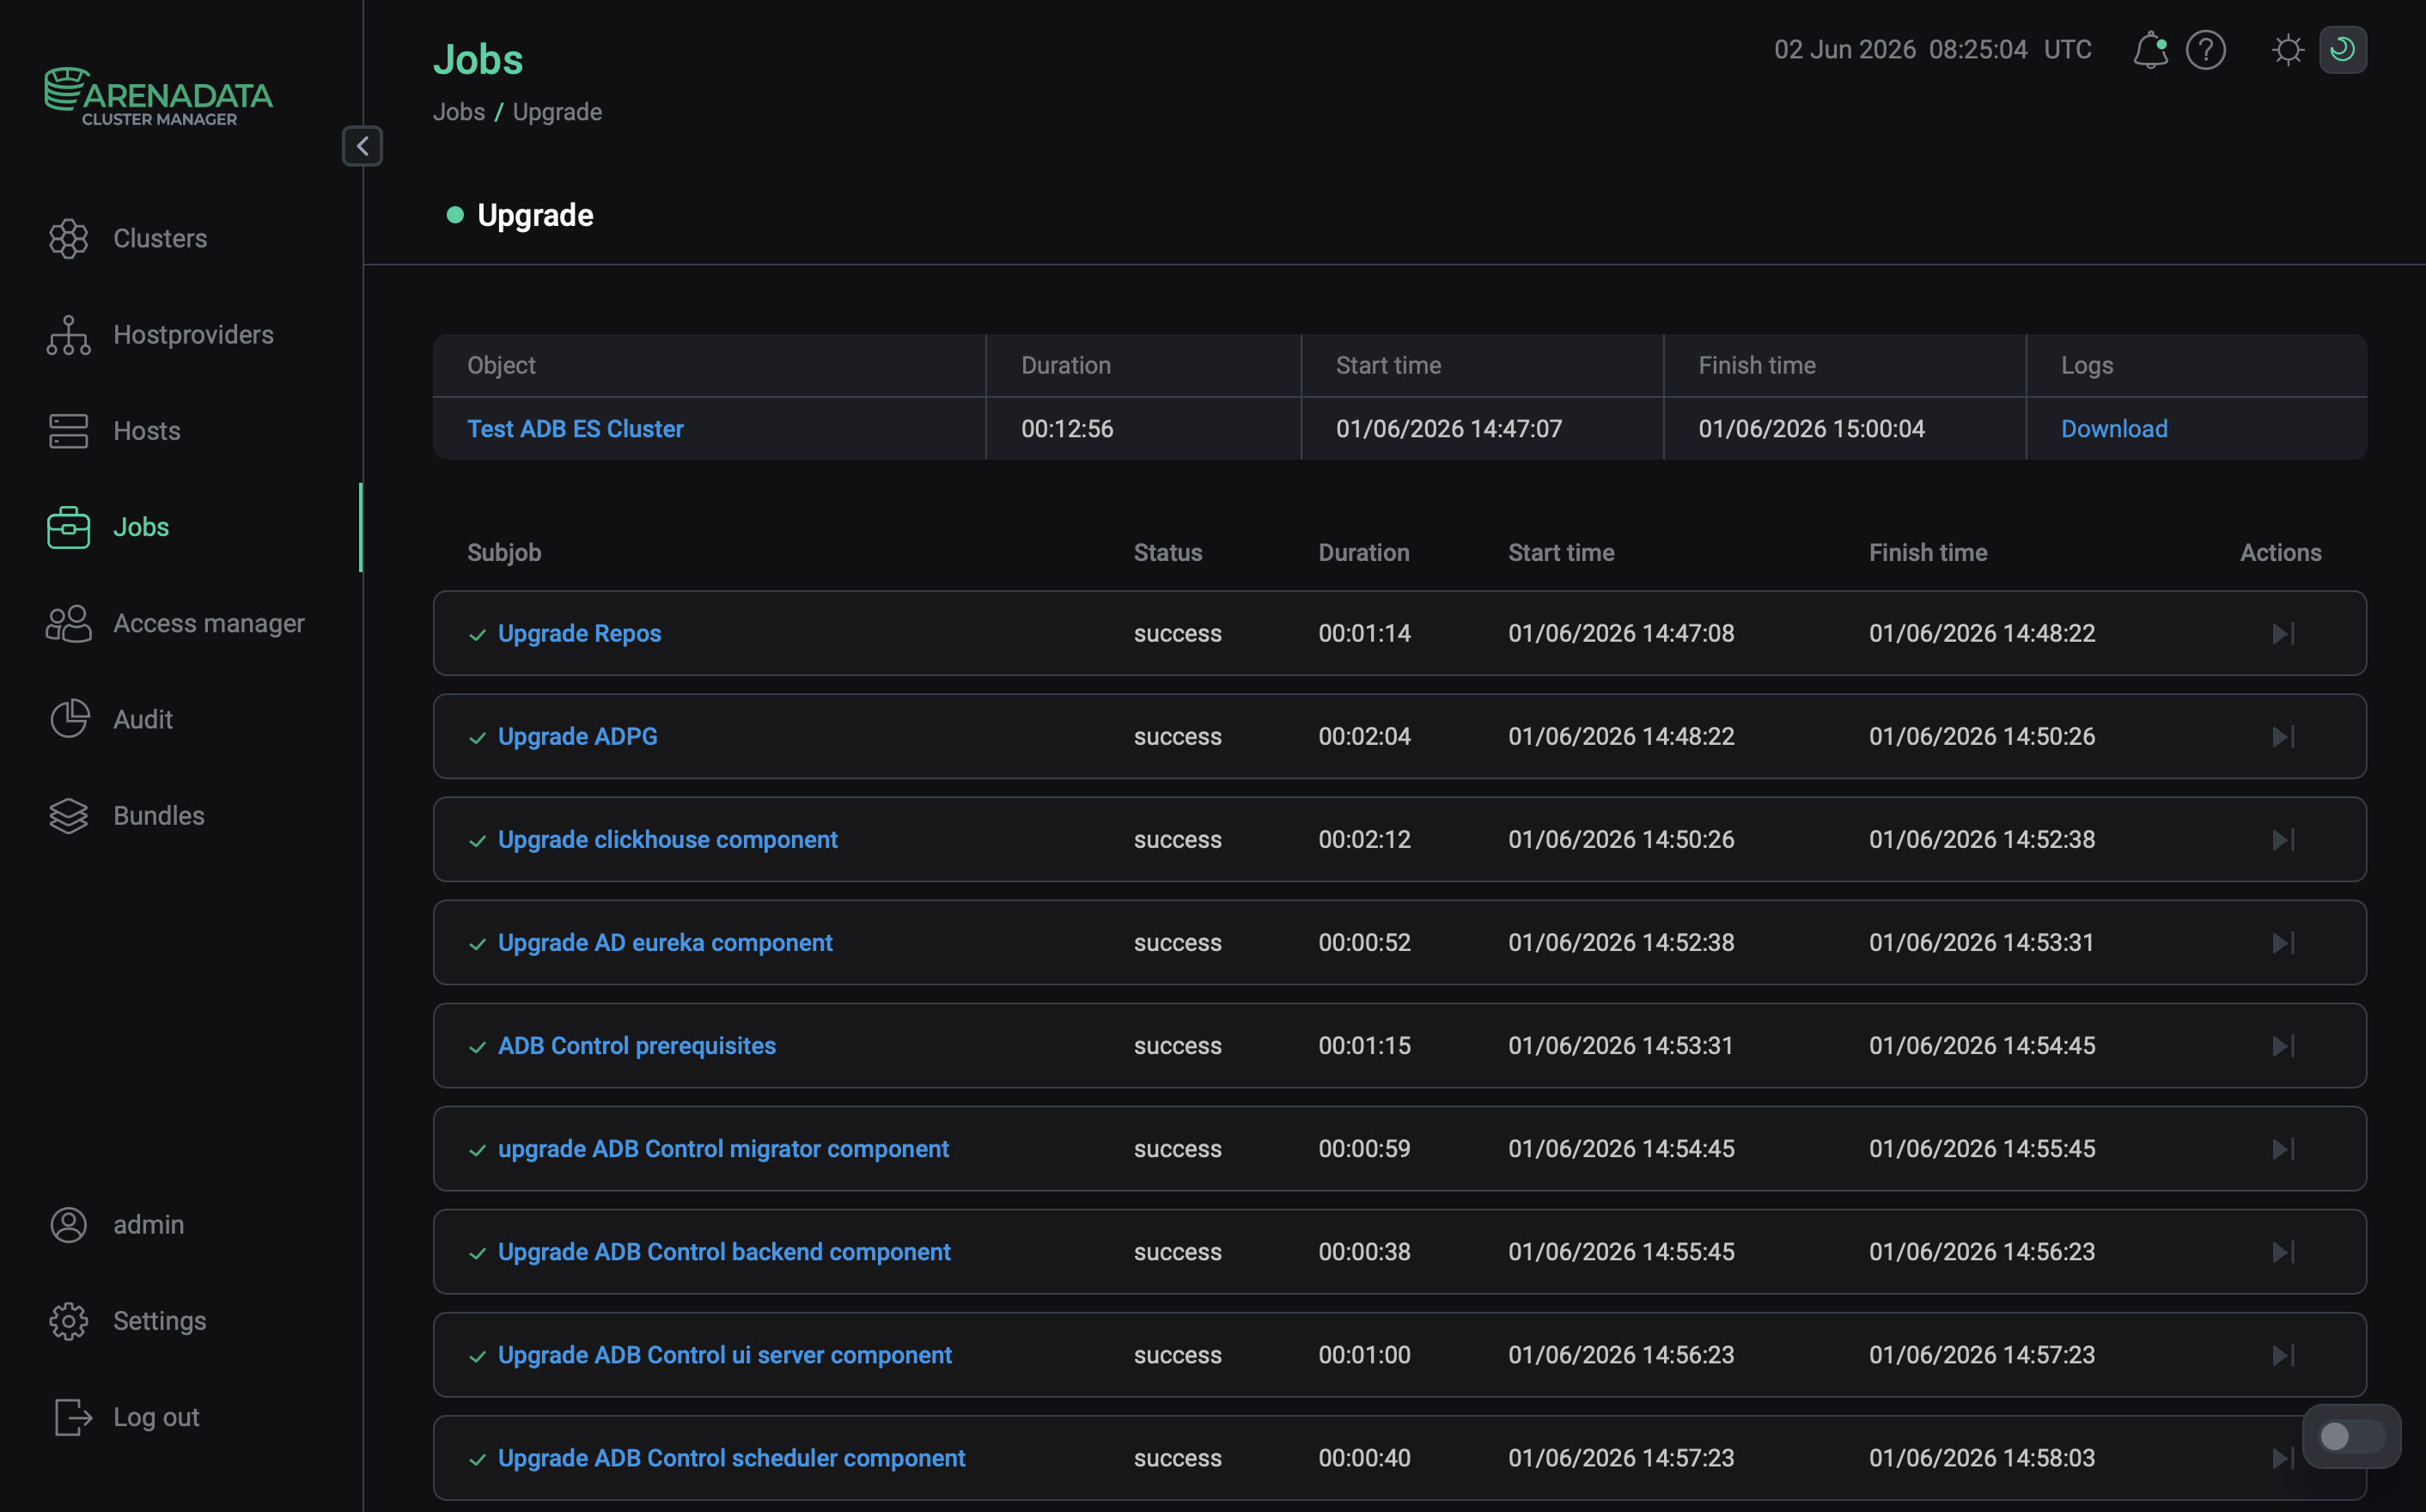 The Upgrade action progress
Upon successful completion, the ADB ES cluster status changes to
installed, and the updated cluster version is shown in the Version column of the Clusters page. If the upgrade fails, check the logs in the Upgrade job details for errors.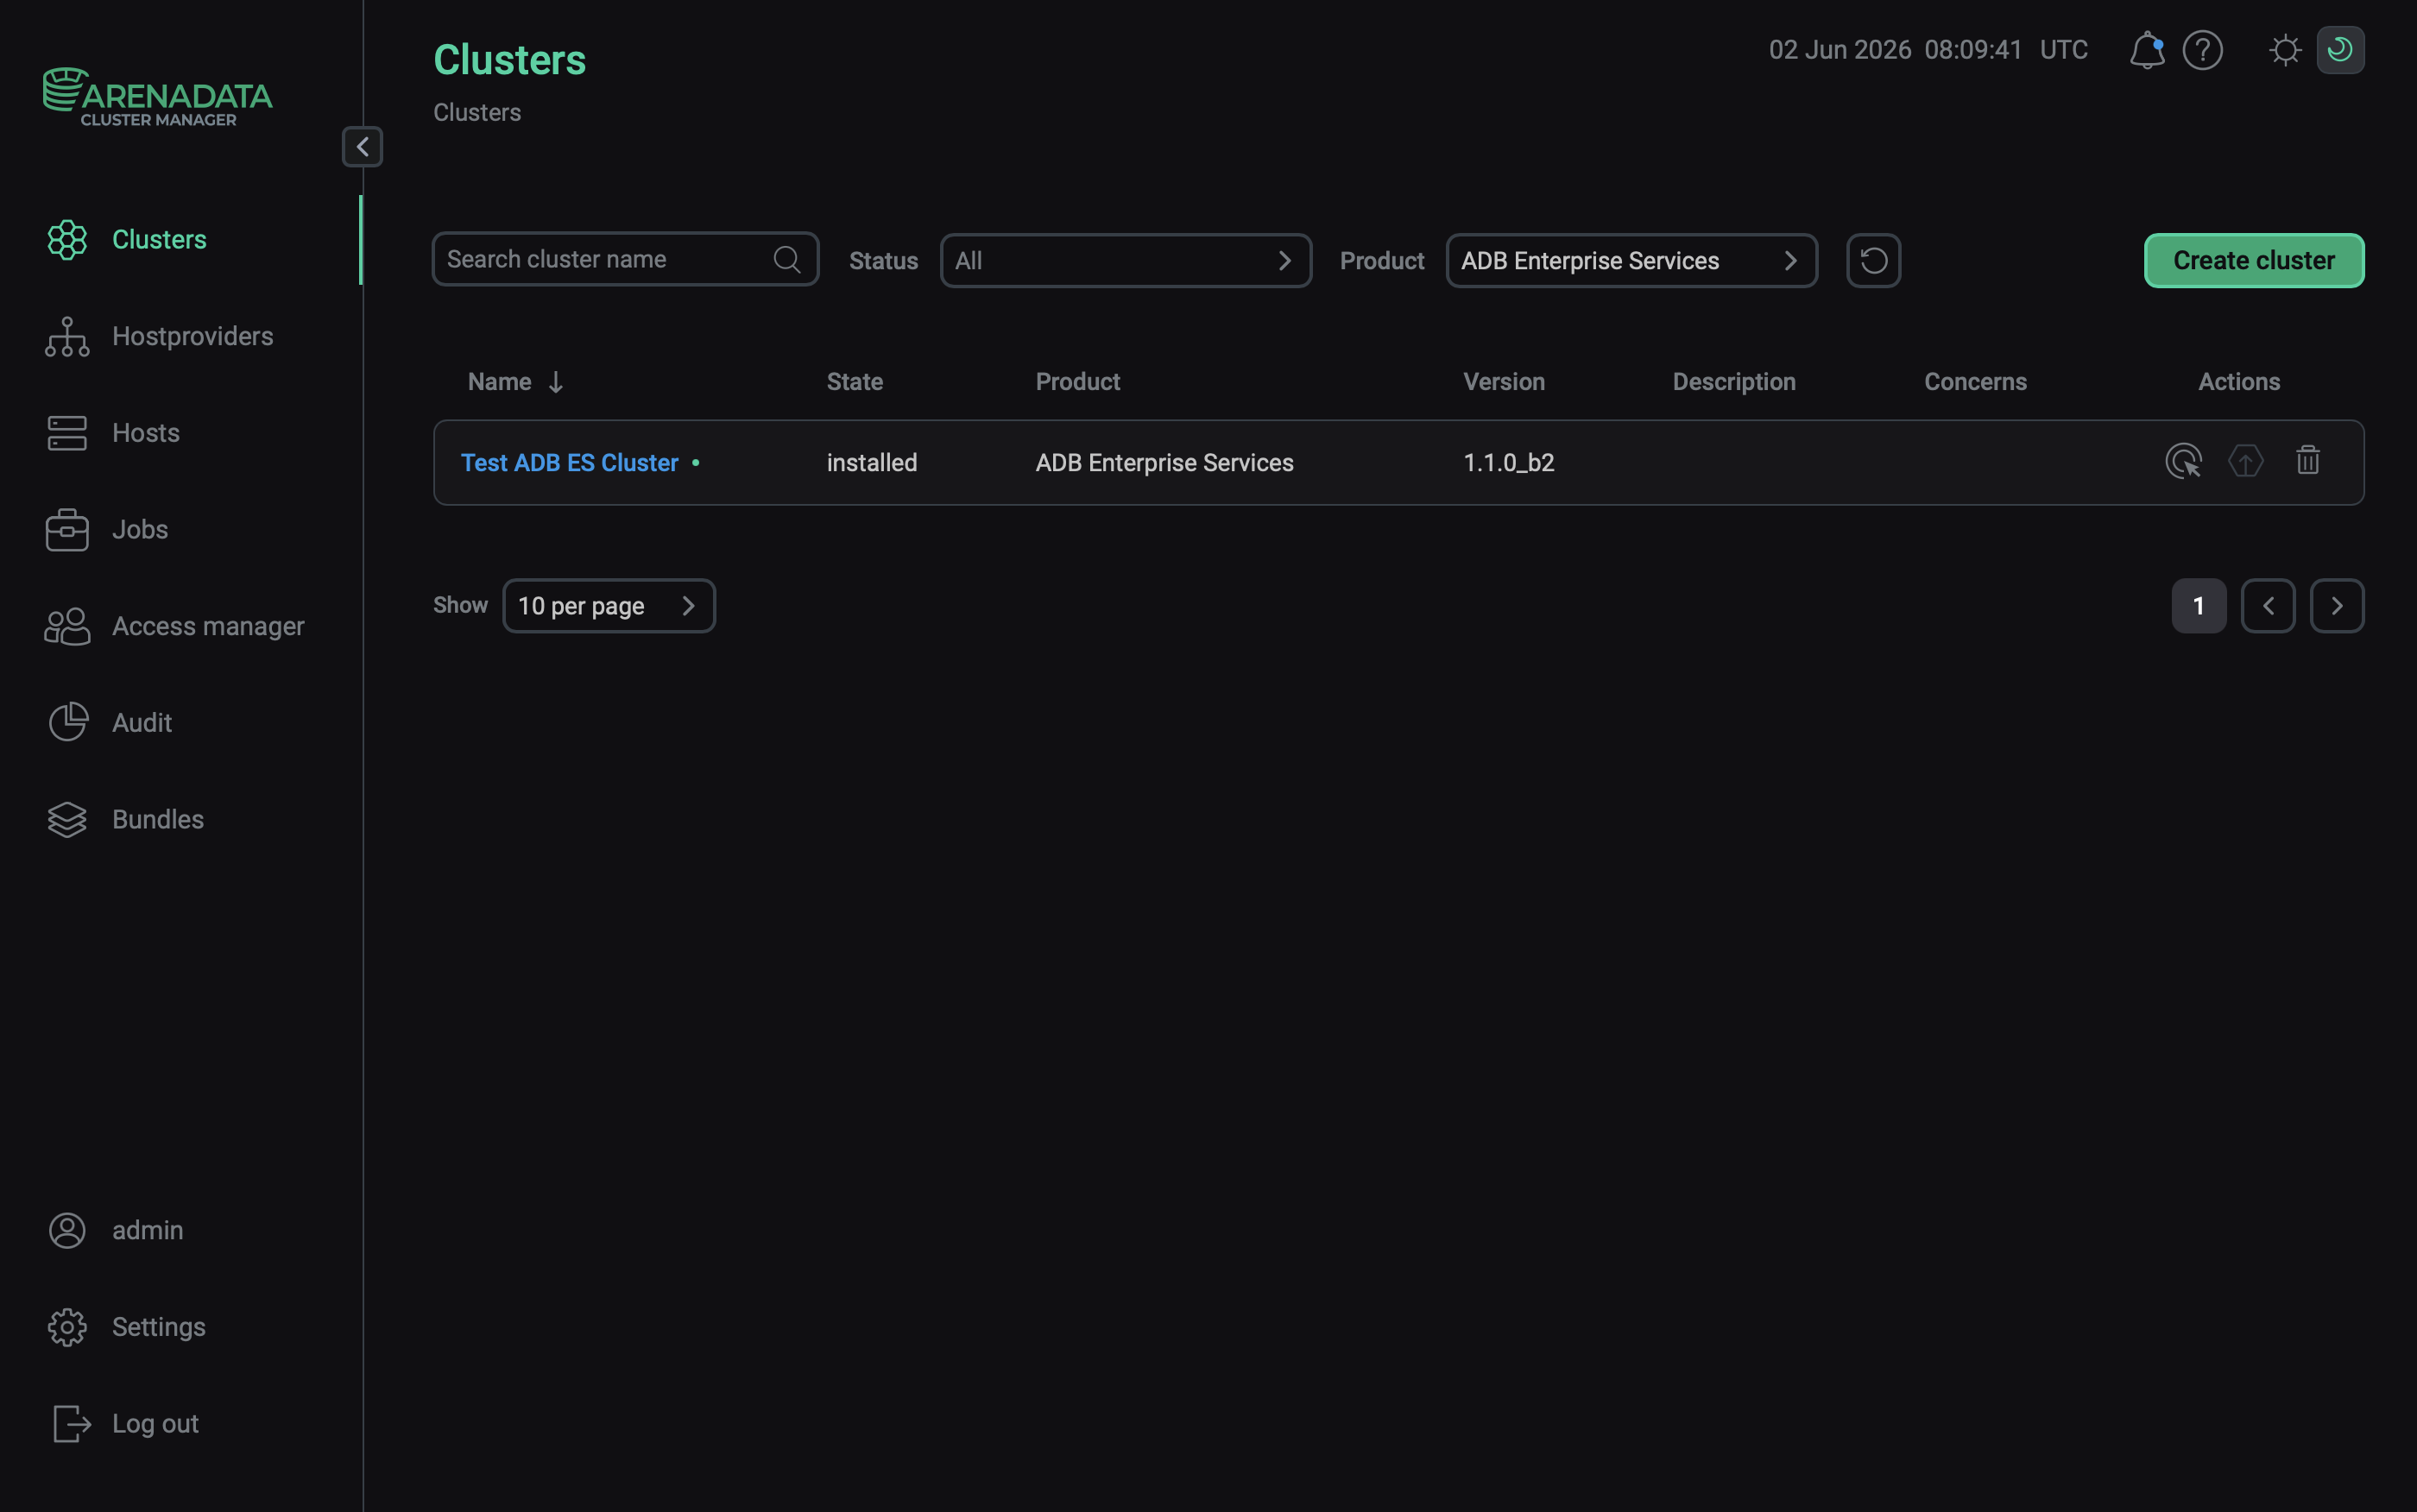 Upgrade completed
|
NOTE
An ADB ES bundle can include updates for the ADBC and ADBM agents. To update them to the newer version, run the Reinstall action on the respective ADBC agents and ADBM agents services in all connected ADB clusters after the ADB ES upgrade. |
Set up GID for ADB ES group when upgrading to 1.2.0
In ADB ES, for SSL to work correctly, certificate files must have owners and groups as specified in Manage SSL.
In ADB ES 1.2.0, the adbes system group was introduced and is used as the owner group for the keystore and truststore files used by ADB Control, ADBM, and AD Eureka.
When upgrading ADB ES from 1.1.1 or earlier to 1.2.0 or later, the bundle automatically creates the adbes system group with the GID that you specify (3033 by default).
Before the upgrade, you have to assign this GID to the keystore and truststore files on each host where ADB Control, ADBM, and AD Eureka are installed.
-
If you use environment variables to set up SSL for ADBM (such as
ADBM_CORE_SSL_KEY_STOREandADBM_CORE_SSL_TRUST_STORE), remove them. -
Assign a GID to the required keystore and truststore files. For example:
$ chgrp 3033 /opt/ssl/adcc-server/truststore.p12 /opt/ssl/adcc-server/keystore.p12 -
Start the upgrade process.
-
In the Upgrade action form, in the ADB ES group GID field, enter the specified GID, for example
3033.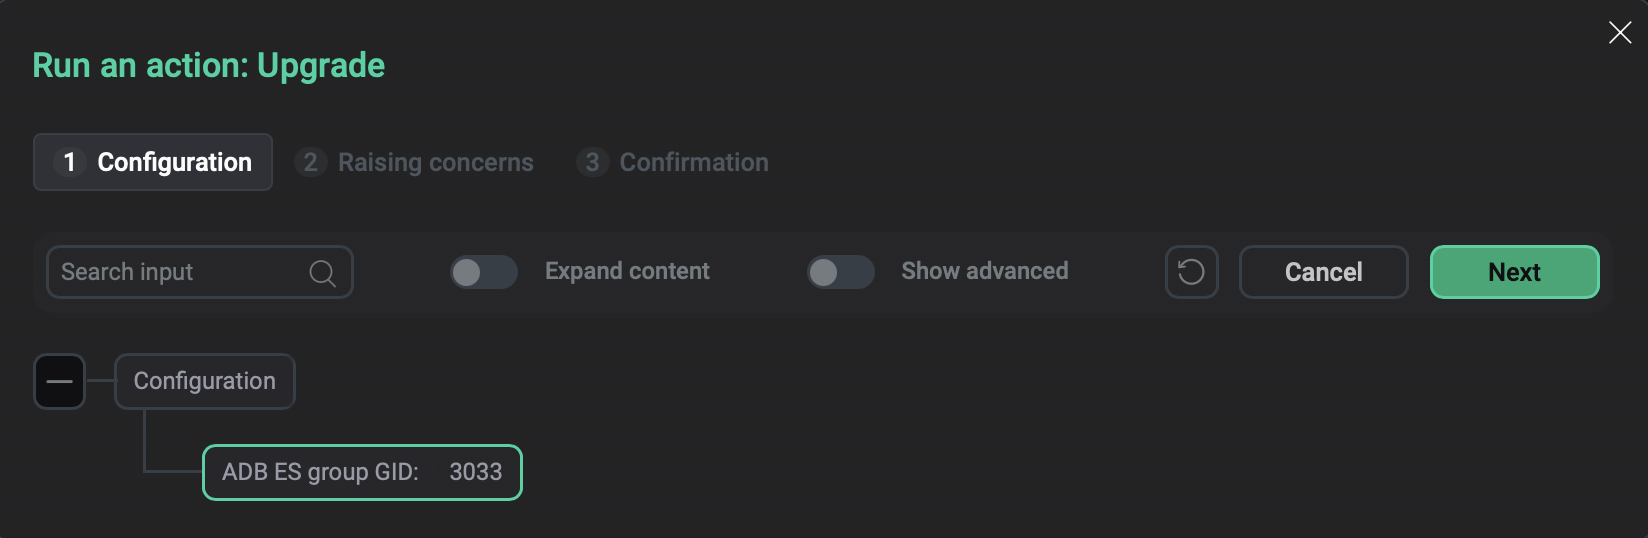 ADB ES group GID field in the Upgrade action
 -
Click Next and then Run to complete the upgrade. During the upgrade, the bundle will create the
adbesgroup with this specified GID.
|
IMPORTANT
If you do not assign the specified GID to the required keystore and truststore files, the upgrade job in ADCM completes successfully, but the ADBM migration service will fail. In this case, assign the GID to the required files after the upgrade and then run the Manage SSL cluster action. |
Transfer advanced parameters
If you upgrade from ADB 6.29.1 and earlier, you may need to transfer advanced parameters. In ADB 6.29.1 and earlier, the advanced parameters were configured in the YAML format in the Advanced parameters group of the ADB Control and ADBM services of the ADB cluster.
In ADB ES, the advanced parameters are located in the corresponding services of the ADB ES cluster as shown in the tables below. The agent parameters are located in the corresponding ADB cluster.
| Parameter (ADB 6.29.1 and earlier) | Current service | Current location |
|---|---|---|
Backend app parameters |
ADB Control |
Backend parameters |
Registry app parameters |
AD Eureka |
Registry parameters |
UI server app parameters |
ADB Control |
UI component parameters |
Scheduler app parameters |
ADB Control |
ADB Control scheduler param |
Migration app parameters |
ADB Control |
Database migration parameters |
ADB Control agent properties |
ADBC agents |
Connected ADB cluster |
ADB Control agent hazelcast properties |
ADBC agents |
Connected ADB cluster |
| Parameter (ADB 6.29.1 and earlier) | Current service | Current location |
|---|---|---|
Backend app parameters |
ADBM |
Backend parameters |
Backend auth properties |
ADBM |
Backend parameters |
Migration app parameters |
ADBM |
Database migration parameters |
ADBM agent properties |
ADBM agents |
Connected ADB cluster |
Each component has:
-
The app parameters field (for example Backend app parameters in ADB Control) that lists the component environment variables in the
${ENV_VAR:default}form. Use this field as a reference to get the variable names. -
The environment key-value section (for example Backend server app environment key-value) that you can use to customize the variable values.
|
NOTE
|
Example of transferring a parameter
To transfer a parameter value, copy it and identify the variable name where this value should be applied.
For example, to transfer the value of the moveToActiveTimeoutSeconds parameter:
-
In the ADB cluster (version 6.29.1 or earlier), select the ADB Control service on the Services tab, select the Advanced flag, and expand the Advanced parameters group.
-
Open the ADB Control agent properties group of parameters (in the YAML format), find the required parameter (
moveToActiveTimeoutSecondsin this example), and copy its value.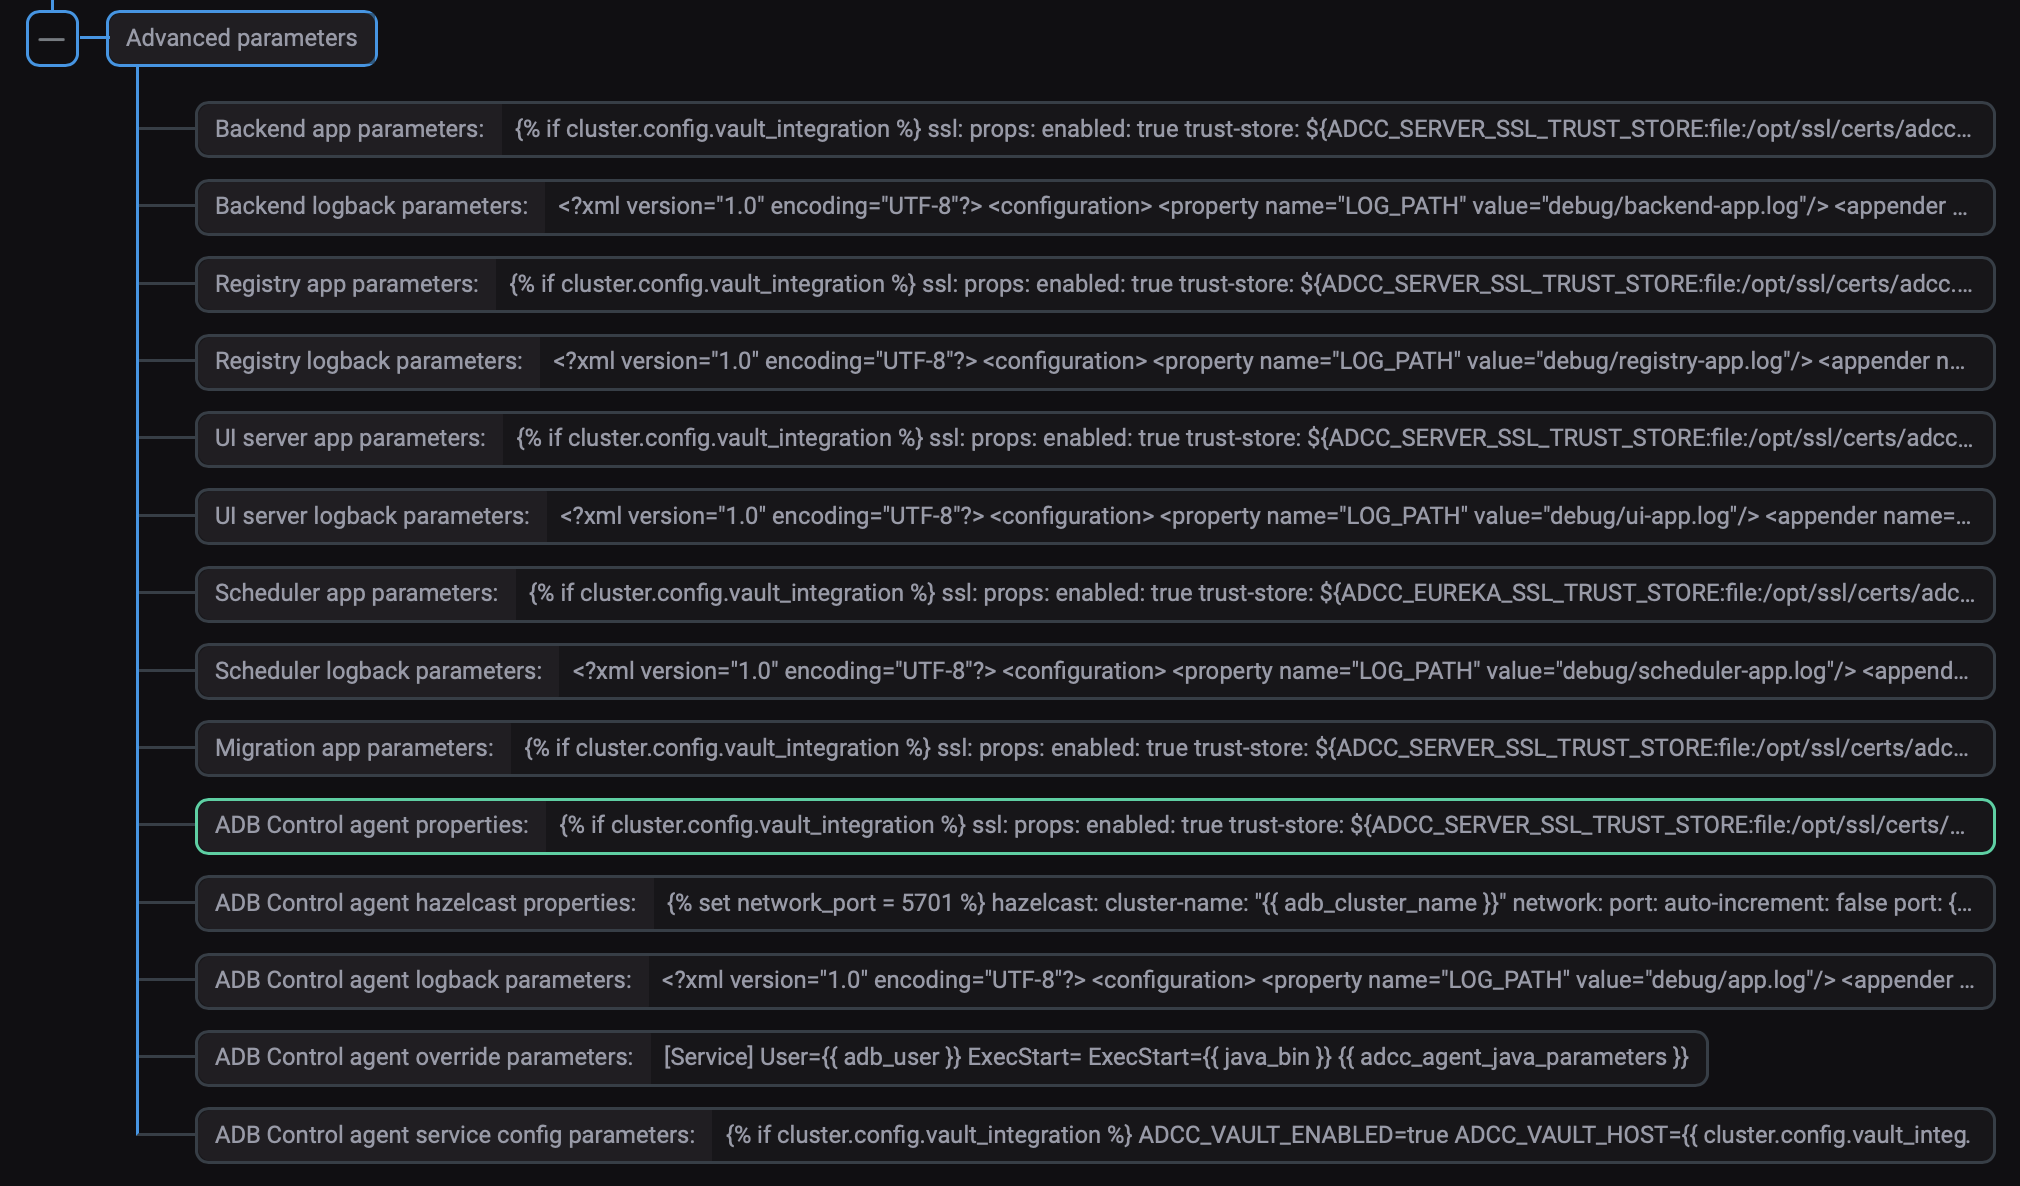 ADB Control agent properties in 6.29.1 and earlier
 -
To identify the corresponding variable name to be used in ADB ES, navigate to the ADB ES cluster, select the ADB Control service, open the read-only ADCC agents environment reference file field and search it by
moveToActiveTimeoutSeconds.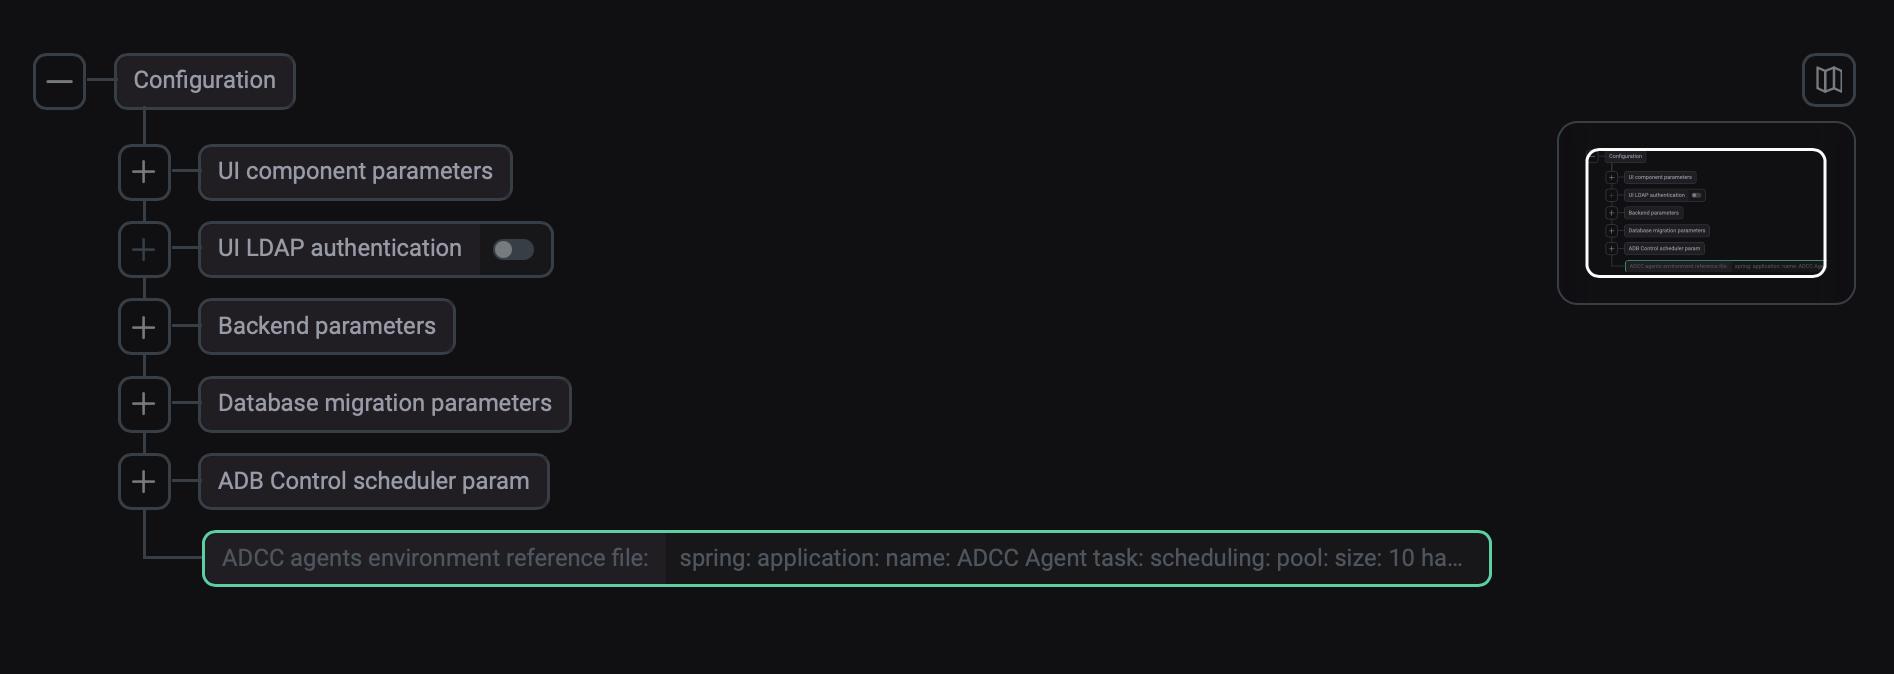 ADCC agents environment reference file
The file contains the following section:
    queryIdCache:
      moveToActiveTimeoutSeconds: ${ADCC_QUERY_ID_CACHE_MOVE_TO_ACTIVE_TIMEOUT_SECONDS:5}
So the variable name to be used in ADB ES is
ADCC_QUERY_ID_CACHE_MOVE_TO_ACTIVE_TIMEOUT_SECONDS. -
Because it’s an agent-level parameter, open the connected ADB cluster upgraded to a newer version.
-
On the Services tab, select the ADBC agents service and navigate to ADB control agent parameters.
-
In the Environment key-value section, click Add property and enter
ADCC_QUERY_ID_CACHE_MOVE_TO_ACTIVE_TIMEOUT_SECONDSas the variable name and the required number of seconds as its value.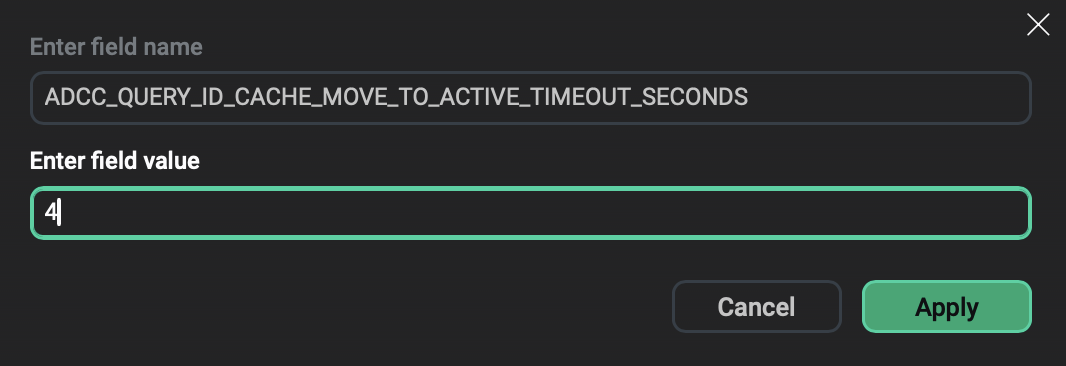 Adding ADBC agents service property
The resulting ADBC agents service settings look as follows:
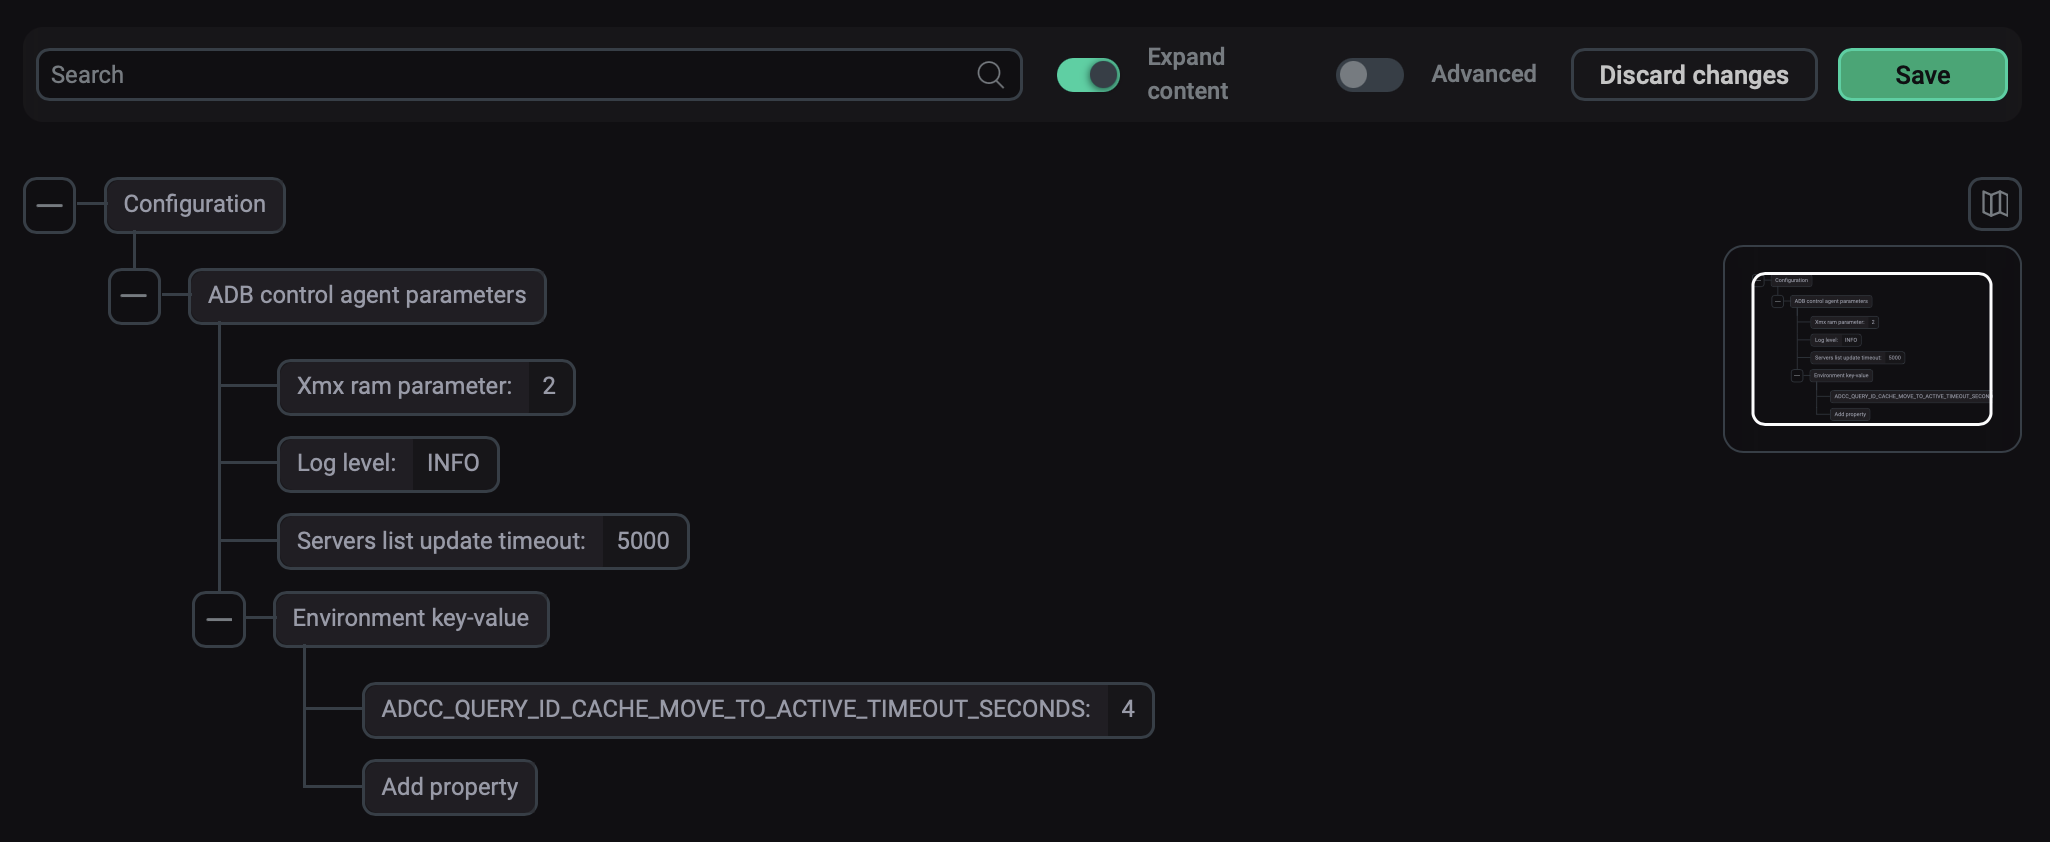 The resulting ADBC agents service
 -
Click Save and run the Reconfigure and restart action of the ADBC agents service to apply the changes.