

ClickHouse Keeper
To use ClickHouse Keeper for data replication and query distribution in ADQM, you can:
-
install ClickHouse Keeper in an ADQM cluster as a separate service;
-
use ClickHouse Keeper integrated into a ClickHouse server.
ClickHouse Keeper as a service of ADQM
If you need to locate ClickHouse Keeper on dedicated hosts, install ClickHouse Keeper as a service in an ADQM cluster. For this, do the following in the ADCM interface:
-
Add the Clickhouse Keeper service to the ADQM cluster.
-
Install the Clickhouse Keeper Server component to an odd number of hosts.
-
Configure the Clickhouse Keeper service (for descriptions of available parameters, see the Configuration parameters article).
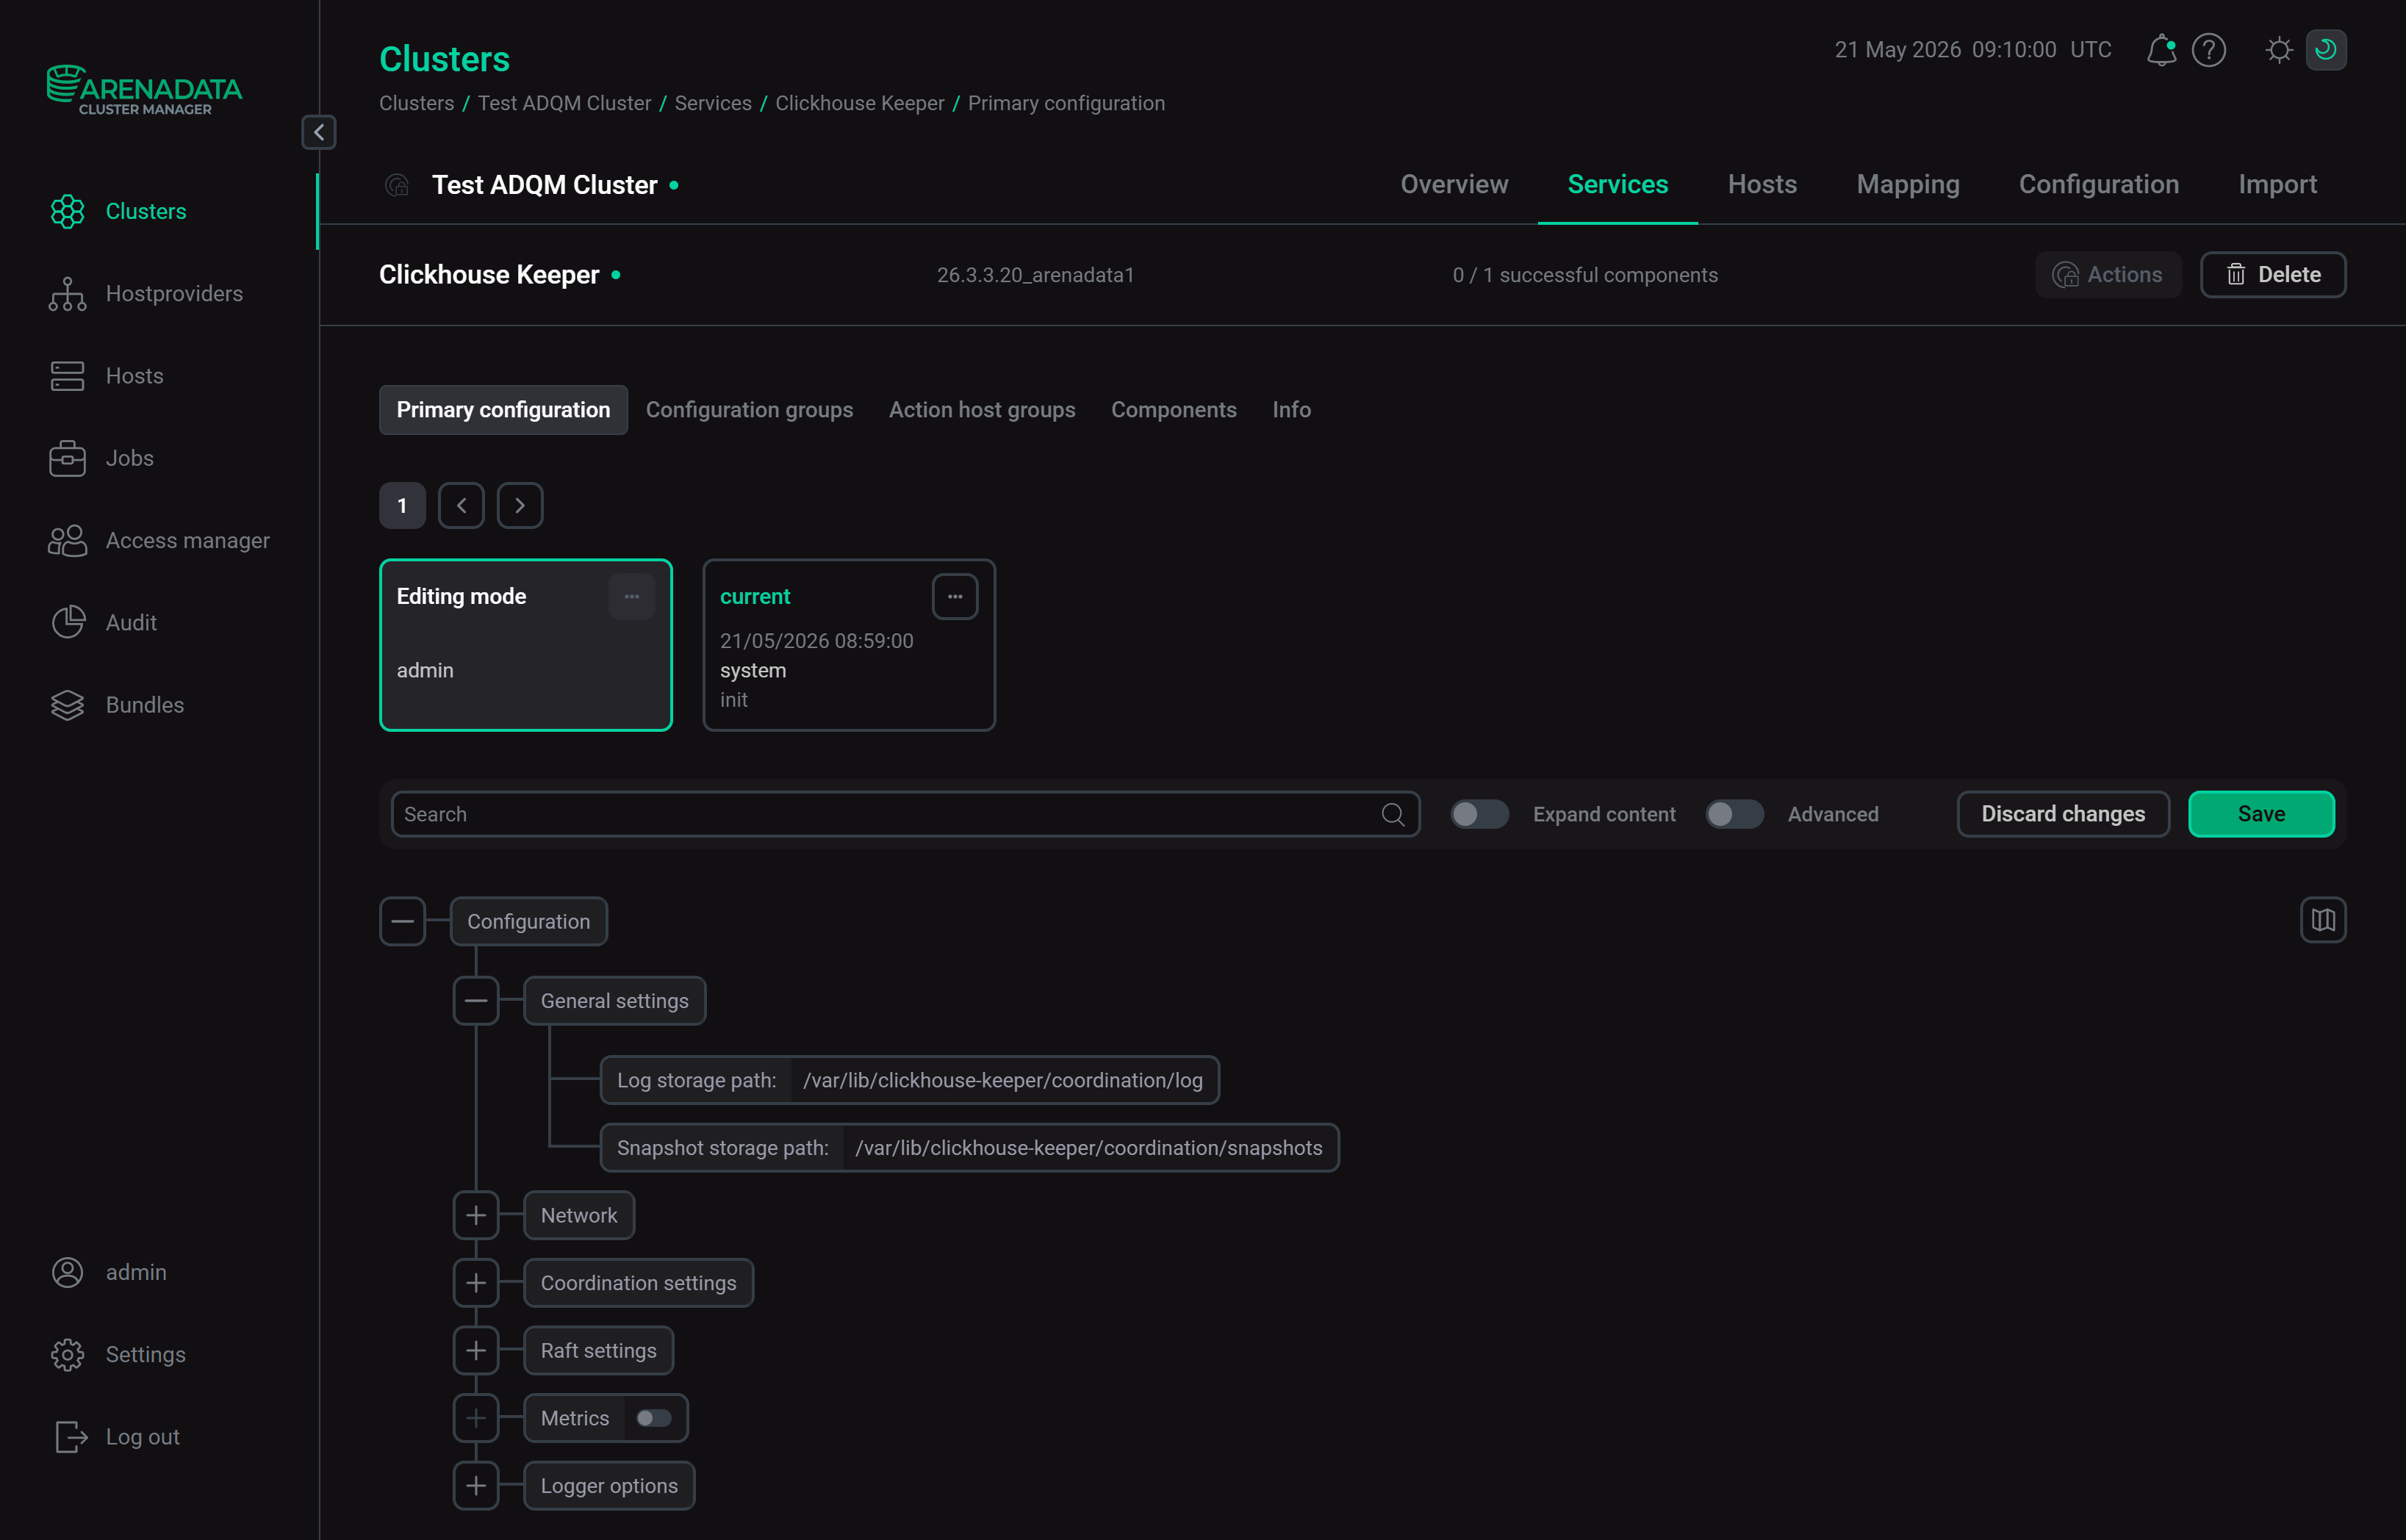 Set up the Clickhouse Keeper service
Click Save to save settings.
-
If you are migrating your cluster from ZooKeeper to ClickHouse Keeper, copy data from ZooKeeper to ClickHouse Keeper at this stage. Formats of ClickHouse Keeper snapshots and logs are incompatible with ZooKeeper, so you should first convert ZooKeeper data to ClickHouse Keeper snapshots (for details, see the Migration from ZooKeeper section in the ClickHouse documentation).
-
On the ADQMDB service configuration page, set
chkeeper_allocatedas the Coordination system parameter value.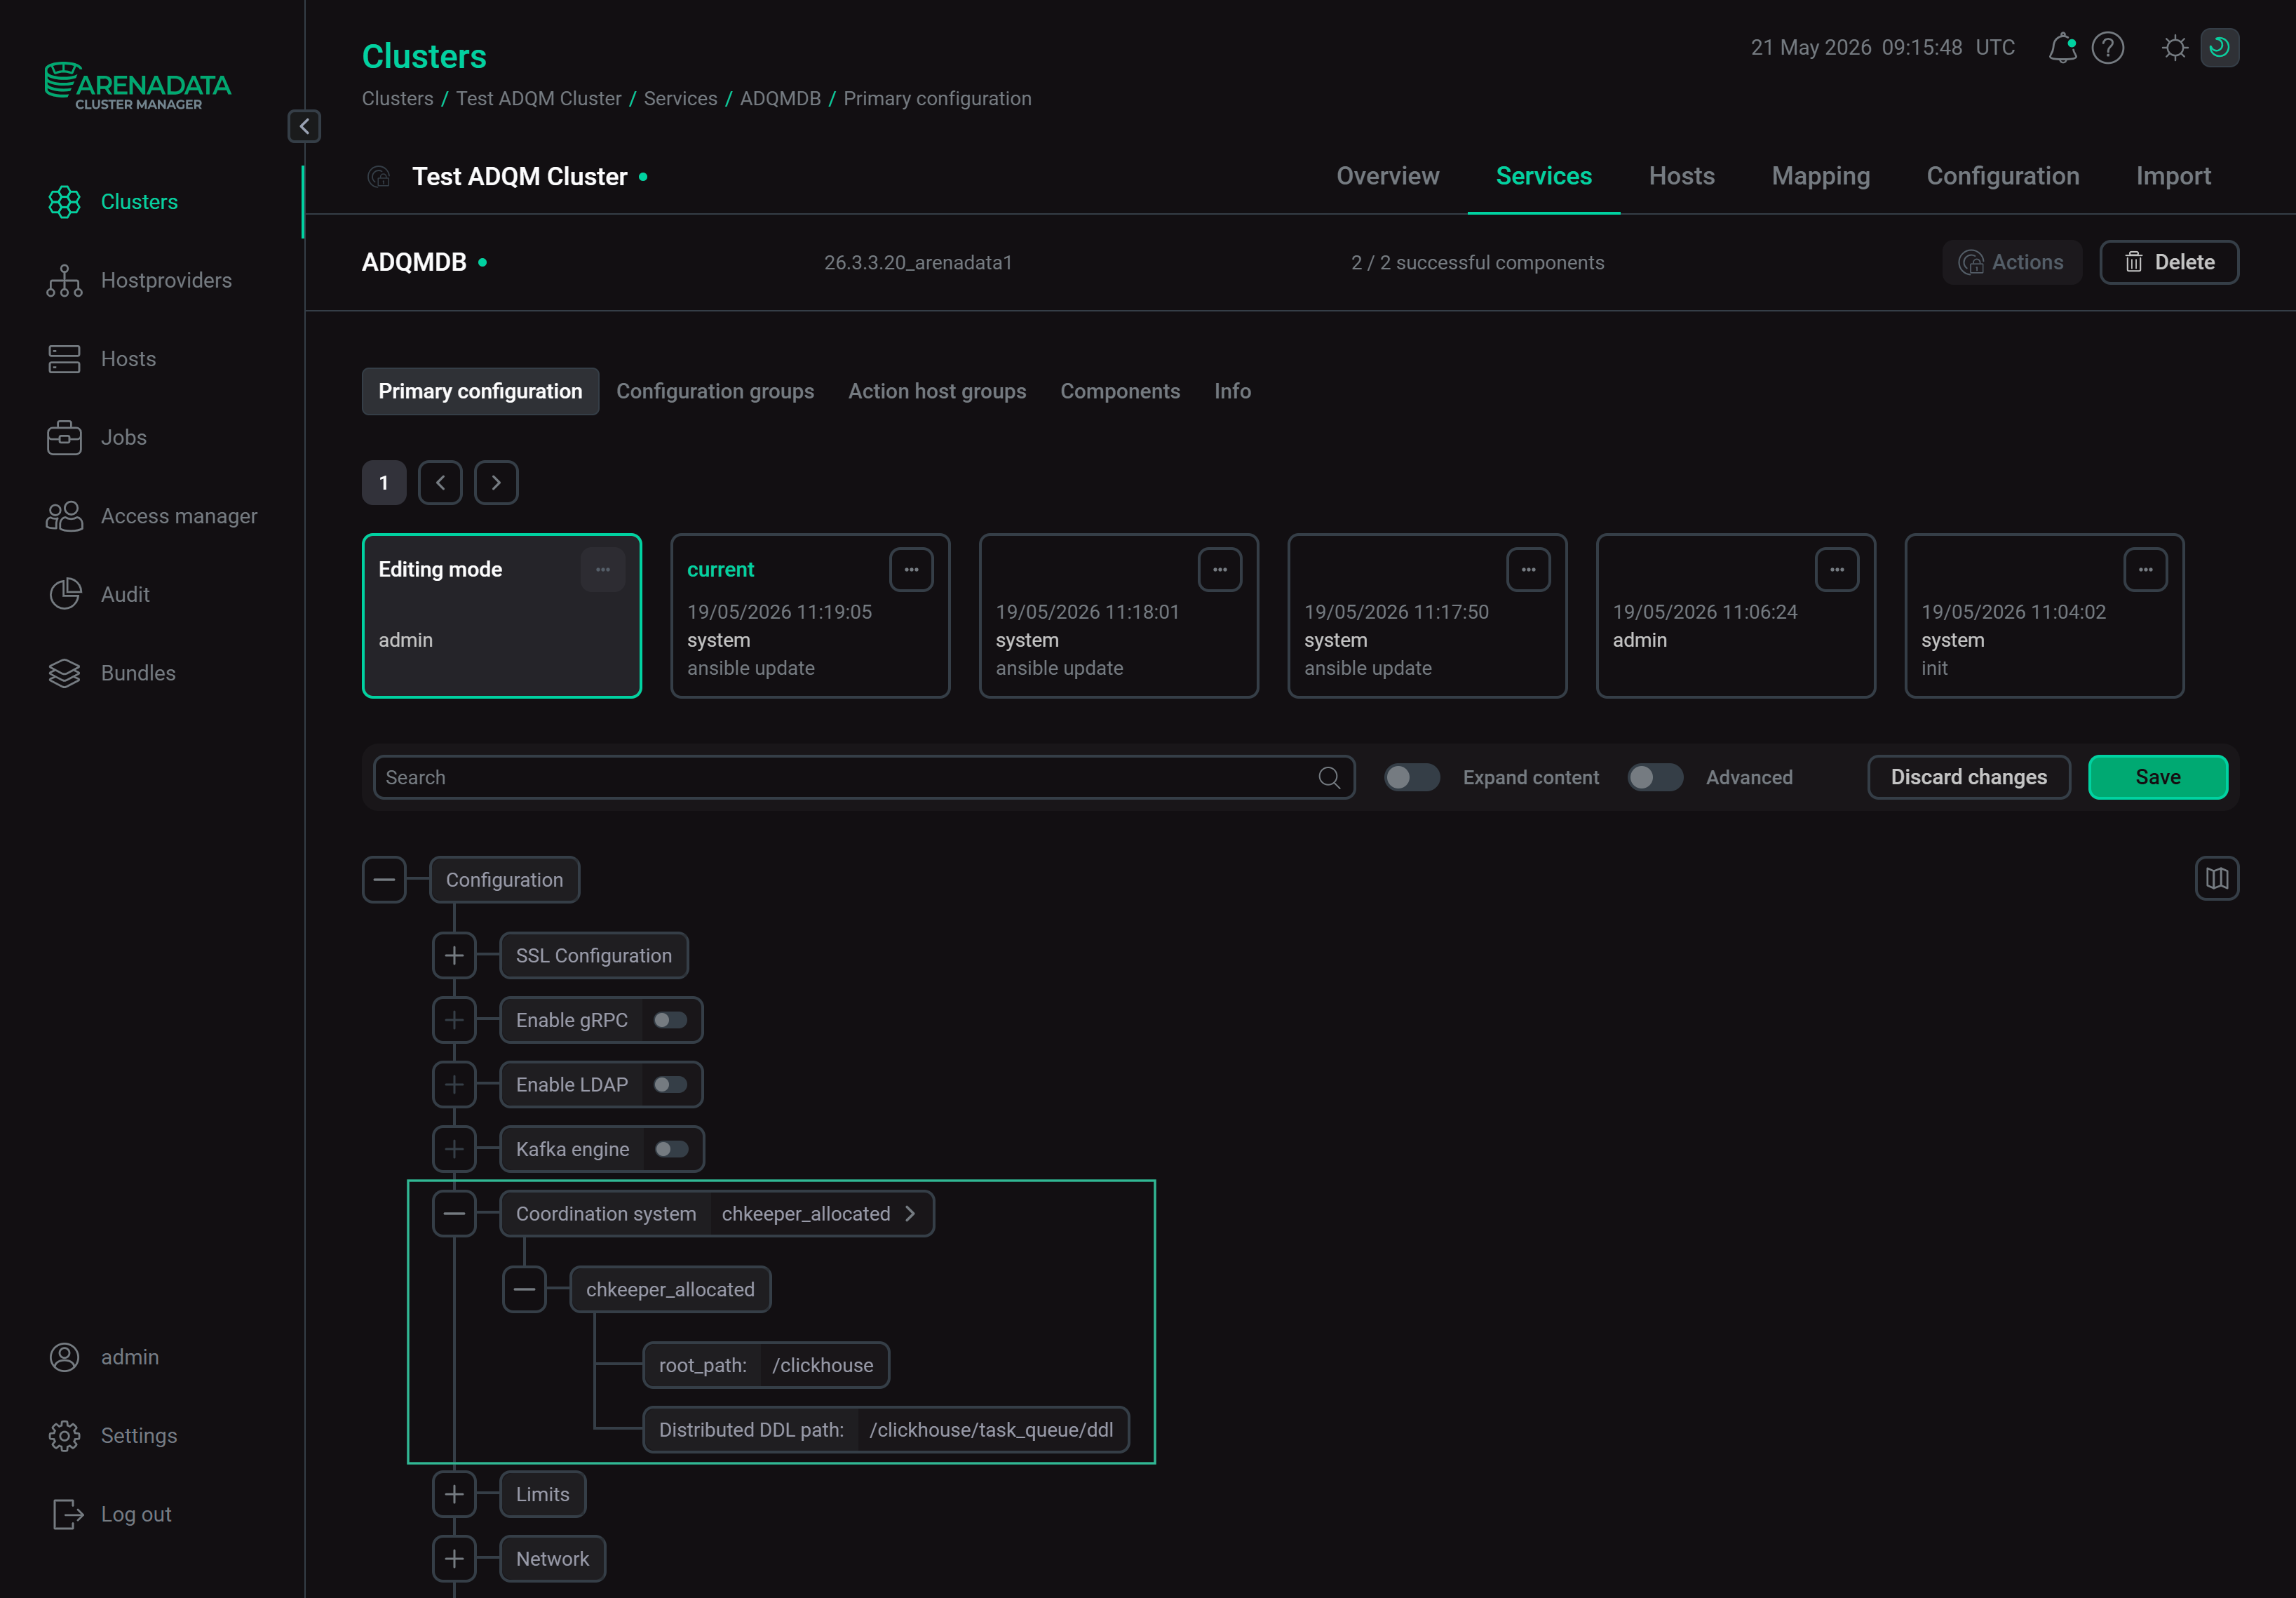 Enable the Clickhouse Keeper service
In the nested chkeeper_allocated parameter group, you can configure znode paths.
-
Click Save and execute the Reconfig action for the ADQMDB service to use the installed ClickHouse Keeper as a coordination service for the ADQM cluster.
|
NOTE
To change hosts on which ClickHouse Keeper should be installed, you can use the Add/Remove components action of the Clickhouse Keeper service. After this action is completed, run the Reconfig action for the ADQMDB service to apply the changes. |
Integrated ClickHouse Keeper
If there is no requirement to control on which hosts ClickHouse Keeper is installed (for example, in test or small clusters), you can use the integrated ClickHouse Keeper — ADQM will automatically configure and deploy it on hosts where the Clickhouse Server component is installed. To do this, perform the following in the ADCM interface:
-
Set the Coordination system parameter to
chkeeper_integratedon the configuration page of the ADQMDB service. In the nested chkeeper_integrated section, settings are filled in automatically based on the ClickHouse server parameters. You can change parameter values if necessary (see parameter descriptions in the Configuration parameters article).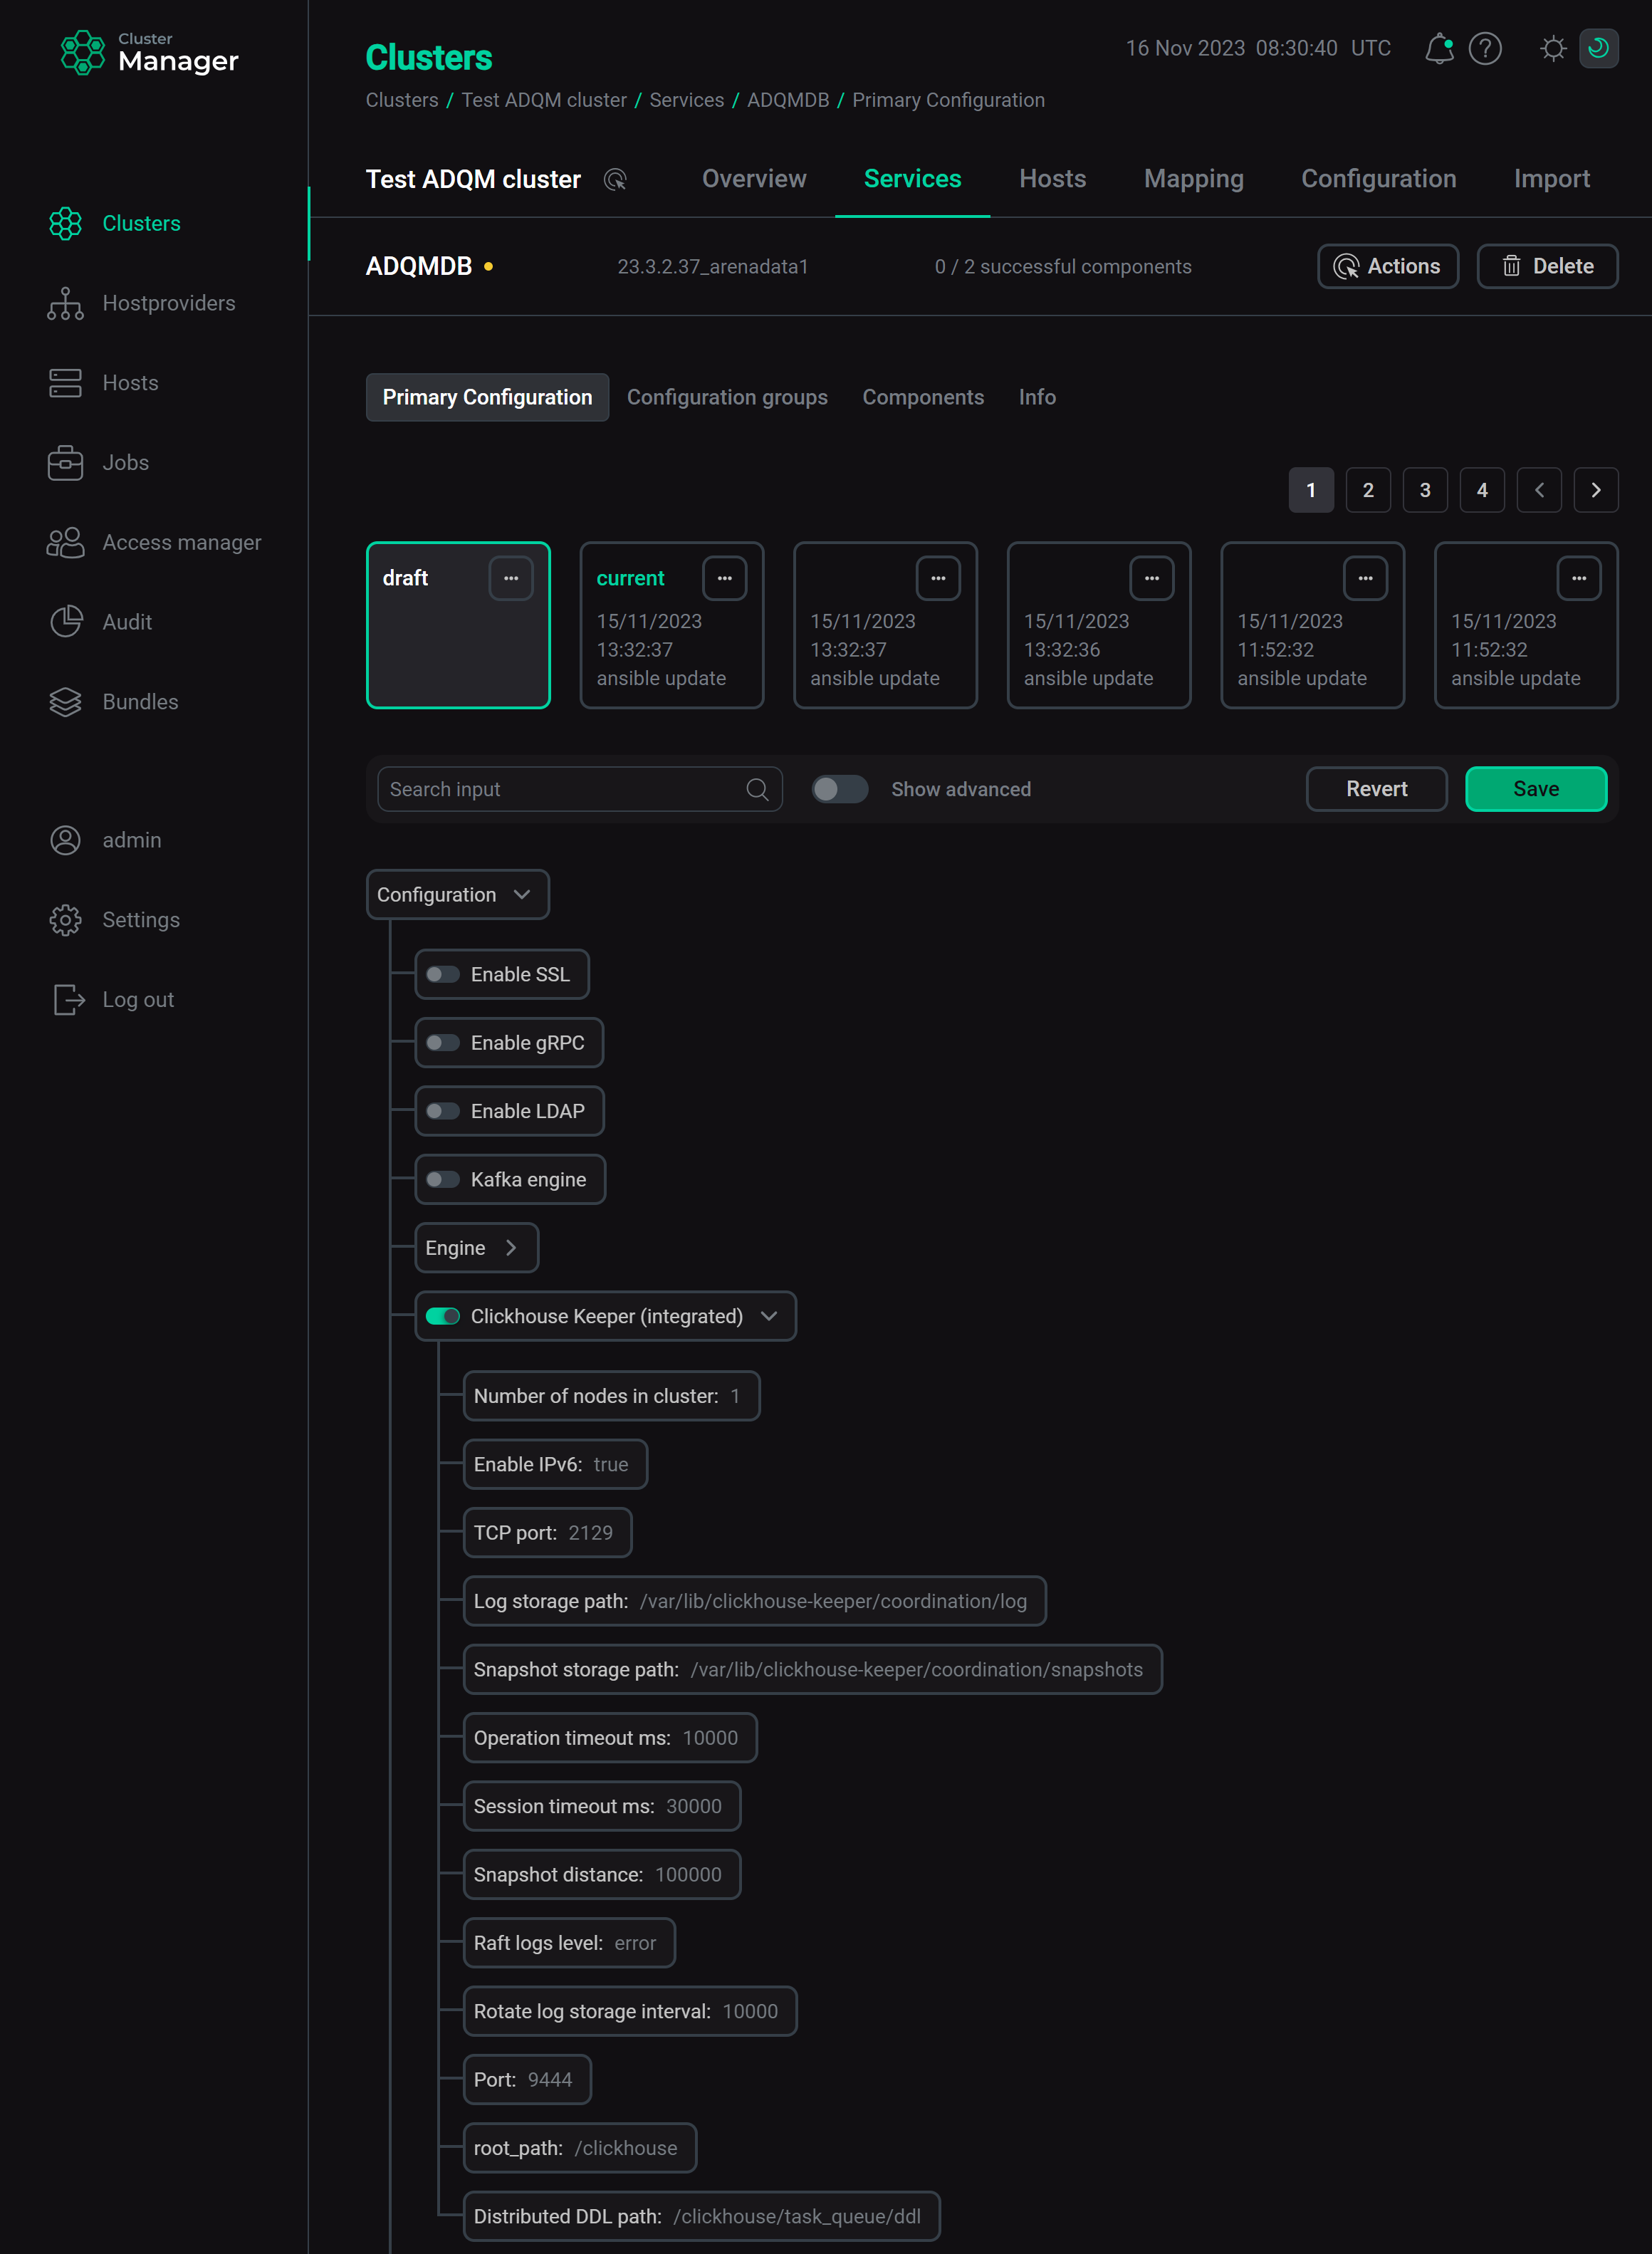 Configure and enable the integrated ClickHouse Keeper
 -
Click Save and execute the Reconfig action for the ADQMDB service to deploy the internal ClickHouse Keeper and enable it to be used as a coordination service for the ADQM cluster.
Test replicated and distributed tables
Configure ADQM cluster with ClickHouse Keeper
-
Configure a test ADQM cluster — two shards with two replicas in each one (hosts used in this example are host-1, host-2, host-3, and host-4). To learn how to do this via the ADCM interface, read Configure logical clusters in the ADCM interface. In this case, all necessary sections described below are added to the configuration file of each server automatically.
-
Logical cluster configuration
In the config.xml file, the cluster configuration is defined in the
remote_serverssection:<remote_servers> <default_cluster> <shard> <internal_replication>true</internal_replication> <weight>1</weight> <replica> <host>host-1</host> <port>9000</port> </replica> <replica> <host>host-2</host> <port>9000</port> </replica> </shard> <shard> <internal_replication>true</internal_replication> <weight>1</weight> <replica> <host>host-3</host> <port>9000</port> </replica> <replica> <host>host-4</host> <port>9000</port> </replica> </shard> </default_cluster> </remote_servers>In this example, a ReplicatedMergeTree table is used, so the
internal_replicationparameter is set totruefor each shard — in this case, the replicated table manages data replication itself (data is written to any available replica, and another replica receives data in the asynchronous mode). If using regular tables, set theinternal_replicationparameter tofalse— in this case, data is replicated by a Distributed table (data is written to all replicas of a shard). -
Macros
Each server configuration should also contain the
macrossection, which defines the shard and replica identifiers to be replaced with values corresponding to a specific host when creating replicated tables on the cluster (ON CLUSTER). For example, macros for host-1 contained in thedefault_clustercluster:<macros> <replica>1</replica> <shard>1</shard> </macros>If you configure a logical cluster in the ADCM interface via the Cluster Configuration setting and specify the cluster name, for example,
abc, ADQM will write macros to config.xml as follows (for host-1 in theabccluster with the same topology as provided above):<macros> <abc_replica>1</abc_replica> <abc_shard>1</abc_shard> </macros>In this case, use the
{abc_shard}and{abc_replica}variables within ReplicatedMergeTree parameters when creating replicated tables.
-
-
Install the Clickhouse Keeper service to three hosts (host-1, host-2, host-3). After that, the following sections will be added to the config.xml file:
-
zookeeper— list of ClickHouse Keeper nodes; -
distributed_ddl— path in ClickHouse Keeper to the queue with DDL queries (if multiple clusters use the same ClickHouse Keeper, this path should be unique for each cluster).
<zookeeper> <node> <host>host-1</host> <port>2129</port> </node> <node> <host>host-2</host> <port>2129</port> </node> <node> <host>host-3</host> <port>2129</port> </node> <root>/clickhouse</root> </zookeeper> <distributed_ddl> <path>/clickhouse/task_queue/ddl</path> </distributed_ddl> -
Replicated tables
-
Execute the following query on one of the hosts (for example, on host-1) to create a replicated table:
CREATE TABLE test_local ON CLUSTER default_cluster (id Int32, value_string String)
ENGINE = ReplicatedMergeTree('/clickhouse/tables/{shard}/test_local', '{replica}')
ORDER BY id;
This query creates the
test_localtable on all hosts of thedefault_clustercluster. -
Insert data into the table on host-2:
INSERT INTO test_local VALUES (1, 'a'); -
Make sure data is replicated. To do this, select data from the
test_localtable on host-1:SELECT * FROM test_local;If replication works correctly, the table on host-1 will automatically receive data written to the replica on host-2:
┌─id─┬─value_string─┐
│  1 │ a            │
└────┴──────────────┘
Distributed tables
Note that the SELECT query returns data only from a table on a host on which the query is being run.
Insert data into any replica on the second shard (for example, into a table on host-3):
INSERT INTO test_local VALUES (2, 'b');Repeat the SELECT query on host-1 or host-2 — the resulting selection will not include data from the second shard:
┌─id─┬─value_string─┐
│  1 │ a            │
└────┴──────────────┘
You can use distributed tables to get data from all shards (for details, see the Distributed tables section).
-
Create a table using the Distributed engine:
CREATE TABLE test_distr ON CLUSTER default_cluster AS default.test_local ENGINE = Distributed(default_cluster, default, test_local, rand()); -
Run the following query on any host:
SELECT * FROM test_distr;The output includes data from both shards:
┌─id─┬─value_string─┐
│  1 │ a            │
└────┴──────────────┘
┌─id─┬─value_string─┐
│  2 │ b            │
└────┴──────────────┘