
Install a cluster
Step 1. Run installation
The last step of adding a new Enterprise Tools cluster is to install its services. To do this:
-
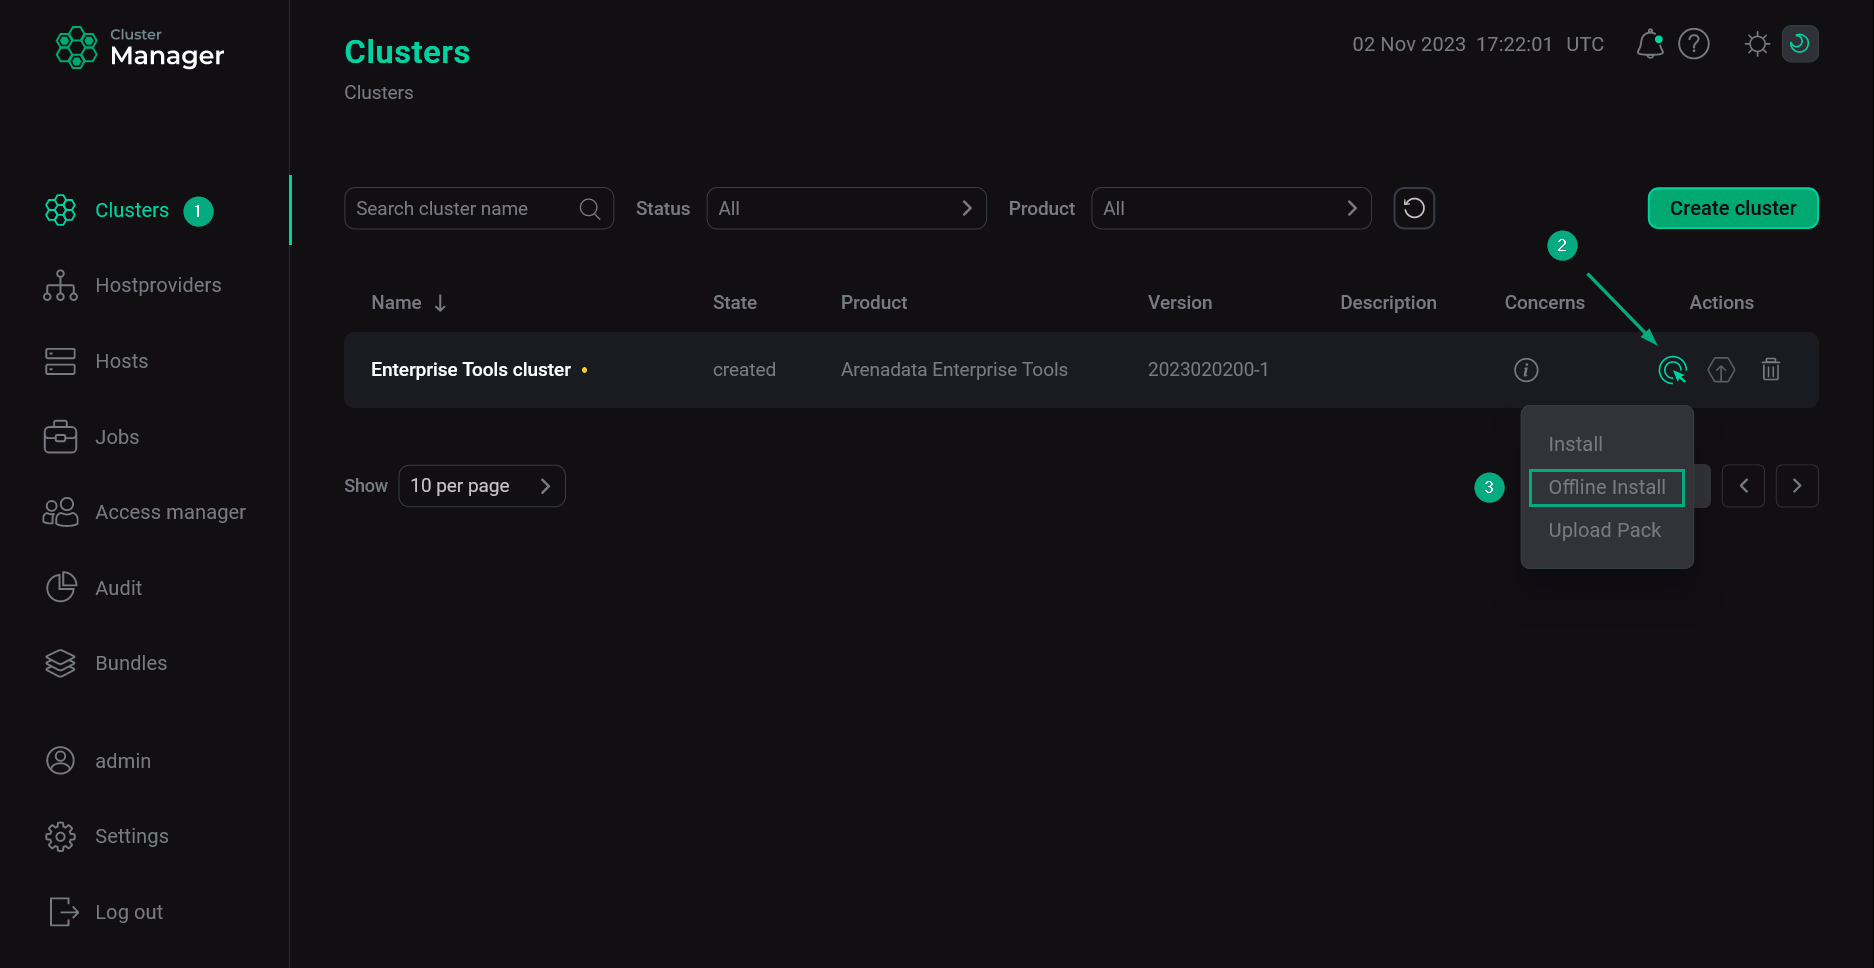
Apply the Offline Install action to the cluster selected on the Clusters page by clicking the
icon in the Actions column.
 Switch to cluster installation
 -
In the opened window, enter a full path to the shell script that is received from the Arenadata support team and click Run.
 Verify installation
 -
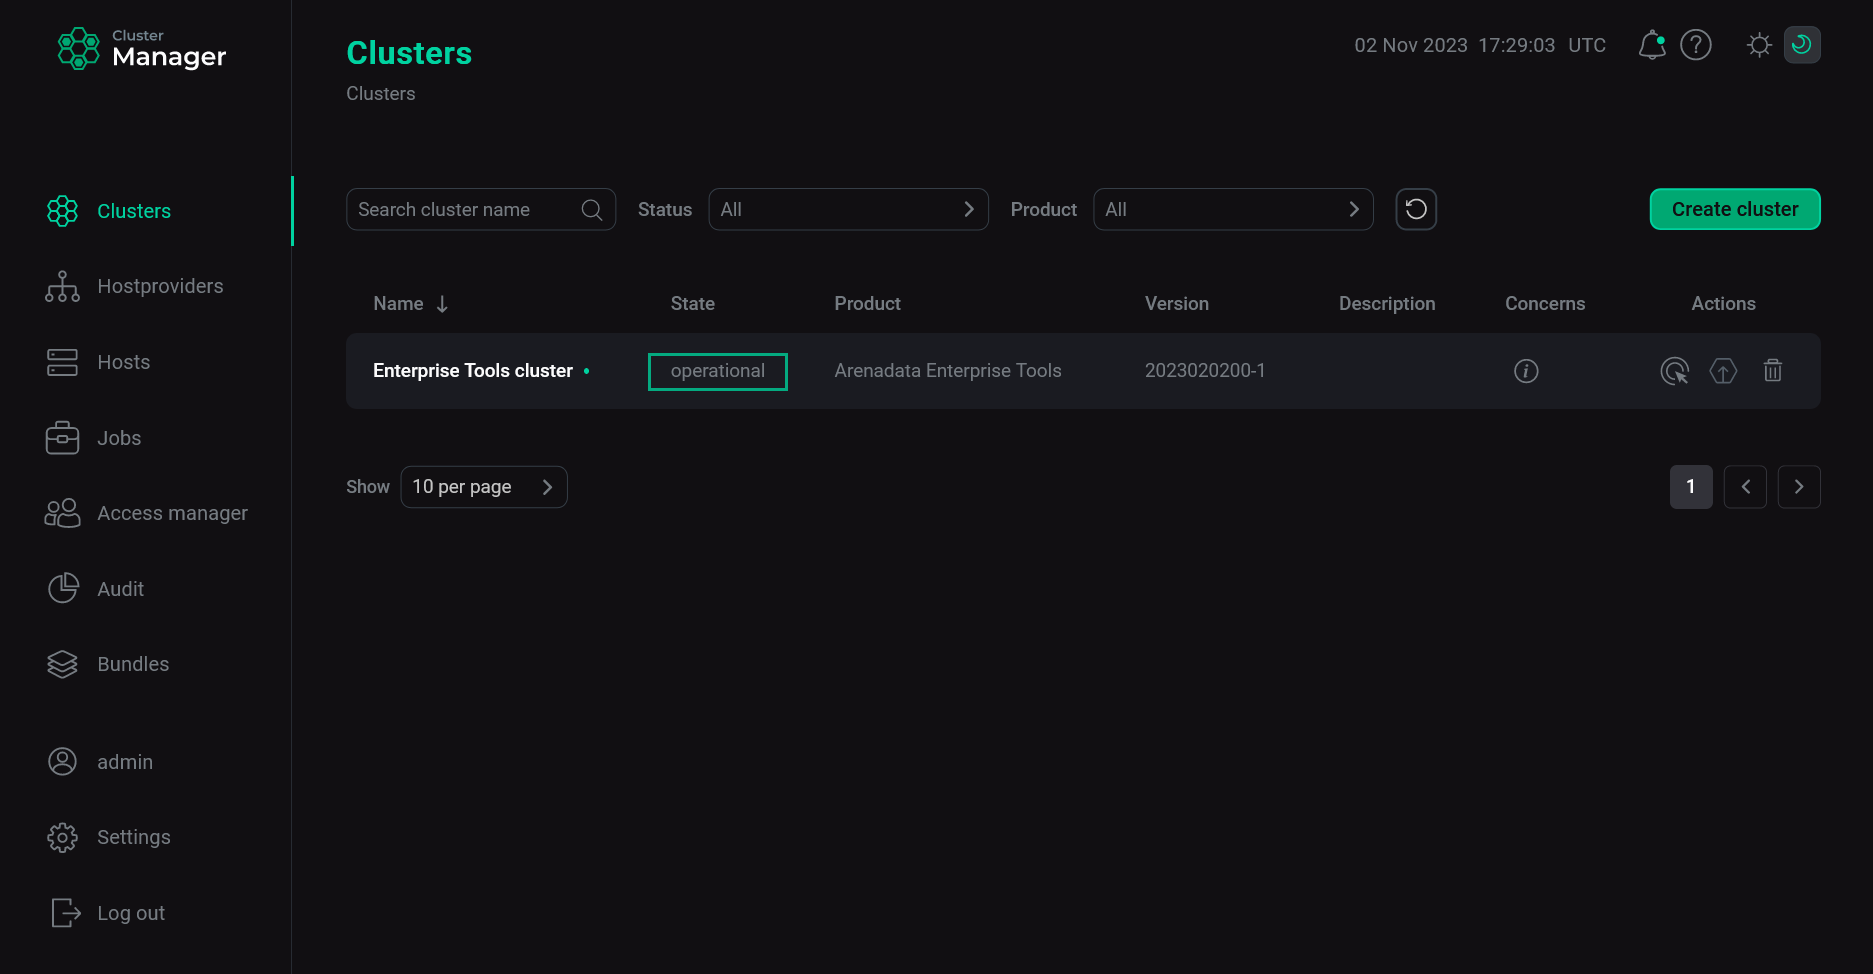
Wait until the installation process is completed.
NOTEIn case of errors, you can find logs on the Jobs page. Cluster installation is completed
Step 2. Upload packages for offline installation
In addition to installing the cluster, you should process the shell script that is received from the Arenadata support team. It is necessary to enable offline installation of products in the future. To do this:
-
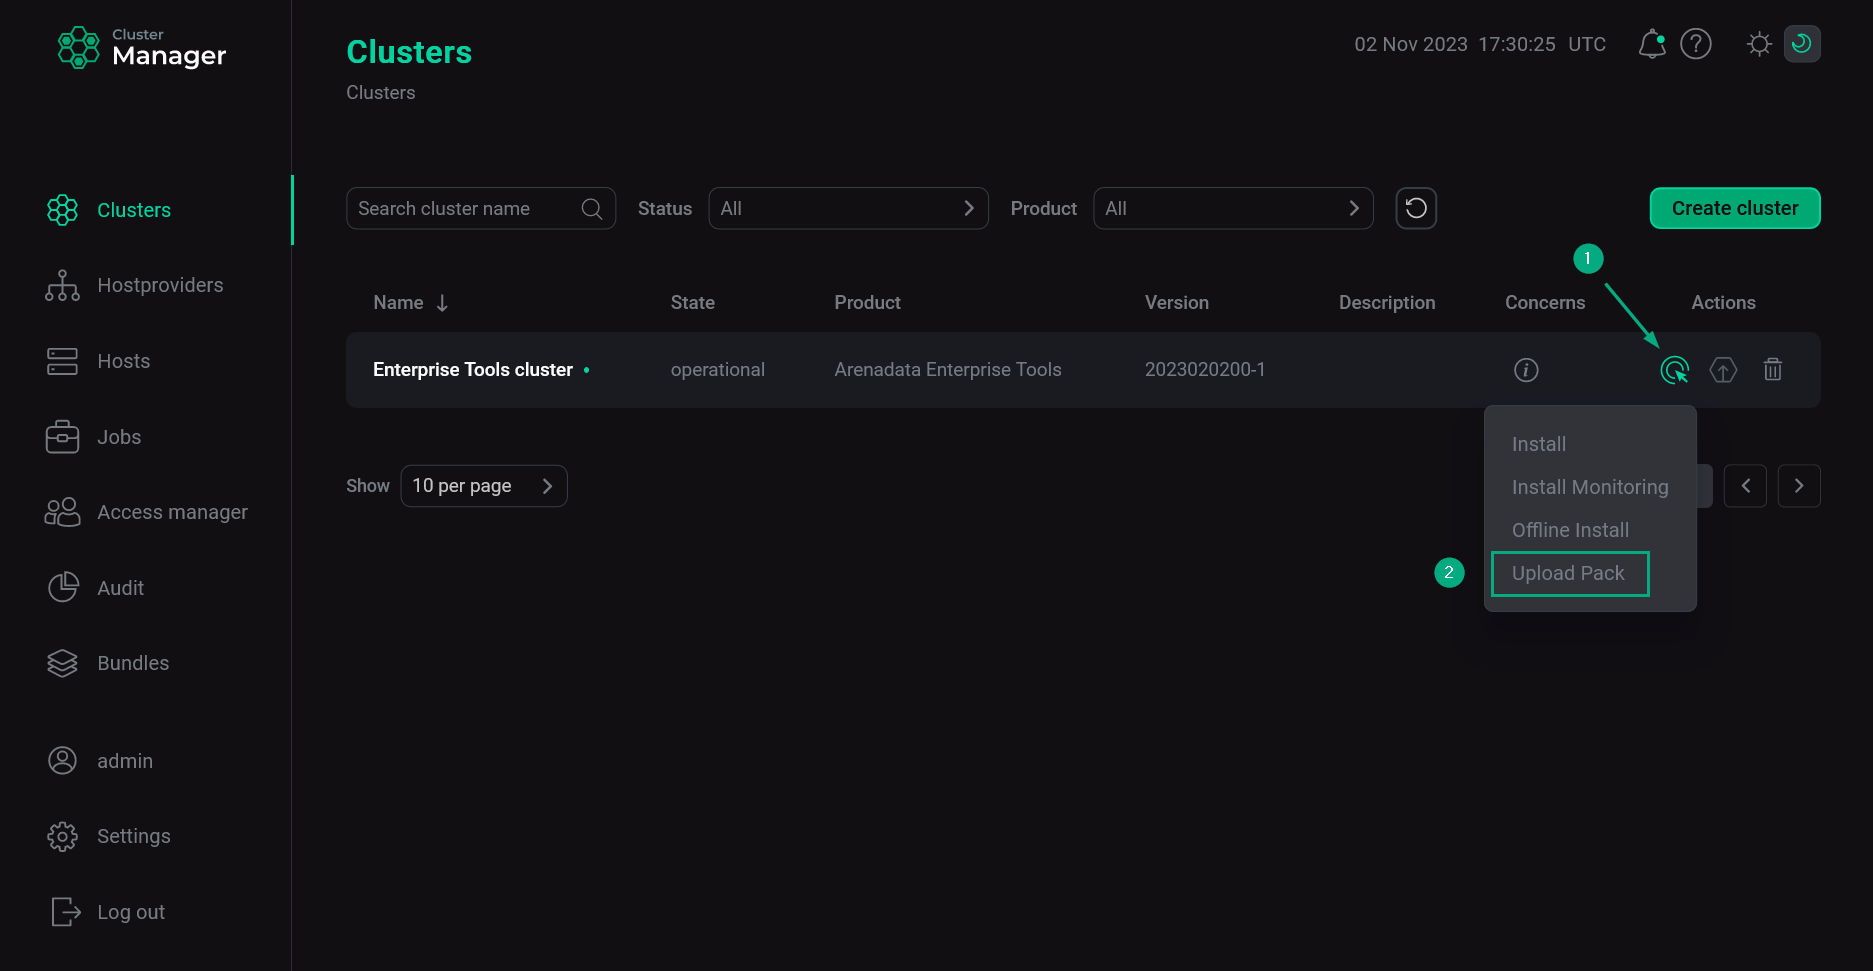
Apply the Upload Pack action to the cluster selected on the Clusters page by clicking the
icon in the Actions column.
 Switch to uploading packages
 -
In the opened window, enter a full path to the shell script received from the Arenadata support team and click Run.
 Verify upload
 -
Wait until the upload process is completed.
NOTEIn case of errors, you can find logs on the Jobs page.
Step 3. Verify results
The steps for checking the installation results are listed below:
-
Check that ports
443and81are listened at the host where cluster is installed. The first port is used by the Docker Registry service, the second one — by the HTTP Mirror service.$ sudo netstat -ntlp|grep L|grep -E "81|443"The result should look like this:
tcp6       0      0 :::443                  :::*                    LISTEN      1694/docker-proxy-c
tcp6       0      0 :::81                   :::*                    LISTEN      1708/docker-proxy-c
-
Check that the /opt/arenadata/etools/httprepo/arenadata-repo folder exists at the host where the cluster is installed. This folder should contain the data necessary for offline installation of the products that you have chosen before getting a shell script from the Arenadata support team.
$ ls -la /opt/arenadata/etools/httprepo/arenadata-repoThe following example displays the data that can be placed in this folder for ADQM installation.
total 0
drwxr-xr-x. 5 root root 46 june 15 09:00 .
drwxr-xr-x. 3 root root 28 june 15 08:59 ..
drwxr-xr-x. 3 root root 17 june 15 09:00 ADM
drwxr-xr-x. 3 root root 33 june 15 08:59 ADQM
drwxr-xr-x. 3 root root 19 june 15 09:00 zookeeper