

Configure topologies in Knox
Knox allows you to manually create topologies for your clusters, while another option is to bind clusters in ADCM and load automatically created (not generated) topologies. This article describes how to configure topologies both ways.
Load autocreated topologies
|
NOTE
Currently, only ADPS and ADH clusters can be imported into an ADPS cluster. Thus, this topology loading method doesn’t suit the ADS users.
|
-
In ADCM, find your ADPS cluster, select it, and head to the Import configuration tab. There, select the Cluster configuration option for each cluster, topologies for which you want to autoload. Click Save.
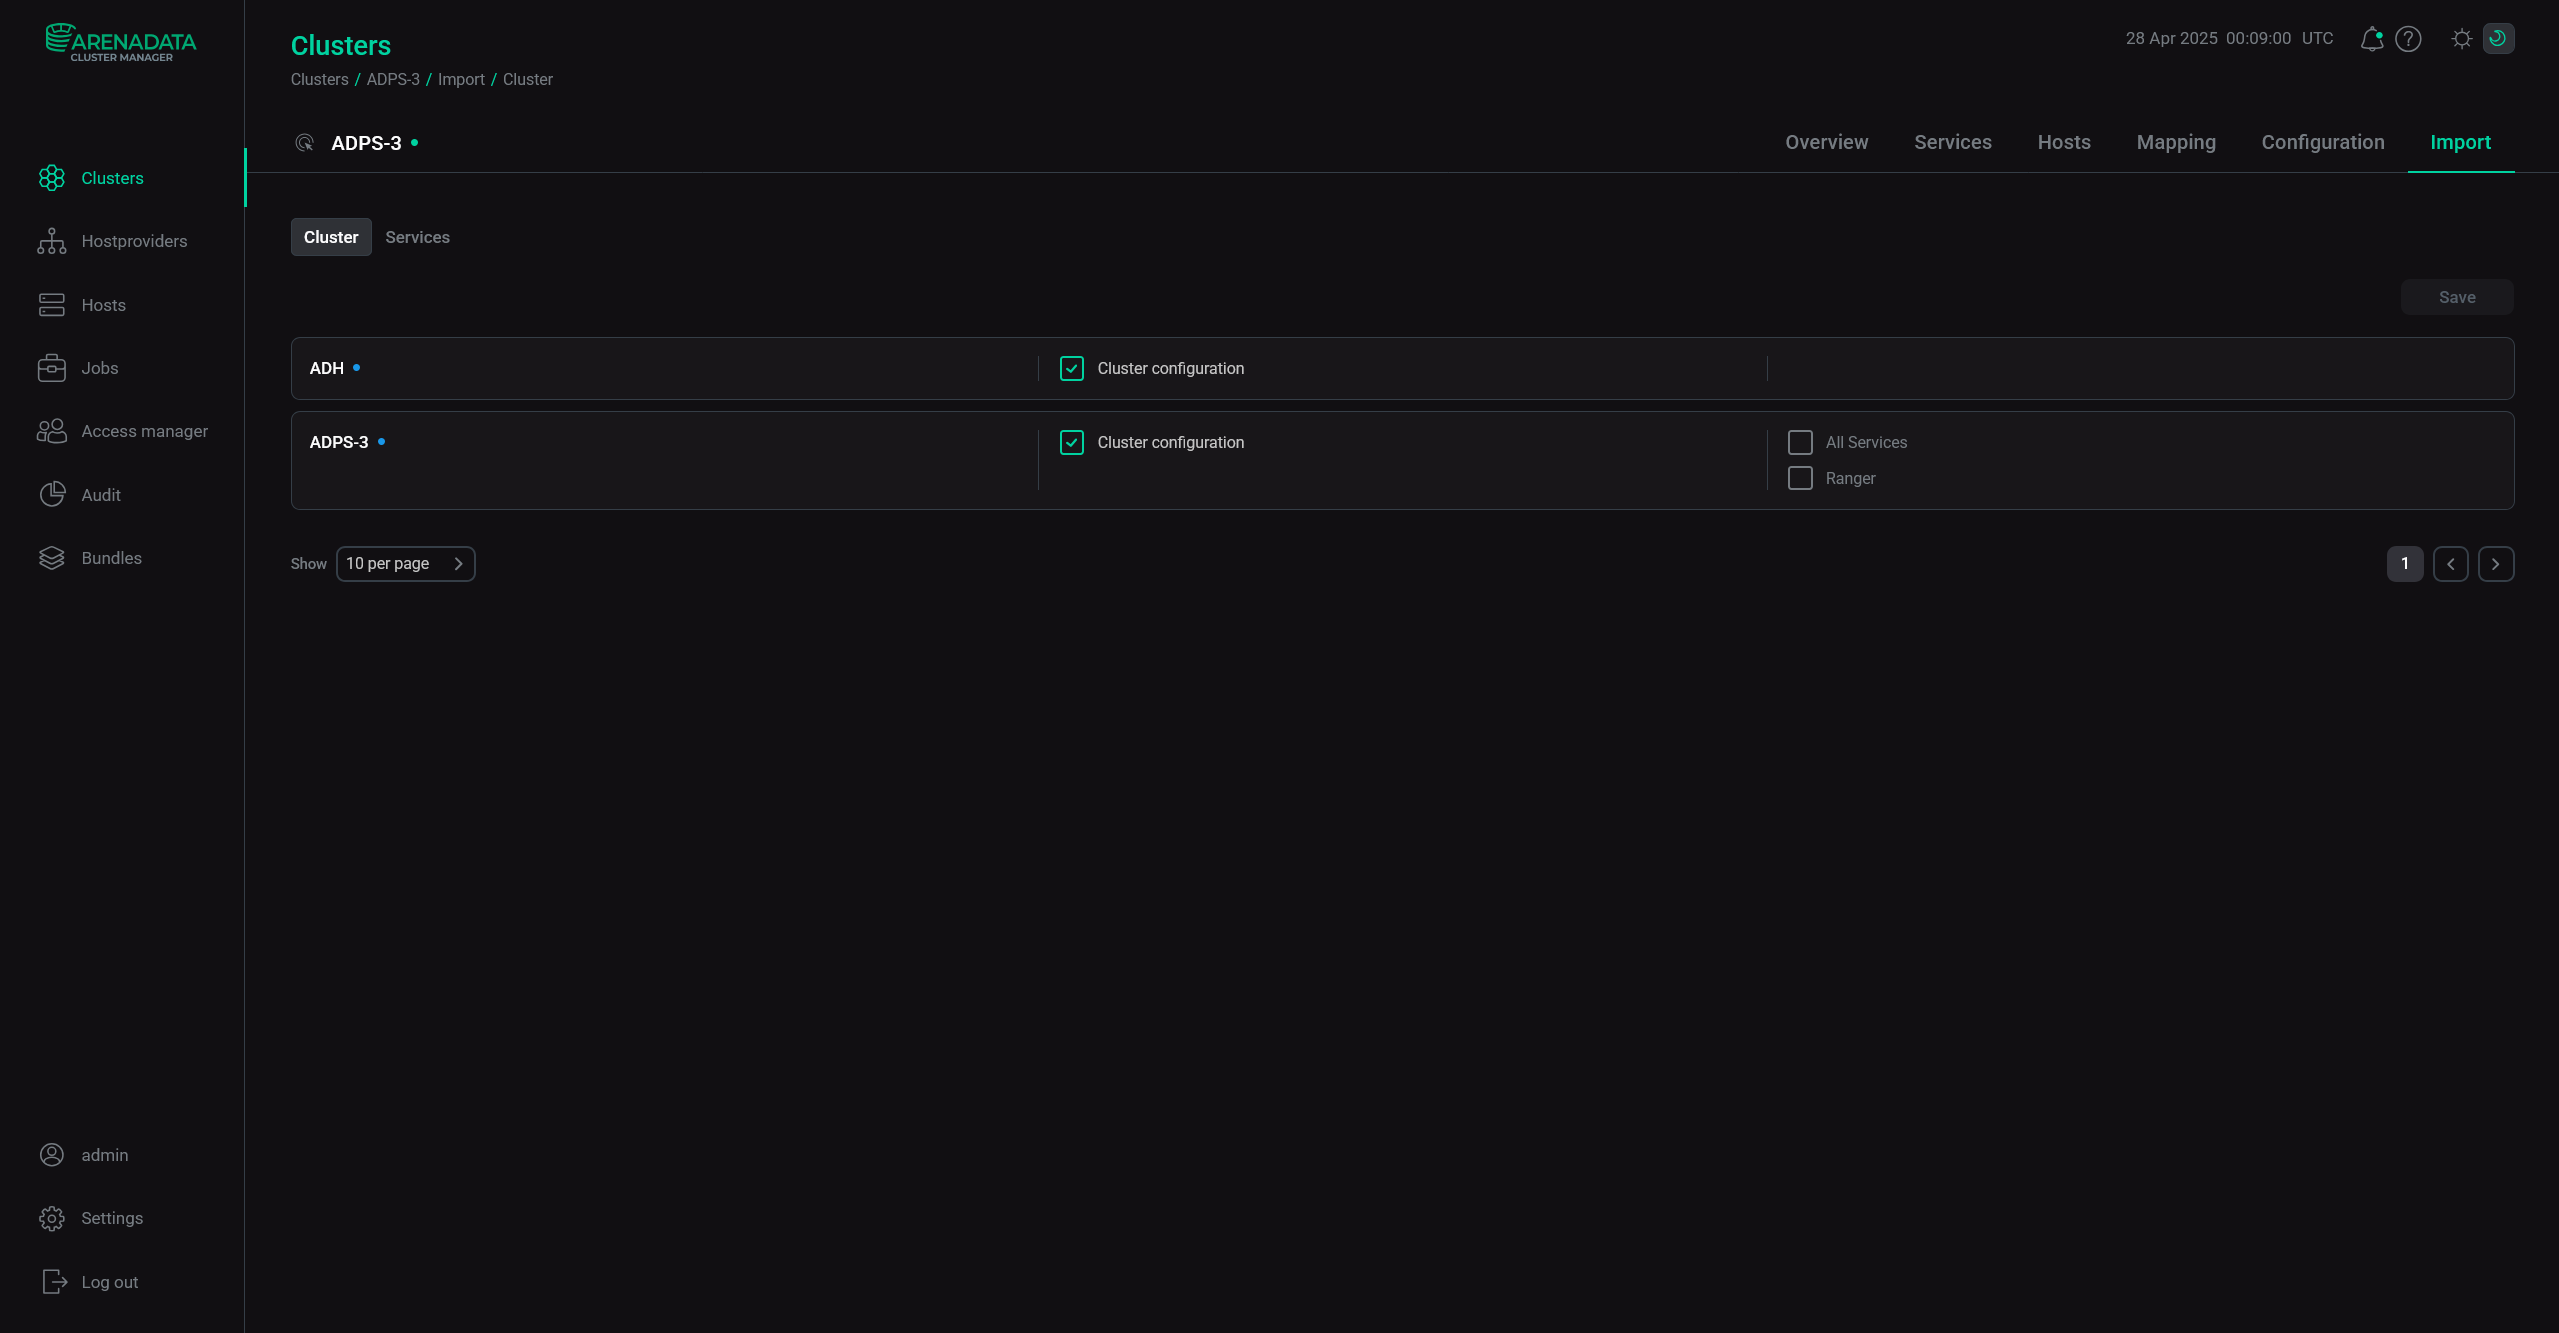 ADPS "Import" tab
 -
On the Services tab of your ADPS cluster, run the Reload topologies action for Knox.
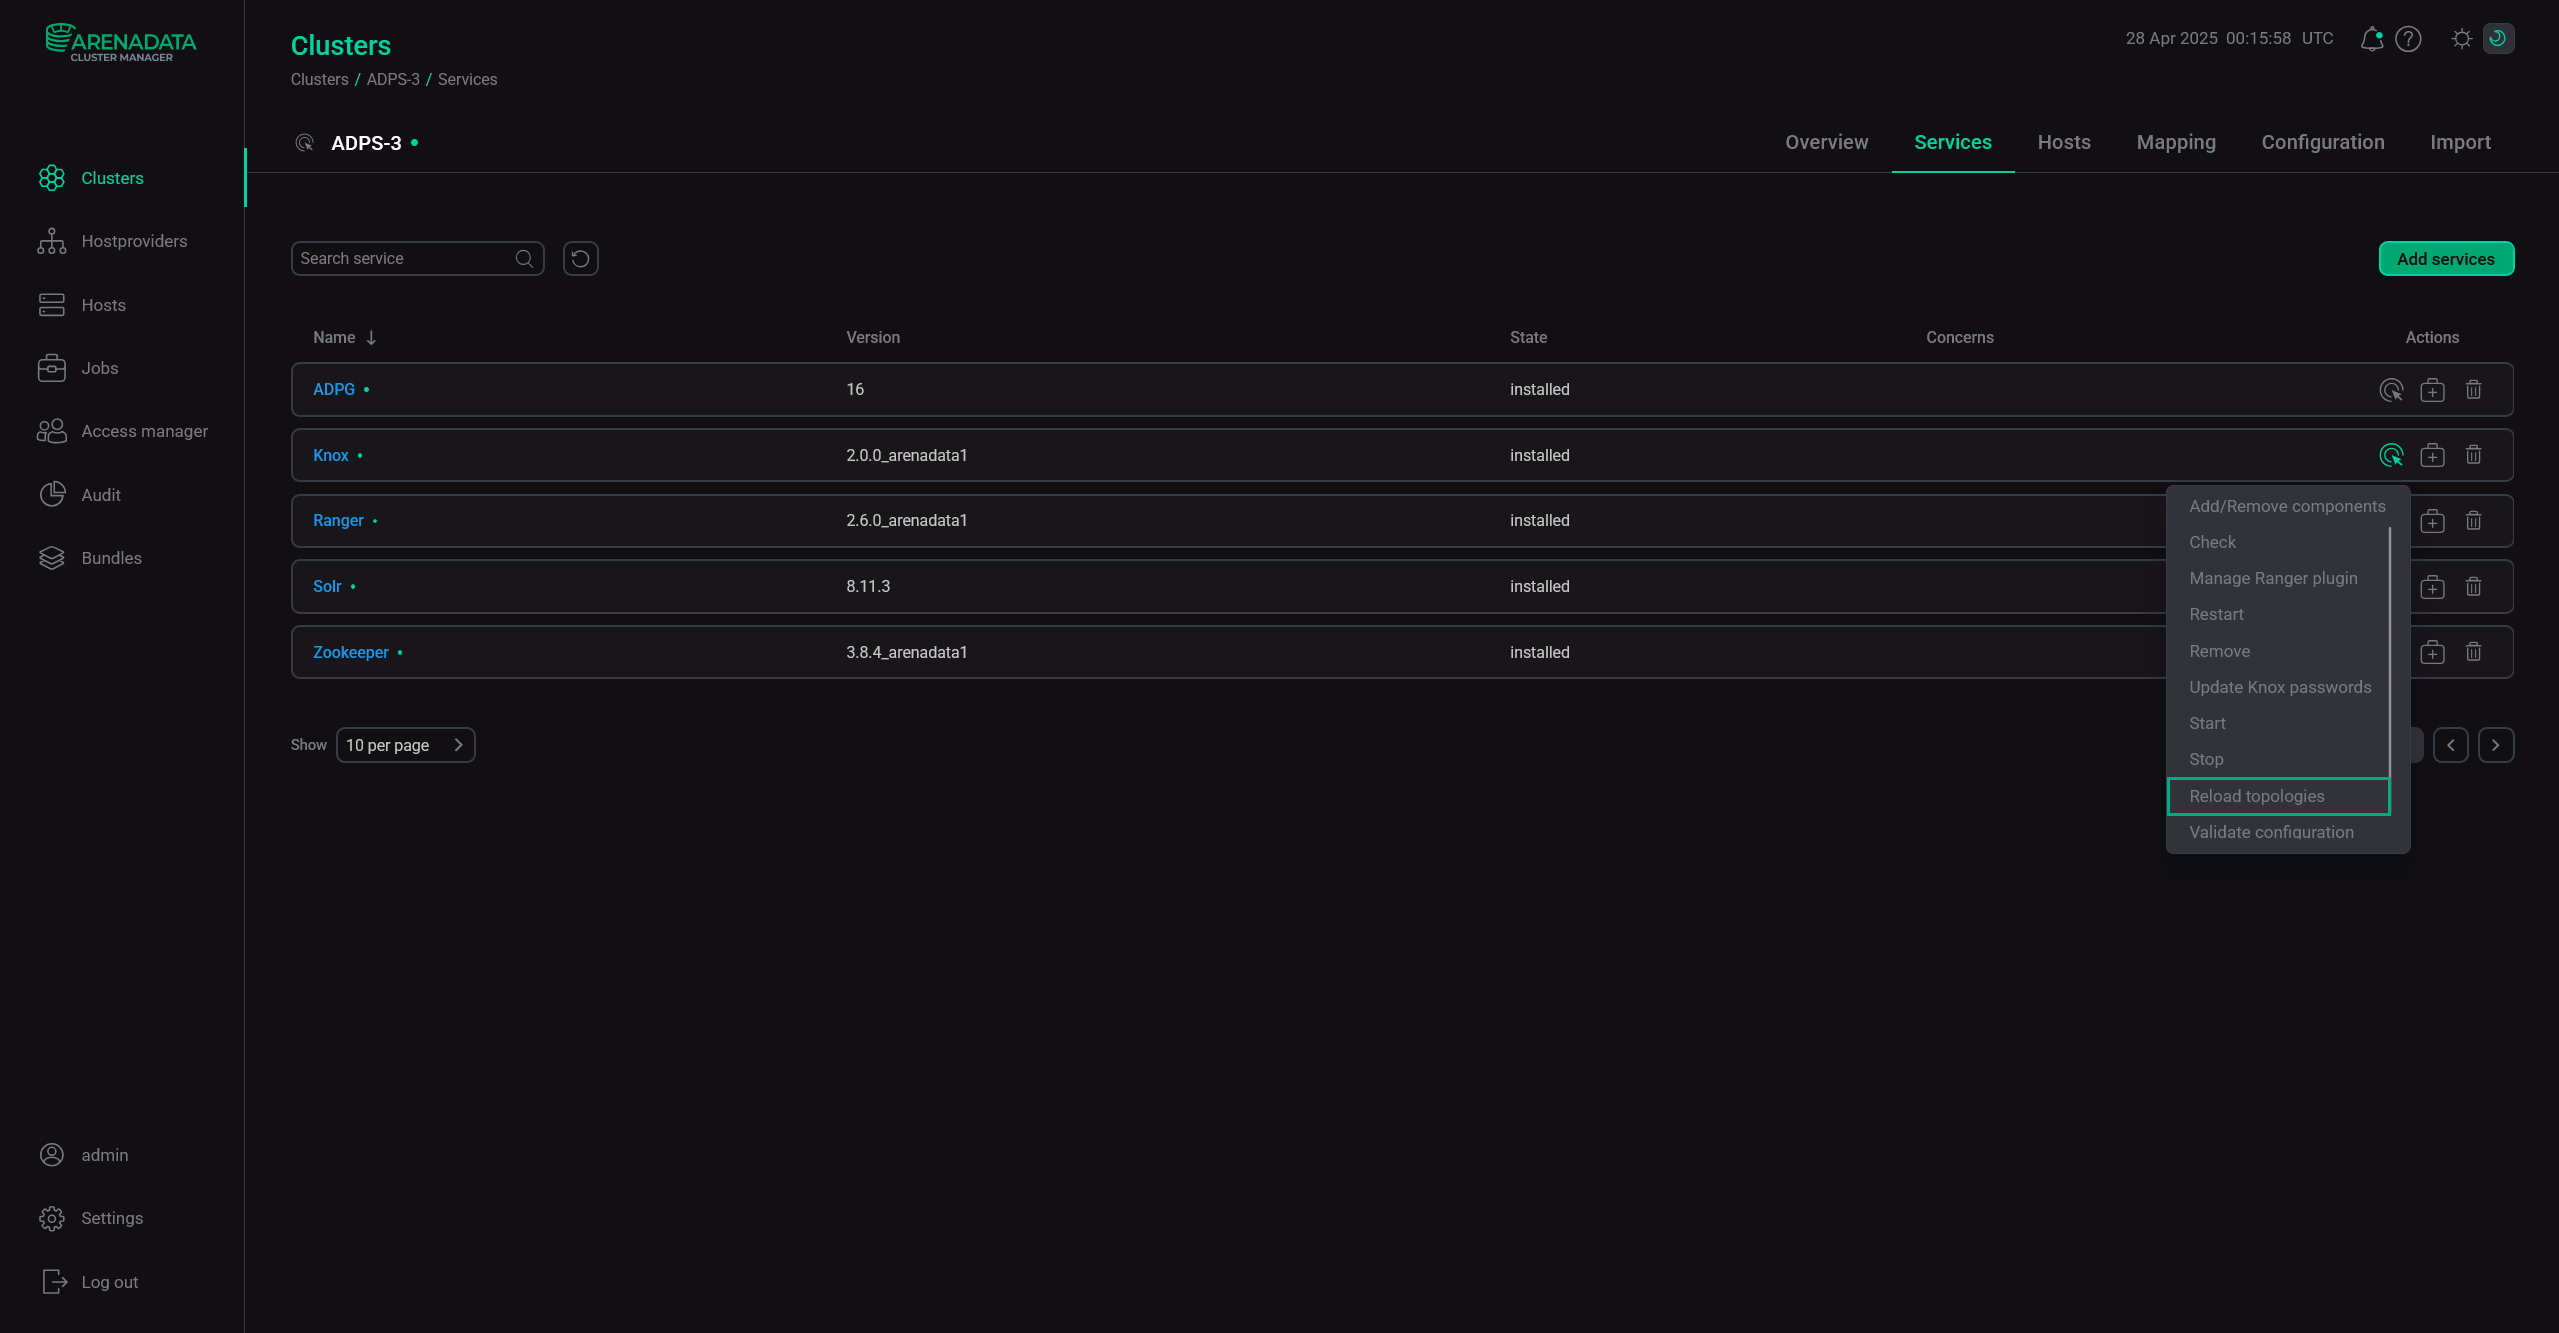 Knox "Reload topologies" action
 -
Wait for the action to finish and check the Knox Admin UI to see that the necessary topologies have appeared.
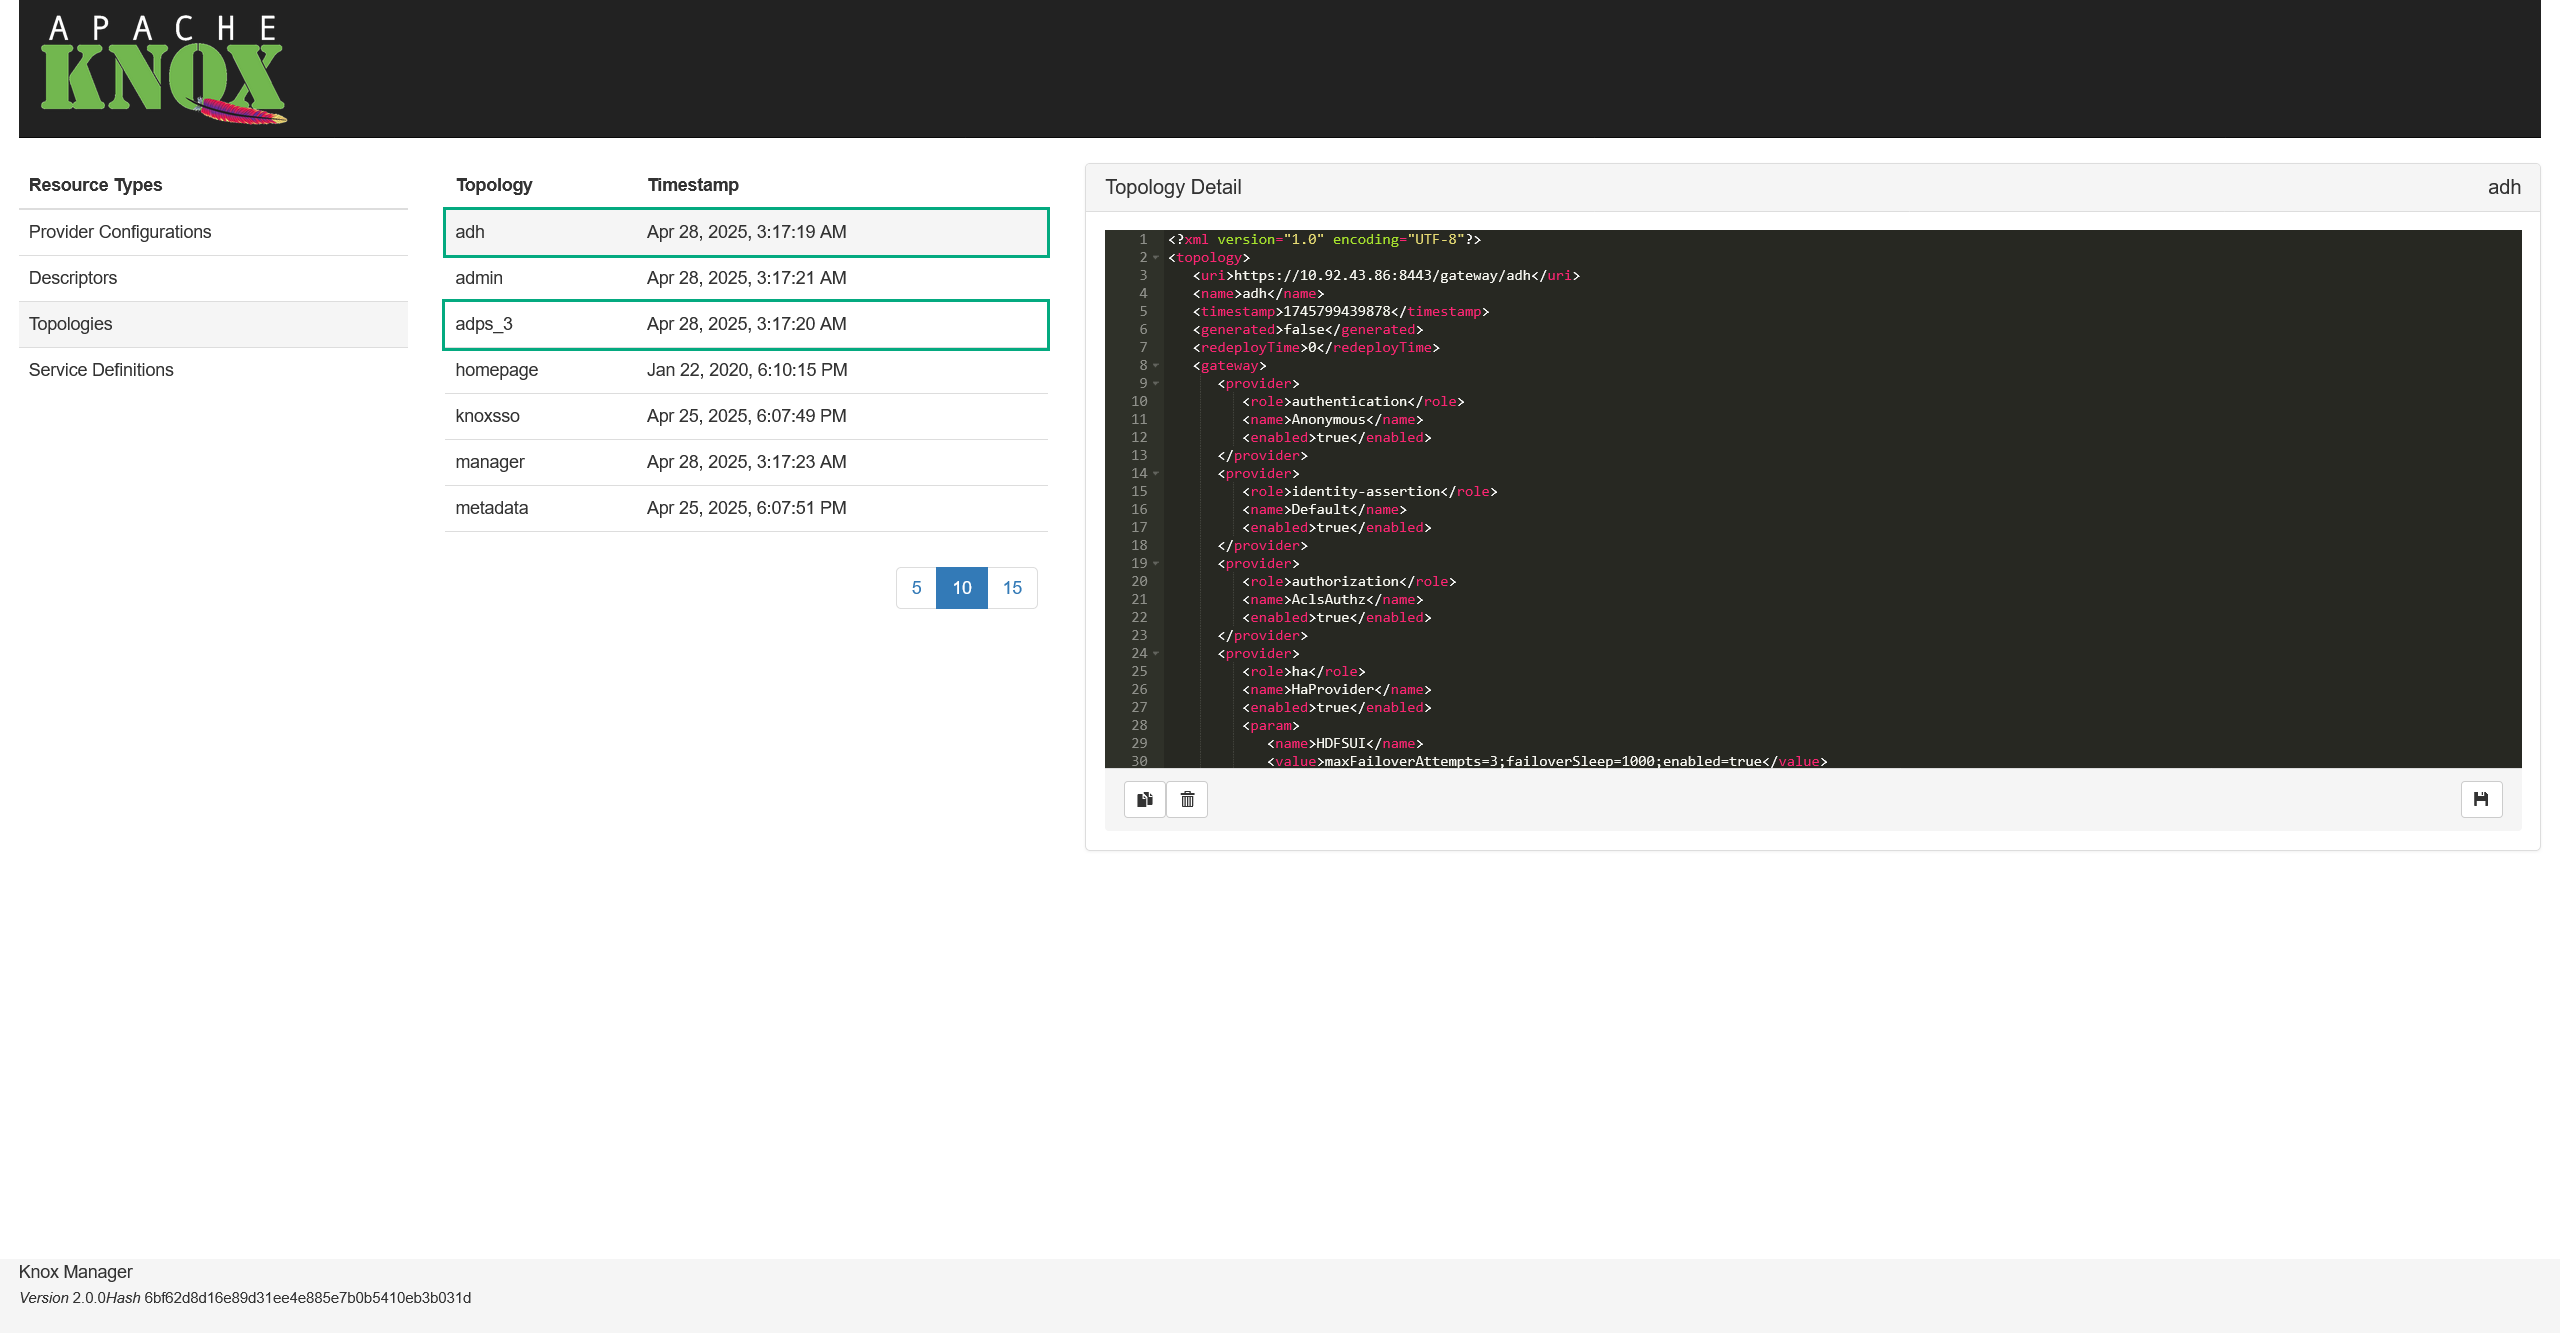 Autoloaded topologies
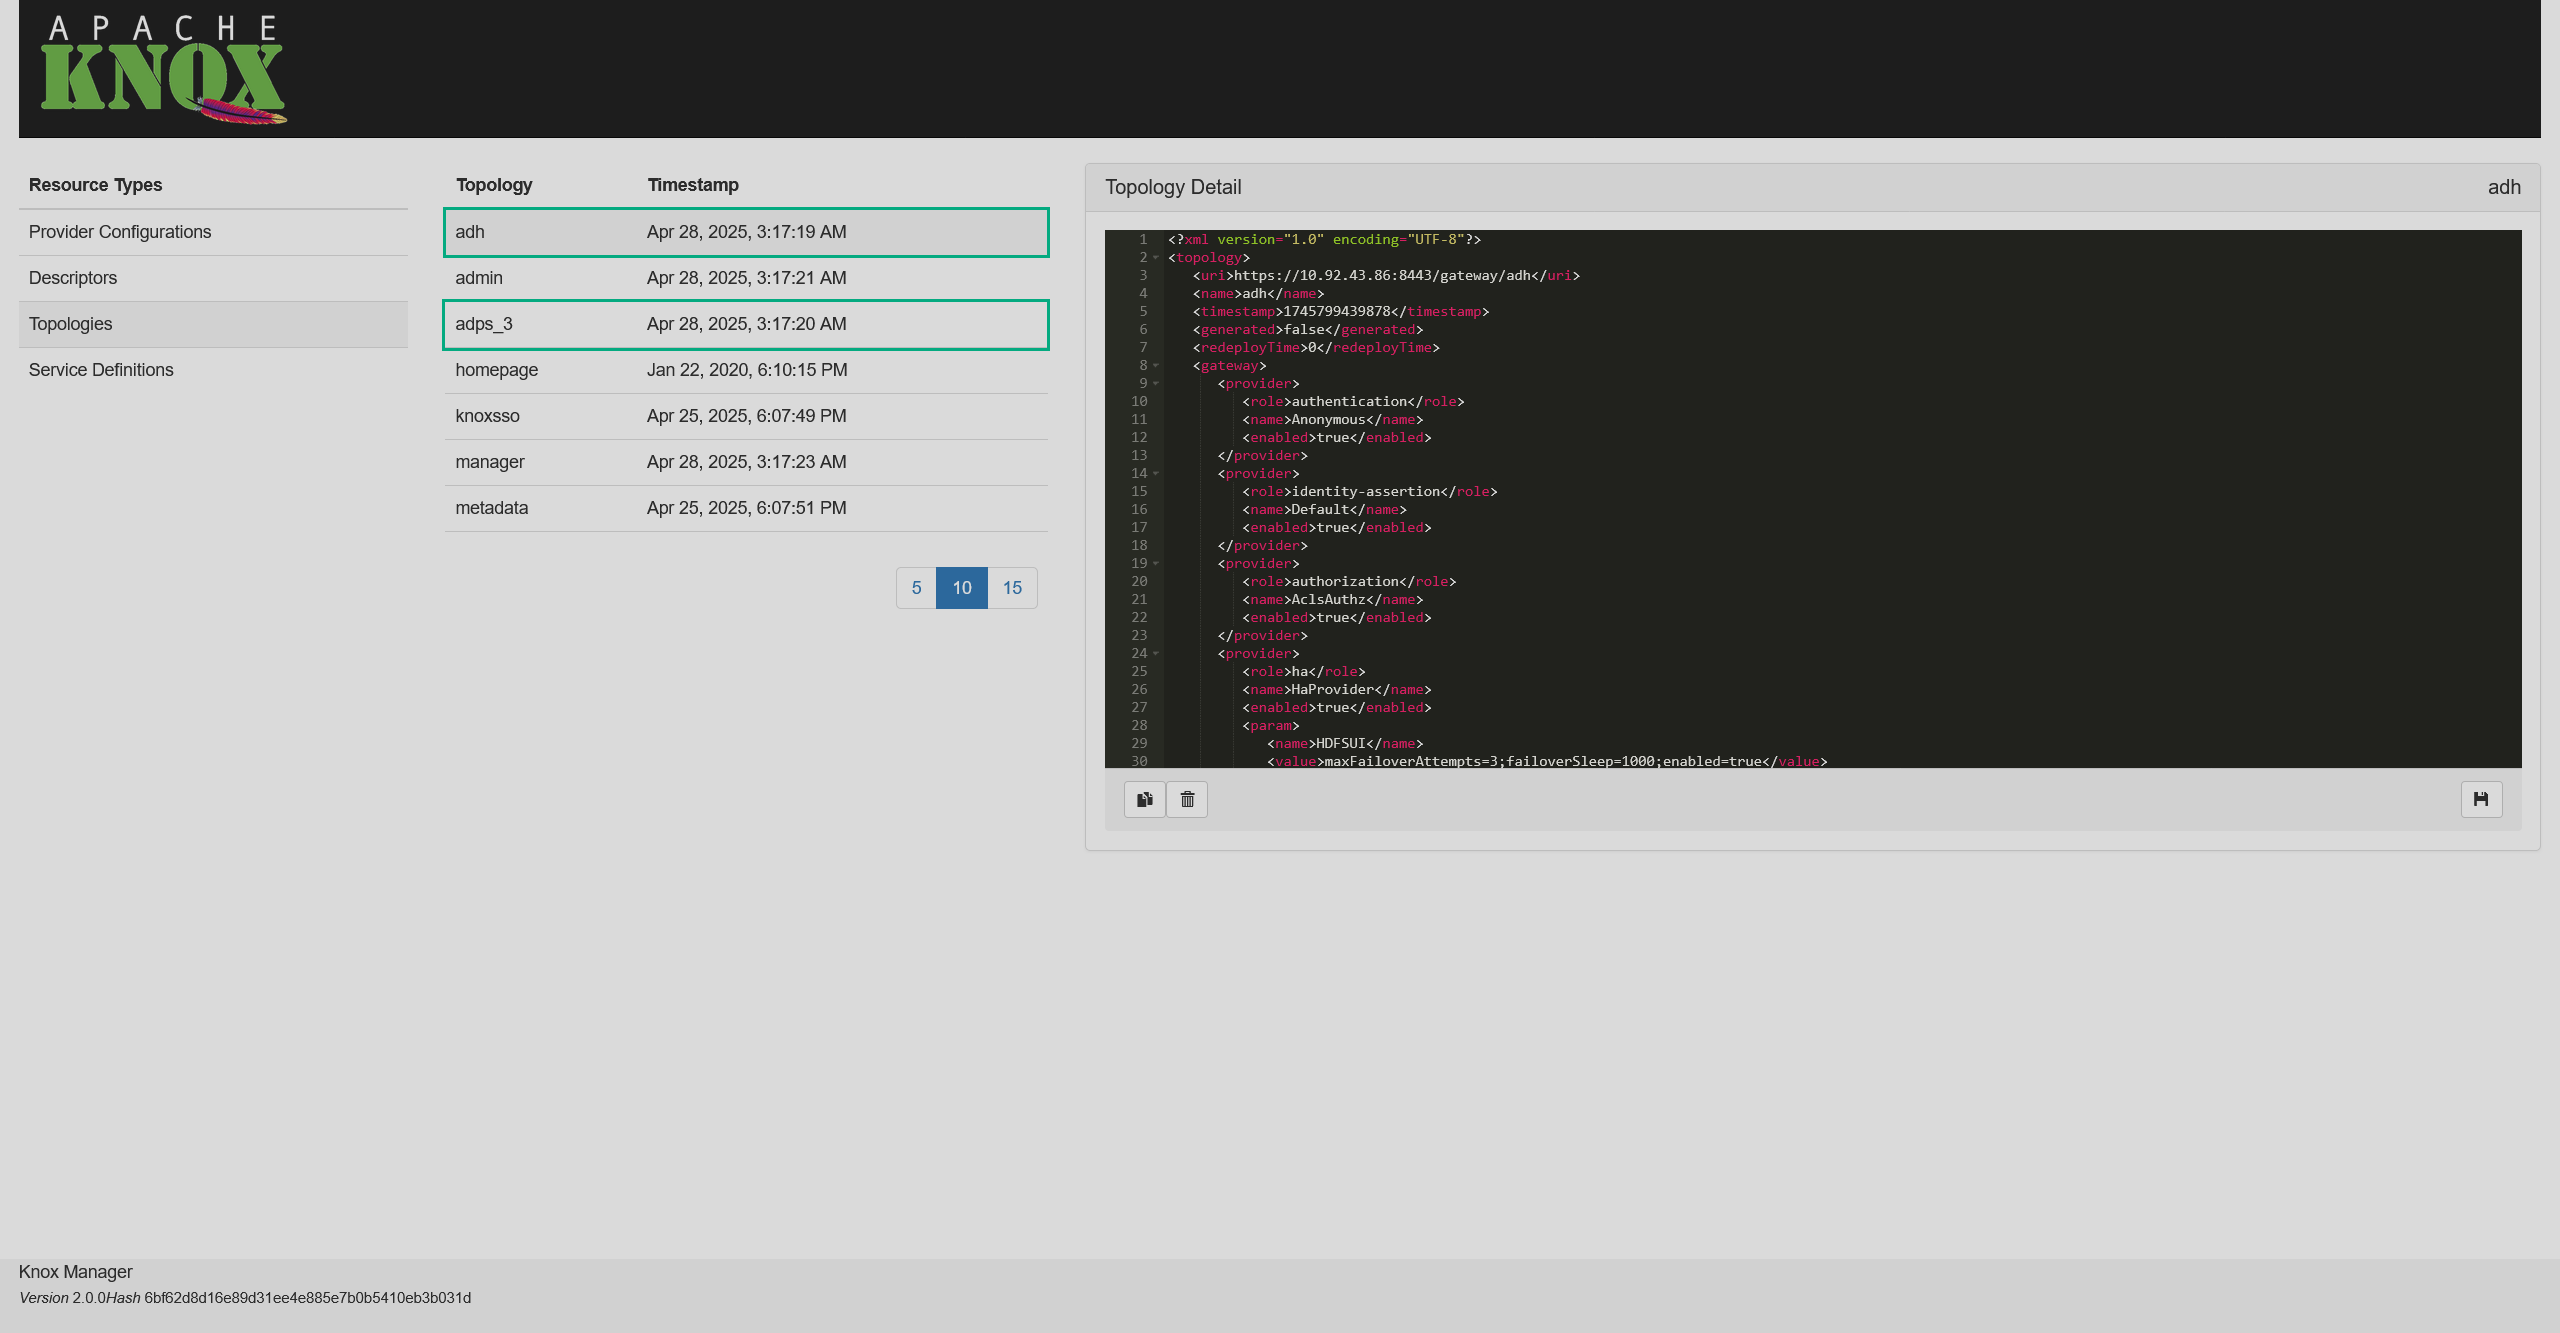 Autoloaded topologies
Create custom topologies
In Knox, a topology is defined by it’s provider and descriptor. The example below demonstrates how to setup access for some ADH services in the Knox Admin UI. This guide only features the cURL access. For Groovy and DSL access, refer to the Knox documentation.
Authentication provider
|
NOTE
If you already have a sufficient authentication provider, you may skip this section.
|
First, set up an authentication provider:
-
On the Provider configurations page, click
 to the right from the Provider Configurations list title.
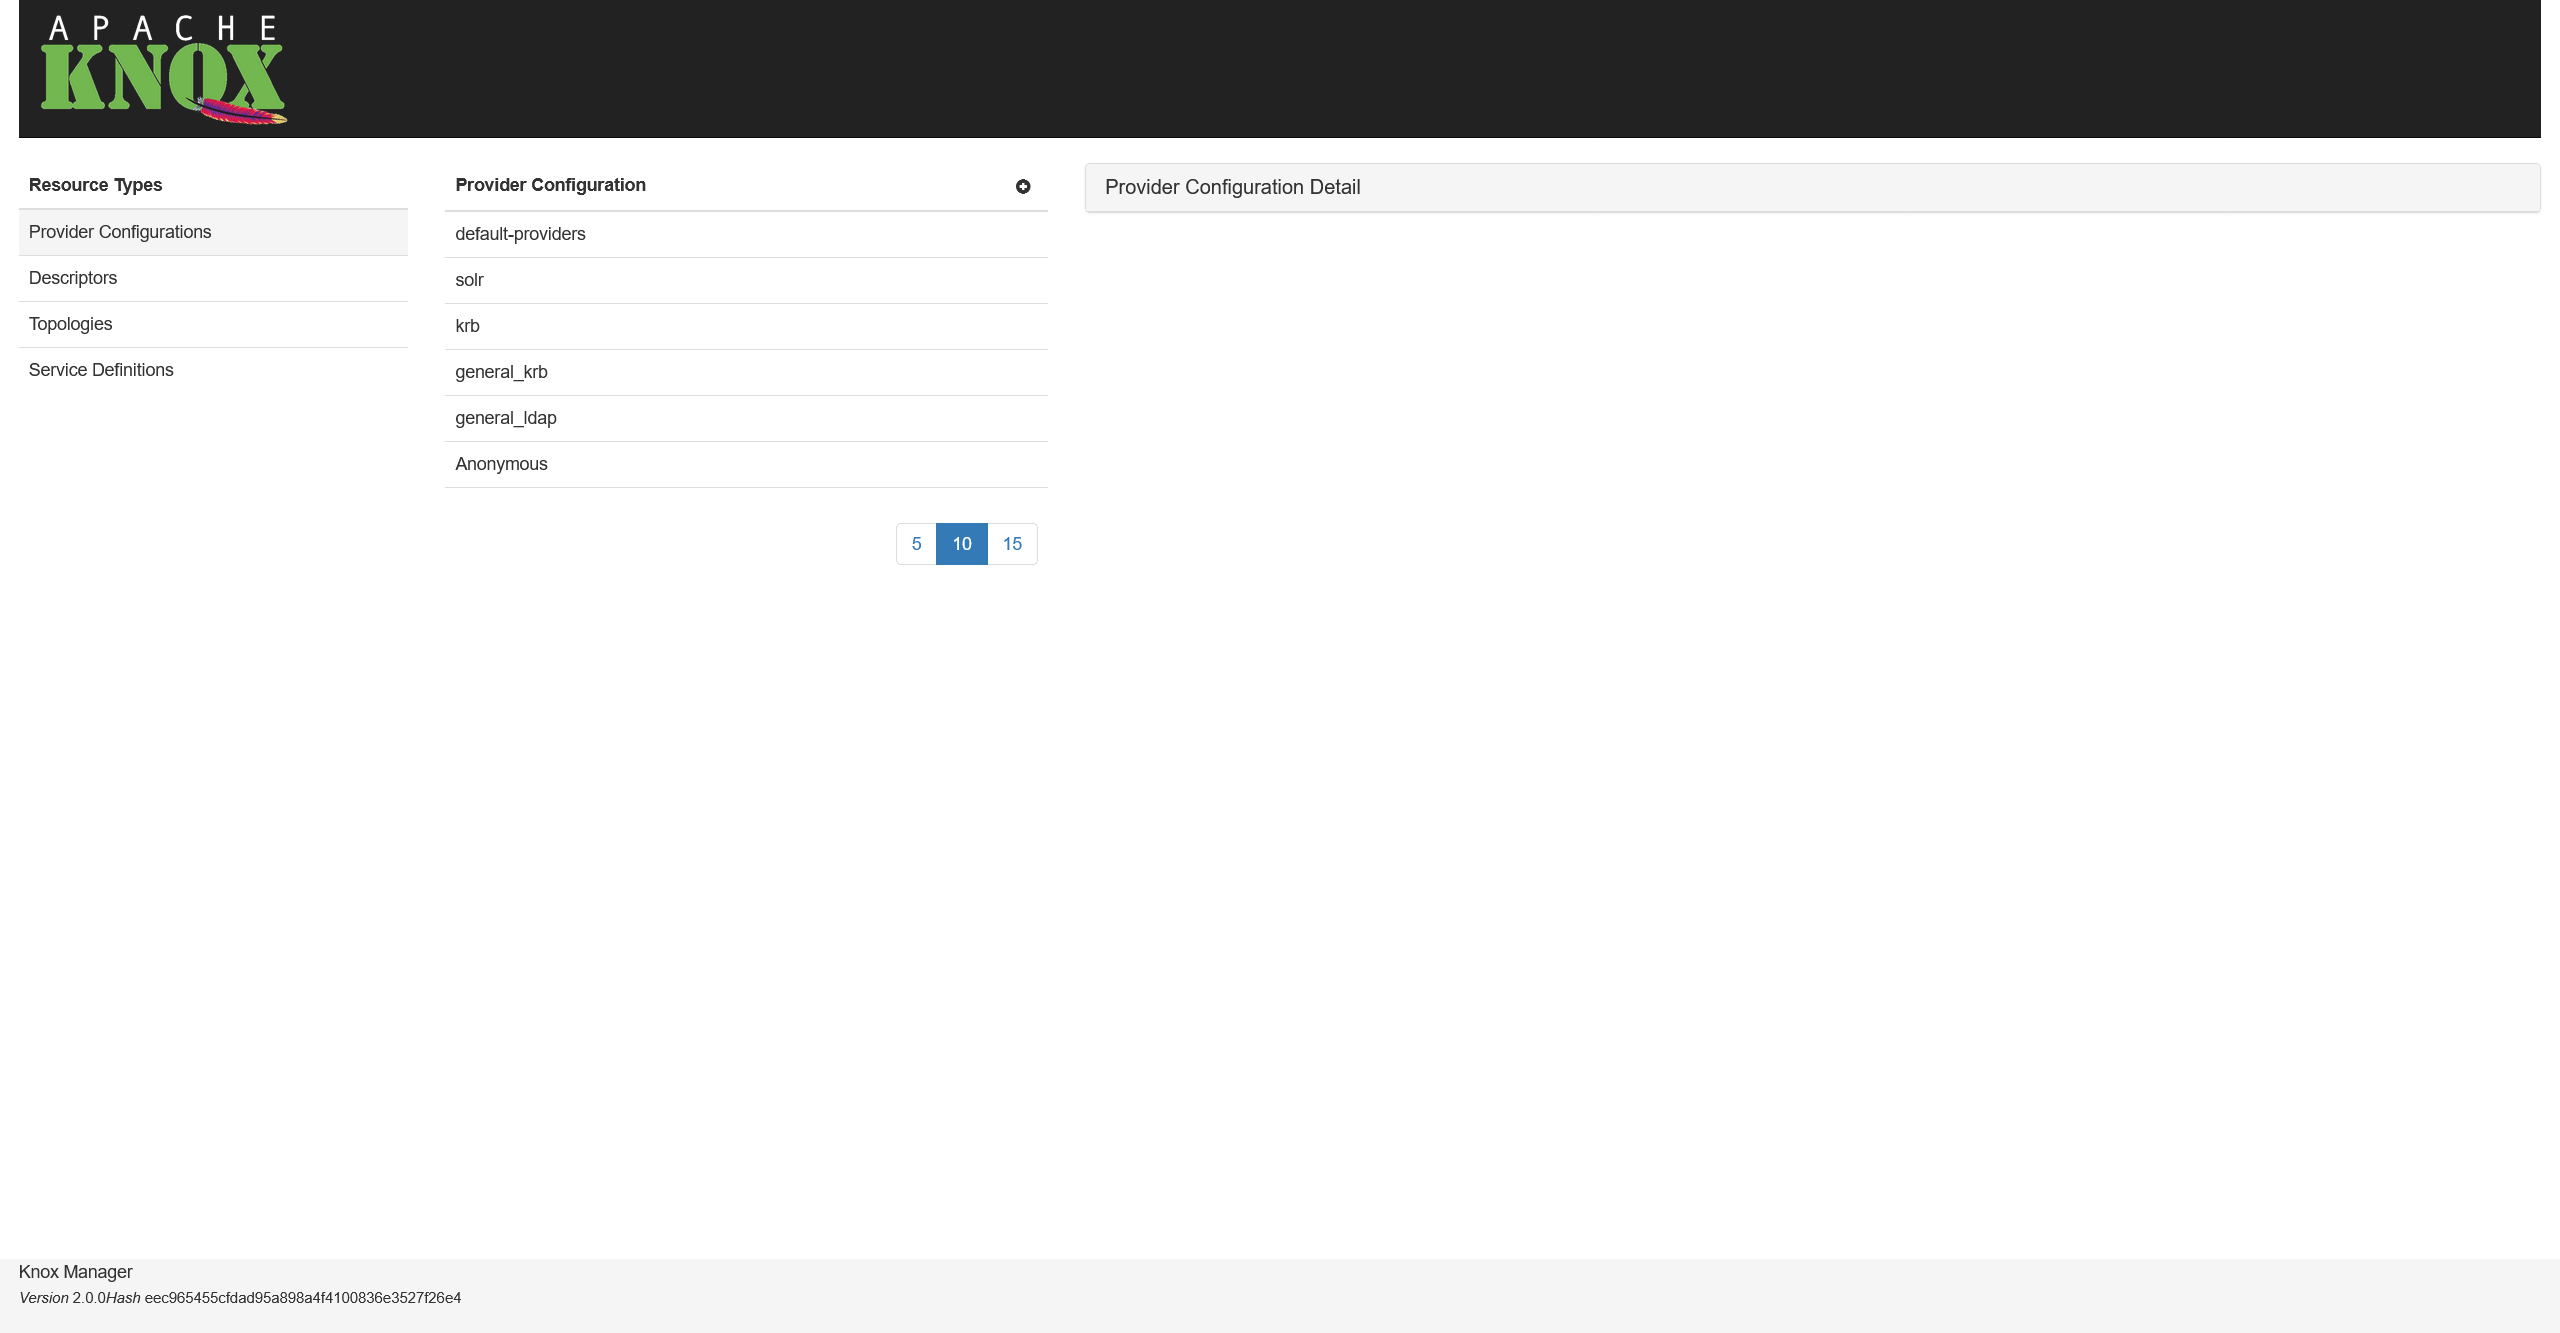 Provider configurations
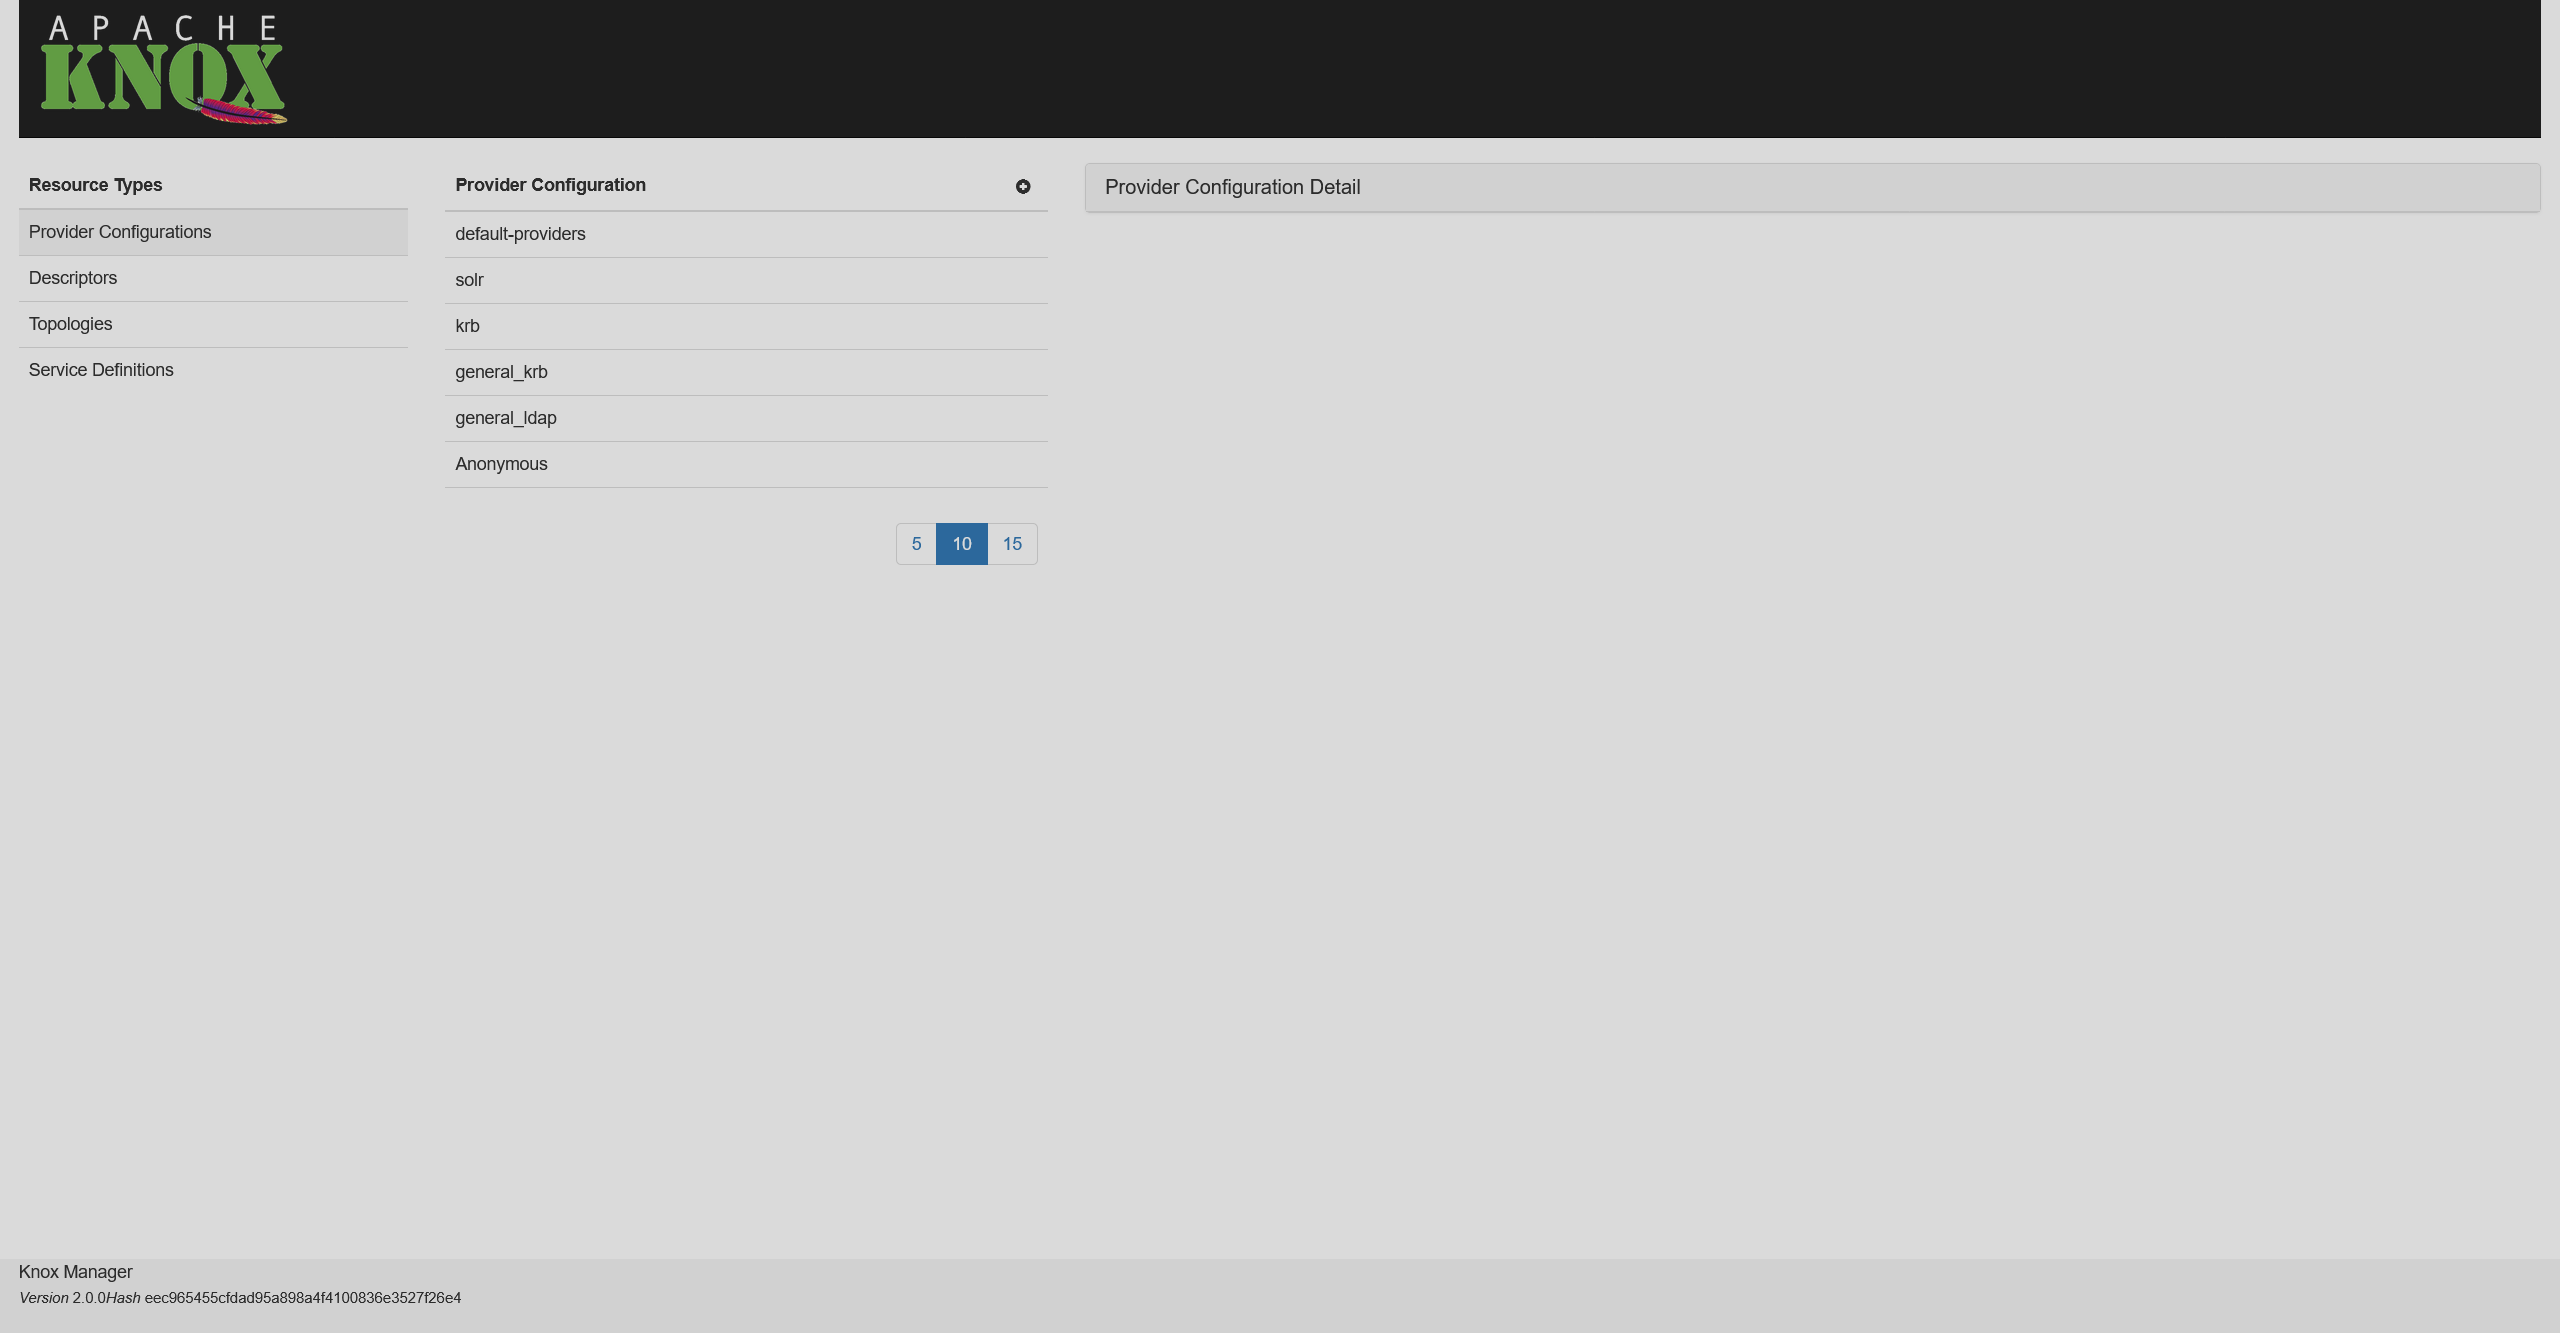 Provider configurations
 -
Choose a name for a provider (e.g.
my-provider) and click Add Provider.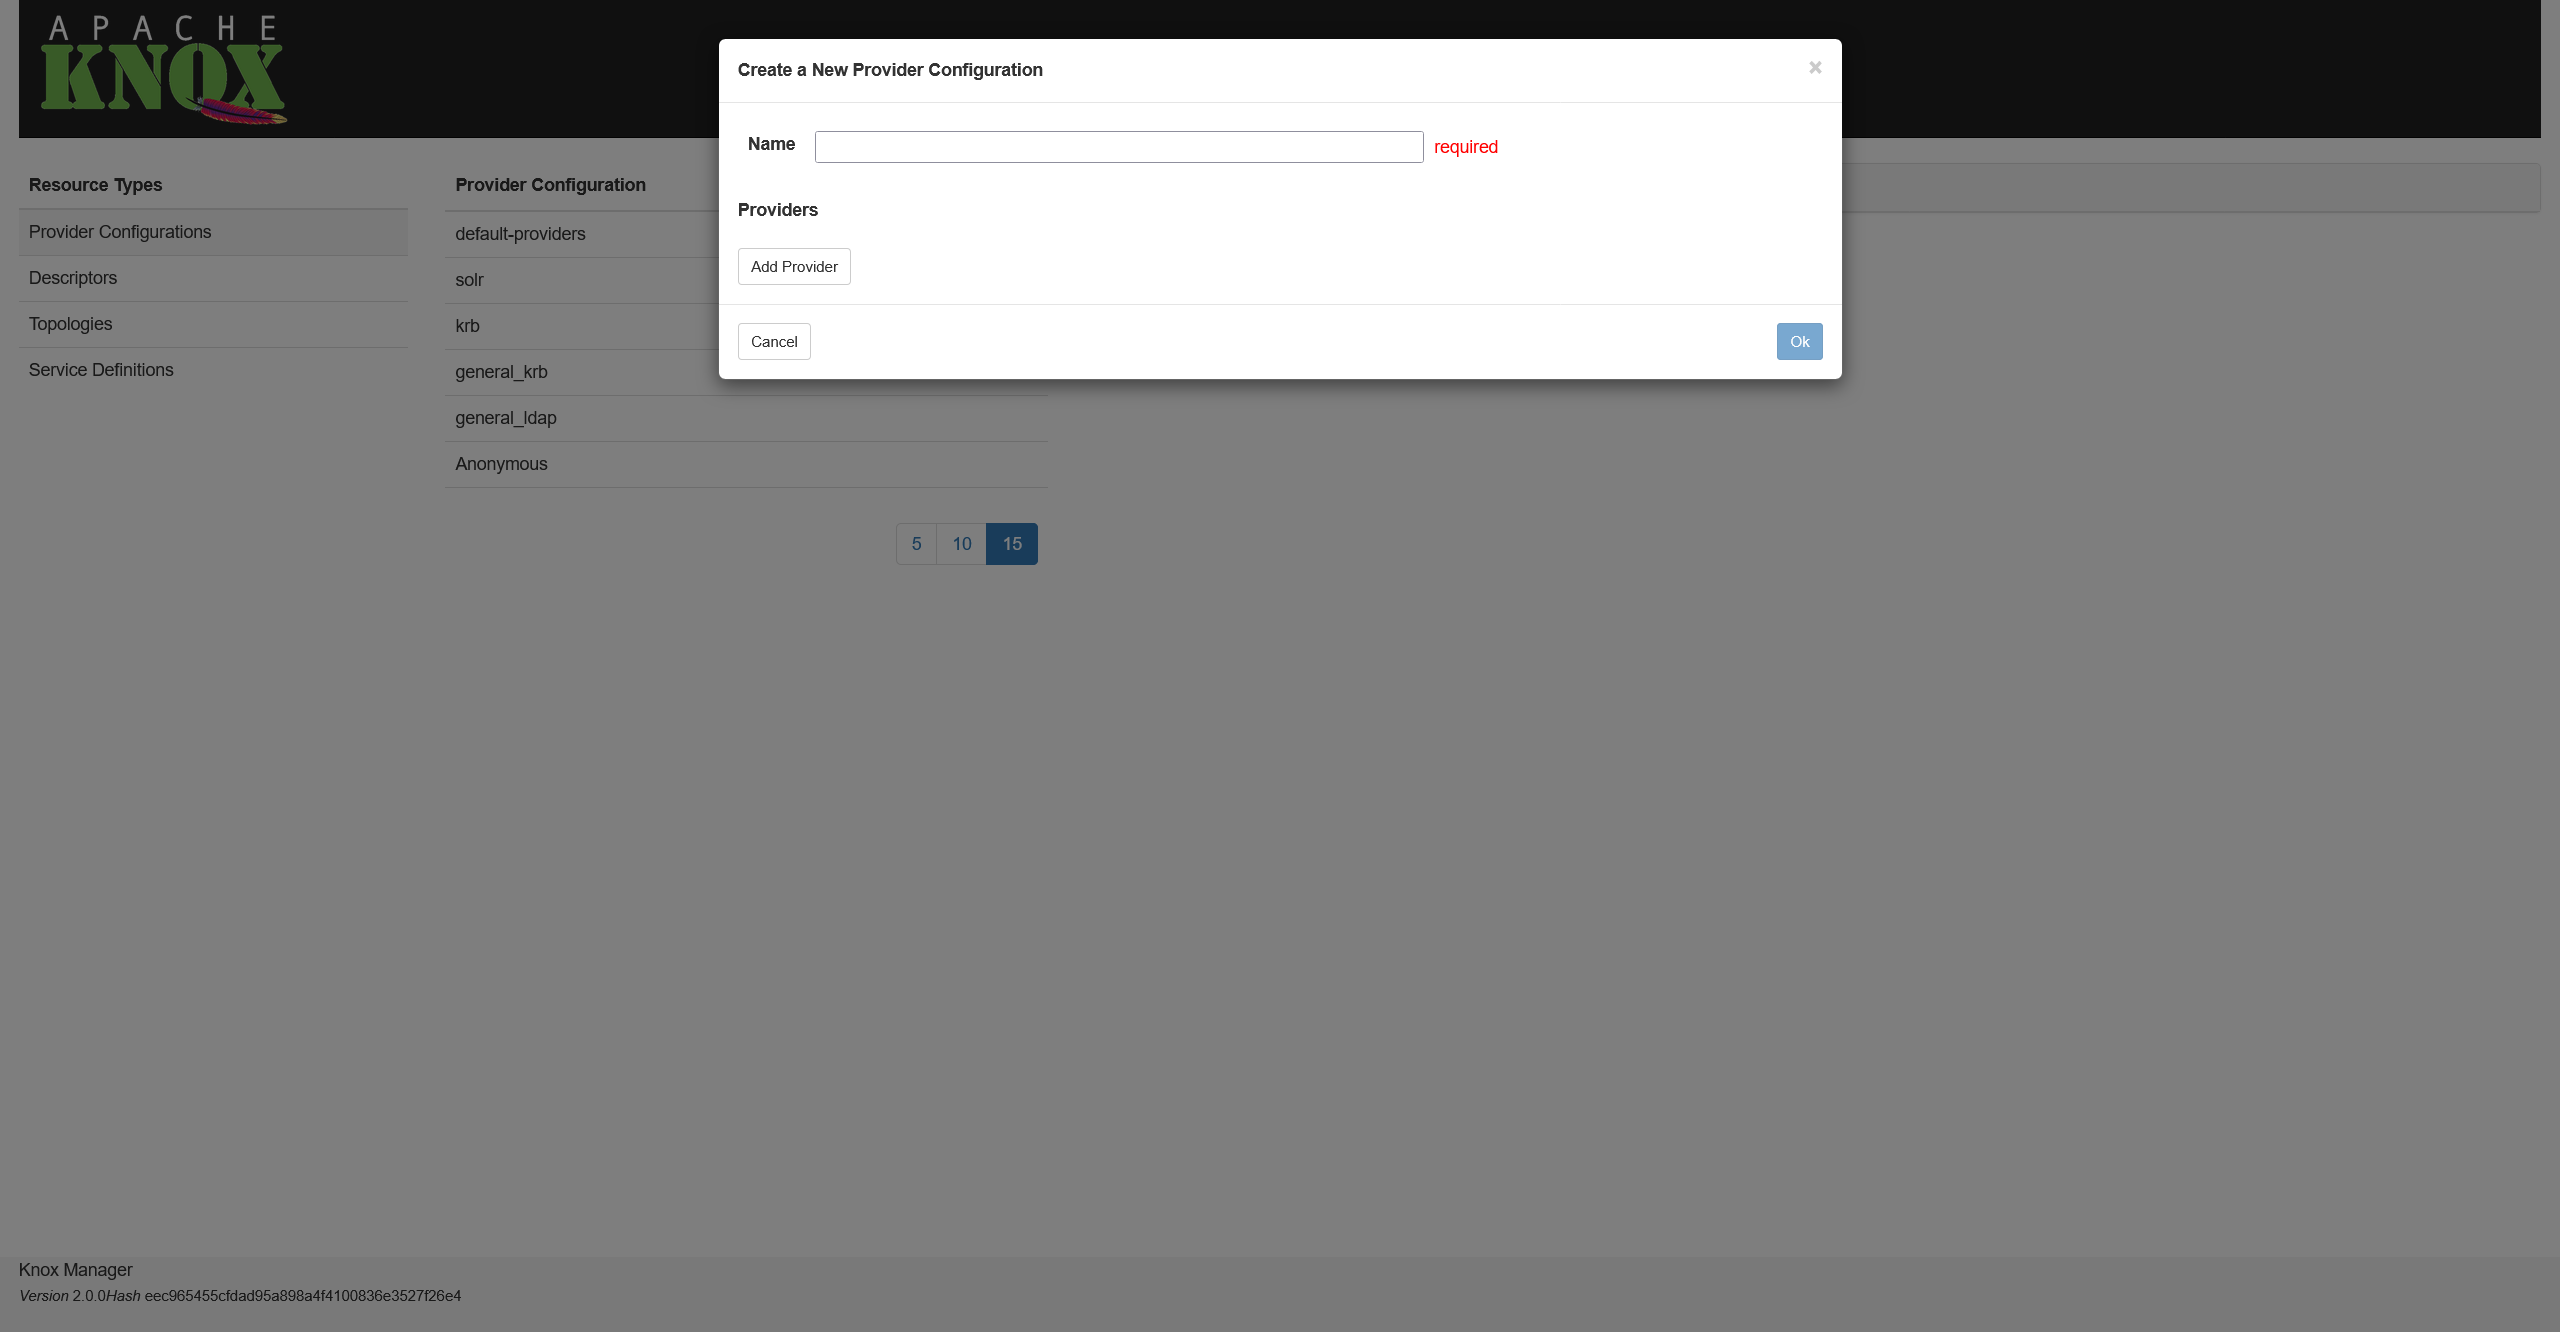 Adding a provider
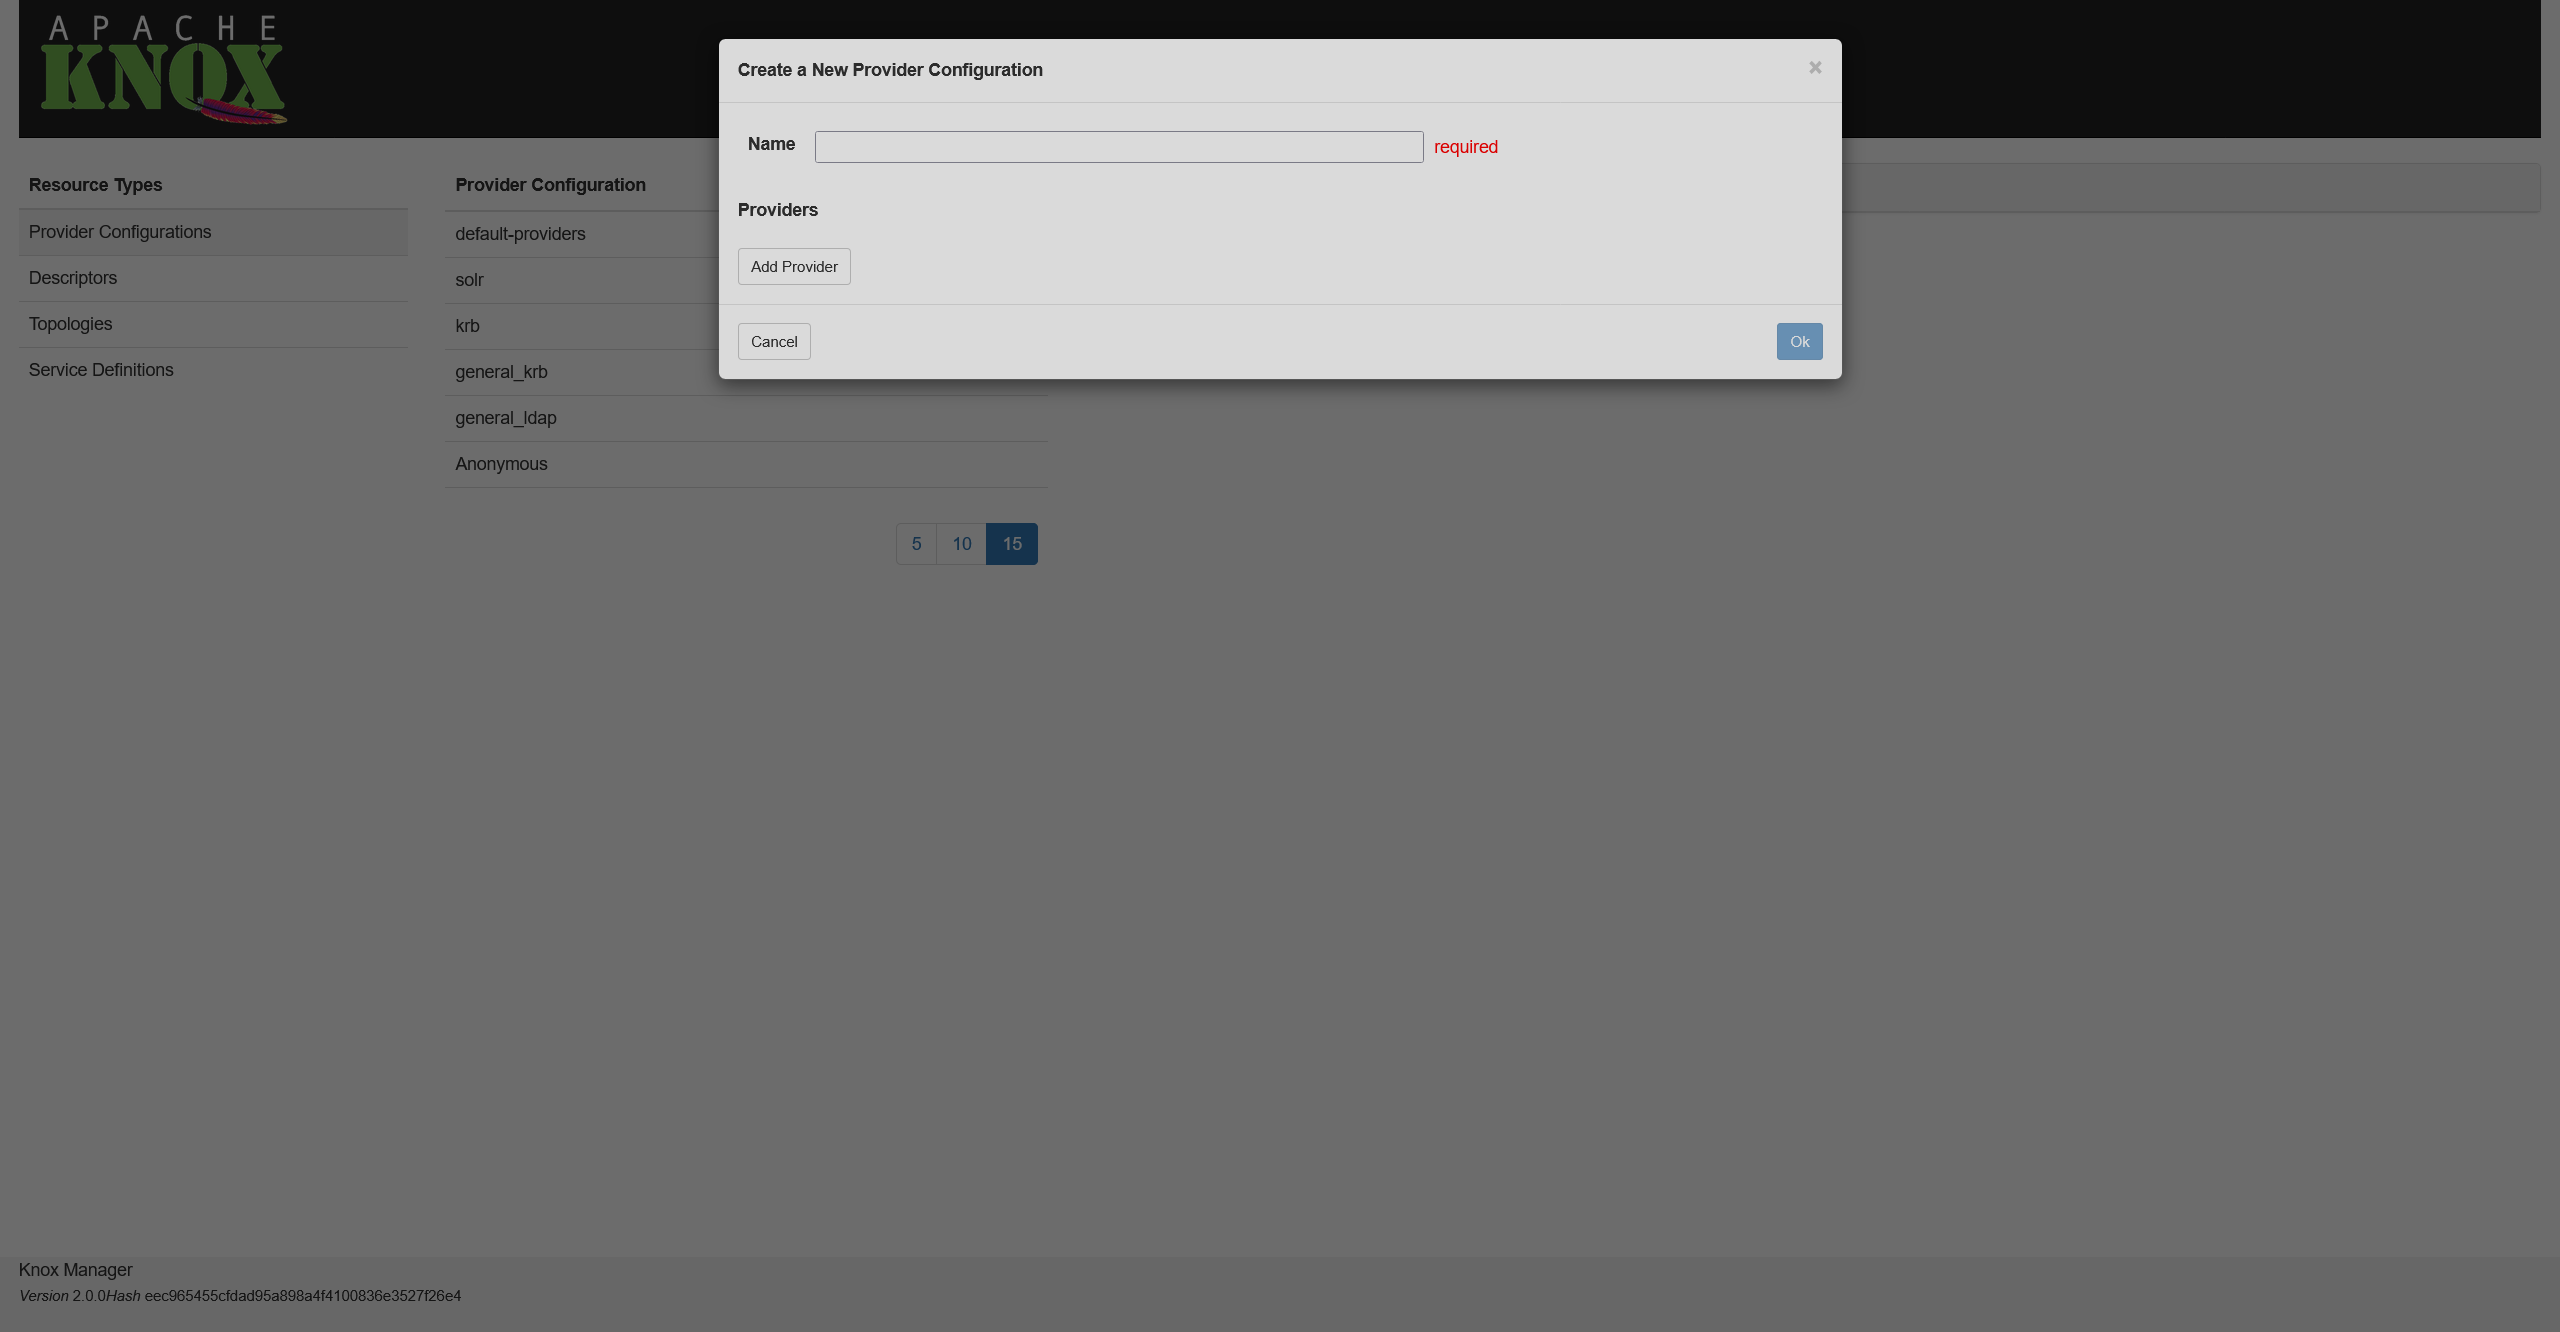 Adding a provider
 -
On the opened screen, select the Authentication option and click Next.
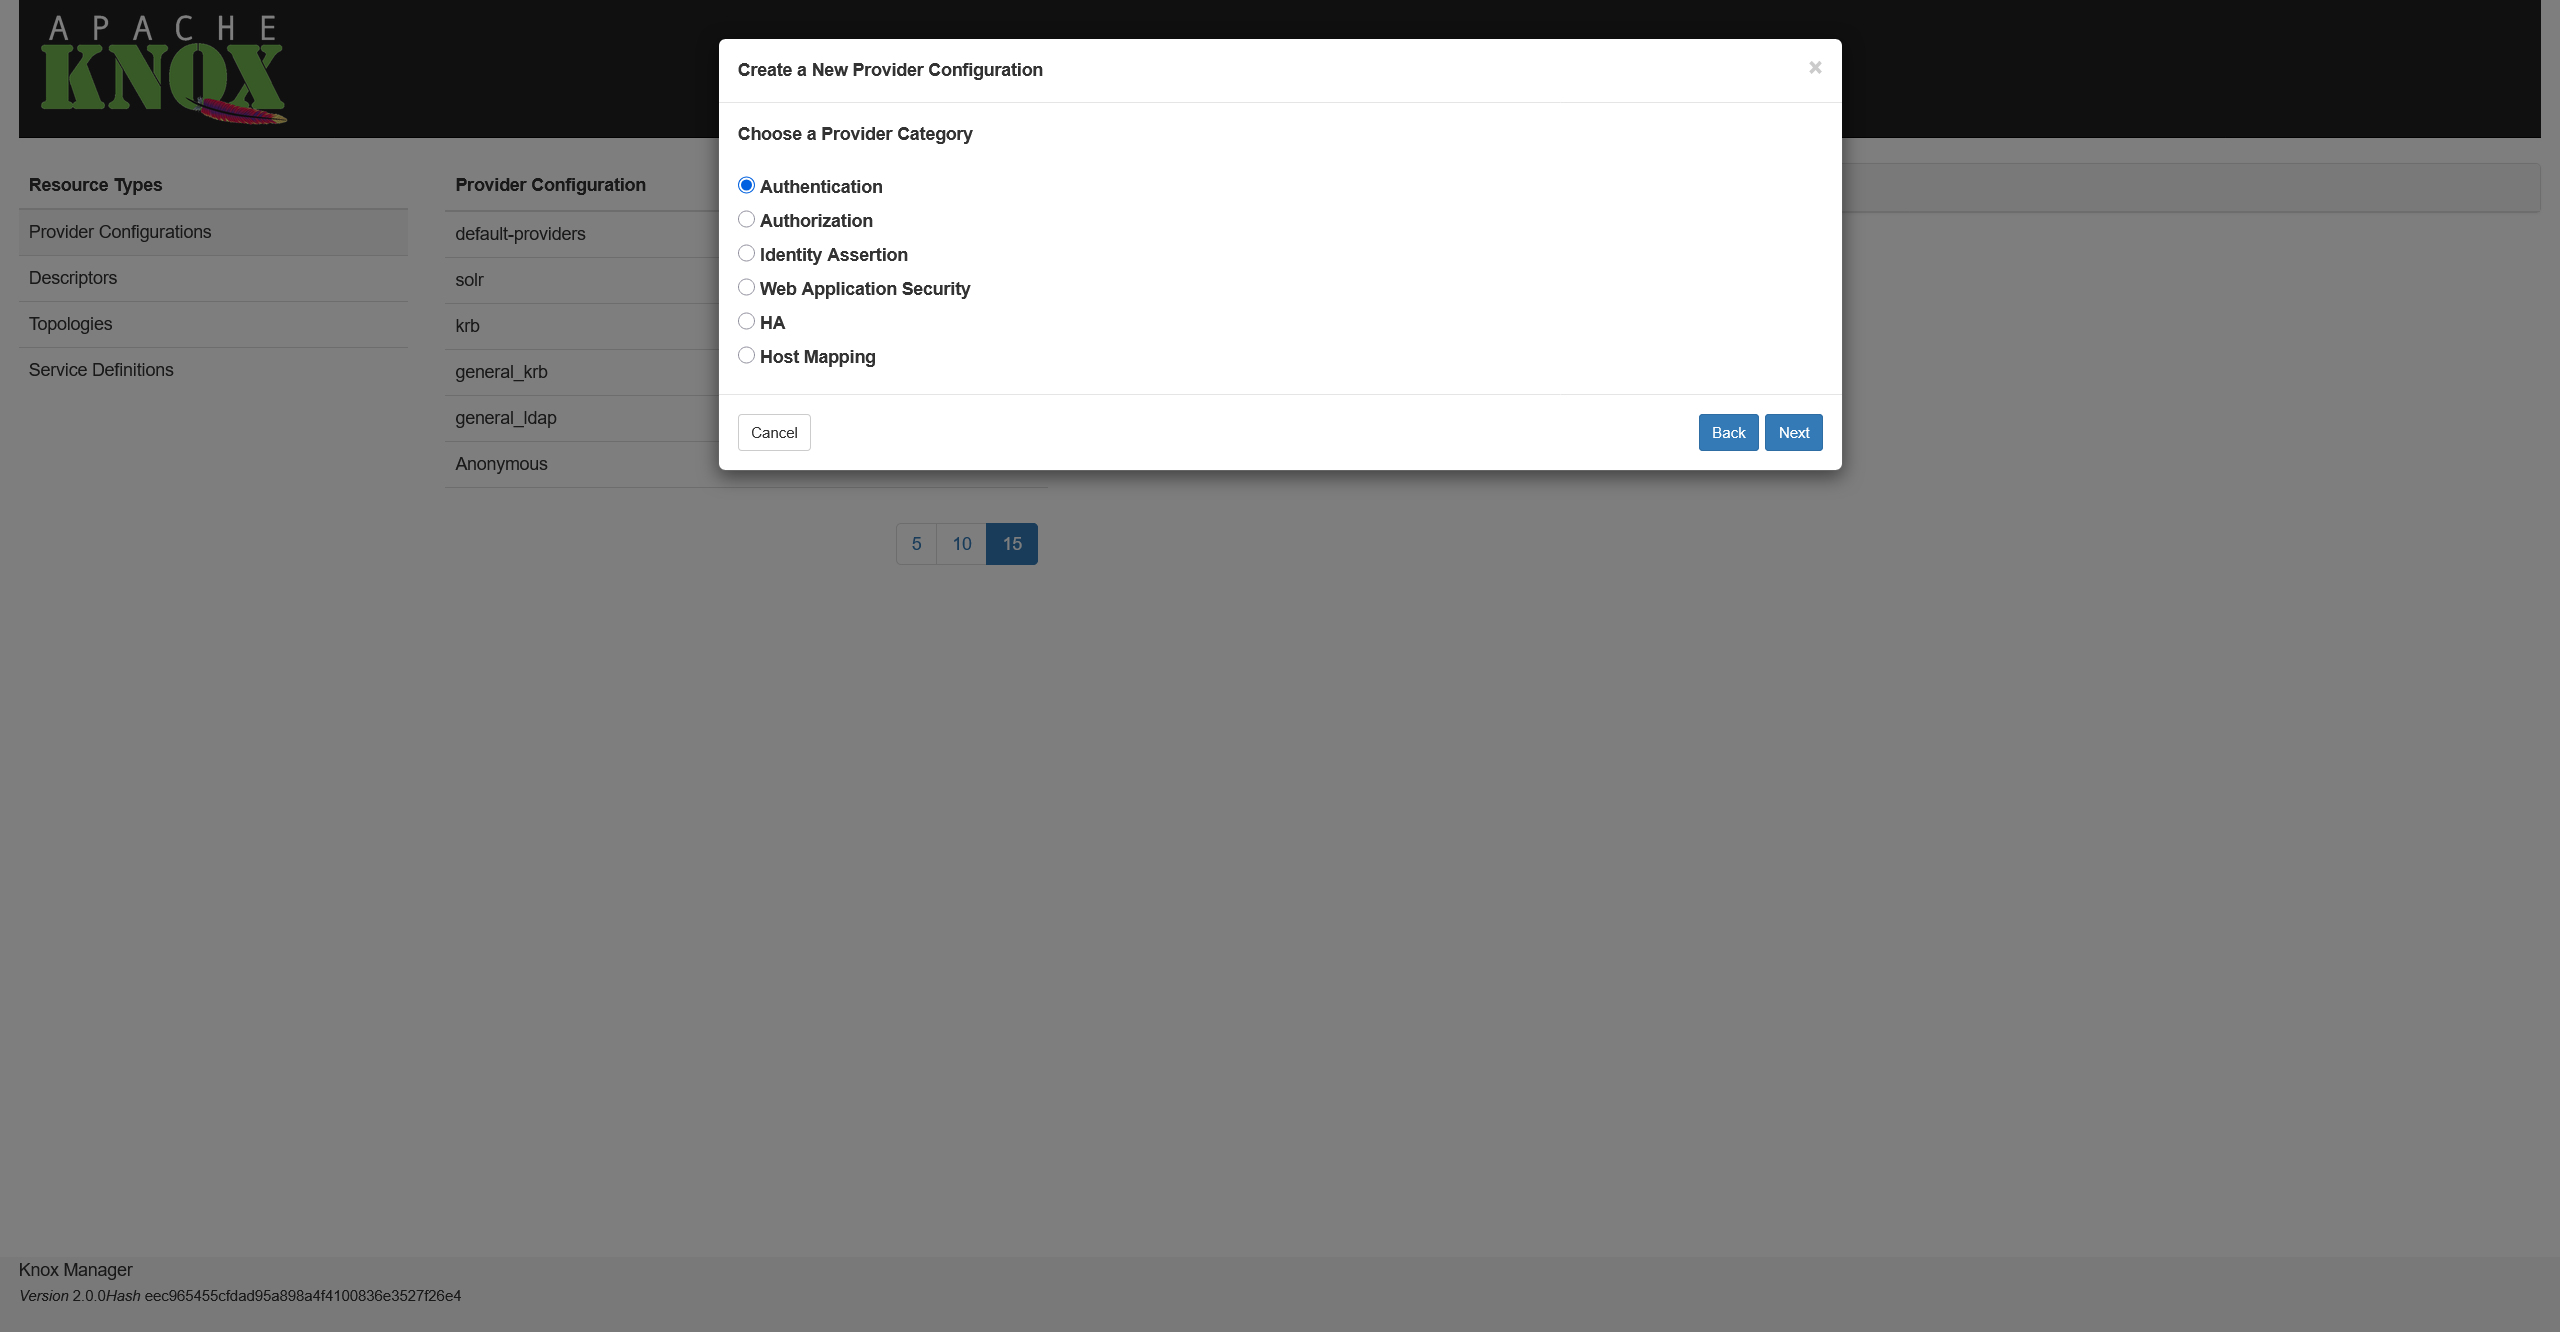 Selecting a provider type
 Selecting a provider type
 -
Select an authentication type and click Next. In this example, it’s Kerberos.
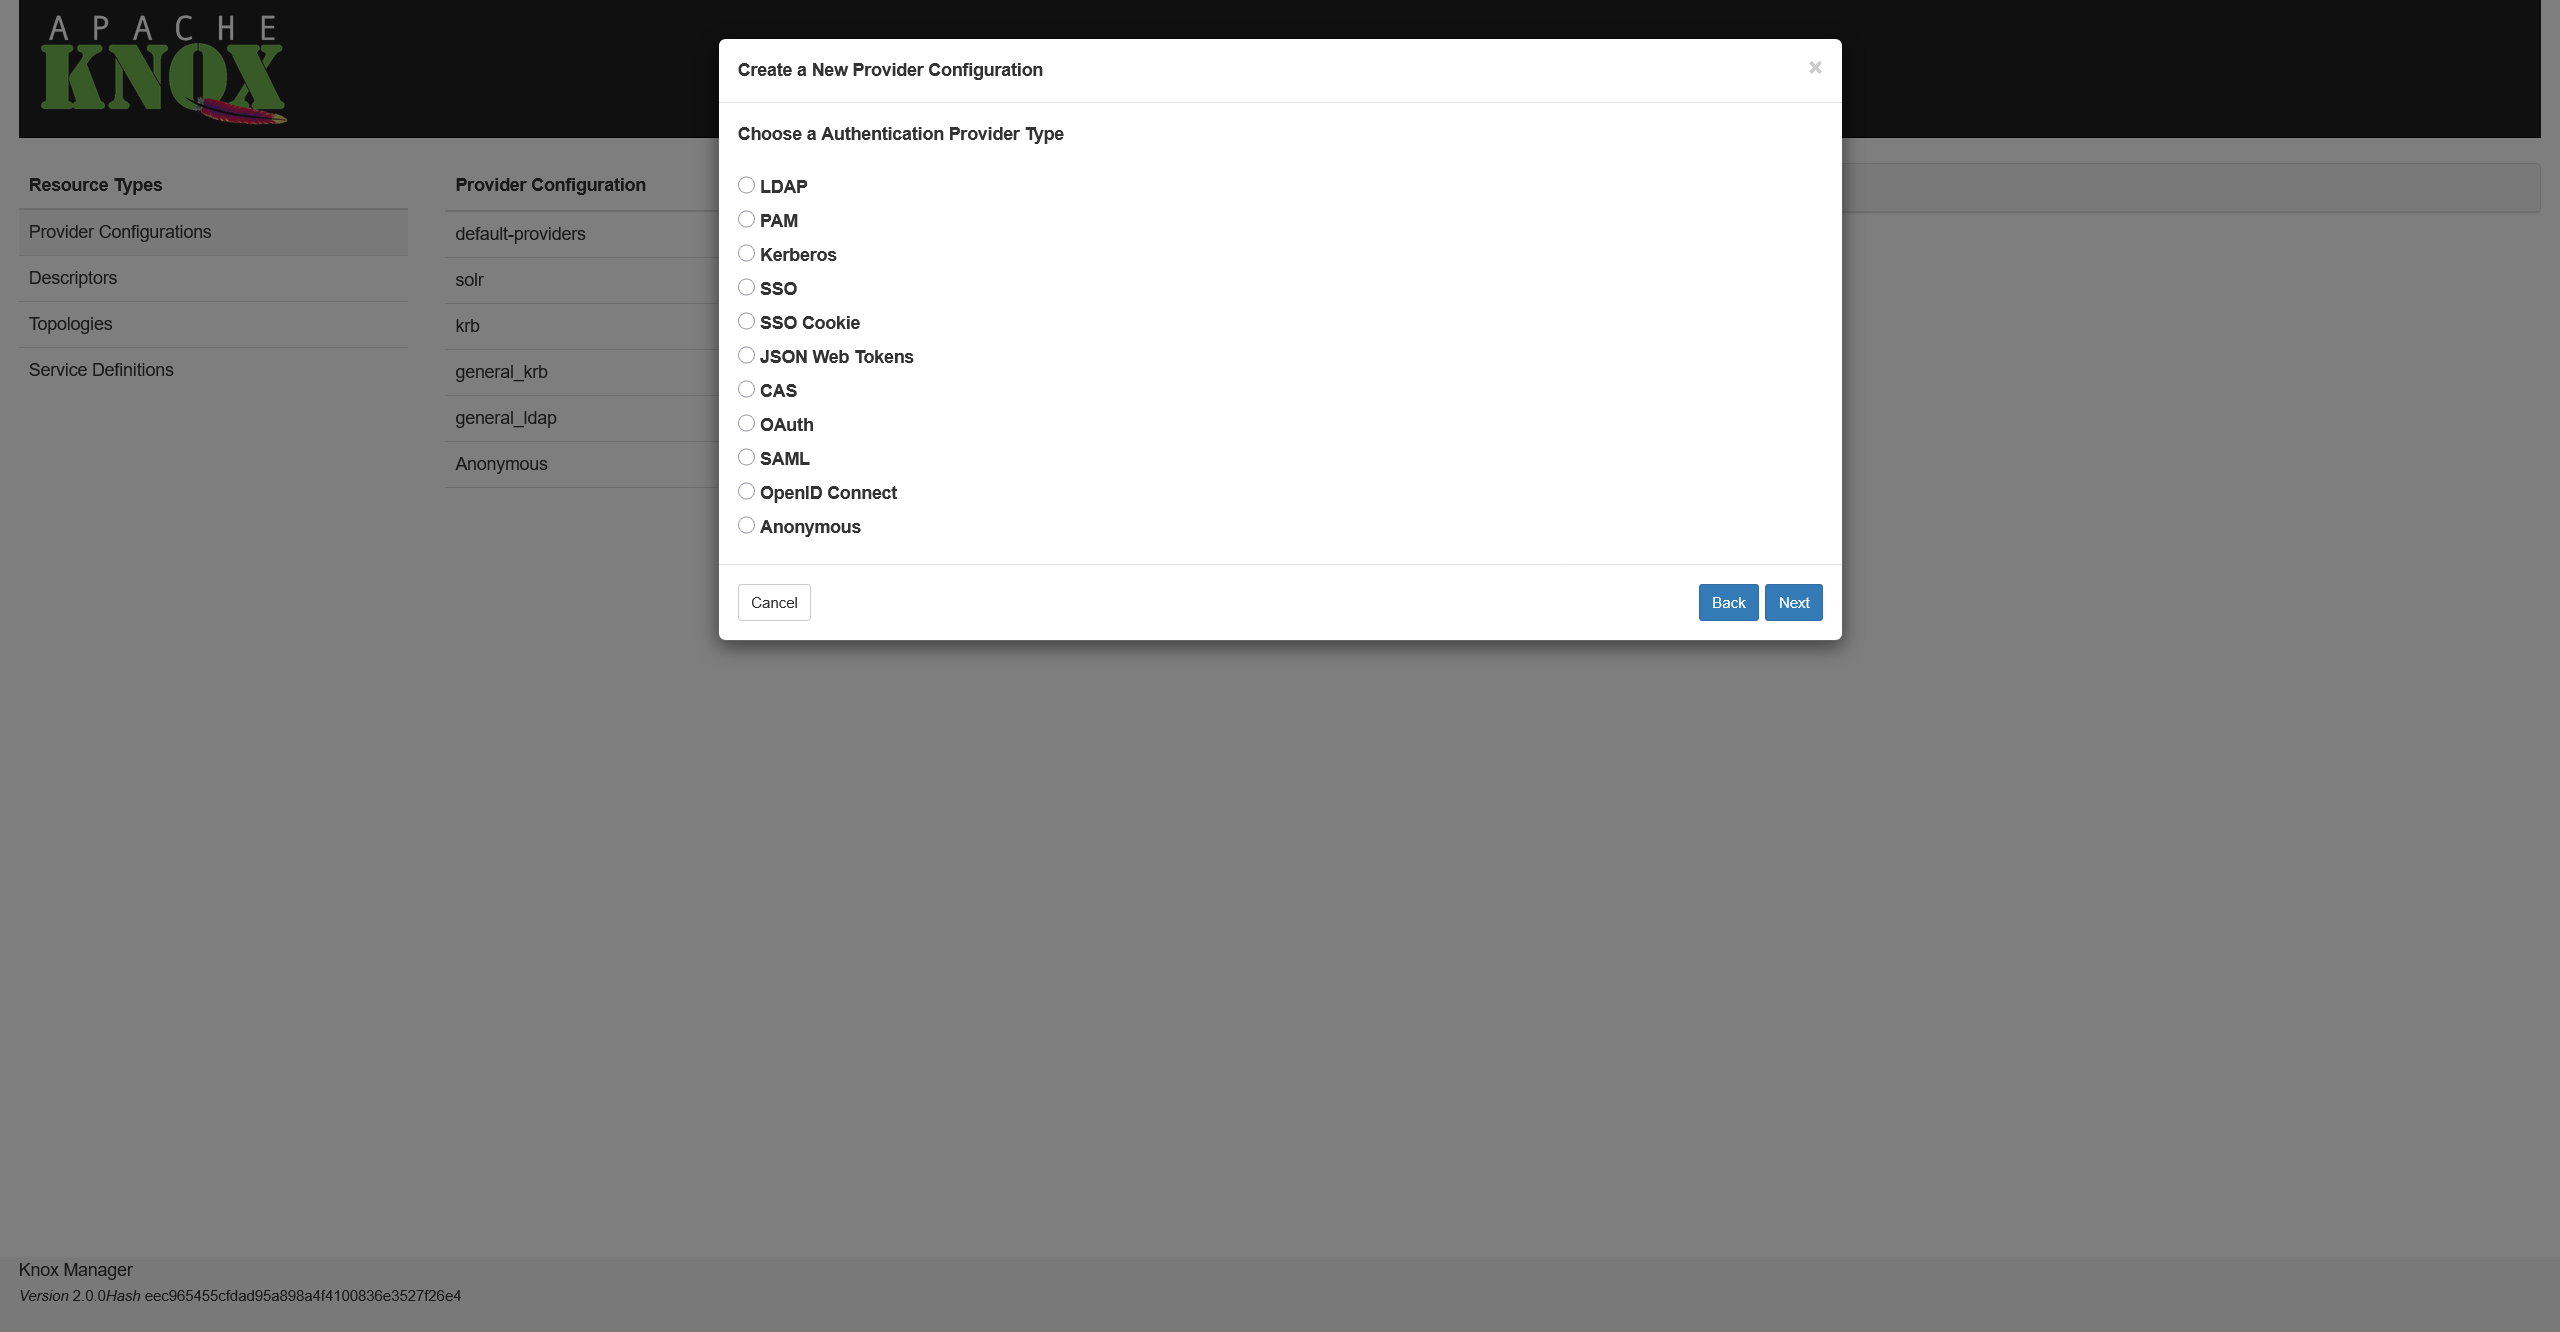 Selecting an authentication type
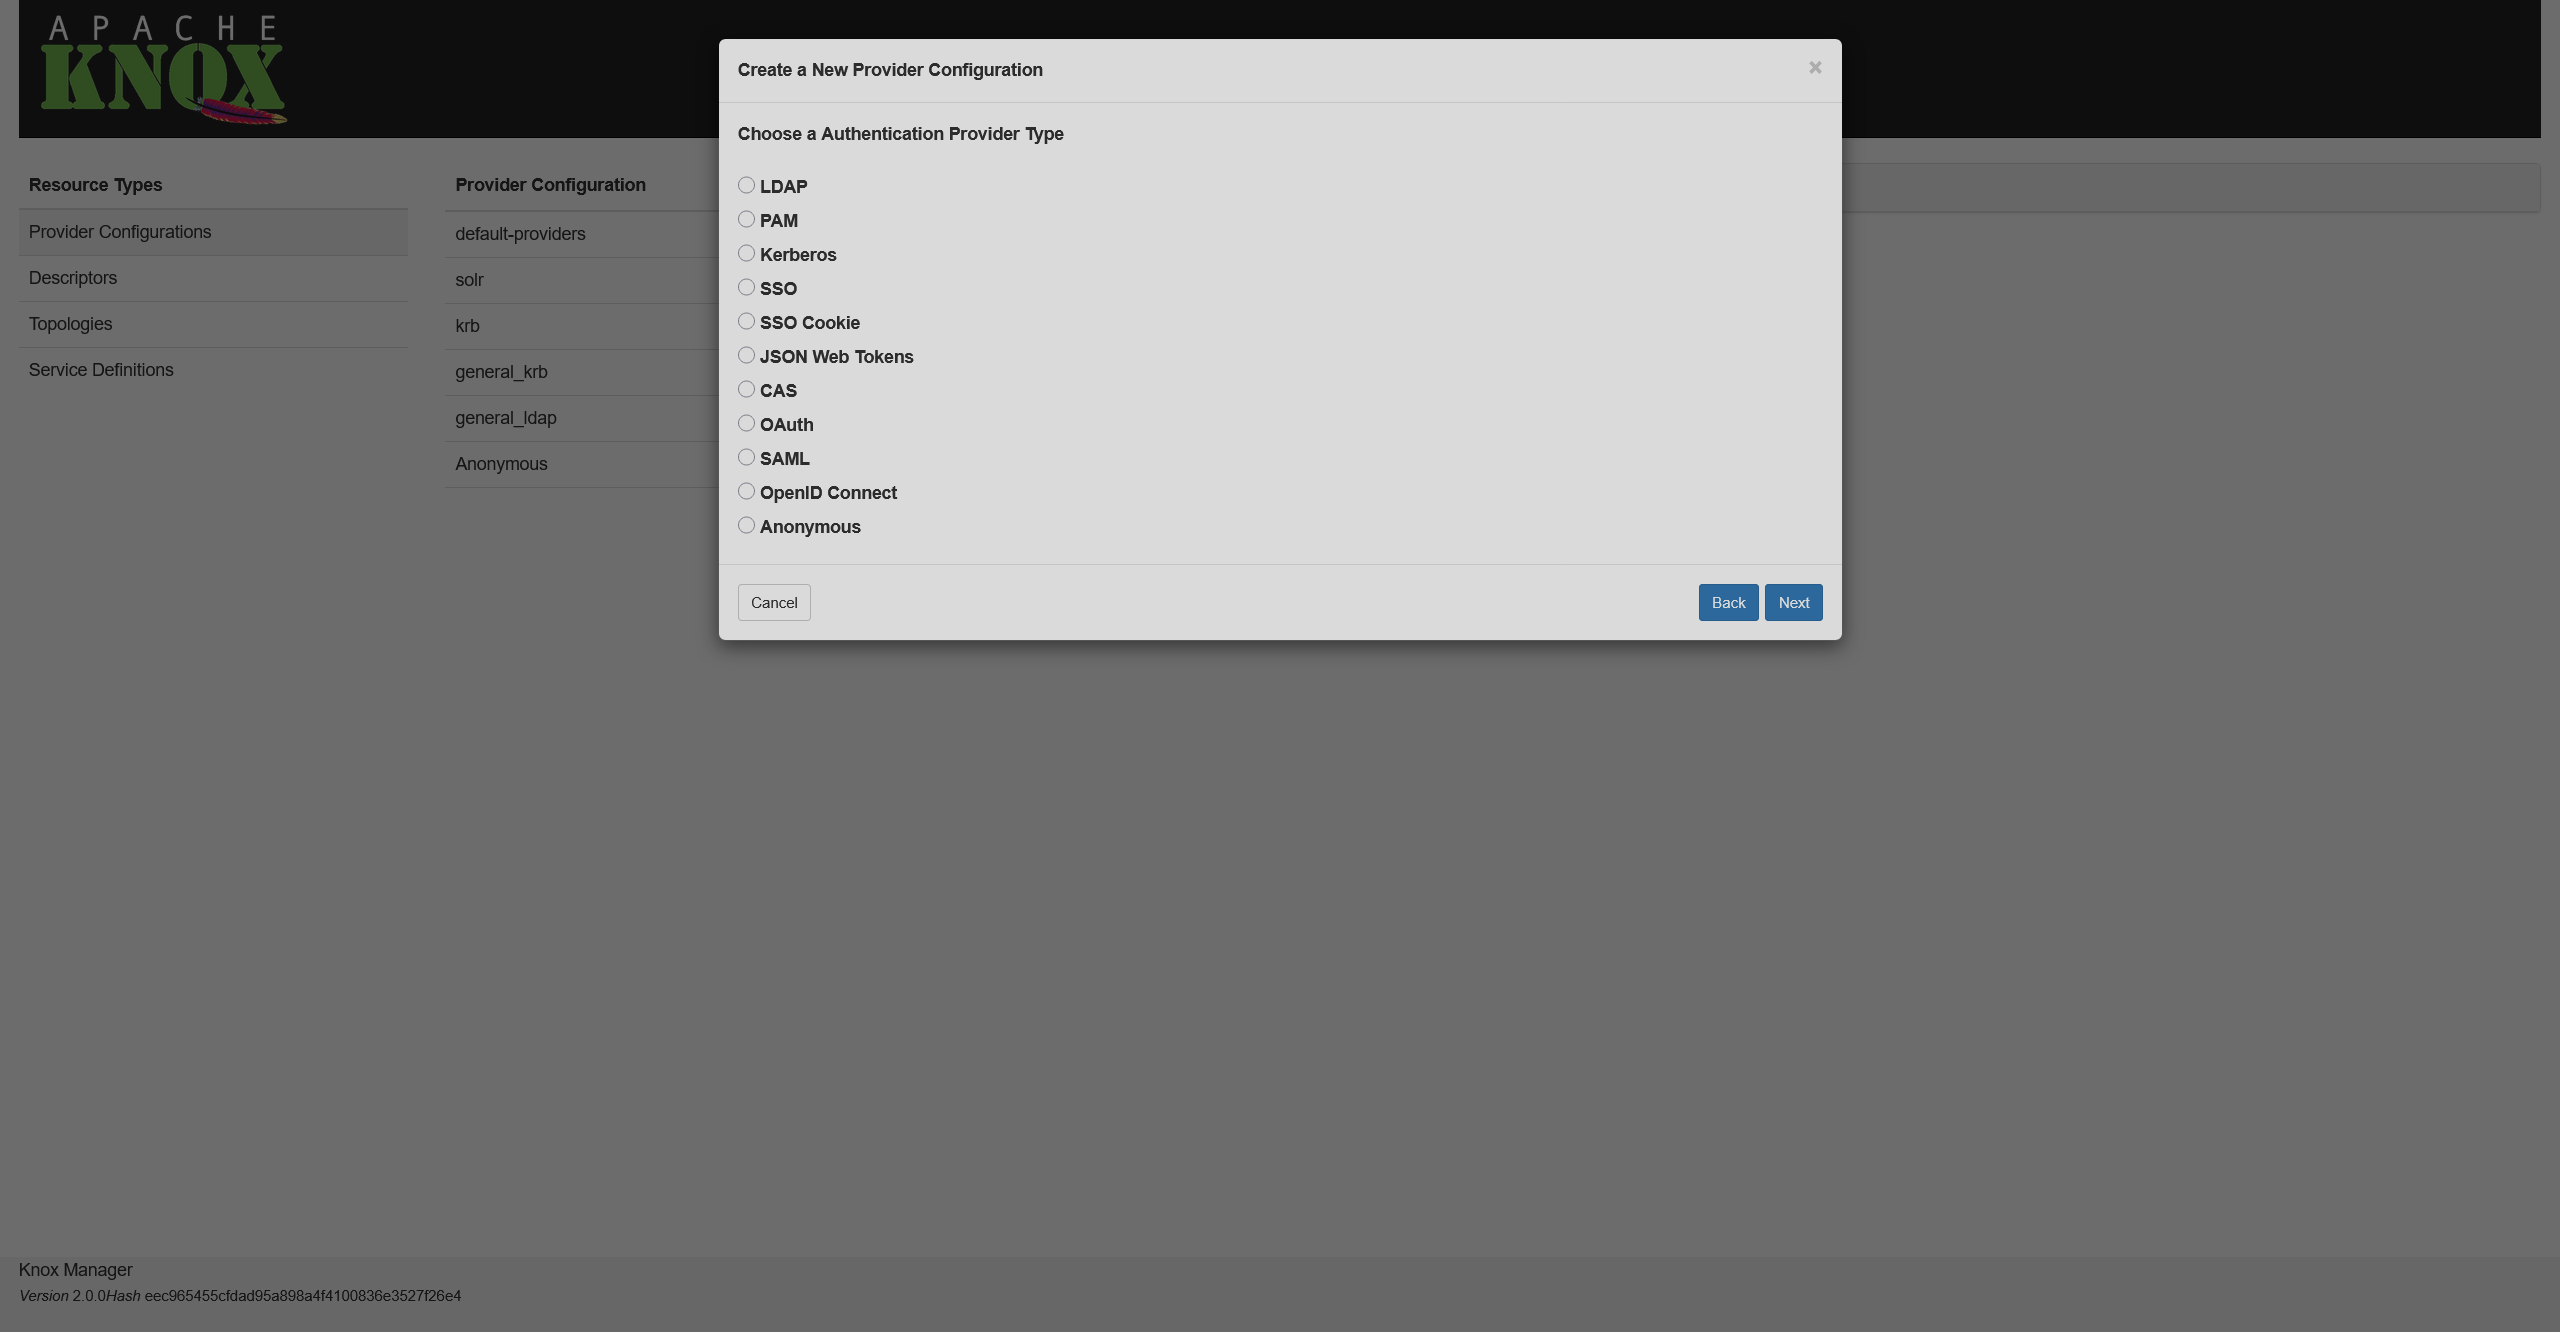 Selecting an authentication type
 -
Fill in the required information and click Ok.
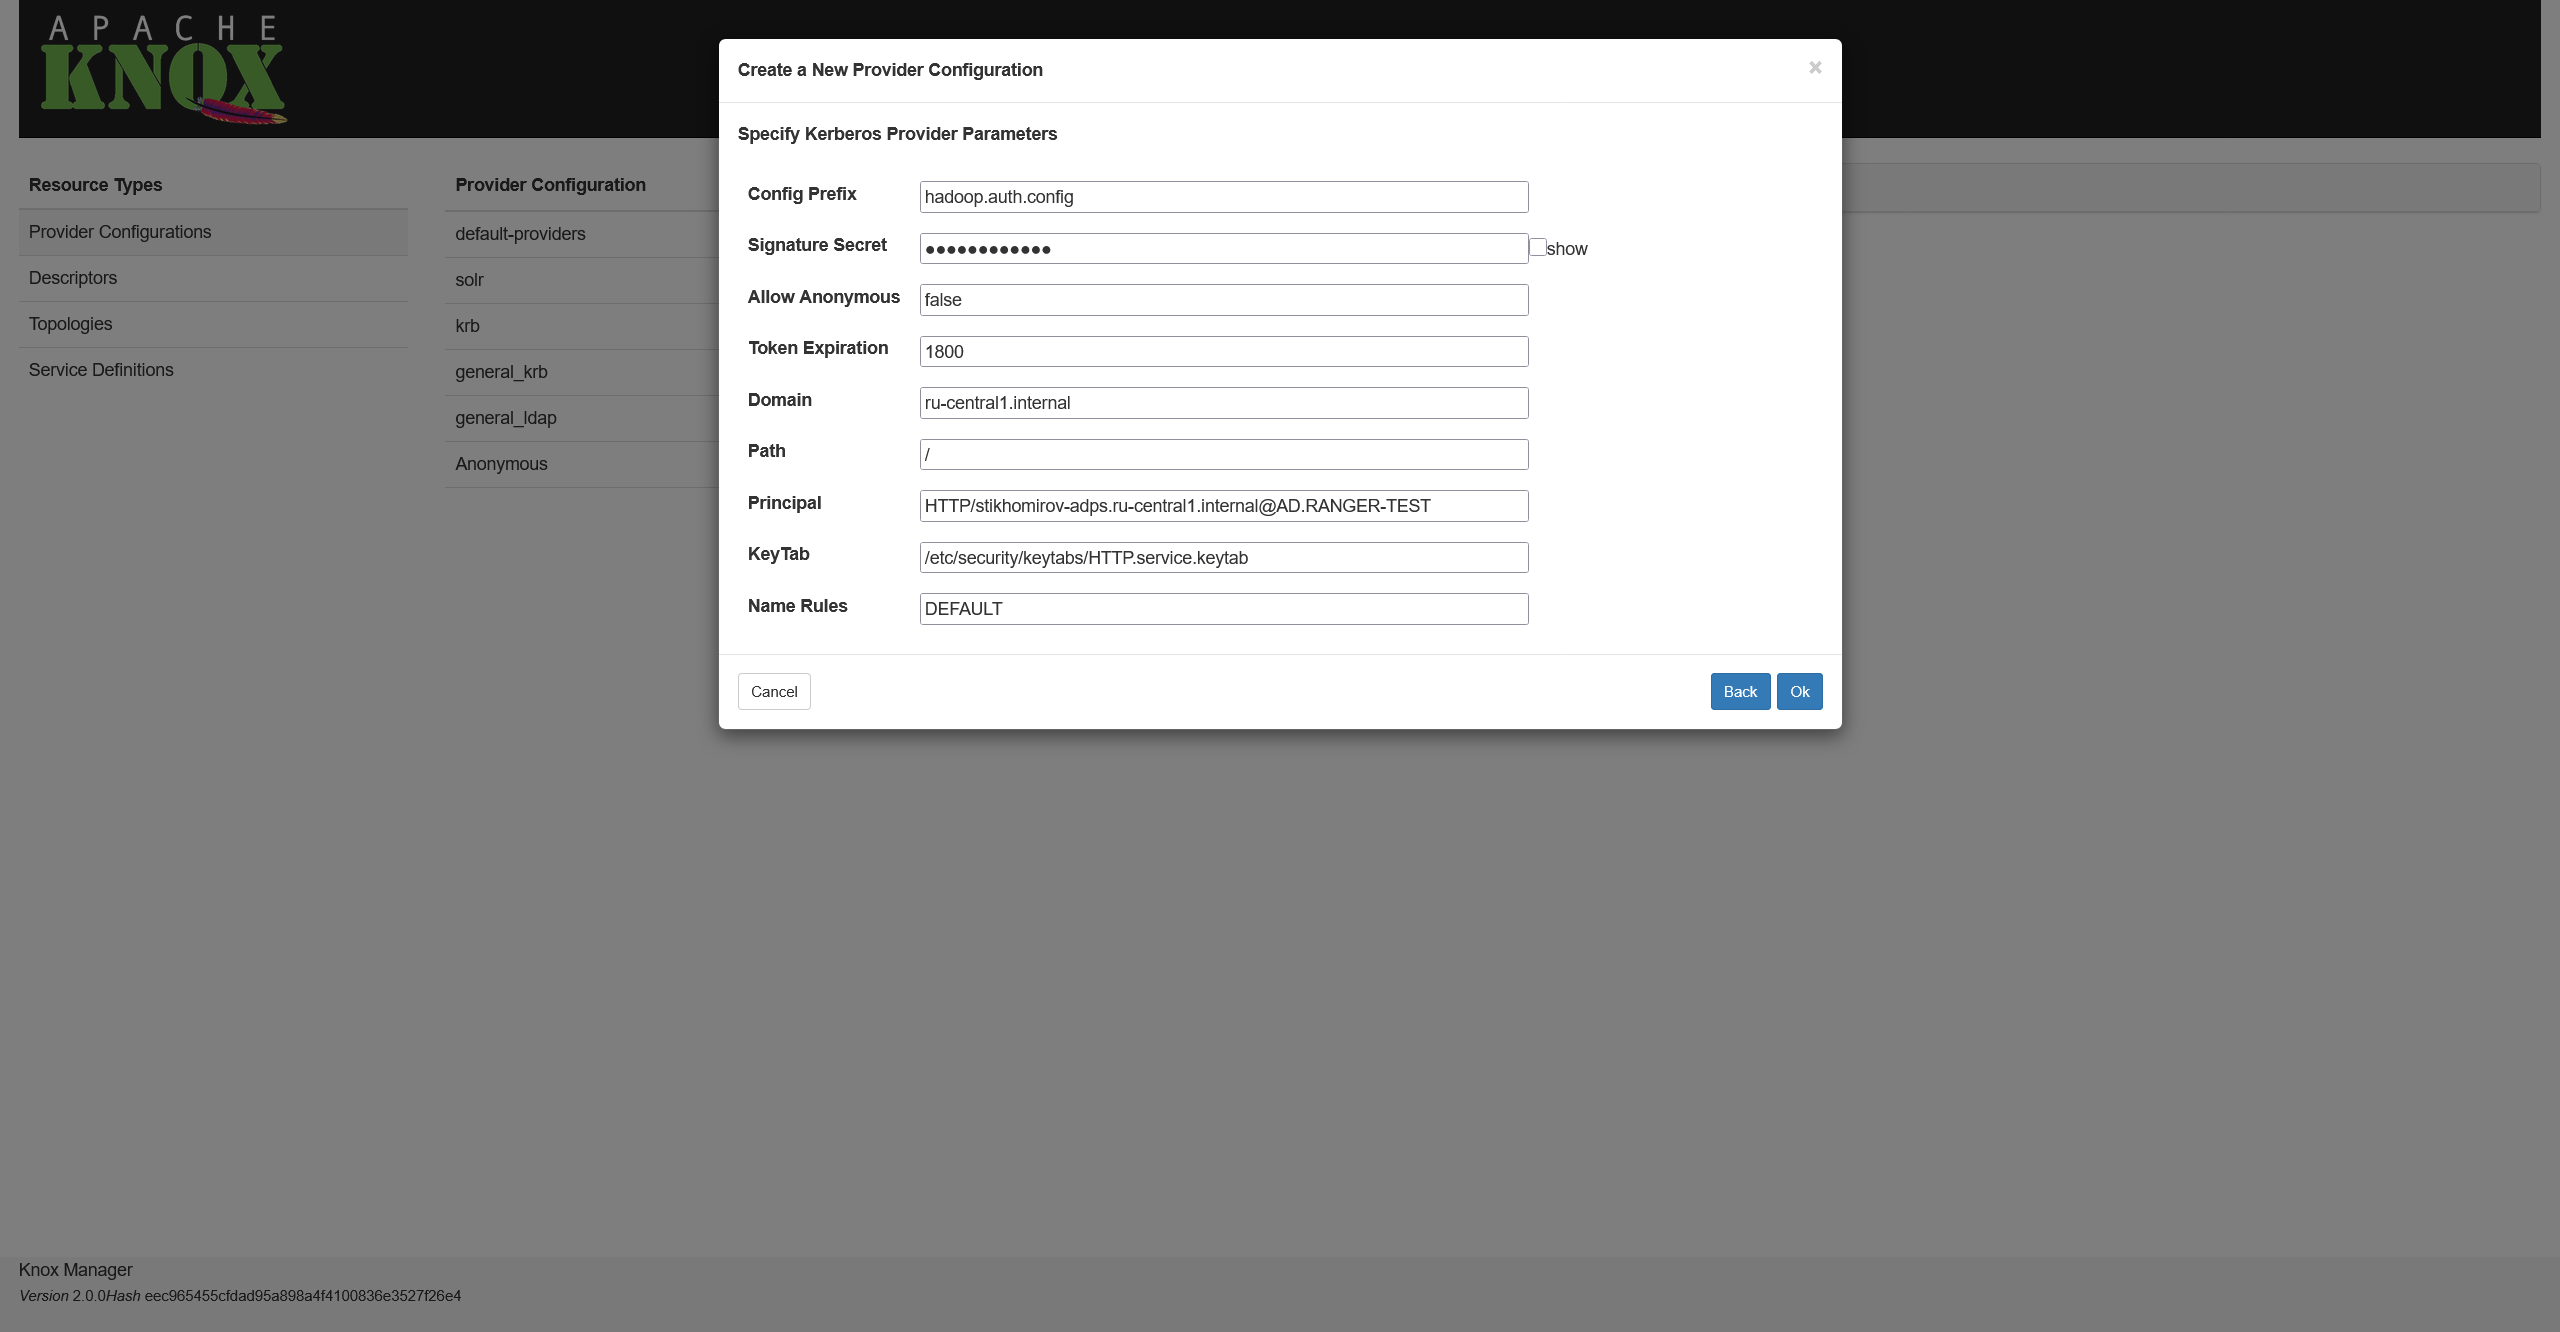 Setting authentication parameters
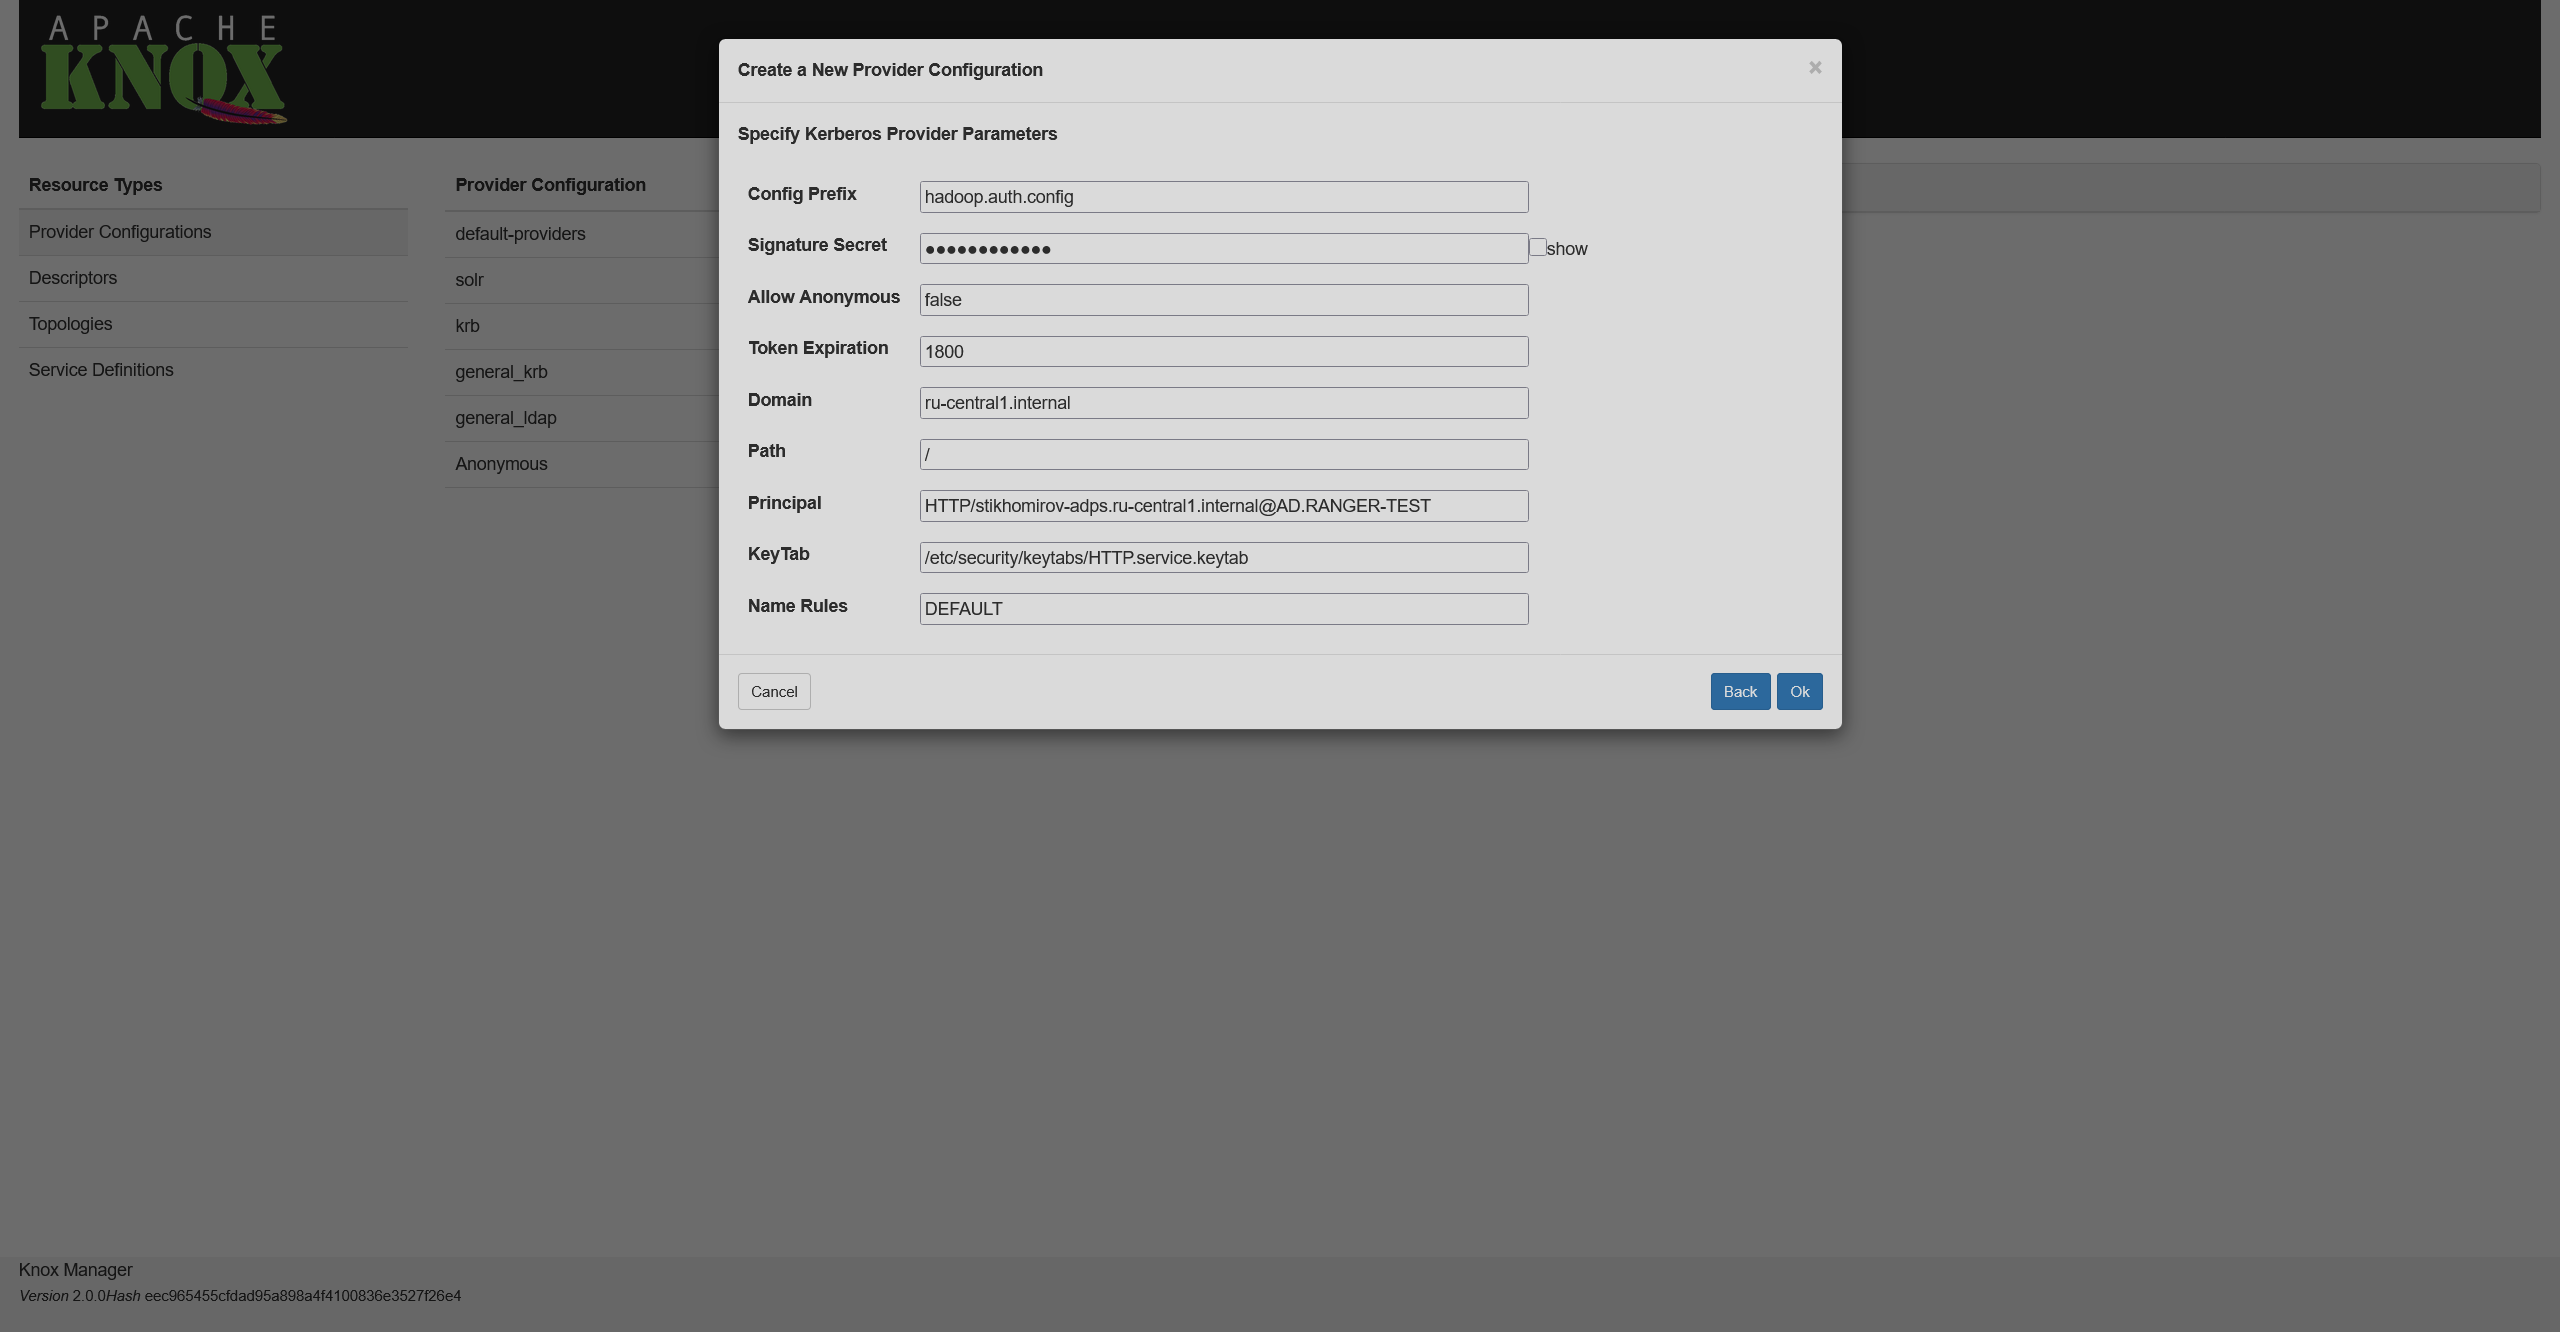 Setting authentication parameters
 -
On the final screen, you can configure additional settings for a provider like ACLs.
Descriptor
The next step is to prepare a descriptor. If you want to create a topology for several services within a cluster, follow the steps below. If you want to have separate topologies, you’ll have to repeat the same steps for each service.
-
On the Descriptors page, click
to the right from the Descriptors list title.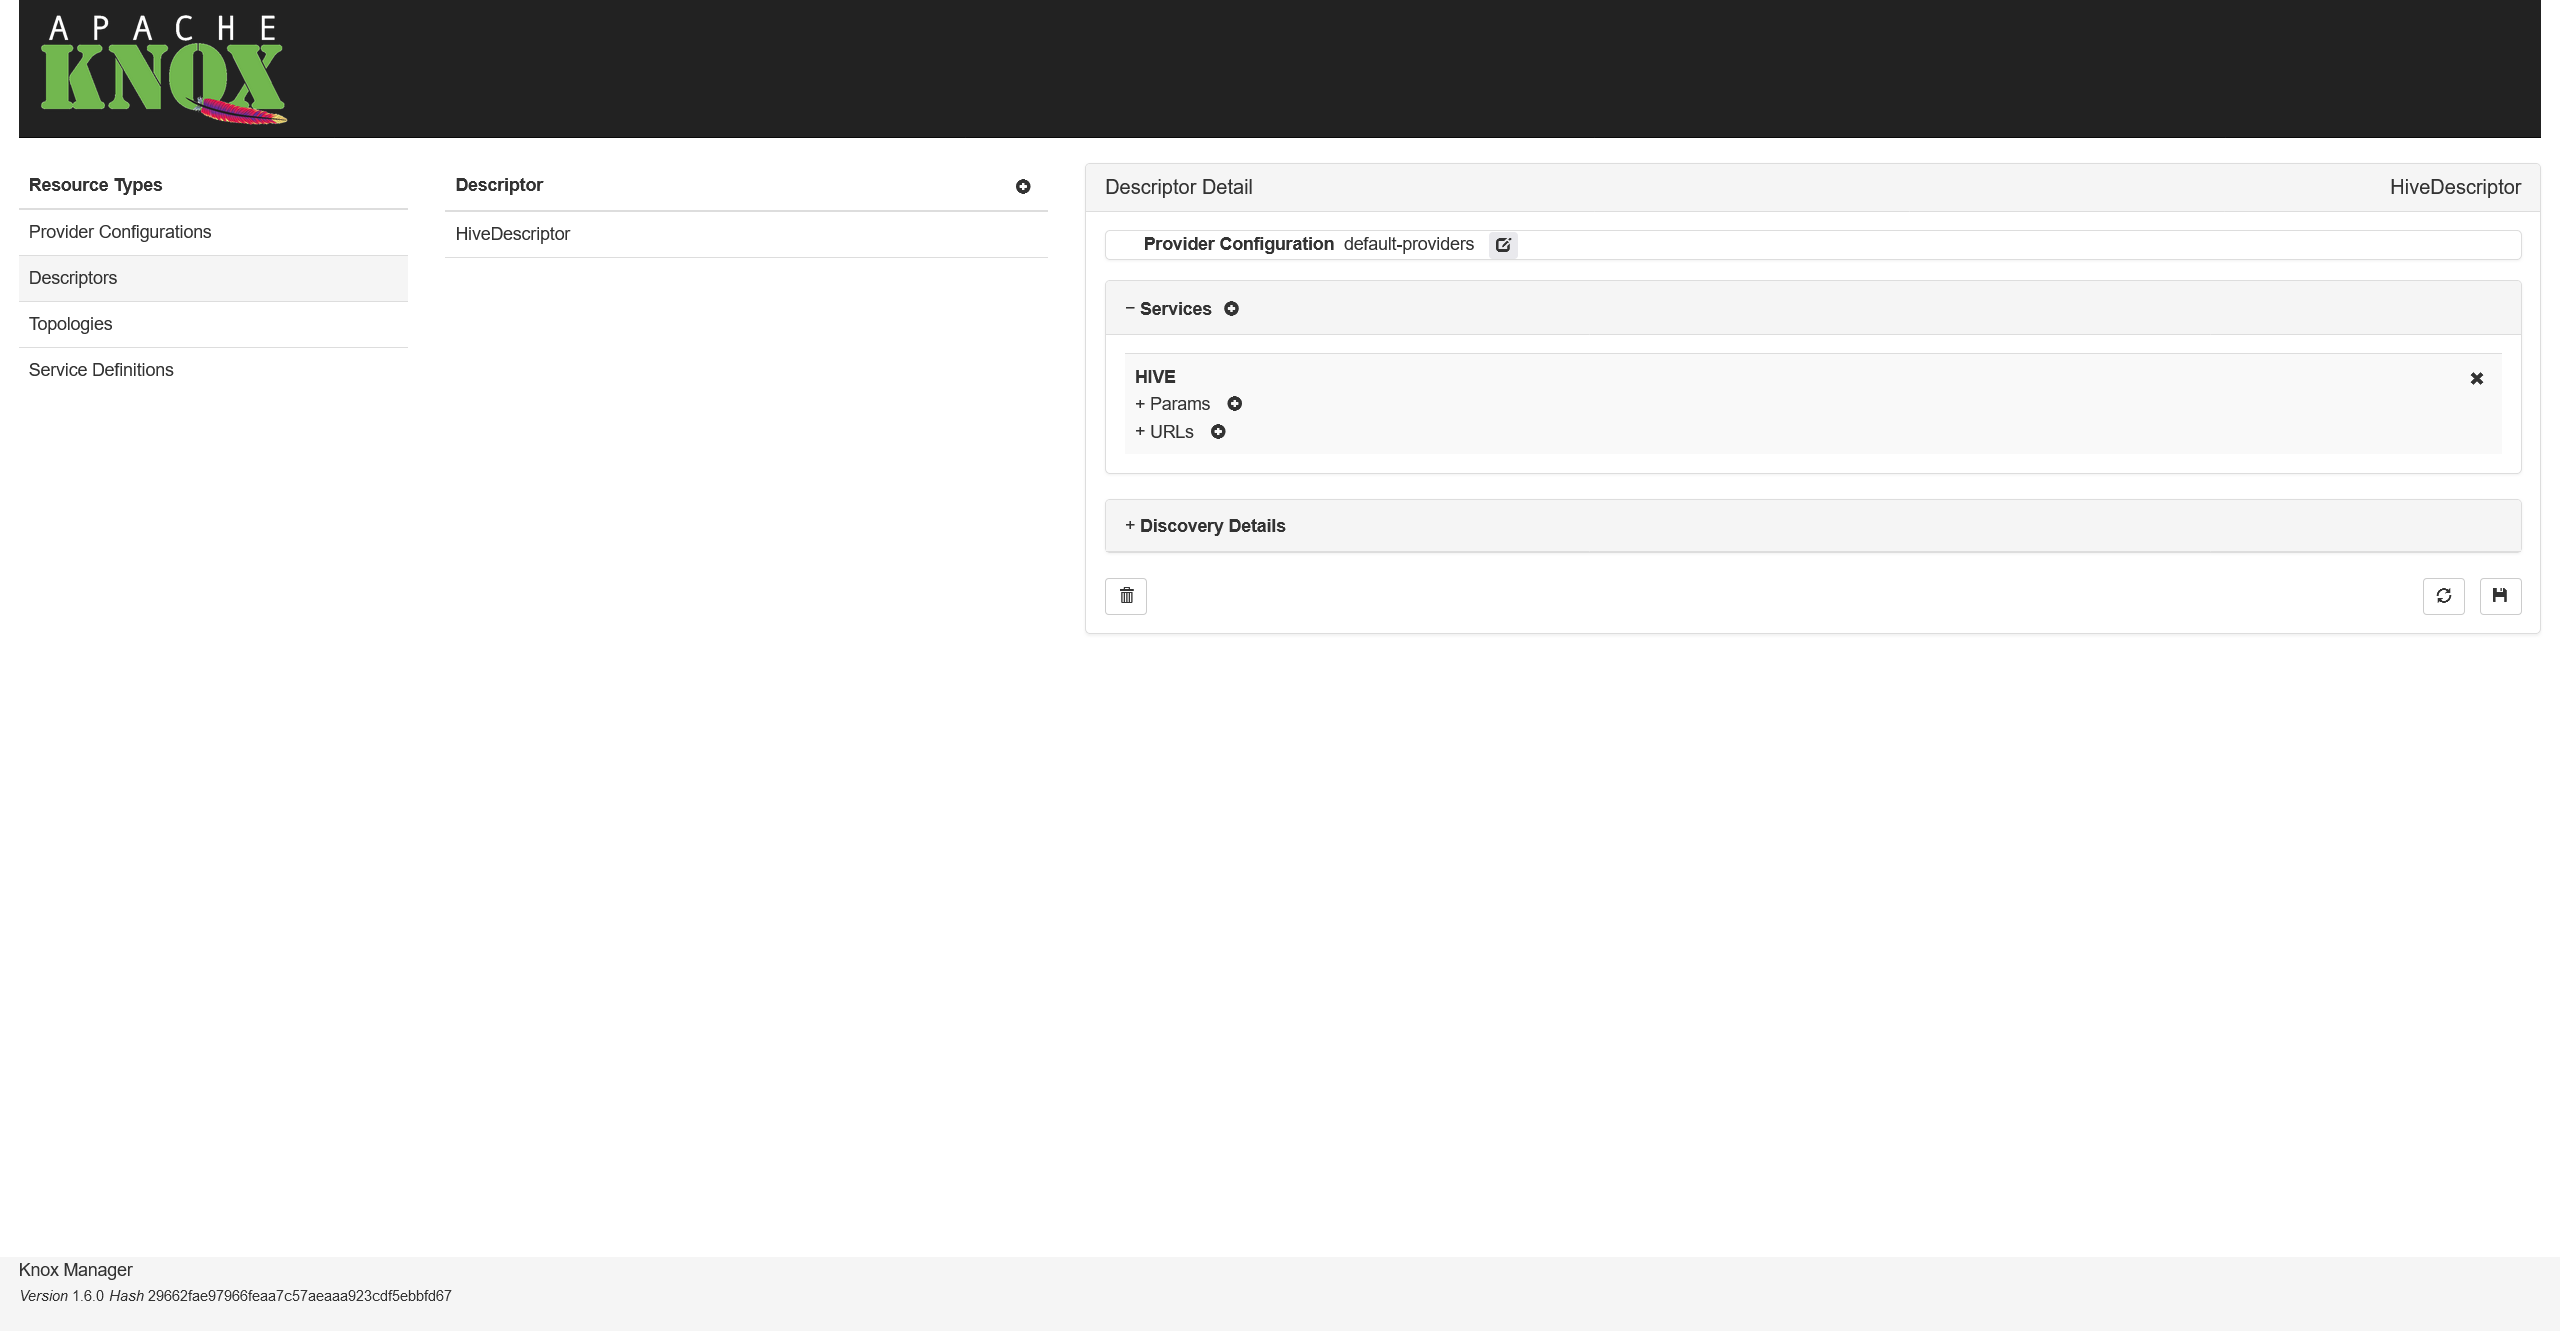 Descriptors list
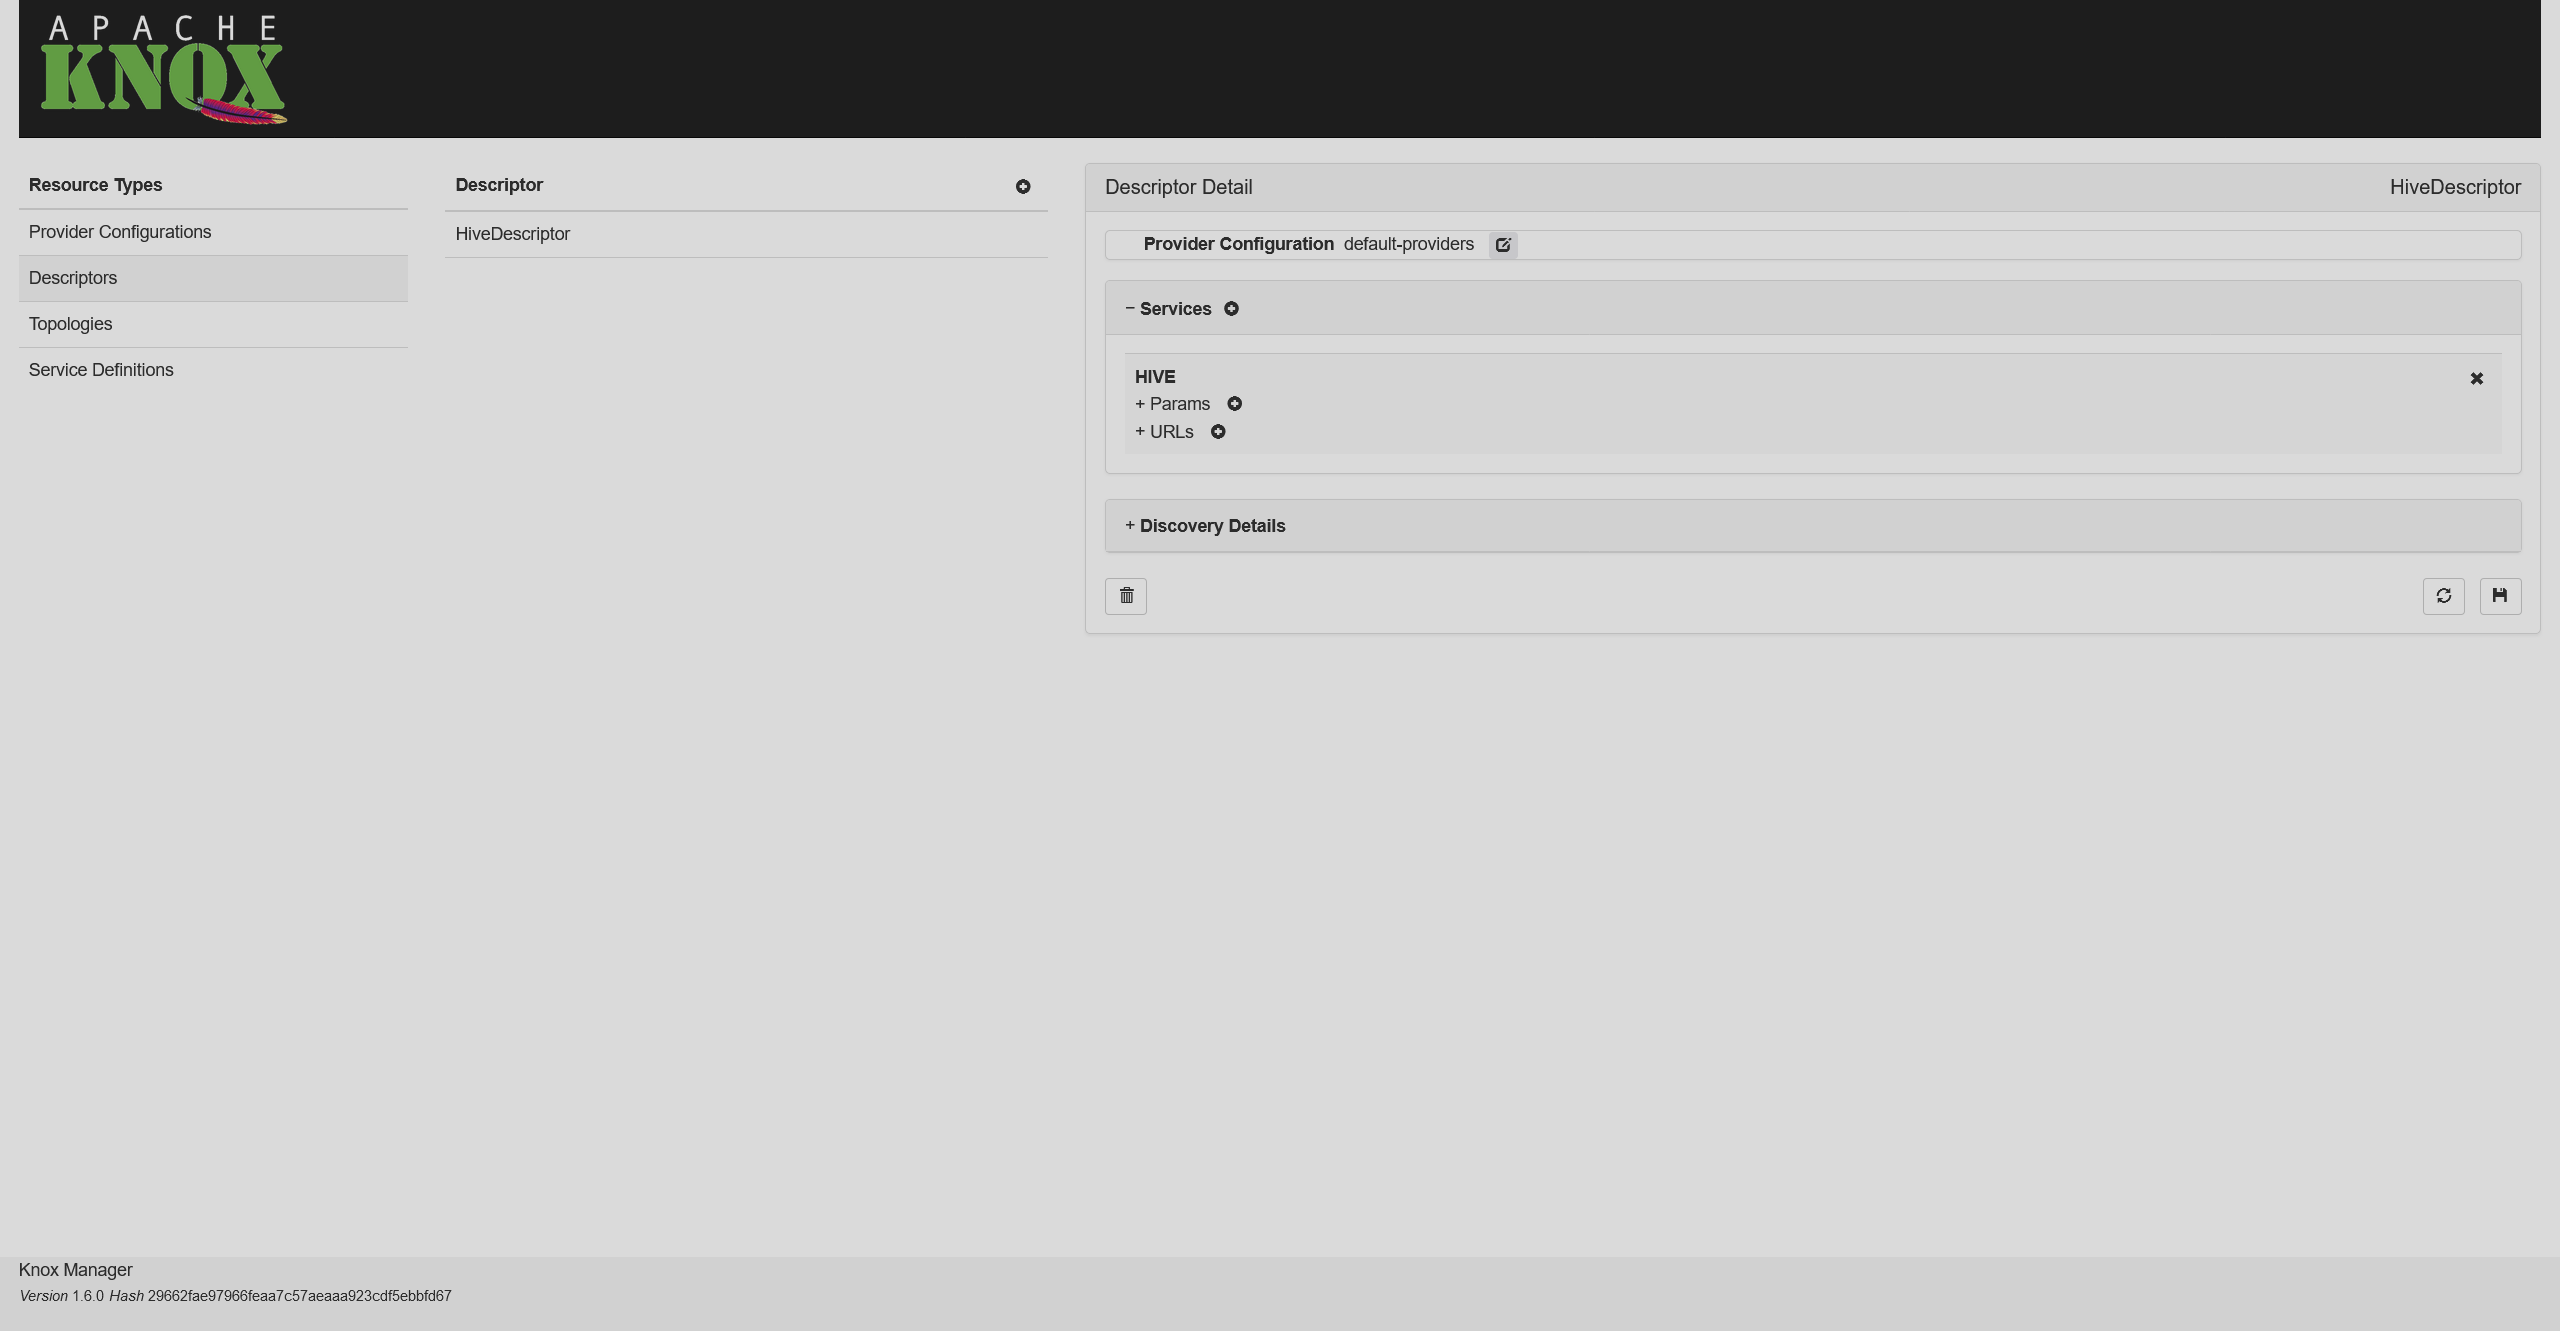 Descriptors list
 -
Choose a name for your descriptor (e.g.
my-descriptor), select the necessary provider, and select services which will be affected by this descriptor (e.g. WEBHBASE, HIVE, WEBHDFS, and RESOURCEMANAGER (YARN)). After that, click Ok.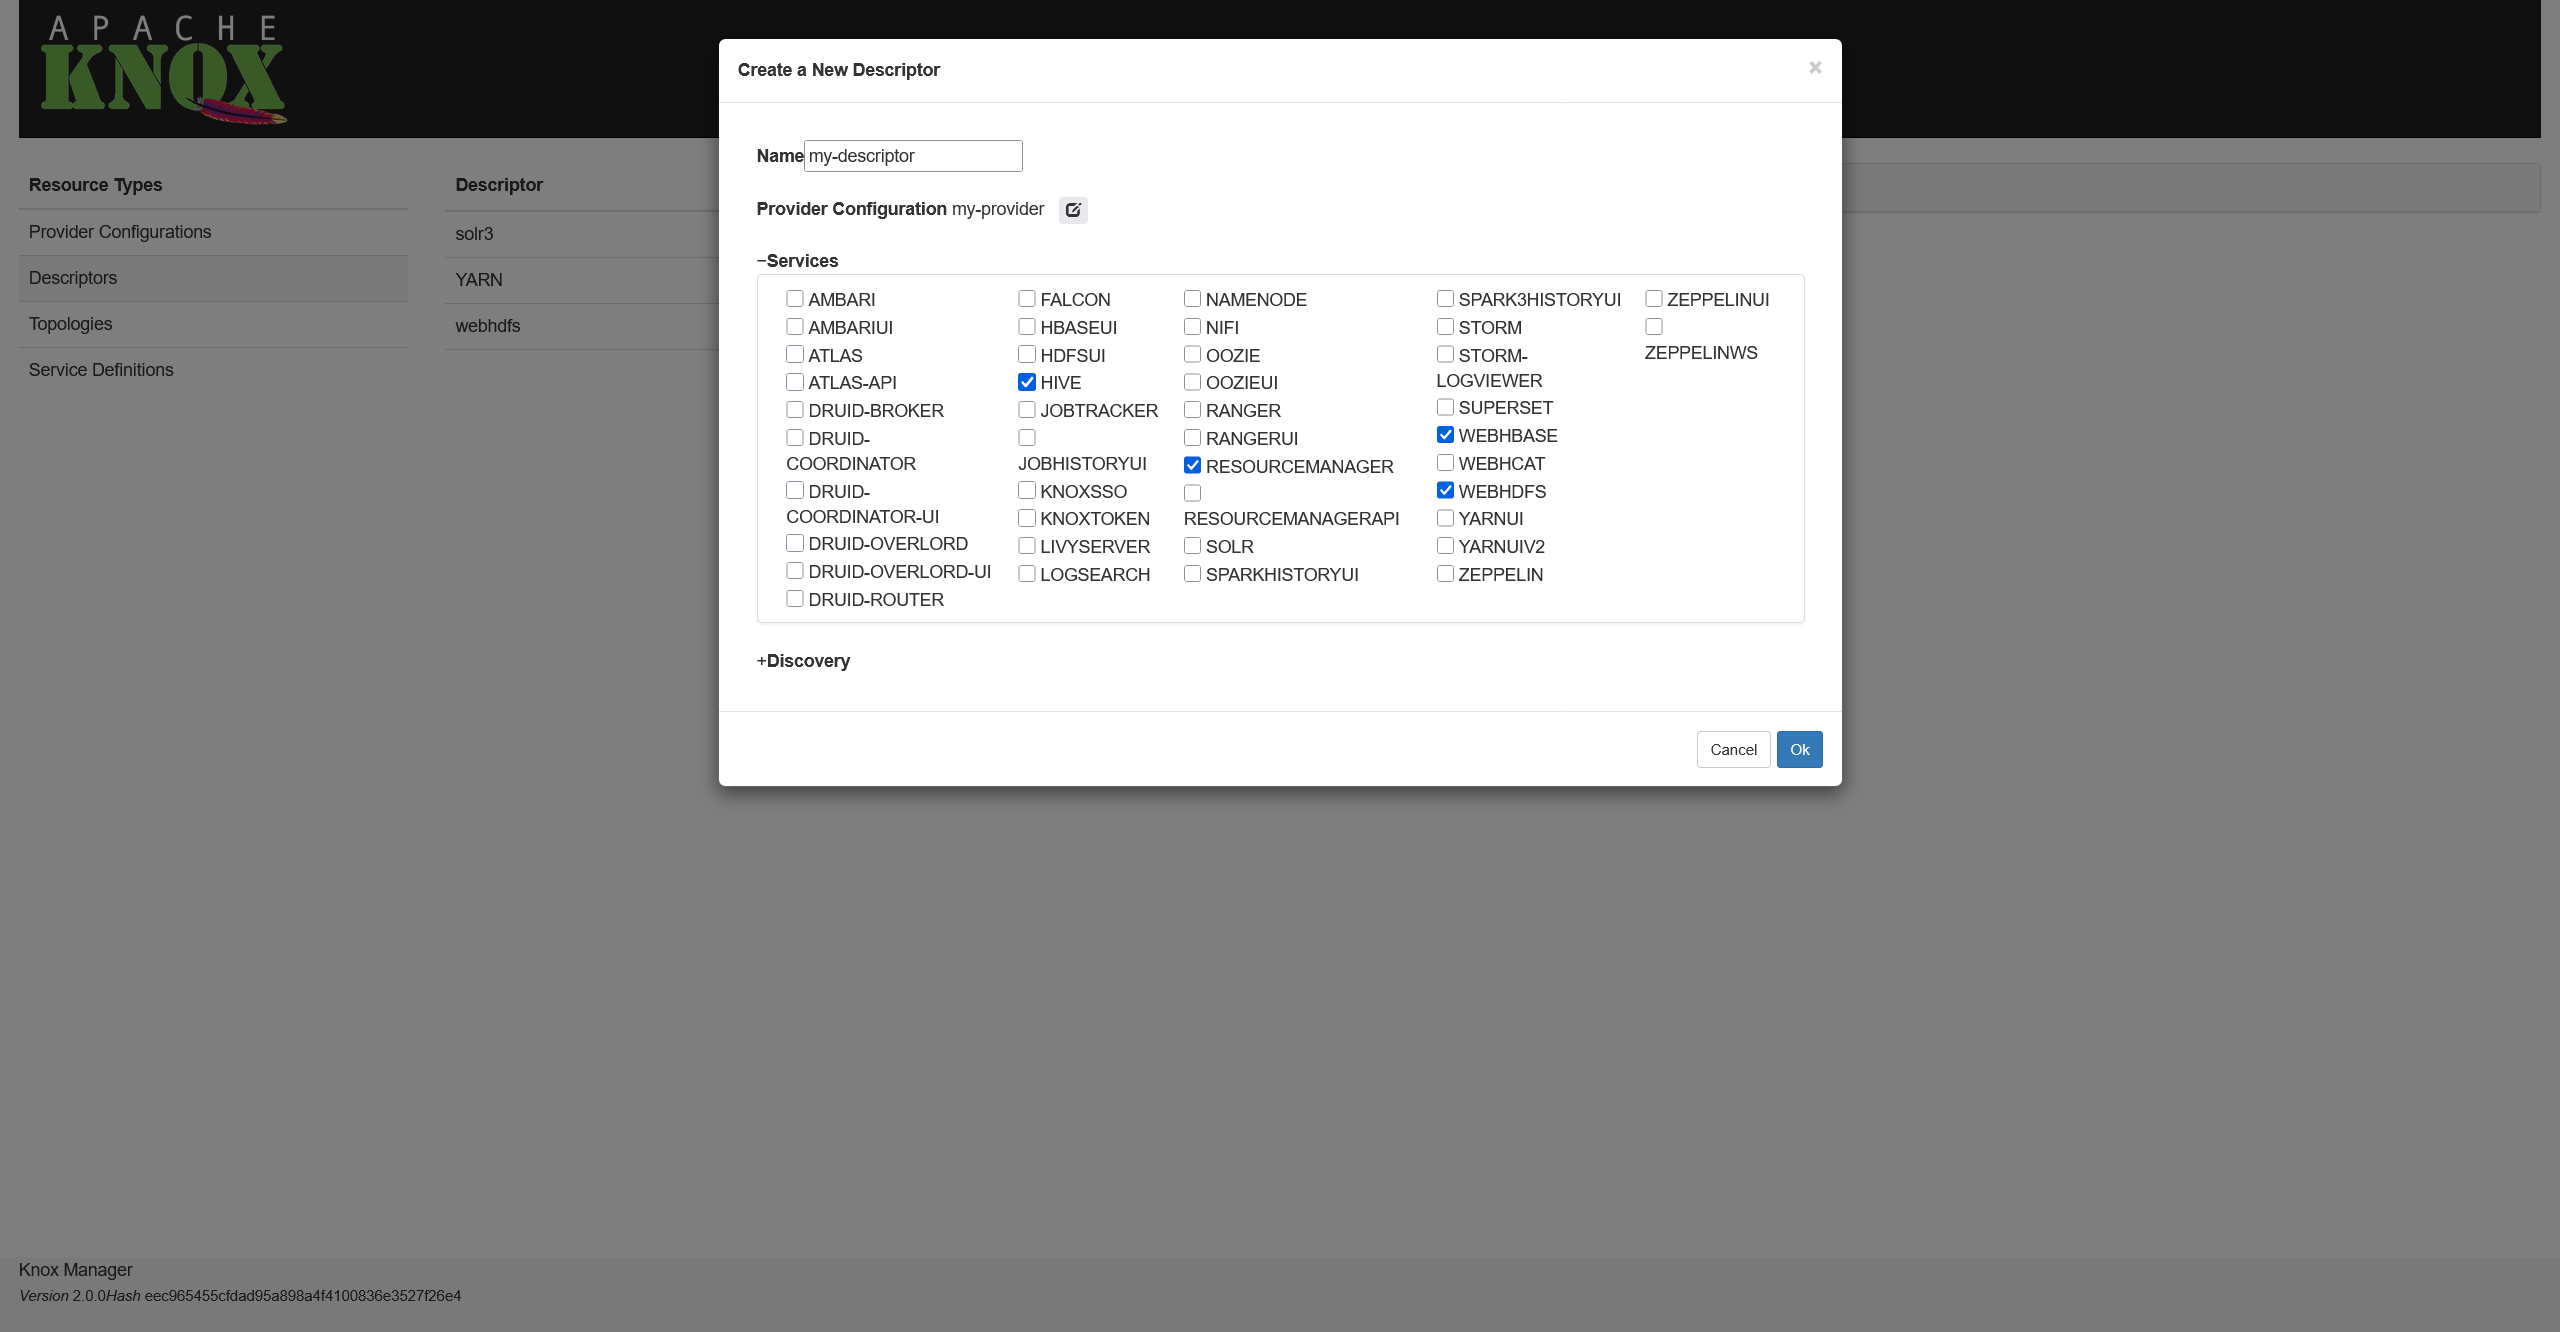 Selecting cluster services
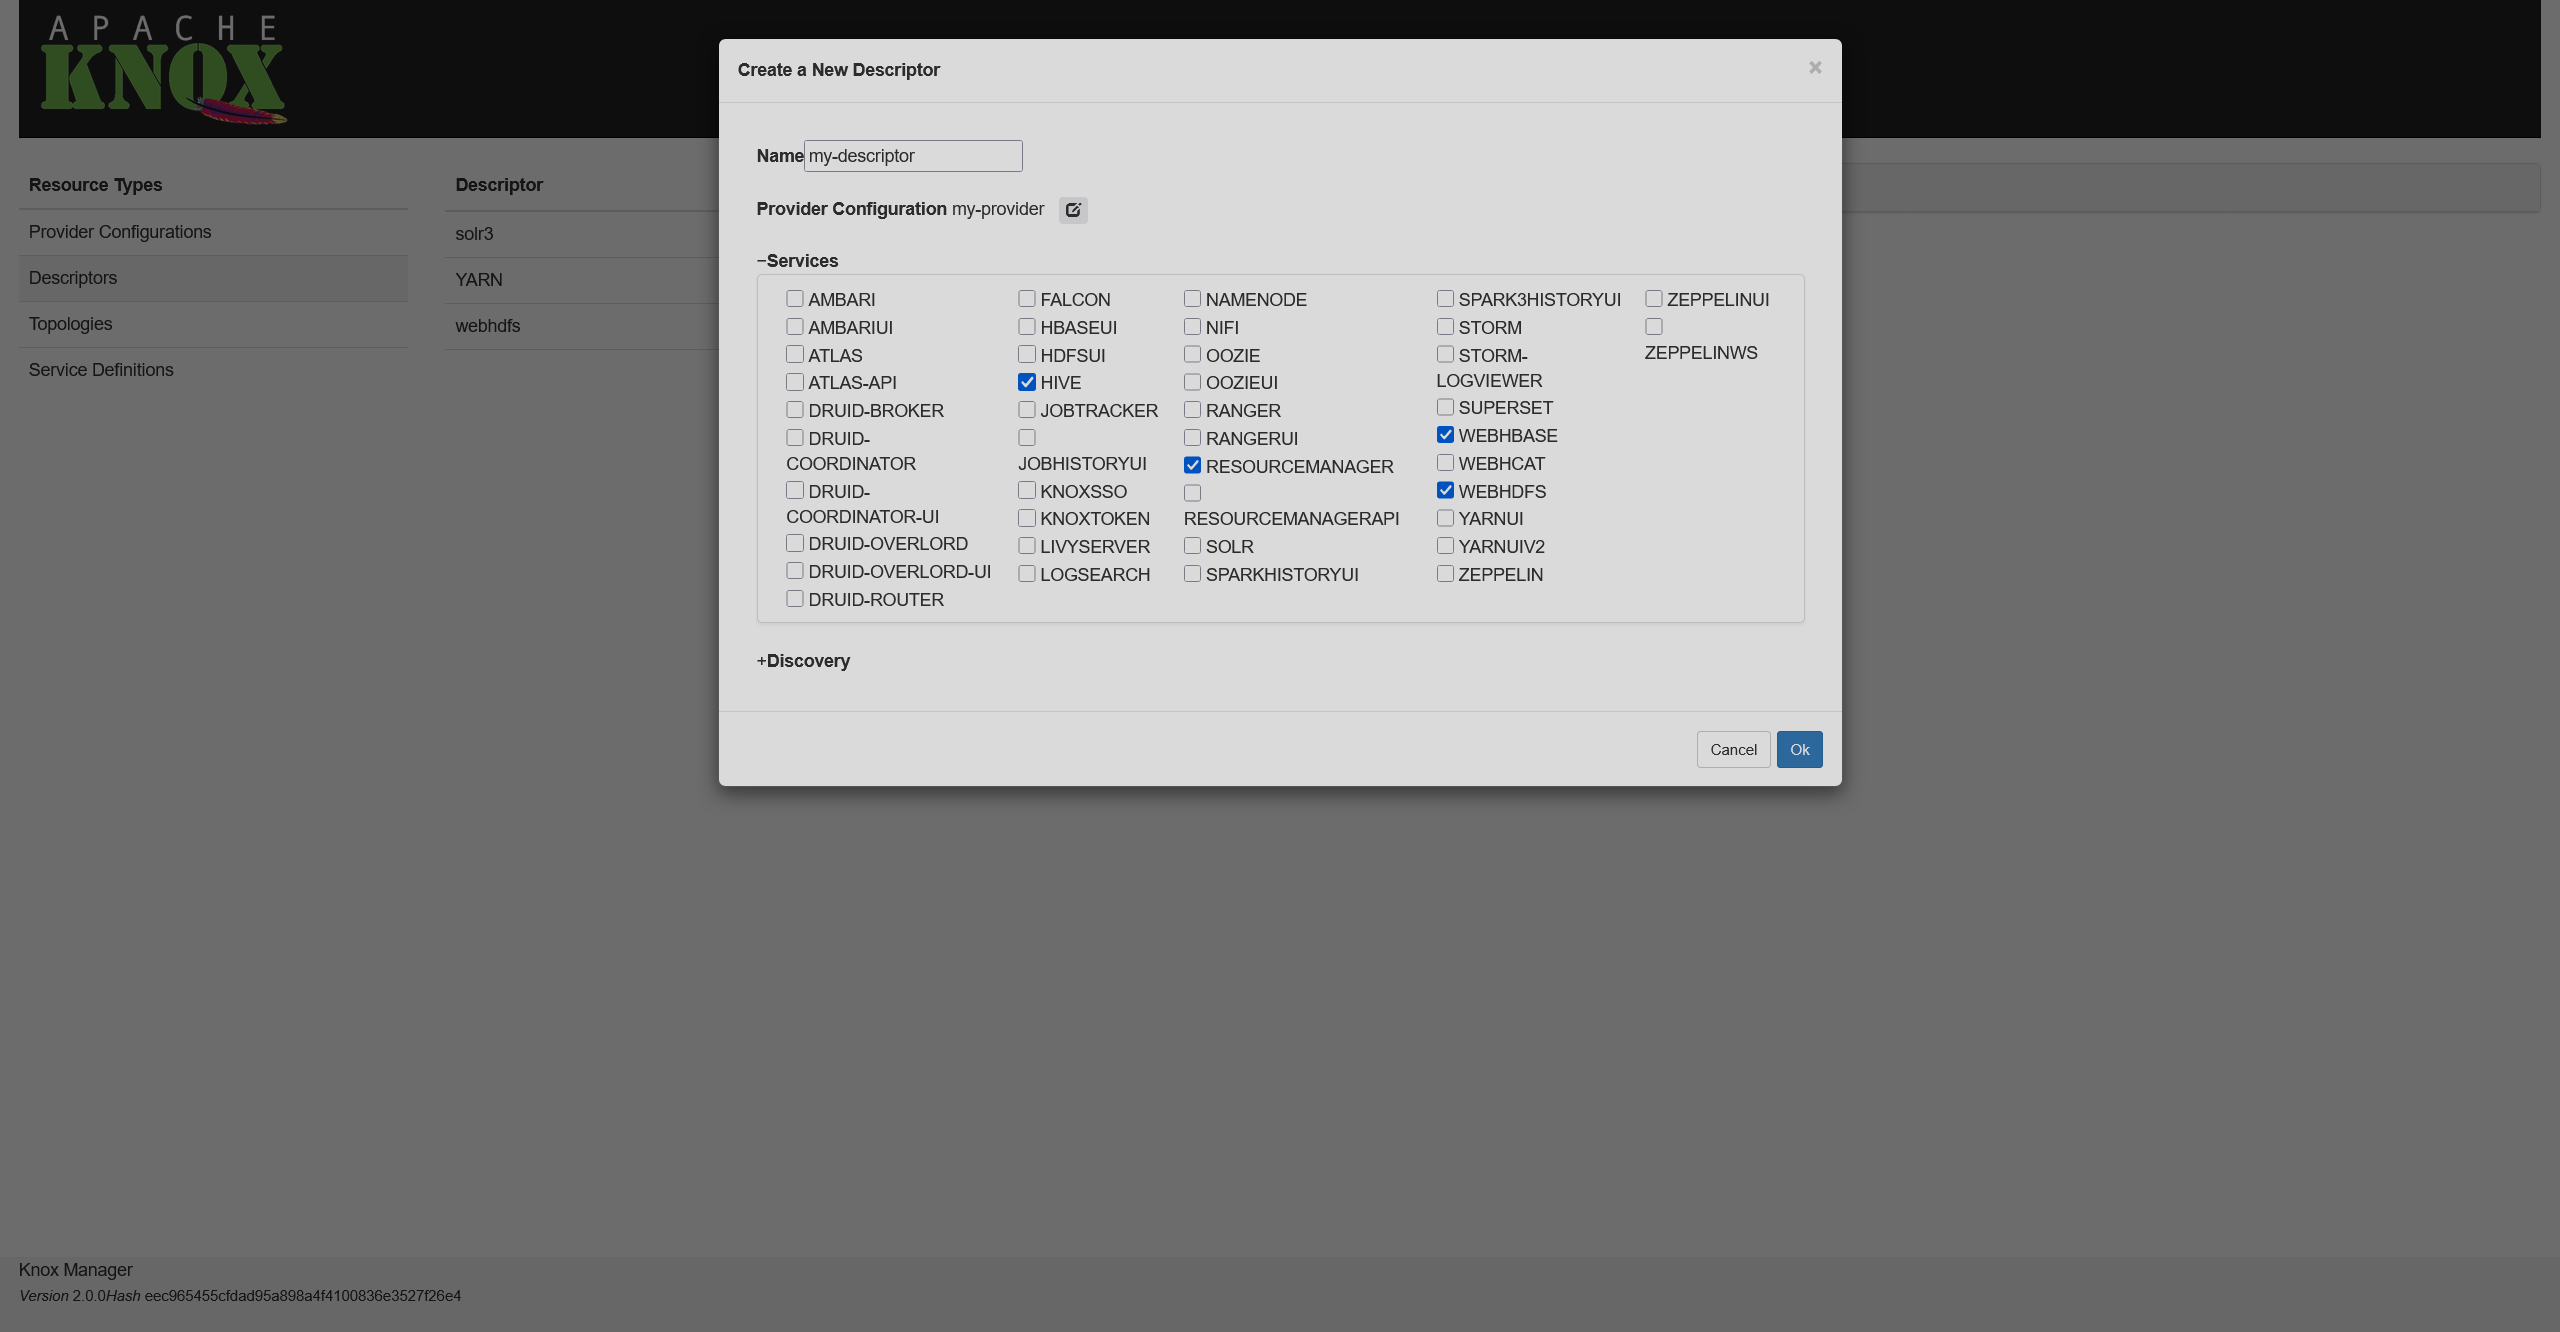 Selecting cluster services
 -
Expand the Services group in the created descriptor and fill in the URLs parameter for each service. Here, you need to specify the URL that a request will be redirected to. Once you’re done, click
 .
.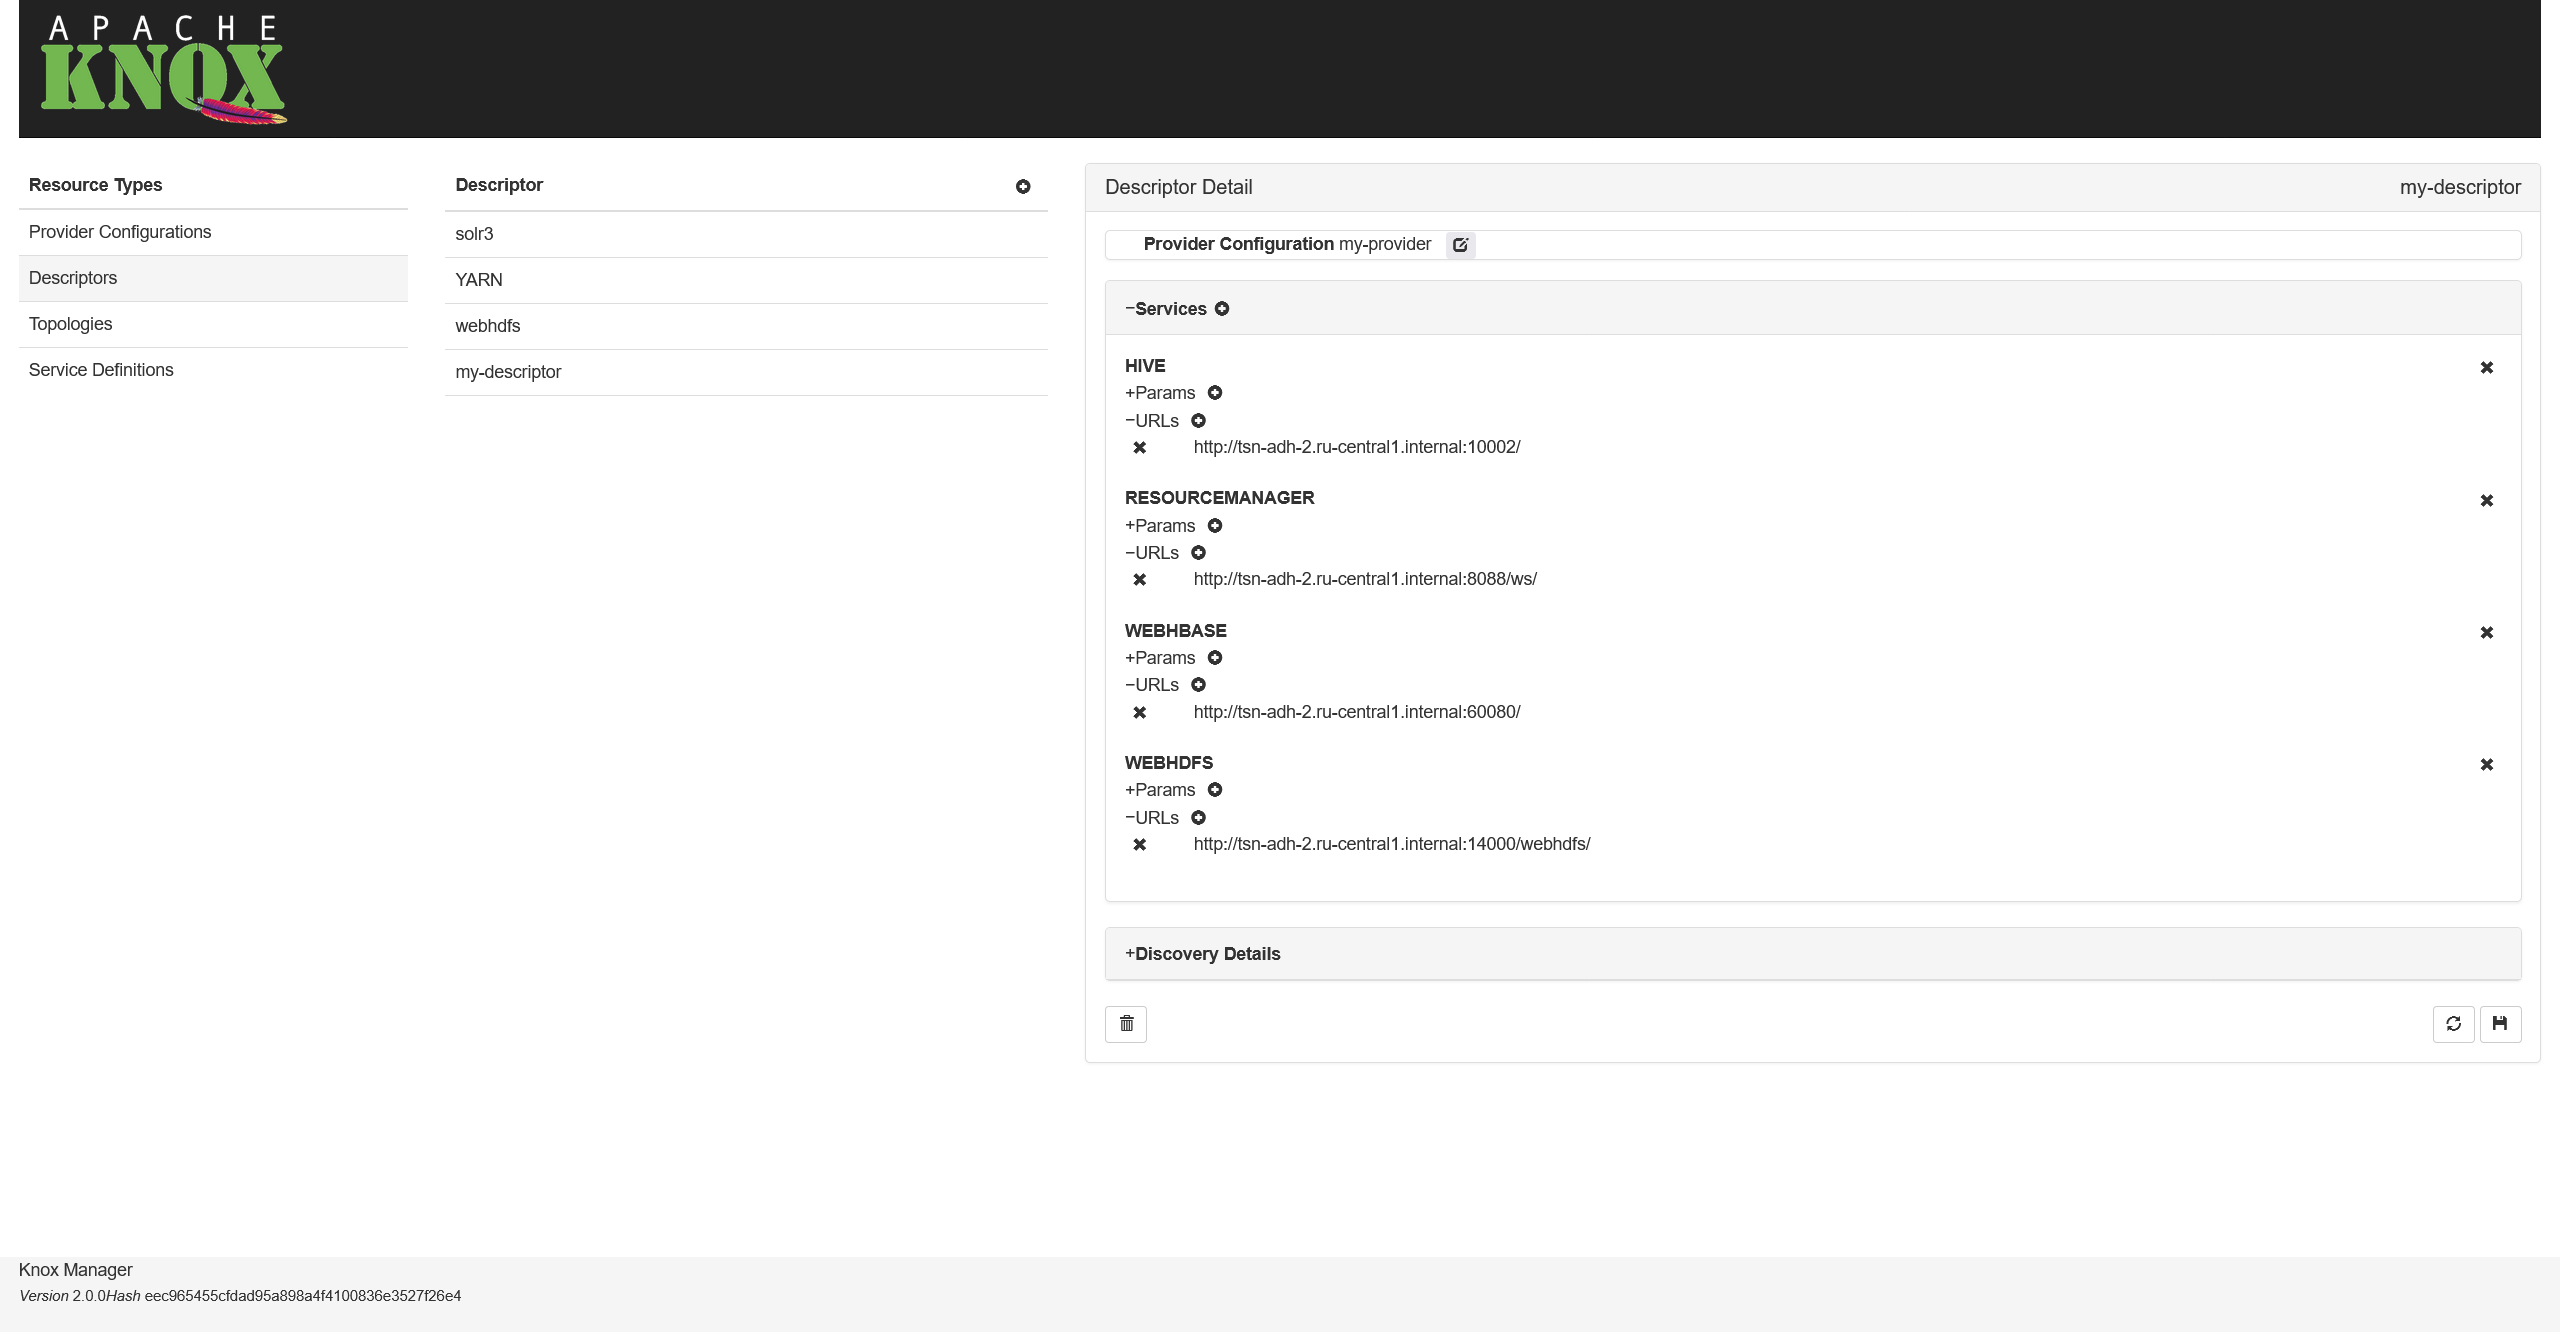 Adding service URLs
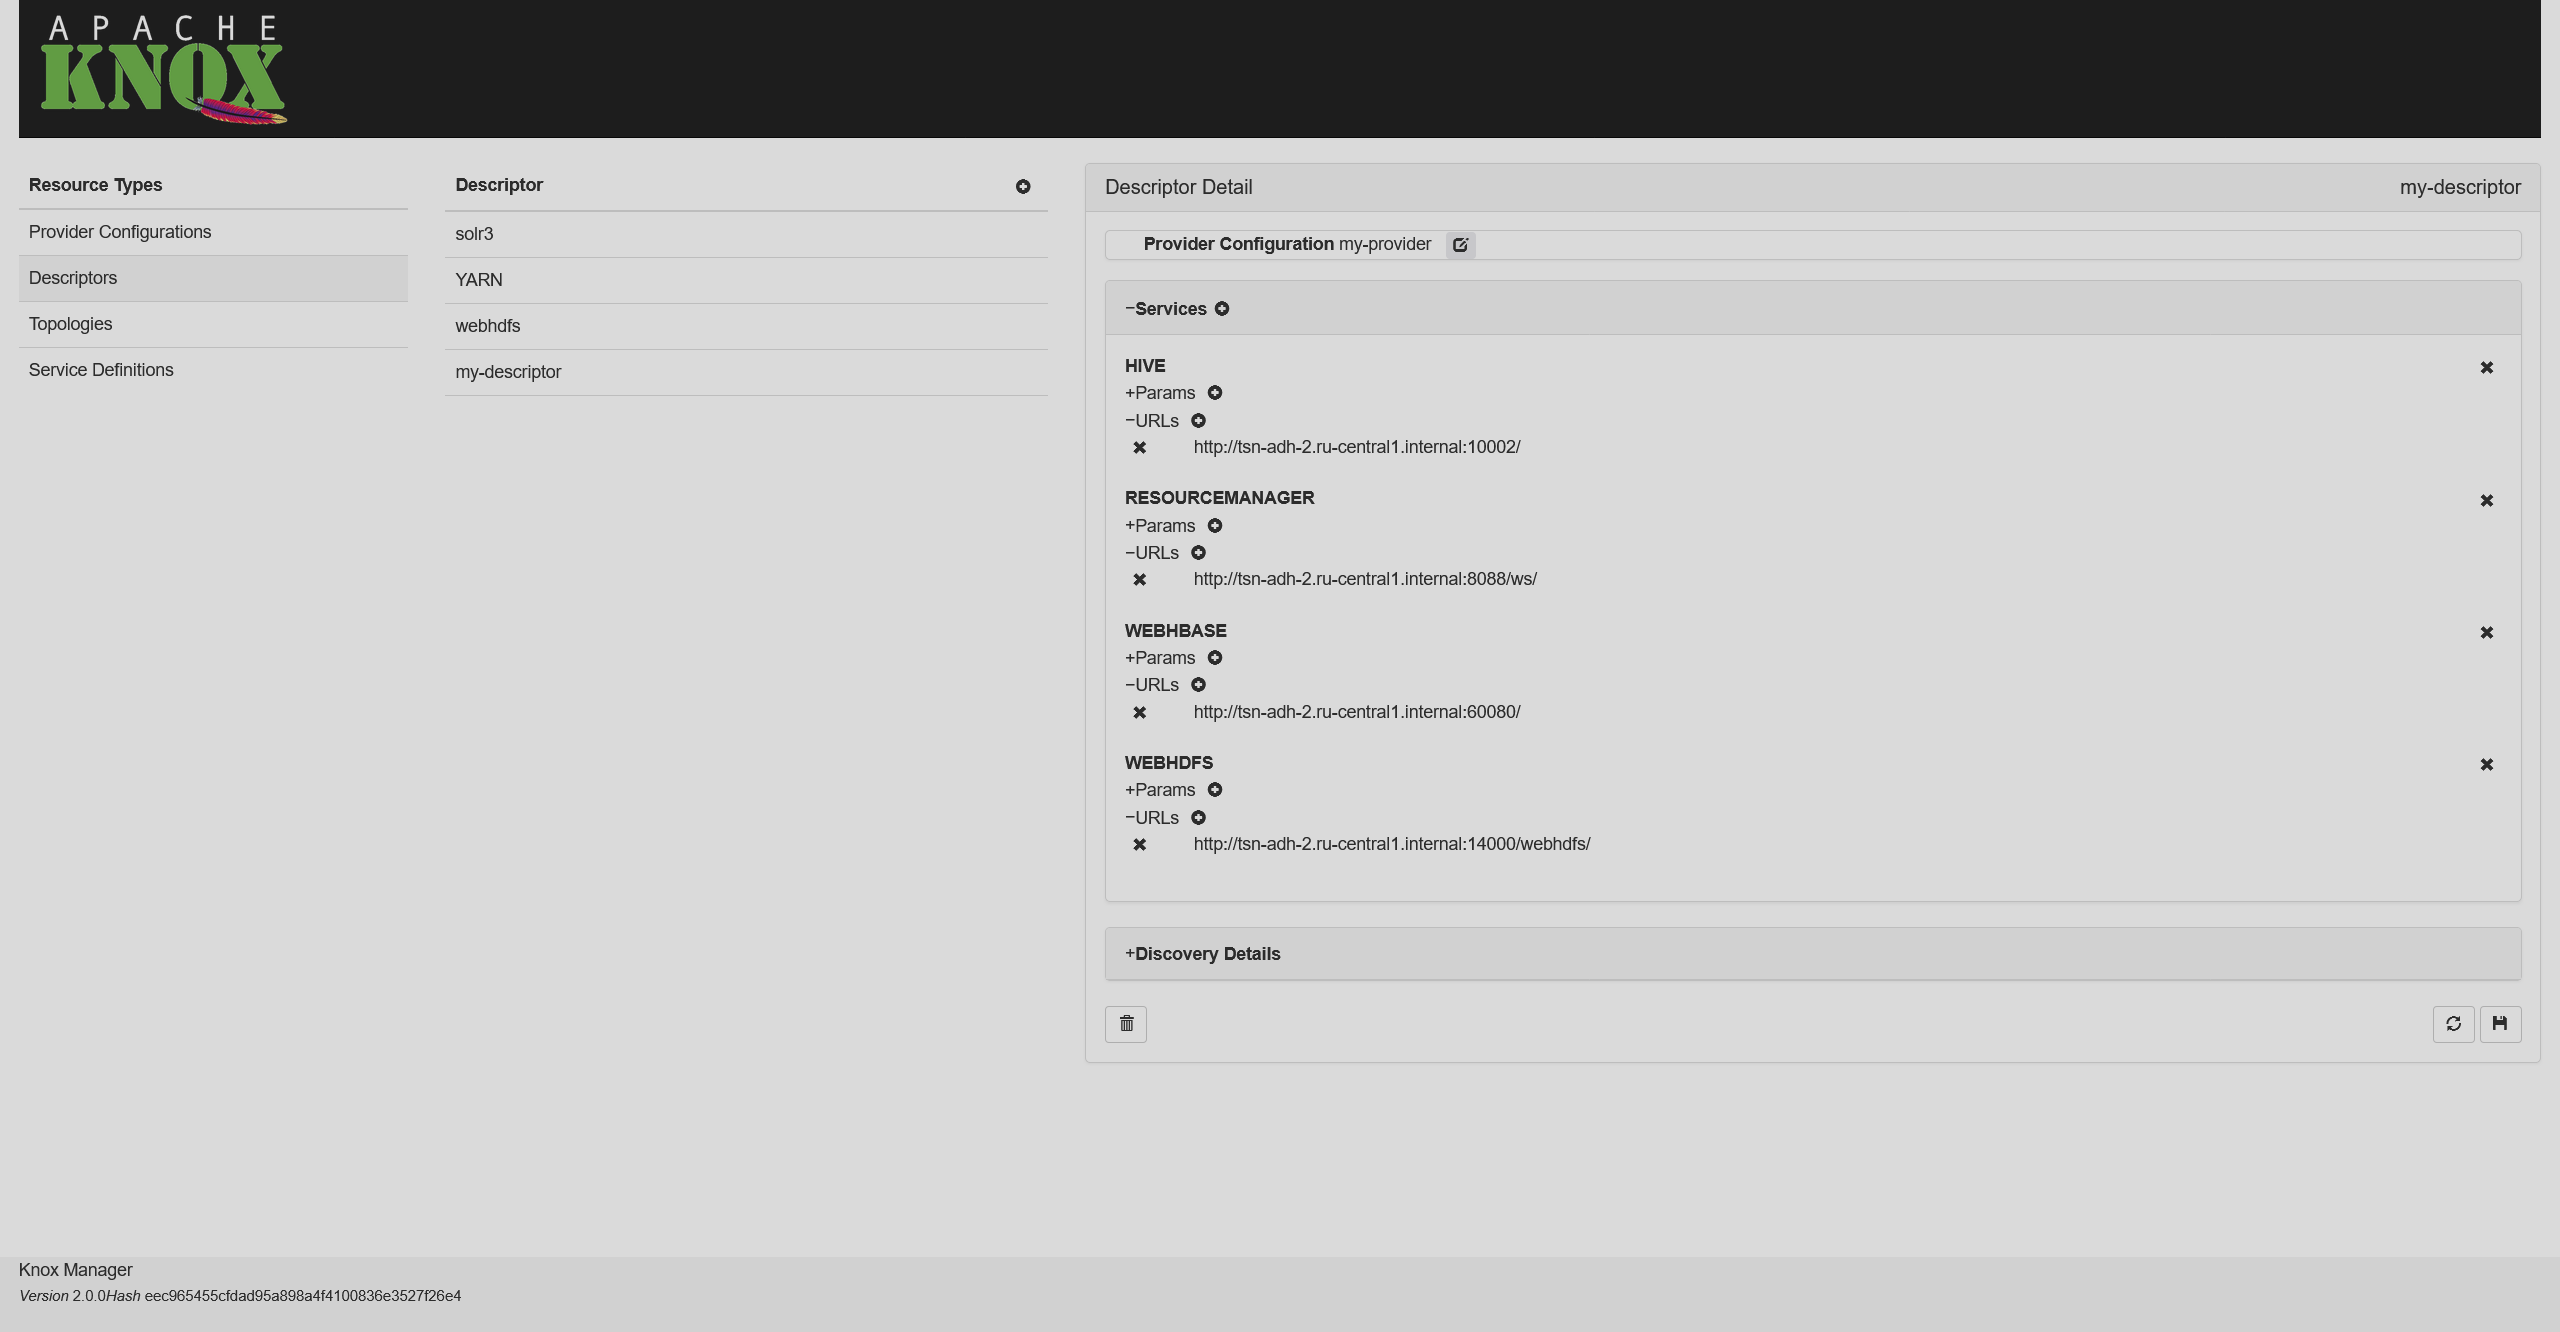 Adding service URLs
You can find such URLs on the Info tab of each service in ADCM.
|
NOTE
A read-only topology file is automatically generated based on each descriptor. The name of the topology matches the descriptor name.
|