Manage security zones in Ranger
Overview
Ranger’s security zones allow you to separate resource policies into various zones for convenience. Such separation simplifies administration of policies and also lowers the amount of policies that need to be checked during authorization, since only policies under a particular zone that contains the requested resource are loaded and checked. Also, it allows administrators to set up different policies based on the zones they have admin rights for.
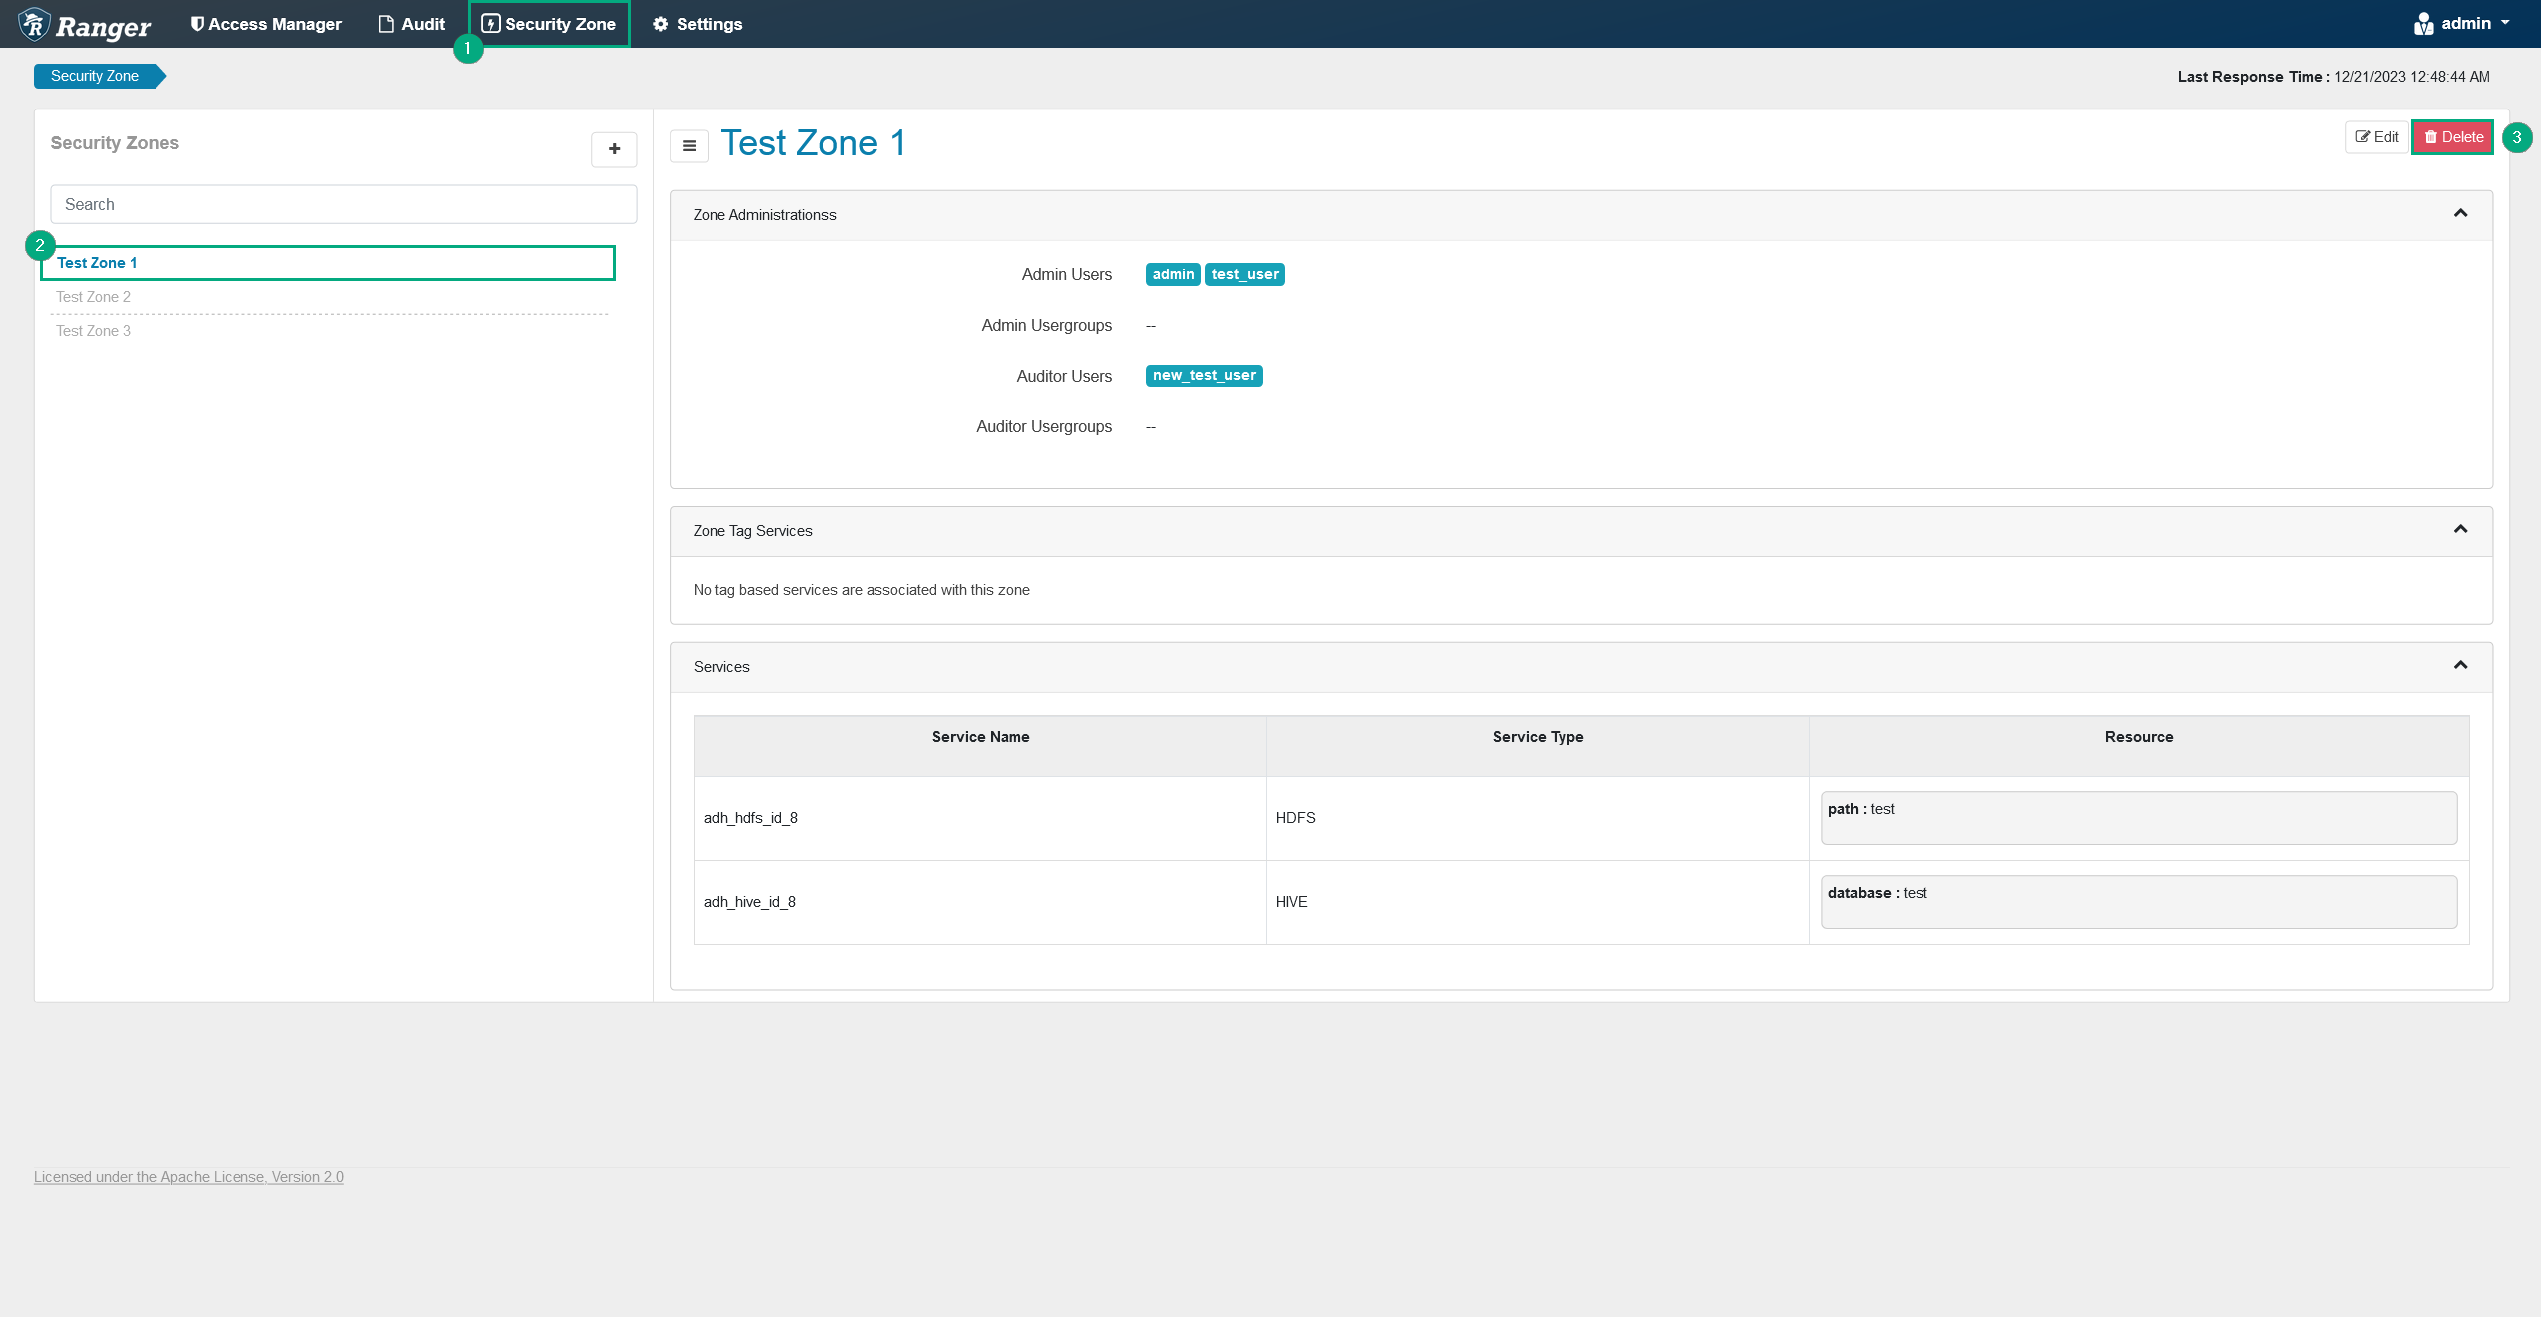
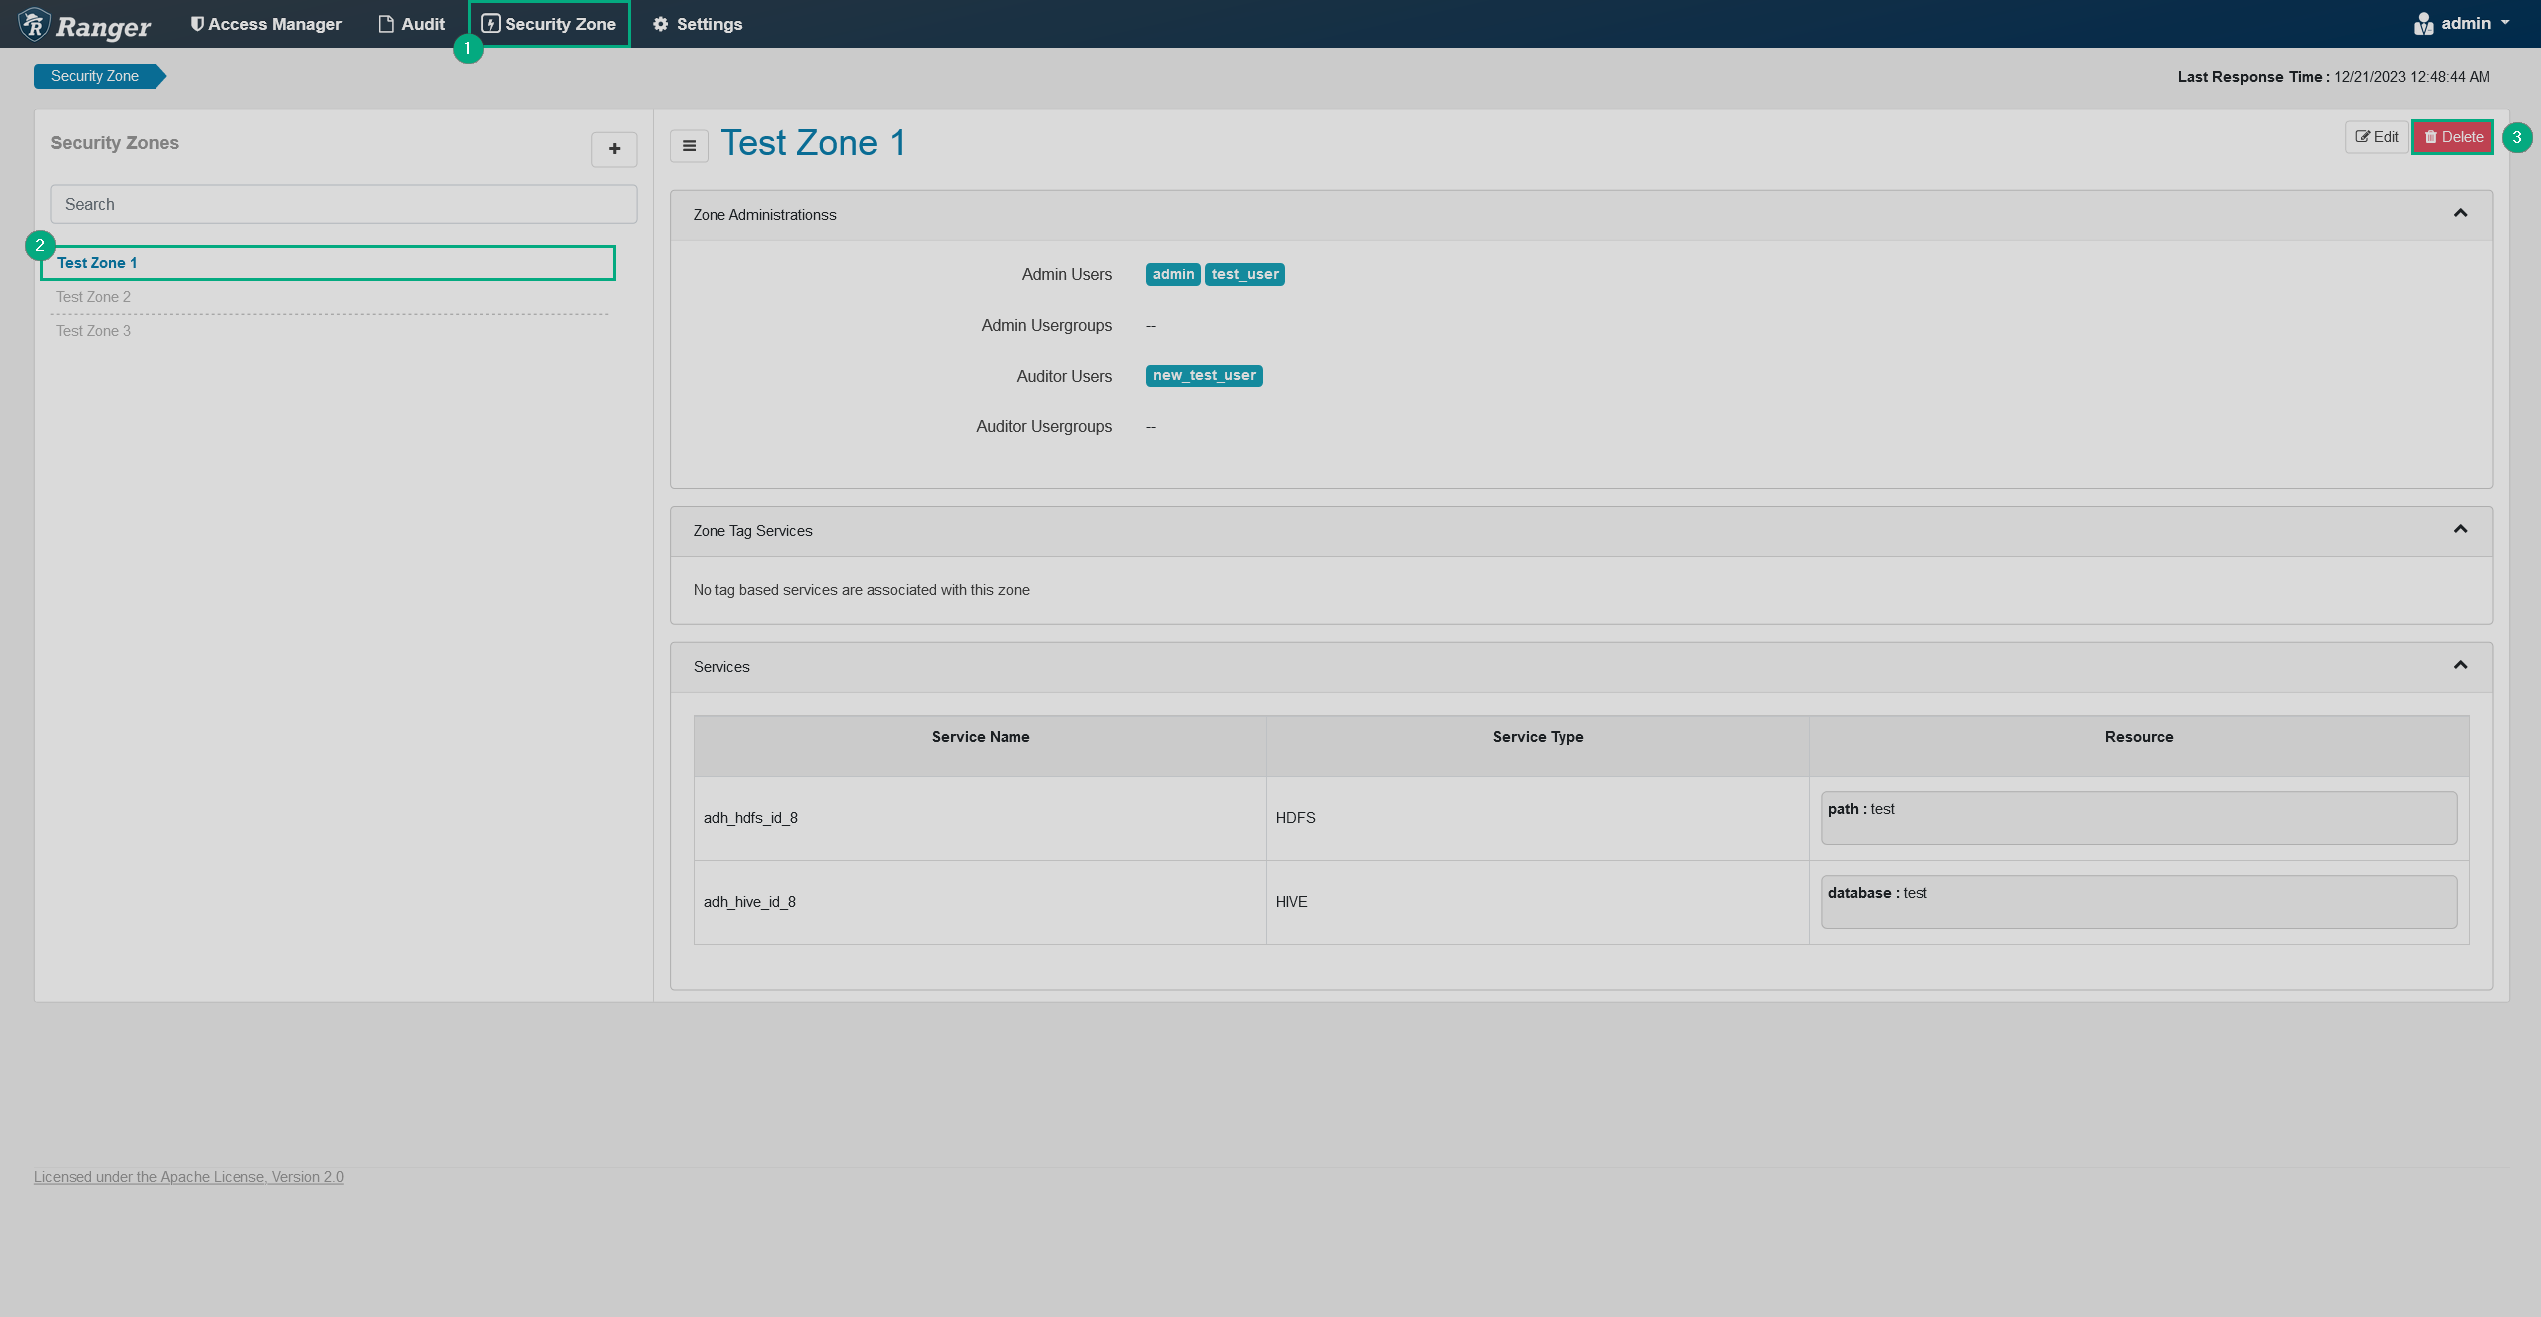
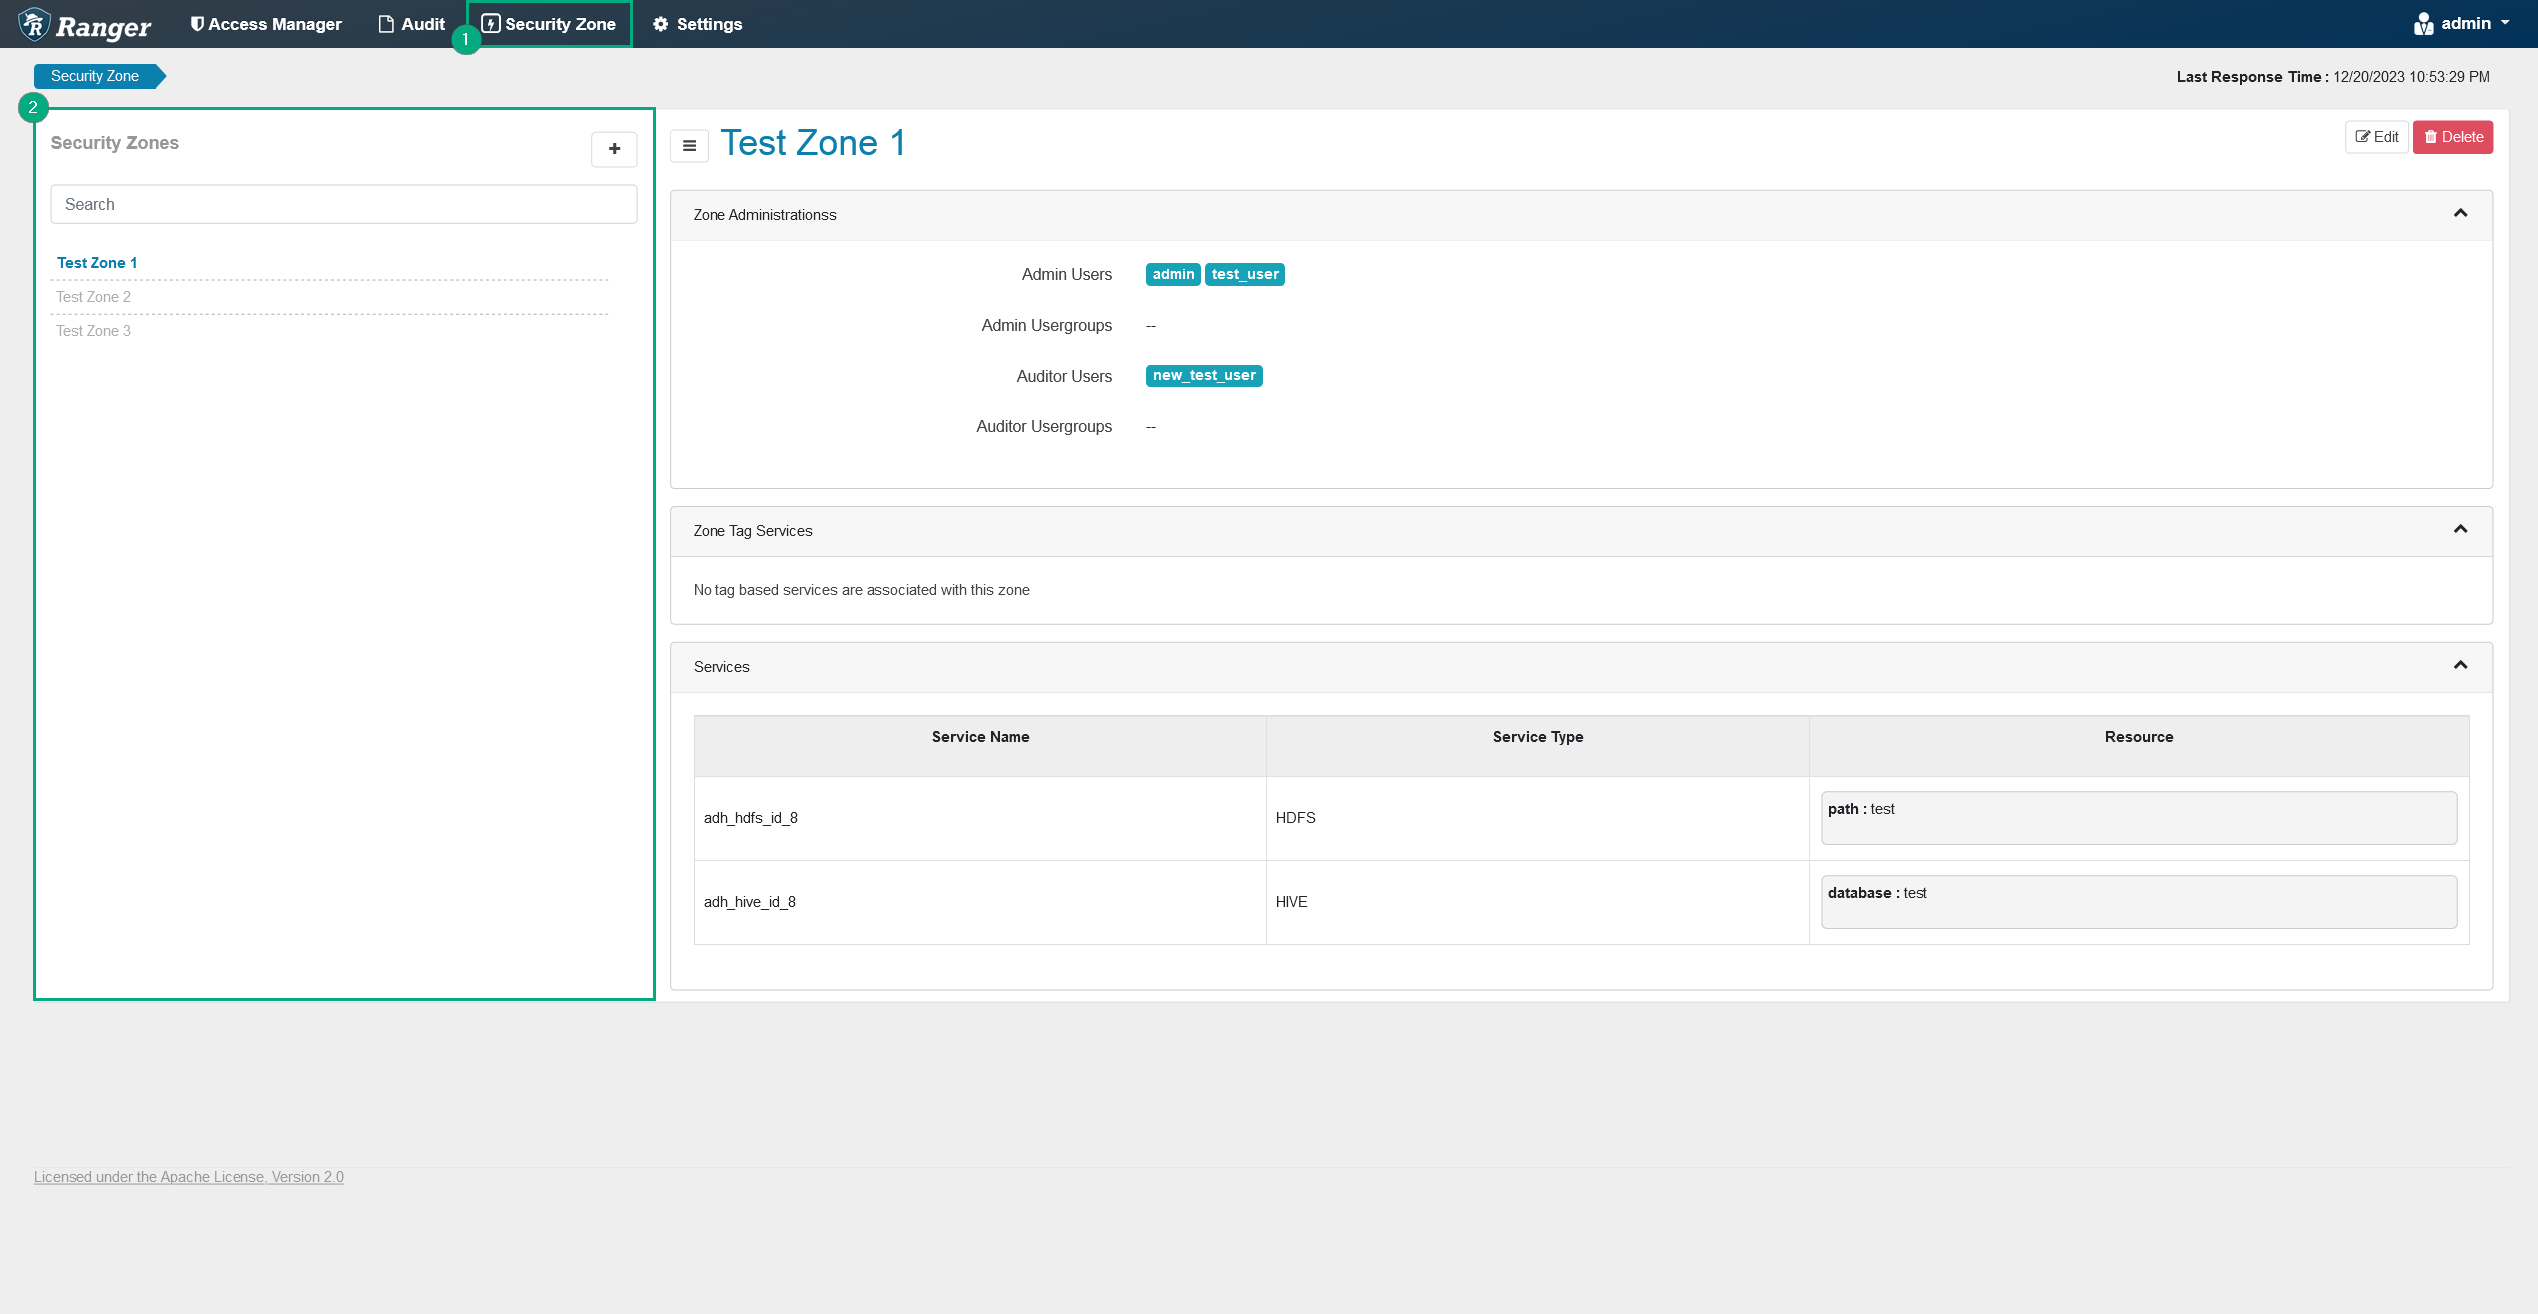
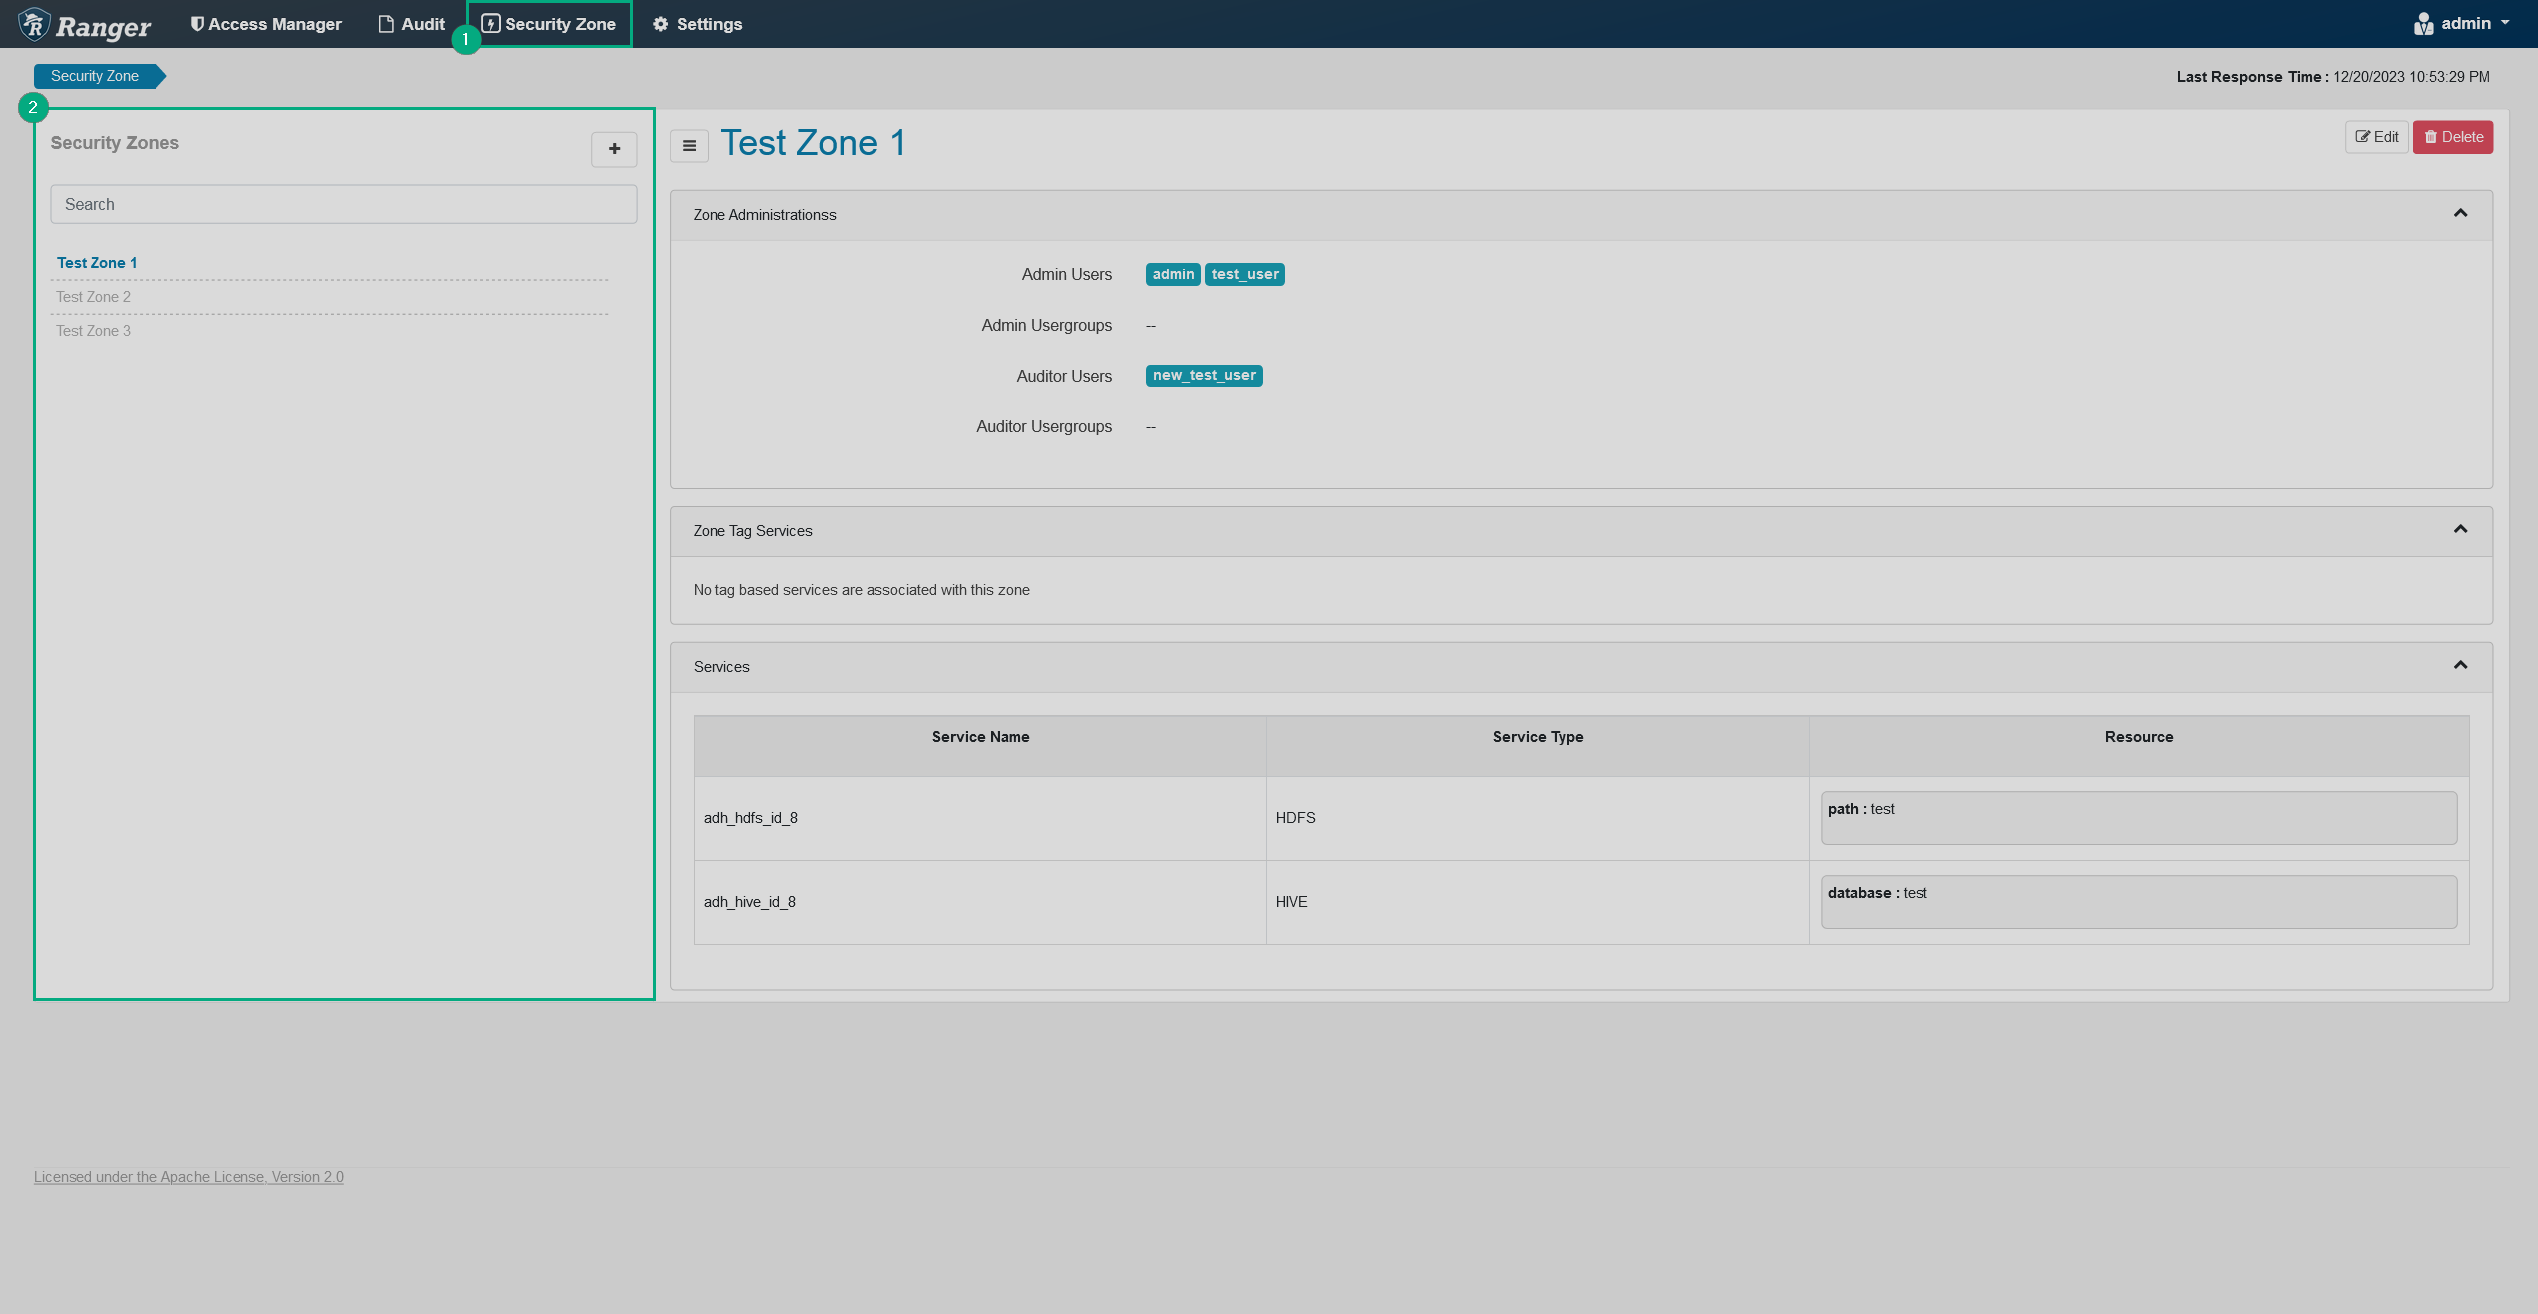
You can see all the zones on the Security Zone page. To see information about a particular zone, click on its name in the list.
Create a security zone
To create a security zone, follow the steps below:
-
On the Security Zone page, click
 Create Zone above the list of the existing security zones.
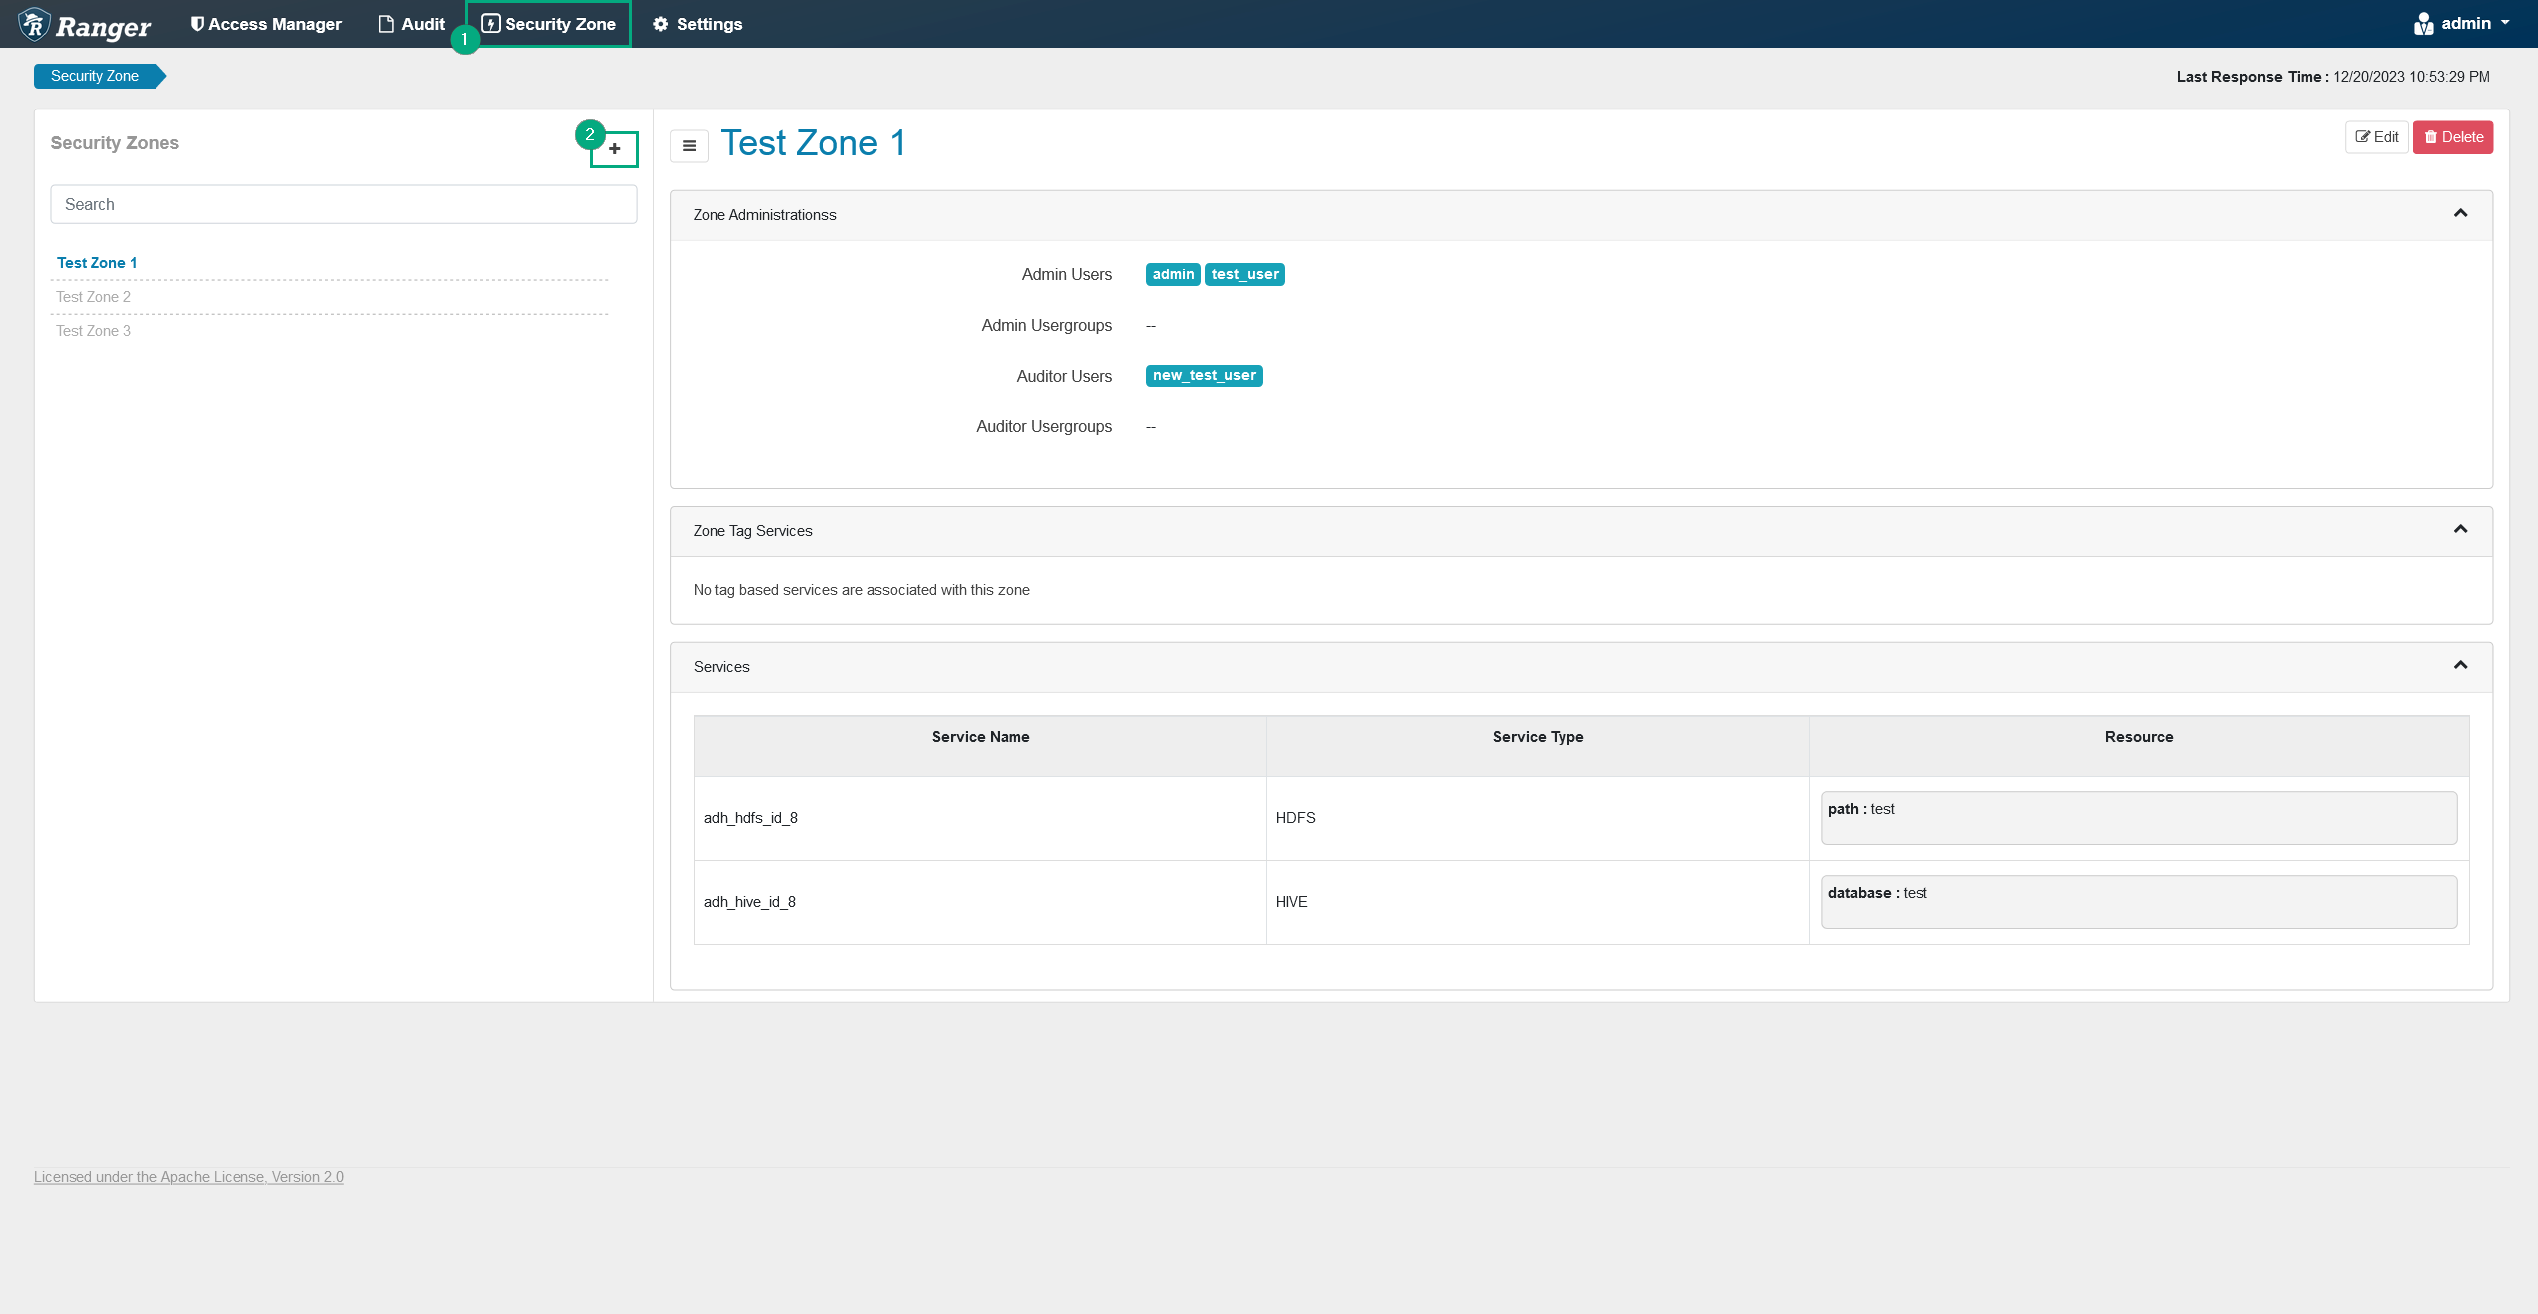 Adding a new security zone
 Adding a new security zone
 -
On the opened Create Zone page, fill in the necessary details and choose services that will be assigned to the zone. Each service has its own resources which can only be assigned to one security zone.
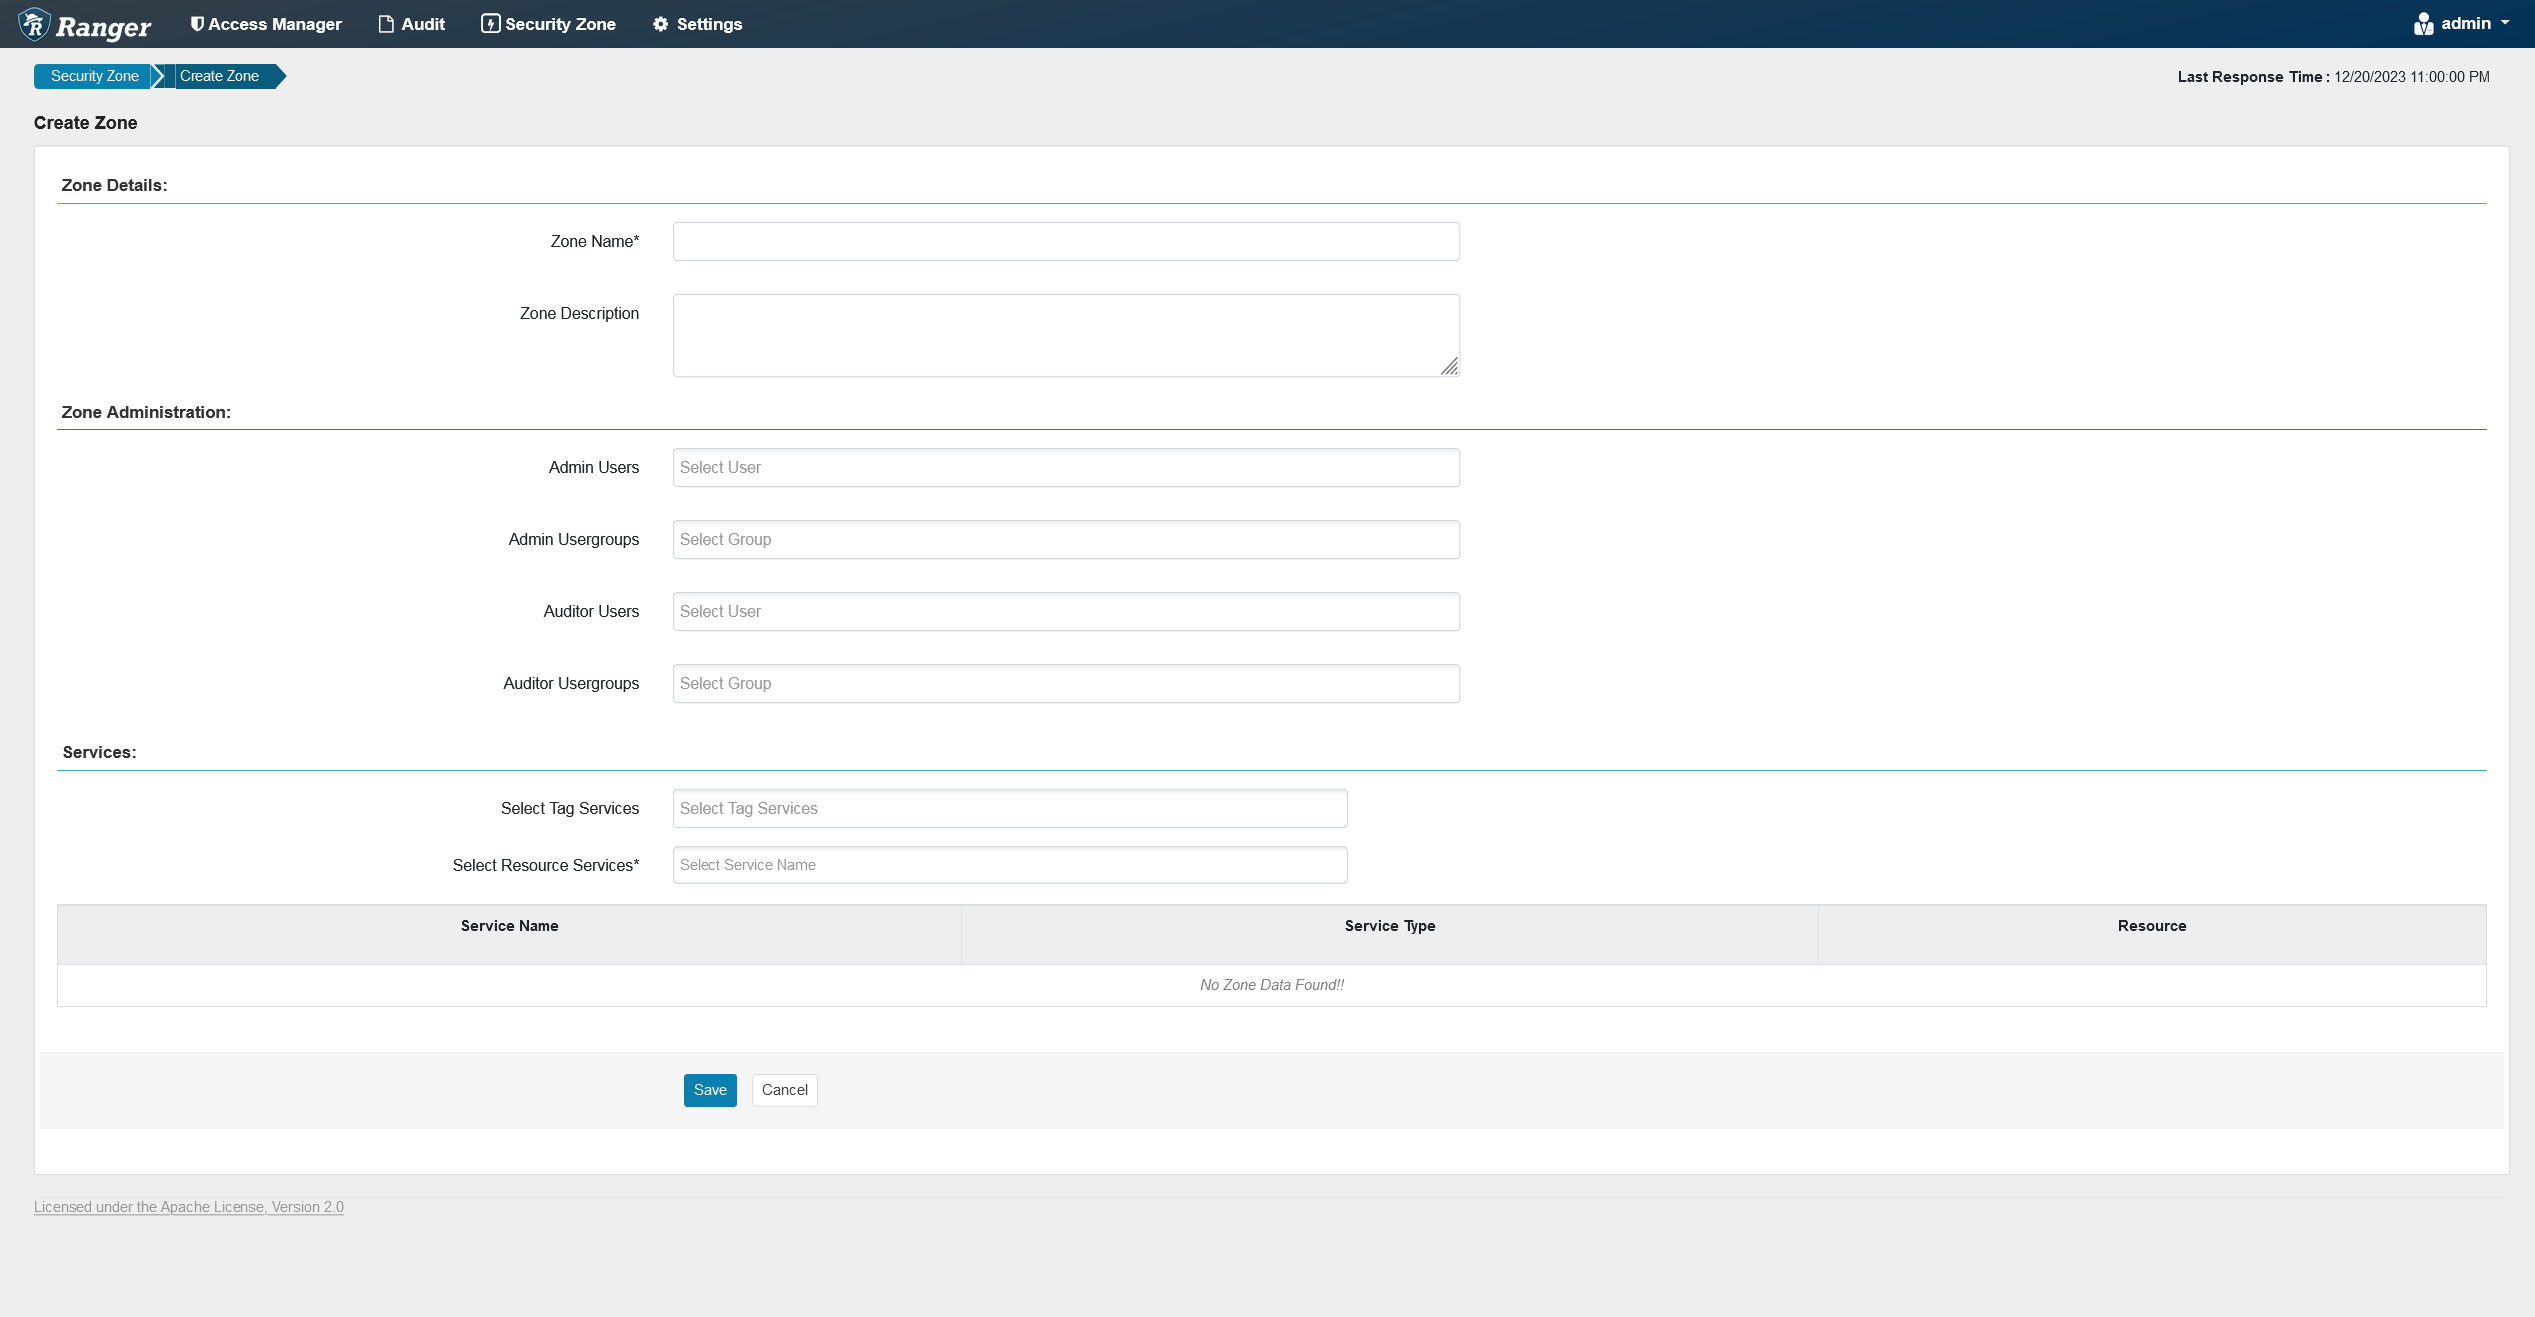 Security zone details
 Security zone detailsZone parameters
Parameter Description Zone Name
Name of the zone
Zone Description
Description of the zone’s purpose
Admin Users
Users that will have admin rights within the zone
Admin Usergroups
Groups that will have admin rights within the zone
Auditor Users
Users that will have auditor rights withing the zone
Auditor Usergroups
Groups that will have auditor rights within the zone
Select Tag Services
Tag-based services to be added to the zone
Select Resource Services
Resource-based services to be added to the zone.
-
Click Save at the bottom of the page. The newly created zone will be added to the bottom of the zone list.
Edit a security zone
To edit a security zone, follow the steps below:
-
On the Security Zone page, select a security zone you want to edit by clicking on its name and click
 Edit .
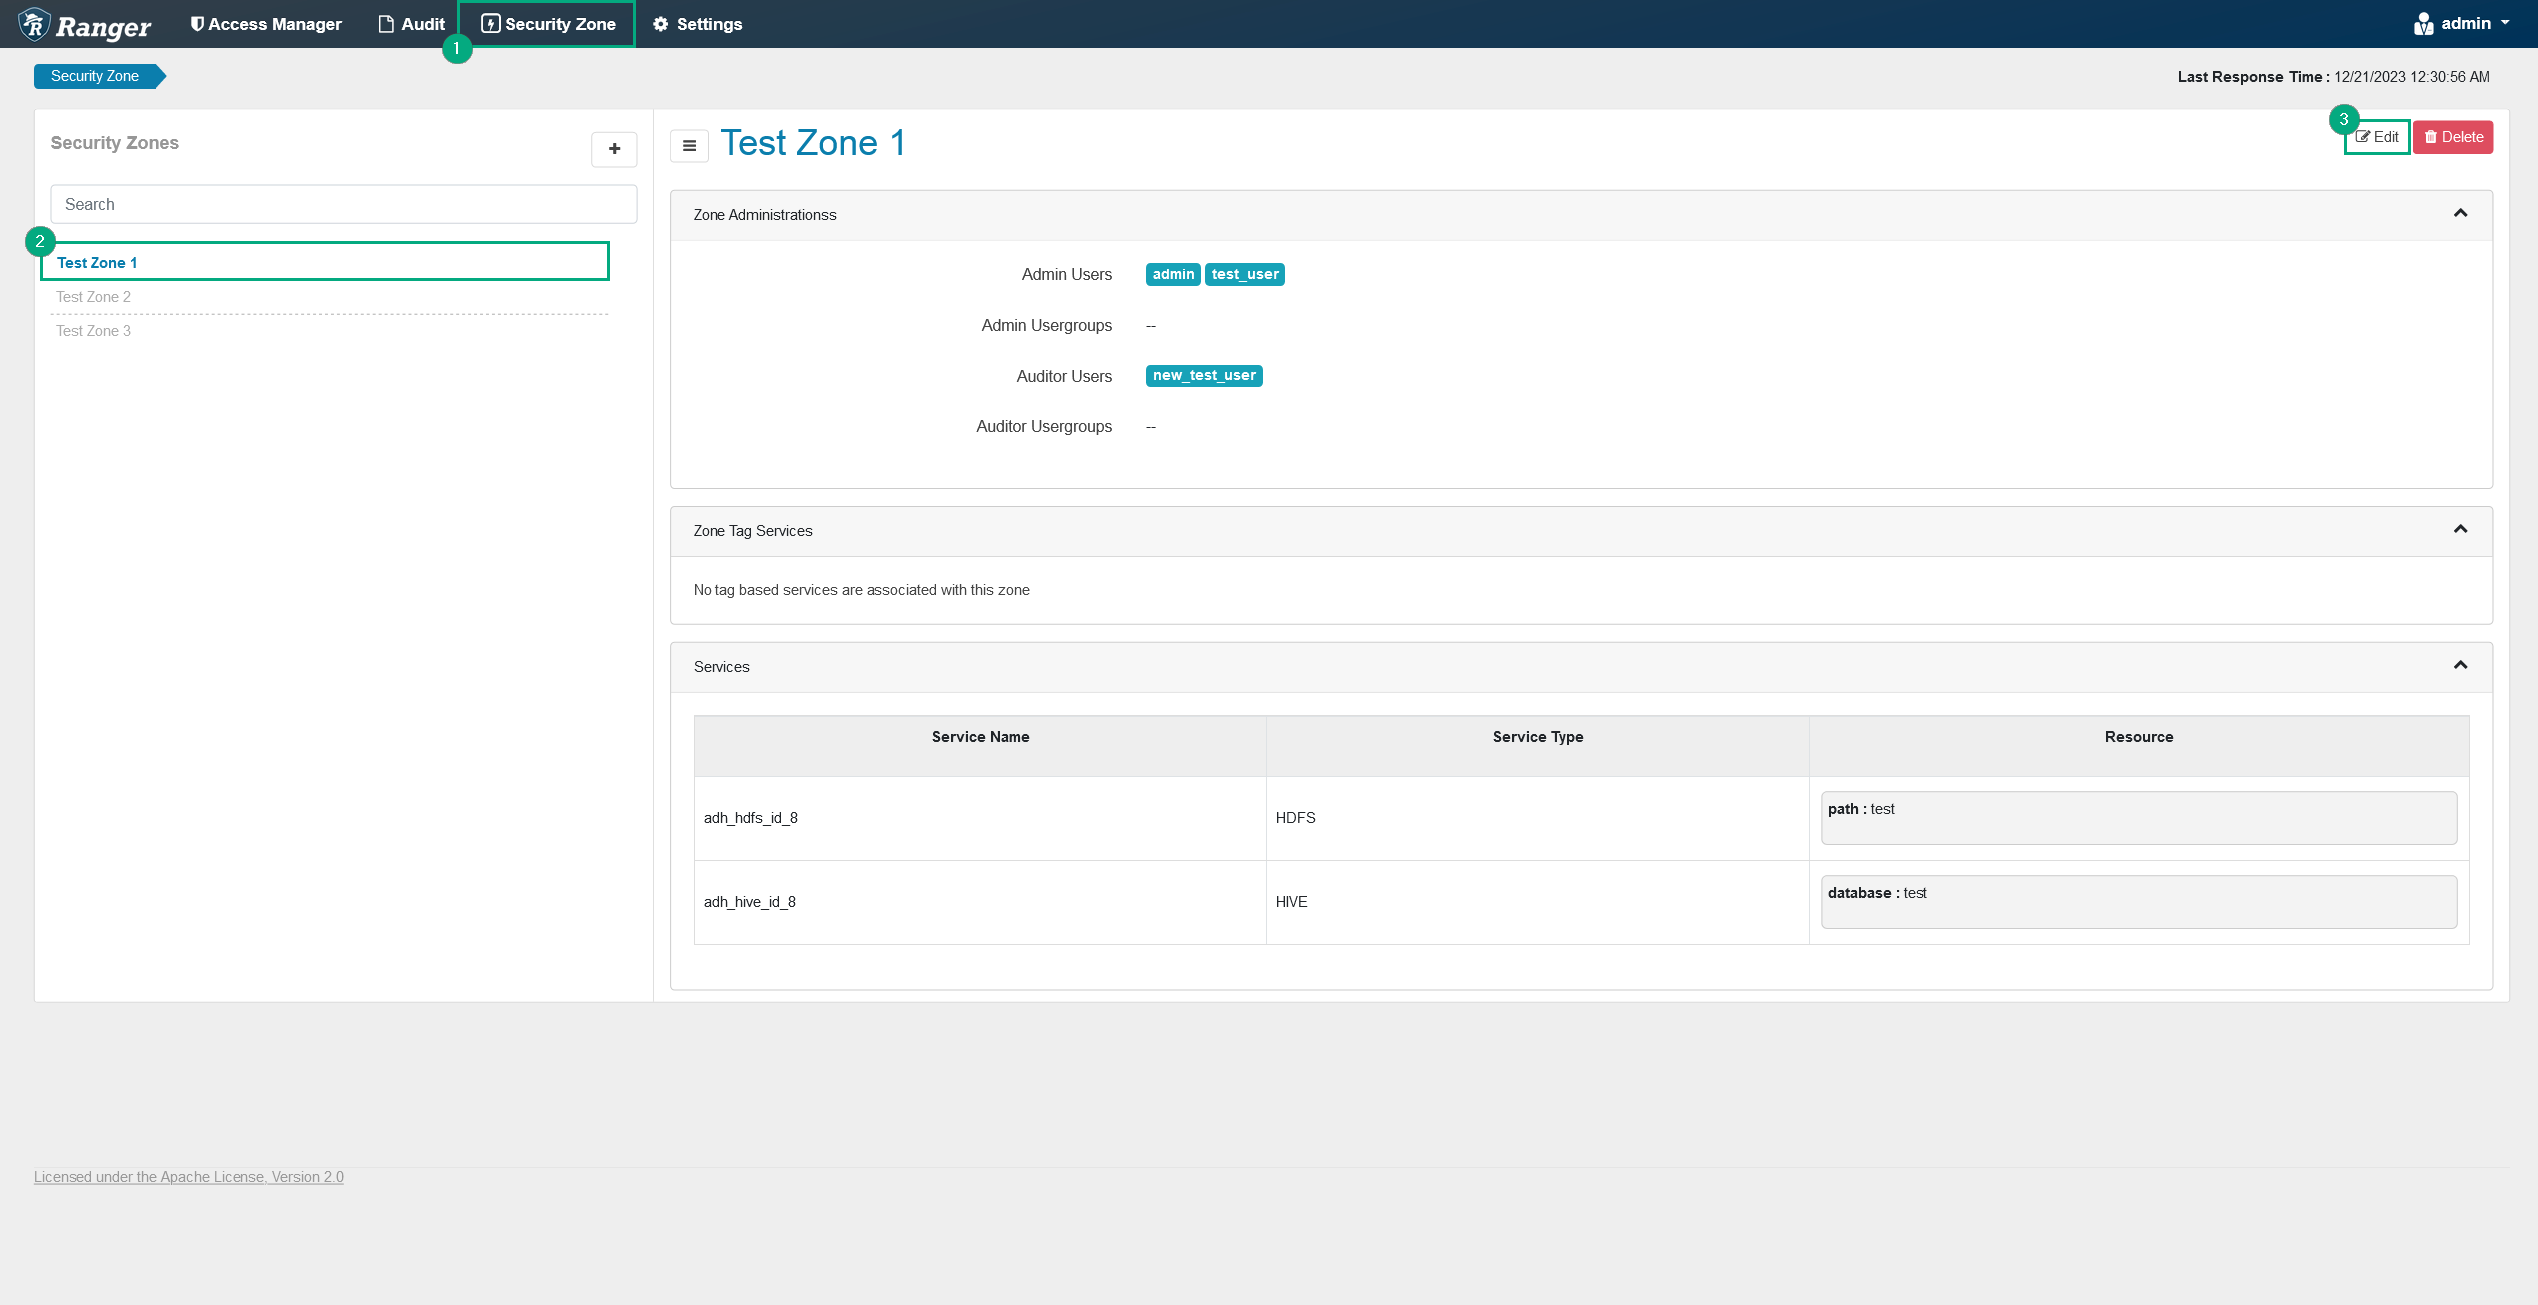 Editing a zone
 Editing a zone
 -
On the opened Zone Edit page, edit the necessary information.
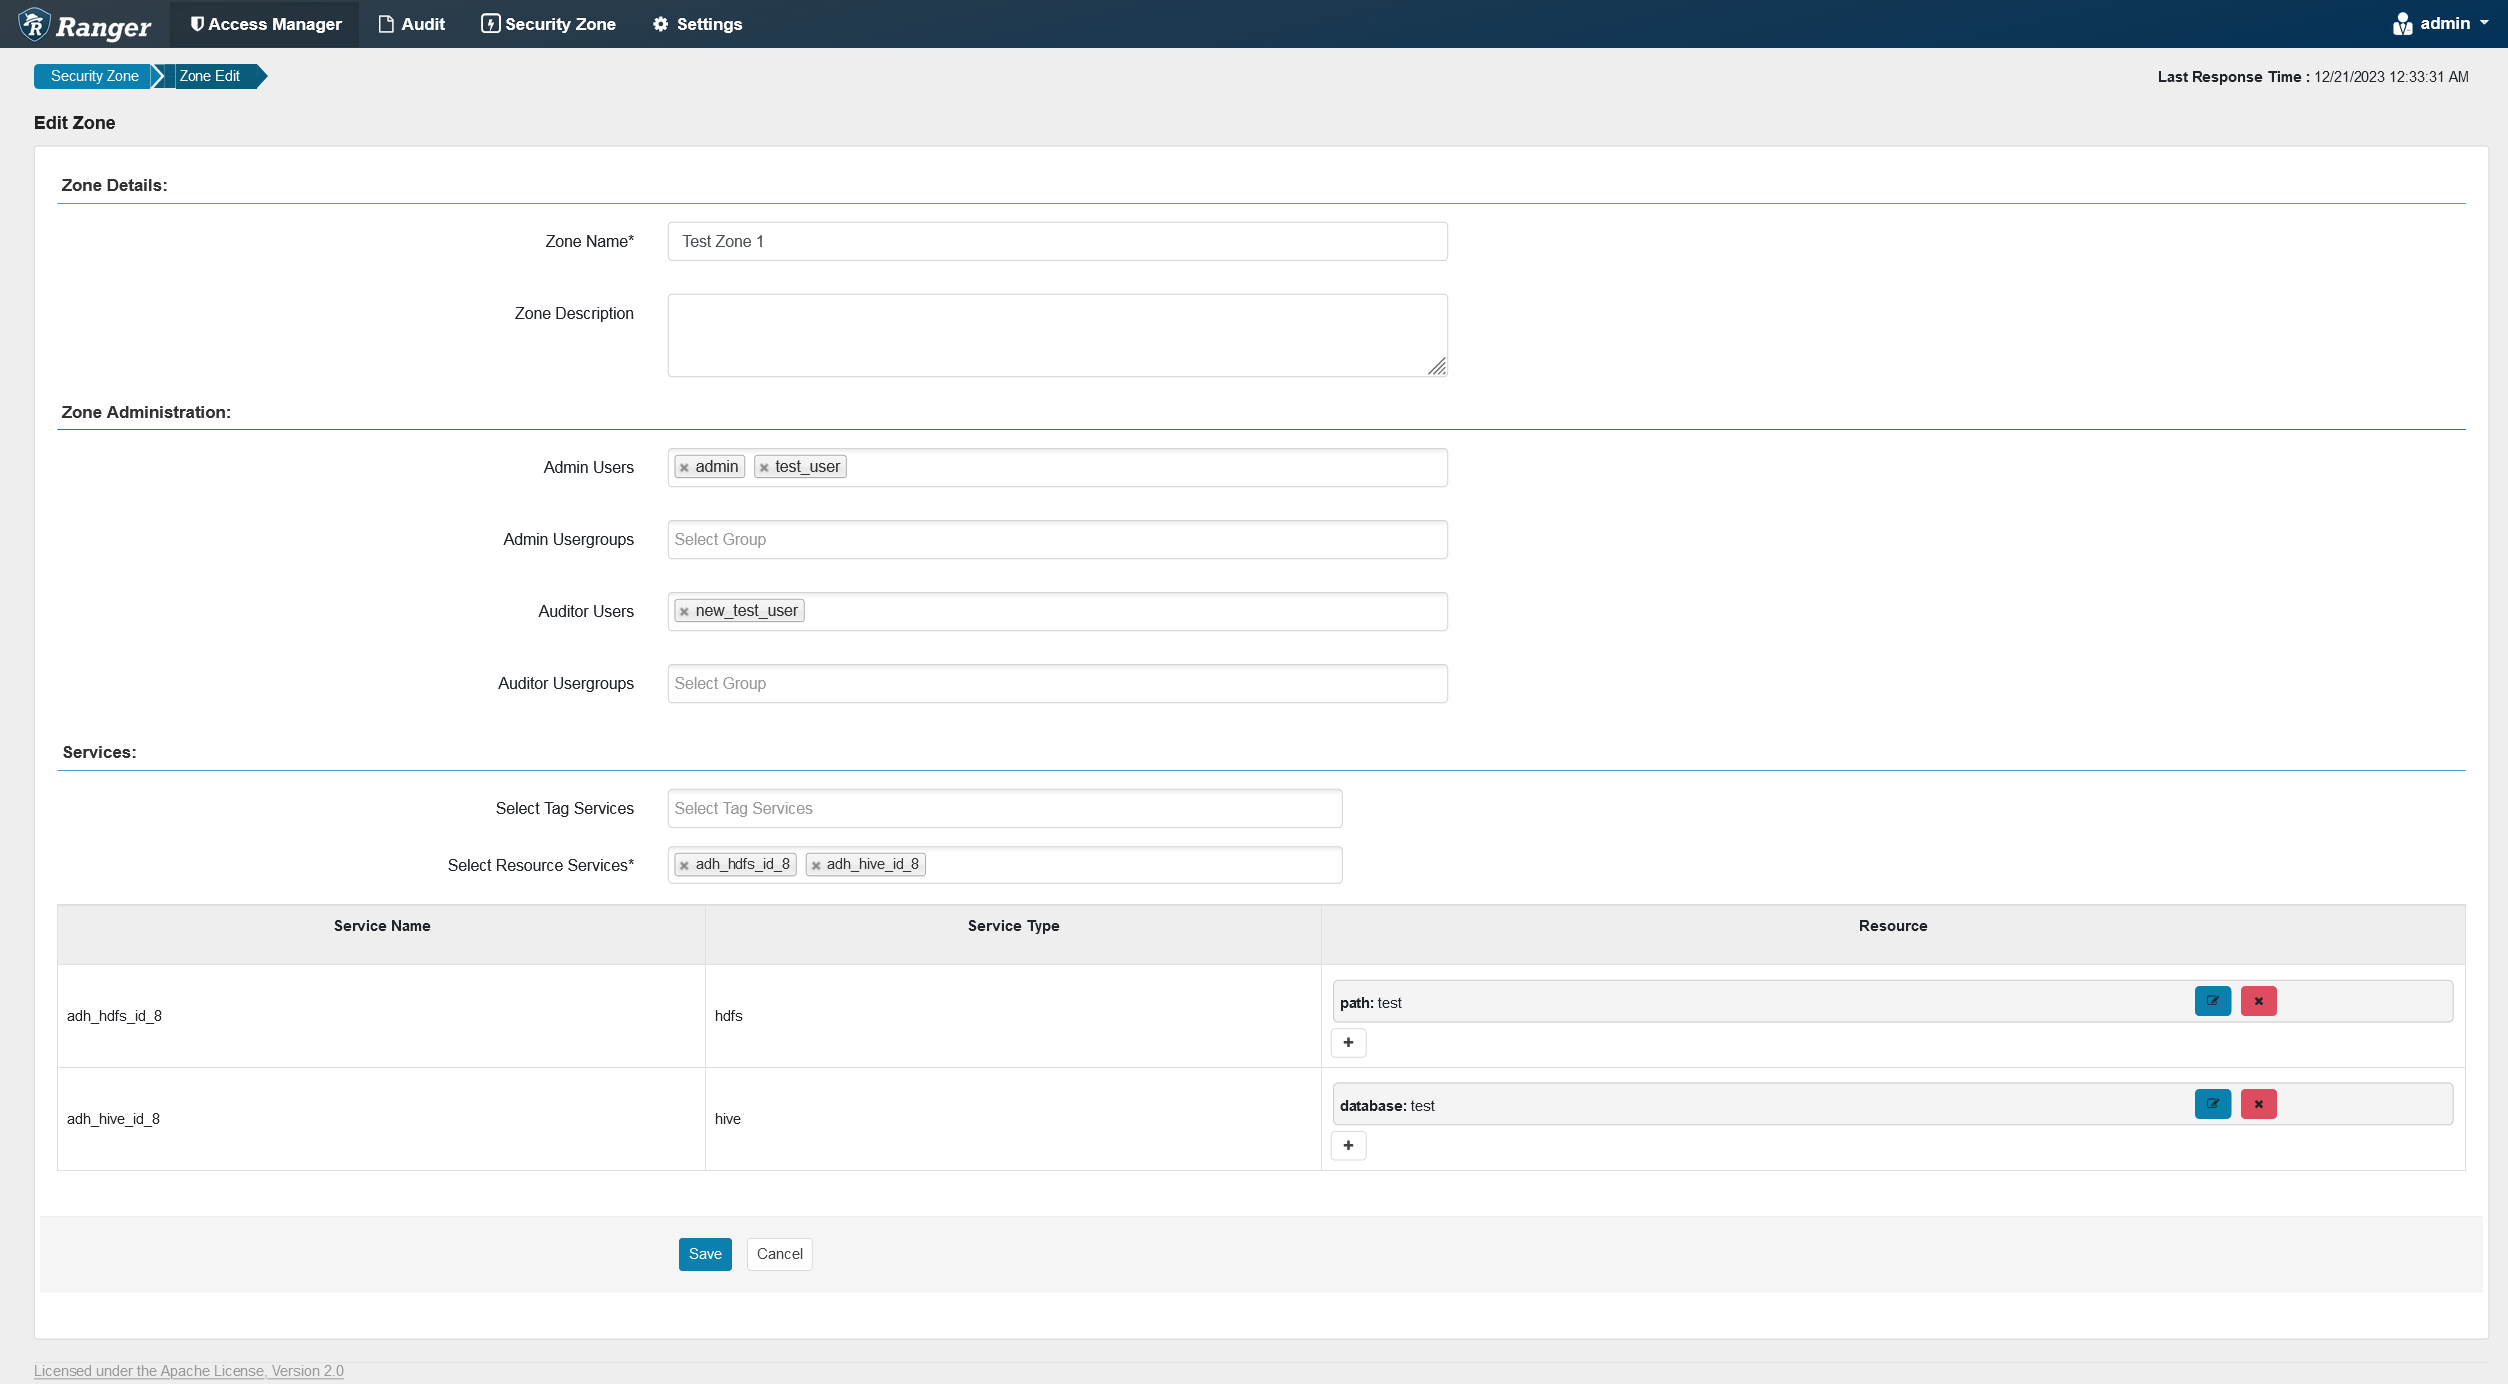 Editing security zone details
 Editing security zone details
 -
Click Save at the bottom of the page.