

Work with Kafka Connect in ADS Control
Kafka Connects page overview
The Clusters → <cluster name> → Kafka Connects page in the ADS Control web interface is designed to display information about available instances of the Kafka Connect service in the ADS cluster. The Kafka Connects page becomes available after selecting a cluster in the cluster management section and going to the desired tab on the General page.
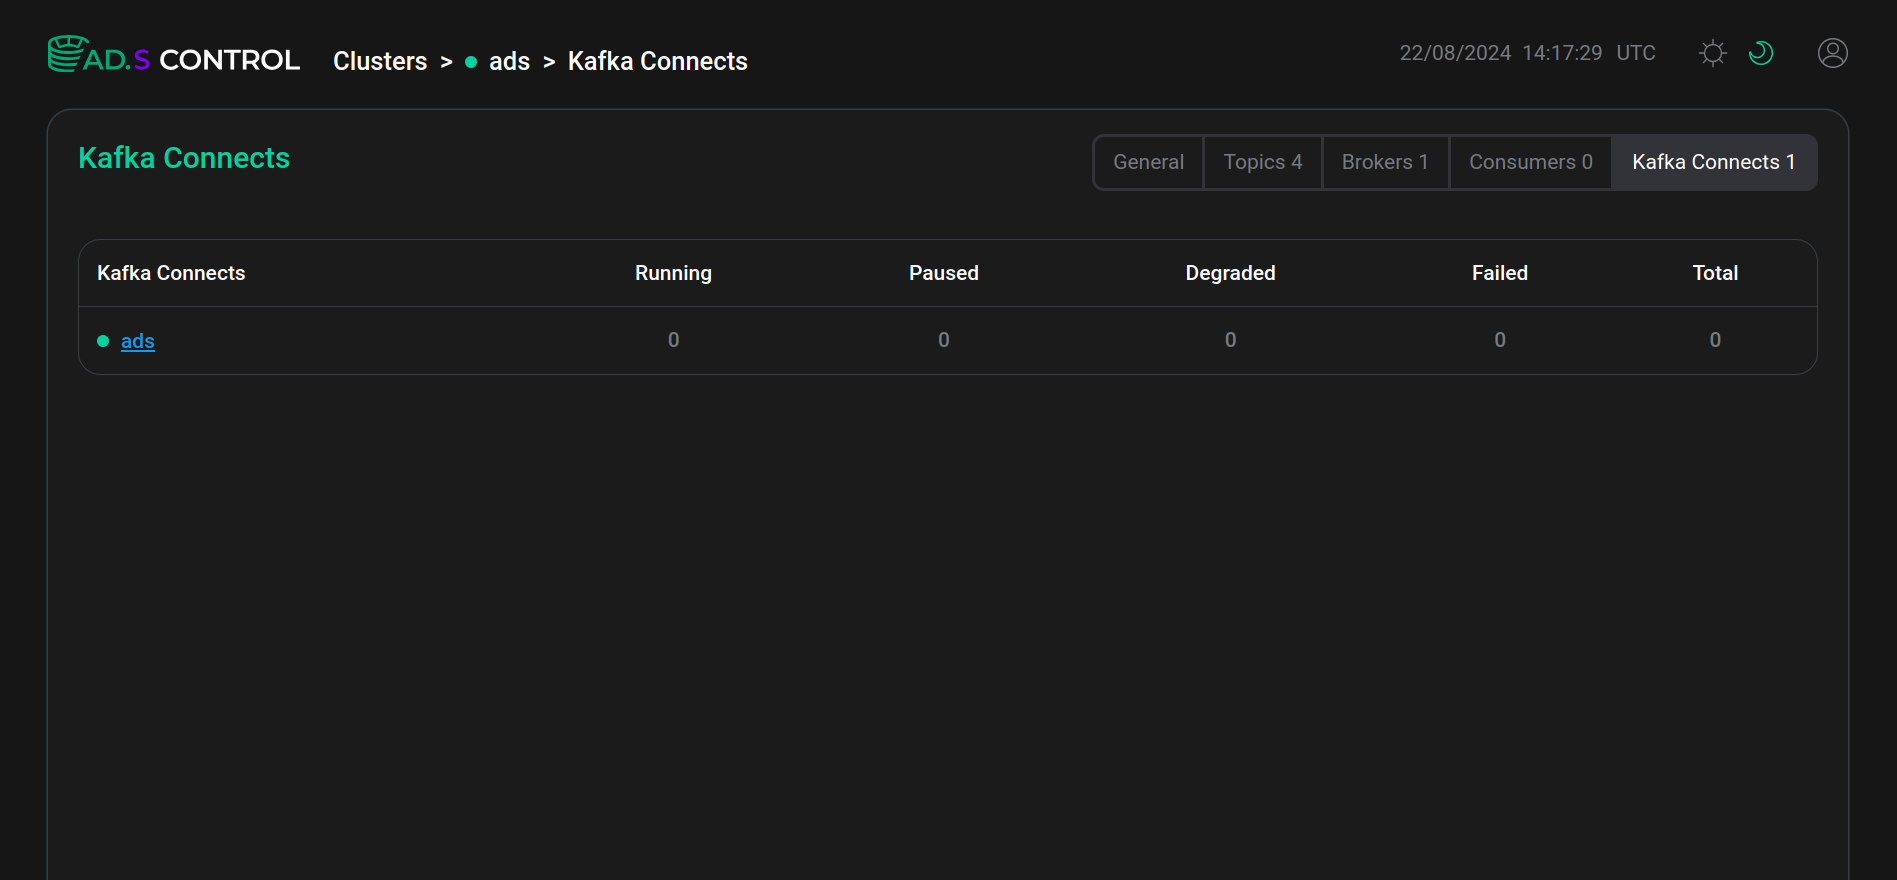
The Kafka Connects page contains a table with information about instances of the Kafka Connect service. The table columns are described below.
| Field | Description |
|---|---|
Kafka Connects |
Name of the Kafka Connect service instance. By clicking on the name, you can go to the Kafka Connect instance overview page |
Running |
Number of running connectors |
Paused |
Number of paused connectors |
Stopped |
Number of stopped connectors |
Degraded |
Number of connectors in |
Failed |
Number of connectors with error |
Total |
Total number of connectors |
Kafka Connect instance overview
After clicking on the name, the Kafka Connect instance overview page Clusters → <cluster name> → Kafka Connects → <cluster name> connector, which provides information about the created Kafka Connect connector instances, opens.
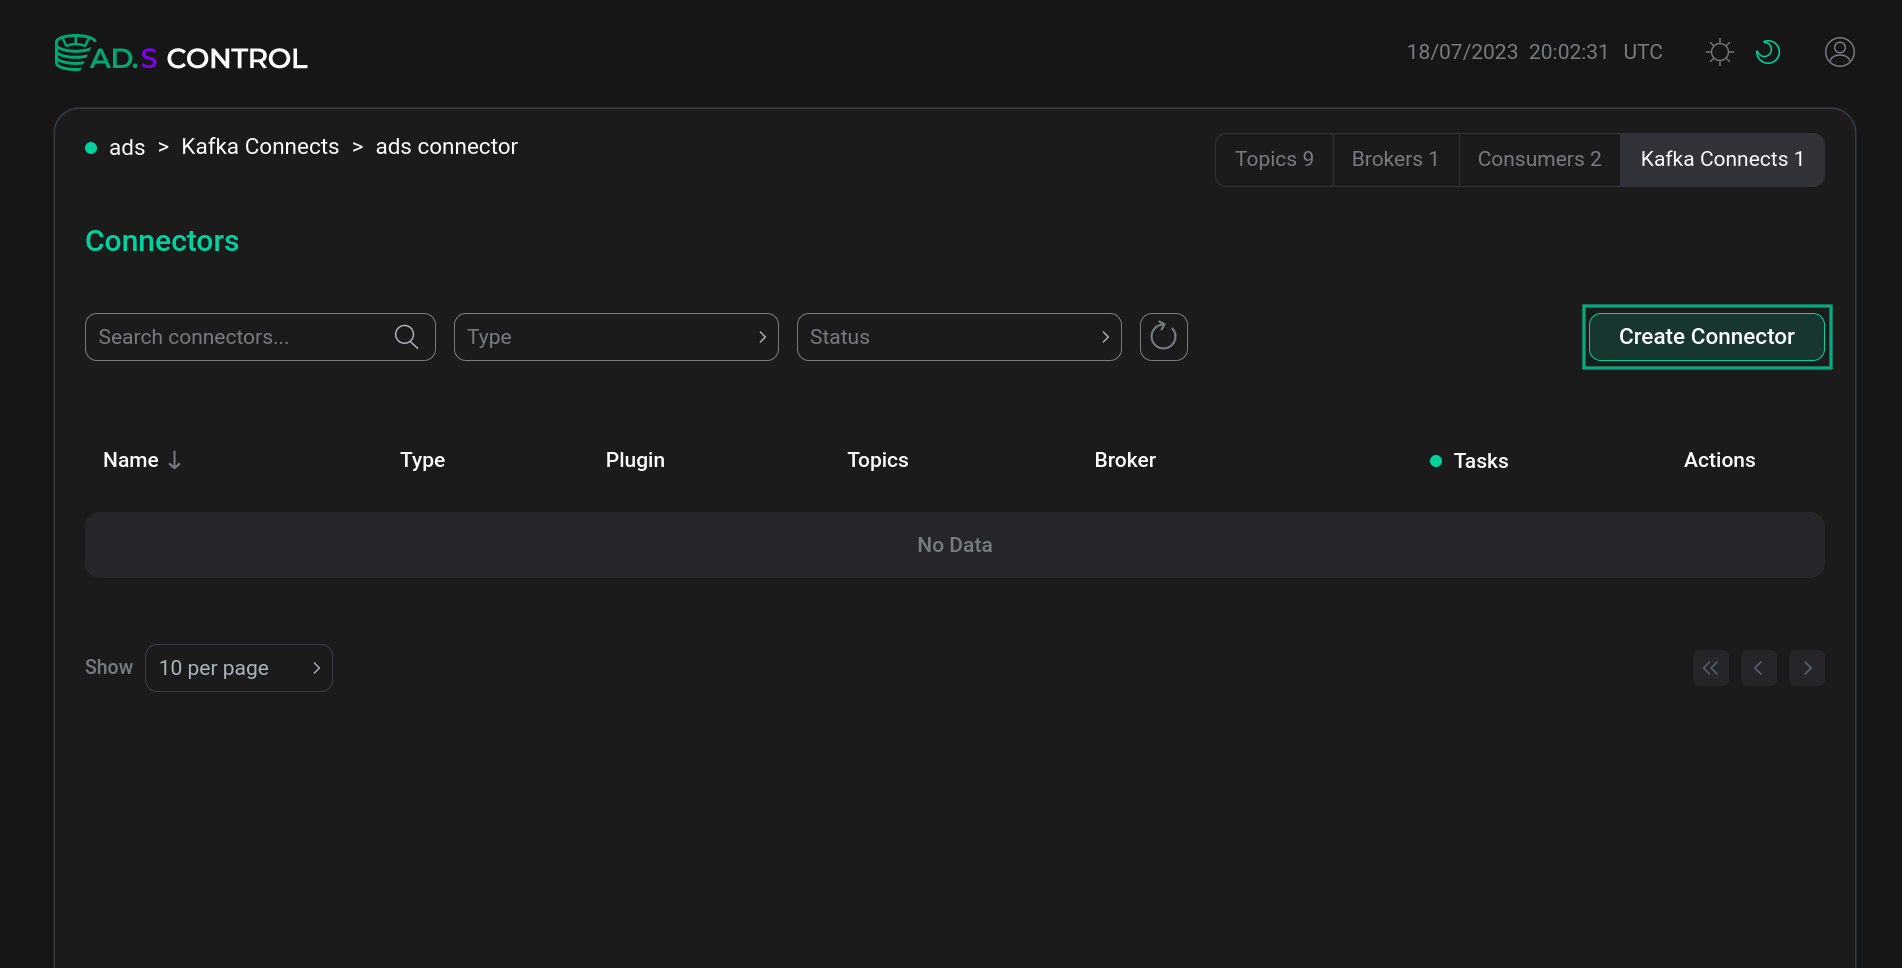
The Kafka Connects service overview page contains:
-
Section with general information about connectors according to the table provided above.
-
Search and filtering section:
-
field for searching a connector by name;
-
Type field for filtering connectors by type:
SourceorSink; -
Status field for filtering connectors by status:
-
Running -
Stopped -
Paused -
Unassigned -
Failed -
Degraded
-
-

 button to reset the search and filtering results;
 -
Create Connector button for creation new connectors.
-
-
Table with information about created Kafka Connect connectors. The table columns are described below.
| Field | Description |
|---|---|
Name |
Connector name. By clicking on the name, you can go to the connector instance overview page |
Type |
Connector type |
Plugin |
Name of the connector plugin |
Topics |
Topics related to the operation of the connector |
Broker |
Broker on which the connector is running |
Tasks |
Number of connector tasks |
Actions |
Column contains icons for managing the connector:
All actions require confirmation |
Create a connector
To create a connector, run:
-
Click Create Connector on the Kafka Connect instance overview page. After clicking Create Connector, the window for selecting the connector plugin Clusters → <cluster name> → Kafka Connects → <cluster name> connector → Kafka connector plugins opens.
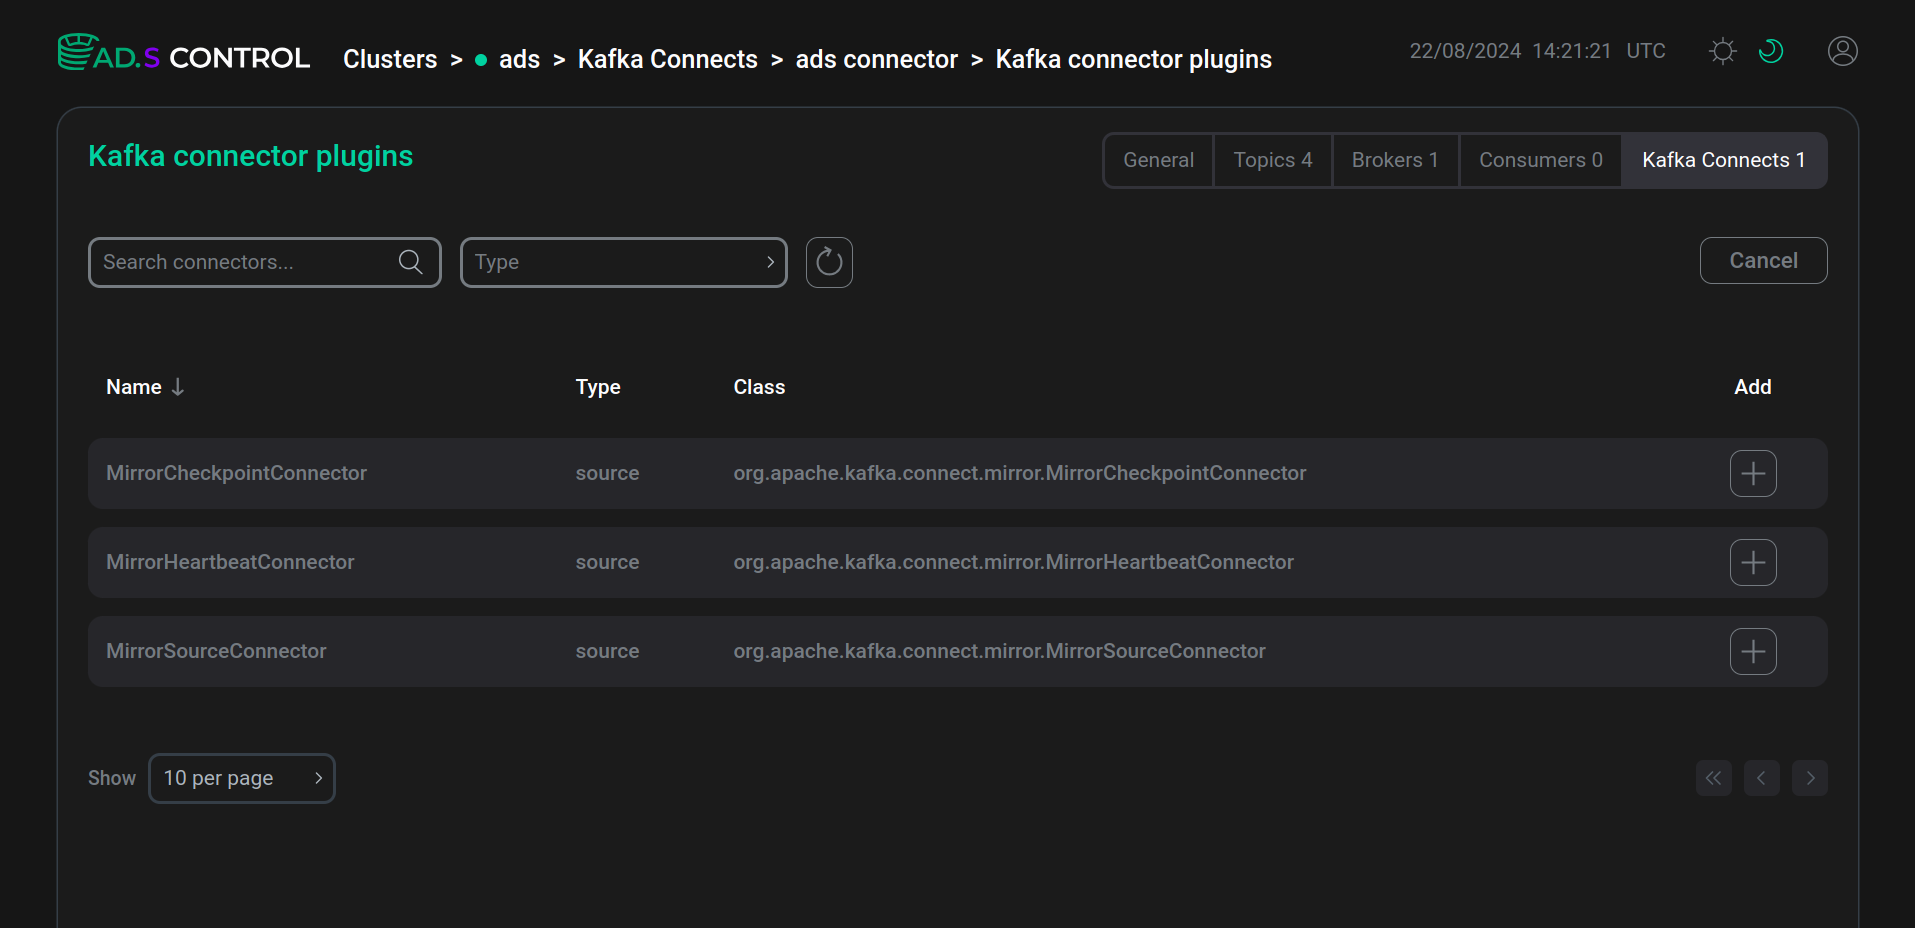 Connector plugin selection window
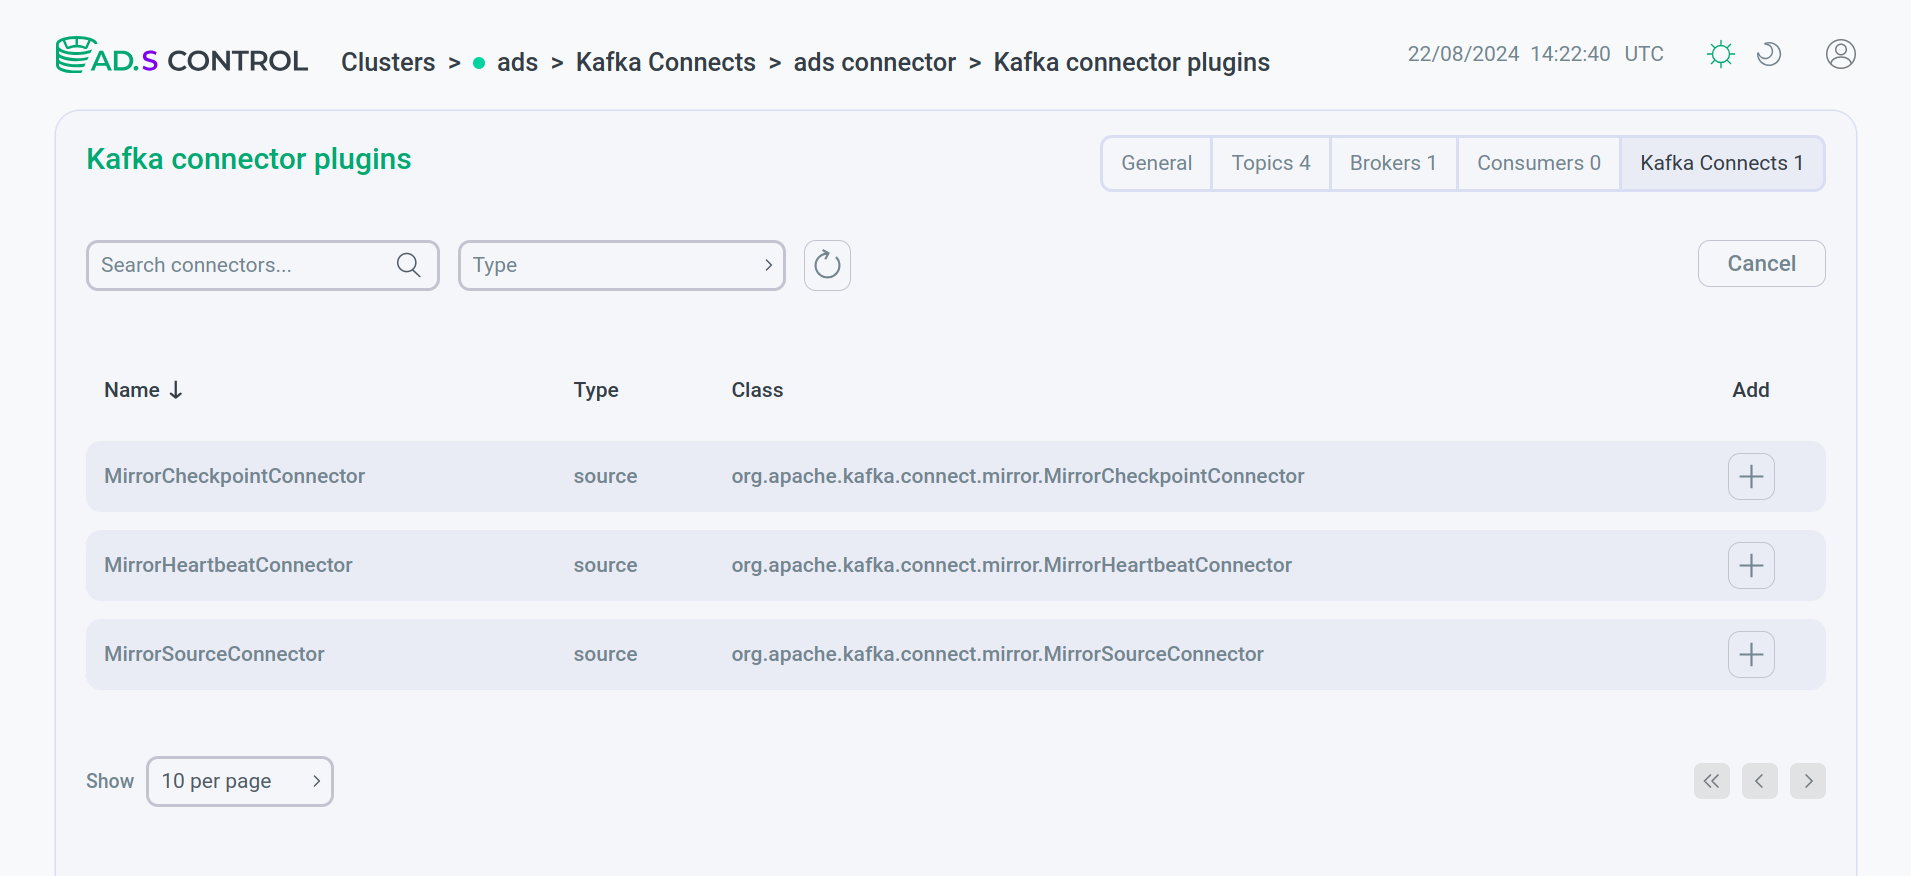 Connector plugin selection window
 -
Select the required connector plugin.
-
MirrorCheckpointConnector, MirrorHeartbeatConnector, MirrorSourceConnector — connectors designed to replicate topics using the Mirror Maker 2 mechanism. For more information on working with these connectors in ADS Control, see Mirror Maker 2 in ADS Control.
-
SqlServerConnector — a connector designed to collect changed data in SQL Server databases and transfer it to Kafka. For more information, see Debezium connector for MS SQL Server.
-
PostgresConnector — a connector designed to collect changed data in PostgreSQL Server databases and transfer it to Kafka. For more information, see Debezium connector for PostgreSQL Server.
-
IcebergSinkConnector — connector for writing data from Kafka to Iceberg tables. For more information, see Iceberg connector.
-
-
Next, fill in the connector configuration in the window that opens. You can use populating the config as a JSON file. To do this, turn on the corresponding switch.
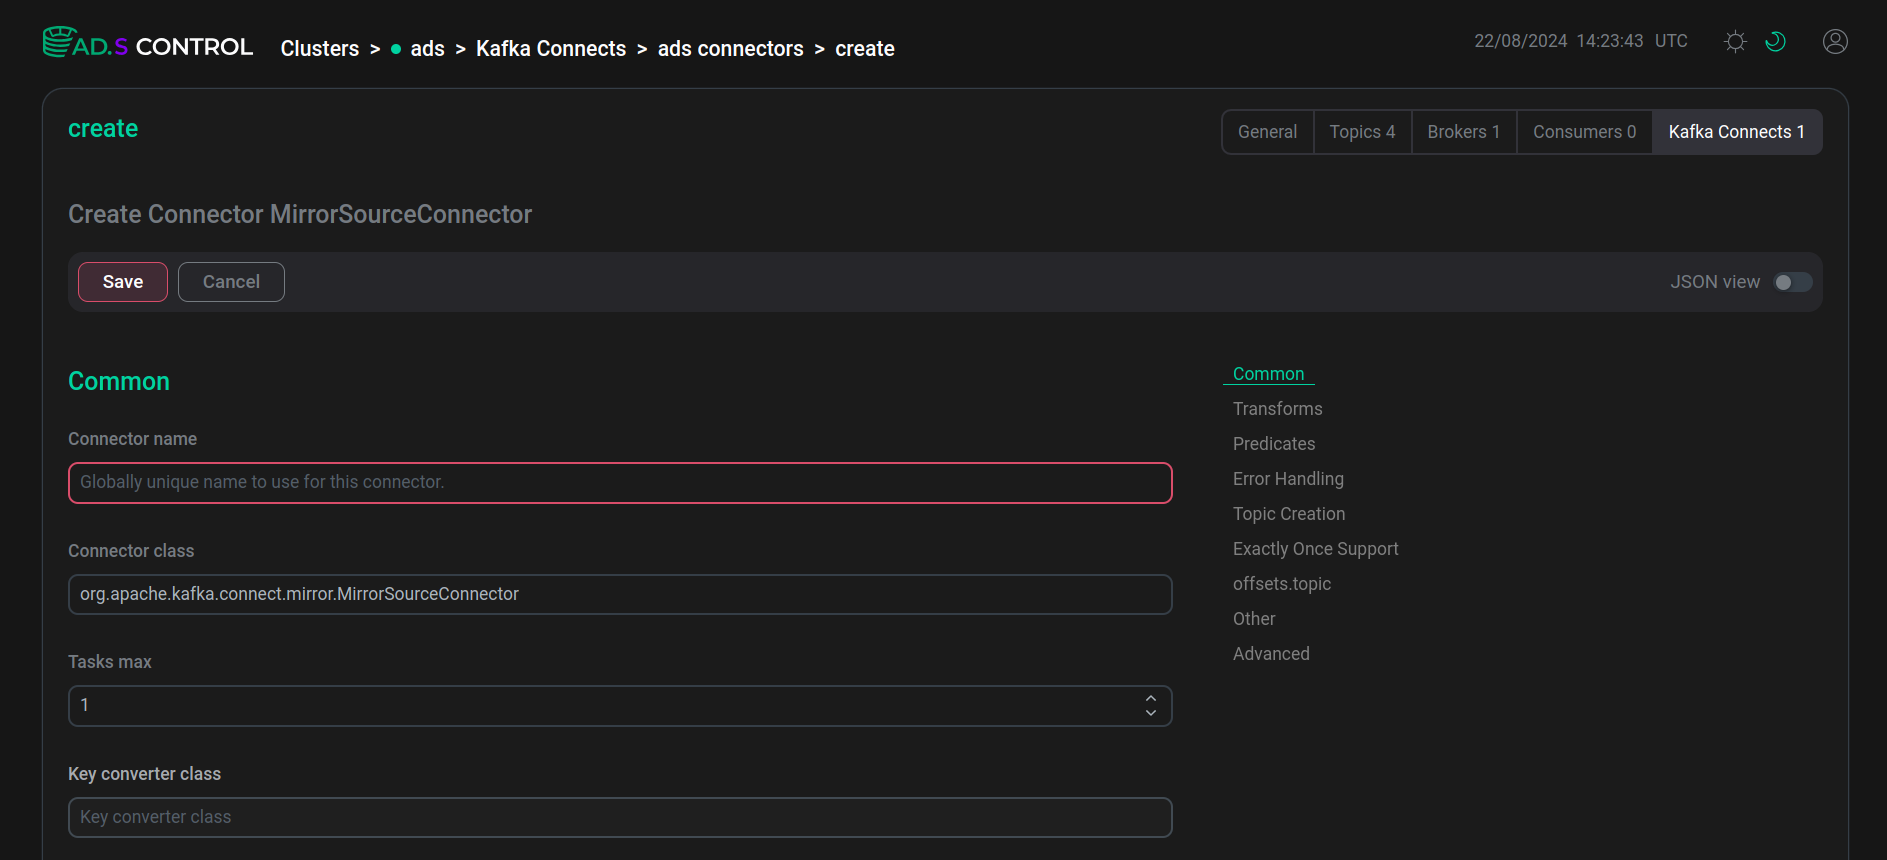 Connector configuration
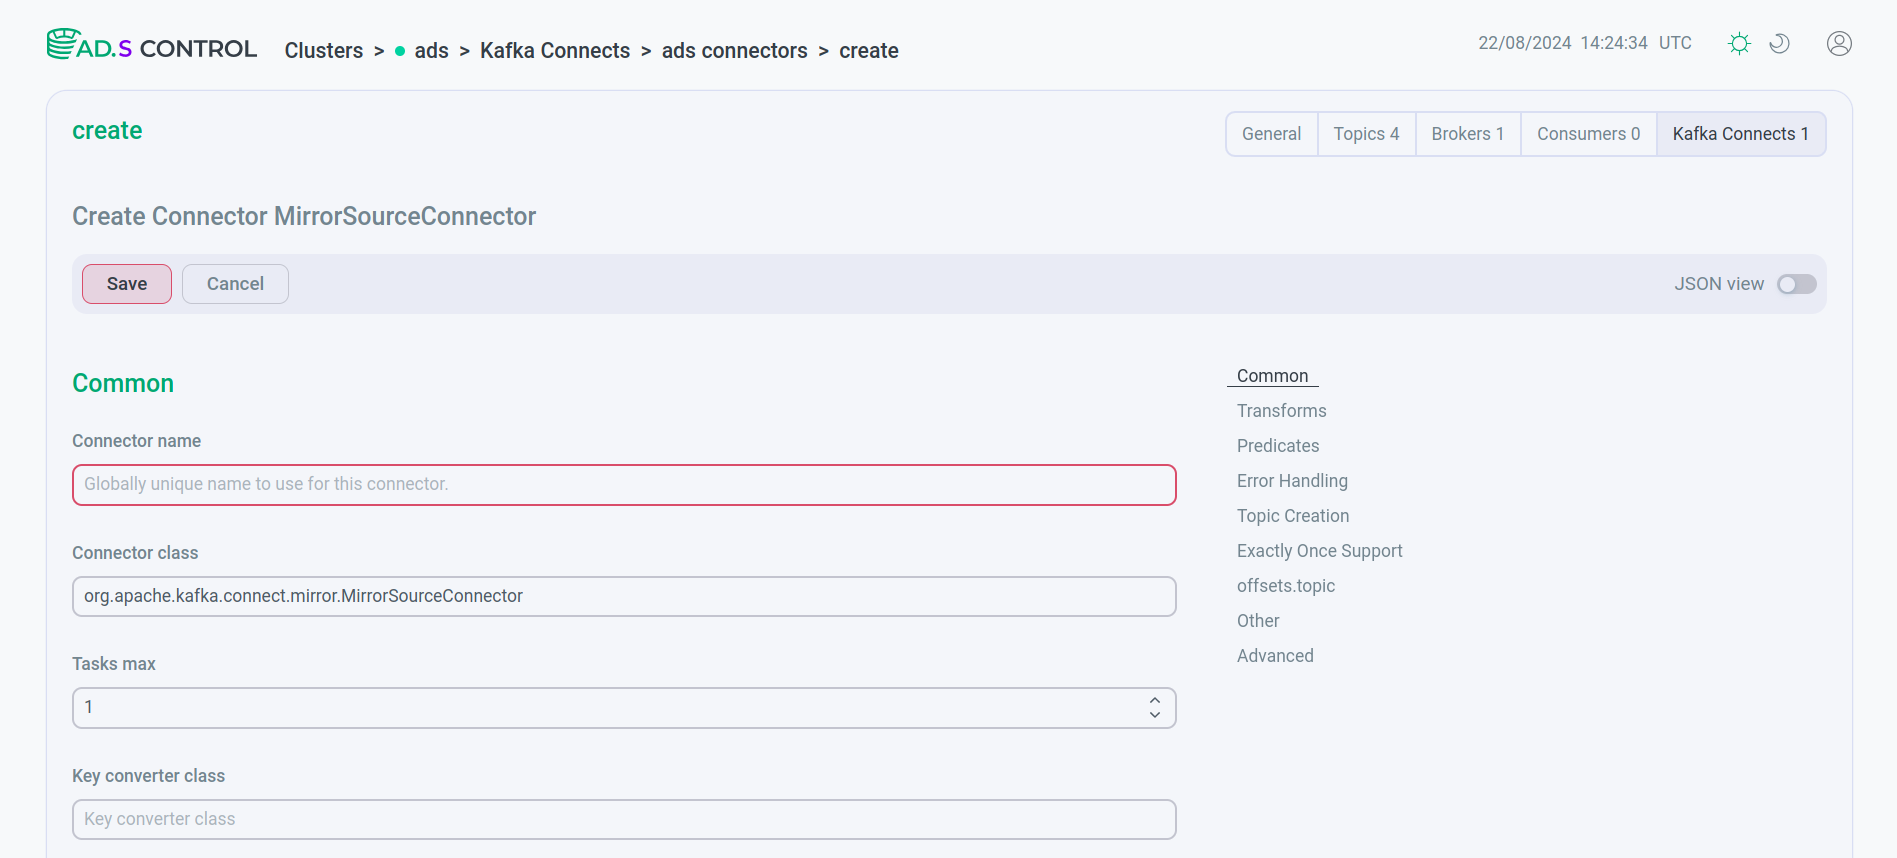 Connector configuration
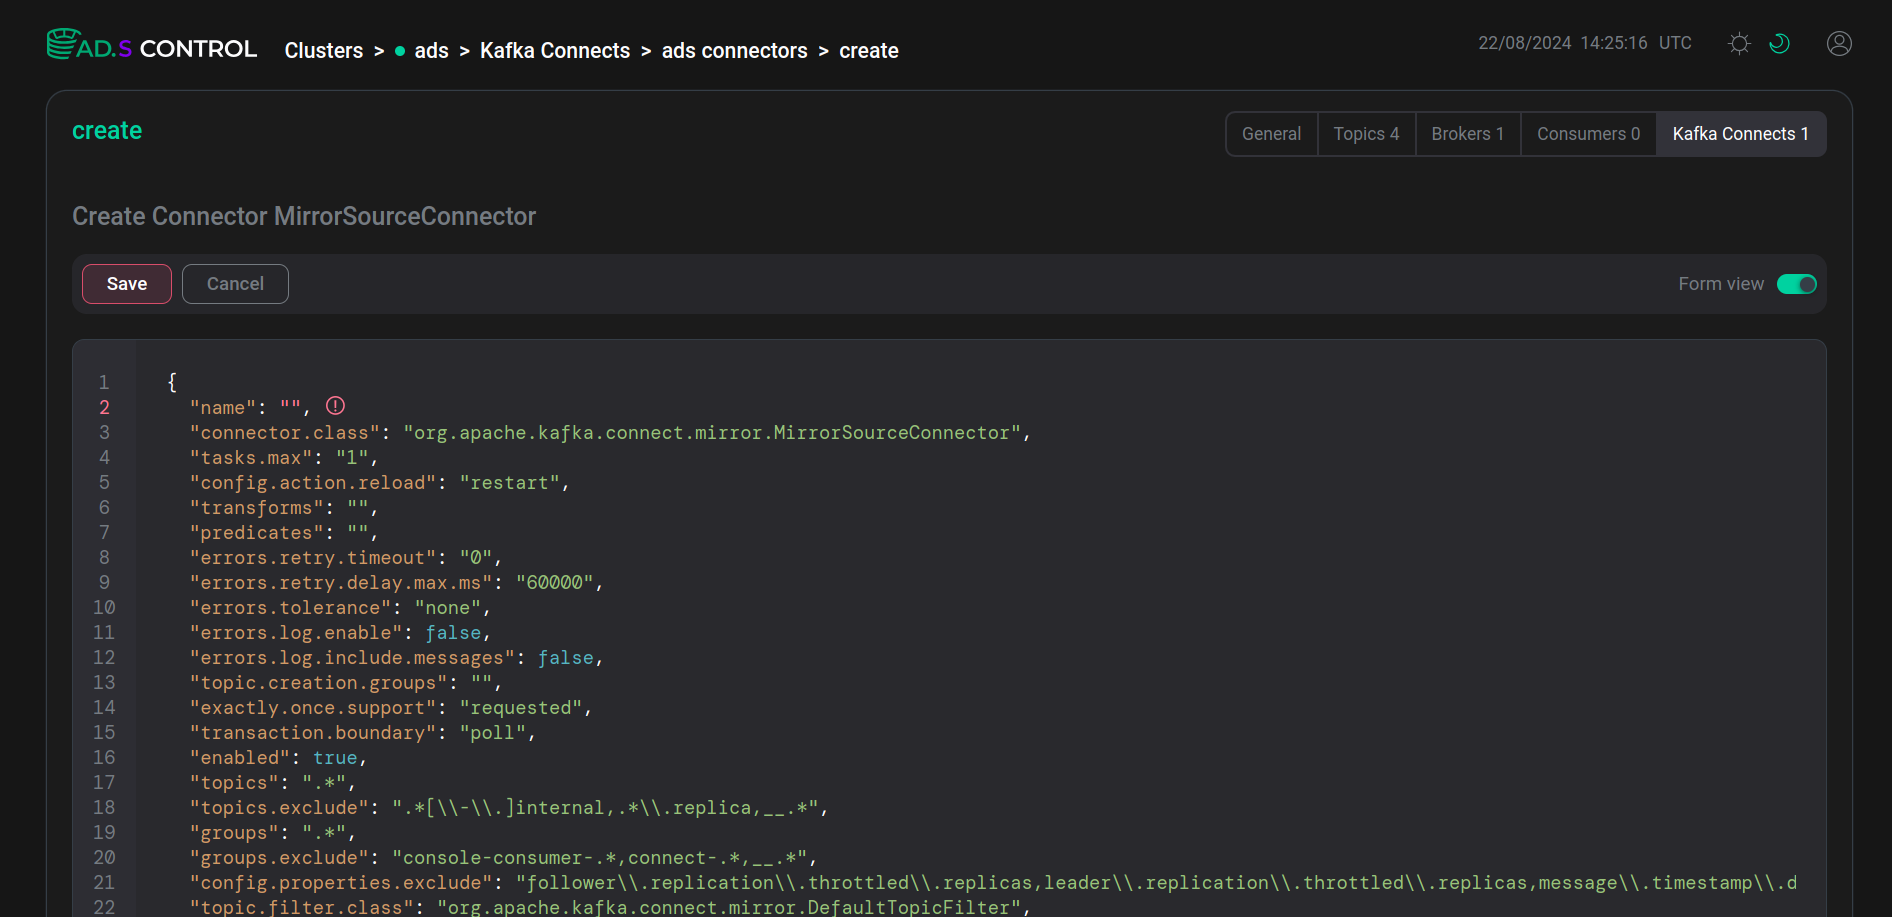 Сonnector JSON configuration file
 Сonnector JSON configuration file
 -
After filling, click Save and get a message about the successful creation of the connector.
 Message about the successful creation of the connector
 Message about the successful creation of the connector
 -
On the opened page, launch the connector using the

 icon.
icon.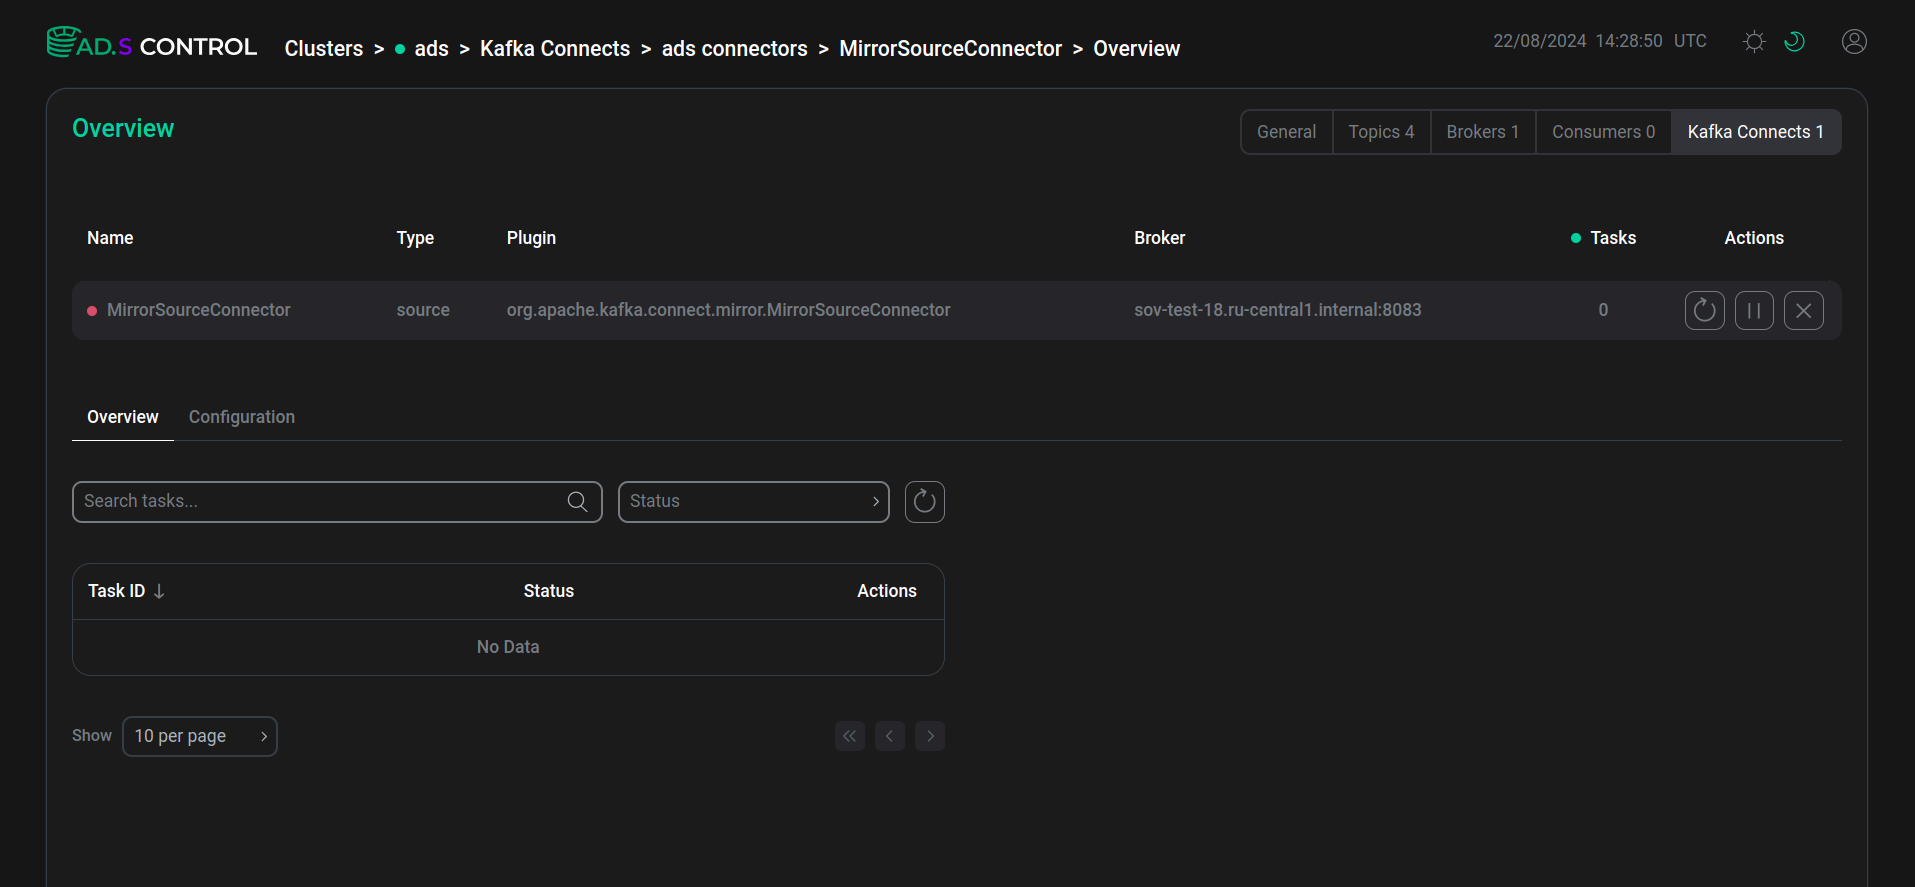 Created and launched connector
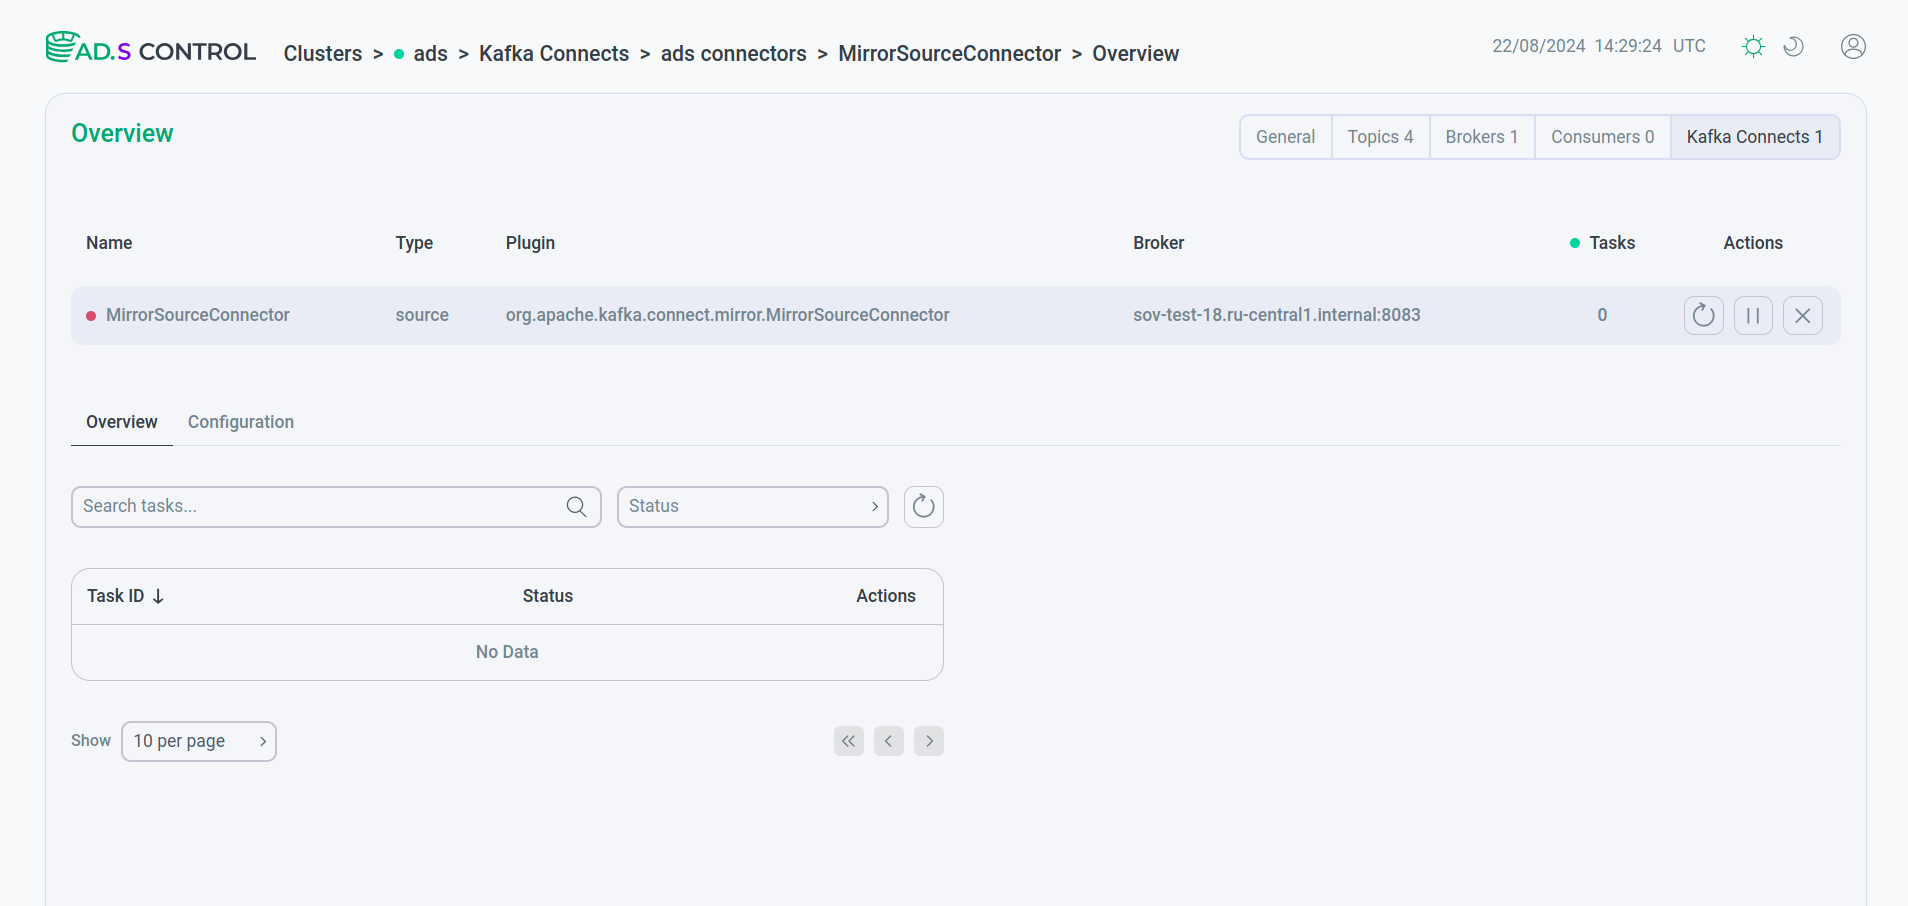 Created and launched connector
 -
Check that the Clusters → <cluster name> → Kafka connects → <cluster name> connector page displays the created connectors in the working status. The status is determined depending on the indicator in front of the connector name. A description of the indicators is provided below.
Indicator Status Description 
Running
Connector/task started

Paused
Connector/task has been administratively paused
Stopped
Connector/task stopped

Failed
Error in connector/task operation
Degraded
Connector/task is operating at reduced performance

Unassigned
Connector/task has not yet been assigned to a worker
Connector overview
After clicking on the connector name in the table with information about the created connectors, the connector instance overview page opens.
At the top of the page, there is a section displaying the main parameters of the connector, as well as connector management icons according to the table provided above.


Tabs are displayed at the bottom:
Overview tab
The Clusters → <cluster name> → Kafka connects → <cluster name> connector → <connector name> → Overview tab opens by default when navigating to the connector overview page. The tab provides information about the connector’s tasks and their status.

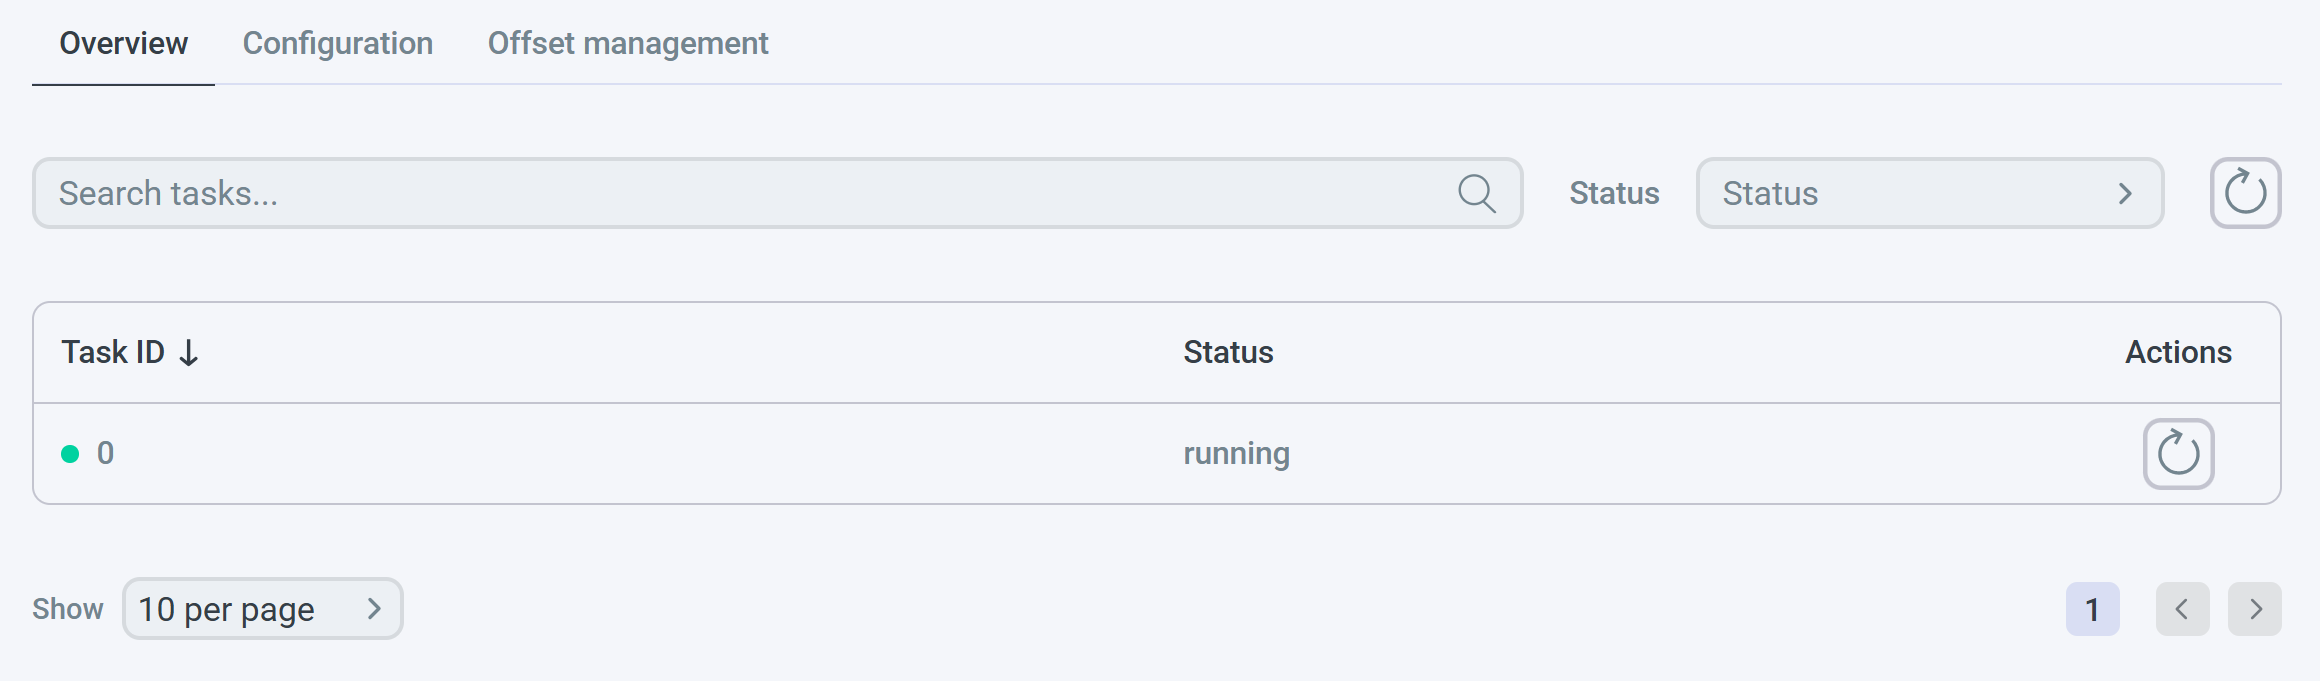
On the Overview tab, you will find:
-
Search and filter section:
-
field to search for a task by ID;
-
Status field to filter tasks by status:
-
Running -
Failed -
Paused -
Stopped -
Unassigned -
Degraded
-
-
button
to reset search results.
-
-
Table with information about each task. The description of the table columns is provided below.
| Field | Description |
|---|---|
Task ID |
Task ID |
Status |
Task status. When the status is |
Actions |
Column contains the |
Configuration tab
The Clusters → <cluster name> → Kafka connects → <cluster name> connector → <connector name> → Configuration tab opens from the connector overview page. The tab allows you to view and edit the connector’s settings.

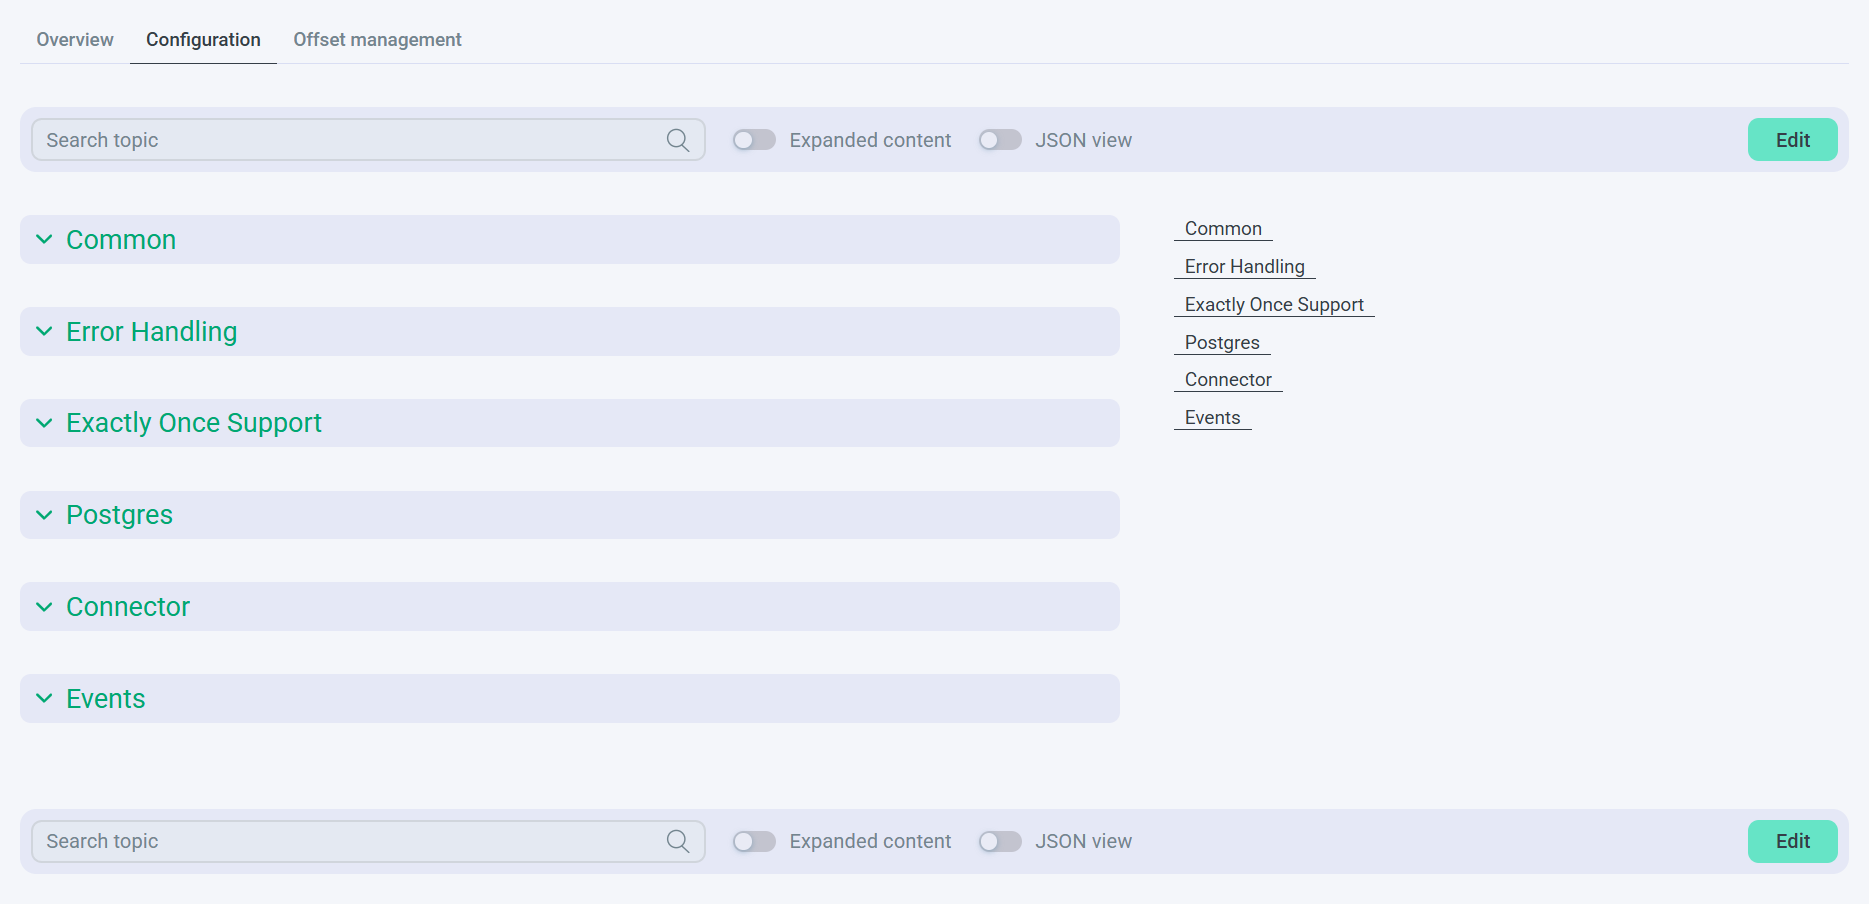
The Configuration tab contains:
-
Field for searching a parameter by name.
-

 Expand content switch, which reveals hidden content.
 -
JSON view switch, which opens the content in JSON format.
-
Edit button to enter connector parameter editing mode. After editing the parameters, click Save to save changes or Cancel to discard them.
-
Connector parameters, divided into dropdown lists. The set of connector configuration parameters depends on the connector plugin and generally includes the main parameters of the source connector or sink connector, as well as parameters defined by the plugin vendor. Some parameters are described in articles dedicated to using connectors in ADS Control.
Offset management tab
The Clusters → <cluster name> → Kafka connects → <cluster name> connector → <connector name> → Offset management tab is opened from the connector instance overview page. The tab allows you to view and modify offsets for the connector.

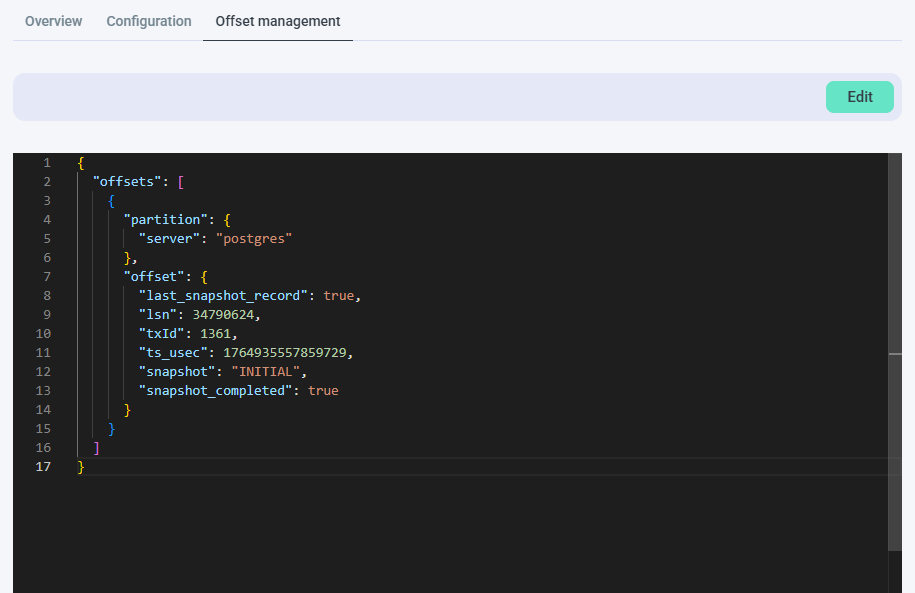
The Offset management tab contains:
-
Edit button to enter the connector offset editing mode. After editing offsets, click Save to save changes or Cancel to discard them. The button is available only if the connector is in the Stopped status.
-
Current connector offsets as a JSON file, which is the response to the offsets request GET /connectors/<connector_name>/offsets.
Below is an example of a JSON file for different instances of the connector.
{
  "offsets": [
    {
      "partition": {
        "kafka_partition": 0,
        "kafka_topic": "topic-test"
      },
      "offset": {
        "kafka_offset": 4
      }
    }
  ]
}{
"offsets": [
{
"partition": {
"server": "postgres"
},
"offset": {
"last_snapshot_record": true,
"lsn": 34790624,
"txId": 1361,
"ts_usec": 1764935557859729,
"snapshot": "INITIAL",
"snapshot_completed": true
}
}
]
}