User Guide
Tutorial
Fast Start with ADB
Goal:
- Run a backup job on ADB cluster with ADSS
Prerequisite:
- You have ADSS and ADB installed.
Script:
- Login to ADSS
- Add filesystem:
- Go to: Main Menu -> FILE SYSTEM -> Add File System button
- Choose required File System Type
- Enter name
- Enter display name
- Click Add button
- Increase number of parallel operation on File System:
- Go to: Main Menu -> FILE SYSTEM -> Click on exact File System line
- Go to: Left Menu -> Capacity
- Increase a number of parallel operations by type of operations.
- Click Update button
- Add Cluster
- Go to Main Menu -> CLUSTERS -> Add cluster button
- Fill the following fields:
- name with fqdn like name of cluster
- display name with name in any free format
- set cluster type to “Arenadata DB”
- set Master Host Adress to ip or FQDN of master host in ADB cluster
- set ADB related system user (gpadmin usually) name which has access to gpbackup/gprestore execution
- set user password or user privite key to connect to master host over ssh
- Spawn “on demand” backup job for your ADB cluster:
- Go to Main Menu -> JOBS -> Add job Queue button
- Enter job name
- Enter job display name
- Choose cluster from list
- Choose file system from list
- Set handler type to “ADB backup handler”
- Set DB Name to a name of database you want to backup
- Set Schema to a name of schema you want to backup
- Set Table to a name of table you want to backup
- Set Threads to a number of parallel operations during backup (take a note, that this value should not exceed the number of parallel operation allowed for cluster and filesystem)
- Set compression level
- Set if this table backup should be a full
- Click Add
UI in Details
Main Menu
Location: On top of every page.
There are a number of links in the Main Menu. These links represent corresponding main objects in ADSS:
- “CLUSTERS”
- “FILE SYSTEMS”
- “CRON LINE”
- “JOBS”
Link hightlited with “orange” (like “JOBS” in the screenshot above is a current page**.
Cluster List View
Location: Main Menu -> “CLUSTERS**
List of all clusters controlled by ADSS
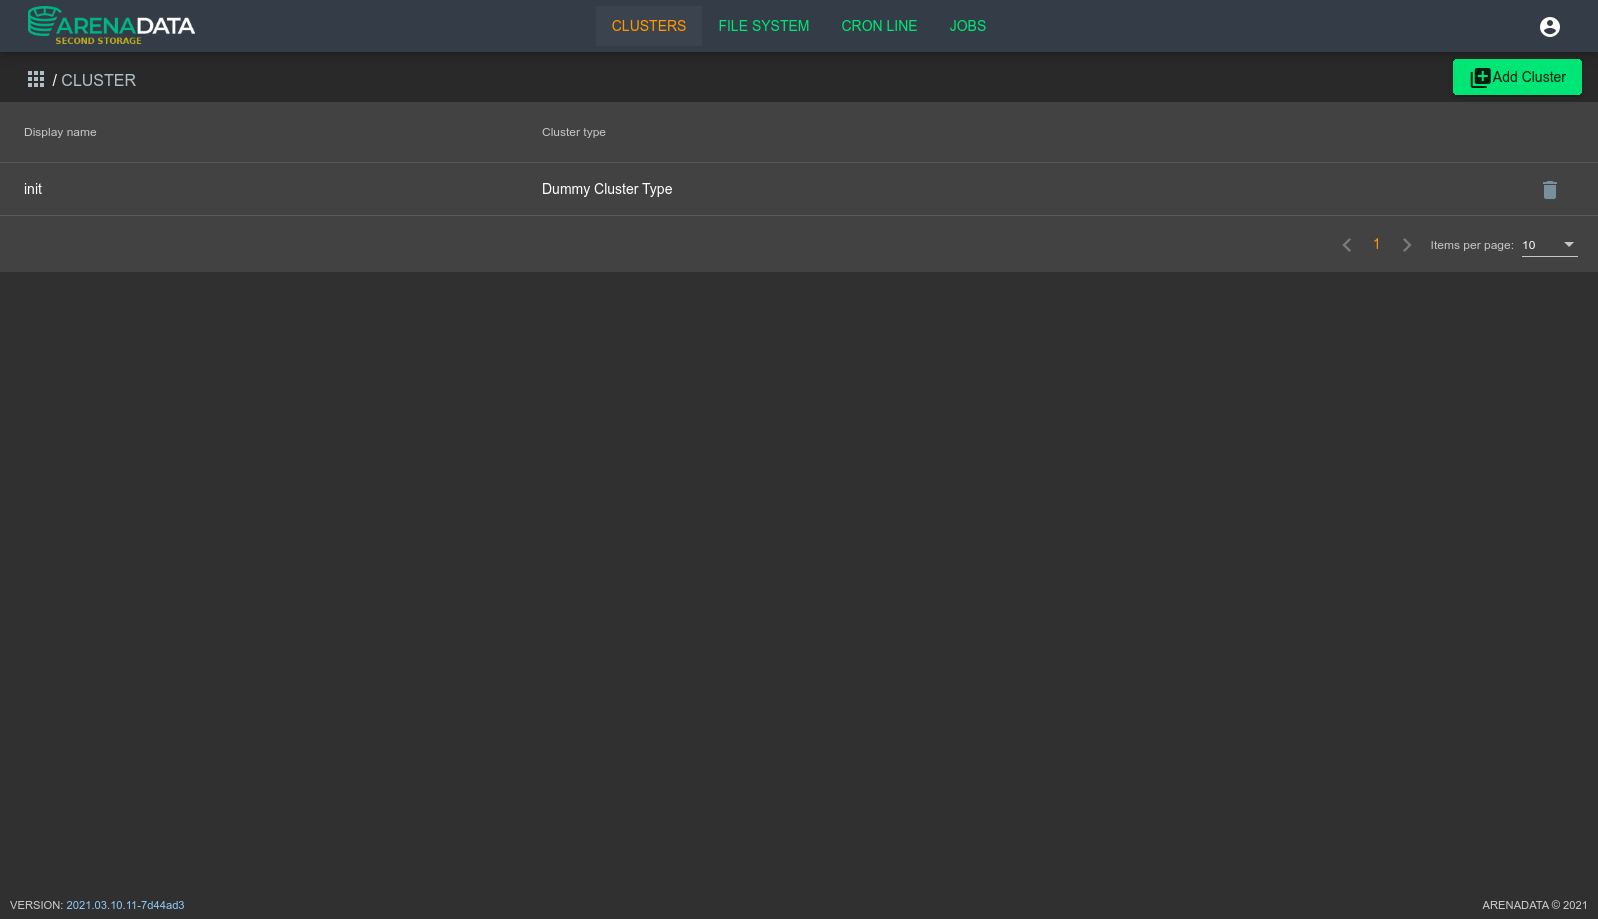
For every cluster on this view you could do the following operation:
- Remove cluster with a button at right on every line in grid
- Go to Cluster Details View with a click anywhere on line in grid
Besides you could add new cluster to ADSS with “Add Cluster” button.
File System List View
Location: Main Menu -> “FILE SYSTEM”
List of all file systems controlled by ADSS.

For every Filesystem on this view you could do the following operation:
- Remove Filesystem with a button at right on every line in grid
- Go to Filesystem Details View with a click anywhere on line in grid
Besides you could add new filesystem to ADSS with “Add Filesystem” button.
Cronline List View
Location: Main Menu -> “CRON LINE”
Lis of all “cronlines” controlled by ADSS. Cron line is a type of scheduler. Every line here is an operation which could be repeated according to rules provided in form of extended cronline format
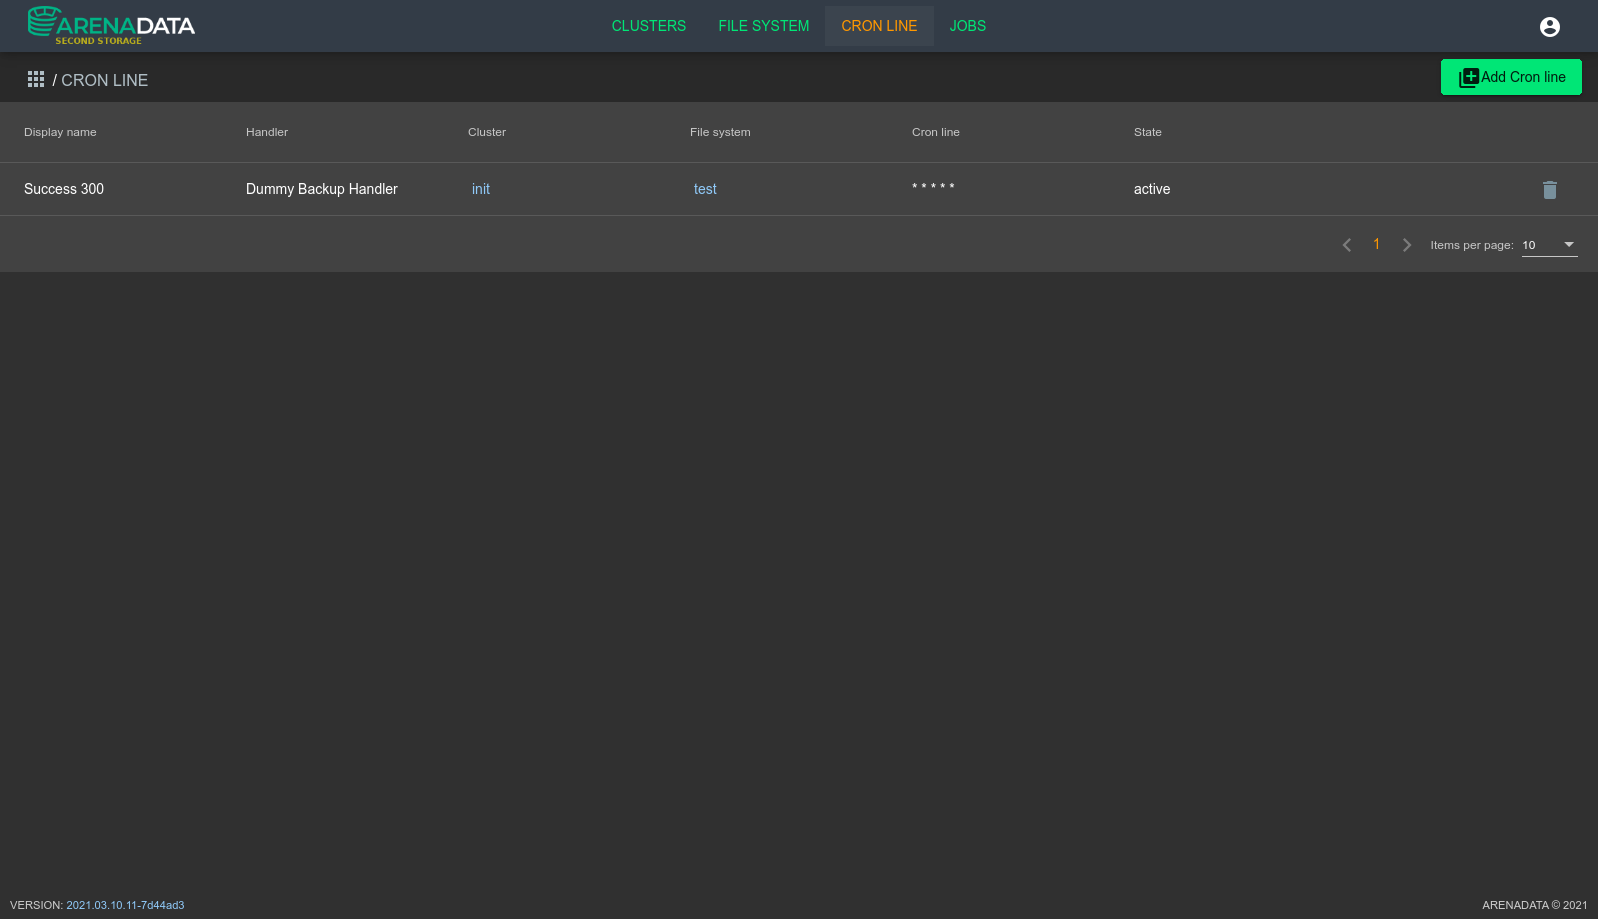
For every cronline on this view you could do the following operation:
- Remove cronline with a button at right on every line in grid
- Go to Cronline Details View with a click anywhere on line in grid
- View cron line
- View state
- Go to related cluster
- Go to related file system
Besides you could add new cronline to ADSS with “Add Cronline” button.
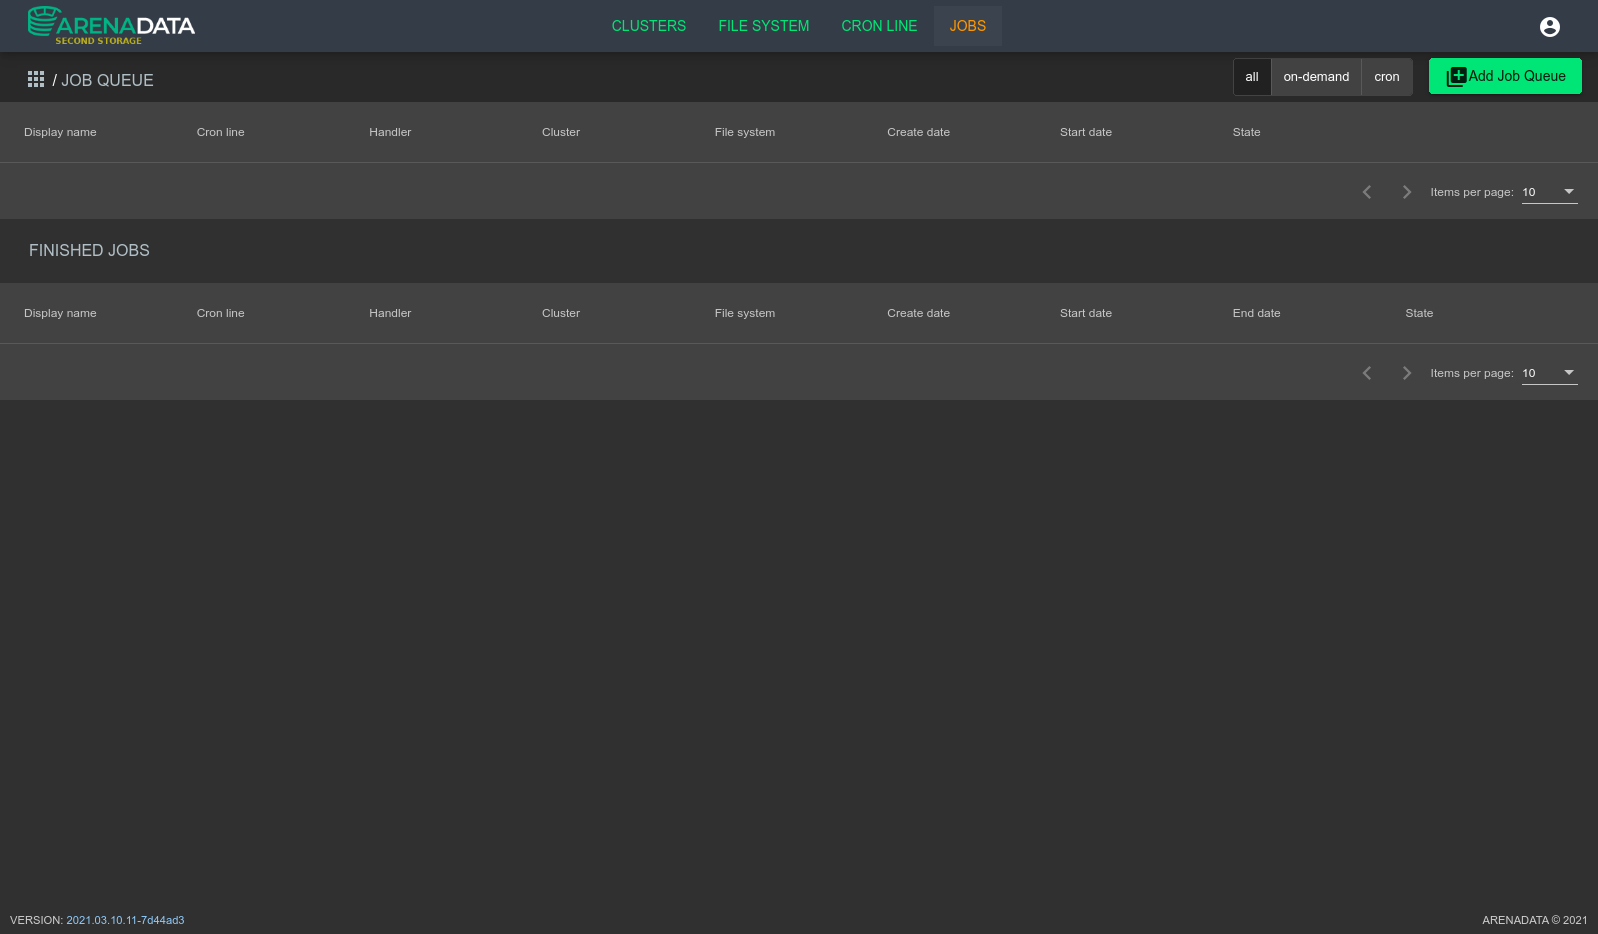
Job List View
Location: Main Menu -> “JOBS”
List of all jobs runned by ADSS.
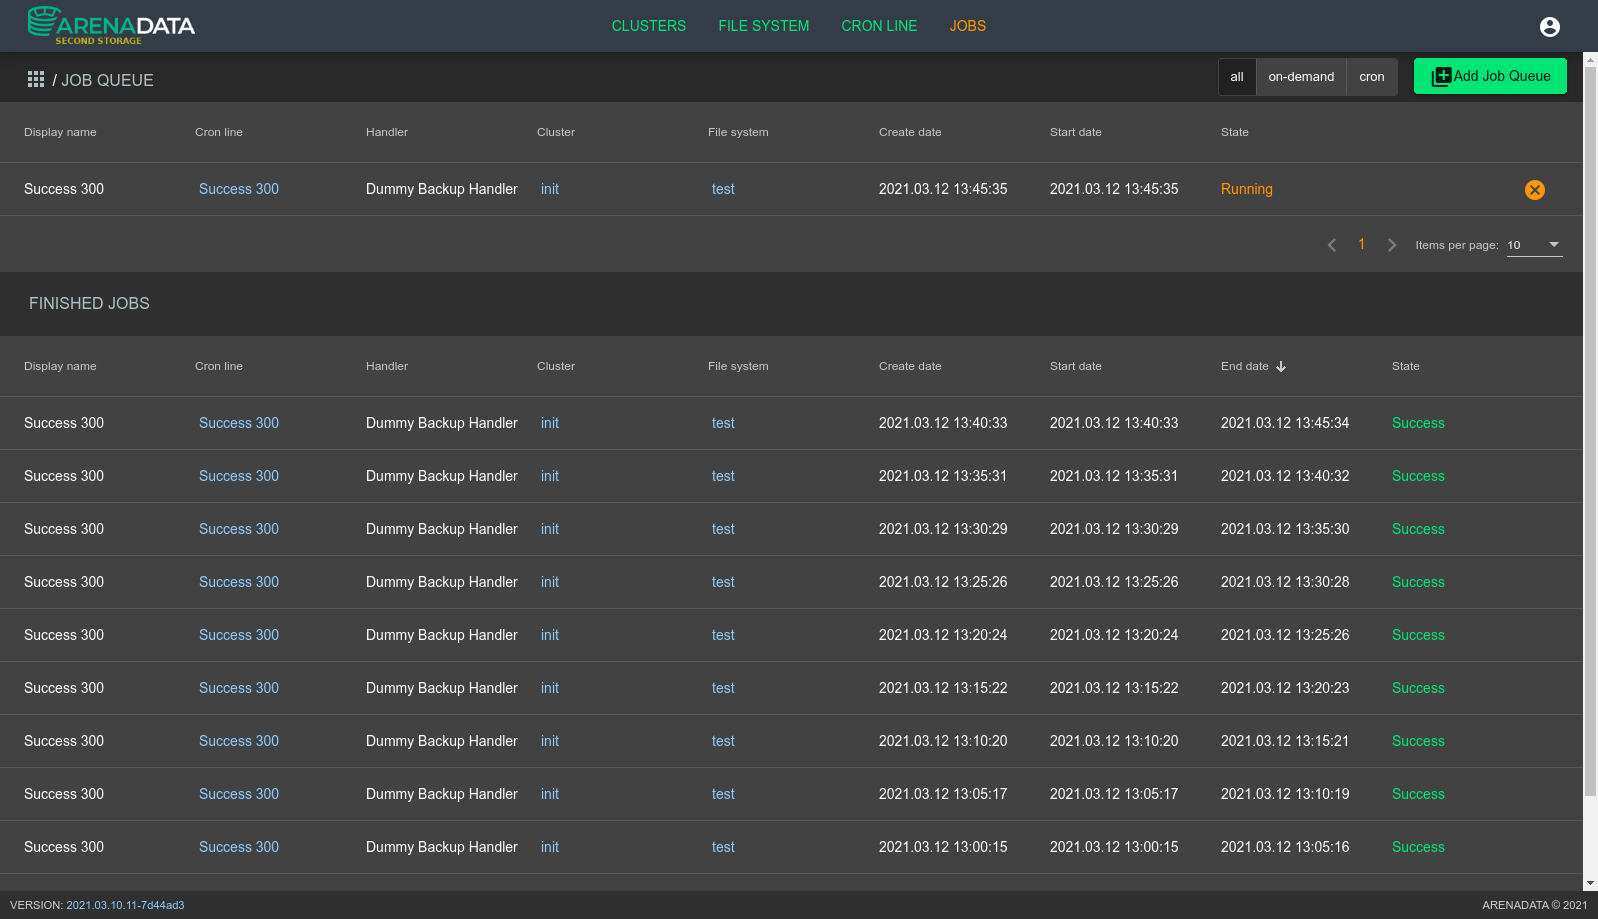
This view diveded on two parts:
- List of “in progress” Jobs
- List of finished jobs
There are following operations for every job available:
- View state of job.
- View information about date of creation, starting and finishing (only in history part).
- Go to related Cluster, Filesystem or Cronline (if job was run from cronline)
- Kill the job with button on the right (for active jobs only)
There is also “Add Job Queue” button to create “on demand” job. This type of job is running only once. If you need a repeatable job you have to go to Cronline.
There is also a quick filter on the upper right allows you to filter job created “on demand** and created by cronline.
Cluster Details View
Location Main Menu -> CLUSTERS -> Click on line in grid
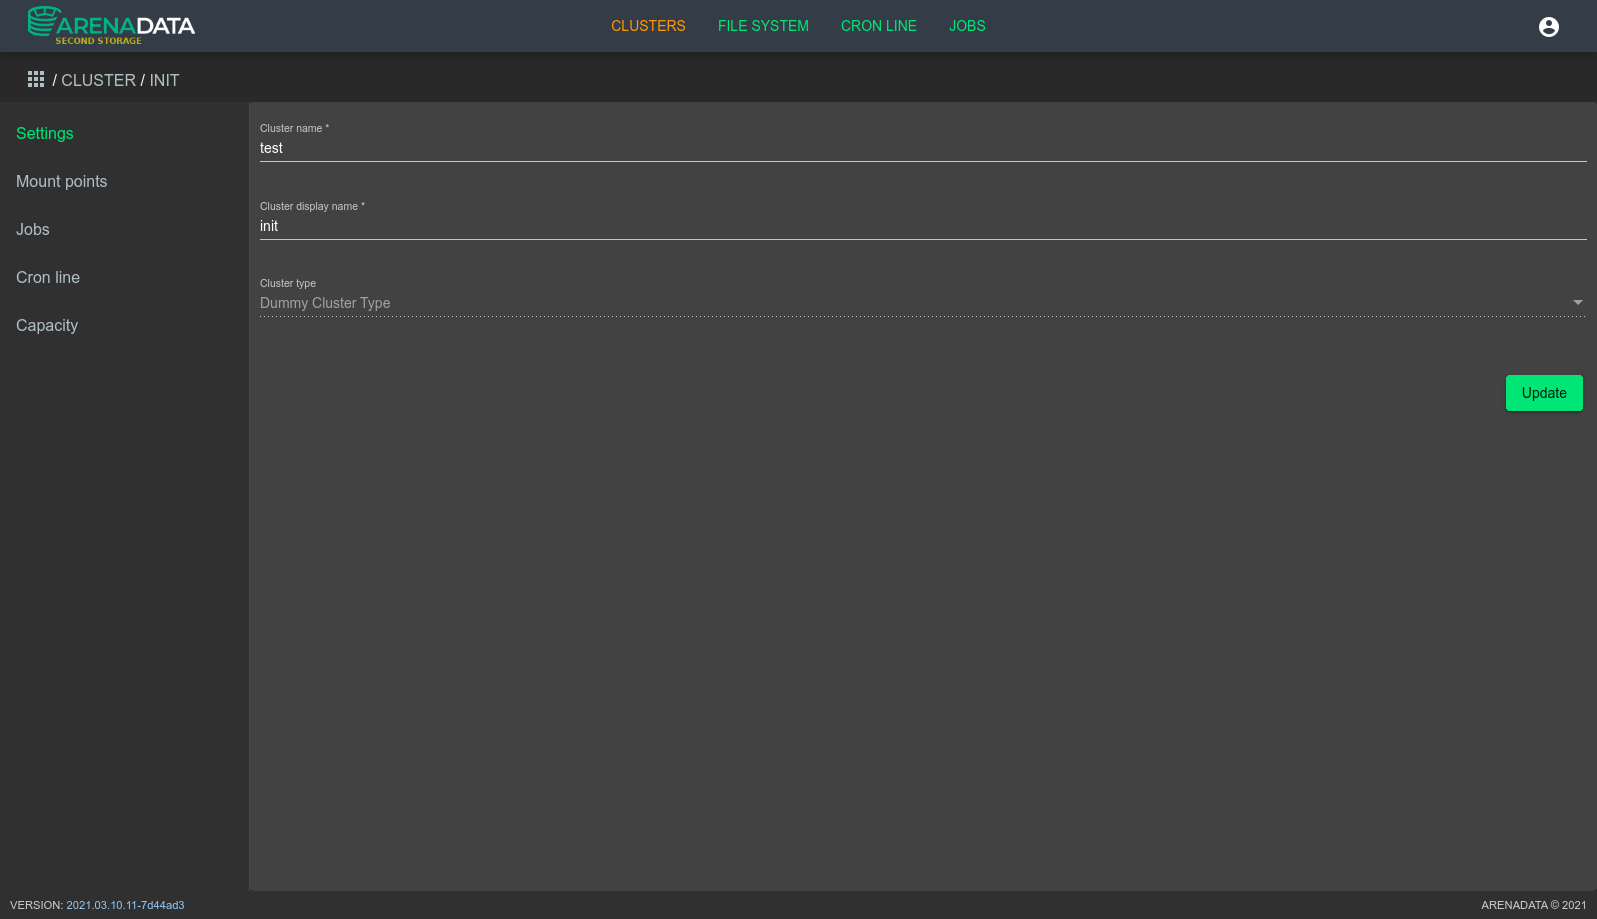
This is a page created to view and modify information about one particular cluster.
There is a number of links in Left Menu you could use to navigate inside a cluster:
- Settings - default page with some parameters one can change
- Mount points - information about connection between File System and Cluster
- Jobs - any job related to the cluster. This page equal to Job List View but this page shows only exact cluster related jobs.
- Cron line - any cron lines related to the clusters. This page equal to Cronline List View
- Capacity - is a page with information about cluster capacity against some type of operations.
File System Details View
Location Main Menu -> FILE SYSTEM -> Click on line in grid
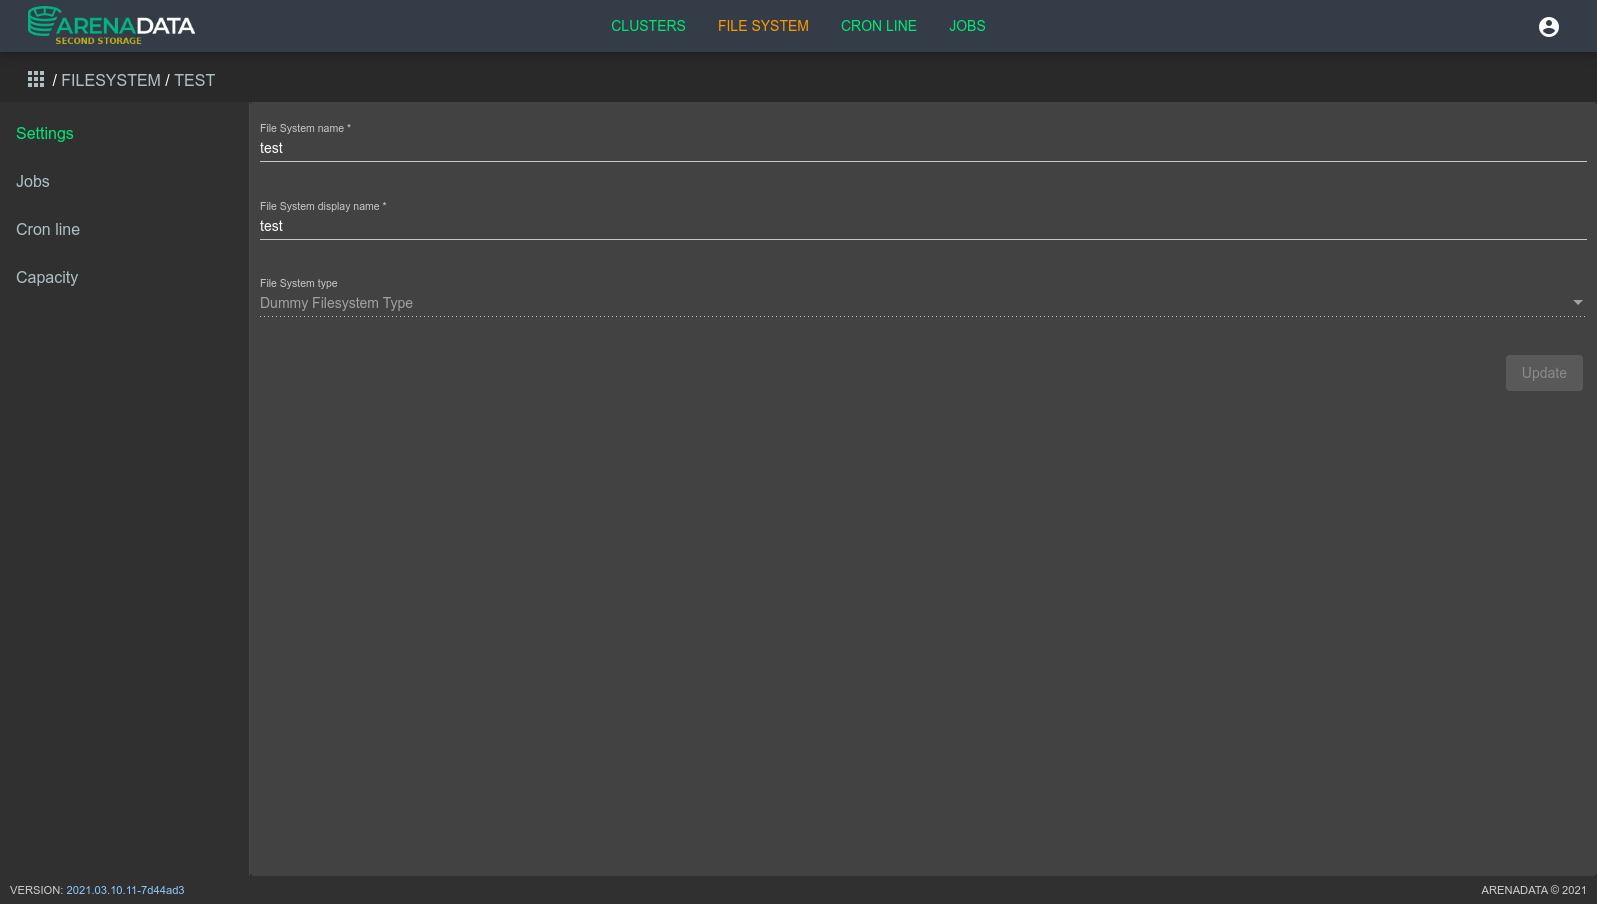
This is a page created to view and modify information about one particular filesystem.
There is a number of links in Left Menu you could use to navigate inside a filesystem:
- Settings - default page with some parameters one can change
- Jobs - any job related to the filesystem. This page equal to Job List View but this page shows only exact filesystem related jobs.
- Cron line - any cron lines related to the filesystems. This page equal to Cronline List View
- Capacity - is a page with information about filesystem capacity against some type of operations.
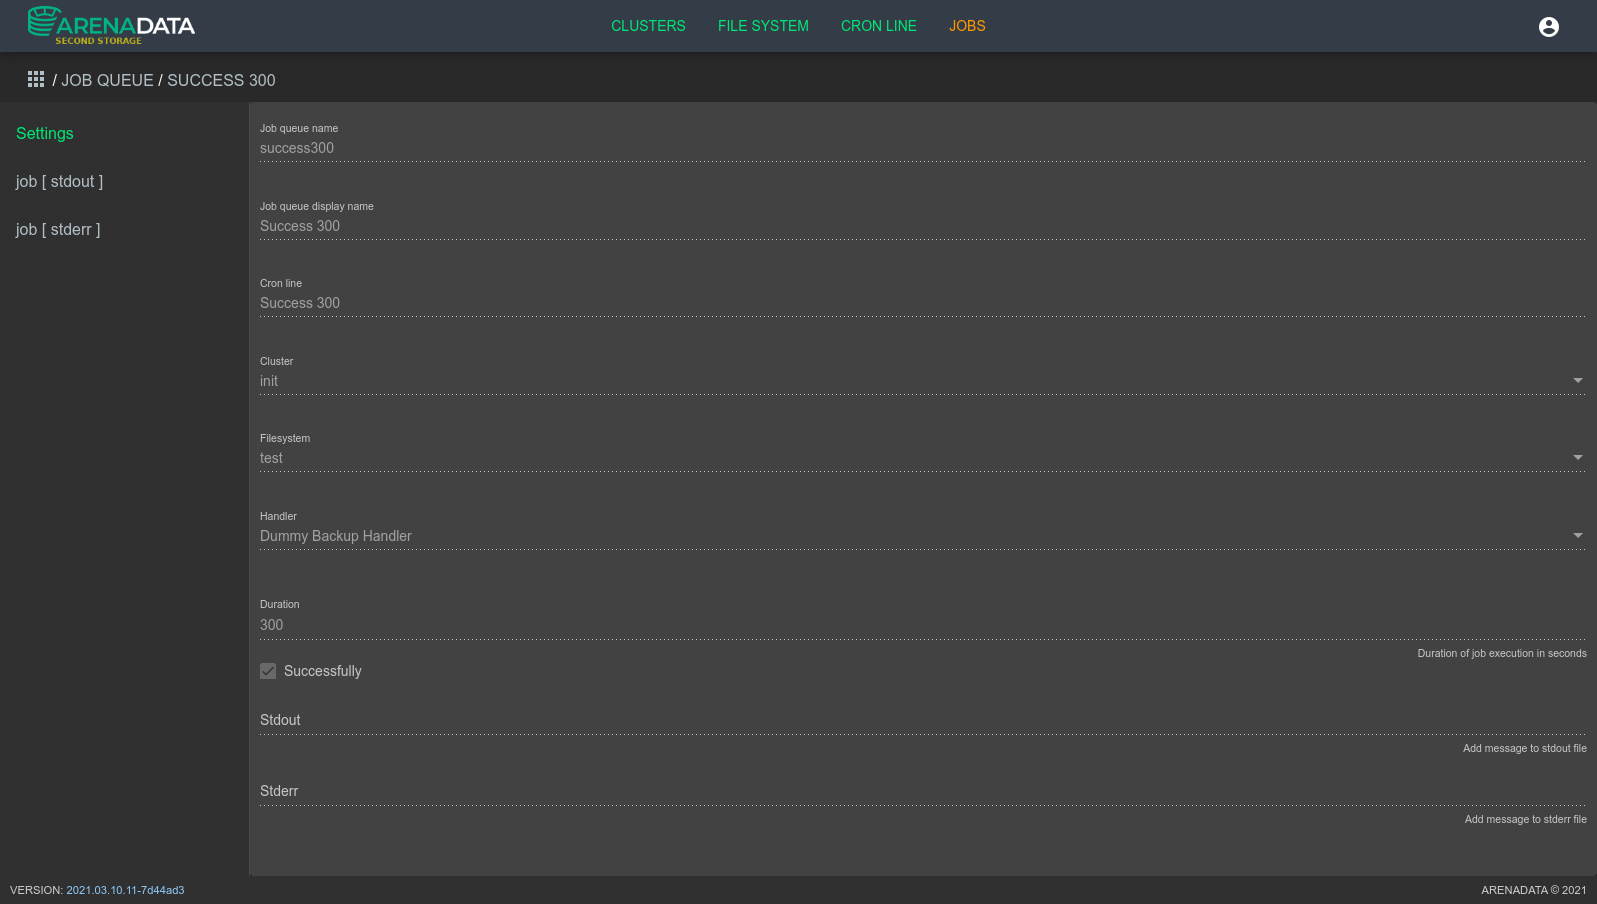
Cron Line Details View
Location Main Menu -> CRON LINE -> Click on line in grid
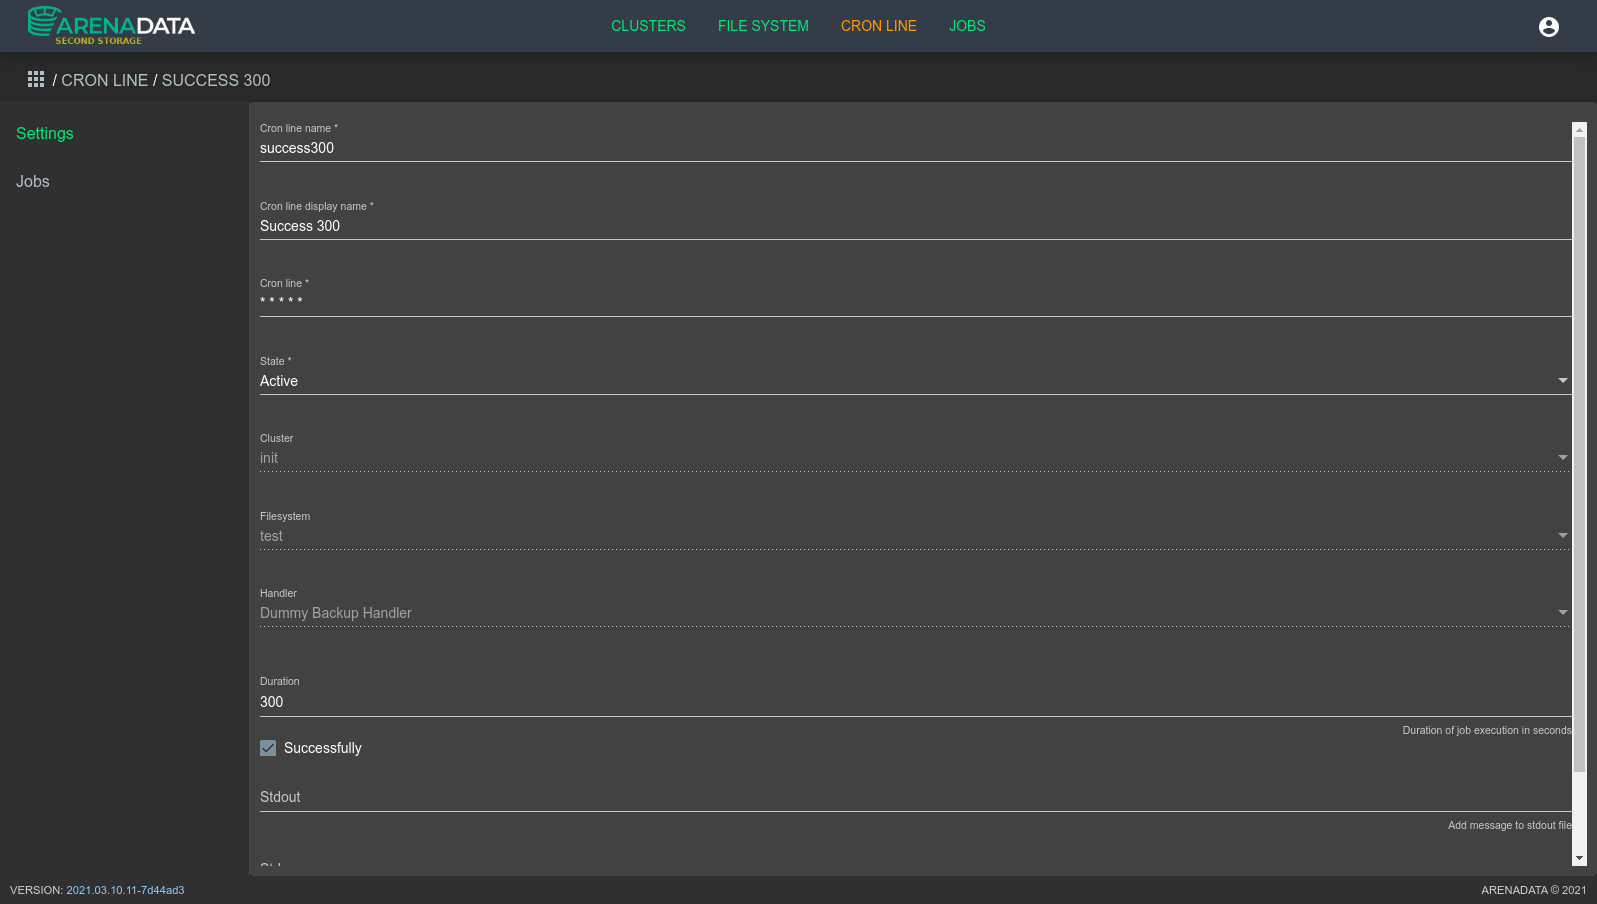
This is a page to view and mofify information about one cron line entry.
There is two links in Left Menu you could use to navigate inside a cron line:
- Settings - default page with some parameters one can change
- Jobs - any job related to the filesystem. This page equal to Job List View but this page shows only jobs created from this cron line.